


The Tigre's Lair - The Sequel ...My Pit Trailer Project II
 06-27-2009, 06:17 PM
#181
where have you been, amazed we all were about 2 weeks ago your going to need to step up the descriptive adjective skills to match your building skills. 
Now on to the Pics no one watches porn for the script same applies here now get on with it man!


Now on to the Pics no one watches porn for the script same applies here now get on with it man!
 06-27-2009, 08:17 PM
#182
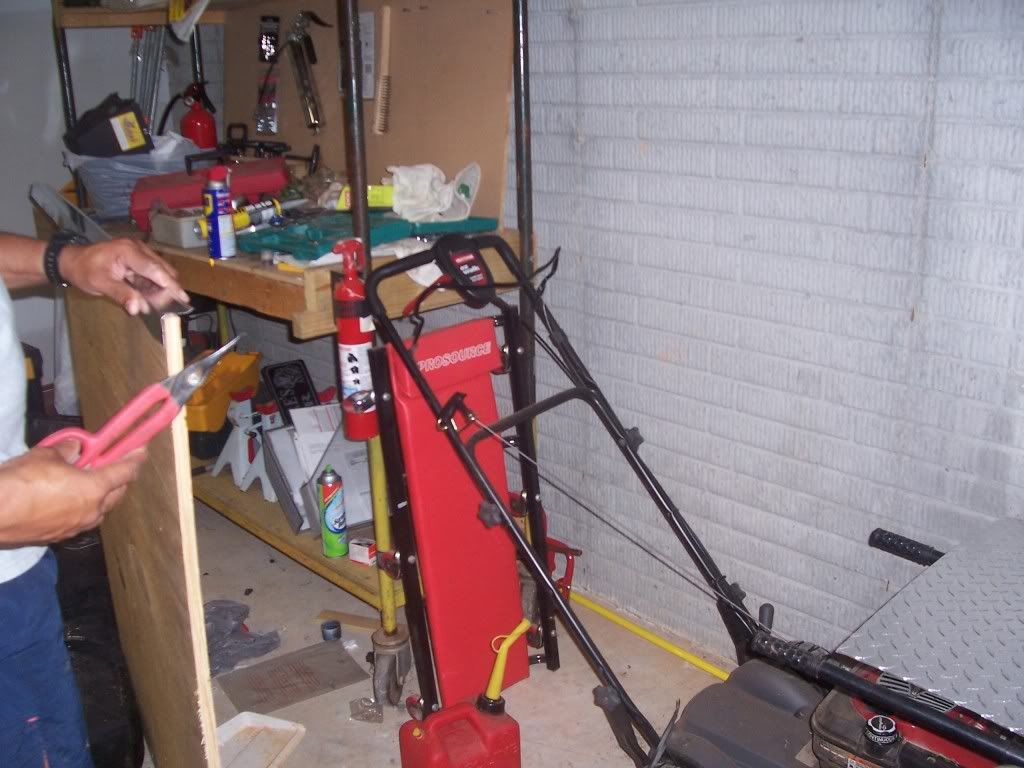
Okay everybody here's that hit of crack that everyone has been craving for....ENJOY!!
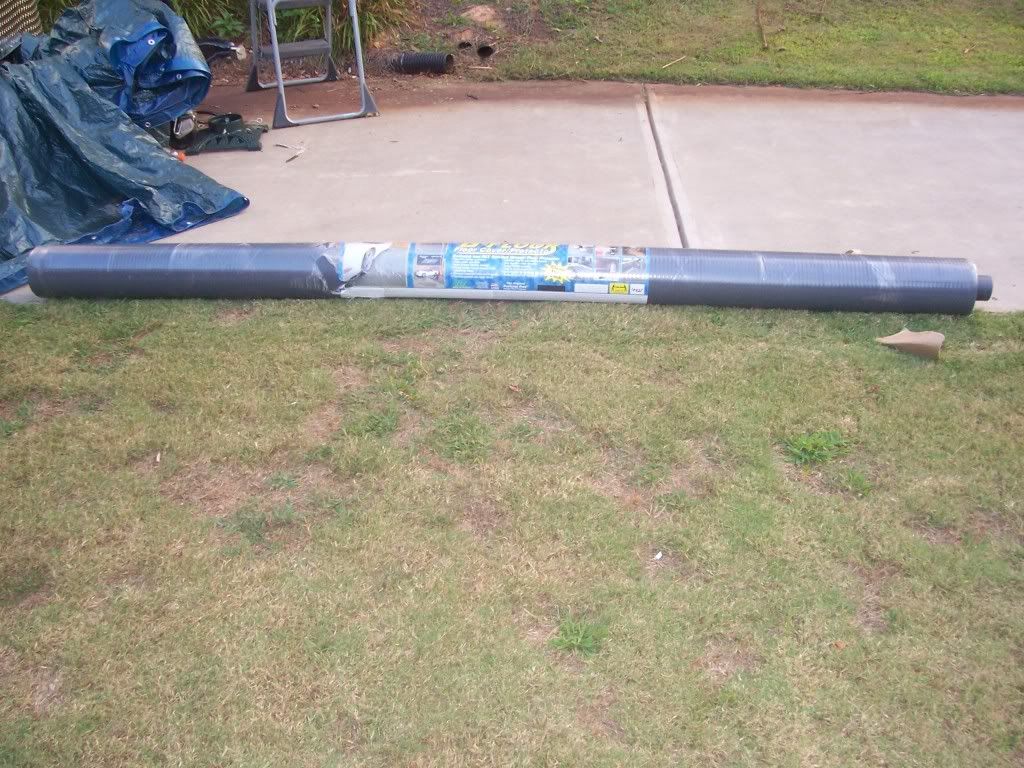
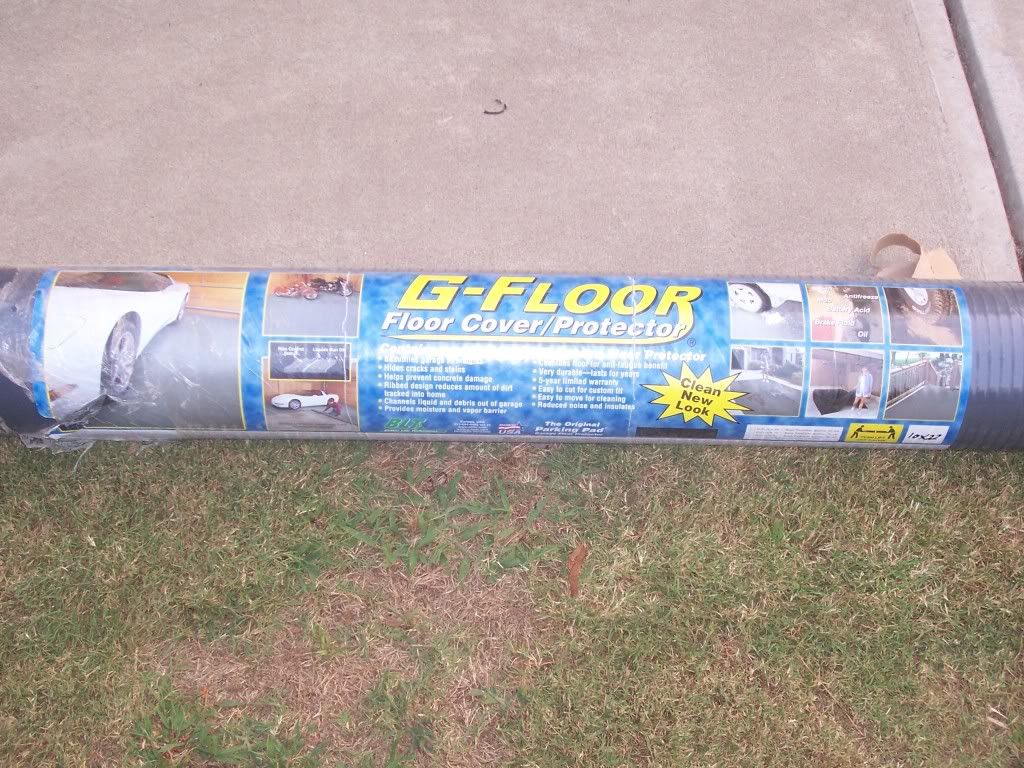
For the flooring I'm using G-Floor. It's a large rolled rubber mat that is awesome and super cheap. The cheapest place is Sam's club online for $200. Anywhere else it will run you $400.

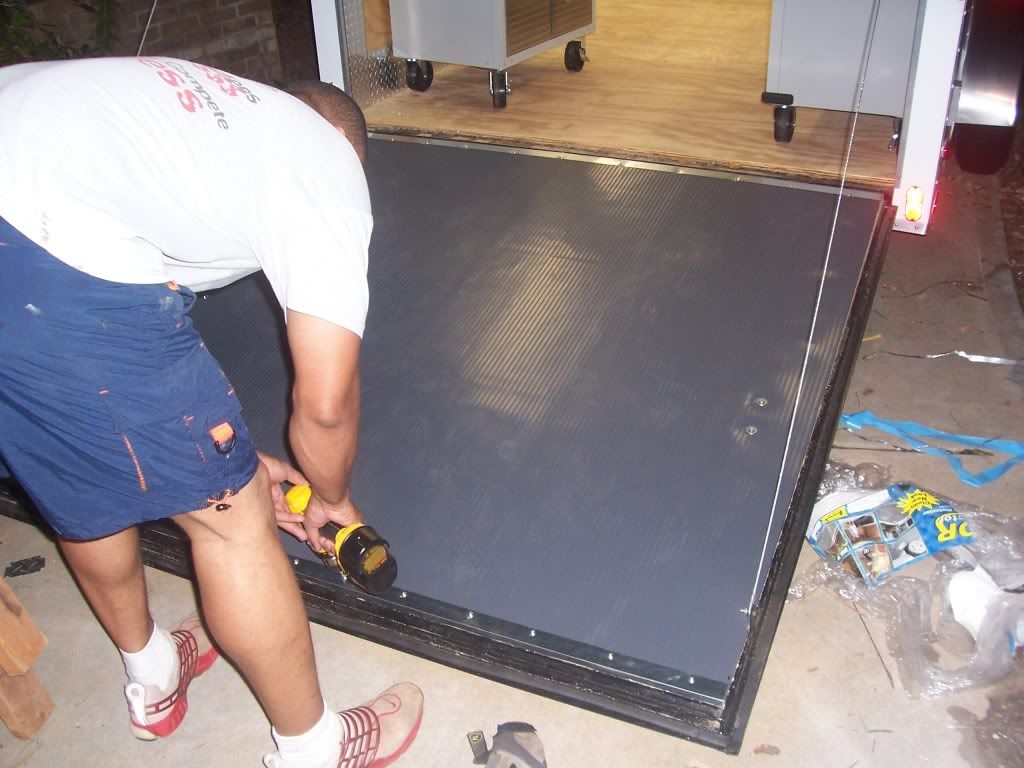
Rolling out a 6ft section for the ramp
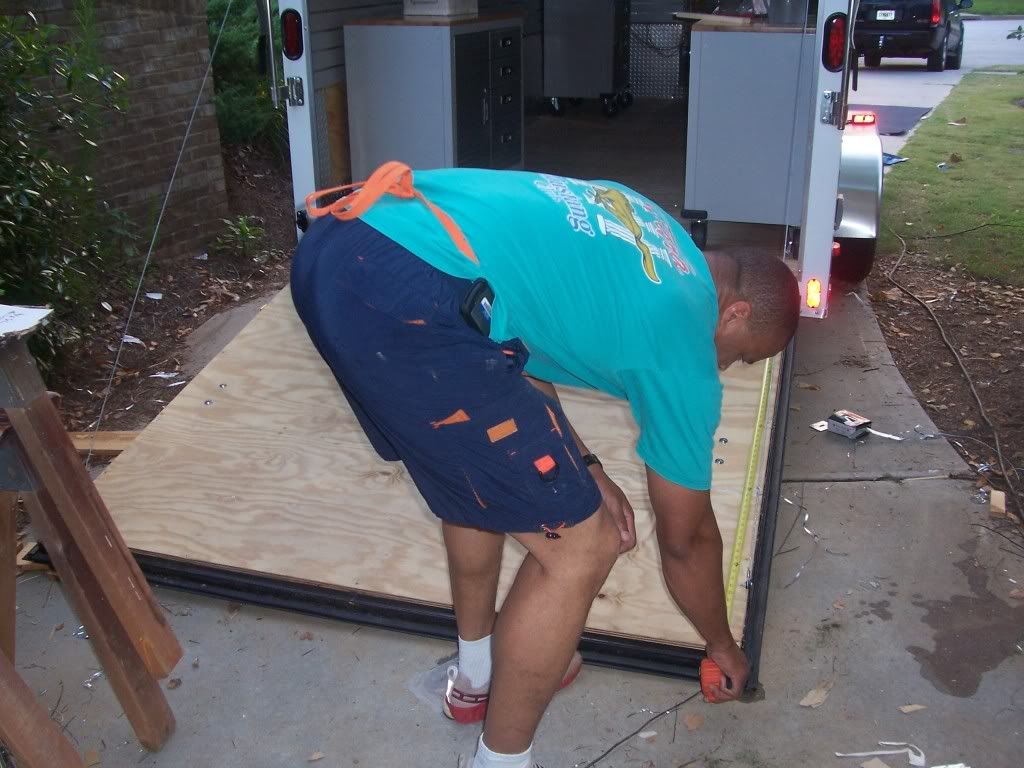
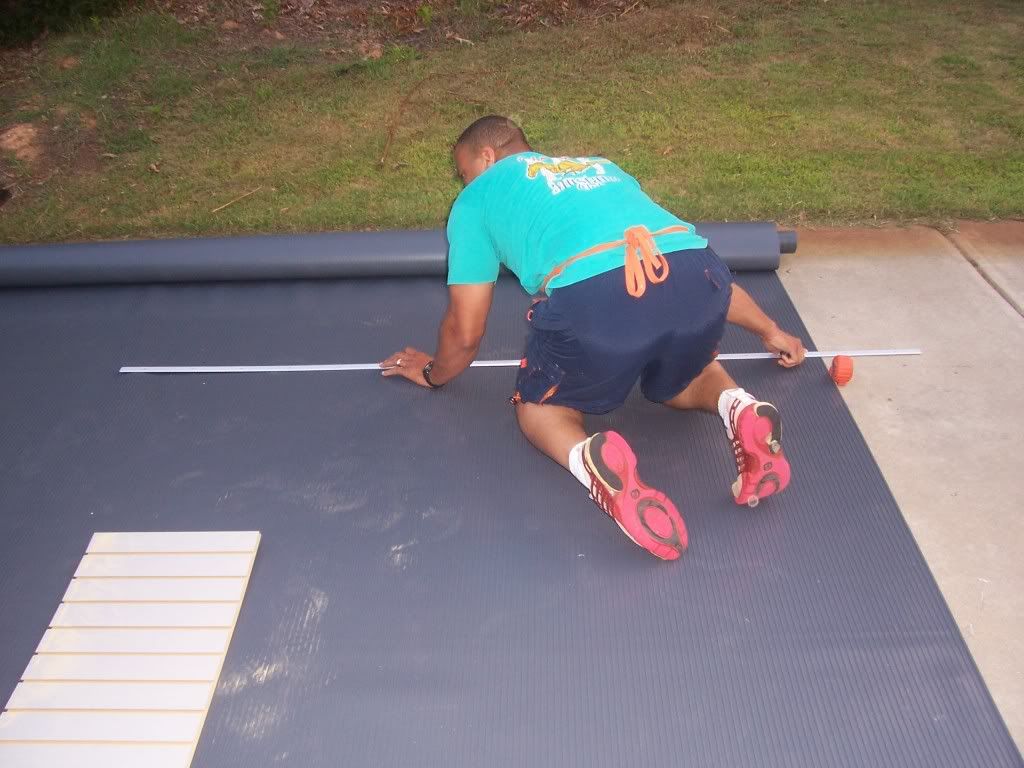
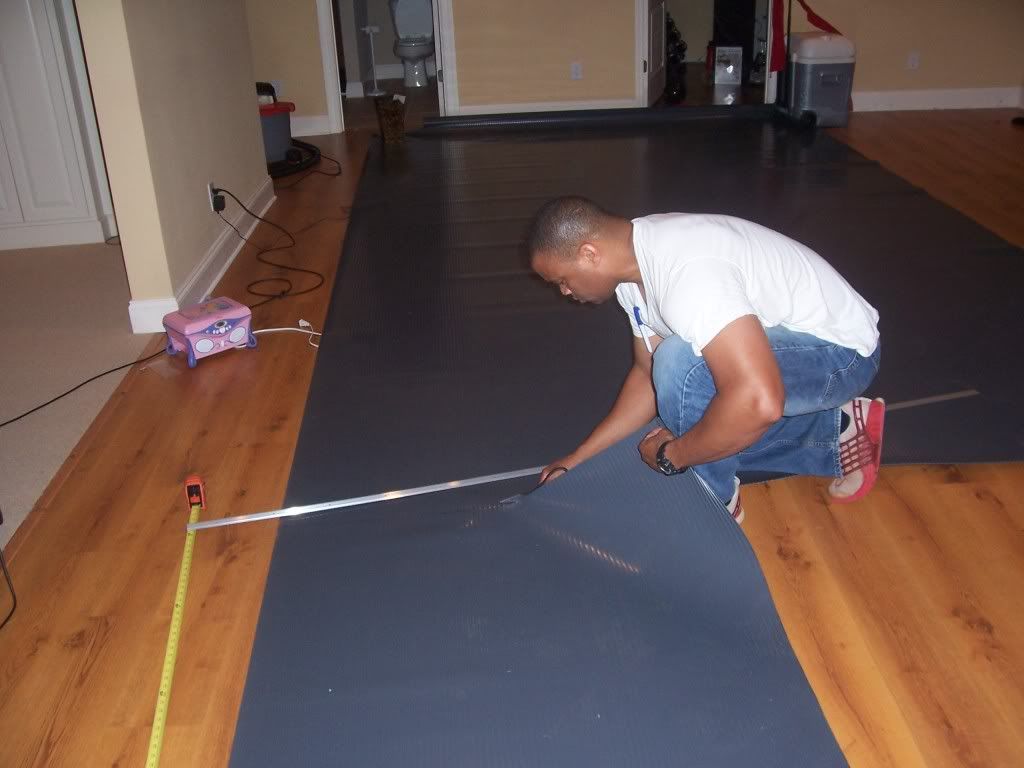
Measuring the width of the ramp

Measuring the height of the ramp
Marking off the ramp measurements

Using a straight edge to cut out the ramp piece
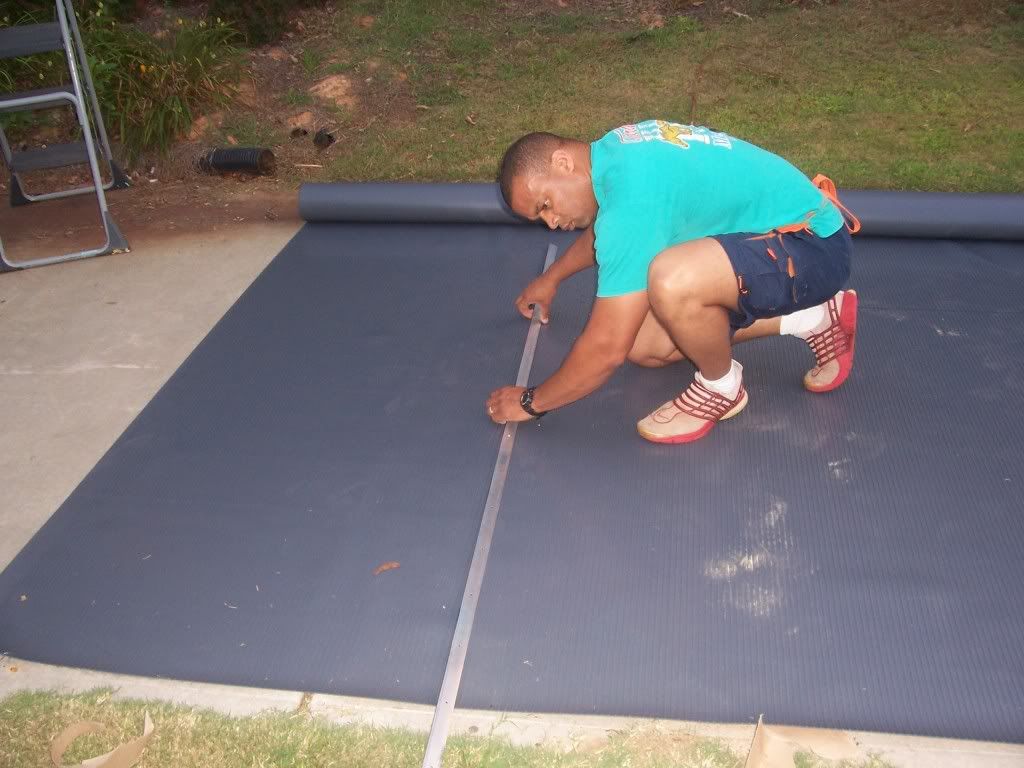

Perfect fit

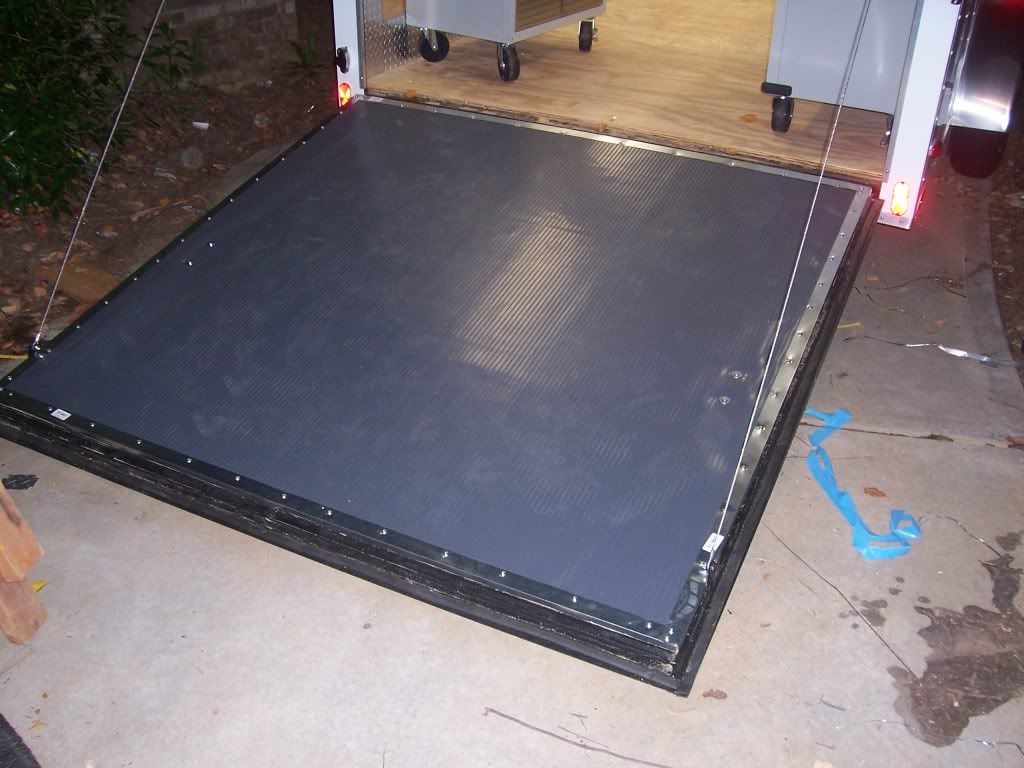
First tried double sided tape, but it's bonding to the wood so I will get some spray adhesive later
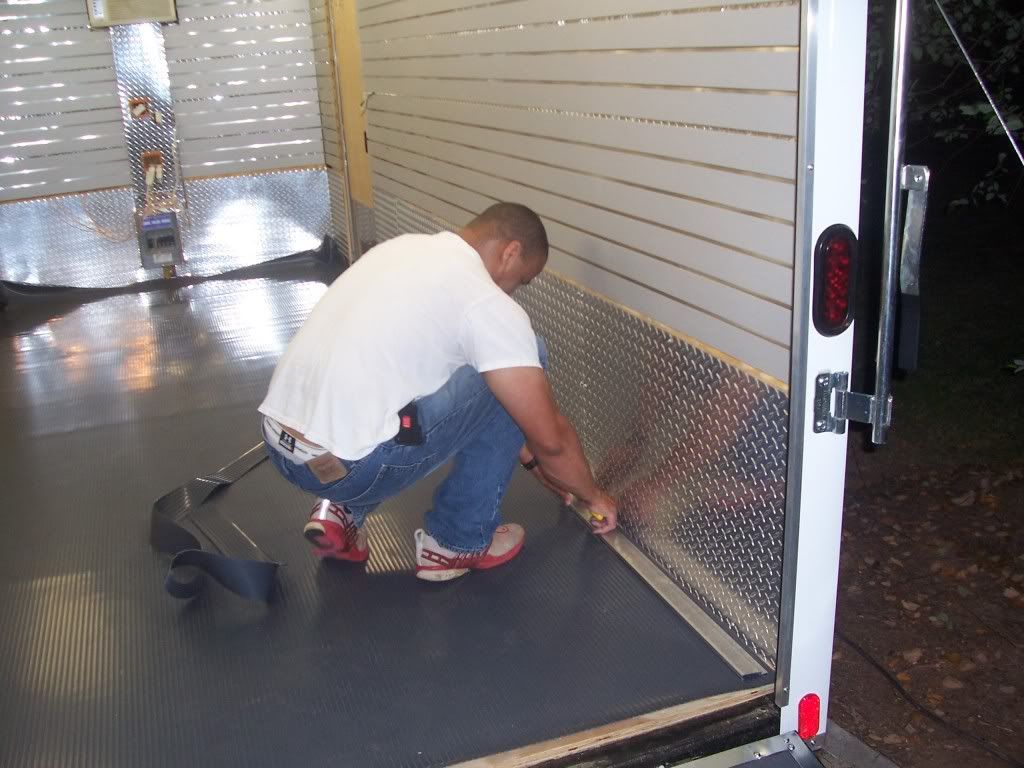
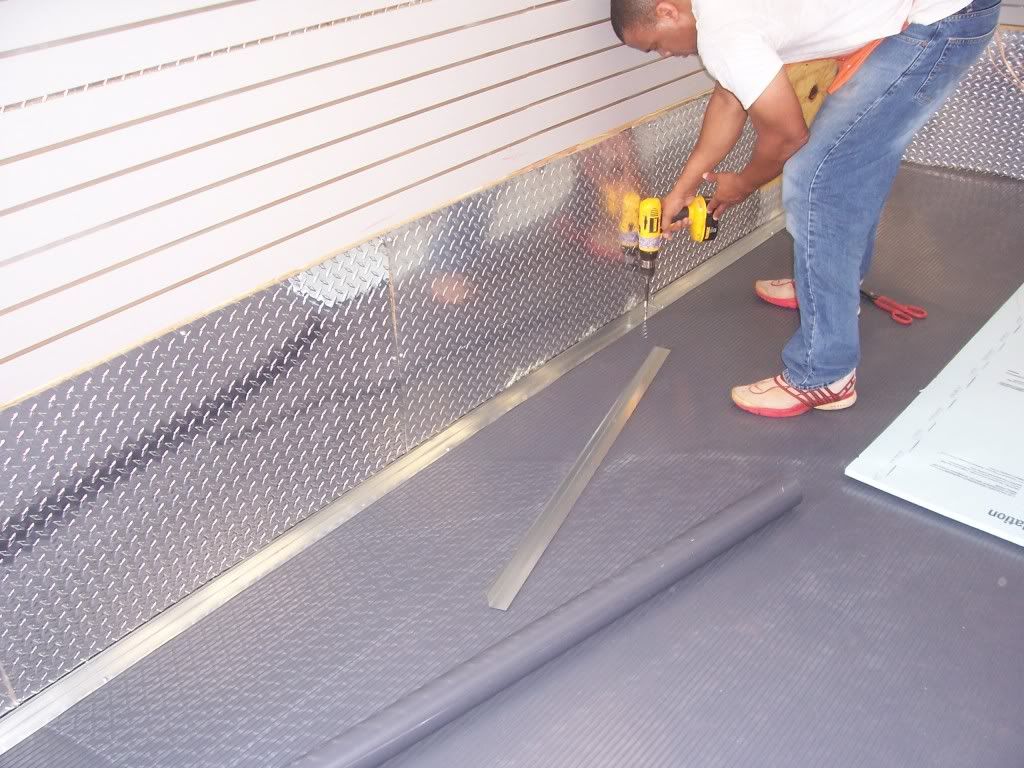
I'm going to cover the edges with aluminum flashing corners. A strip runs about $1.87
Will hold aluminum edges down with rounded hex screws

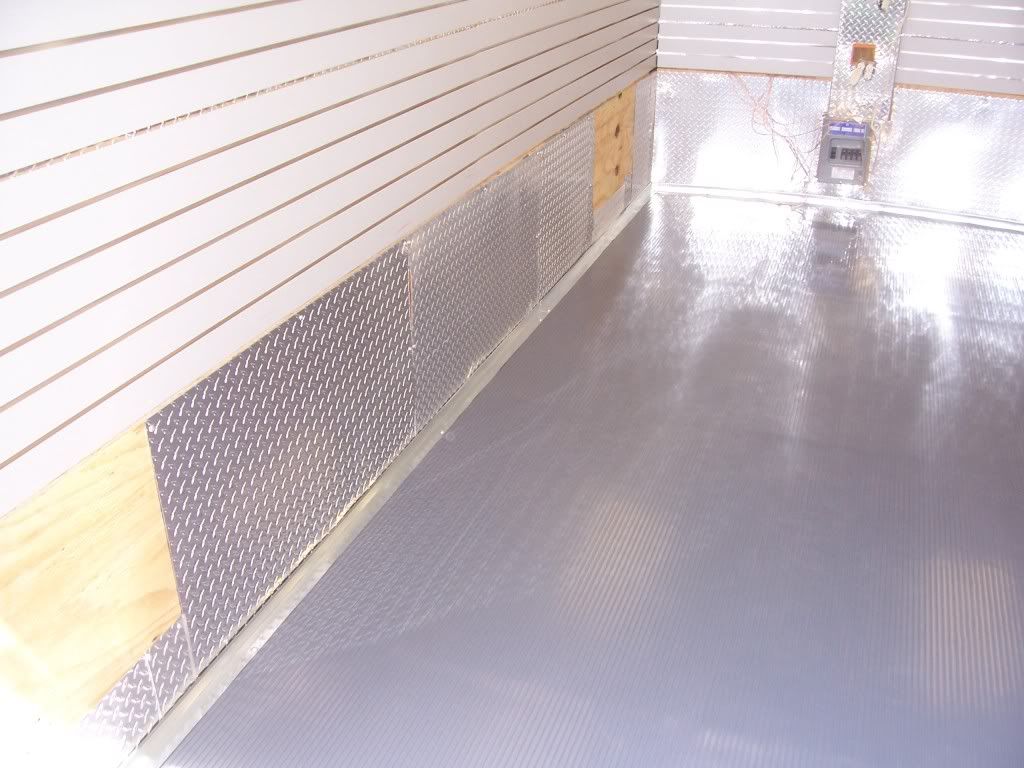
All four sides installed. Looks good
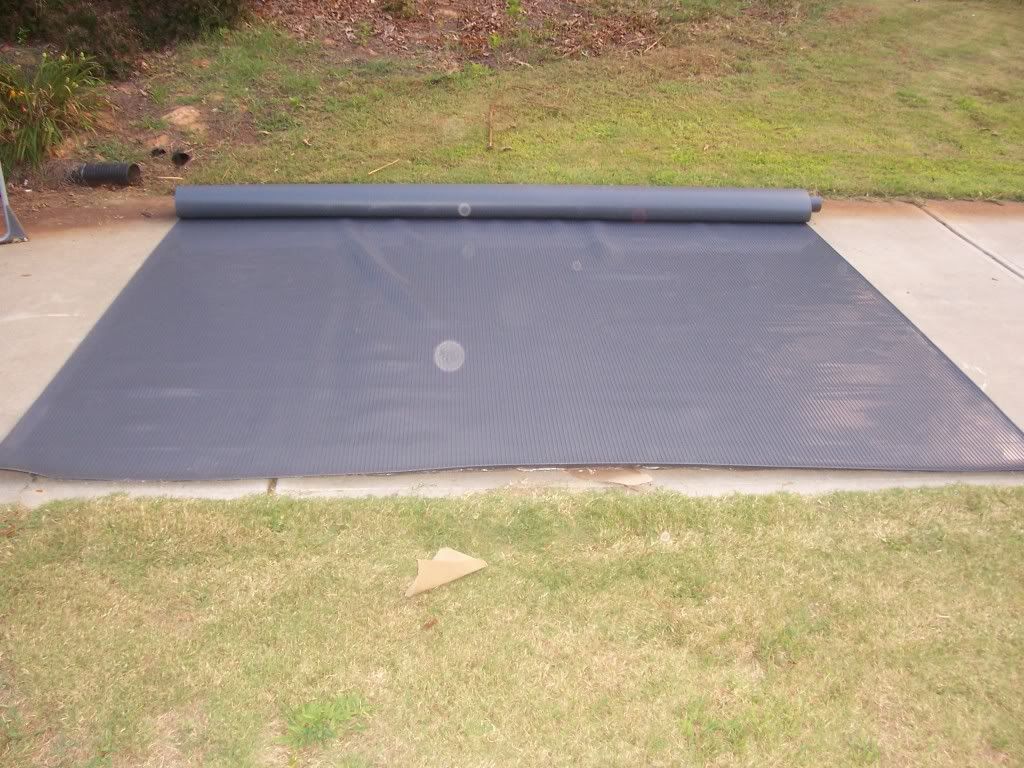
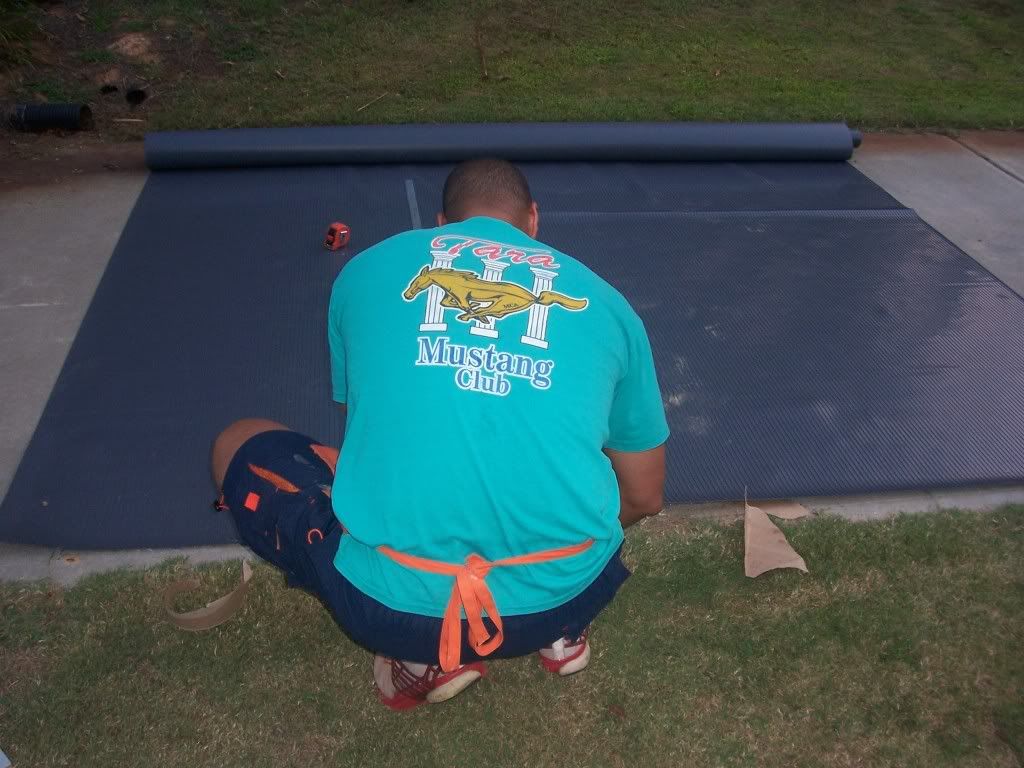
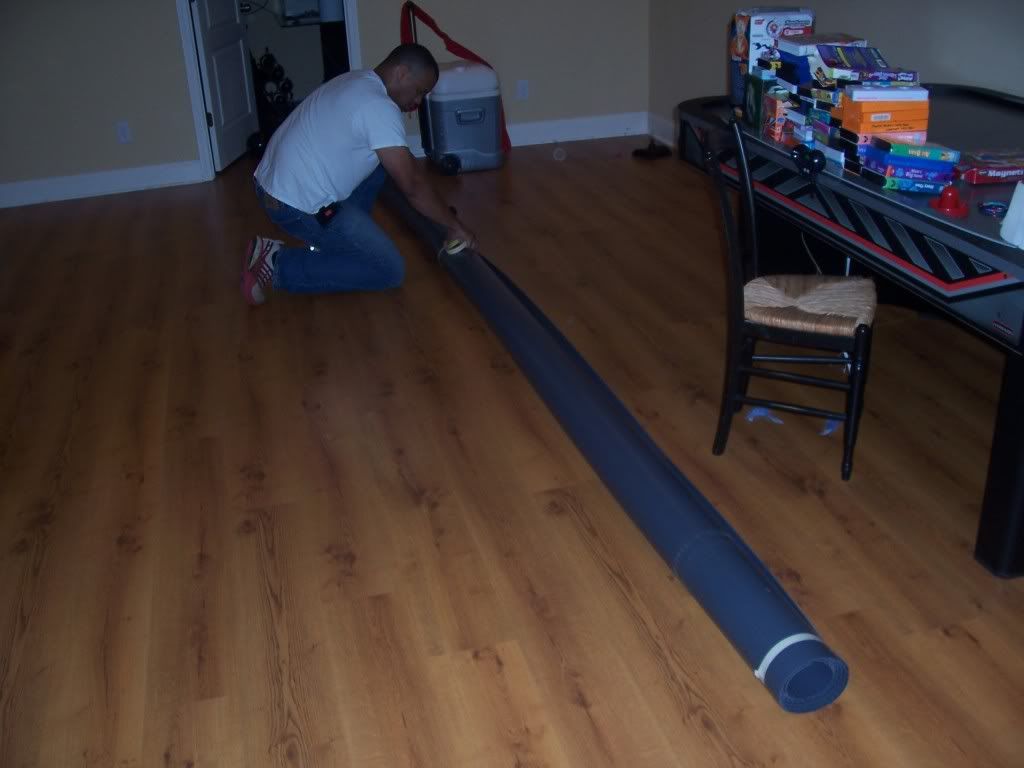
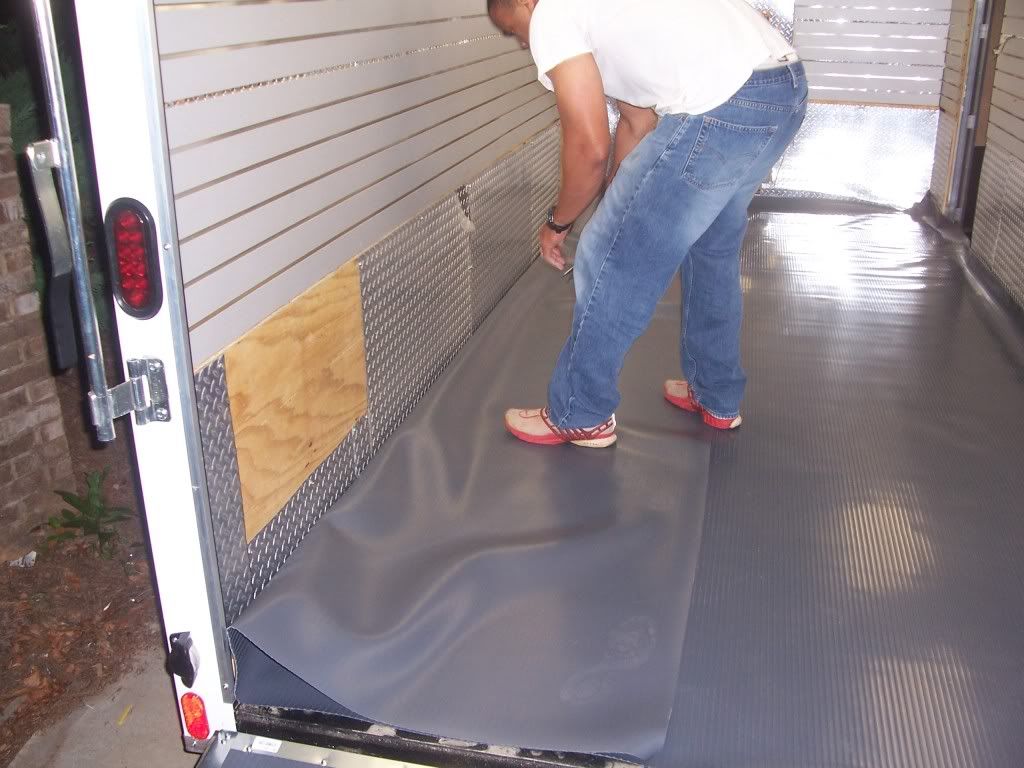
Rolling out the mat to flatten and prep. I'm glad I got a basement big enough to roll this stuff out.

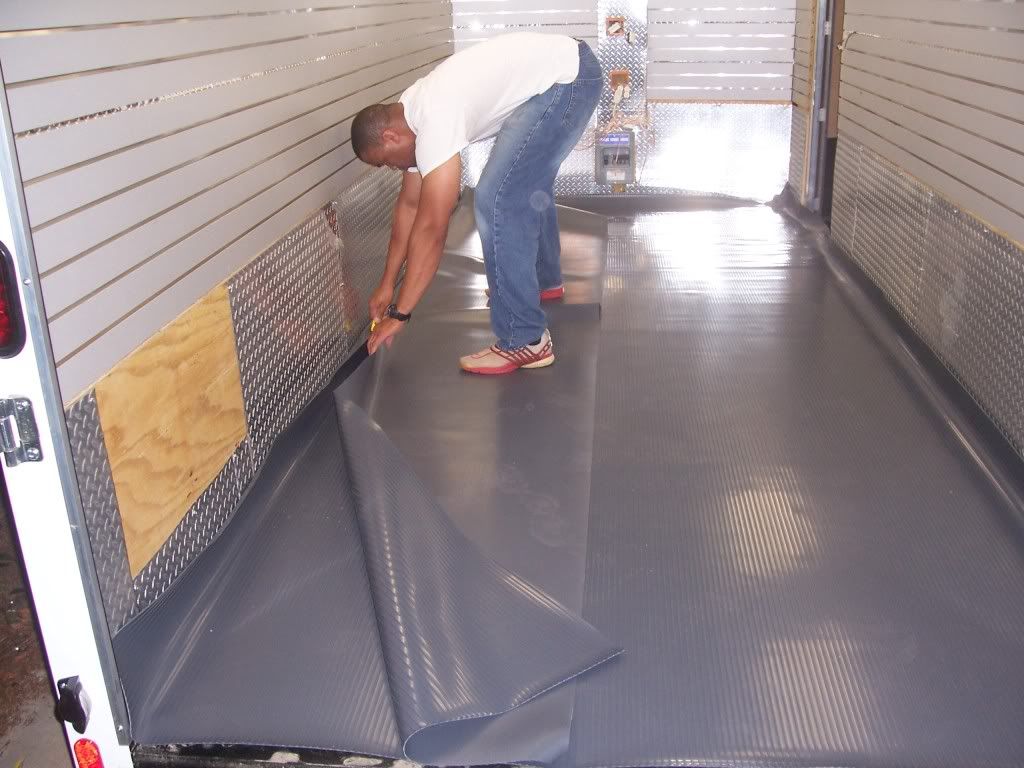
Cutting off the excess material
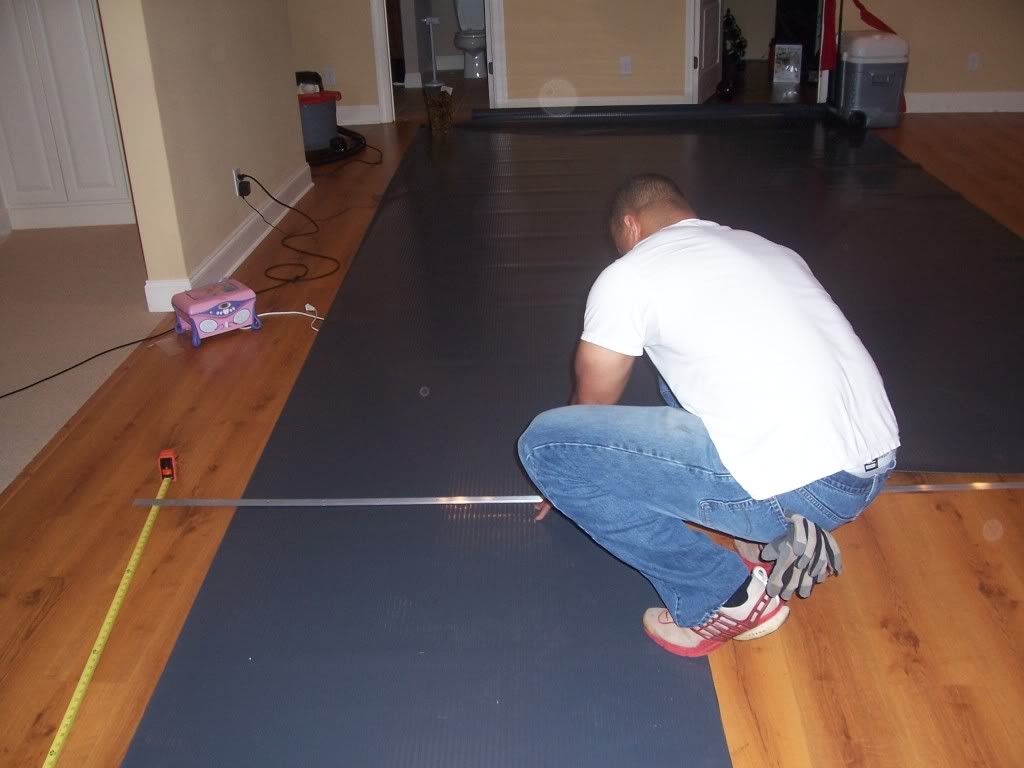
Rolling the mat length wise to make it easy to roll out inside trailer
If you think the Slatwall is heavy, this shitz weighs 115lbs. It was an absolute bitch to haul from the house to the
trailer

As I said the mat is 10x22 so I have plenty of excess to trim off and use for other stuff
Cutting off the major excess and will trim the remainder with a boxknife
Just need to trim off remainder

The tricky part is triming off enough that when the mat expands and contracts with temparture, no budges or humps form
Almost done
Looks good. Will let it lay flat overnight and settle
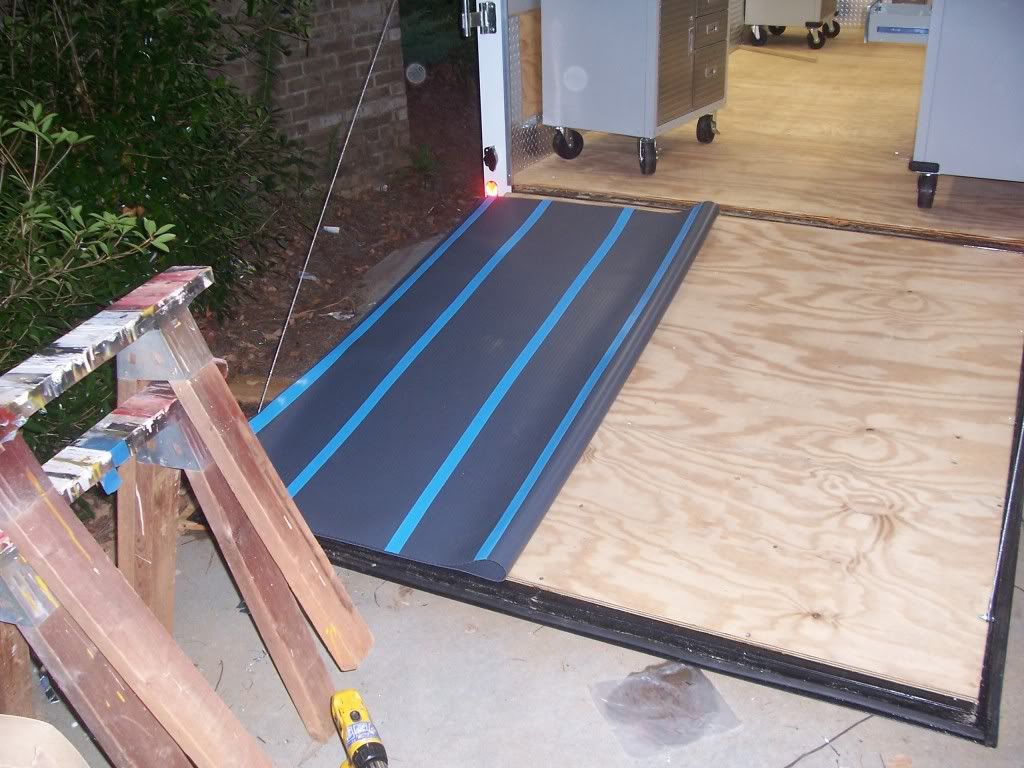
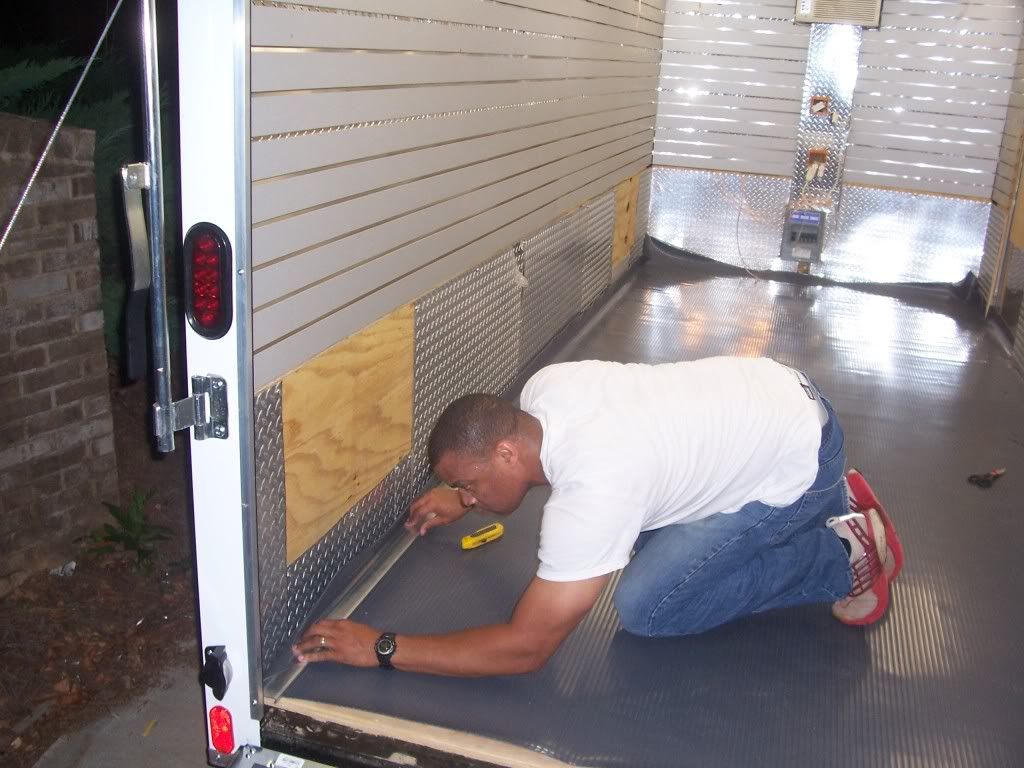
Here is a daylight shot of the ramp. I went back and removed the doublesided tape and used the spray adhesive. I'm still getting a lot of lumps when the sun hits the ramp and the rubber expands. I will jack with it later and keep moving.

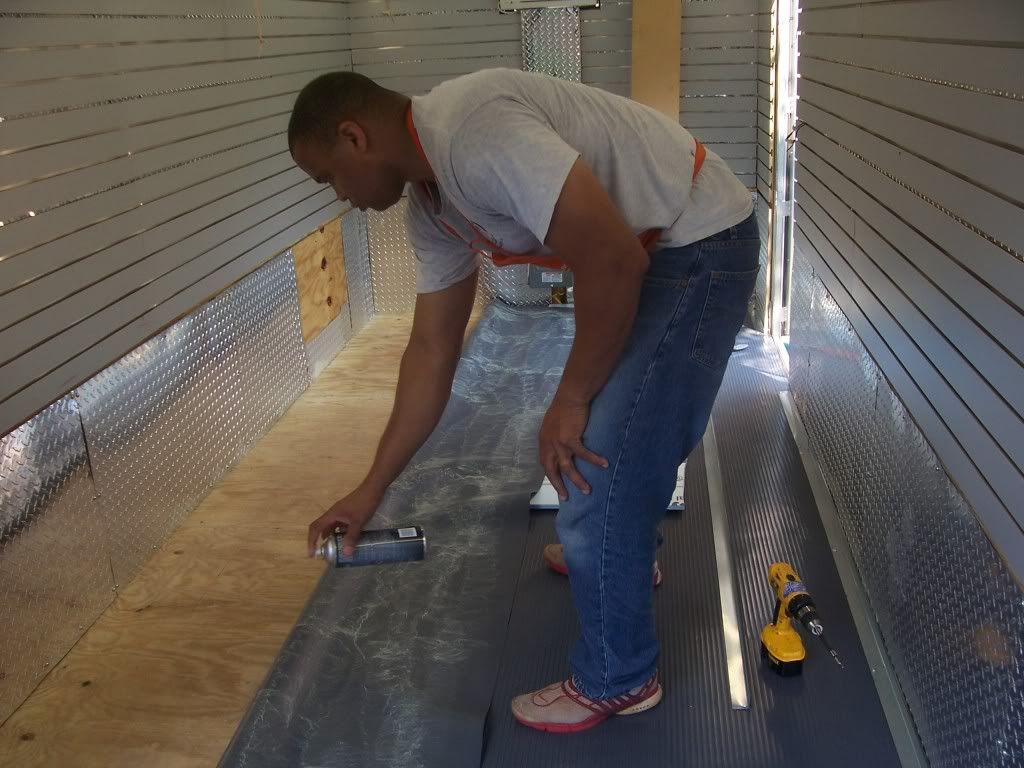
For the spray adhesive I'm using 3M Type 80 Spray Adhesive. Cost $12 a can. This is the only stuff that will bond rubber to wood. Use in a well ventilated area or else you will get high which is cool, but then you will die, which is not so cool

I'm using the same aluminum corners on the ramp to edge the corners of the floor. Here I'am doing the right side

Now I'm spraying the left side
Installing the aluminum corners on the left side
Now I'm installing the aluminum corners in the front left side

Now I'm installing the aluminum corners in the front right side
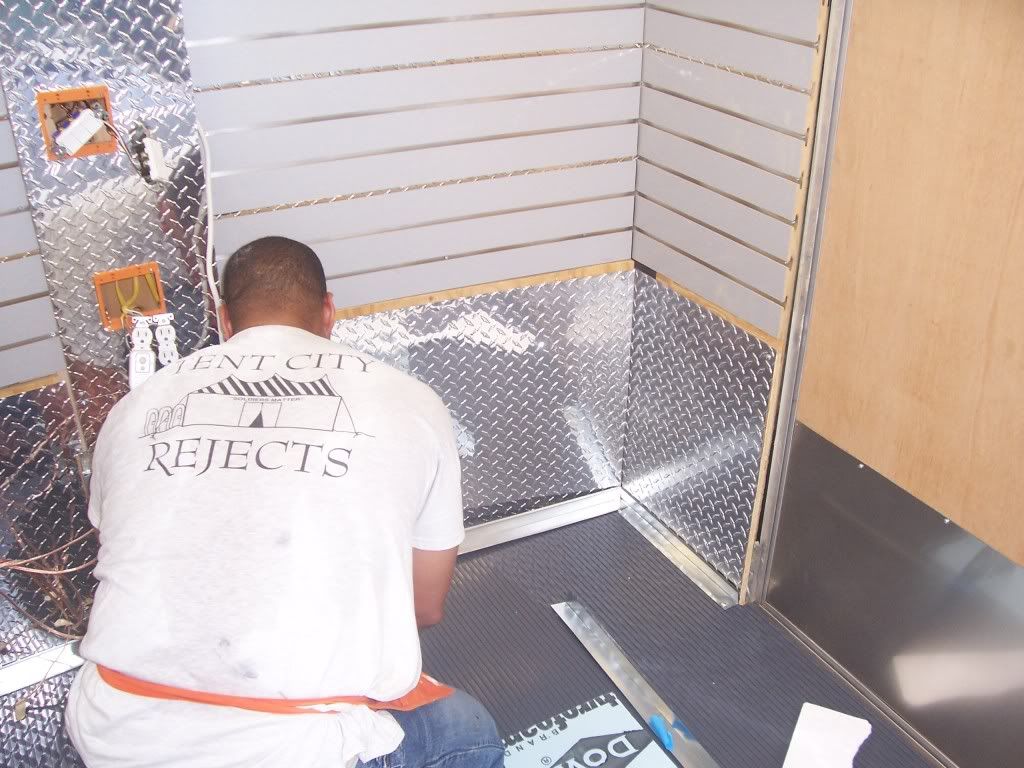
Now I'm installing the aluminum corners in the rear

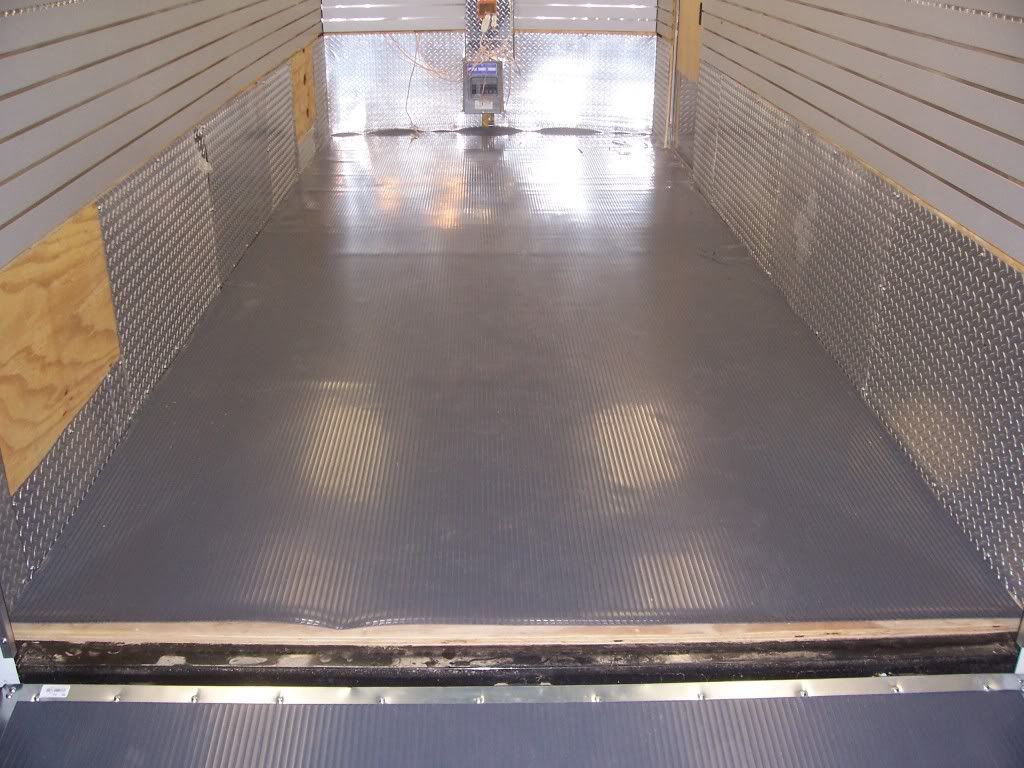
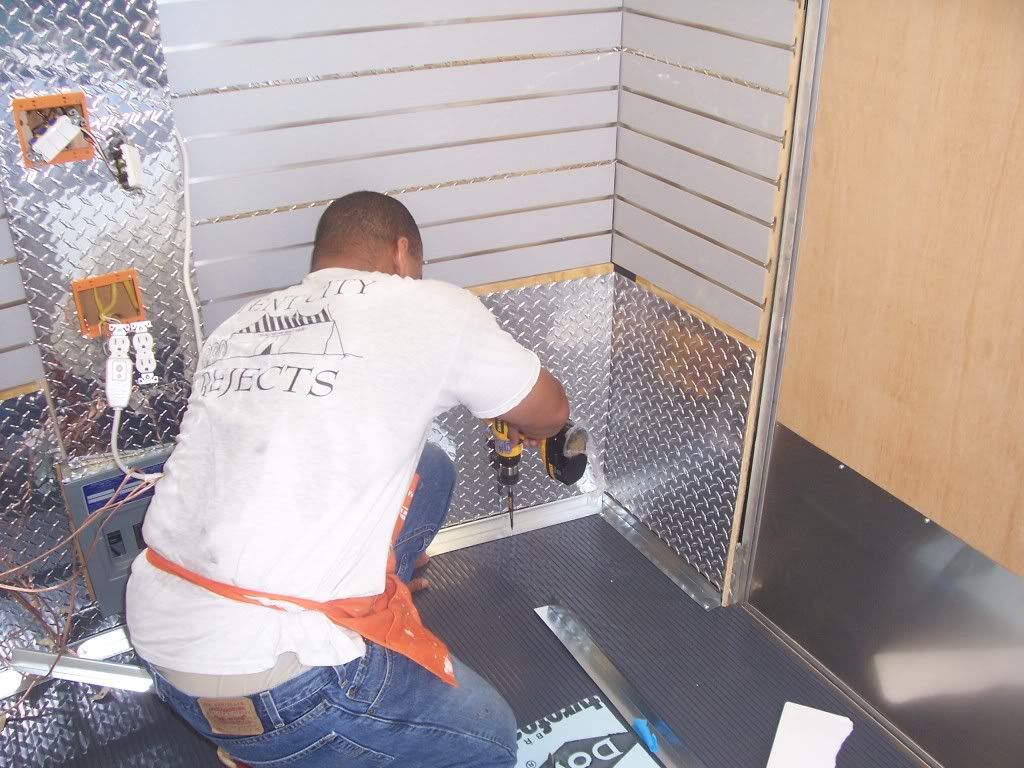
NOW THAT'S WHAT I'M TALKIN BOUT!!!!
Left side BOOM!!!
Right side POP!!!

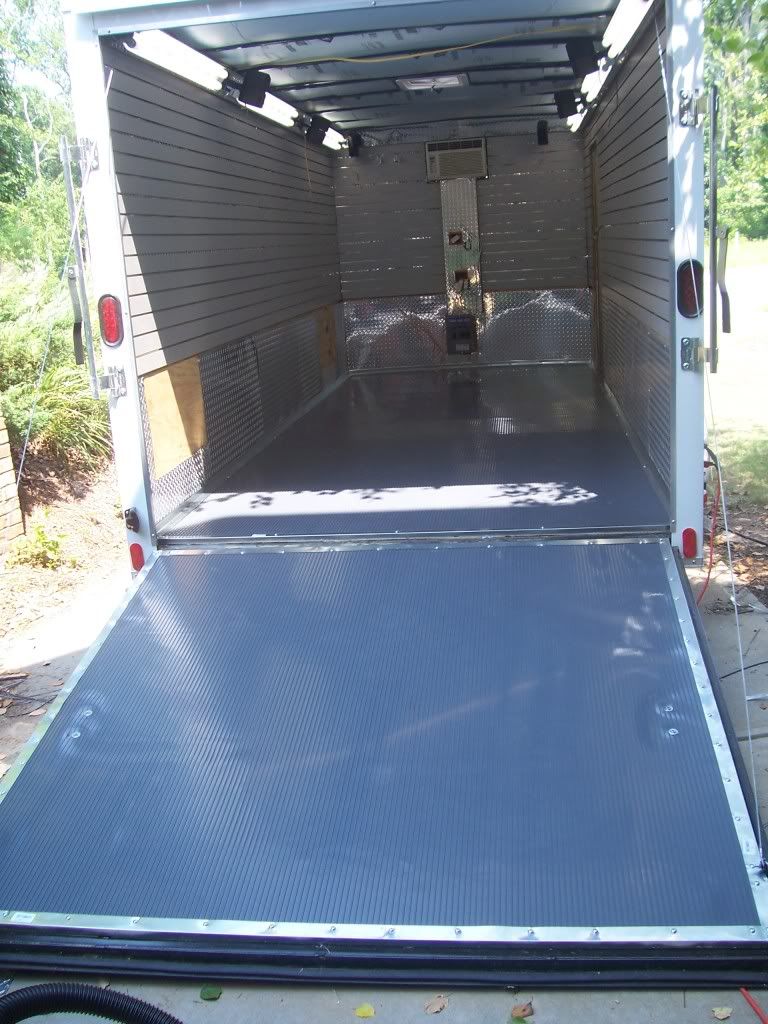
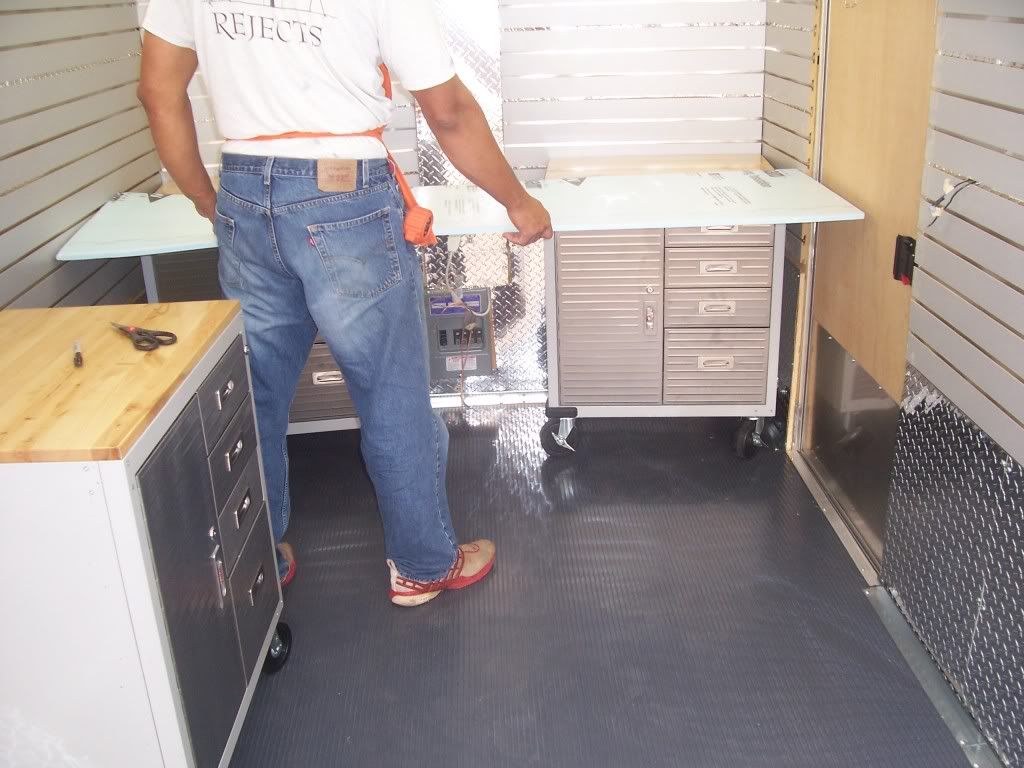
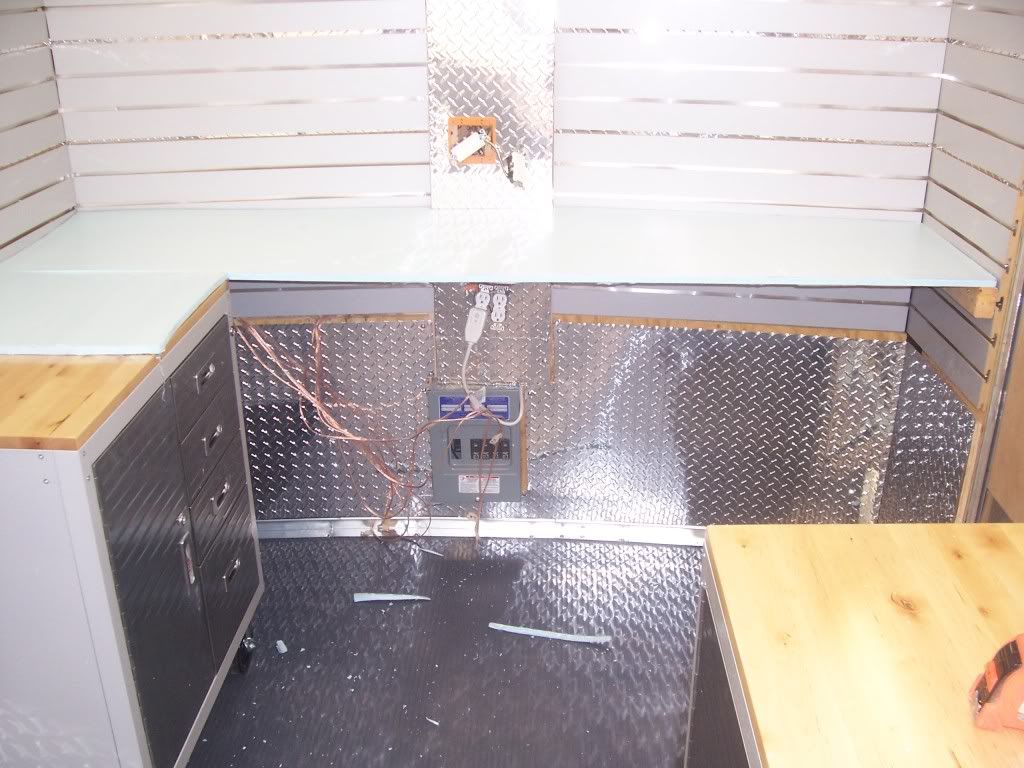
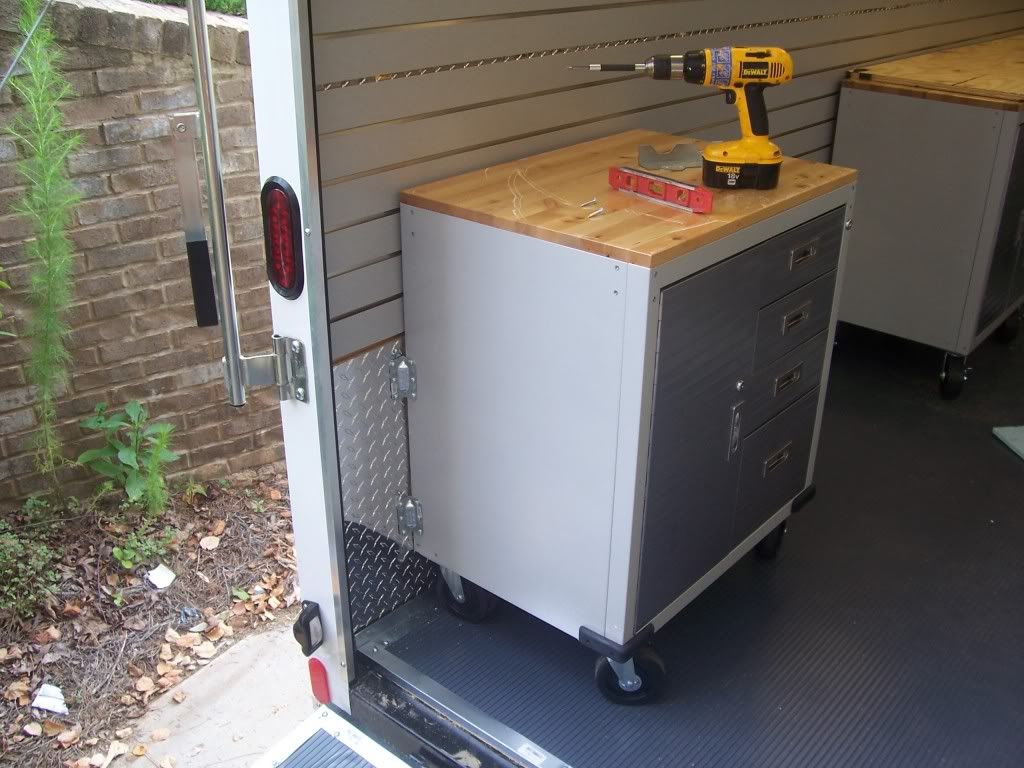
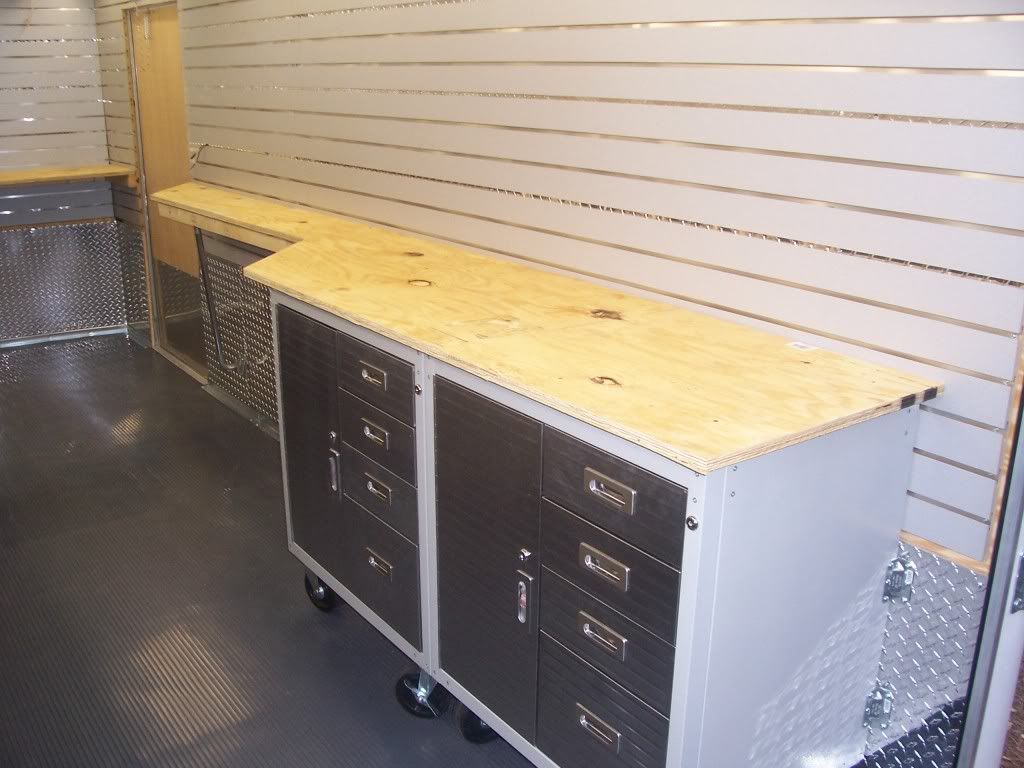
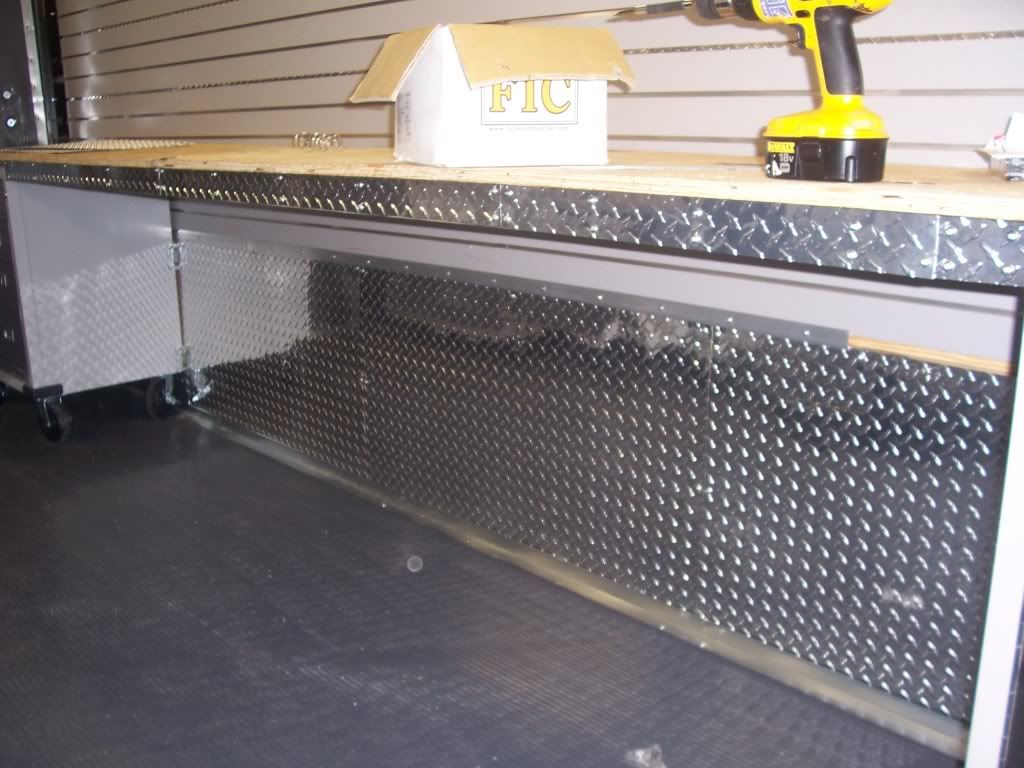
Front looks tight. Floors are done!!! On to the counters

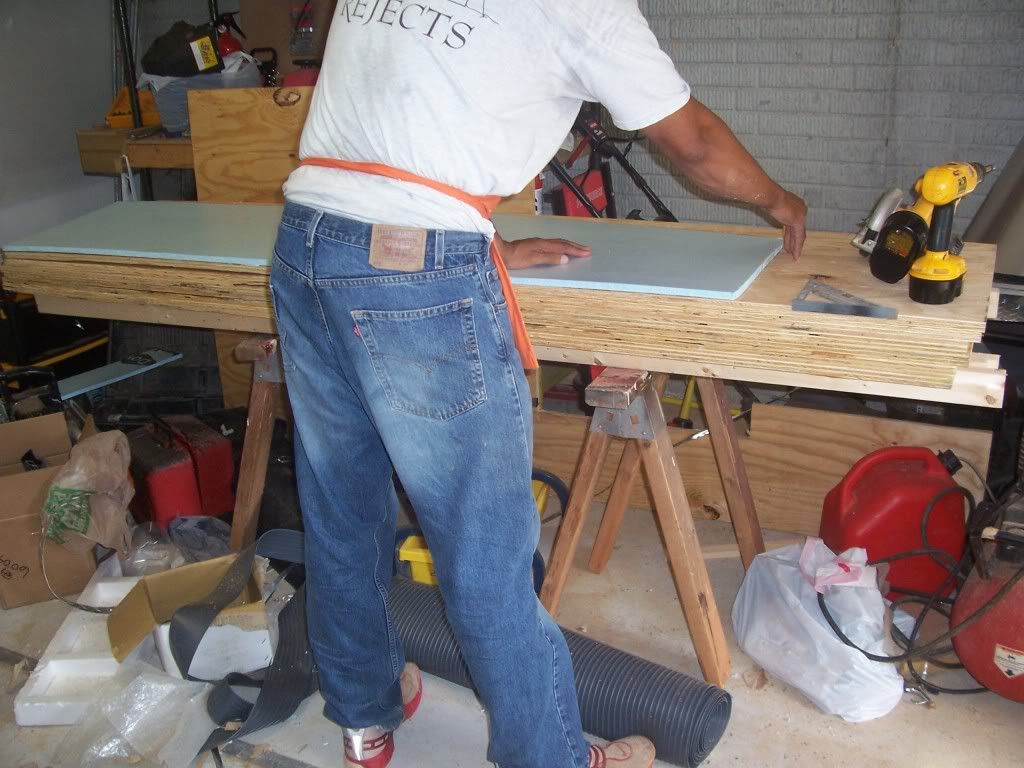
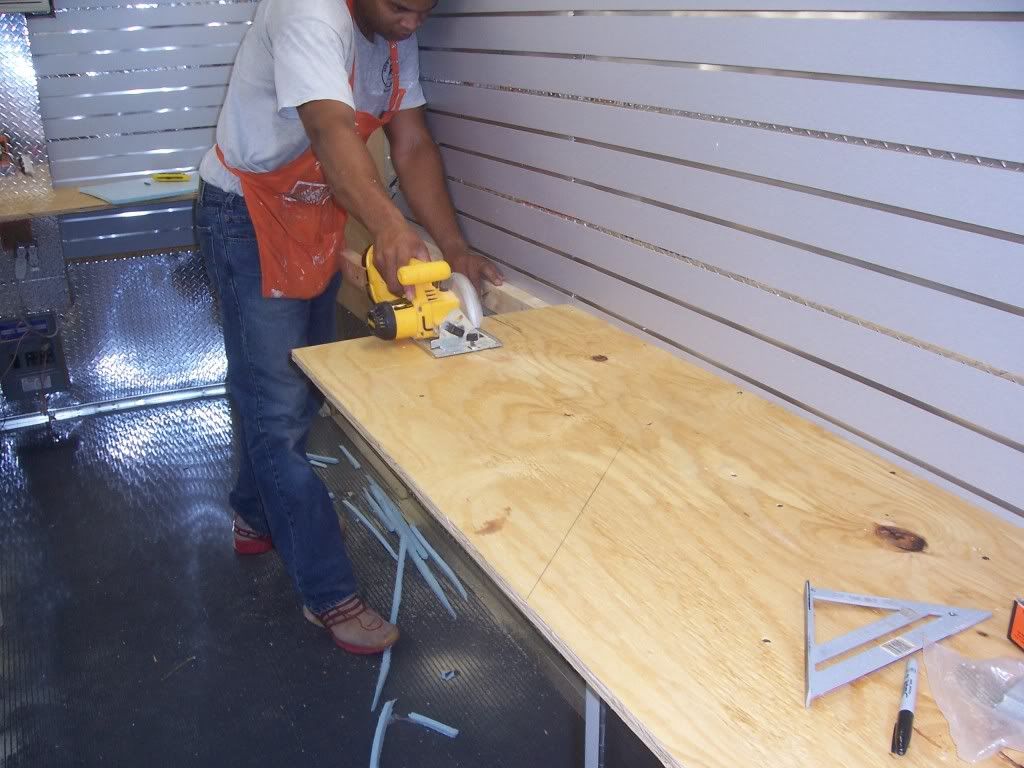
I'm going to start by cutting out the front counter. Since the front counter is on the slope side of the trailer and has a hump from the encasement, I'm going to cut a template out of some scrap foam insulation

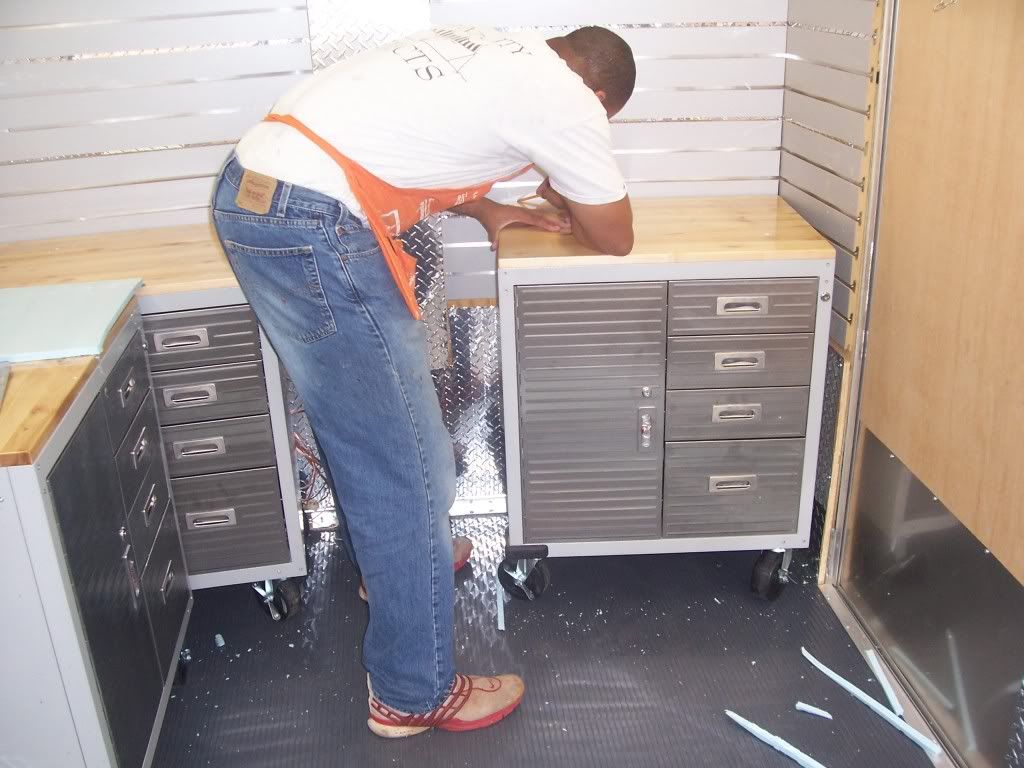
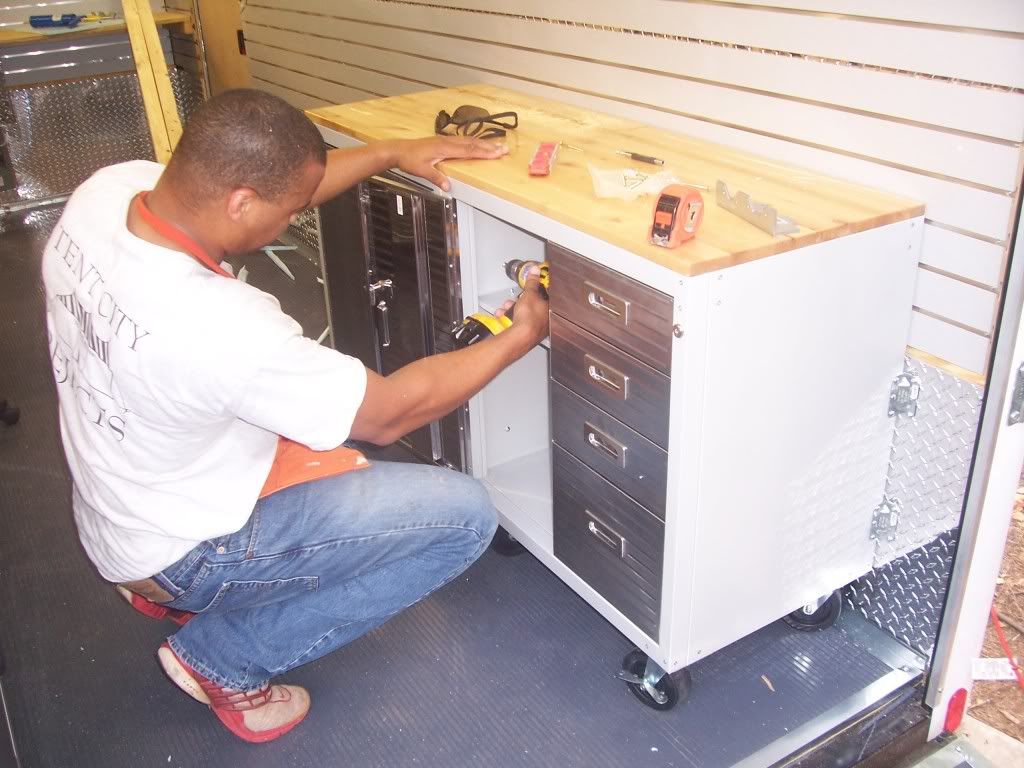
Just to make sure that the counter height is right, I'm moving the cabinets in the front to line the height up with the
side cabinets
It took about 30 min of trimming but I finally got it right


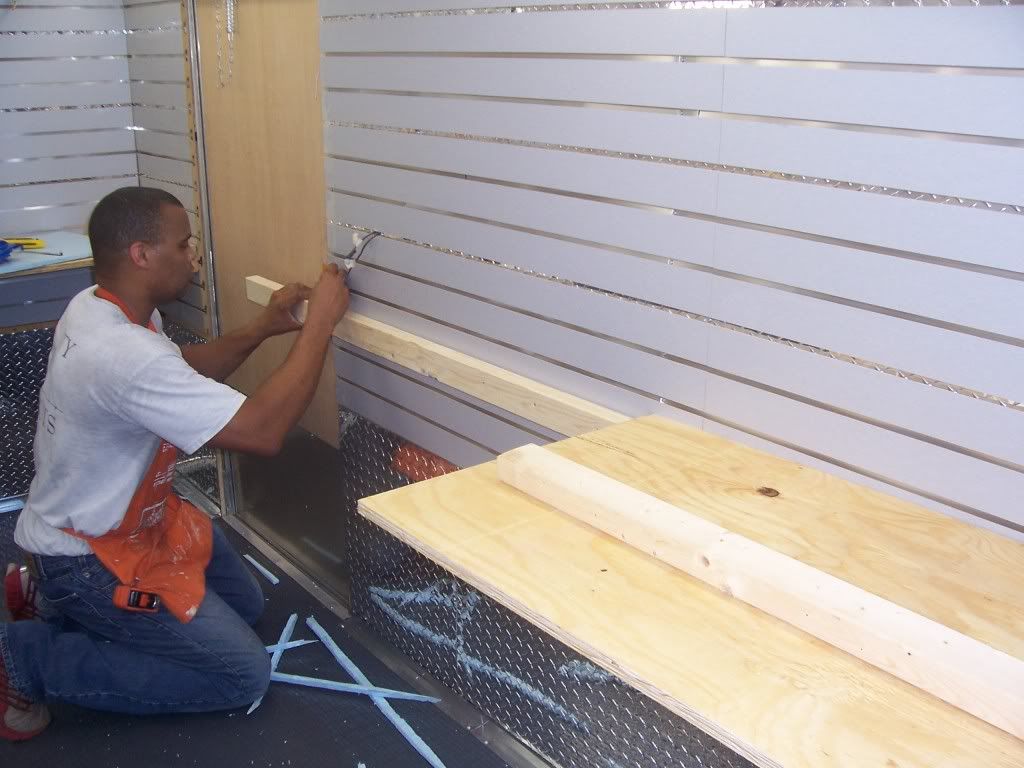
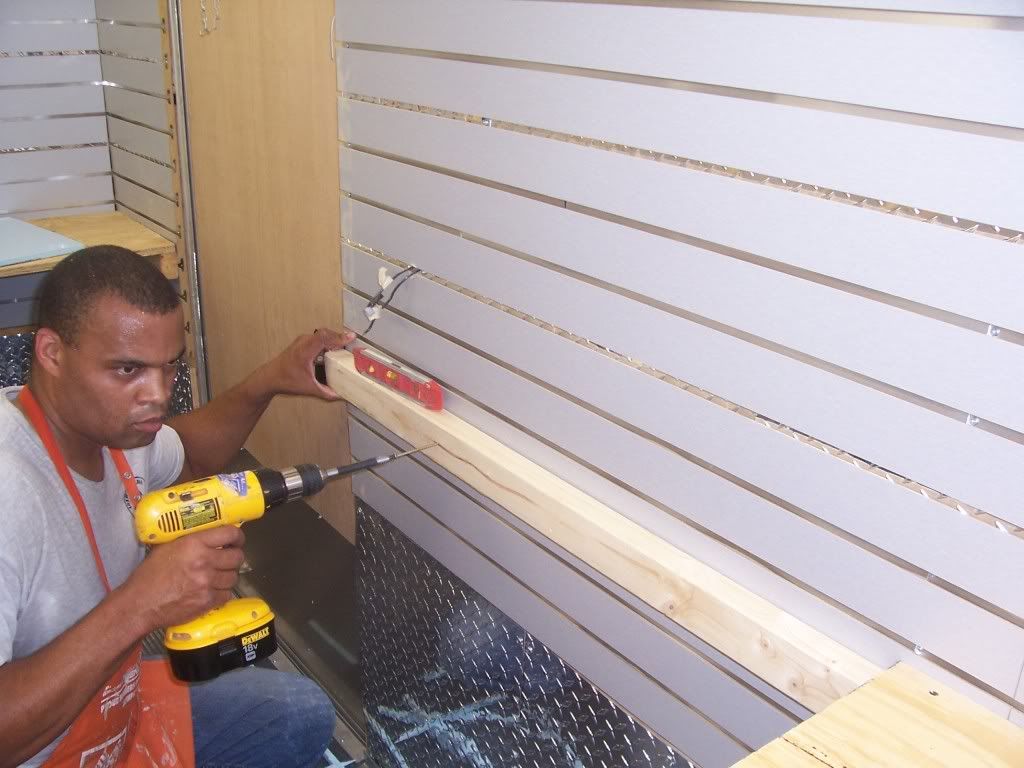
Now I'm marking off the height of the cabinets on the wall so I can install the framerails that will support the counter
For the framerails I'm using 2x3s instead of 2x4s. They are cheaper and easier to handle

installing the front right frame rail
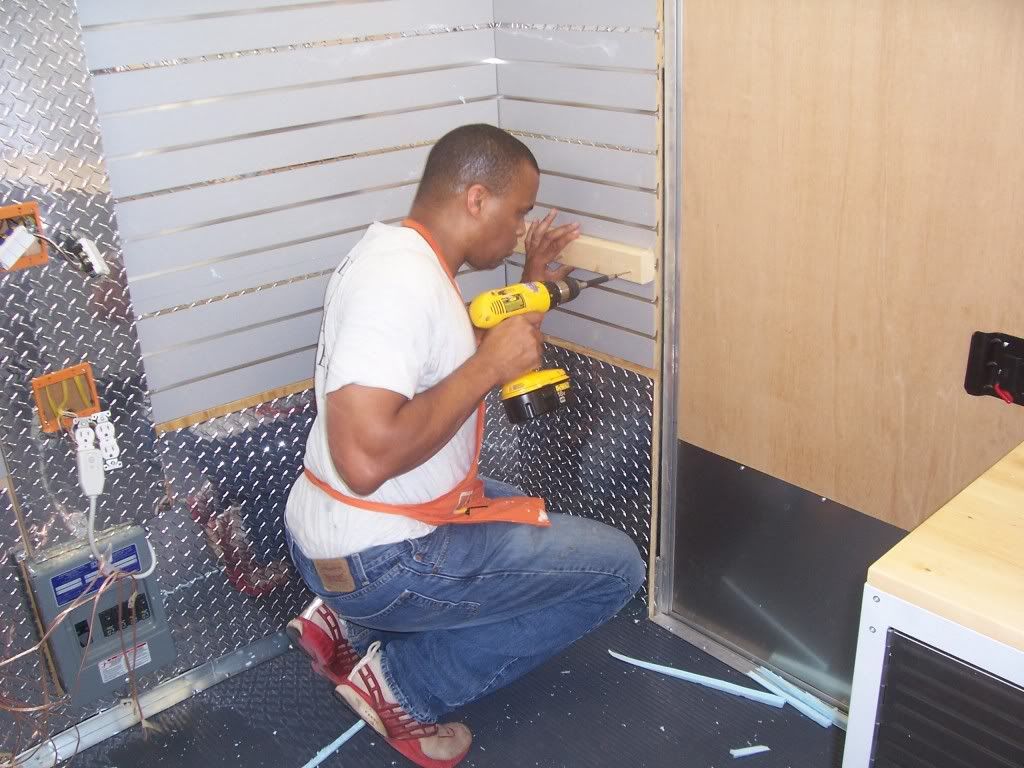
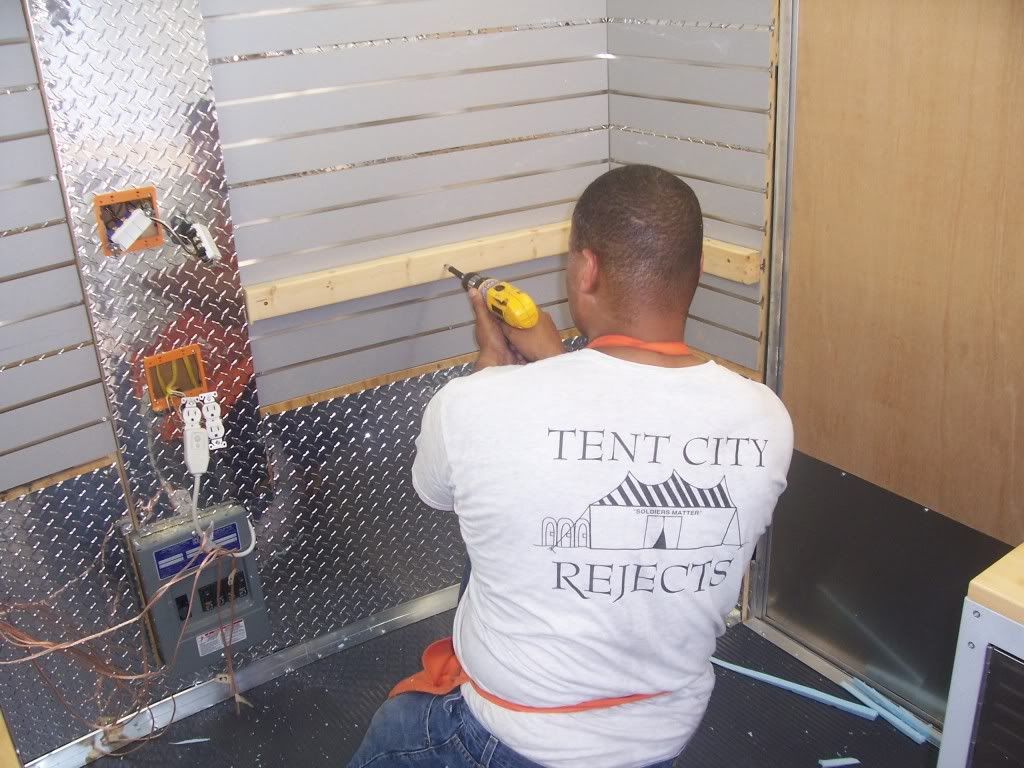
Now I'm installing the left front frame rail
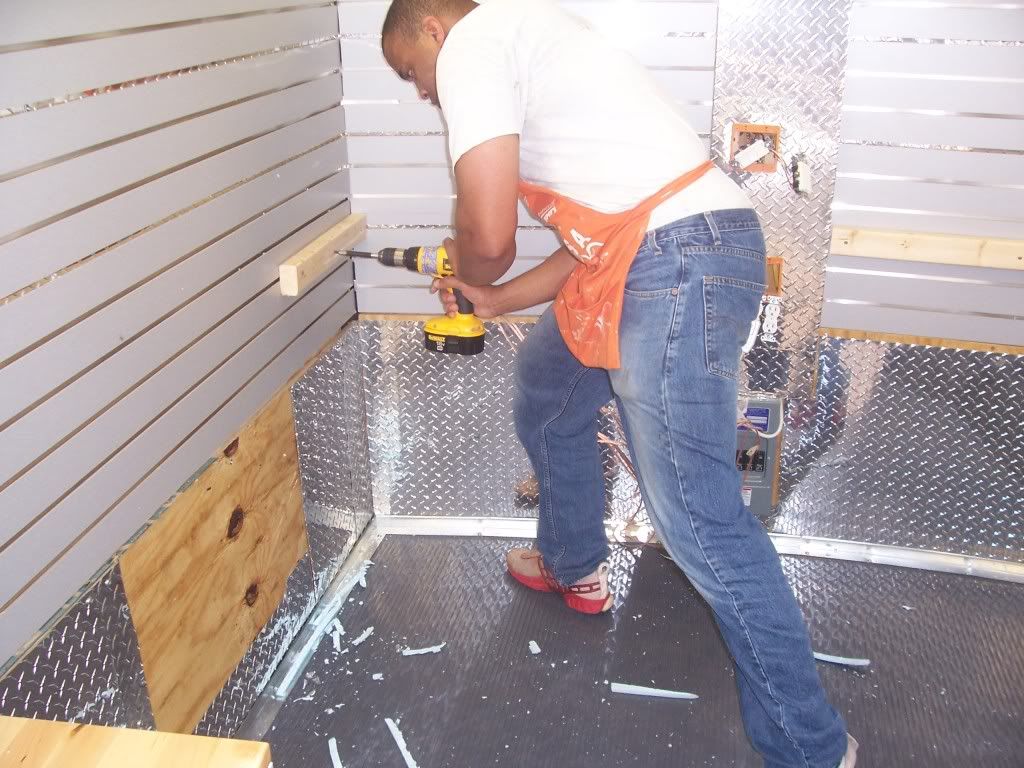
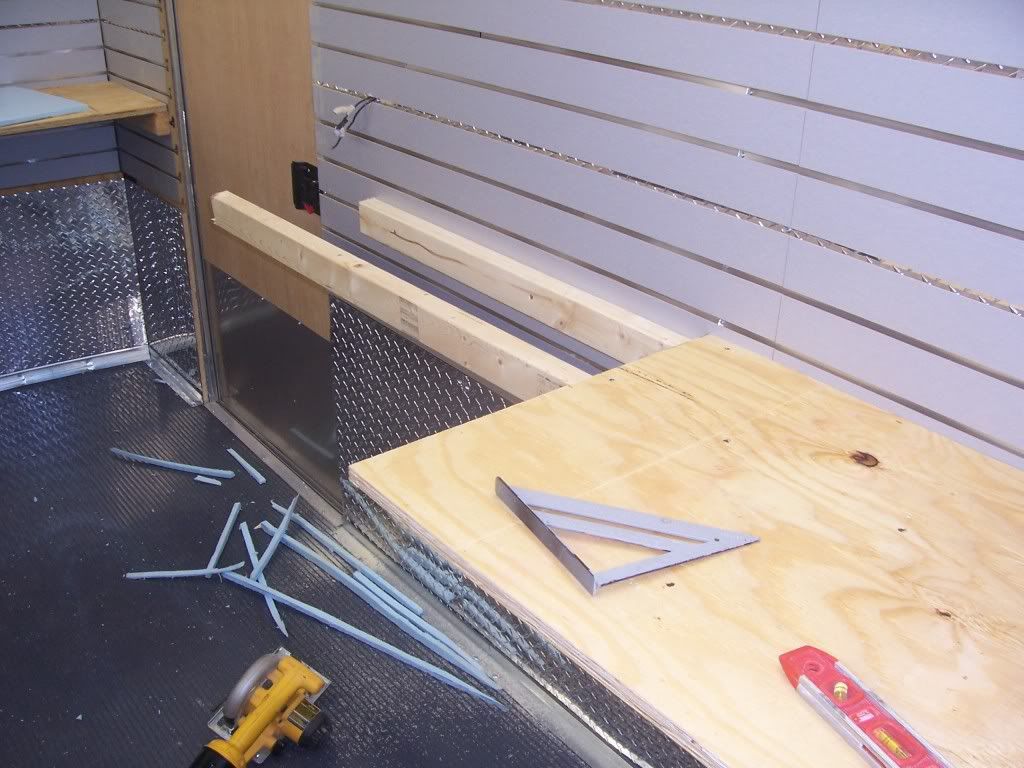
Look ma, no cabinets!!
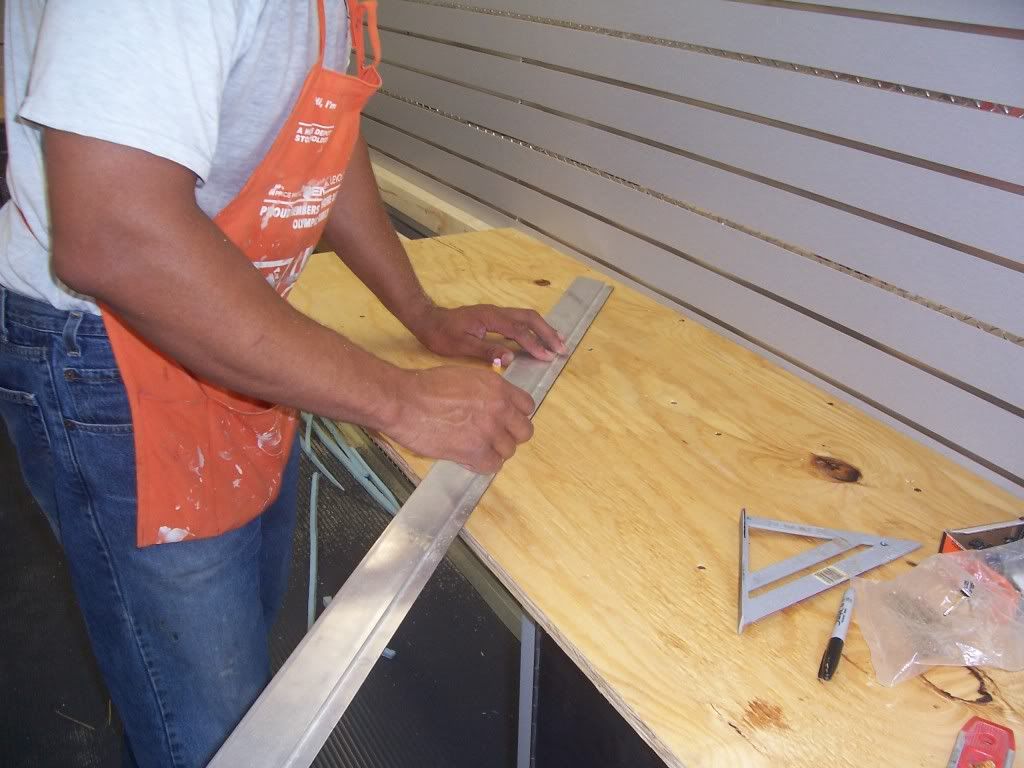
Now that I've verified that the fit is good. I can cut the front counter out using the foam template
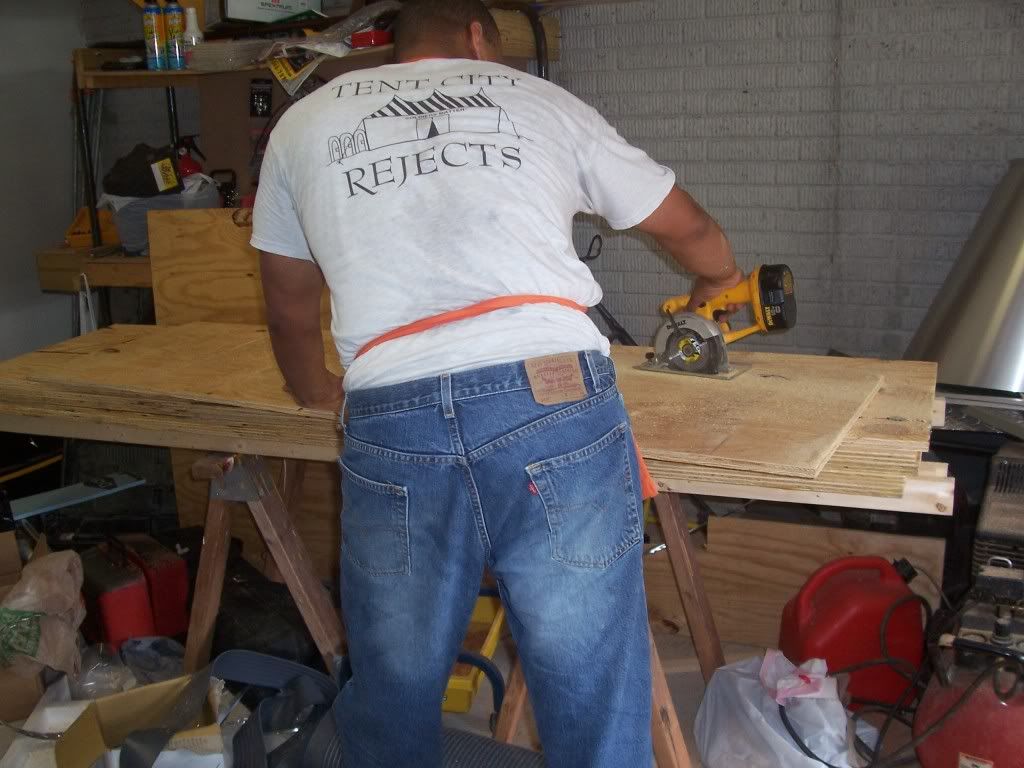
BOOYAH BEEOTCHES!!! Looks like a front counter to me. I won't bolt it in until I build the shelf for the Stereo
components. On to the left countertop
I'm cutting the board for the left countertop

Before I go any further with the board cuts, I'm going to secure the cabinets. I'm using corner braces to secure the
cabinets. They run abour $1.87 a pop. I used four per cabinet

Right side is good
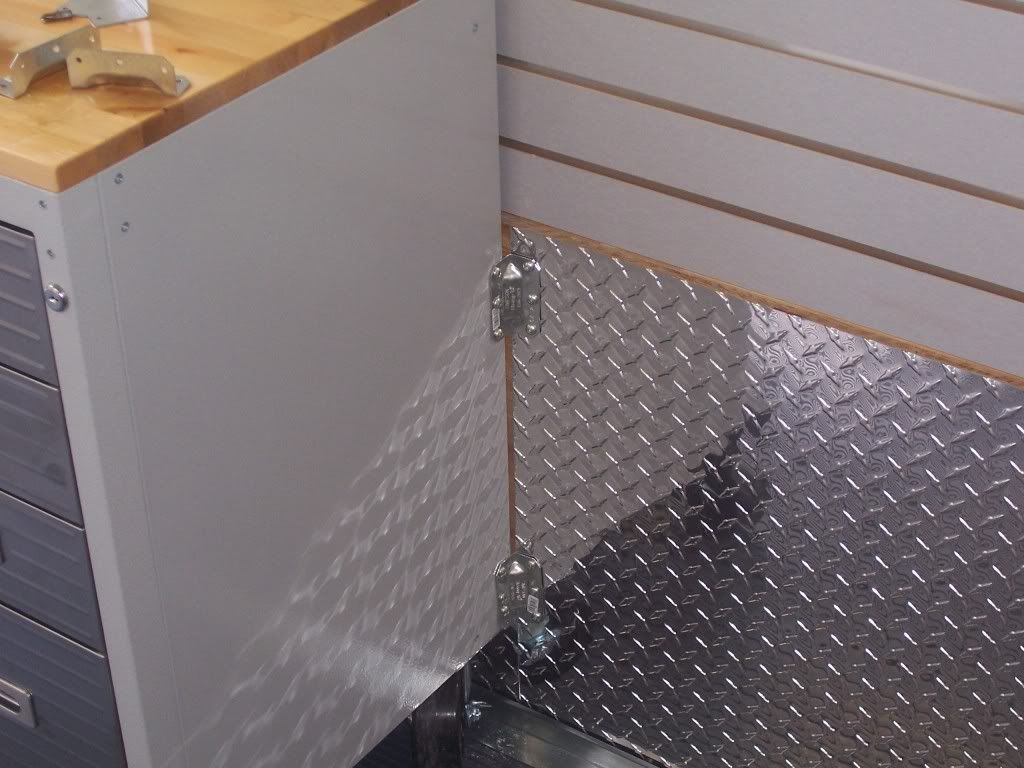
Working on the left
left side is good. This sucka isn't going anywhere
I've already cut the main section of the left countertop which was 8ft long. However since the left counter is 14ft
long, I need to cut a 6ft foot piece

OH YEAH!!
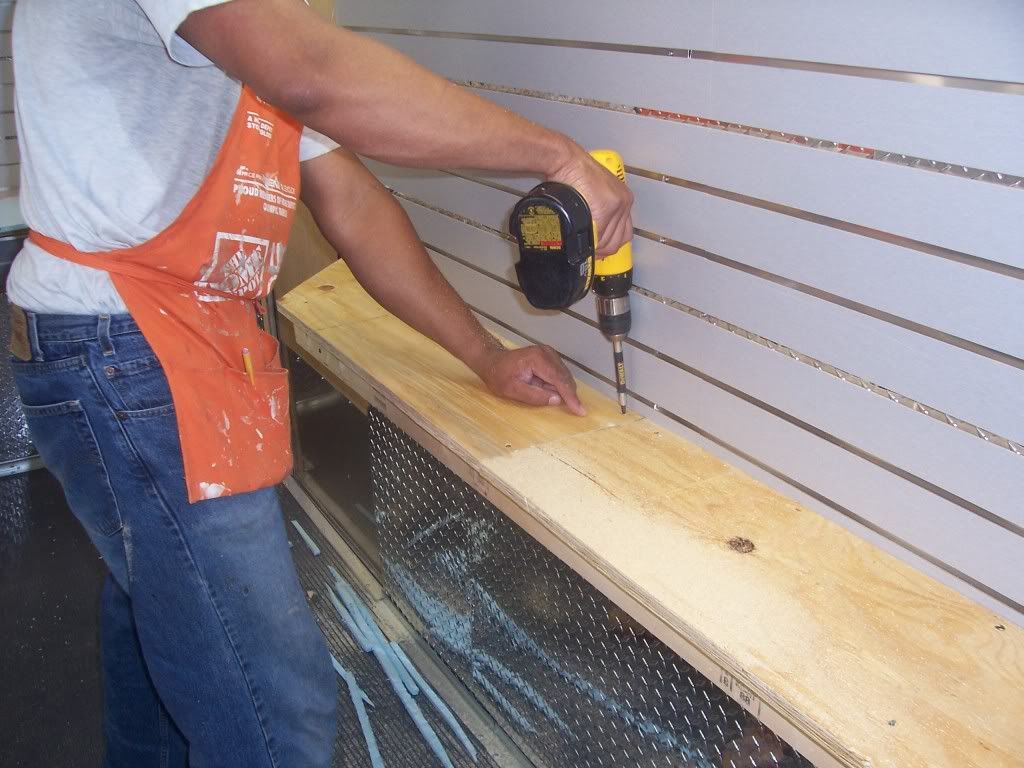
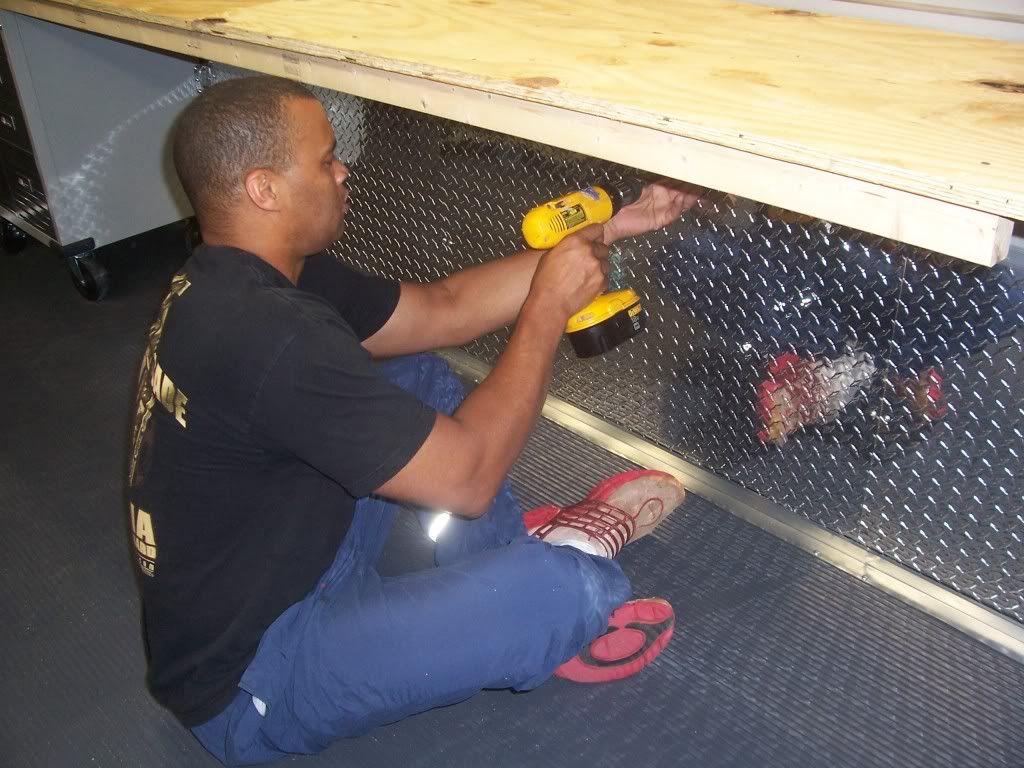
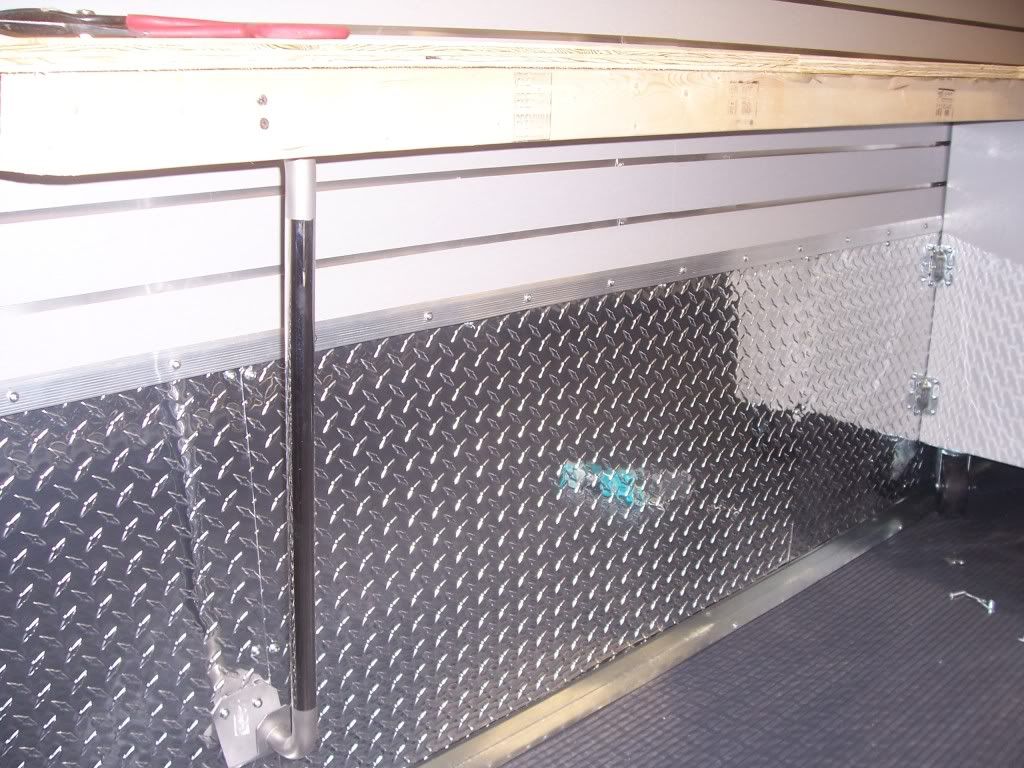
Now I can underpin the left counter with 2x3 for additional strength to keep the middle from sagging. I'm running 2x3 in front, middle and back of the counter to really reinforce the middle.

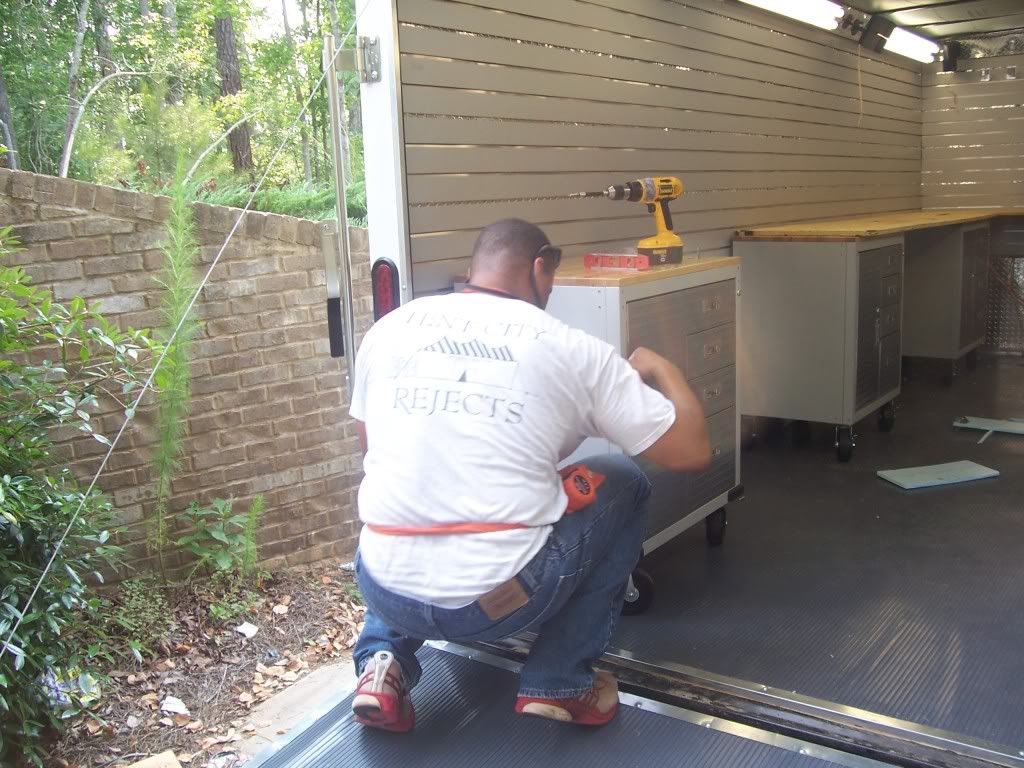
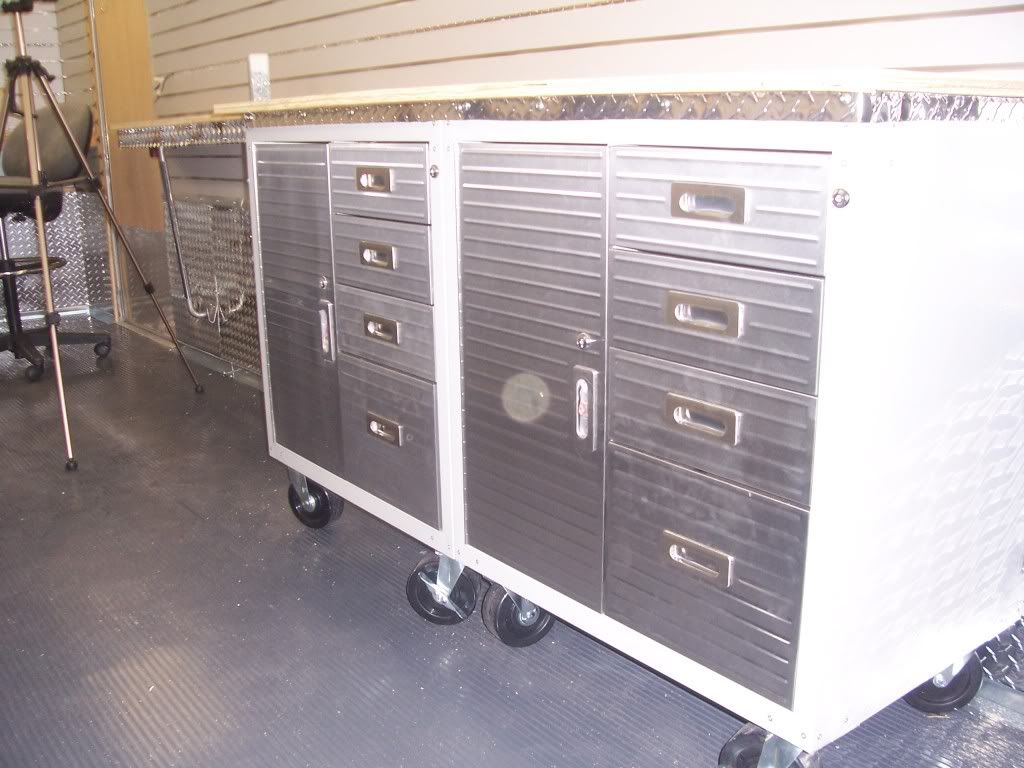
Moving on to the right side. Drilling the corner braces on the right side cabinets

Doing the other side of the right side cabinets

I'm bolting the two cabinets together in the center
Cutting the board for the countertop
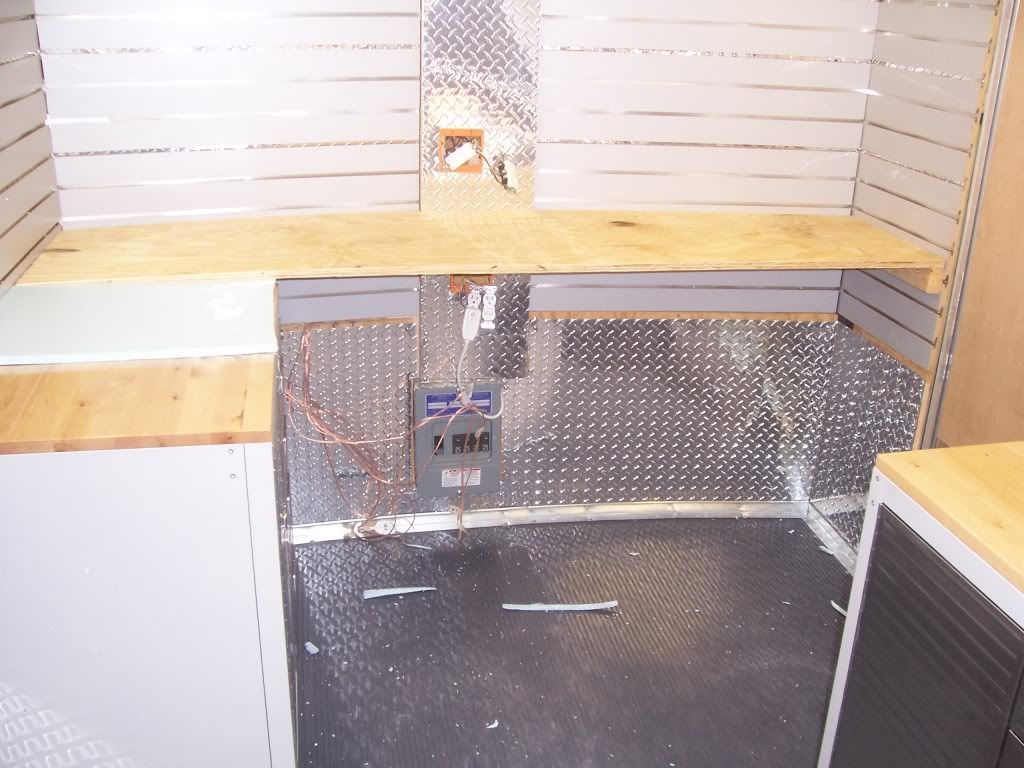
The countertop is in and now I'm measuring off the rear framerail for the 10 in shelf
Adding liquid nail to the brace

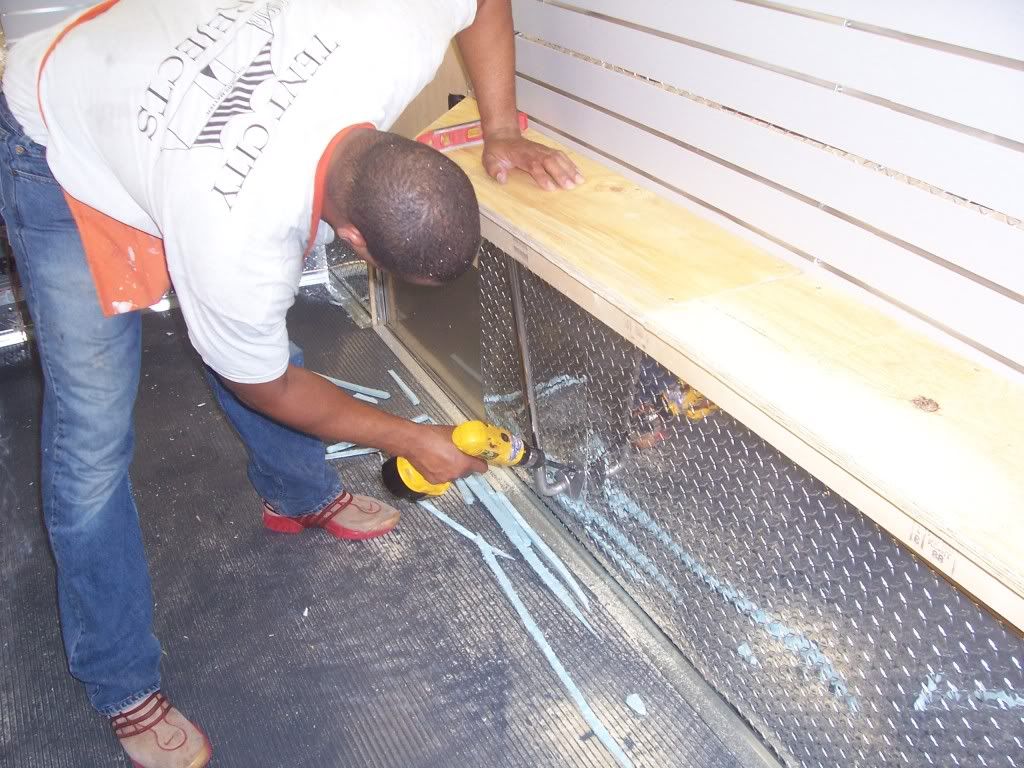
Screwing the framerail into the wall and looking like a serial killer at the same time
Adding the center frame rail to support the front of the 10 in shelf
Measuring the countertop off to cut it at the 45 degree angle to lead into the 10 in shelf
Cutting the counter
BOOYAH BEEOTACHS!!!! I love it when a plan comes together!

Adding the 10 in shelf
This is a handle that came with each of the cabinets. Since I'm not attaching them to the cabinets and the chrome fits in with the decor, I'm gonna use it as a bracket to support the 10 in shelf section of the right counter. GENIUS!!

A little bend here and there and BOOYAH!!!
Looks like OPTION C is definely a winner!!! Remember...plan the work and work the plan...
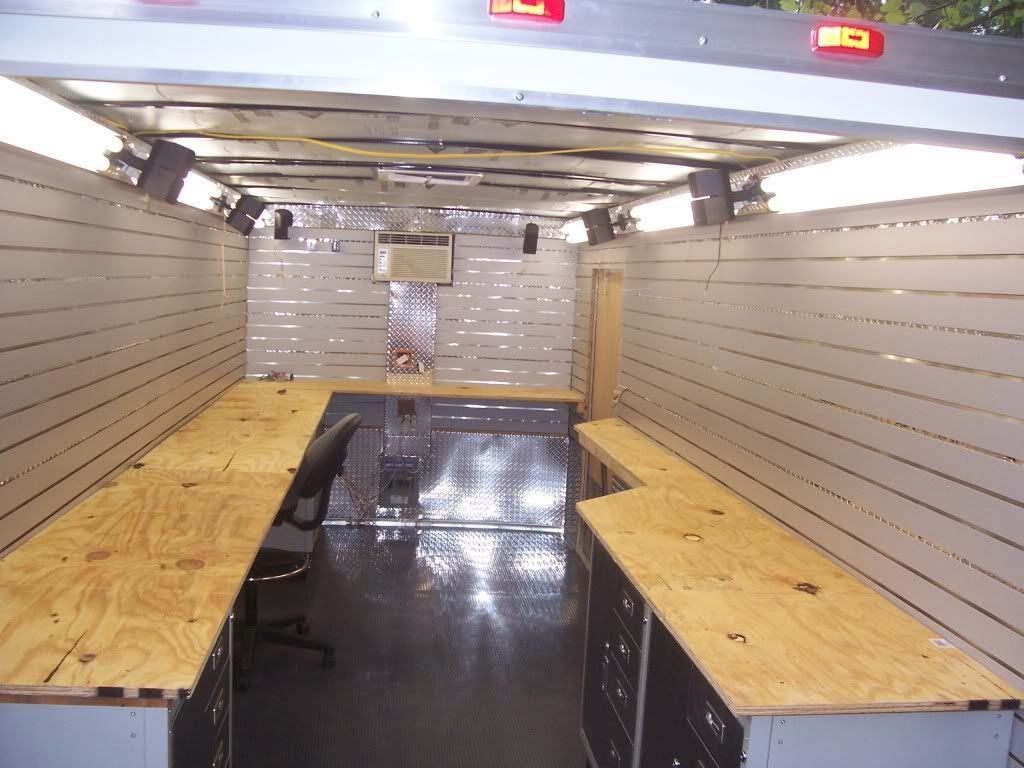
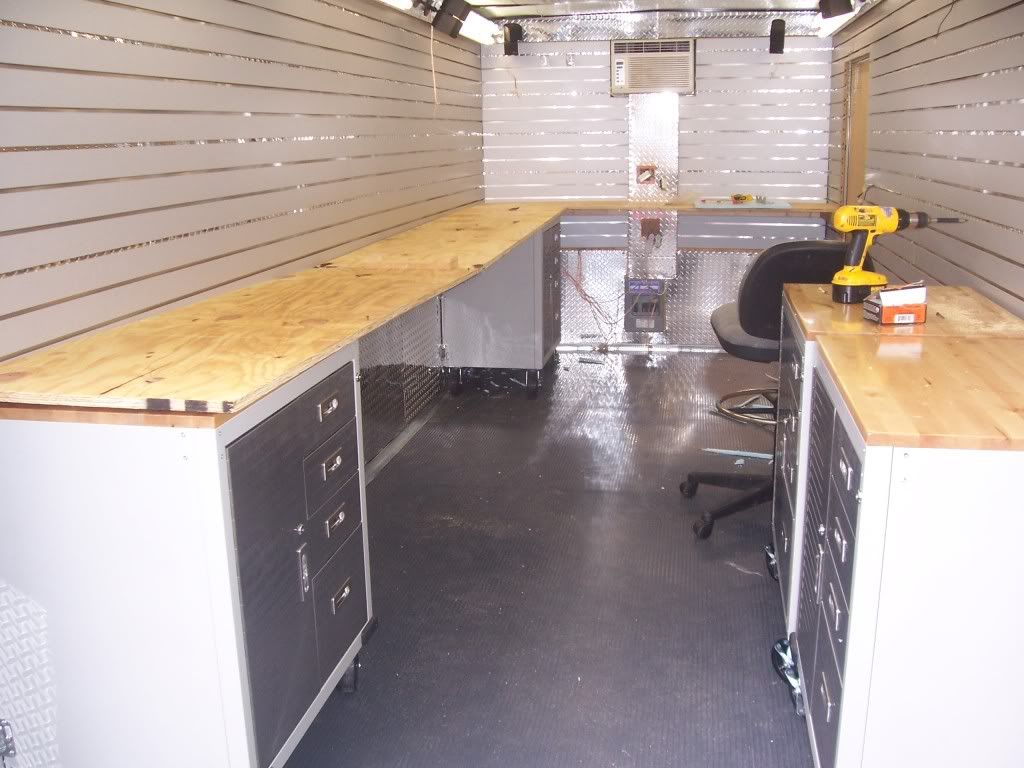
left side looks great. Looka at all that real estate. In my last trailer I only had about 6ft of counterspace. Now I have about 3 times that amount now. Of yeah, with the raised counter height I needed to get a higher chair. I came
across the drafting chair in the picture at a salvage yard for $10!! Normally this is a $150-$200 chair. The only
downside is that I had to totally take the fabric and foams apart and wash them about three times to get the smell out.
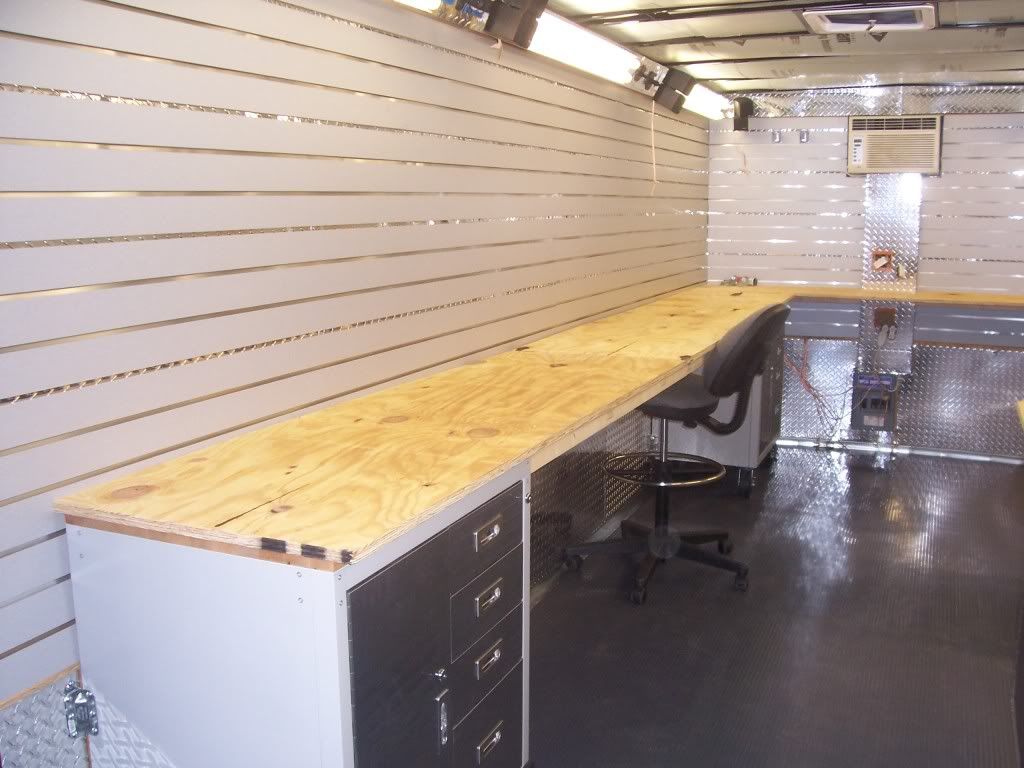
right side looks good. Man that chrome handle really fits right in and makes it look like I meant to do it
Still need to brace the front counter and build the shelf underneath to hold the receiver EQ and XBox. Done for now.
Worked all day and I'm a whipped puppy. Stay tuned.

For the flooring I'm using G-Floor. It's a large rolled rubber mat that is awesome and super cheap. The cheapest place is Sam's club online for $200. Anywhere else it will run you $400.
Rolling out a 6ft section for the ramp
Measuring the width of the ramp
Measuring the height of the ramp
Marking off the ramp measurements
Using a straight edge to cut out the ramp piece
Perfect fit
First tried double sided tape, but it's bonding to the wood so I will get some spray adhesive later
I'm going to cover the edges with aluminum flashing corners. A strip runs about $1.87
Will hold aluminum edges down with rounded hex screws
All four sides installed. Looks good
Rolling out the mat to flatten and prep. I'm glad I got a basement big enough to roll this stuff out.
Cutting off the excess material
Rolling the mat length wise to make it easy to roll out inside trailer
If you think the Slatwall is heavy, this shitz weighs 115lbs. It was an absolute bitch to haul from the house to the
trailer
As I said the mat is 10x22 so I have plenty of excess to trim off and use for other stuff
Cutting off the major excess and will trim the remainder with a boxknife
Just need to trim off remainder
The tricky part is triming off enough that when the mat expands and contracts with temparture, no budges or humps form
Almost done
Looks good. Will let it lay flat overnight and settle
Here is a daylight shot of the ramp. I went back and removed the doublesided tape and used the spray adhesive. I'm still getting a lot of lumps when the sun hits the ramp and the rubber expands. I will jack with it later and keep moving.
For the spray adhesive I'm using 3M Type 80 Spray Adhesive. Cost $12 a can. This is the only stuff that will bond rubber to wood. Use in a well ventilated area or else you will get high which is cool, but then you will die, which is not so cool
I'm using the same aluminum corners on the ramp to edge the corners of the floor. Here I'am doing the right side
Now I'm spraying the left side
Installing the aluminum corners on the left side
Now I'm installing the aluminum corners in the front left side
Now I'm installing the aluminum corners in the front right side
Now I'm installing the aluminum corners in the rear
NOW THAT'S WHAT I'M TALKIN BOUT!!!!
Left side BOOM!!!
Right side POP!!!
Front looks tight. Floors are done!!! On to the counters
I'm going to start by cutting out the front counter. Since the front counter is on the slope side of the trailer and has a hump from the encasement, I'm going to cut a template out of some scrap foam insulation
Just to make sure that the counter height is right, I'm moving the cabinets in the front to line the height up with the
side cabinets
It took about 30 min of trimming but I finally got it right
Now I'm marking off the height of the cabinets on the wall so I can install the framerails that will support the counter
For the framerails I'm using 2x3s instead of 2x4s. They are cheaper and easier to handle
installing the front right frame rail
Now I'm installing the left front frame rail
Look ma, no cabinets!!
Now that I've verified that the fit is good. I can cut the front counter out using the foam template
BOOYAH BEEOTCHES!!! Looks like a front counter to me. I won't bolt it in until I build the shelf for the Stereo
components. On to the left countertop
I'm cutting the board for the left countertop
Before I go any further with the board cuts, I'm going to secure the cabinets. I'm using corner braces to secure the
cabinets. They run abour $1.87 a pop. I used four per cabinet
Right side is good
Working on the left
left side is good. This sucka isn't going anywhere
I've already cut the main section of the left countertop which was 8ft long. However since the left counter is 14ft
long, I need to cut a 6ft foot piece
OH YEAH!!
Now I can underpin the left counter with 2x3 for additional strength to keep the middle from sagging. I'm running 2x3 in front, middle and back of the counter to really reinforce the middle.
Moving on to the right side. Drilling the corner braces on the right side cabinets
Doing the other side of the right side cabinets
I'm bolting the two cabinets together in the center
Cutting the board for the countertop
The countertop is in and now I'm measuring off the rear framerail for the 10 in shelf
Adding liquid nail to the brace
Screwing the framerail into the wall and looking like a serial killer at the same time
Adding the center frame rail to support the front of the 10 in shelf
Measuring the countertop off to cut it at the 45 degree angle to lead into the 10 in shelf
Cutting the counter
BOOYAH BEEOTACHS!!!! I love it when a plan comes together!
Adding the 10 in shelf
This is a handle that came with each of the cabinets. Since I'm not attaching them to the cabinets and the chrome fits in with the decor, I'm gonna use it as a bracket to support the 10 in shelf section of the right counter. GENIUS!!
A little bend here and there and BOOYAH!!!
Looks like OPTION C is definely a winner!!! Remember...plan the work and work the plan...
left side looks great. Looka at all that real estate. In my last trailer I only had about 6ft of counterspace. Now I have about 3 times that amount now. Of yeah, with the raised counter height I needed to get a higher chair. I came
across the drafting chair in the picture at a salvage yard for $10!! Normally this is a $150-$200 chair. The only
downside is that I had to totally take the fabric and foams apart and wash them about three times to get the smell out.
right side looks good. Man that chrome handle really fits right in and makes it look like I meant to do it
Still need to brace the front counter and build the shelf underneath to hold the receiver EQ and XBox. Done for now.
Worked all day and I'm a whipped puppy. Stay tuned.
Last edited by El Tigre; 09-25-2011 at 05:49 AM.
06-27-2009, 09:46 PM
#183
Now that's F-------- Awsome!
Can't wait to see the end results.
Can't wait to see the end results.
06-27-2009, 10:02 PM
#184
Tech Adept
Man i will tell you, i just read from the front to hear and i think this is the best Thread on here. Great job. That thing is AWESOME!!!!!!!It will be sick when it is all done.The floor, what a great idea.Plan C was the best, glad you want with it. You could use cove molding around the a/c unit or try to find like what you used on the floor but for the walls. Or you could use screen molding and wrap with a thin sheet of aluminum so it looks good. The stuff for the floor you might have to trim the little edge to fit the 1/2 in or 3/4 in wall board you have but you could make that work. just slide it tight to the a/c unit and your all gone with that.Just a suggestion. Thanks for posting this great stuff. Good Teacher.
Schuyler.
Schuyler.
Last edited by calrosse; 06-27-2009 at 10:06 PM. Reason: added a little bit more
06-27-2009, 10:28 PM
#185

Wow! Holy Lots Of Progress Batman!

1 word - epic.
That looks great. Option C turned out awesome!
And in case the 2x4's under the left counter still let is sag, run a bracing piece from the edge of the counter down the the bottom of the wall to help support the middle.
Like this -
___
| /
06-27-2009, 10:42 PM
#187
looks awsome. nice job
06-27-2009, 10:47 PM
#188
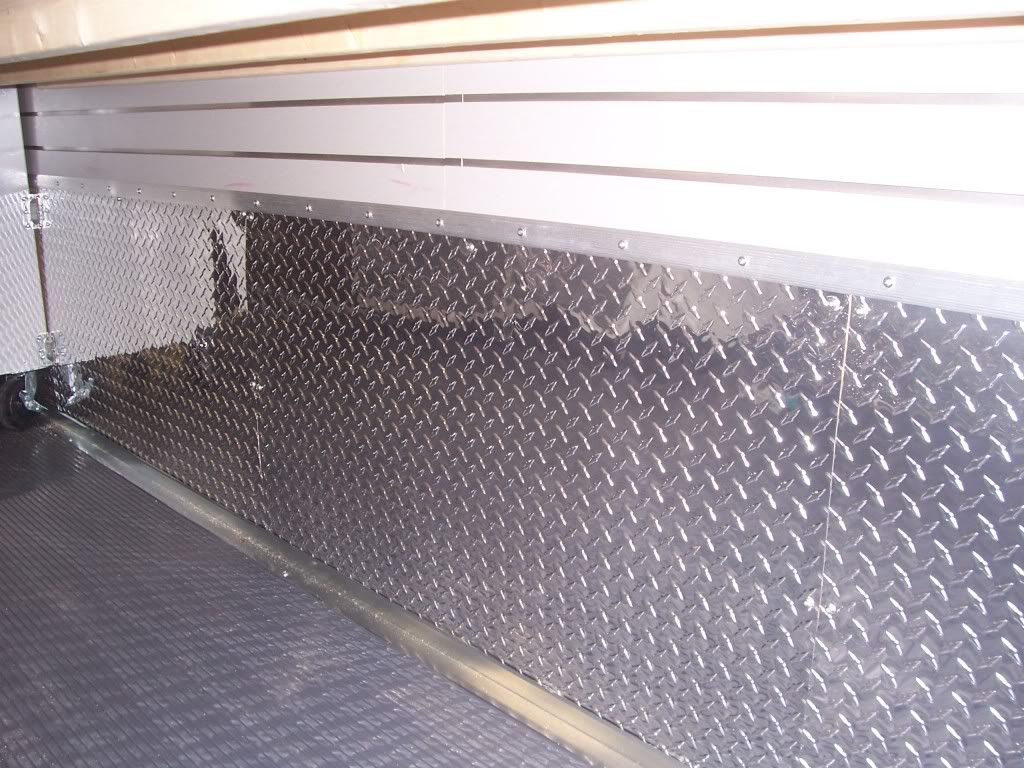
I couldn't sleep so I decided to do some trimwork. I'm covering the exposed wood that was between the Slatwall and the ATP. I'm using 1in wide metal seaming that runs about $7. Here I'am doing the left side
Left side is done, now working on the right.

Now that's snazzy!! Right side is good
I'm about 5 in short on the left side but I know that I will need to buy some more, but it still looks good.
I decided to cover the exposed 2x3 framerails and the exposed hardwood on the cabinets with ATP. I still have a decent amount left and I may as well put it to good use.
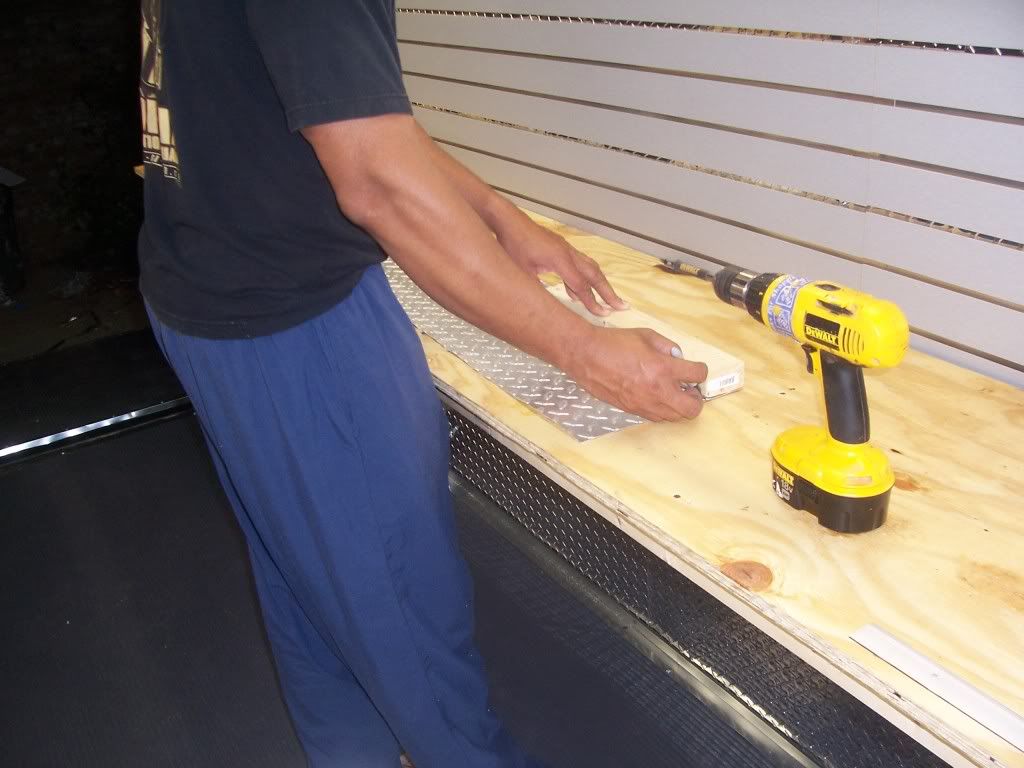
Here I'am trimming the ATP for the 2x3s
Goes on smooth like butter. No muss no fuss

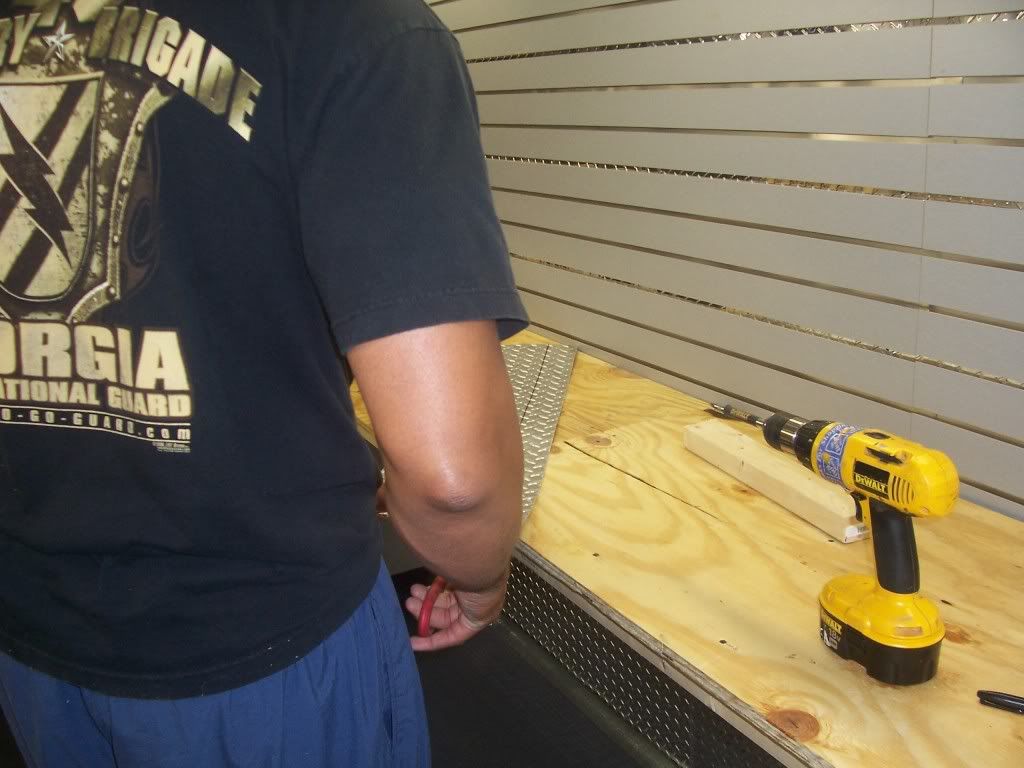
The ATP absolutely makes the 45 degree cuts on the counter stand out. DAMN!! I'm good!! Right side is hot
Left side is poppin
The 2x3s are done and I'm starting on the exposed cabinet hardwood

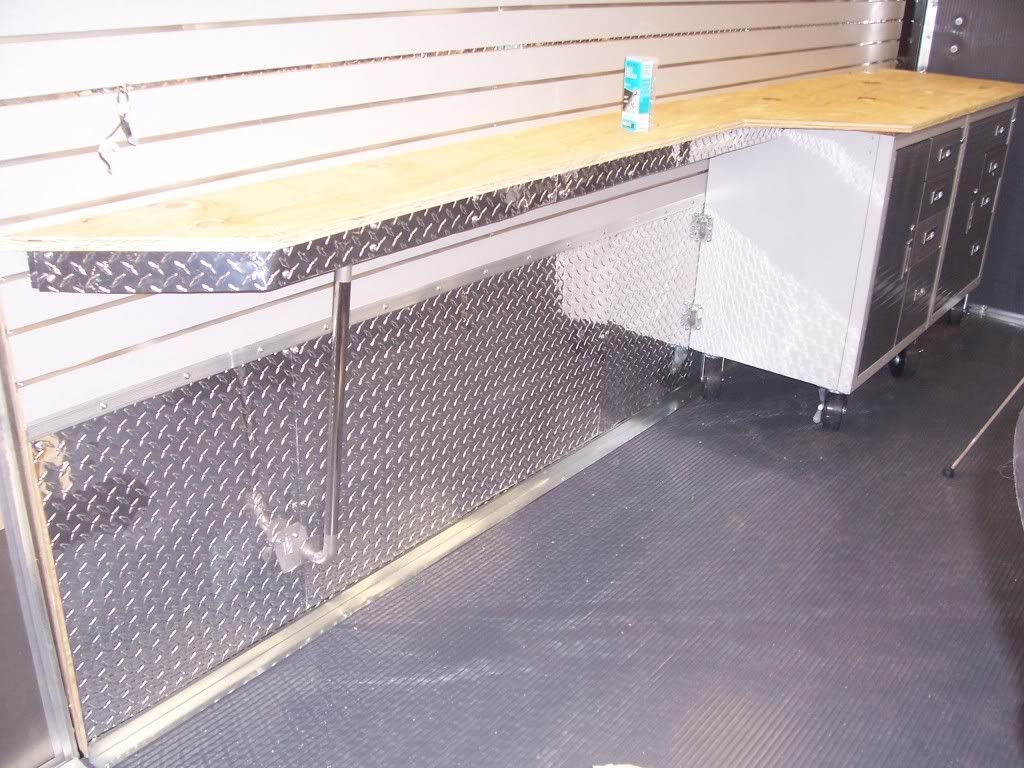
Left side is good

Right side looks good as well. NOW I'm done....Laminating the countertops is next. Stay tuned.
Left side is done, now working on the right.
Now that's snazzy!! Right side is good
I'm about 5 in short on the left side but I know that I will need to buy some more, but it still looks good.
I decided to cover the exposed 2x3 framerails and the exposed hardwood on the cabinets with ATP. I still have a decent amount left and I may as well put it to good use.
Here I'am trimming the ATP for the 2x3s
Goes on smooth like butter. No muss no fuss
The ATP absolutely makes the 45 degree cuts on the counter stand out. DAMN!! I'm good!! Right side is hot
Left side is poppin
The 2x3s are done and I'm starting on the exposed cabinet hardwood
Left side is good
Right side looks good as well. NOW I'm done....Laminating the countertops is next. Stay tuned.
06-27-2009, 10:53 PM
#189
It's awsome, just awsome El Tigre 
You are now the GOLD STANDARD in bad A** R/C Trailers
You are now the GOLD STANDARD in bad A** R/C Trailers
 06-28-2009, 05:51 AM
#191
I love this thread. Hopefully, you are an inspiration for others. I want to know what the end $$$ will end up being when you are complete.
06-28-2009, 06:55 AM
#192

