


The Tigre's Lair - The Sequel ...My Pit Trailer Project II
 06-28-2009, 10:33 PM
#211
That is really neat!

 06-29-2009, 05:56 AM
#213
Yeah i can't see them anymore
06-29-2009, 06:04 AM
#214
I think he blew up photobucket! Someone needs to help this guy post host his pics.
06-29-2009, 08:24 AM
#215
he maxed out his allowable amount of MB's on his acct.....he's gotta upgrade Or Make a new acct And or delete some of his old stuff to get the Old pics back up and running.>>>GET on it Tigre...i was out racing this weekend and haven't seen shit in the last 2 page's.
06-29-2009, 11:28 AM
#216
Tech Initiate
I just found this thread, and I am sick that I can not see any of the pictures.
Please see what you can do to re-host them.
Thanks
Please see what you can do to re-host them.
Thanks
06-29-2009, 06:27 PM
#217
Dont panic people...Apparently my AWESUMNESS exceeded their bandwidth. Just upgraded to a pro account which has unlimited bandwidth...
 but now I'm
  06-29-2009, 06:44 PM
#219
How are liking your RC8B? How does it handle compared to the RC8? I'm gonna get another RC8 or RC8B for my racer and relagate my current buggy to my practice car. I keep breakin shitz during the mains and I know it's from wear and tear from weekly practicing at the track
06-29-2009, 09:01 PM
#221
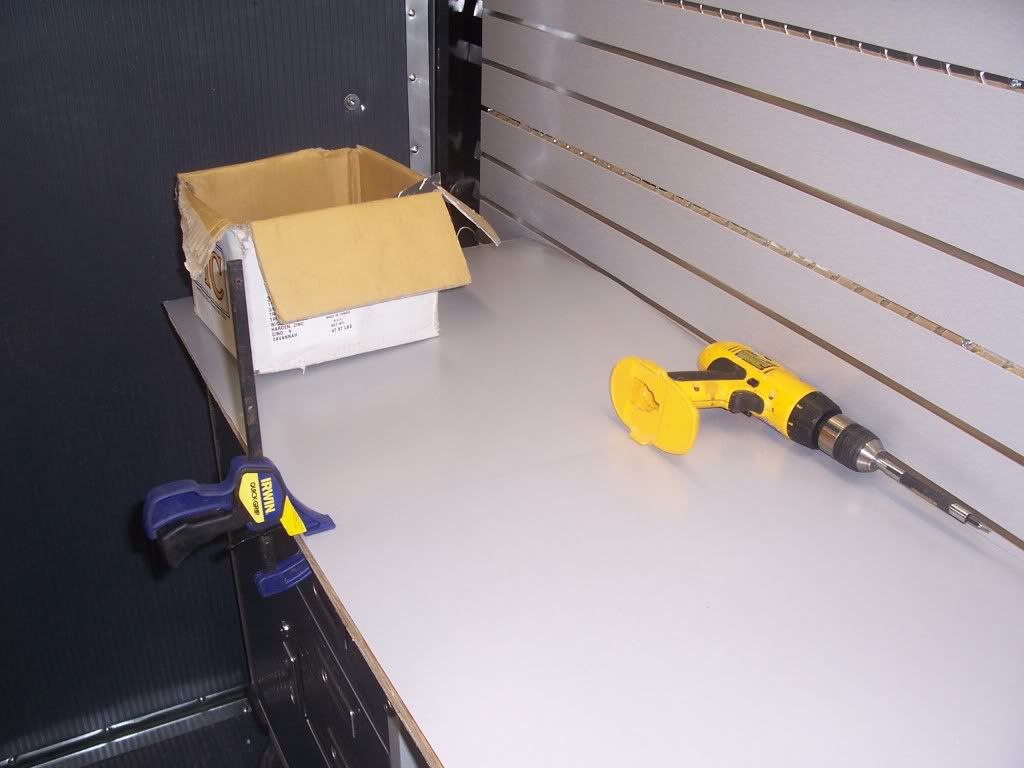
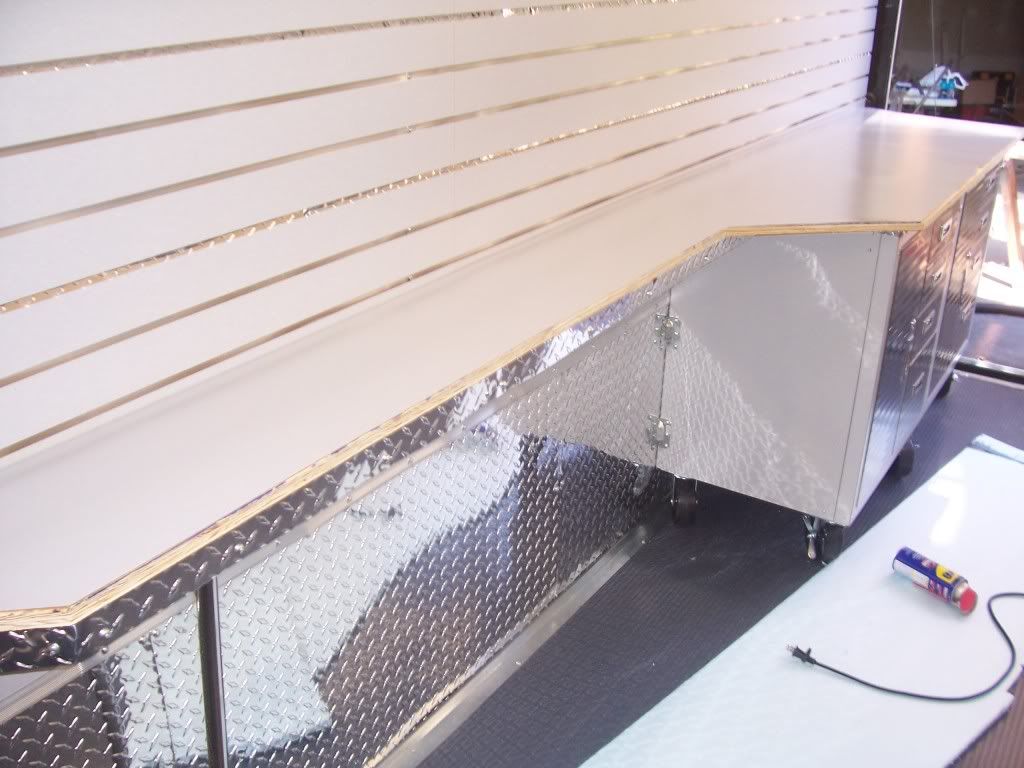
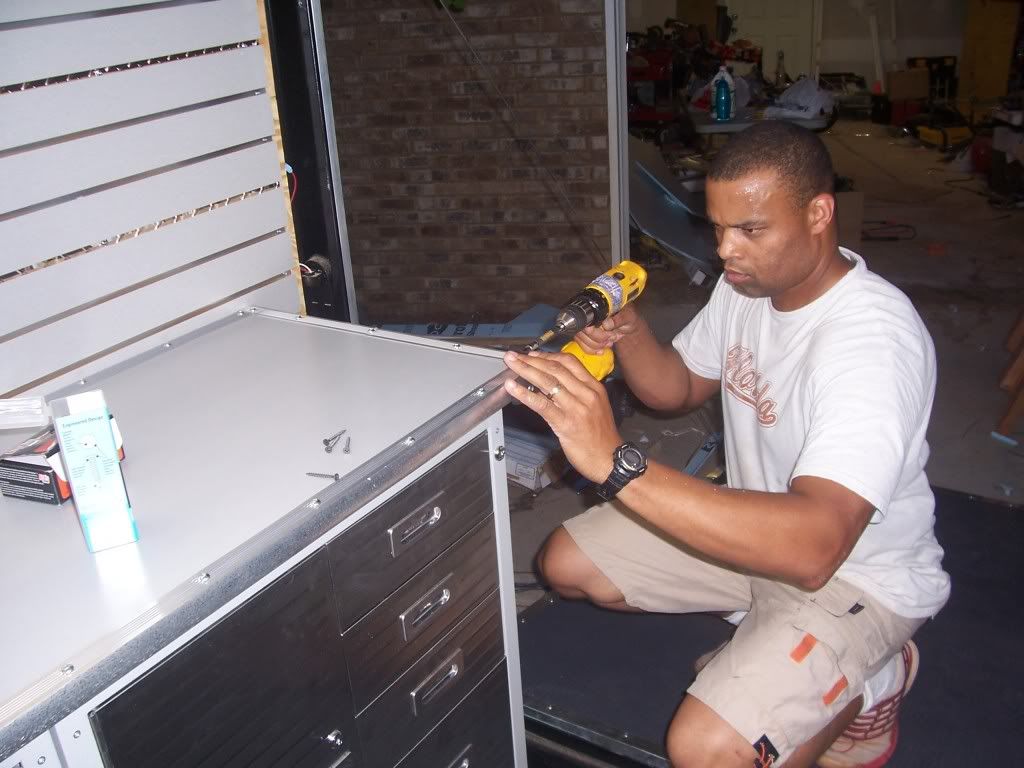
This is the laminate for the countertops. I got it from Home Depot.
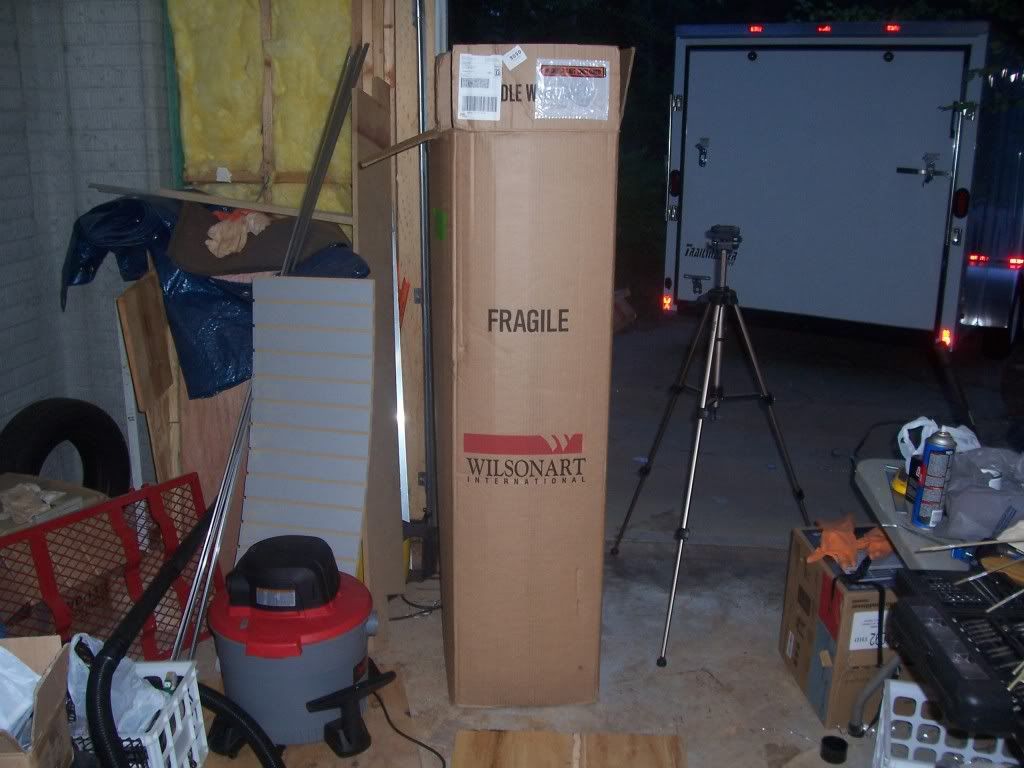
It's called Satin Silver and looks like brushed aluminum except it's more pimp cause it has "Satin" in the name. A 5x12 sheet and 4x8 sheet ran me $224
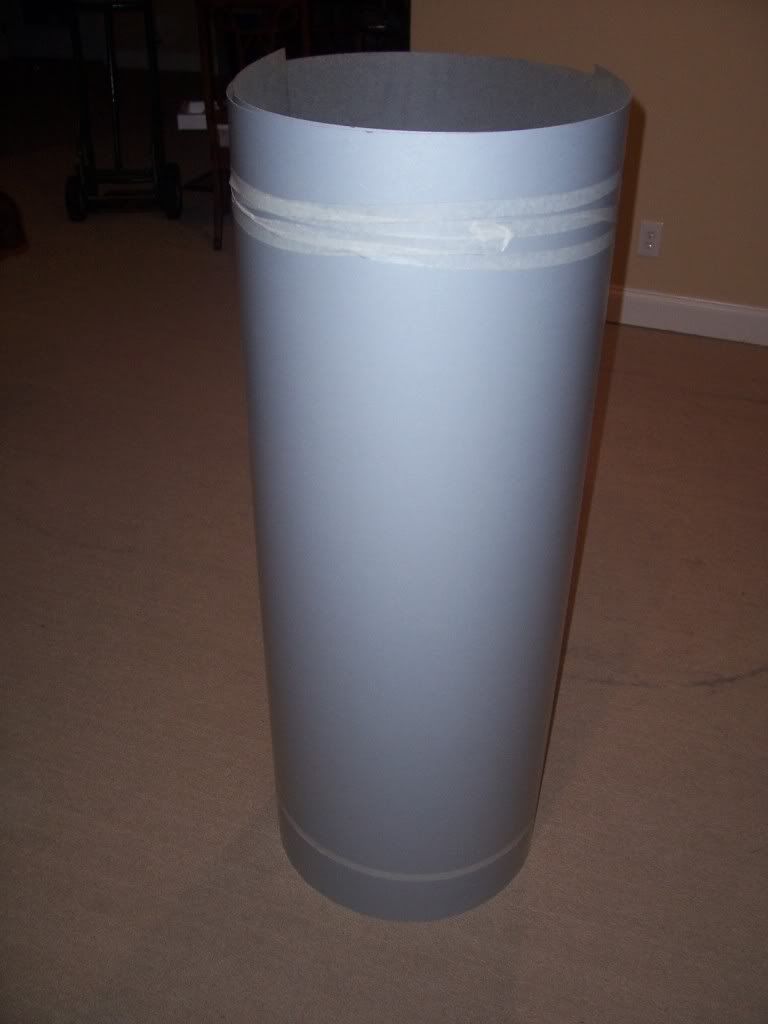
I like the 5x12 sized sheets cause I can rip it in half and cover 80% of my counterspace with just one sheet with a minimum of seams
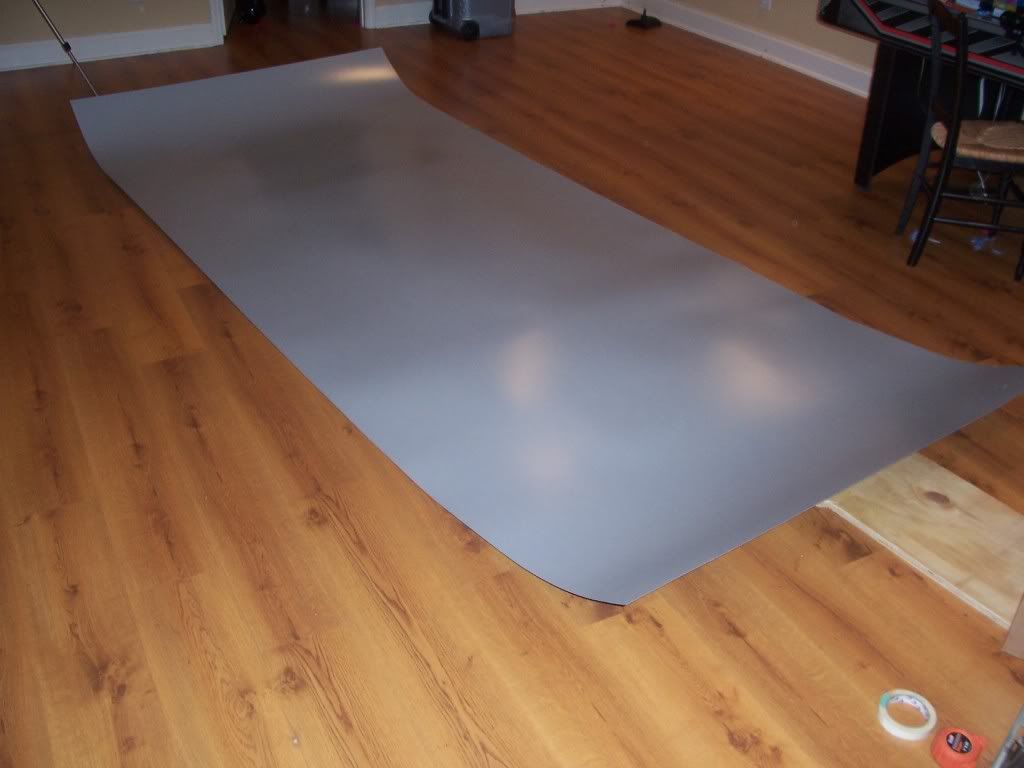
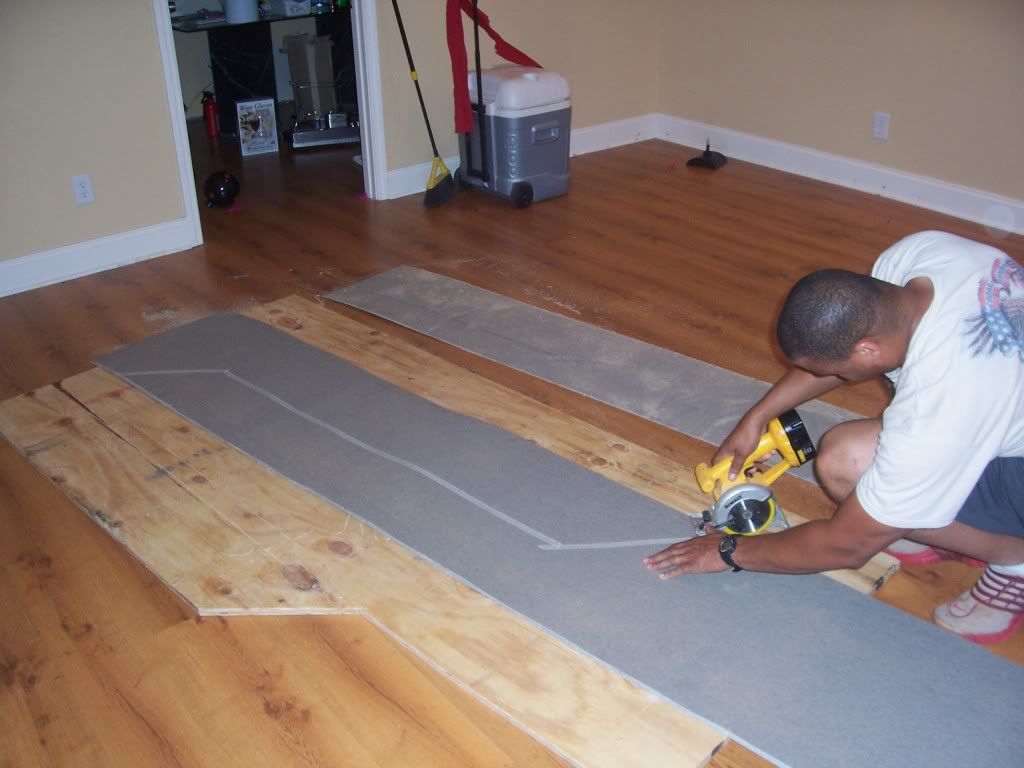
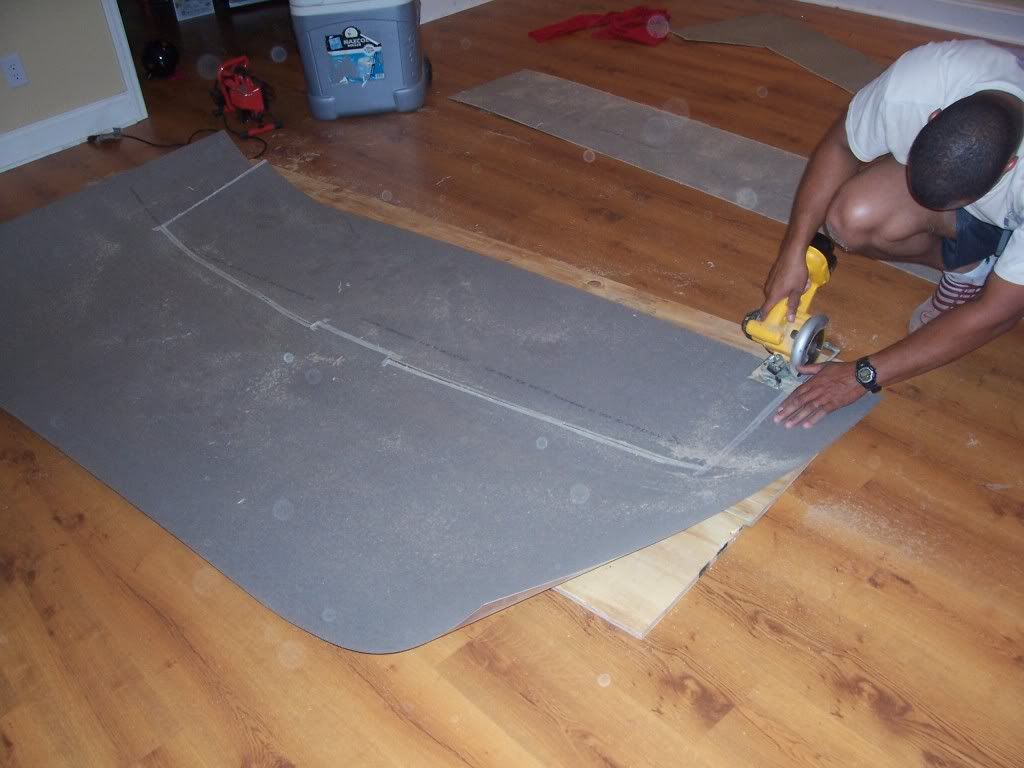
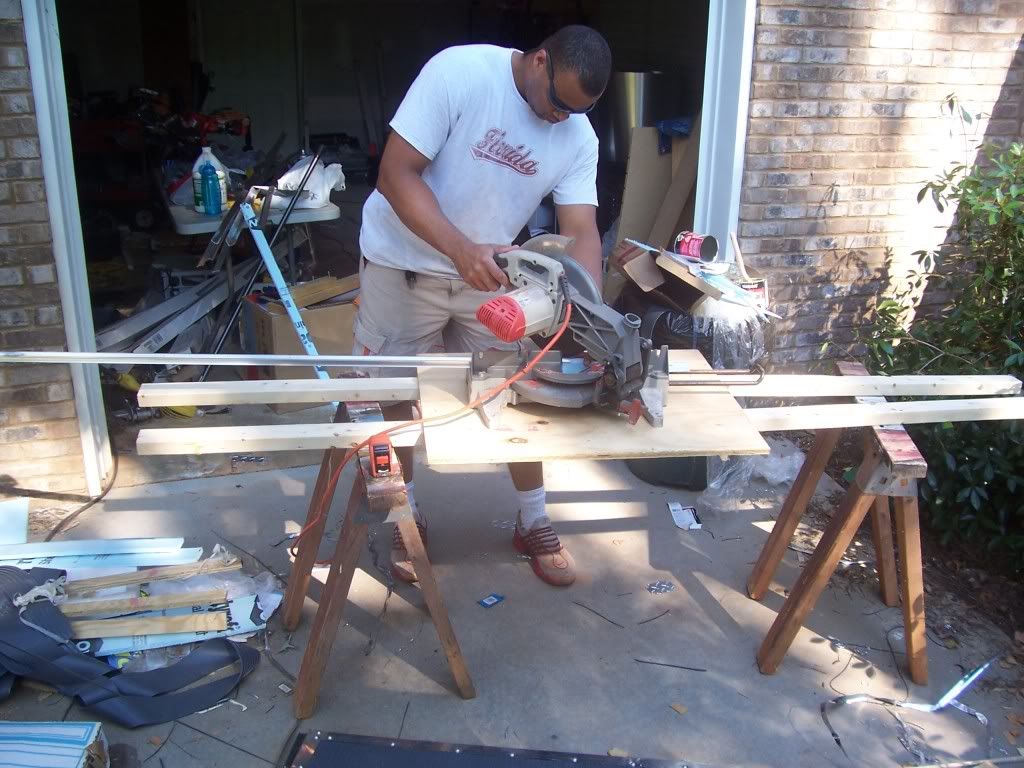
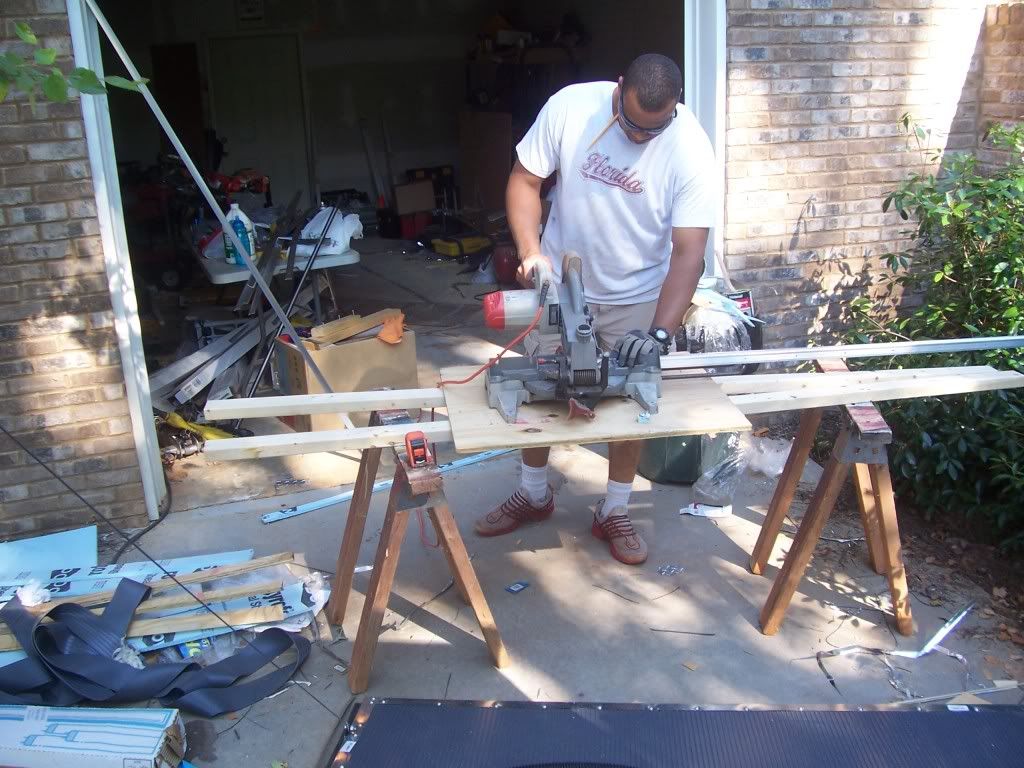
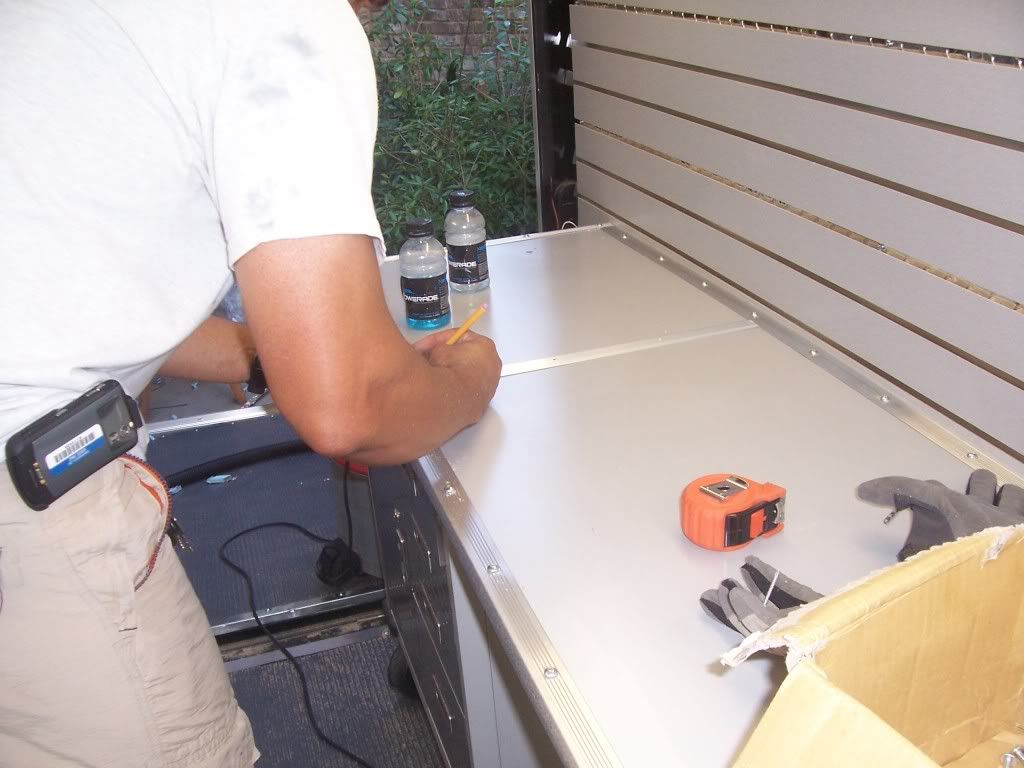
With a sheet this long, you need to mark out your measurements about every 3ft to make sure that your line is straight
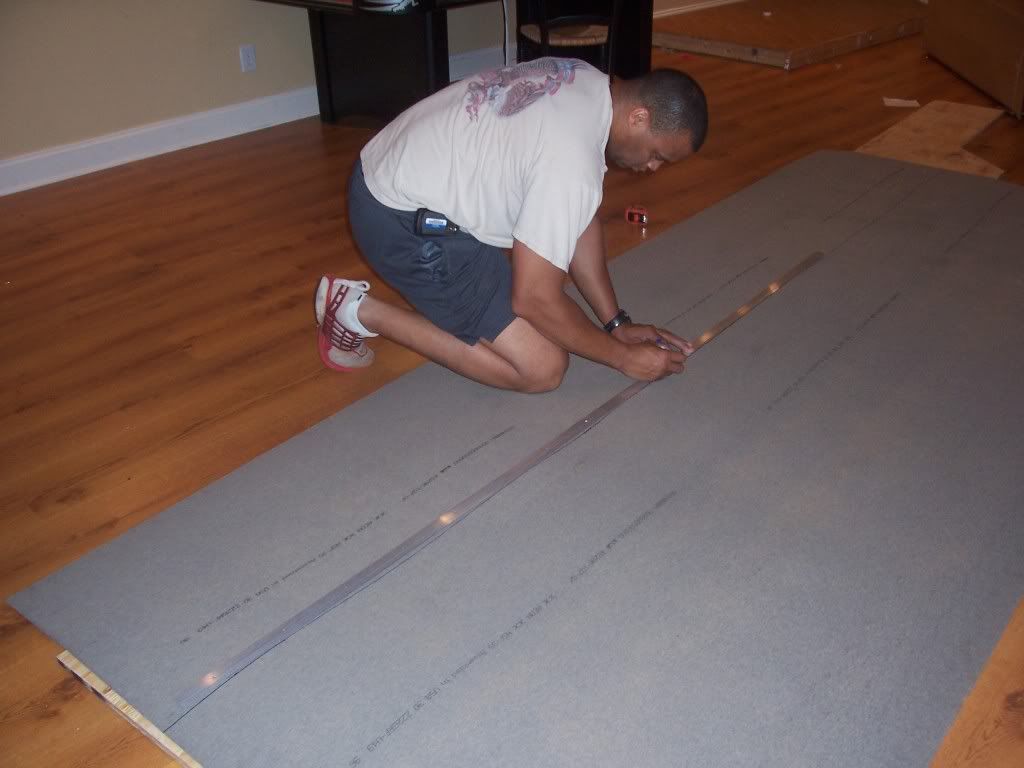
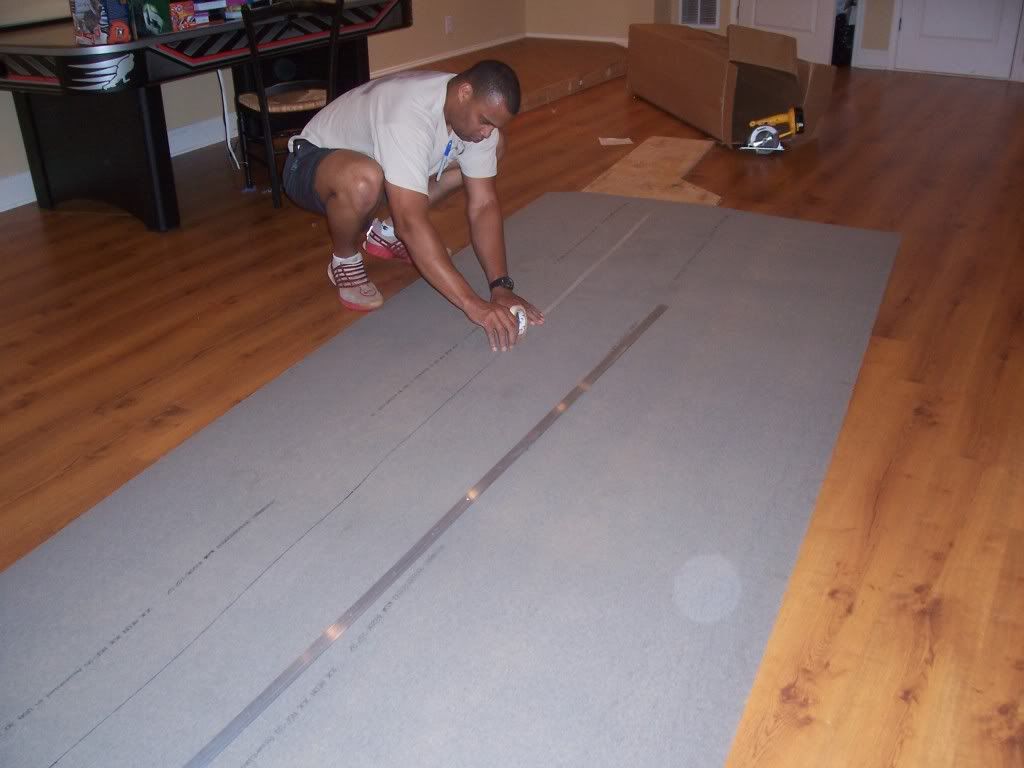
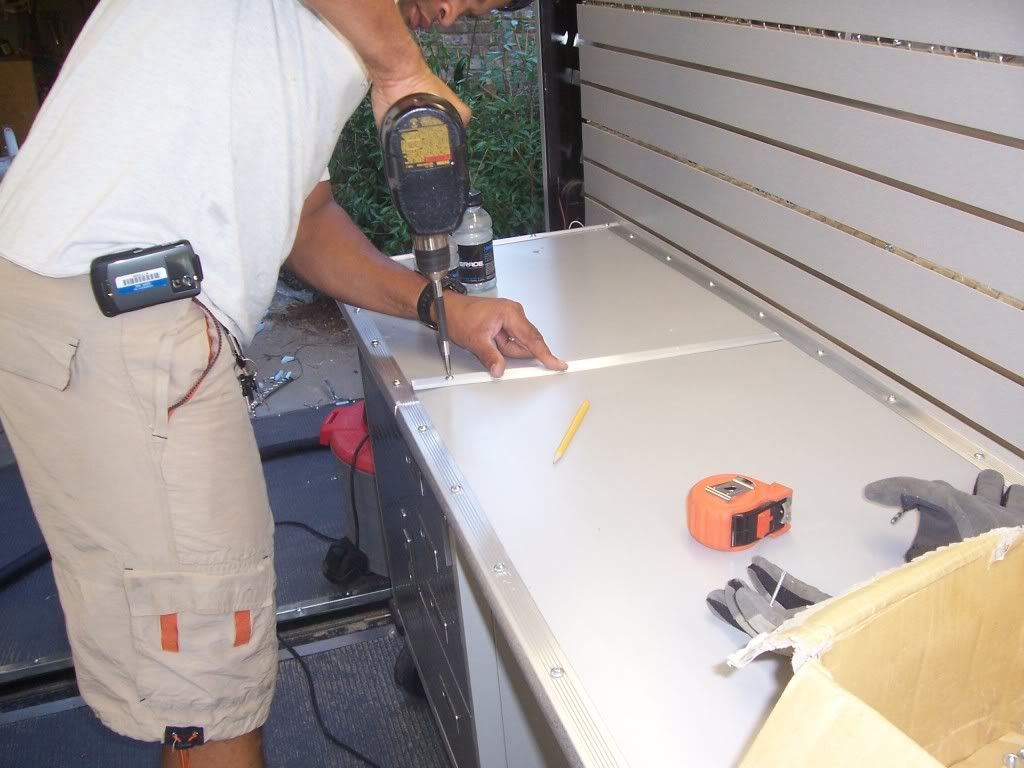
Here I'am about make the cut. For those who don't know, when you cut laminate, you need to turn it over and cut on the backside and tape over the portion that you're going to cut to prevent chipping.
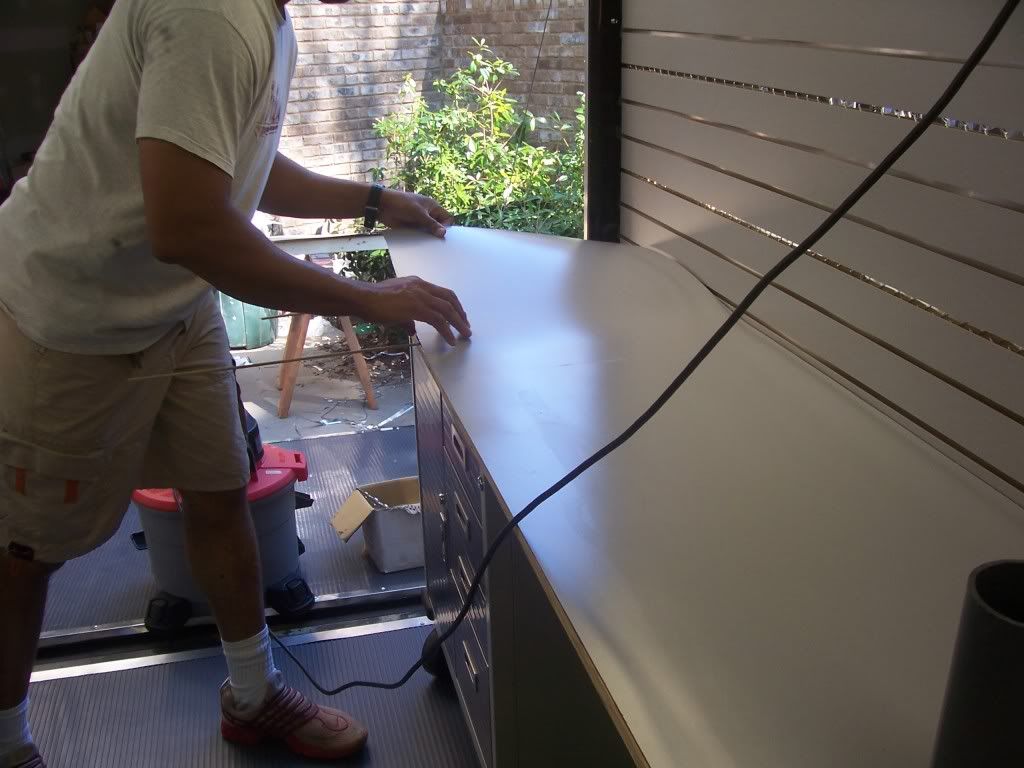
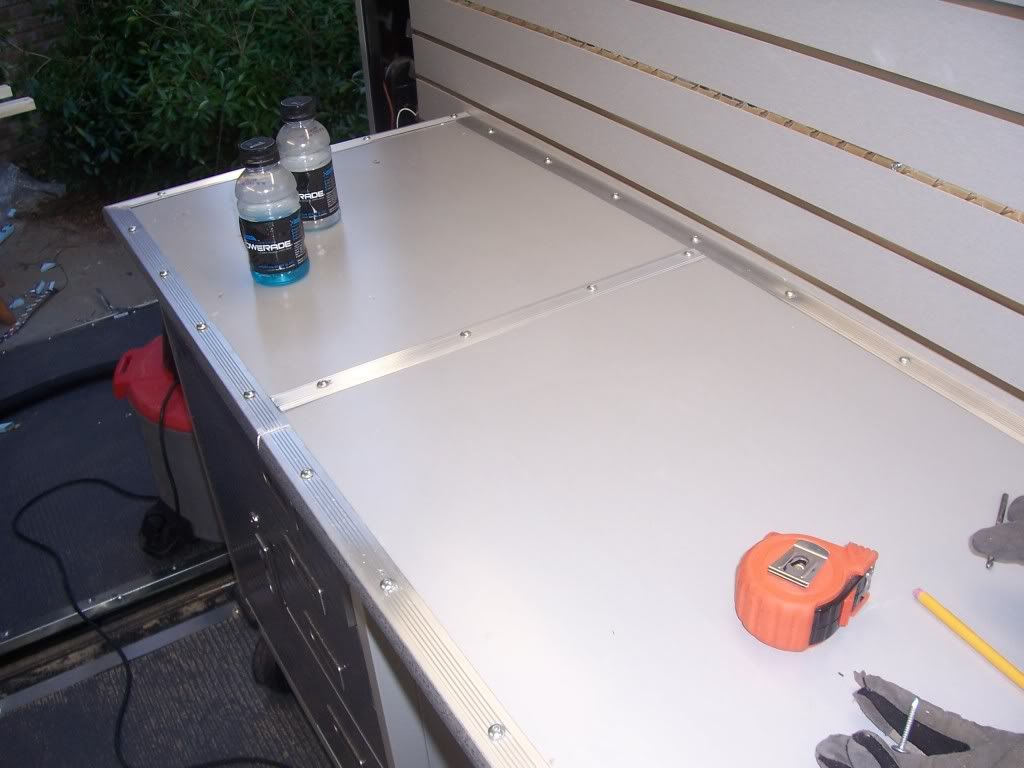
Here is the sheet for the left counter. SInce I'm covering the edges with metal trim, I'm not worry about the exactness of the cut.
Now I'm about to make the cut for the right counter
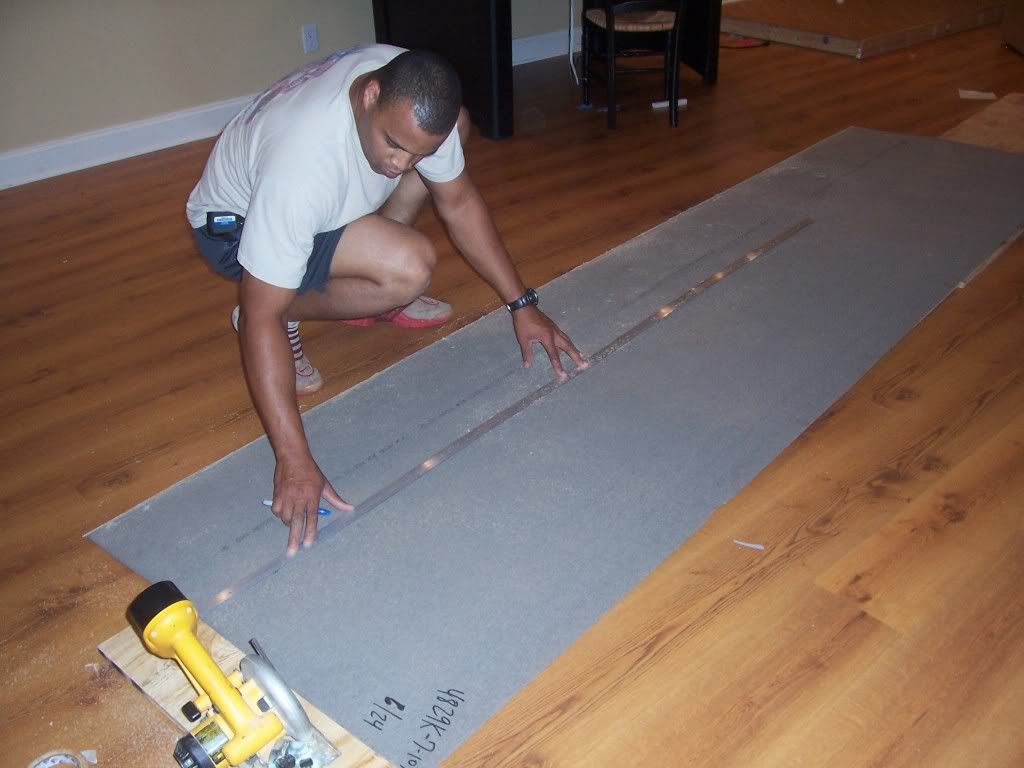
Looks good. I'm going to have to mark off the 45 degree angles and then re-cut


Ah much much better
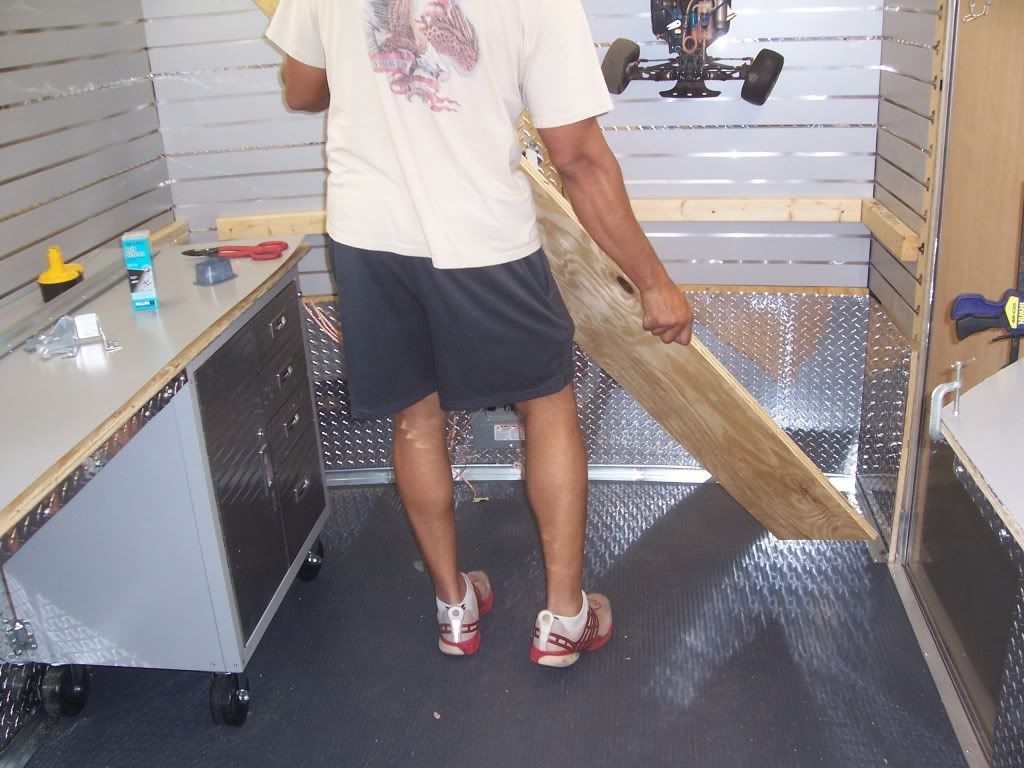
Now comes the tricky part. I'm going to have to remove the front counter, draw out the shape on the 4x8 sheet and then cut it out
Looks good
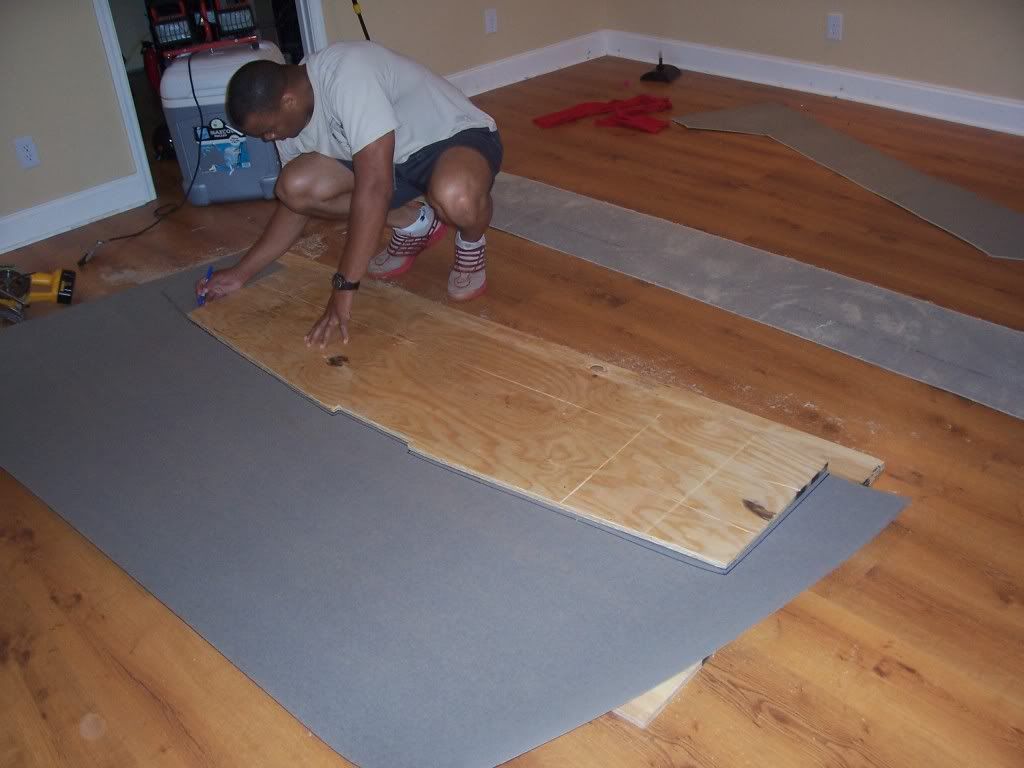
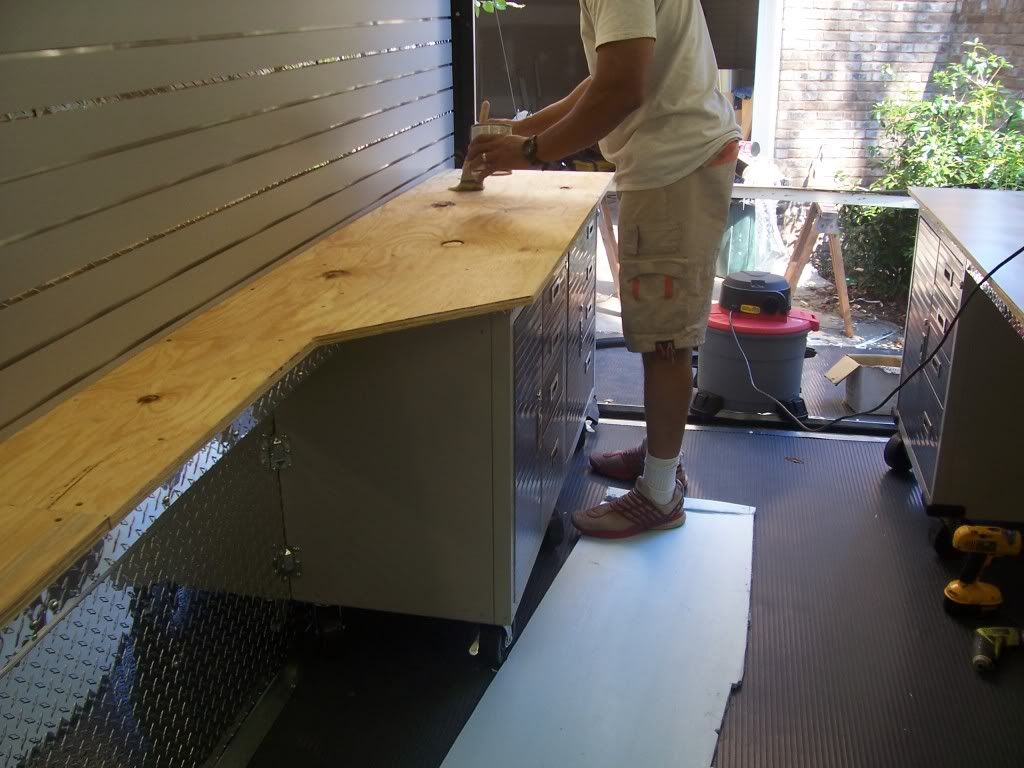
The left counter is 14ft which left me about 2ft short. I'm going to cut the 2ft out of what's left of the 4x8 sheet
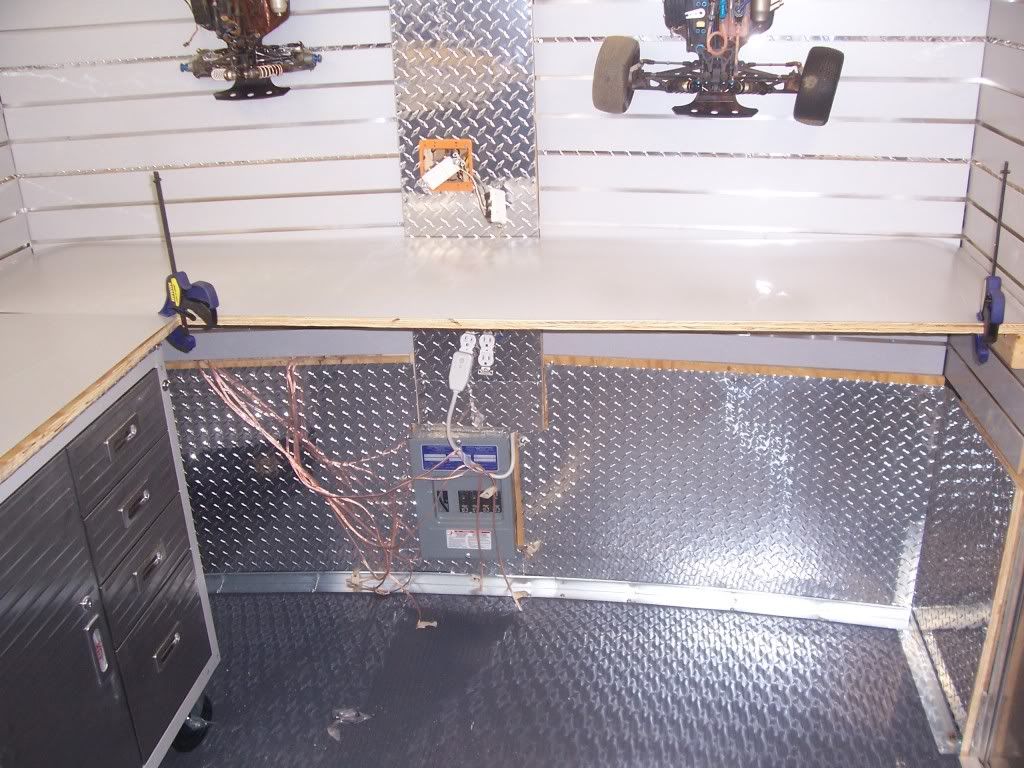
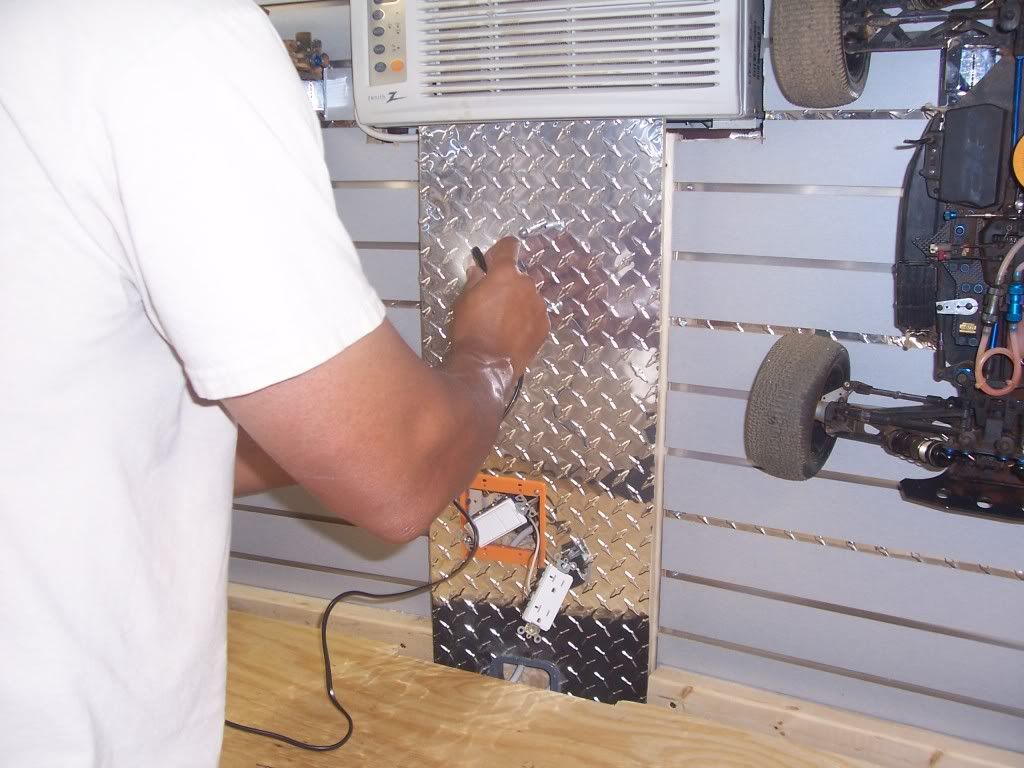
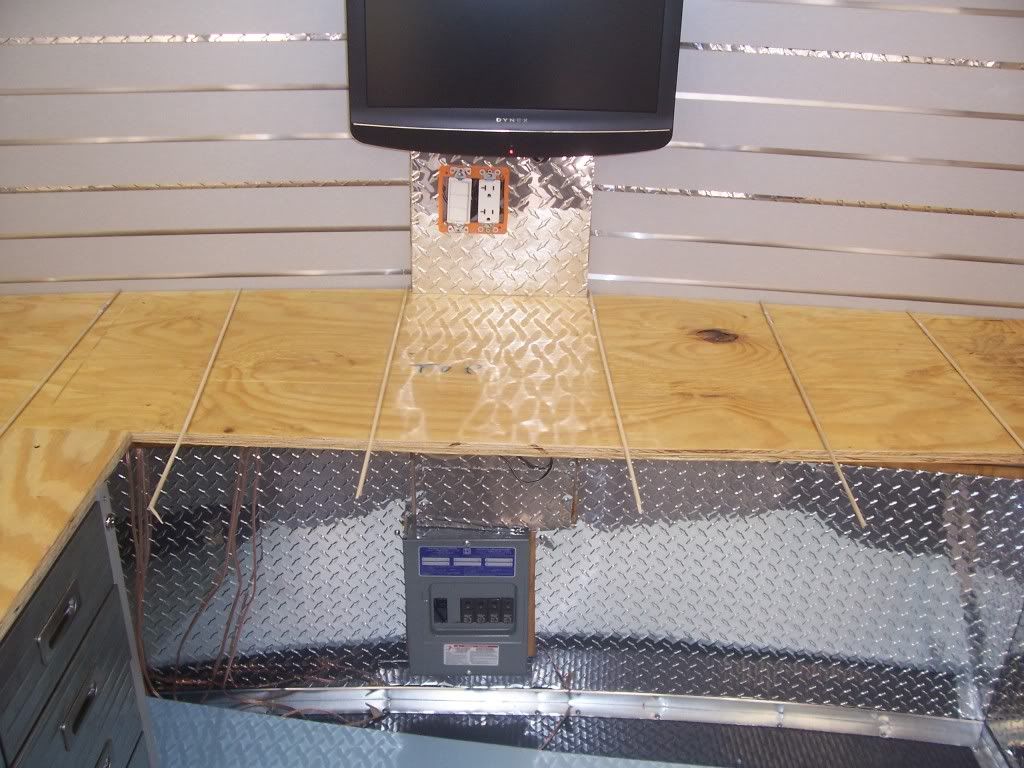
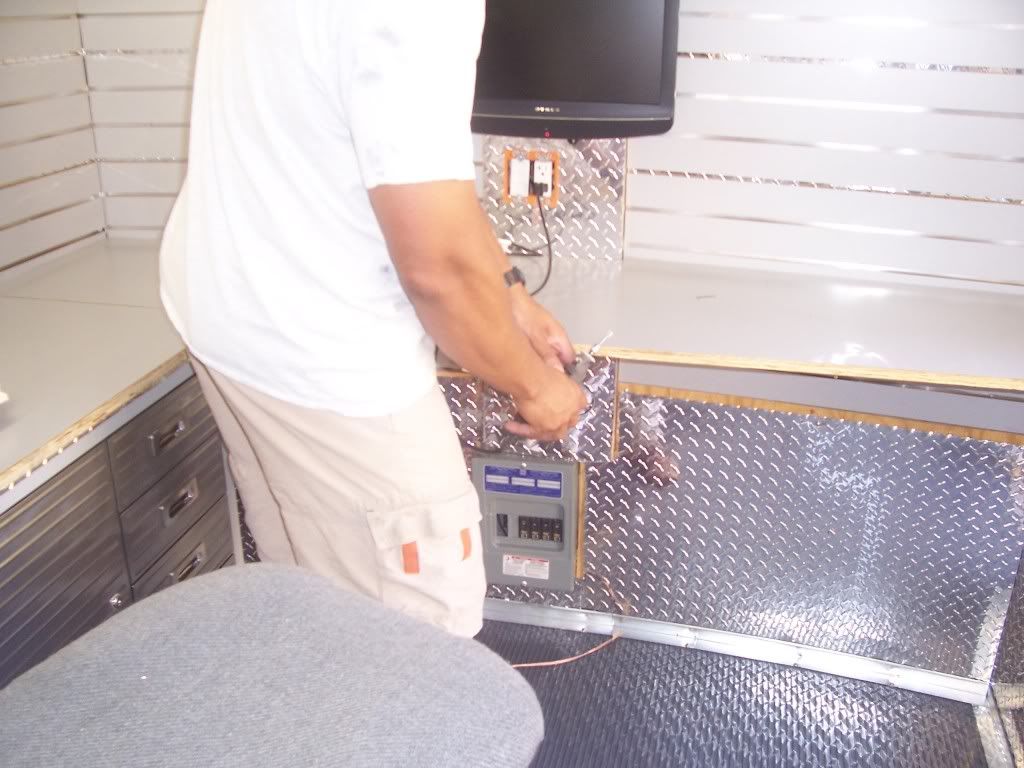
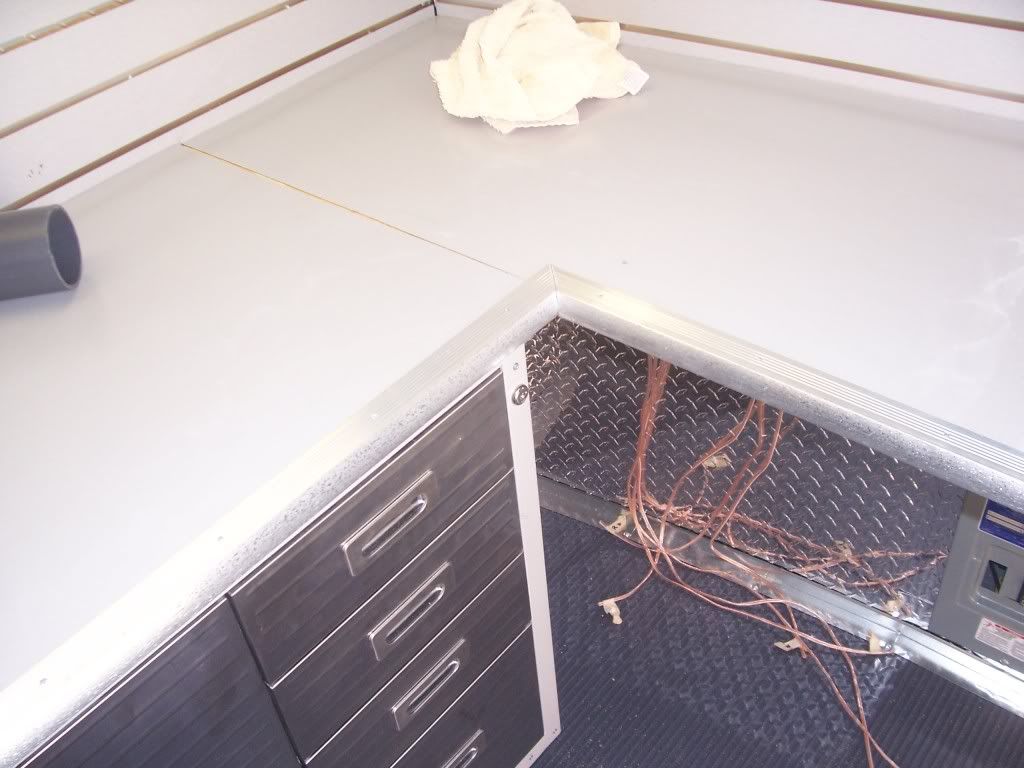
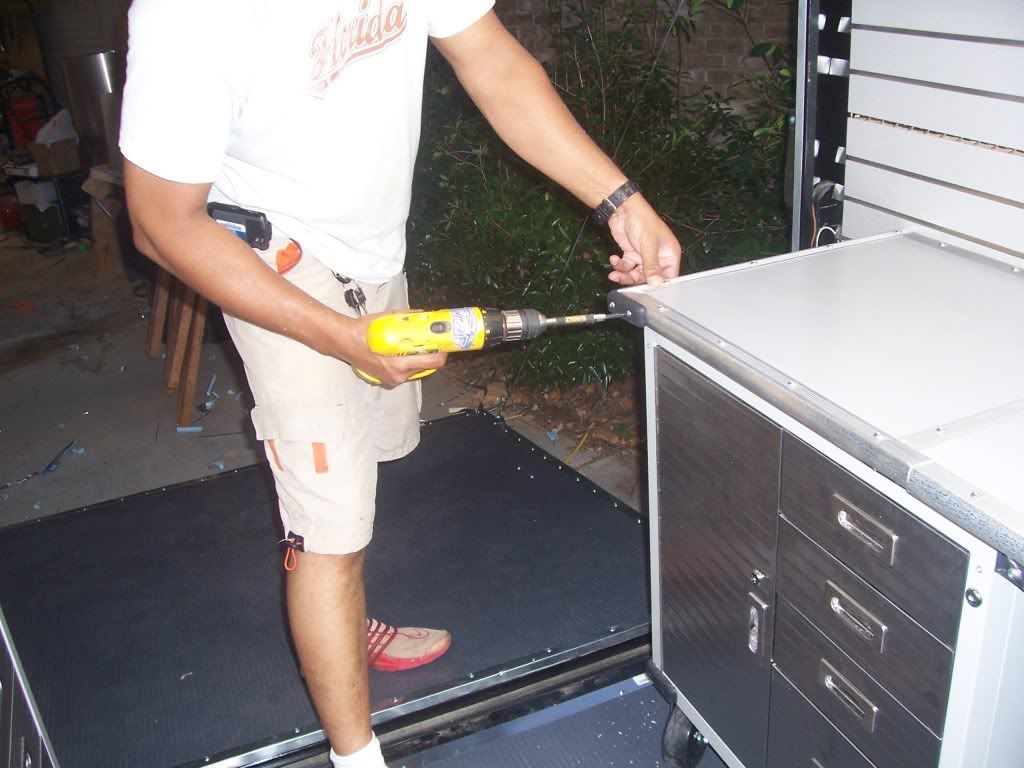
With the laminate cut and laying flat. I can't turn my attention to the encasement. Before I can install the front counter, I need to cut a hole in the bottom of the encasement to route the power cords for the AC and TV.
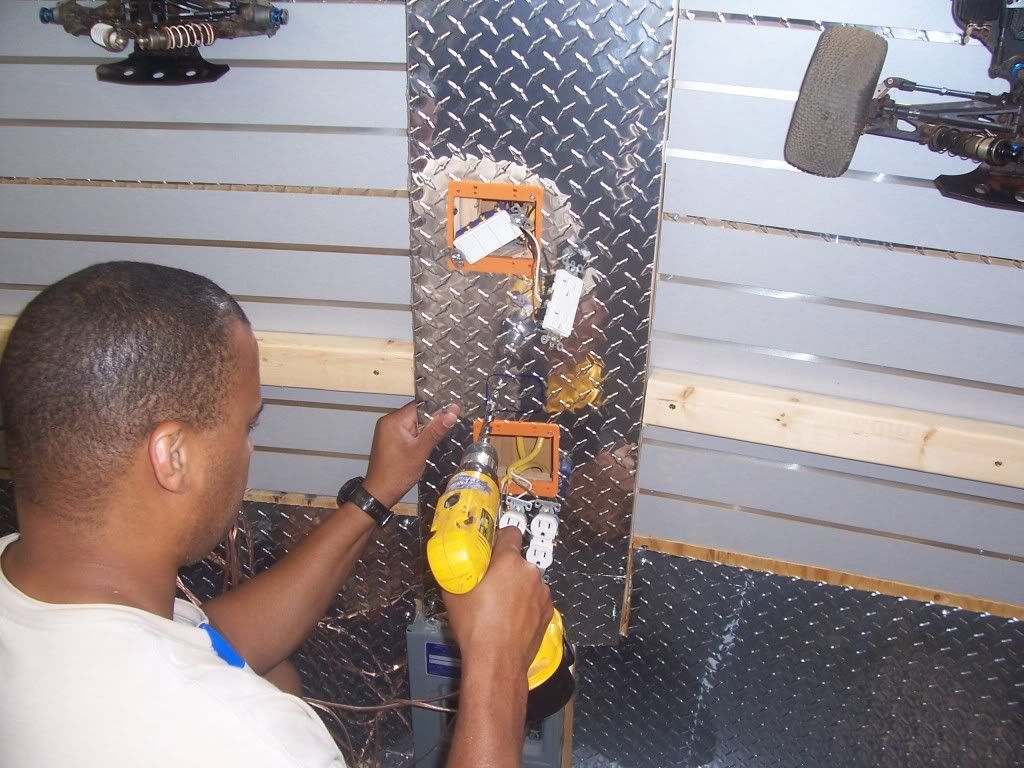
Due to the weird angle and the possiblity of hitting a electrical wire, I'm using a drill to "drill out" the hole using multiple drill holes

I found the grey cover in Home Depot by accident. I have no idea what the hell it's actually used for...
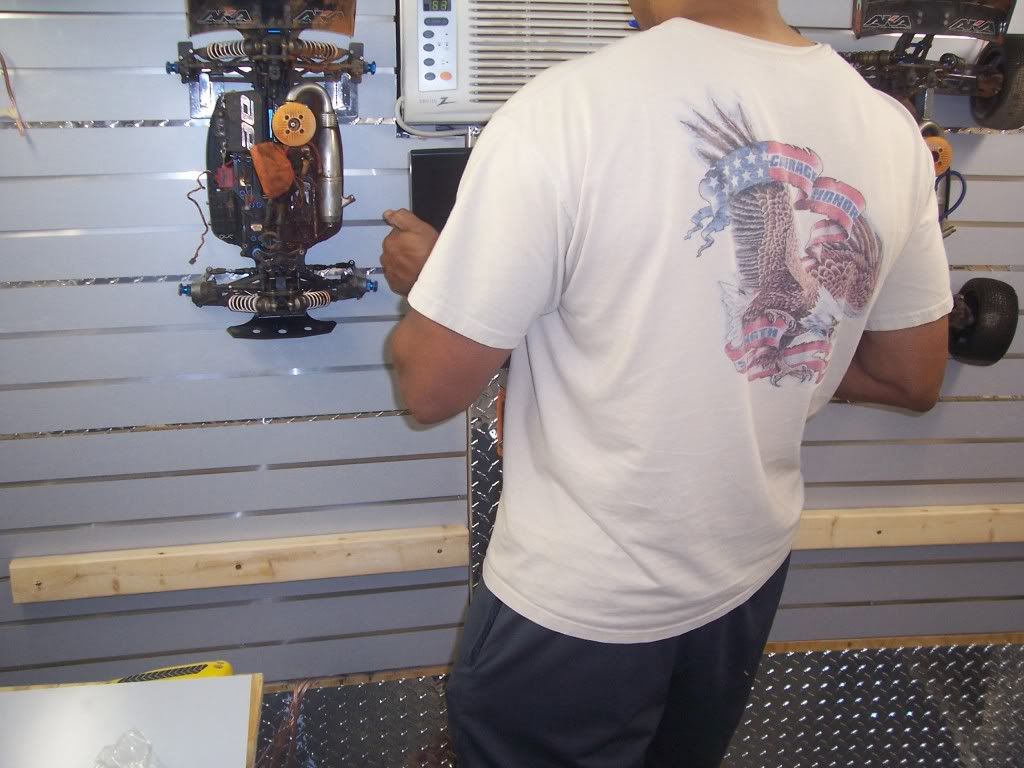
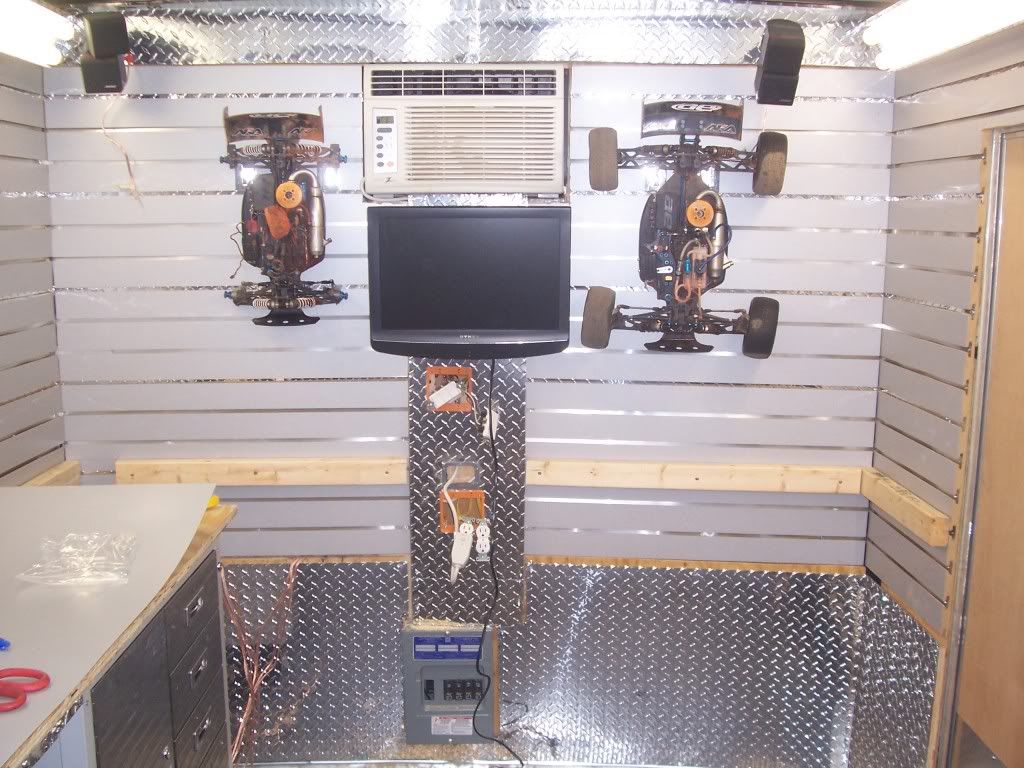
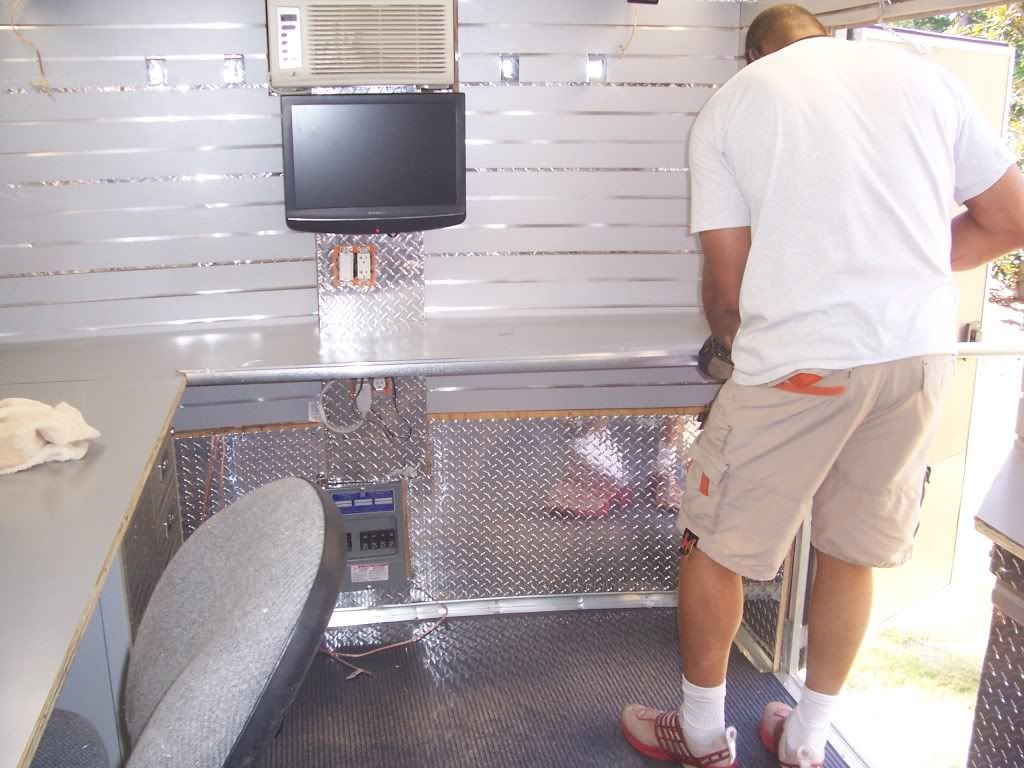
I hung my buggy and truggy to make sure I have enough clearance for the TV. I mark the holes for the bracket and hang the TV to check for fit
BOOYAH BEEOTCHES!!!
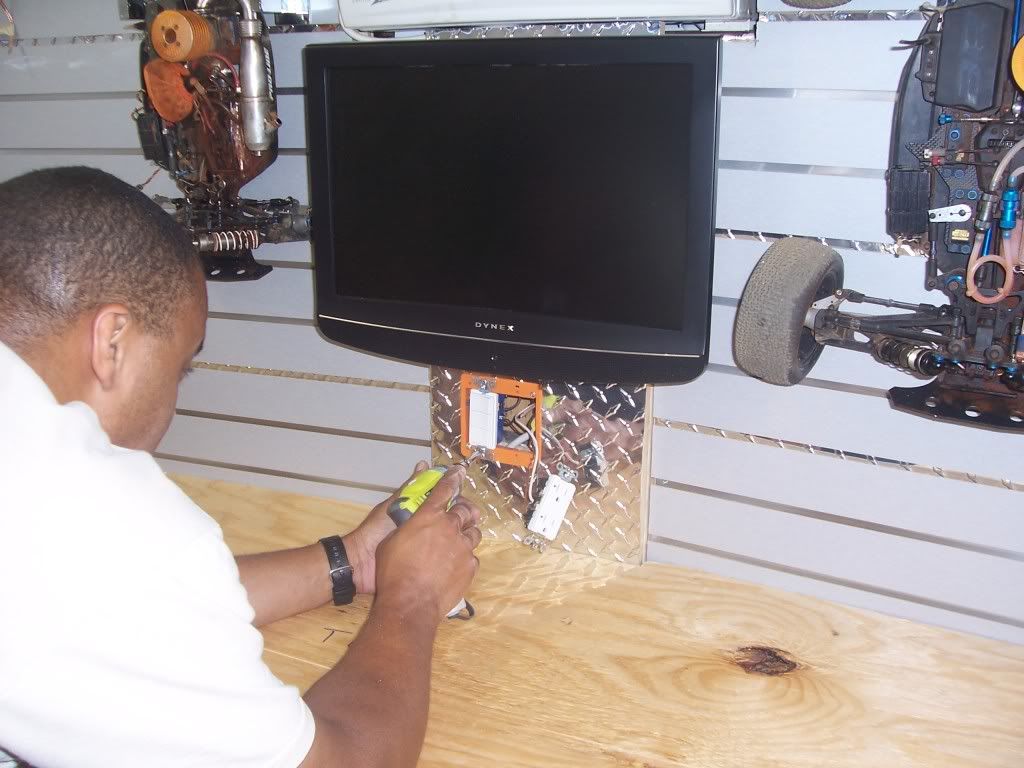
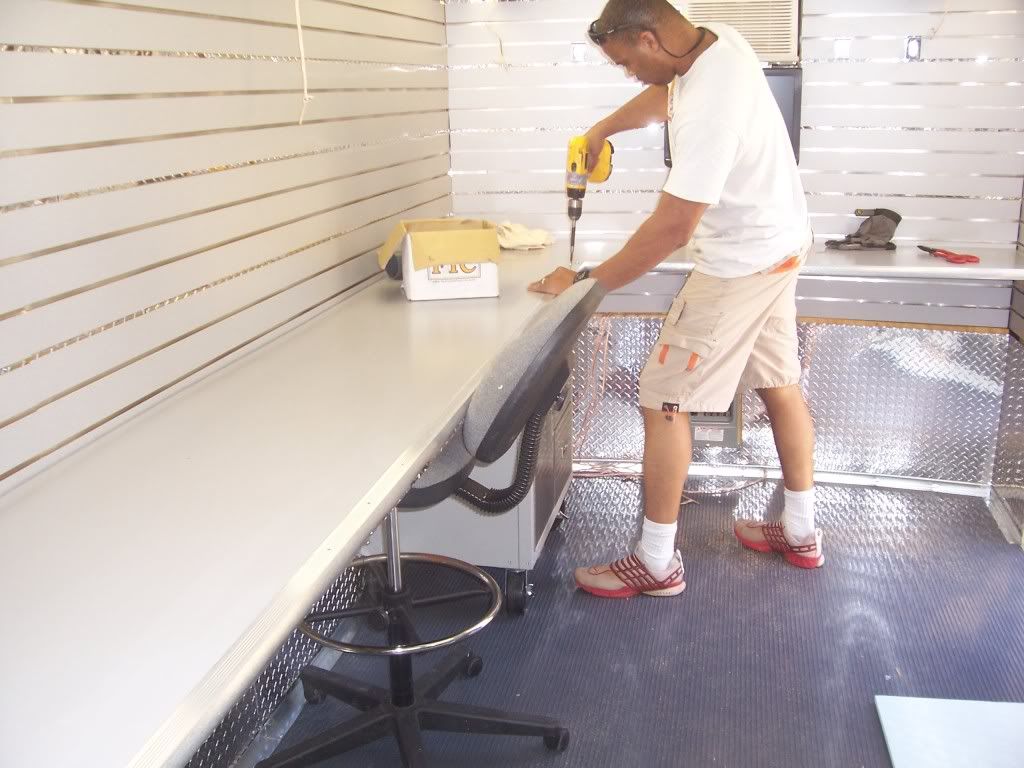
I'm making the holes for the flatscreen bracket
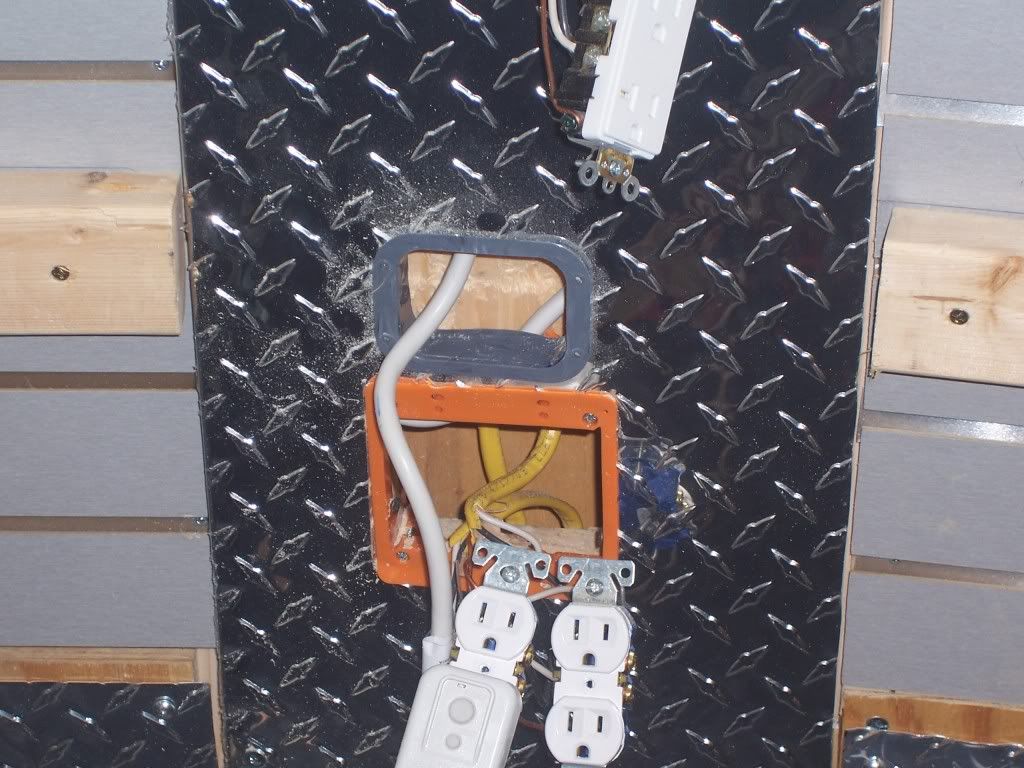
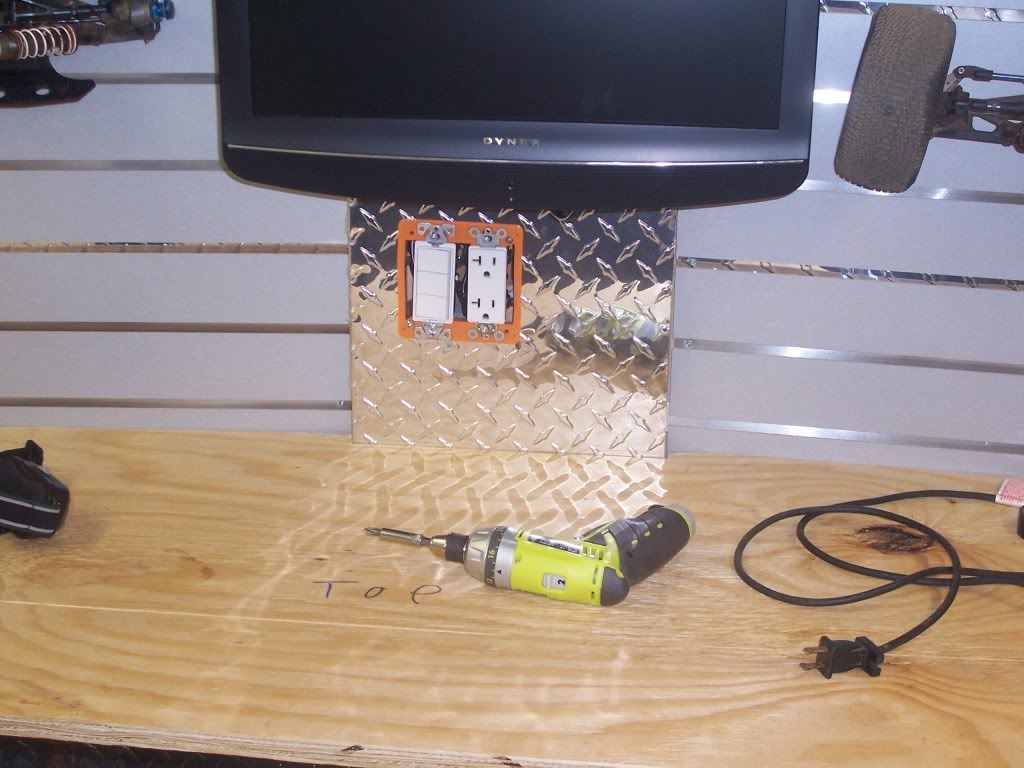
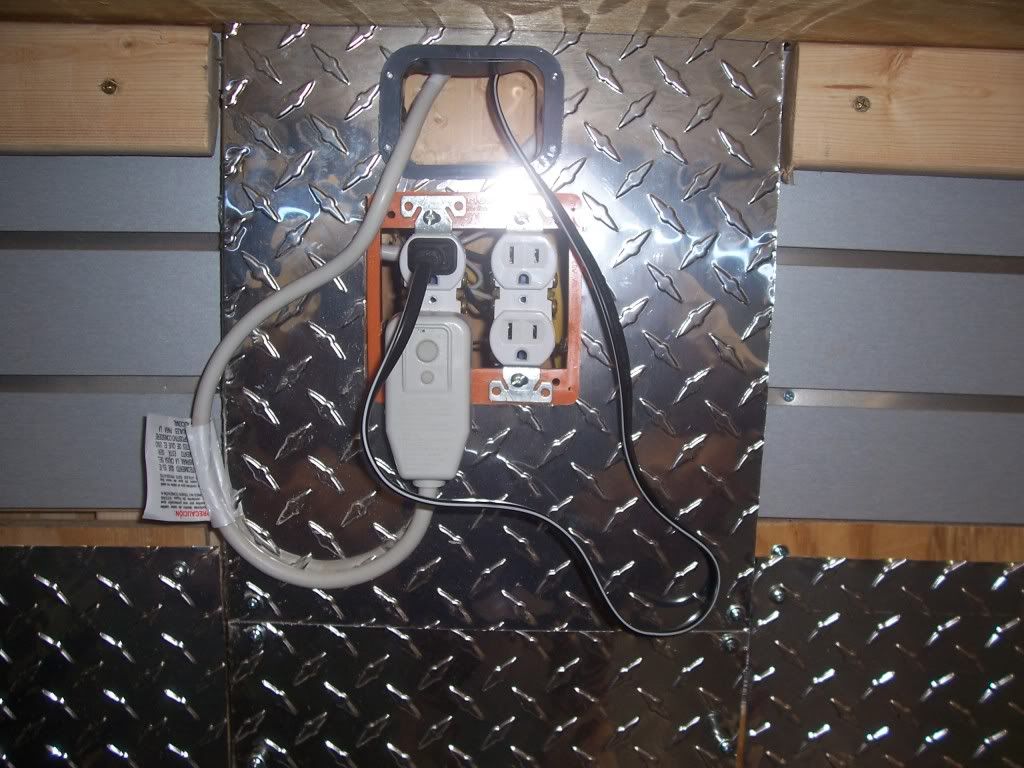
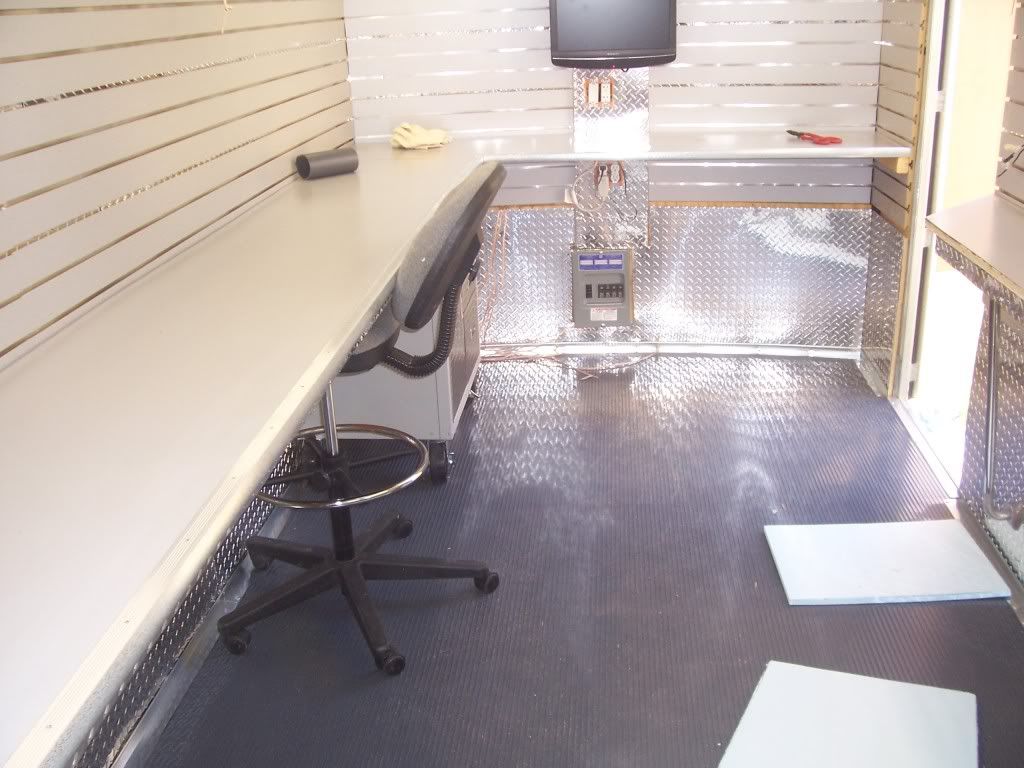
TV is hung and looks good. With the AC and TV power cords routed and the encasement bolted in place, I can screw the main switch and outlets into the boxes
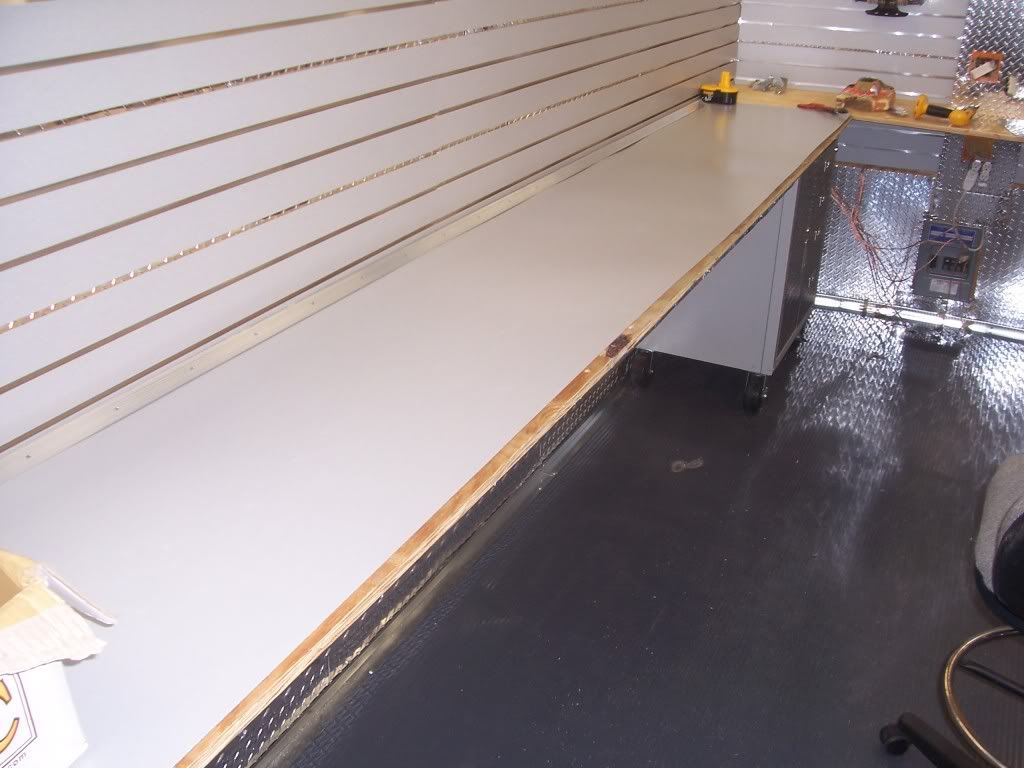
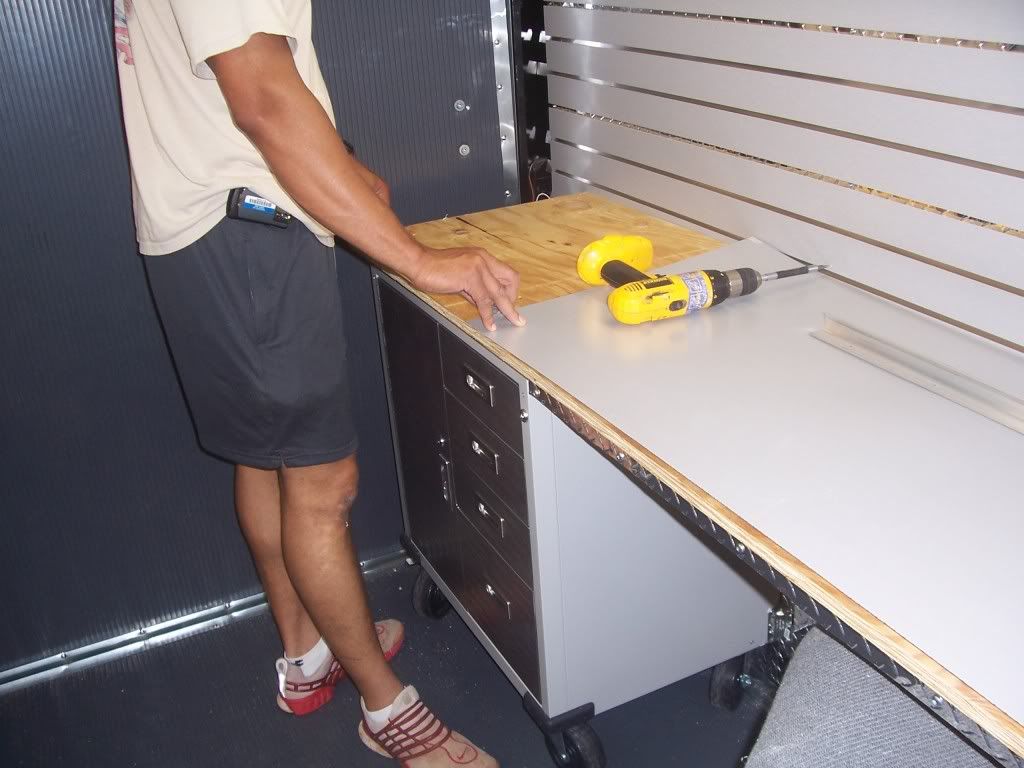
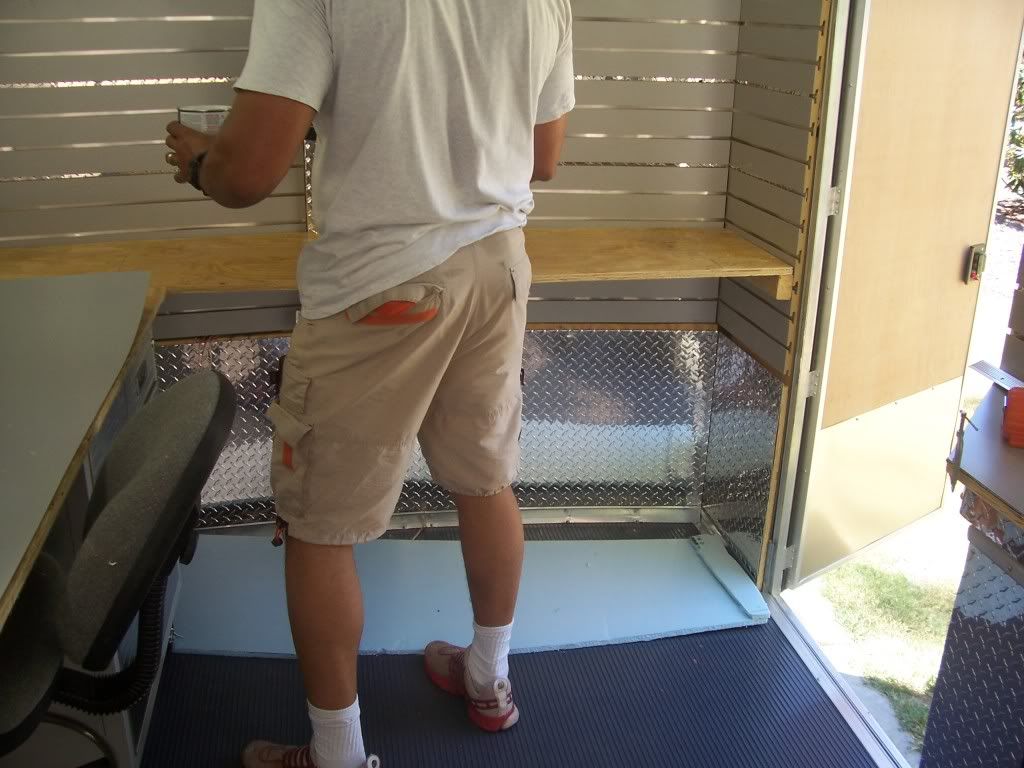
Much better. The encasement is done so I can start installing the laminate
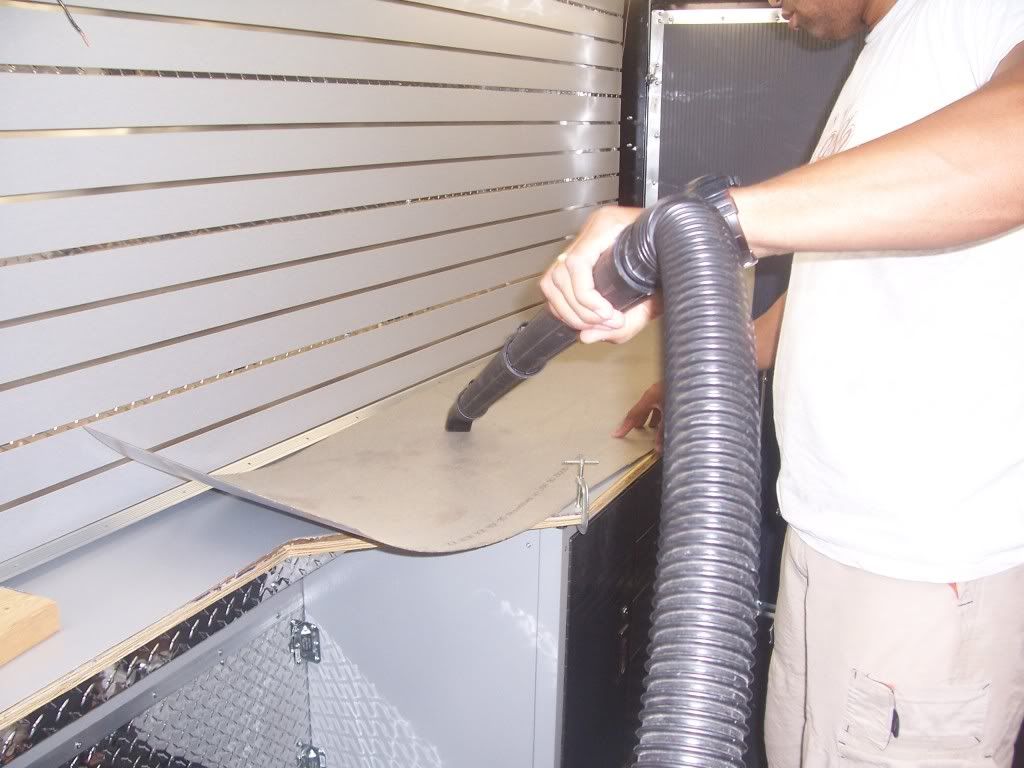
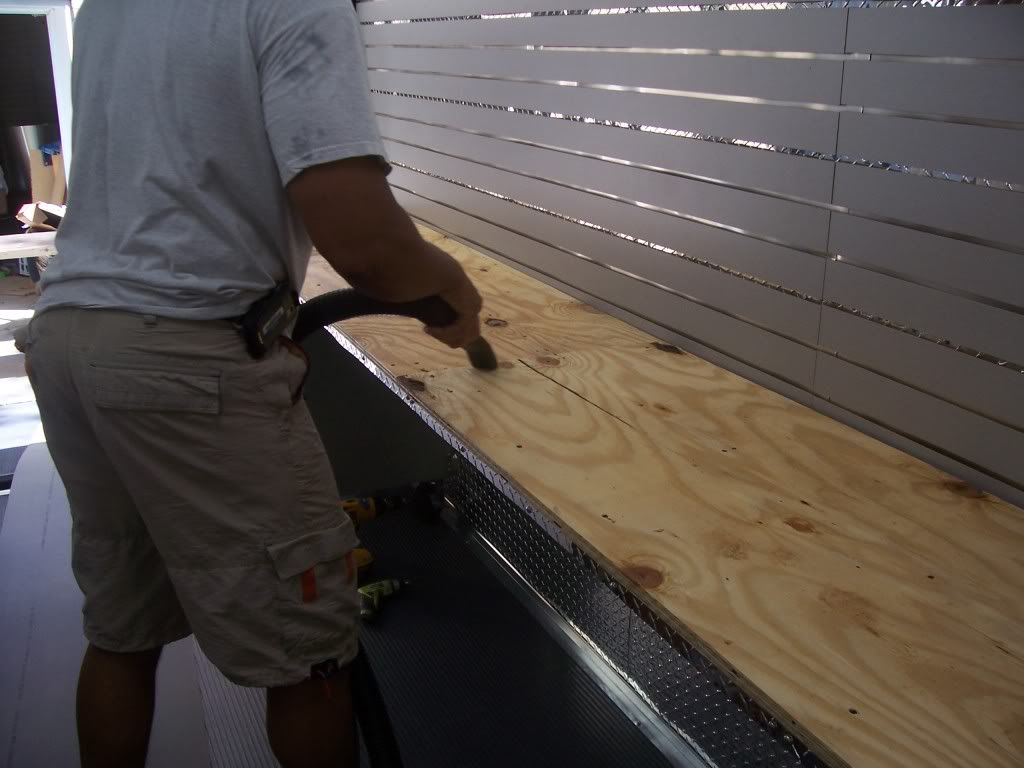
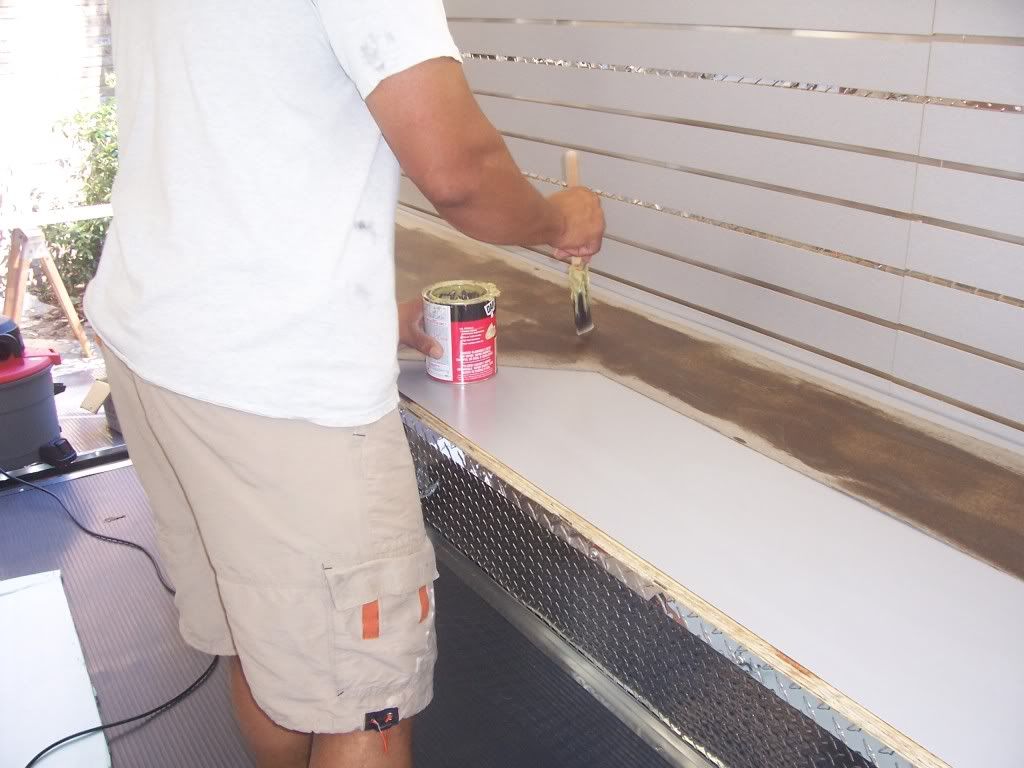
However, before I can lay the laminate I need to clean the sheet and the counter surface of debris and sawdust
I'm using contact cement gel adhesive to install the laminate. Here I'am putting the cement on the laminate sheet using a paint brush. It is important that you apply this stuff in a well ventalated area and keep away from flames or sparks. The fumes that this stuff gave off had me cussing out the pink elephants that were helping me lay this stuff, because they were union, and kept demanding their every 20 min smokebreak
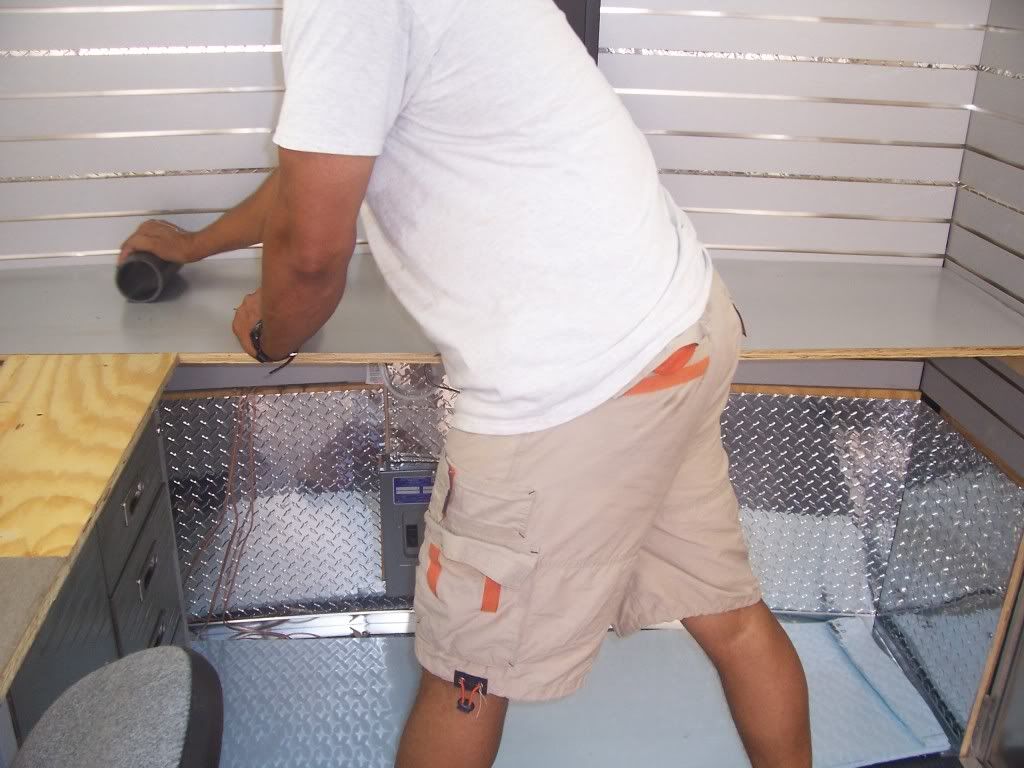
Now I'm spreading it on the counter
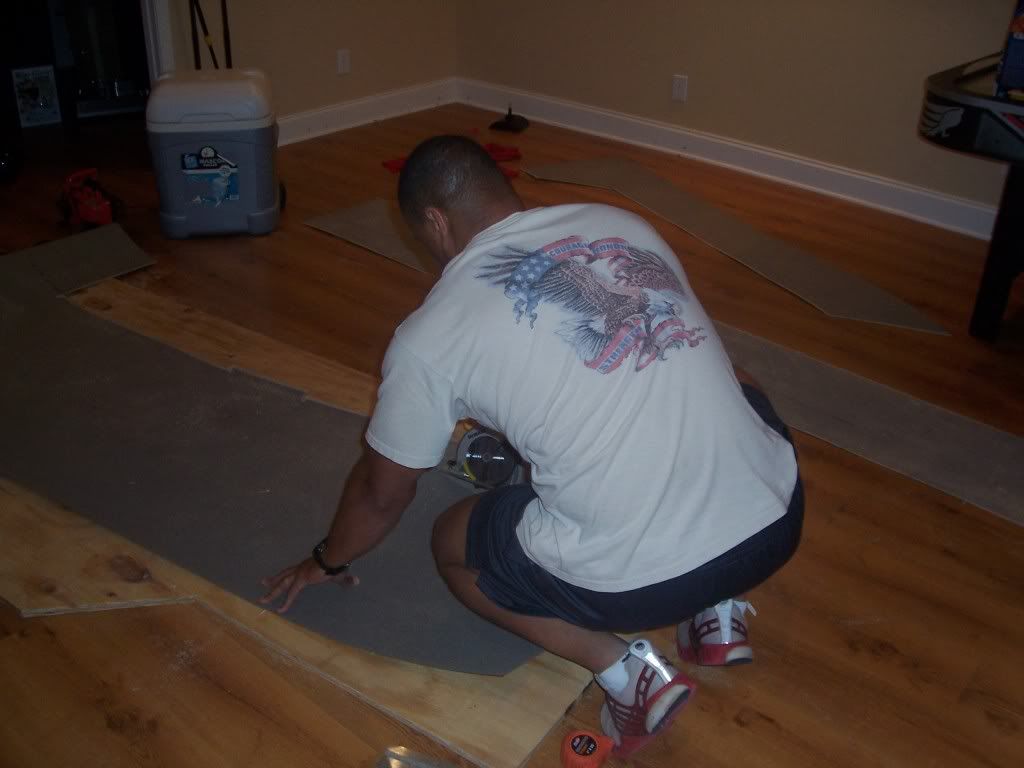
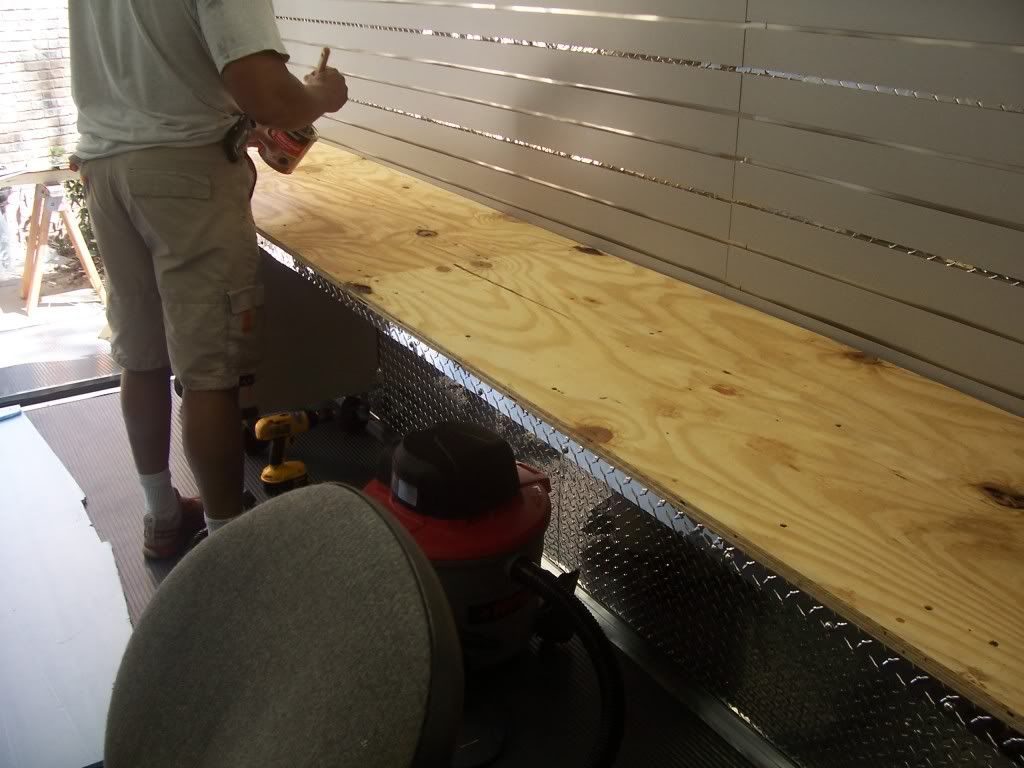
You need to give the adhesive 15-20 min of drying time before you install it. So while the front counter is drying, I'm cleaning the left counter and getting it ready
When the adhesive is dry to the touch, you're ready to lay the laminate. Notice the little wood dowels on the counter. When you install the laminate, you need to have something between the counter and the laminate so when you lay the sheet on the counter, you can position it before you install it. Once the sheet touches the counter, the bond is instantaneous and you can't remove the sheet without possibly breaking it.
Start from the middle and remove the dowels one at a time while pressing down on the sheet to establish the bond. The front sheet is on and it isn't going anywhere
Now I'm applying adhesive to the left counter and the laminate sheet
Once again the wood dowels are a life saver. Especially with the 12 ft piece that was hard to manipulate because it kept flopping everywhere and the pink elephants were on another frickin smoke break. Eventually everything fit right into place
Here I'am brushing adhesive to the right counter top
Here I'am brushing adhesive to the right counter laminate
Removing the dowels to install the right countertop
Oh yeah...looks good
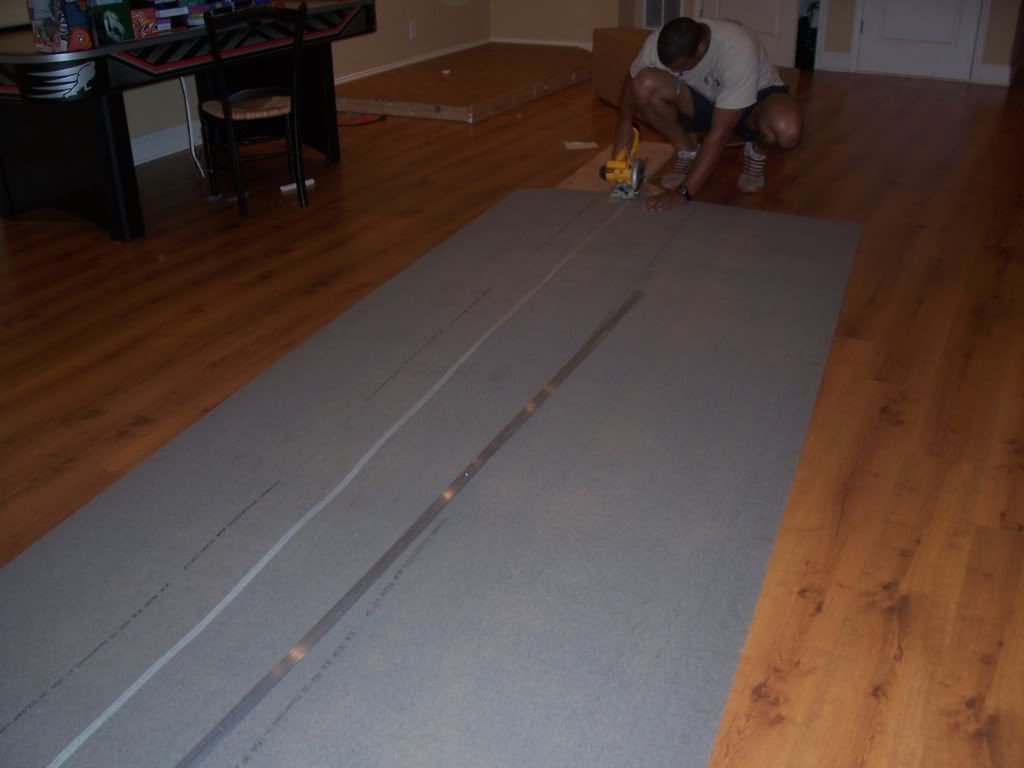
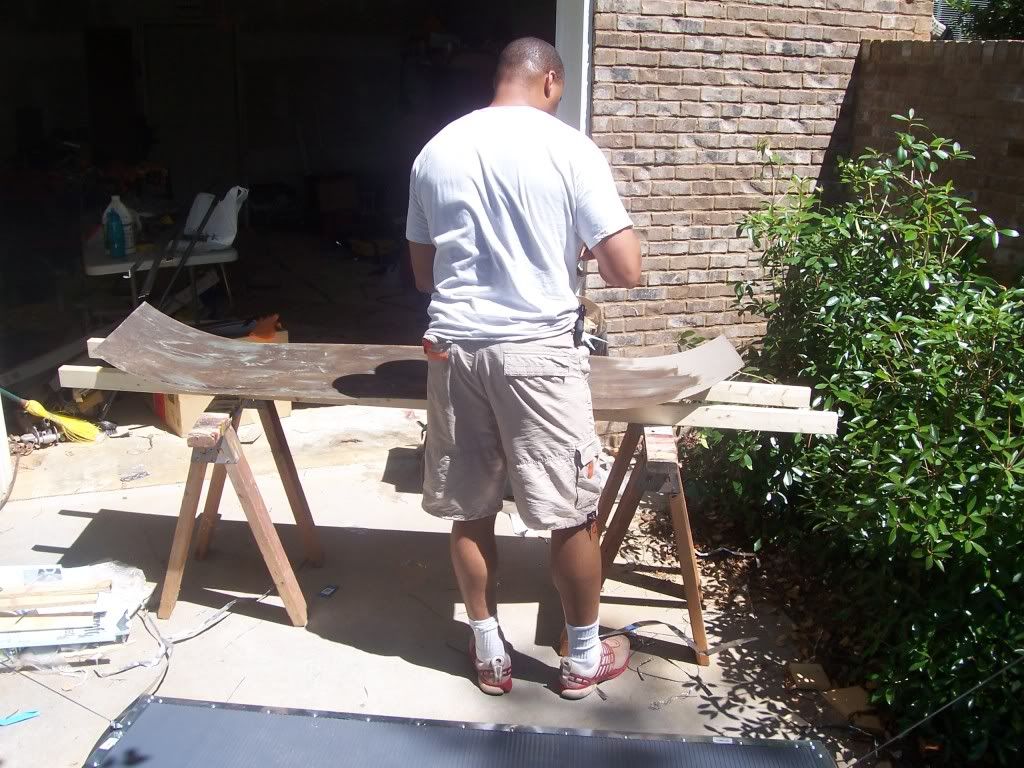
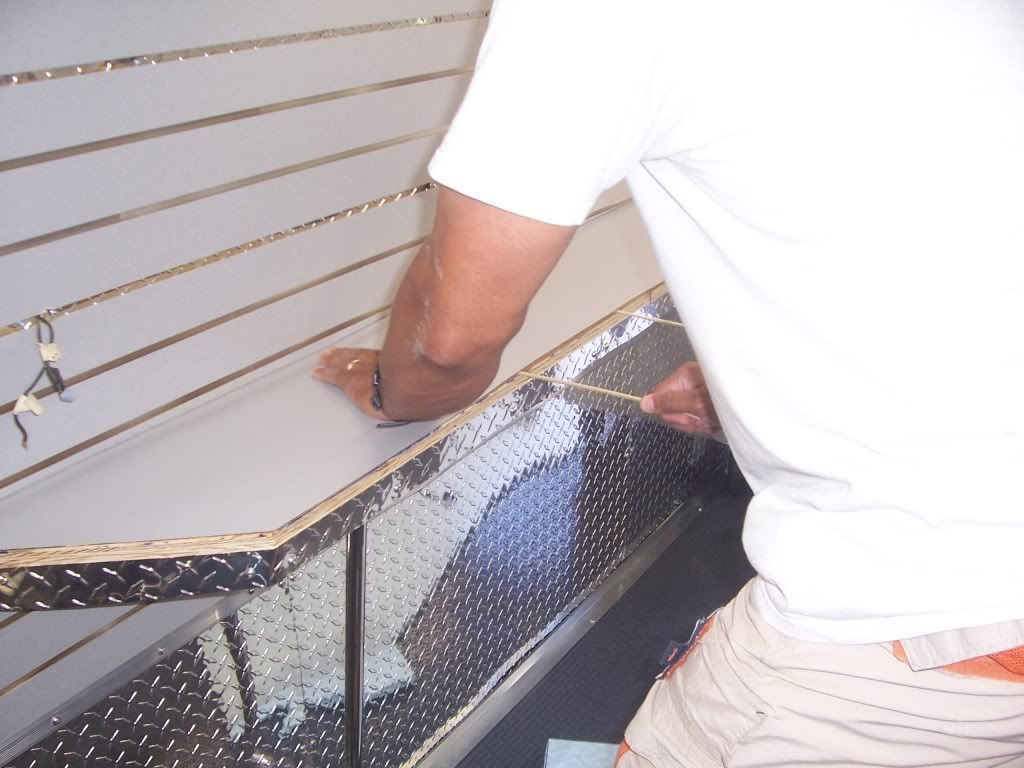
I'm trimming the edges with my dremel
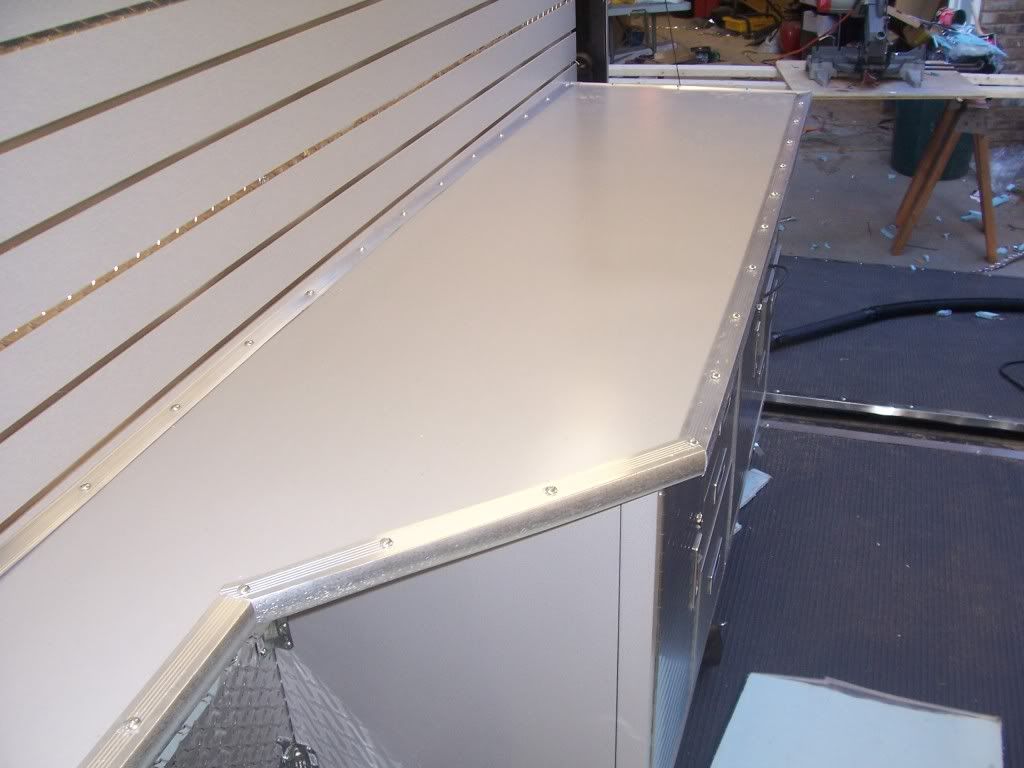
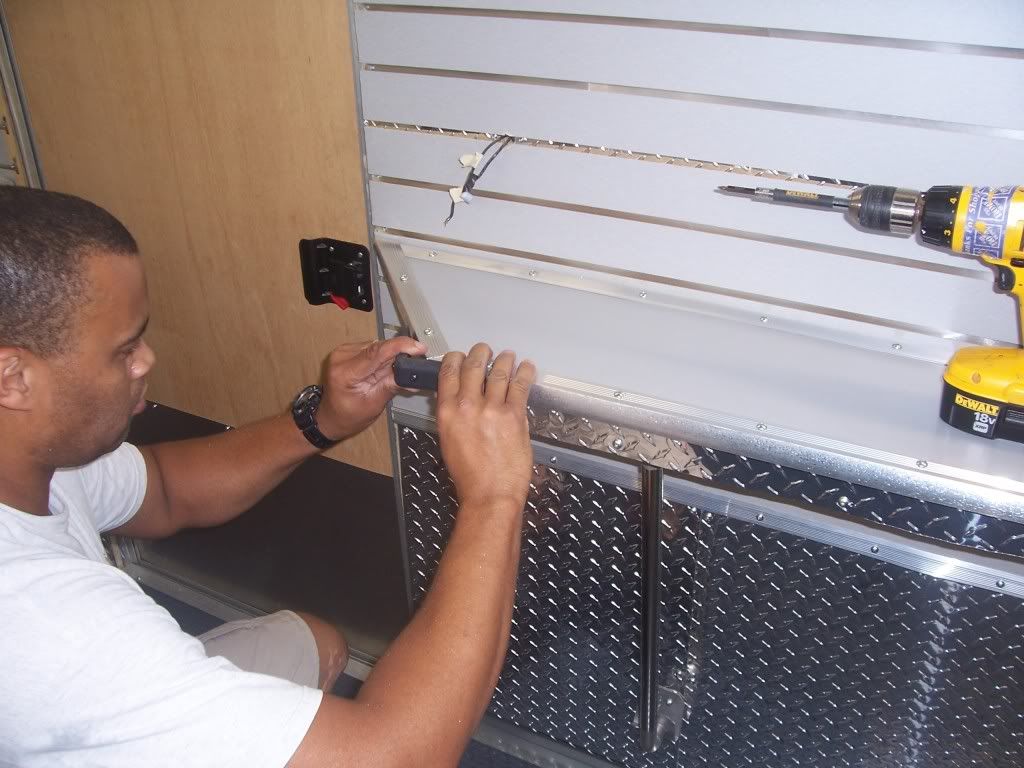
With the laminate laid, I can now smother this sucka in pimp sauce. To cover the edges I'm using metal stair edge trim that runs about $7 for a 8ft section
I'm starting with the front counter
cutting the trim
test for fit. Looks good
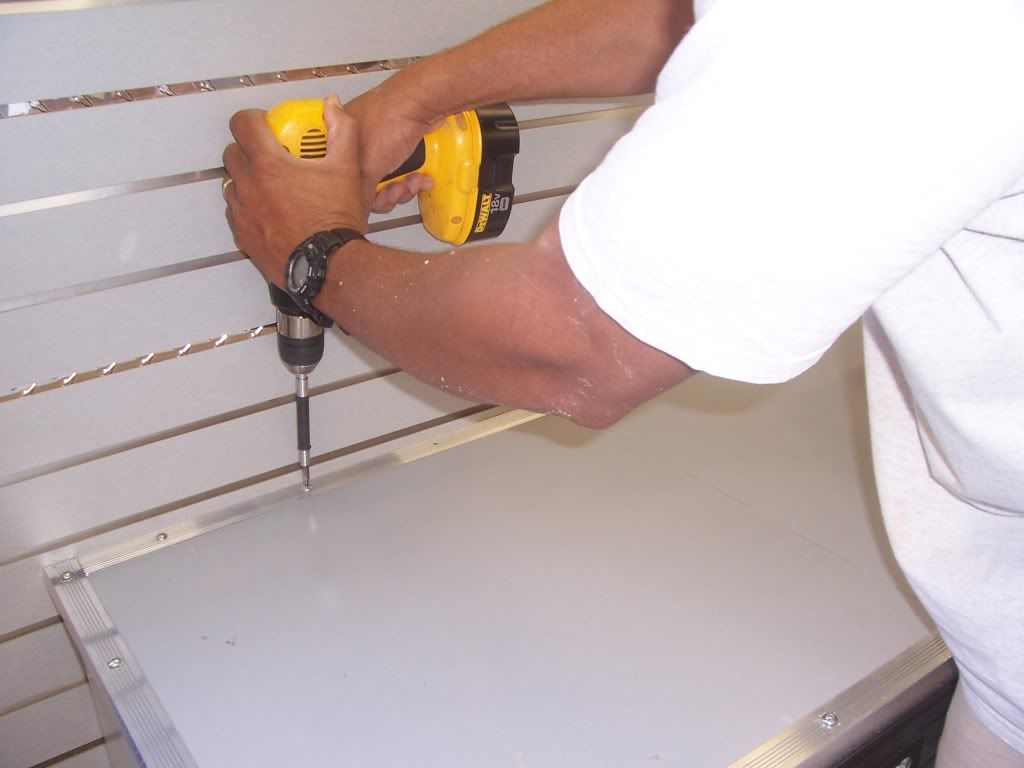
Normally when you install metal edge trim, you run the screws into the side of whatever you're putting the trim on. However to mix things up I'm going to flip the trim over and run the screws through the top
Now that looks good
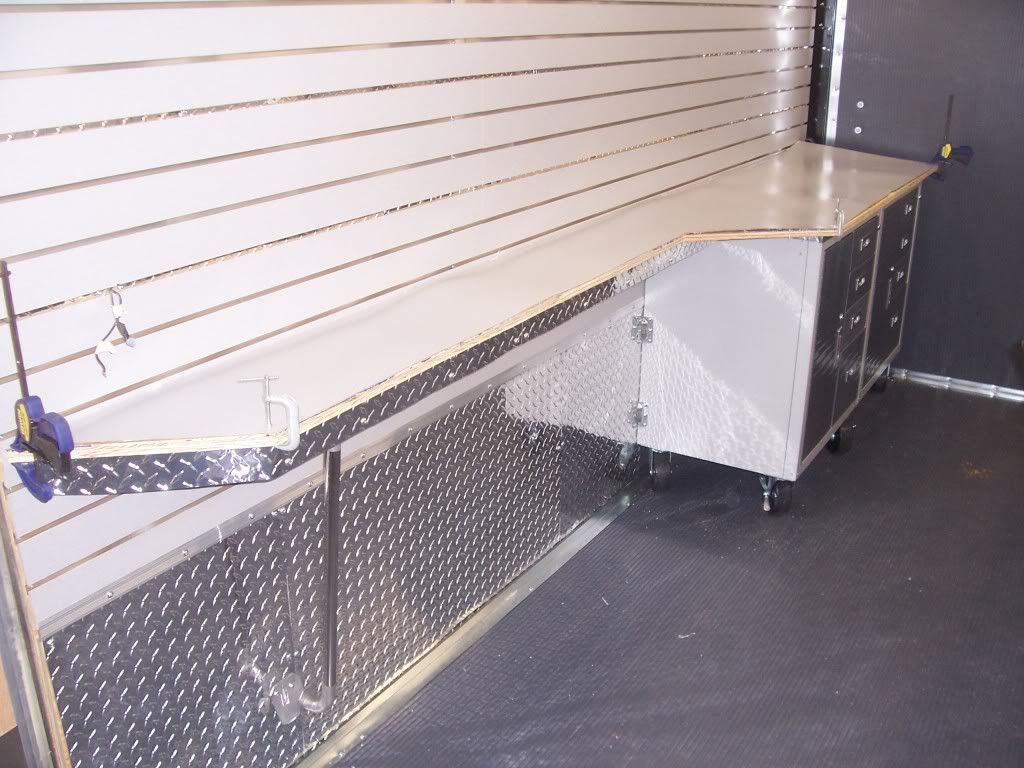
left side trim is done. Now for the wall edge
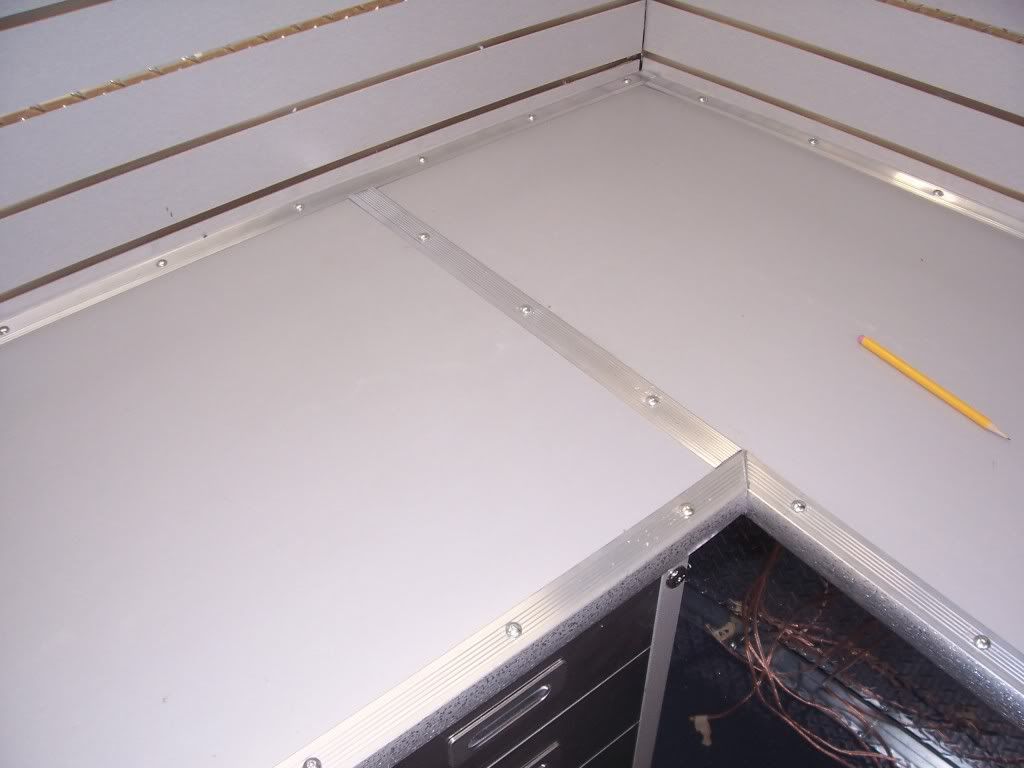
To cover the gap between the wall and the laminate, I'm using metal seaming that runs about $7. I'm keeping with the bolts up top theme
DAMN!!!! that's hot shitz!!!
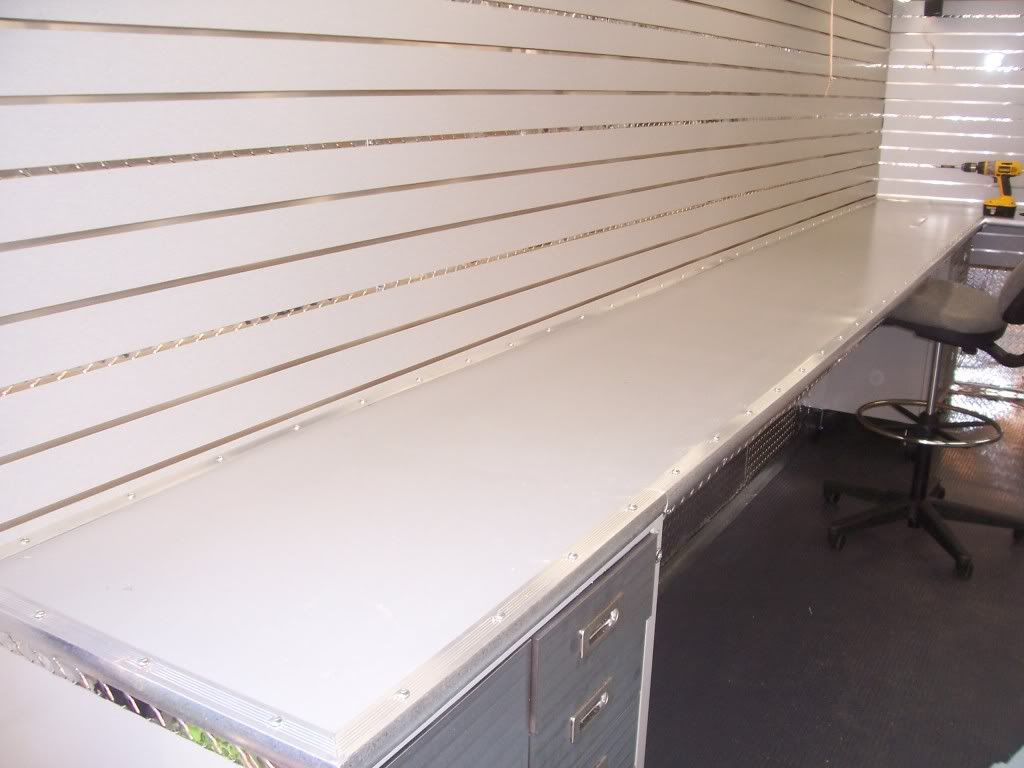
The screws running out the top really set the counter off
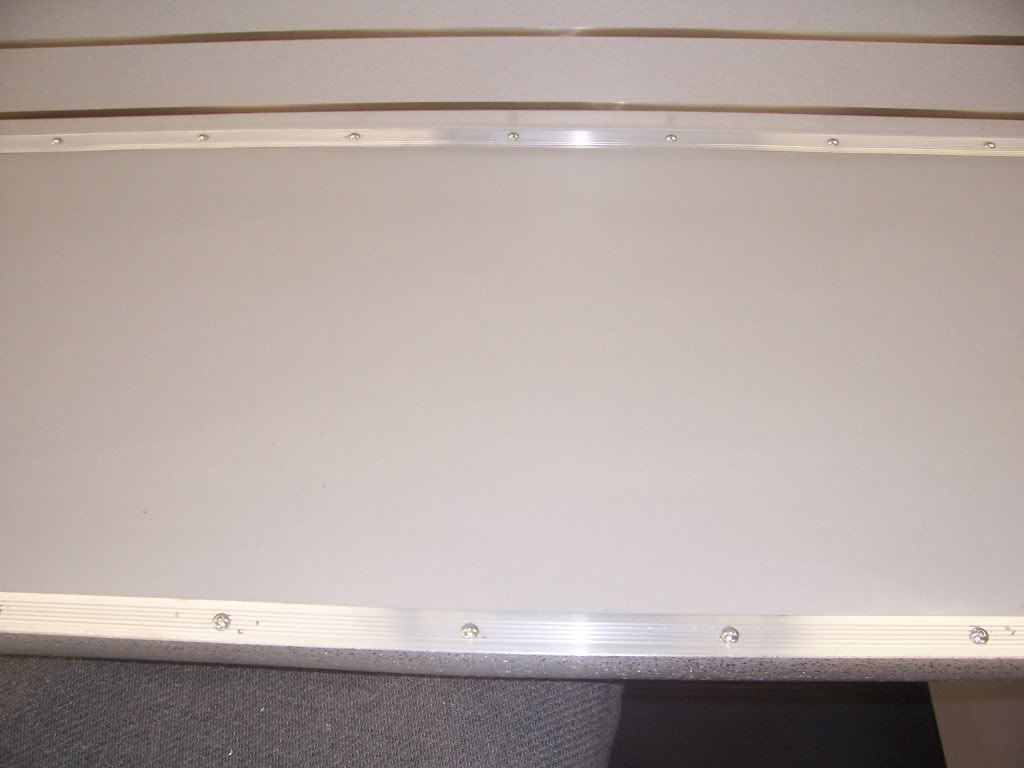
I'm installing the metal seaming in the front counter
Man, this is turning out so good....

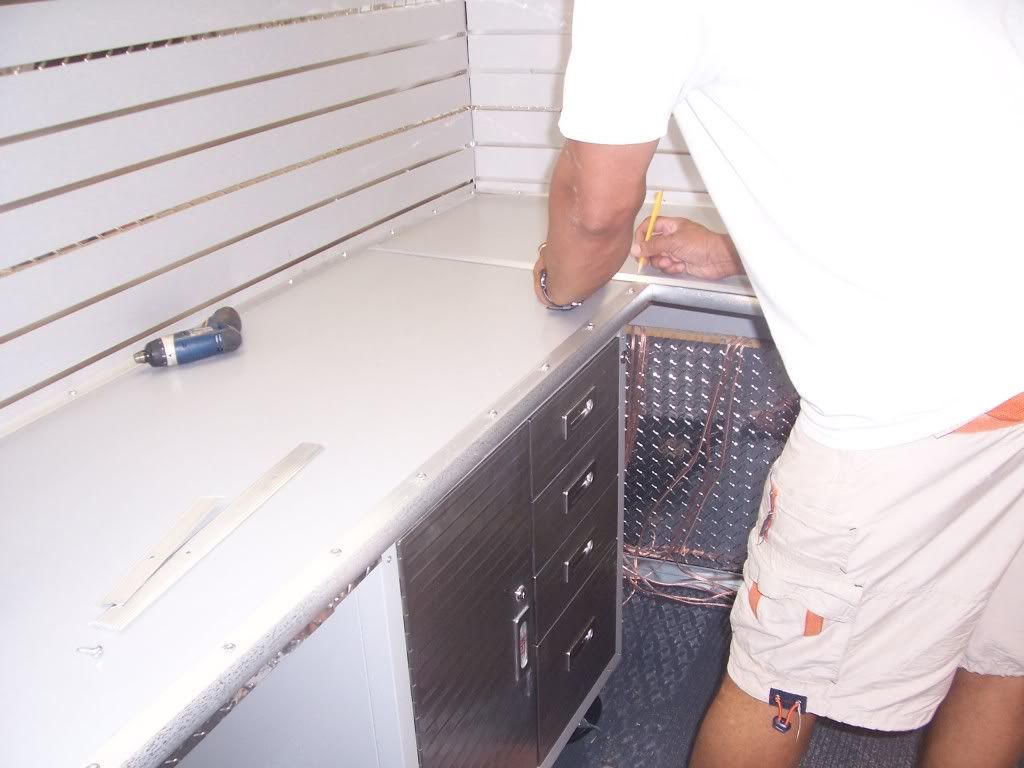
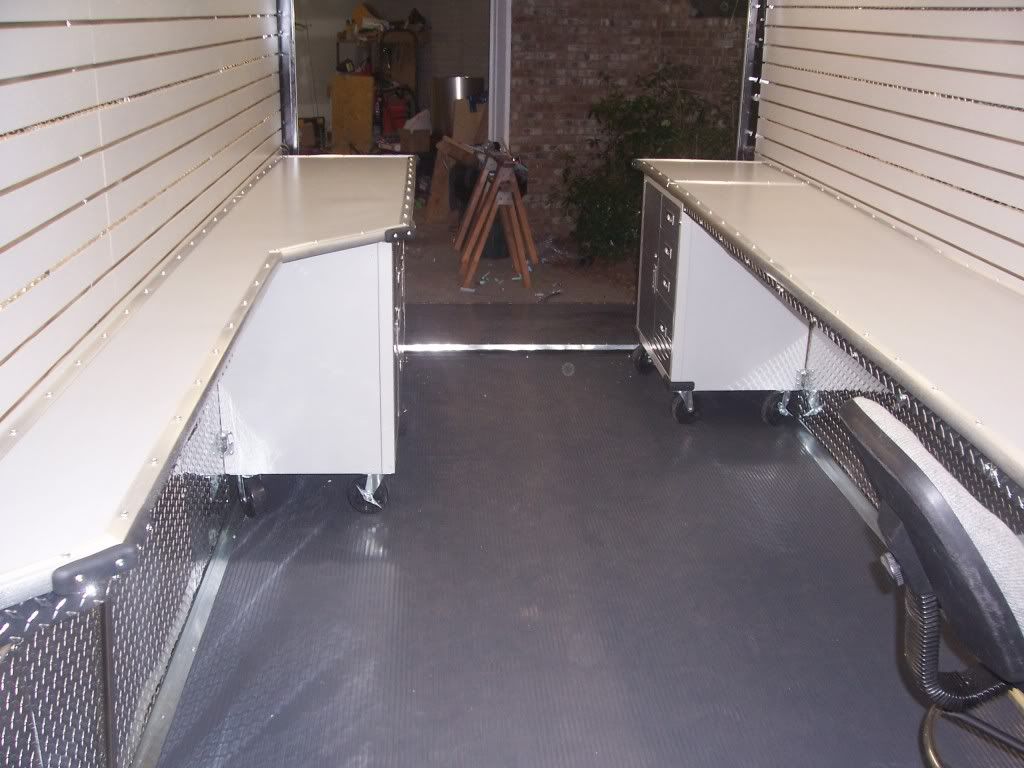
With the left side and front done, I can tackle the left counter which is going to be a MOFO because of the multiple angles
It took about 30 min but it's done and looks good. On to the backwall
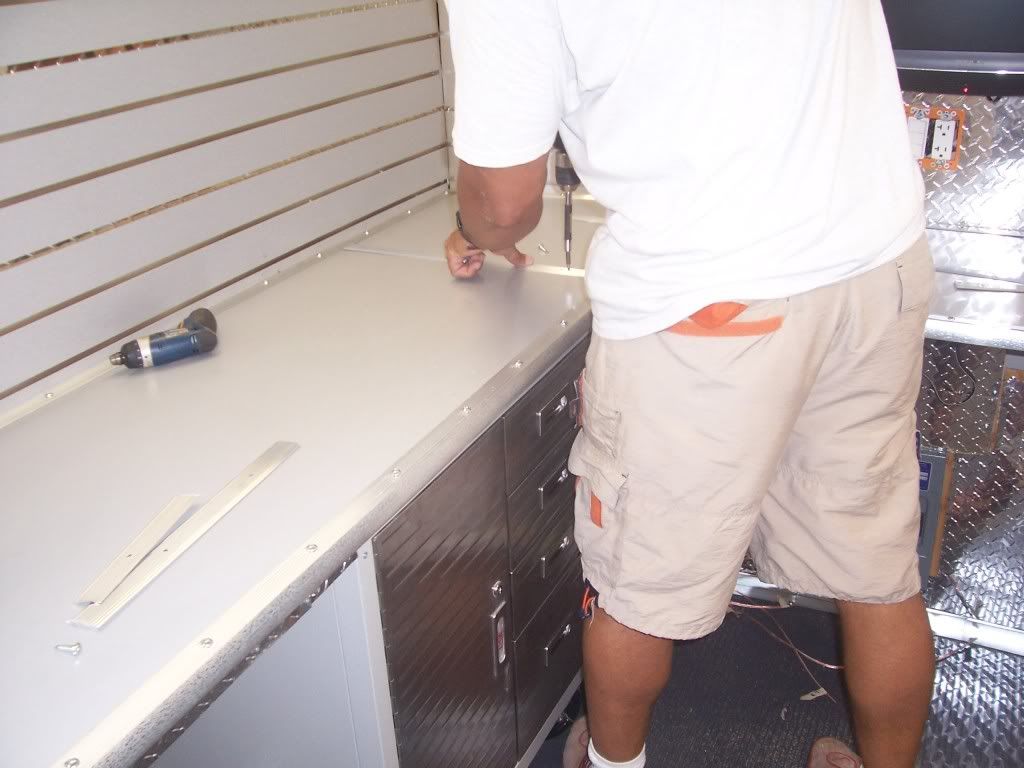
Same drill. Run the metal seaming along the back wall

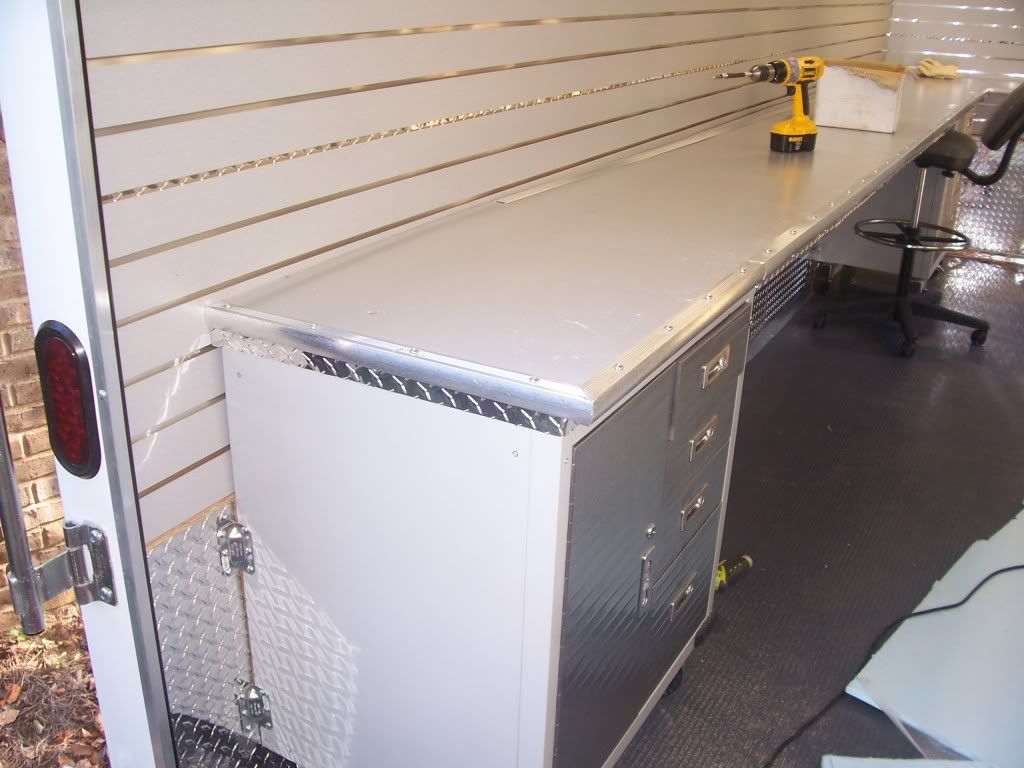
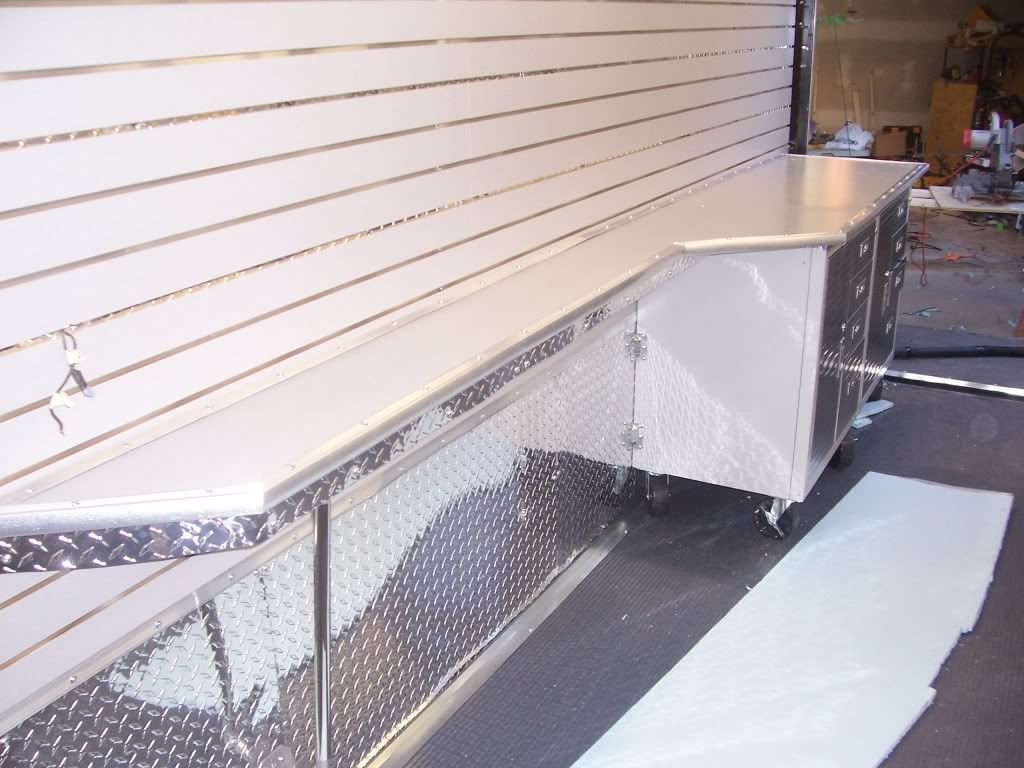
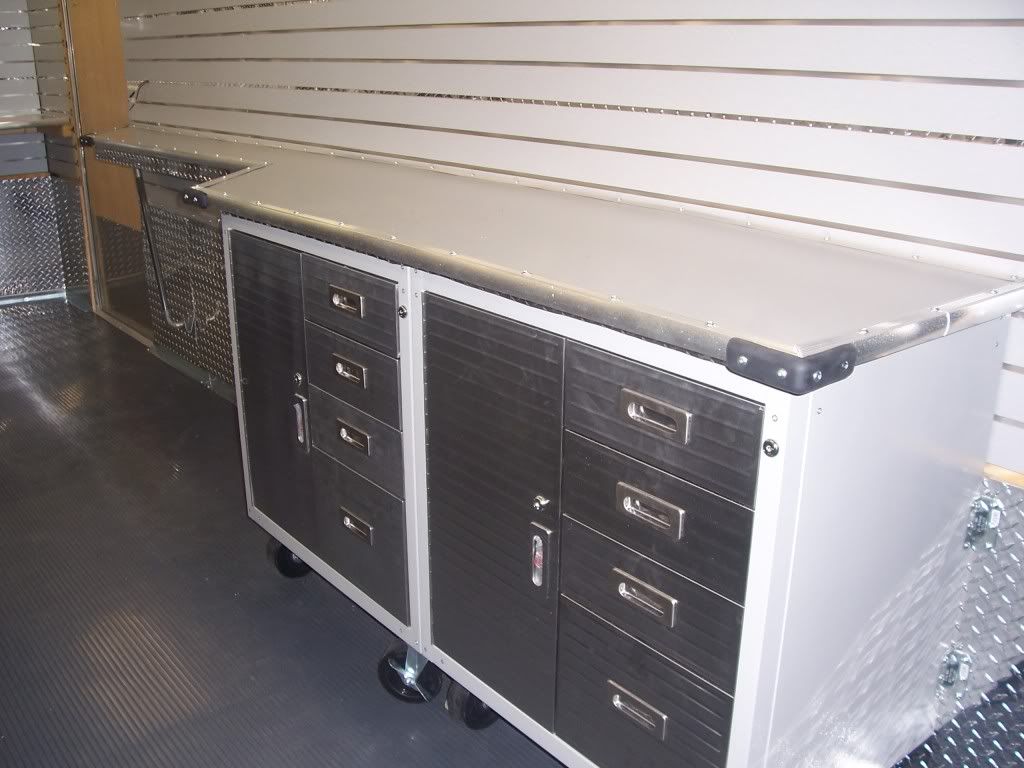
The right counter is the $100 hooker in this pimp stable. I can believe how good it came out

There's a seam between the front and left counter that is totally visible and will collect dirt and debris over time, so I decided to cover it
It just keeps getting better and better
Same for the seam in the back
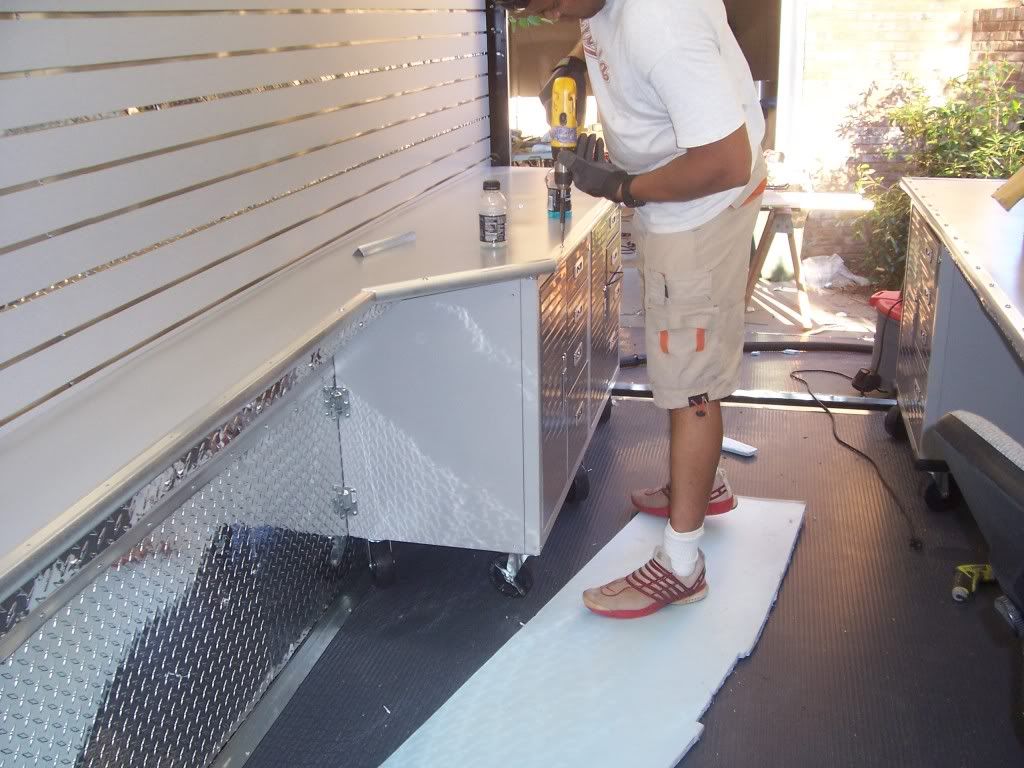
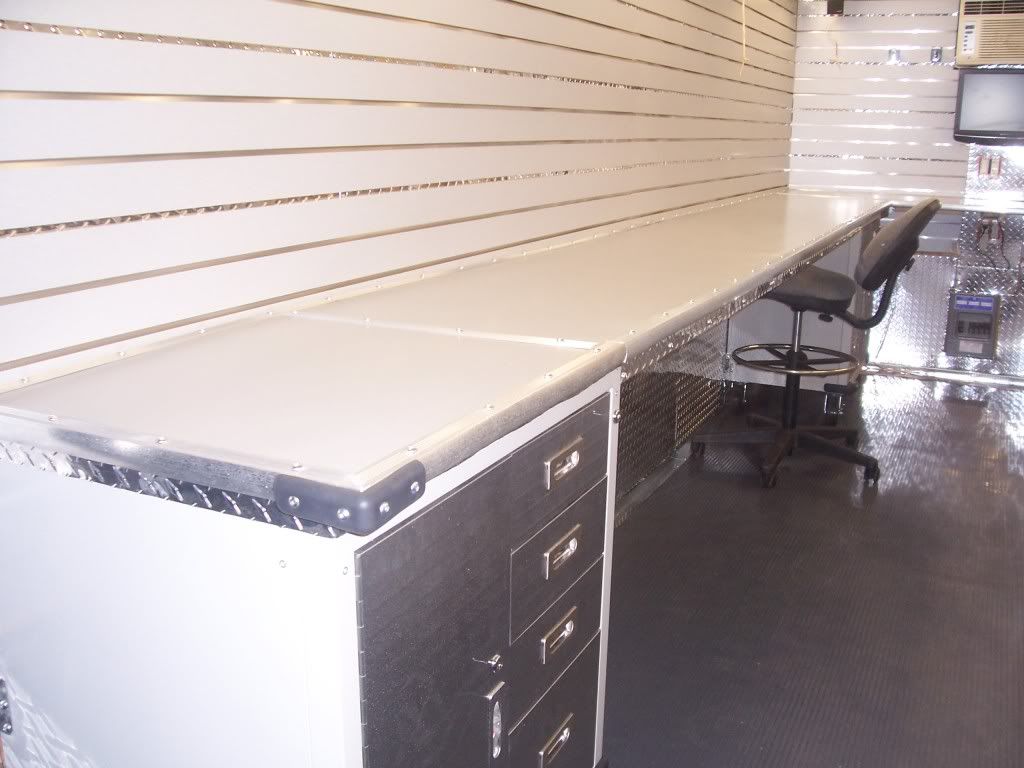
the cabinets I brought came with rubber bumpers. Since I didn't use all of them. I'm puttin the extra ones on the corners. Just that little attention to detail that will keep the skin on my thighs

COUNTERS ARE GO!!!!!
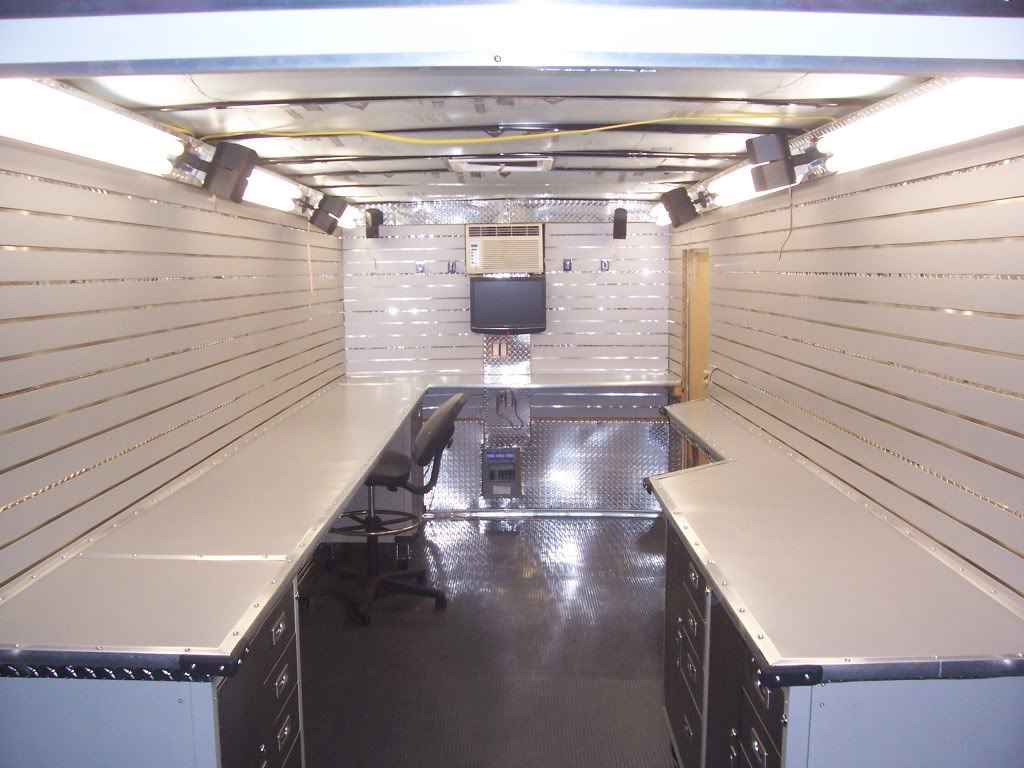
Can I get a AMEN!!!! from the left side of the chruch!!
Can I get a WITNESS ifrom the right side of the chruch!!
Looks like KITT from Knight Rider is going to drive up the ramp any second
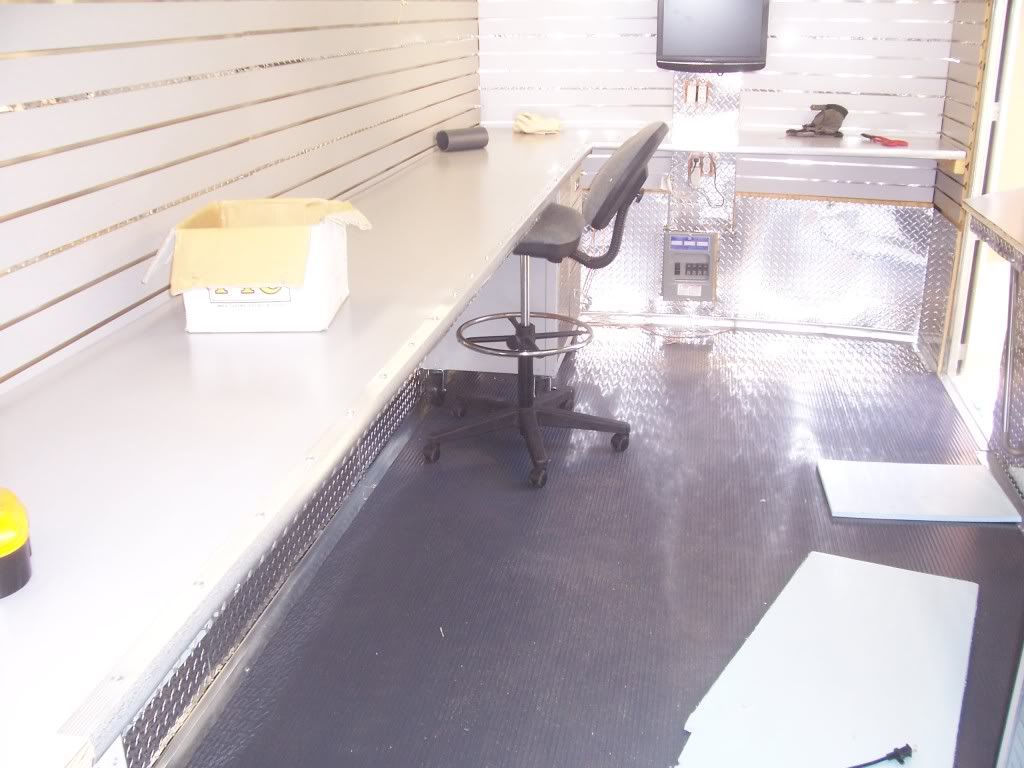
Counters are done. At this point, I'm 90% done. Sound system and ceiling are next. Stay tuned

It's called Satin Silver and looks like brushed aluminum except it's more pimp cause it has "Satin" in the name. A 5x12 sheet and 4x8 sheet ran me $224
I like the 5x12 sized sheets cause I can rip it in half and cover 80% of my counterspace with just one sheet with a minimum of seams
With a sheet this long, you need to mark out your measurements about every 3ft to make sure that your line is straight
Here I'am about make the cut. For those who don't know, when you cut laminate, you need to turn it over and cut on the backside and tape over the portion that you're going to cut to prevent chipping.
Here is the sheet for the left counter. SInce I'm covering the edges with metal trim, I'm not worry about the exactness of the cut.
Now I'm about to make the cut for the right counter
Looks good. I'm going to have to mark off the 45 degree angles and then re-cut
Ah much much better
Now comes the tricky part. I'm going to have to remove the front counter, draw out the shape on the 4x8 sheet and then cut it out
Looks good
The left counter is 14ft which left me about 2ft short. I'm going to cut the 2ft out of what's left of the 4x8 sheet
With the laminate cut and laying flat. I can't turn my attention to the encasement. Before I can install the front counter, I need to cut a hole in the bottom of the encasement to route the power cords for the AC and TV.
Due to the weird angle and the possiblity of hitting a electrical wire, I'm using a drill to "drill out" the hole using multiple drill holes
I found the grey cover in Home Depot by accident. I have no idea what the hell it's actually used for...
I hung my buggy and truggy to make sure I have enough clearance for the TV. I mark the holes for the bracket and hang the TV to check for fit
BOOYAH BEEOTCHES!!!
I'm making the holes for the flatscreen bracket
TV is hung and looks good. With the AC and TV power cords routed and the encasement bolted in place, I can screw the main switch and outlets into the boxes
Much better. The encasement is done so I can start installing the laminate
However, before I can lay the laminate I need to clean the sheet and the counter surface of debris and sawdust
I'm using contact cement gel adhesive to install the laminate. Here I'am putting the cement on the laminate sheet using a paint brush. It is important that you apply this stuff in a well ventalated area and keep away from flames or sparks. The fumes that this stuff gave off had me cussing out the pink elephants that were helping me lay this stuff, because they were union, and kept demanding their every 20 min smokebreak
Now I'm spreading it on the counter
You need to give the adhesive 15-20 min of drying time before you install it. So while the front counter is drying, I'm cleaning the left counter and getting it ready
When the adhesive is dry to the touch, you're ready to lay the laminate. Notice the little wood dowels on the counter. When you install the laminate, you need to have something between the counter and the laminate so when you lay the sheet on the counter, you can position it before you install it. Once the sheet touches the counter, the bond is instantaneous and you can't remove the sheet without possibly breaking it.
Start from the middle and remove the dowels one at a time while pressing down on the sheet to establish the bond. The front sheet is on and it isn't going anywhere
Now I'm applying adhesive to the left counter and the laminate sheet
Once again the wood dowels are a life saver. Especially with the 12 ft piece that was hard to manipulate because it kept flopping everywhere and the pink elephants were on another frickin smoke break. Eventually everything fit right into place
Here I'am brushing adhesive to the right counter top
Here I'am brushing adhesive to the right counter laminate
Removing the dowels to install the right countertop
Oh yeah...looks good
I'm trimming the edges with my dremel
With the laminate laid, I can now smother this sucka in pimp sauce. To cover the edges I'm using metal stair edge trim that runs about $7 for a 8ft section
I'm starting with the front counter
cutting the trim
test for fit. Looks good
Normally when you install metal edge trim, you run the screws into the side of whatever you're putting the trim on. However to mix things up I'm going to flip the trim over and run the screws through the top
Now that looks good
left side trim is done. Now for the wall edge
To cover the gap between the wall and the laminate, I'm using metal seaming that runs about $7. I'm keeping with the bolts up top theme
DAMN!!!! that's hot shitz!!!
The screws running out the top really set the counter off
I'm installing the metal seaming in the front counter
Man, this is turning out so good....
With the left side and front done, I can tackle the left counter which is going to be a MOFO because of the multiple angles
It took about 30 min but it's done and looks good. On to the backwall
Same drill. Run the metal seaming along the back wall
The right counter is the $100 hooker in this pimp stable. I can believe how good it came out
There's a seam between the front and left counter that is totally visible and will collect dirt and debris over time, so I decided to cover it
It just keeps getting better and better
Same for the seam in the back
the cabinets I brought came with rubber bumpers. Since I didn't use all of them. I'm puttin the extra ones on the corners. Just that little attention to detail that will keep the skin on my thighs
COUNTERS ARE GO!!!!!
Can I get a AMEN!!!! from the left side of the chruch!!
Can I get a WITNESS ifrom the right side of the chruch!!
Looks like KITT from Knight Rider is going to drive up the ramp any second
Counters are done. At this point, I'm 90% done. Sound system and ceiling are next. Stay tuned


 or is that next on the list