


 3Likes
Team Associated TC6.2 Touring Car
 05-22-2014, 06:54 AM
#1036

...hmmm, basically the outer ball eyelet of the "castor link" (tm pending) will move on the surface of a sphere, with the inner ball eyelet (chassis side) being the center of the sphere and the length of the "castor link" determining the radius. So using the short hole on the knuckle creates a shorter "castor link", thus a smaller radius of the sphere. A smaller sphere has a more curved surface, therefore you get more castor change when the suspension gets compressed = more reactive castor.
So much for geometry. How much reactive castor you want still remains to be determined at the moment.
Christian
So much for geometry. How much reactive castor you want still remains to be determined at the moment.
Christian
 05-22-2014, 07:39 AM
#1037
Tech Regular
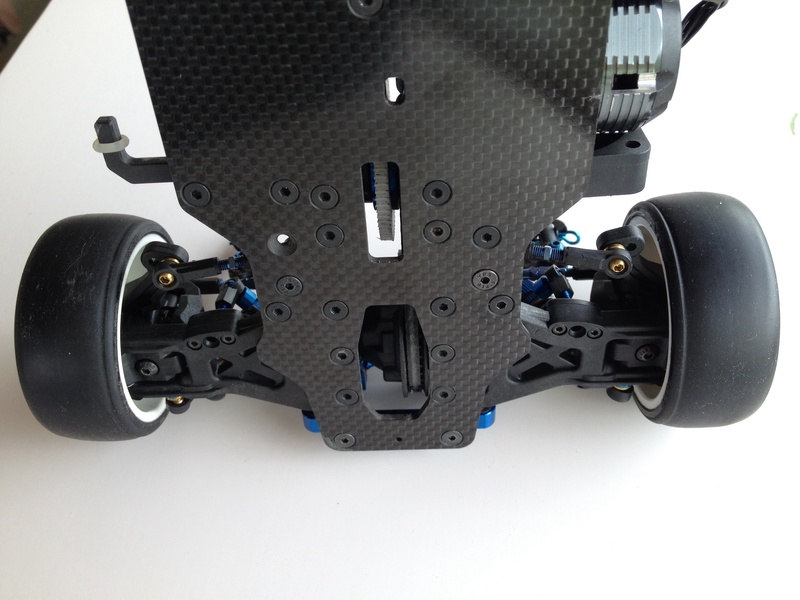
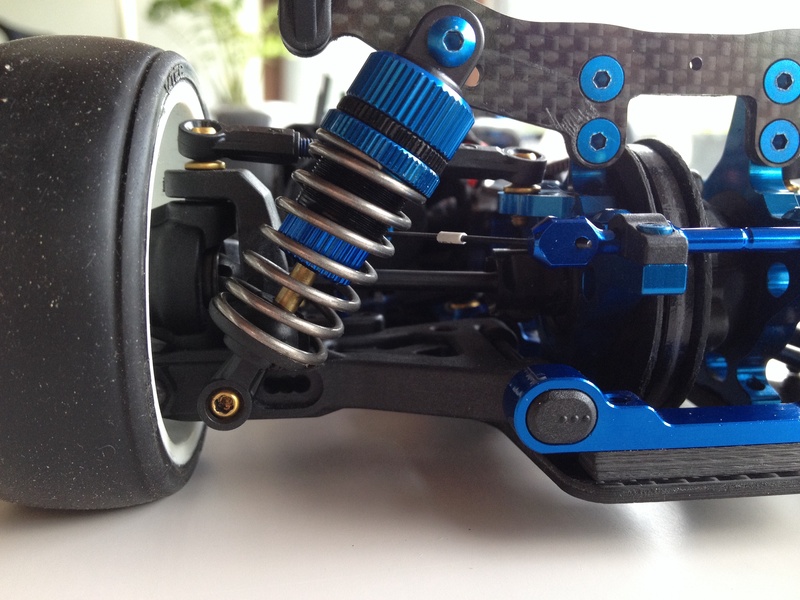
With all the ARS announcements going on, I thought of showing you how AE already prepared the 6.2 for this solution. If you already got some spares the ARS for your 6.2 will cost you nearly nothing 
You need the front suspension plastic parts, 2 ballstuds, 2 flathead screws, two damper mounts, four ballstud eyelets and two short turnbuckles (around 16mm length).
Take the ballstud and screw it into the damper mount. Take the flathead screw, push it through the chassis (blue screw on picture) and attach the ballstud-dampermount on the upside. Install all the front suspension parts on the rear axle. Assemble the turnbuckkles and clip them on the steering block.
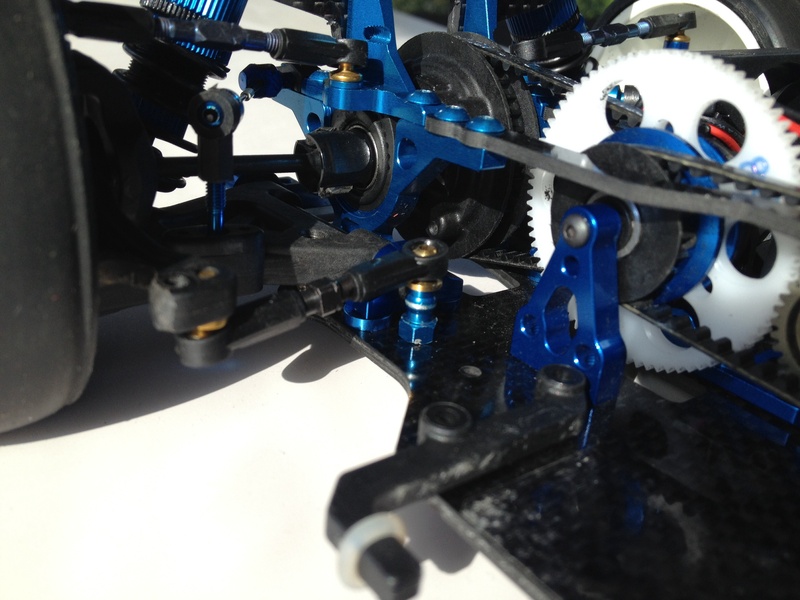
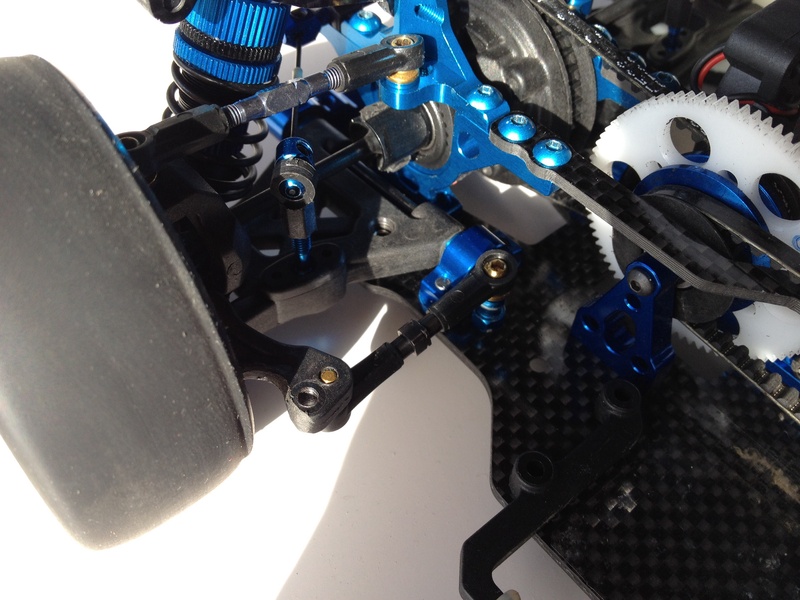
And thats it! Not really xD The hardest will be to find out what kind of ARS setup will work for you in the situation. Use shims to manipulate the changes in degree on the suspension.
05-22-2014, 09:43 AM
#1038
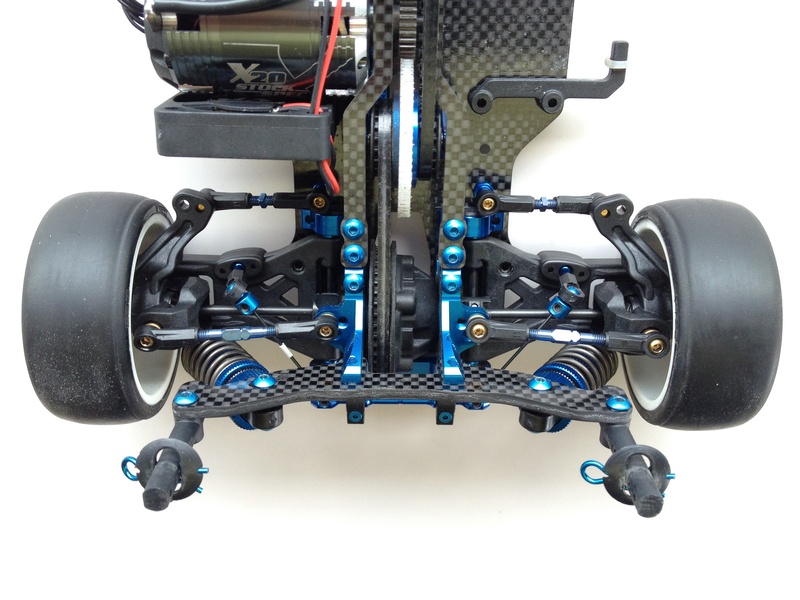
In the pictures is my 6.1 front axle. Because of that there are 4*inserts installed. Normally you would go with 0*inserts. The pics I posted are not for setup, but to show that you can upgrade the 6.2 easily. Which hole to use on the steering block depends on how much of degree change you want in the rear. After moving the suspension this morning, I would tend to the outer hole, as the degreechange with the inner seems a bit too much. But we have to try for ourselves to see if adds something good to our setup.
05-25-2014, 11:39 PM
#1039
I picked up a brand new TC6.2 from a local racer and need to buy a battery, I am not asking brand, just size. Should I go with 5800,6000 or 7000 packs? What does the car balance with best? I am running a LRP SXX ver2, airtronic receiver and a Futaba S9551. Running 17.5 and maybe a little 13.5
05-26-2014, 04:37 AM
#1040
I picked up a brand new TC6.2 from a local racer and need to buy a battery, I am not asking brand, just size. Should I go with 5800,6000 or 7000 packs? What does the car balance with best? I am running a LRP SXX ver2, airtronic receiver and a Futaba S9551. Running 17.5 and maybe a little 13.5

 05-27-2014, 06:02 PM
#1043
Rick,
can you ask Bob to put up his setup and his tire prep ?
can you ask Bob to put up his setup and his tire prep ?
05-28-2014, 03:09 AM
#1044
05-28-2014, 03:07 PM
#1045
Here a blinky 17.5t setup I developed last weekend for a medium grip asphalt track. I really like it. The car turns fast and you can control the turning with the throttle by accelerating very early in the corner 
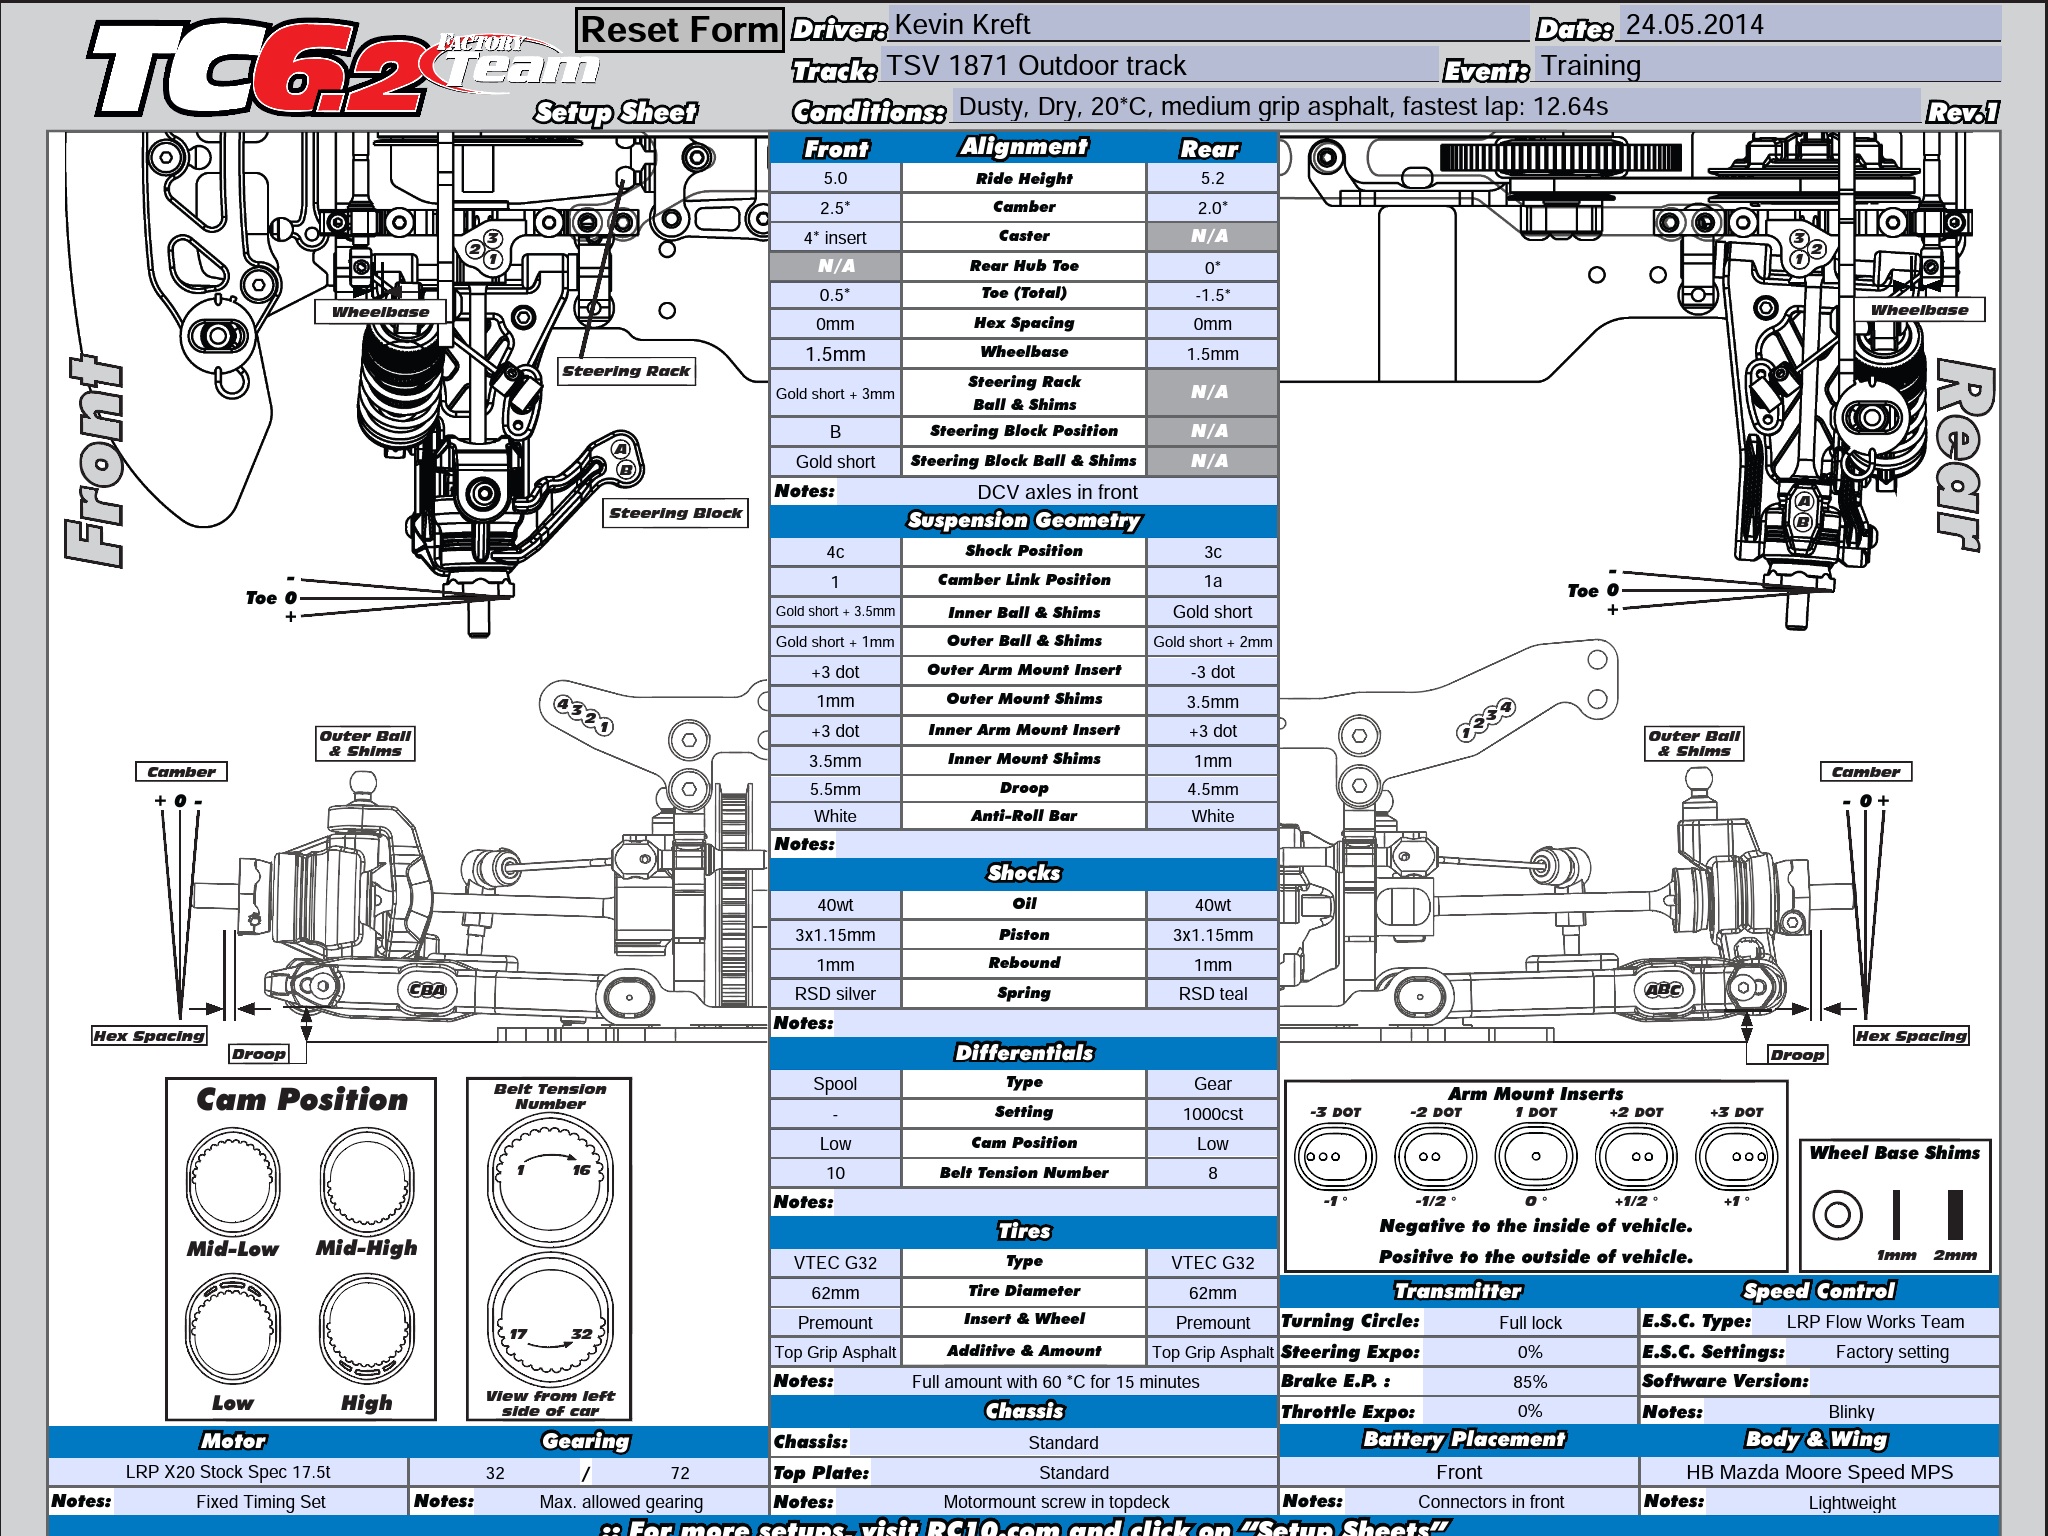
I also finished the "ARS" conversation today. Using the inner hole on the steering arm you can get around 1 degree of toe change when the damper is compressed in the corner. The corner inner suspension side will only change for a maximum of 0.5 degree. So the change is quite drastic. To use the outer hole on the steering arm I recommend 18mm turnbuckle length.
I will try this conversation tomorrow if the weather is dry. But I am not sure if this will be of any help. I can imagine a nice corner entry, but I am afraid in the middle and the exit, with the car still leaning outside, there is lack of rear grip which delays the acceleration. My car is always setupped to be able for me to step on the pedal before it reaches the apex. I will report how it went. Pics will also follow
Last edited by wtcc; 05-28-2014 at 03:58 PM.
05-29-2014, 03:45 AM
#1046
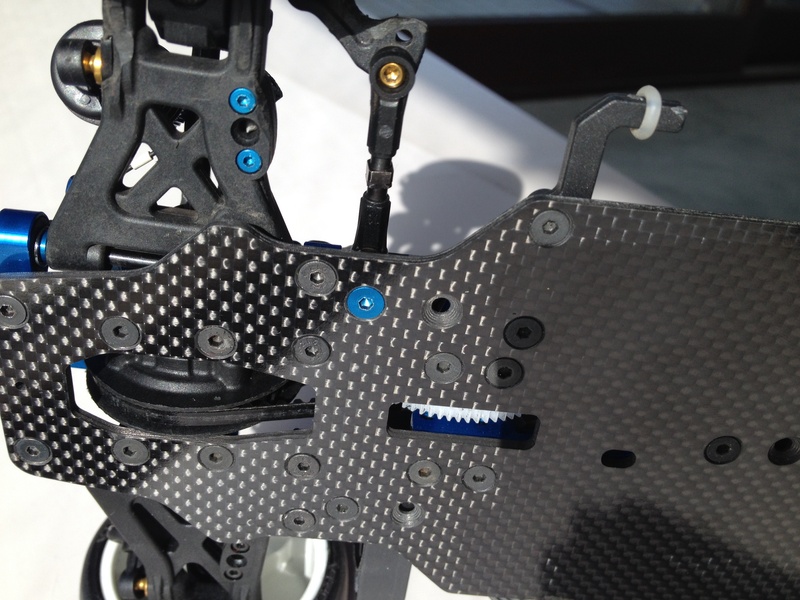
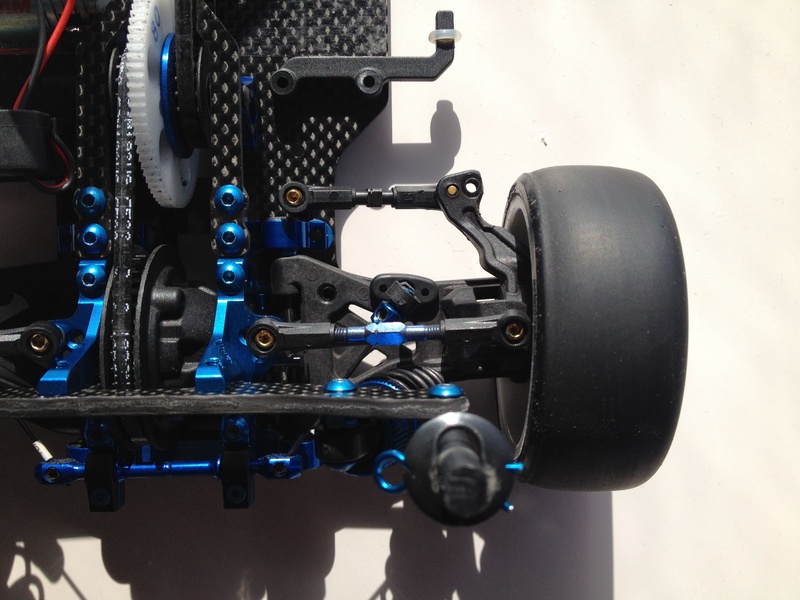
Some more pictures of the rear end conversation:

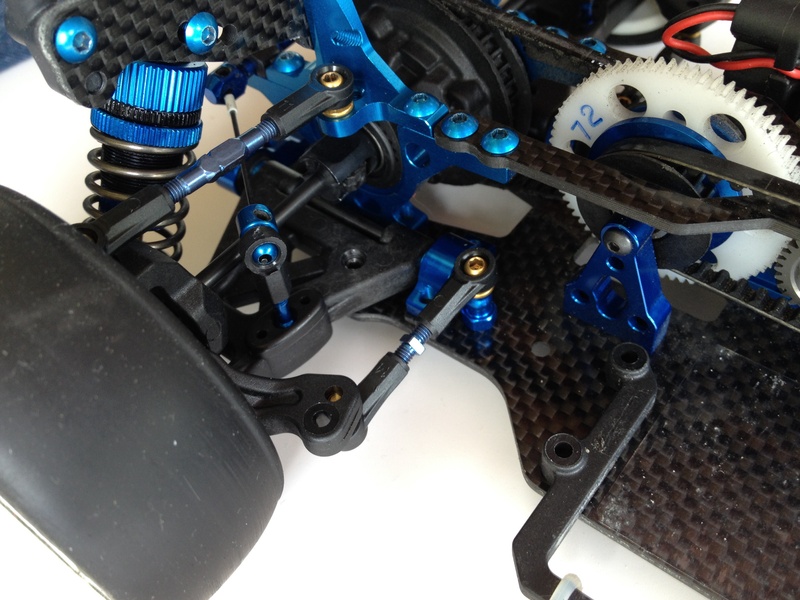

The c-hub is around 2mm higher than the rear hub carrier. I used a2mm shim before, so I could build it without a shim. Also the position of the steering block thread equates the position A of the rear camber link.

To keep the rear damper geometry the same, it is recommended to drill a hole in the suspension arm, 13mm away from the outer pin. This equals damper position C. You may have the damper rubbing lightly against the c-hub. Use a shim or a long neck ballstud then.


The c-hub is around 2mm higher than the rear hub carrier. I used a2mm shim before, so I could build it without a shim. Also the position of the steering block thread equates the position A of the rear camber link.


To keep the rear damper geometry the same, it is recommended to drill a hole in the suspension arm, 13mm away from the outer pin. This equals damper position C. You may have the damper rubbing lightly against the c-hub. Use a shim or a long neck ballstud then.

 05-29-2014, 04:16 AM
#1047
Some more pictures of the rear end conversation:
The c-hub is around 2mm higher than the rear hub carrier. I used a2mm shim before, so I could build it without a shim. Also the position of the steering block thread equates the position A of the rear camber link.
To keep the rear damper geometry the same, it is recommended to drill a hole in the suspension arm, 13mm away from the outer pin. This equals damper position C. You may have the damper rubbing lightly against the c-hub. Use a shim or a long neck ballstud then.
05-29-2014, 04:06 PM
#1048
05-29-2014, 11:33 PM
#1049
05-30-2014, 01:06 AM
#1050
Tech Regular