


 14Likes
Tamiya F104 Pro!
 07-26-2011, 12:51 PM
#5776

crazy question but...
has anyone noticed that the rear pod doesn't rotate left-to-right evenly? I was playing with mine last nite and noticed it rotated more to the passenger side (if it was a 2 seater), then to the drivers side...I looked at the rear diffuser and saw that some of the webbing was thicker on the drivers side of the piece then the diff side..
am i looking too much into this? or is this something people have modified to get even left-to-right rotation?
 07-26-2011, 12:53 PM
#5777
Tech Regular
iTrader: (4)
F1 - WET RACE - final movie  ...
...
http://www.youtube.com/watch?v=hGdUO2V10L8
(Watch in HD)
and "Behind the scenes" ...
http://www.youtube.com/watch?v=gi7KE6zT-2I
... http://www.youtube.com/watch?v=hGdUO2V10L8
(Watch in HD)
and "Behind the scenes" ...
http://www.youtube.com/watch?v=gi7KE6zT-2I
07-26-2011, 01:47 PM
#5778
crazy question but...
has anyone noticed that the rear pod doesn't rotate left-to-right evenly? I was playing with mine last nite and noticed it rotated more to the passenger side (if it was a 2 seater), then to the drivers side...I looked at the rear diffuser and saw that some of the webbing was thicker on the drivers side of the piece then the diff side..
am i looking too much into this? or is this something people have modified to get even left-to-right rotation?
has anyone noticed that the rear pod doesn't rotate left-to-right evenly? I was playing with mine last nite and noticed it rotated more to the passenger side (if it was a 2 seater), then to the drivers side...I looked at the rear diffuser and saw that some of the webbing was thicker on the drivers side of the piece then the diff side..
am i looking too much into this? or is this something people have modified to get even left-to-right rotation?
07-26-2011, 01:50 PM
#5779
the body is off, shock is off, no wires on the motor and no wheels on the rear end...just twisting it by hand and noticed it stopped sooner on the one side...I guess I should have added i have the heavy pivot plate on the car 
it may be nothing, but i figured i'd ask in case anyone else noticed this
it may be nothing, but i figured i'd ask in case anyone else noticed this
07-26-2011, 02:18 PM
#5780
k_bojar, I notice it too...the plastic bottom motor plate does have a rib that comes into contact with the rear chassis bulkhead when twisted to extreme angles. I thought about taking a dremel and trimming the plastic so that it flexes evenly both directions but wondered if we'll ever get that much deflection under normal circumstances. Honestly if your car gets that far out of shape, you're either doing some serious curb climbing, crashing, or offroading 
07-26-2011, 02:21 PM
#5781
k_bojar, I notice it too...the plastic bottom motor plate does have a rib that comes into contact with the rear chassis bulkhead when twisted to extreme angles. I thought about taking a dremel and trimming the plastic so that it flexes evenly both directions but wondered if we'll ever get that much deflection under normal circumstances. Honestly if your car gets that far out of shape, you're either doing some serious curb climbing, crashing, or offroading
and a lot of time within the same lap or cornerlike i said, i was playing with it, and i'm sure it'll never get that much rotation under normal circumstances - but i figured i'd ask to see if anyone else noticed it or did anything to correct it
if you say it's fine, that's good enough for me
I know you know your stuff
07-26-2011, 03:15 PM
#5782
So... I have a low pro servo sitting around and want to try running it so the servo saver is positioned in a way so its easy to remove the massive bump steer the stock geometry gives. Has anyone noticed any weird things this does? Its a huge steering geometry change, and im wondering if I would be wasting my time with it :P. Thanks!!!
07-26-2011, 03:37 PM
#5783
So... I have a low pro servo sitting around and want to try running it so the servo saver is positioned in a way so its easy to remove the massive bump steer the stock geometry gives. Has anyone noticed any weird things this does? Its a huge steering geometry change, and im wondering if I would be wasting my time with it :P. Thanks!!!
Alloy servo saver and 6mm in spacers with Exotek servo mounts and low profile outter balls. Trim under the upper arms to keep from hitting the arm. 07-26-2011, 03:38 PM
#5784
So... I have a low pro servo sitting around and want to try running it so the servo saver is positioned in a way so its easy to remove the massive bump steer the stock geometry gives. Has anyone noticed any weird things this does? Its a huge steering geometry change, and im wondering if I would be wasting my time with it :P. Thanks!!!

Add 2mm spacers under the ball studs...
07-26-2011, 05:06 PM
#5786
Mike!!! Dude that is 1x10^6% pure win! Also you've got the fastest color. That looks to be good for at least half a second per lap 
07-26-2011, 07:09 PM
#5787
Step 18 calls for assembly and attachment of the front uprights.
Parts for step 18

Please note the following:
Too help keep everything in place, use blue loctite on the 2mm nuts and 3mm grub screws

Before I tighten the grub screw completely, I pinch the steering upright up against the upper arm. I'm not certain if doing this affects anything, but it can't hurt.
Step 18 completed

Parts for step 18
Please note the following:
- The kit provides all three different springs. Nice!
- I replaced the plastic spacers with aluminum spacers. Precision!
- I used black springs with Tamiya soft damper grease to provide some form of damping
Too help keep everything in place, use blue loctite on the 2mm nuts and 3mm grub screws
Before I tighten the grub screw completely, I pinch the steering upright up against the upper arm. I'm not certain if doing this affects anything, but it can't hurt.
Step 18 completed
07-26-2011, 07:24 PM
#5788
These steps involve the assembly of shock and roll damper. Not much more can be said about the TRF damper that hasn't already been said before. It's simply the best out there.
Parts for steps 19-22

Note the following:
0.1mm spacer on top of the shock shaft's c-clip
Steps 19-21 completed

Dampers attached, step 22 completed

From another angle

Once everything was together, the damper feel seems to be very promising. It's got that floppy loose feel, but is smooth at the same time.
Parts for steps 19-22
Note the following:
- I added a 0.1mm spacer between the bottom c-clip and shock piston. This reduces any slop that the piston may have.
- The instructions call for Tamiya ball diff lube for the roll damper. Since this is the first X1 I've built, I will go with that. After putting the roll damper on the car, it does feel a little light but very smooth and may just work for the Tamiya track.

- I was pleasantly suprised when I opened the parts bag to found out that the kit comes with 3 springs for the rear shock. The red spring feels almost like the old gold miata spring and that's what I used.
- Assembly of the TRF damper is pretty much a no-brainer. While putting the shock together, I used a drop of shock oil on the orings, rod guides, and shock shaft,
0.1mm spacer on top of the shock shaft's c-clip
Steps 19-21 completed
Dampers attached, step 22 completed
From another angle
Once everything was together, the damper feel seems to be very promising. It's got that floppy loose feel, but is smooth at the same time.
07-26-2011, 07:34 PM
#5789
That pretty much covers the assembly of the chassis. With the exception of a few minor pieces, the car is very close to being finished.


Things to do before the car is ready to run include initial setup, setting steering toe angles, adjust steering end points on the radio, glue tires, mount body, break in of the diff, etc...If you want, I'll post more information about that when I finish prepping the car for it's maiden run.
I hope this build has been informative and I thank you for taking the time to view it. If you have any questions or comments, please let me know.
07-26-2011, 07:40 PM
#5790
Tech Adept
To me it looks like all you need to convert is the top plate, the new damper and counterweight. Lets hope those things are worth it.
Now for my own blabering. I posted earlier some pics of my moded front wing. I could deffinetly tell a difference but it got me thinking, is there enough to see a difference in airflow. So I oiled the front wing to get collection of dust on lower pressure areas.
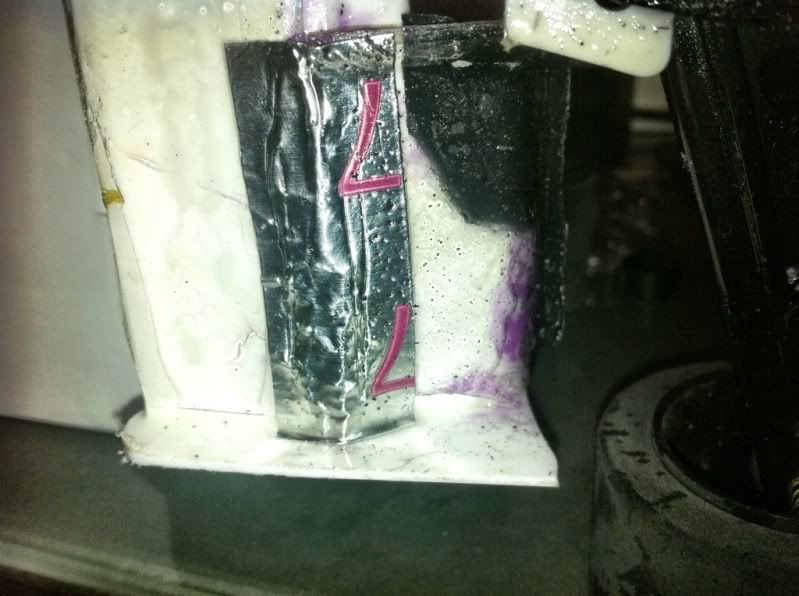

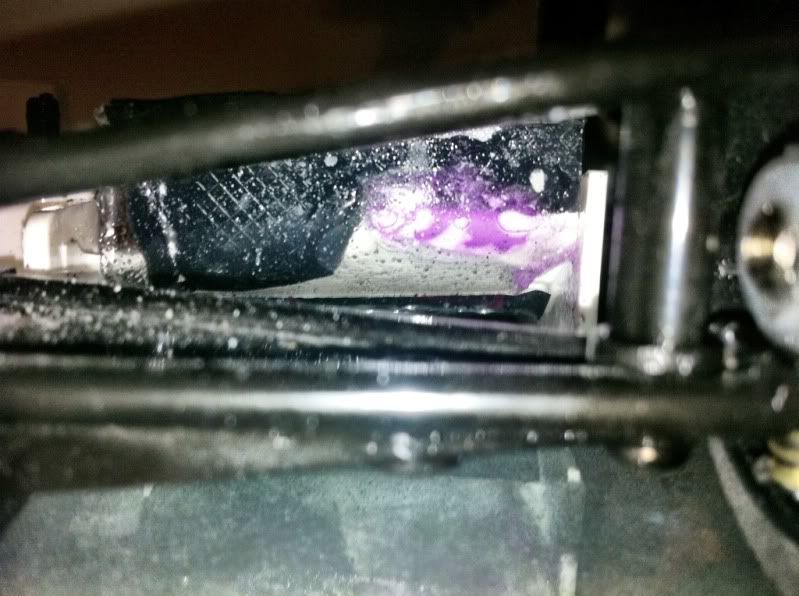
Hard to tell in pics but you can see where it is sucking dirt off the street and sticking it on the part where the airflow detaches as it gets too steep. Another thing i noticed was my suspension was covered in oil and dirt in areas much higher than the front wings
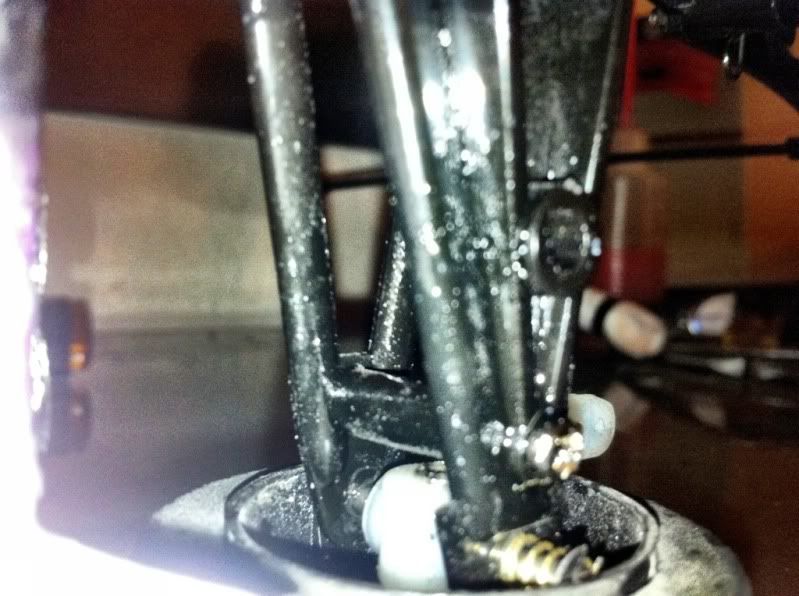
Conclusion, it works better than i expected.
Now for my own blabering. I posted earlier some pics of my moded front wing. I could deffinetly tell a difference but it got me thinking, is there enough to see a difference in airflow. So I oiled the front wing to get collection of dust on lower pressure areas.
Hard to tell in pics but you can see where it is sucking dirt off the street and sticking it on the part where the airflow detaches as it gets too steep. Another thing i noticed was my suspension was covered in oil and dirt in areas much higher than the front wings
Conclusion, it works better than i expected.