


 10Likes
TLR TEN-SCTE 2.0 Kit Thread
 03-06-2013, 09:17 AM
#1321
I am sure that you could. However the radio box was eliminated due to weight. I think that if the rx were mounted on the back of the servo towards the center diff, that it would keep it out of the roost from the front tires. Also, could do the balloon trick to keep it clean.
 03-06-2013, 09:20 AM
#1322
I'm guessing this won't work in the 2.0?
http://www.horizonhobby.com/products...FY9AMgodQz4ALg
http://www.horizonhobby.com/products...FY9AMgodQz4ALg
03-06-2013, 09:36 AM
#1323

I'm guessing this won't work in the 2.0?
http://www.horizonhobby.com/products...FY9AMgodQz4ALg
http://www.horizonhobby.com/products...FY9AMgodQz4ALg
03-06-2013, 09:38 AM
#1324
03-06-2013, 09:40 AM
#1325
If you guys are really worried about your rx, you could use this. I use it on my Ve8 and it works fine.
http://gshobby.com/content/kyosho-92...r-slim-clrblue
http://gshobby.com/content/kyosho-92...r-slim-clrblue
03-06-2013, 09:45 AM
#1326
I'm guessing this won't work in the 2.0?
http://www.horizonhobby.com/products...FY9AMgodQz4ALg
http://www.horizonhobby.com/products...FY9AMgodQz4ALg
I have used some of this stuff for servo tape as I ran out of MIP and needed something else in a pinch and it has worked well so far.
http://www.acehardware.com/product/i...01&cagpspn=pla
I found mine at Home Depot for around $4.
03-06-2013, 09:48 AM
#1327
Just mount it to the flat on the side of the servo mount. We are all mounting our transponders on there as well. I had mine on the chassis and it was not counting right. I moved it next to the reciever and all good now. There is plenty of room on the chassis between the servo and motor to put it on the chasssis if that makes you feel better.
03-06-2013, 09:59 AM
#1328
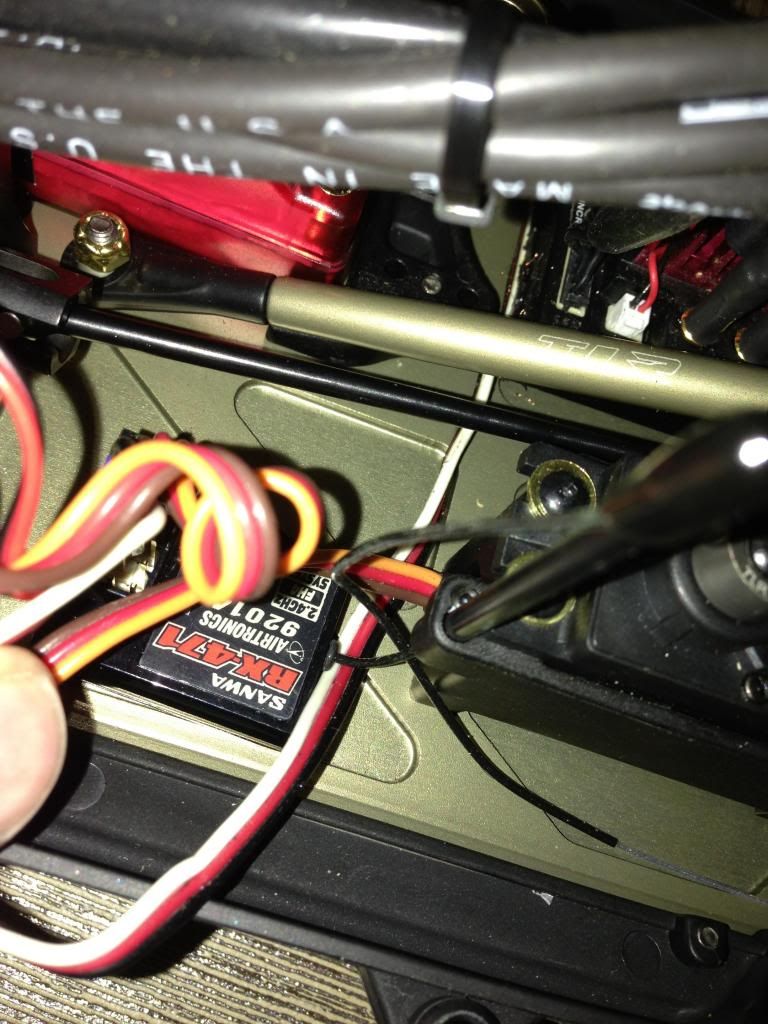
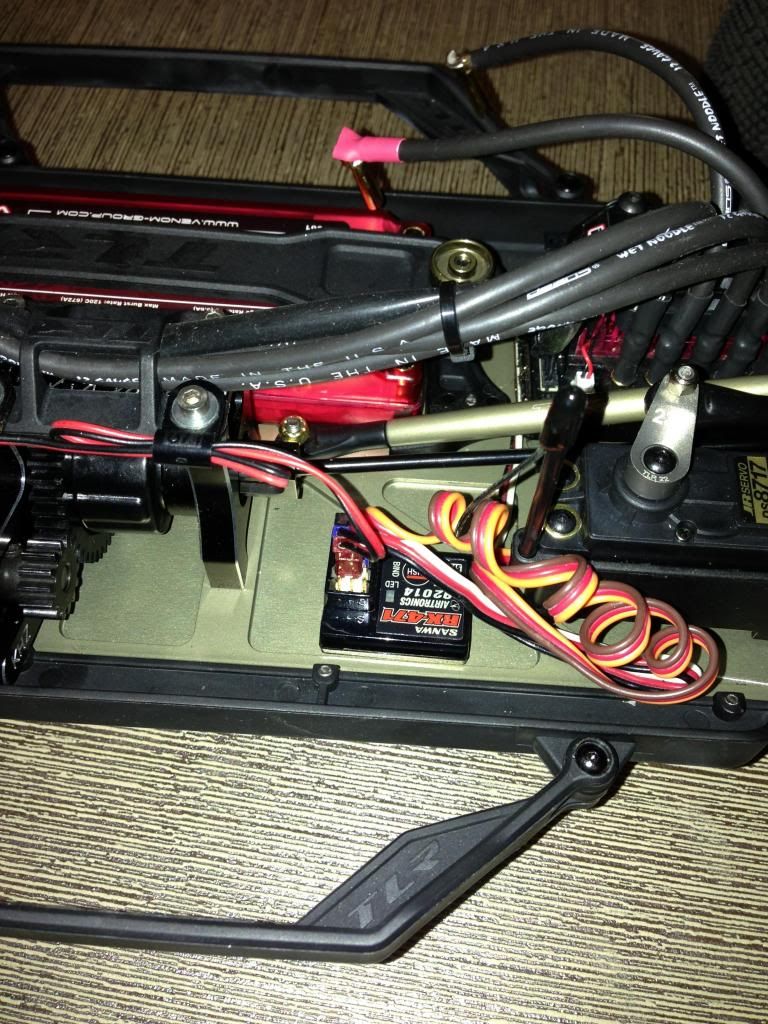
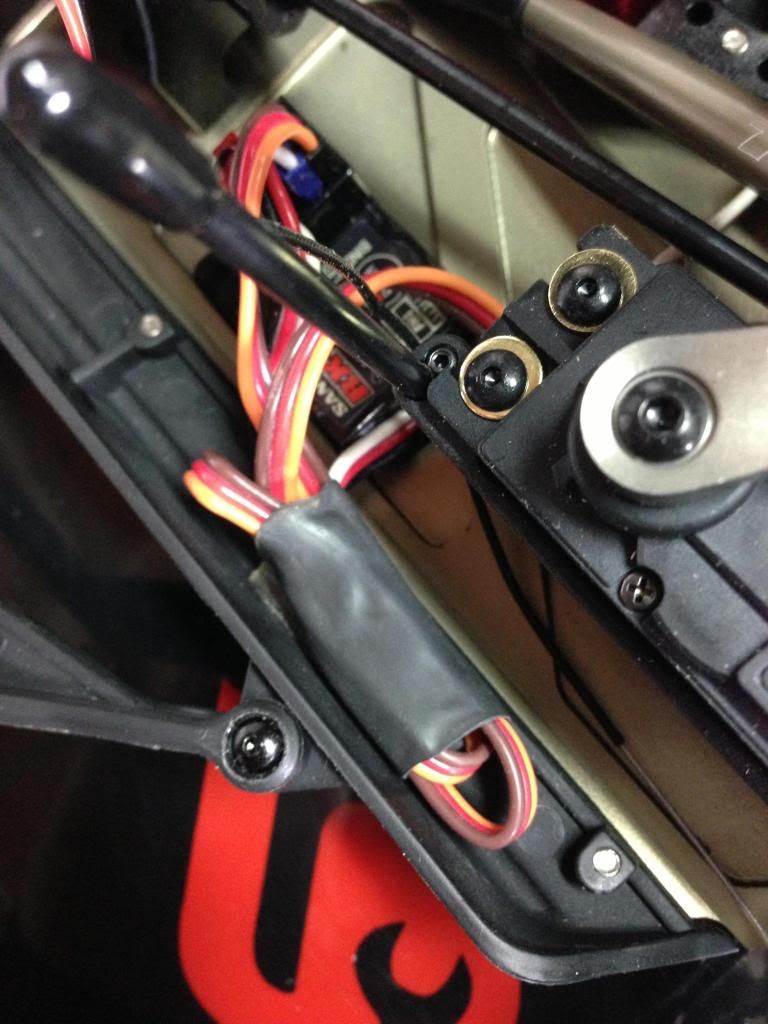
I actually took a large piece of shrink tube and put the excess servo and esc wiring in it. I used servo tape and stuck the strink tubed wire to the side of the chassis. That was the easiest thing I could think of.
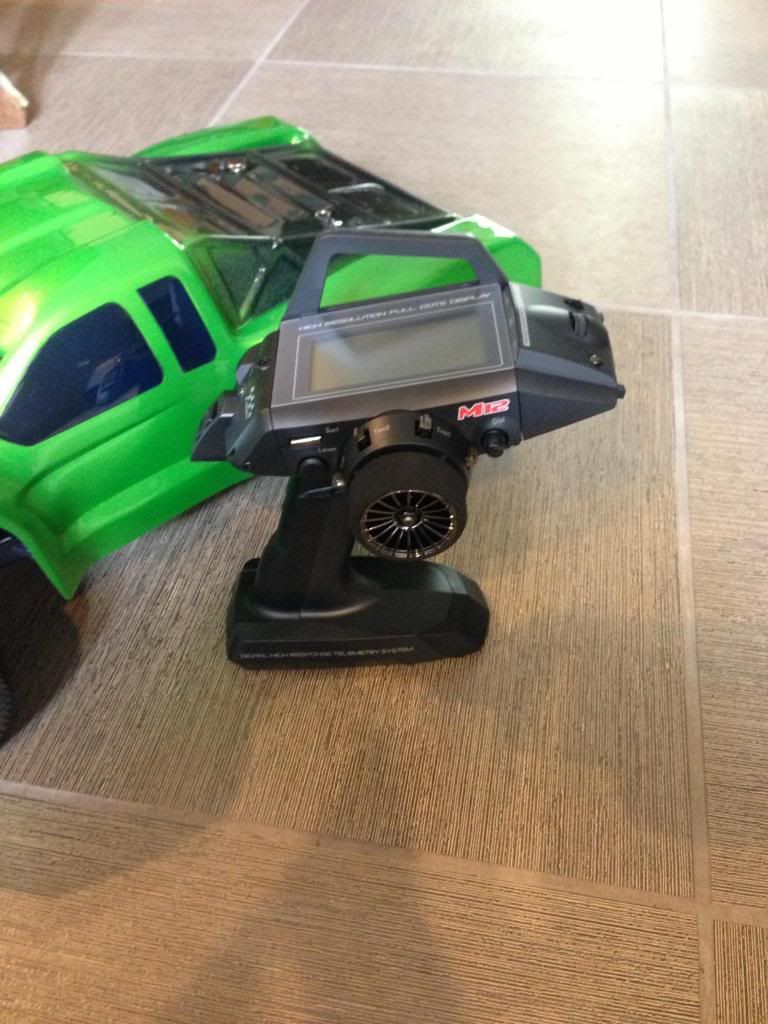
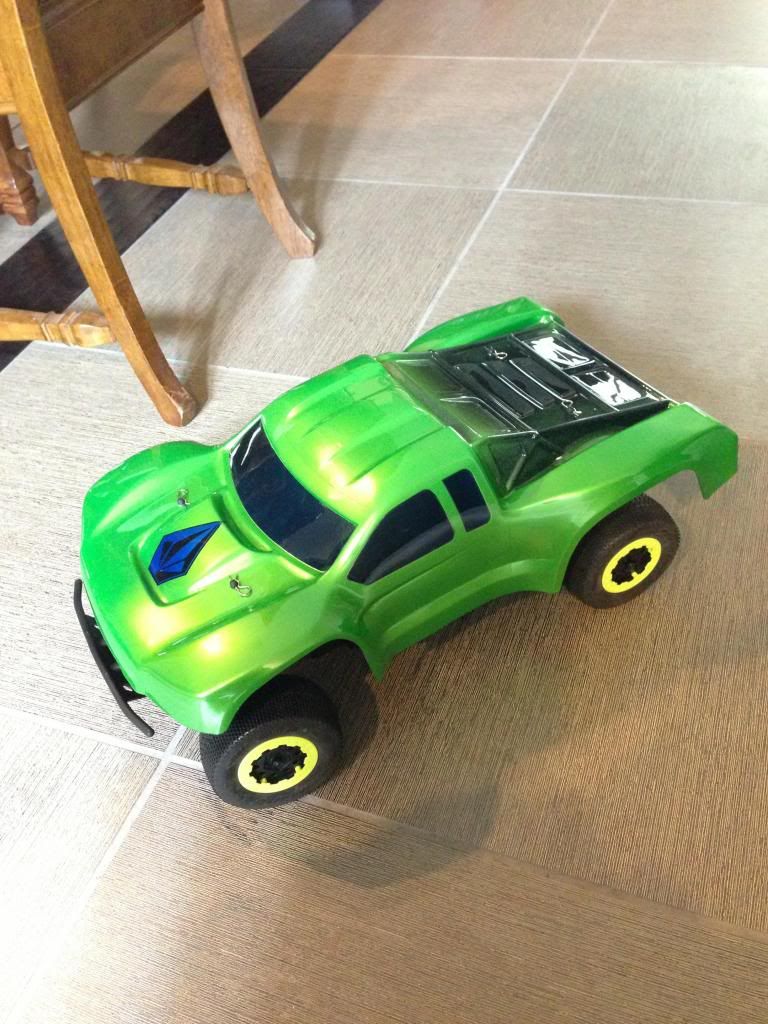
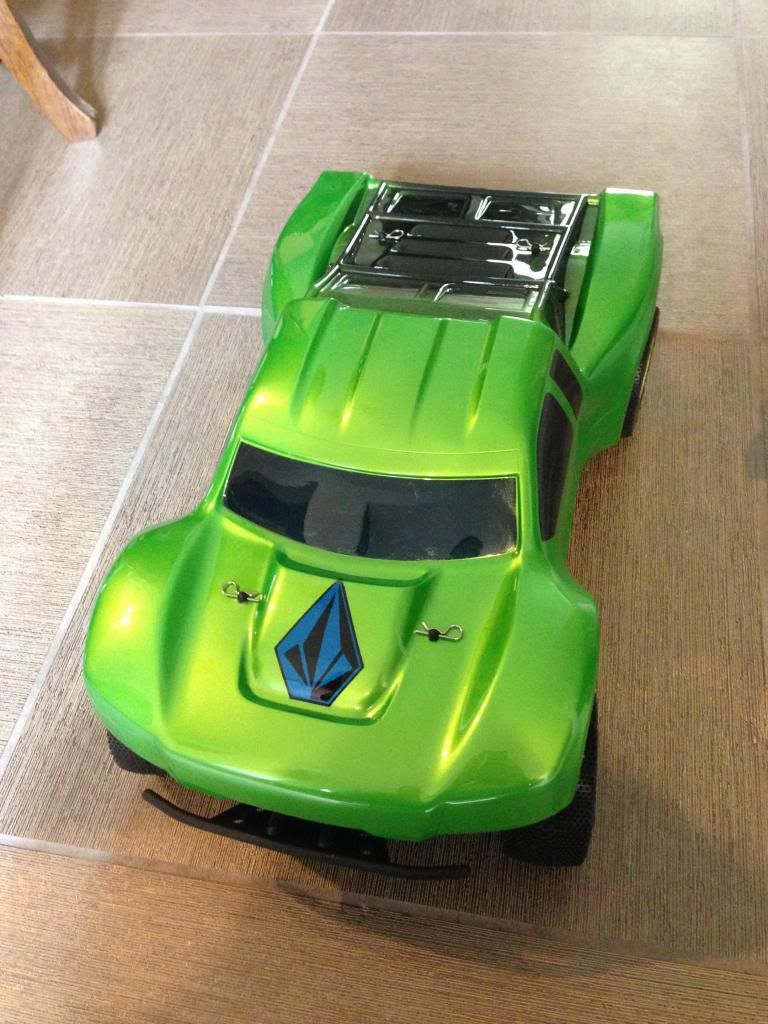
Also pictures of my body and my new toy (M12) hehehe... can't wait to get this out to the track! I haven't raced in 15 years!
One word of advise for those who still didn't build there kit.. in the manual it shows to make the front toe adjusters like 98mm or something like that.. well I used my micrometers and made every turn buckle exact length.. the front has sooo much toe in!! The manual has to be wrong on that measurement. I havent adjusted mine yet so I don't know what length is a good starting point, but it needs to be much shorter!
03-06-2013, 10:01 AM
#1329
Suspended
Servo tape followed by a thin bead of ShoeGoo around the edge, and I've never had anything ever come loose.
03-06-2013, 10:03 AM
#1330
alright thanks for the info
03-06-2013, 10:23 AM
#1331
Tech Master
iTrader: (25)
I actually took a large piece of shrink tube and put the excess servo and esc wiring in it. I used servo tape and stuck the strink tubed wire to the side of the chassis. That was the easiest thing I could think of.
Also pictures of my body and my new toy (M12) hehehe... can't wait to get this out to the track! I haven't raced in 15 years!
One word of advise for those who still didn't build there kit.. in the manual it shows to make the front toe adjusters like 98mm or something like that.. well I used my micrometers and made every turn buckle exact length.. the front has sooo much toe in!! The manual has to be wrong on that measurement. I havent adjusted mine yet so I don't know what length is a good starting point, but it needs to be much shorter!
03-06-2013, 10:27 AM
#1332
Tech Apprentice
There was some talk earlier in this thread of using a balloon or large shrink tube over the receiver for protection. I really like the shrink over the leads on the RX8 Volcomstned; real clean looking (and the green on the body, what paint/color is that!)! I too use the Deans wet noodle wire, really happy with it.
Casper I wanted to ask a follow up question to your answer about the turnbuckle length in the manual stock setup sheet was wrong and to make sure they are both the same length and adjust as needed. I don't believe the original question was answered though, does the length specified in the manual setup sheet reflect the toe angle in the setup sheet? How about the SCTE 1.0 is it true for that too?
I actually use the losi shock matching tool to measure the turnbuckle length and ensure they are of equal length; but the measurements are from the center of the screws and not the outer edge of the eyelets. If I know that too be true, I'll have an easier way to build the turnbuckles. I understand that I'll may need to perform final toe measurements once the wheels are on, but I wouldn't expect there need to be much adjustment at that point.
03-06-2013, 10:38 AM
#1333
[QUOTE=RC-Rick;11898400]There was some talk earlier in this thread of using a balloon or large shrink tube over the receiver for protection. I really like the shrink over the leads on the RX8 Volcomstned; real clean looking (and the green on the body, what paint/color is that!)! I too use the Deans wet noodle wire, really happy with it.
Thank you! I let the GF pick out the body color since I ignored her for 2 days while I built my truck lol. Its Parma PSE FasPearl Key Lime. Actually a really cool color!
Thank you! I let the GF pick out the body color since I ignored her for 2 days while I built my truck lol. Its Parma PSE FasPearl Key Lime. Actually a really cool color!
03-06-2013, 10:41 AM
#1334
I don't know why you would focus on the length of the turnbuckle for anything but a place to starts. You're going to adjust all the turnbuckles once the car is built and you put a setup on it. They can account for the final weight of the RTR vehicle. Just make certain the turnbuckles are evenly threaded into the rod ends and install them. Once your build is complete, slap in all your electronics and mount your tires - then adjust your turnbuckles.
03-06-2013, 10:48 AM
#1335
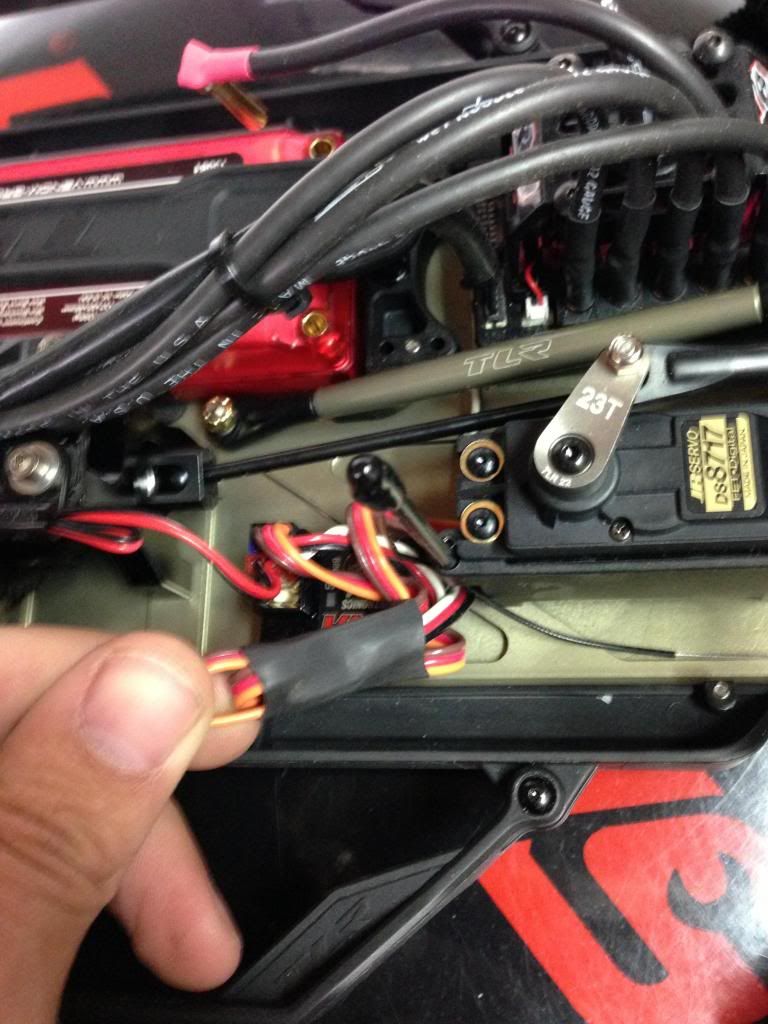
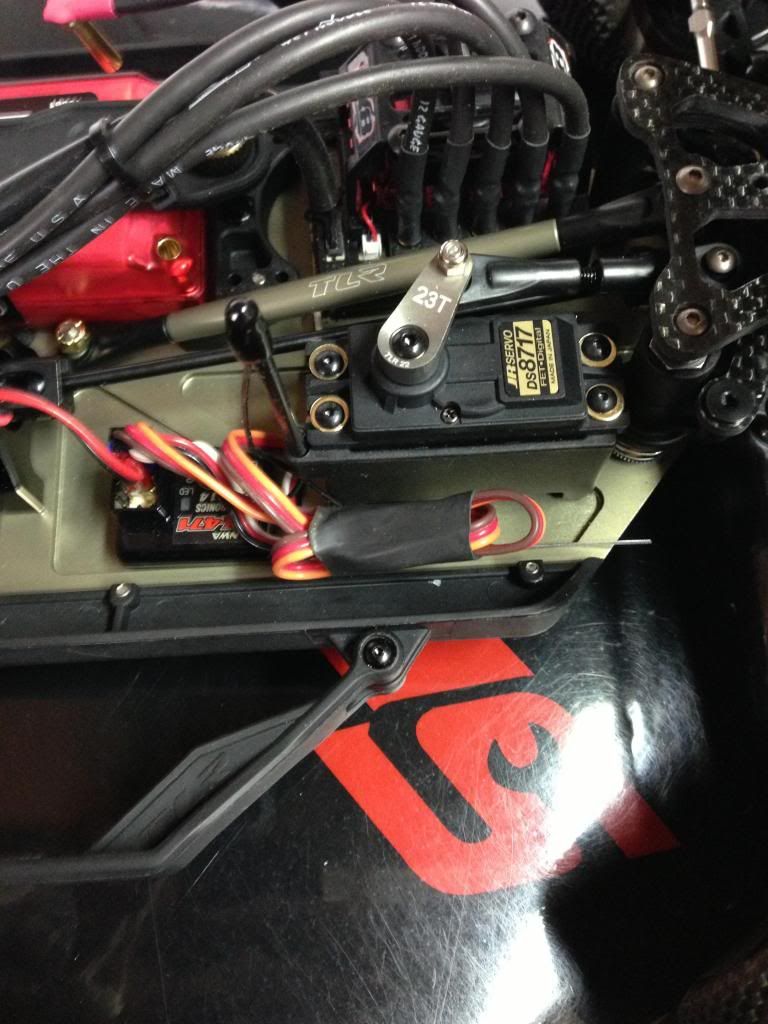
Guys when routing your reciever wire from the ESC it will fit under the servo. This will help keep the wire on the chassis and out of the way of the drive line. Just a quick tip. You don't HAVE to run it this way but something to think about as you wire up your trucks.
I agree you just want to make sure they start threaded on both ends about the same. The expecption is the two steerng links. Get these the same length before you mount and ALWAYS make equal adjustments to keep these two link the same lenght. The camber links you will be adjusted on the car and they don't have to start out the same length.
I don't know why you would focus on the length of the turnbuckle for anything but a place to starts. You're going to adjust all the turnbuckles once the car is built and you put a setup on it. They can account for the final weight of the RTR vehicle. Just make certain the turnbuckles are evenly threaded into the rod ends and install them. Once your build is complete, slap in all your electronics and mount your tires - then adjust your turnbuckles.