


 5Likes
SC10 4x4 Thread
 11-16-2011 | 08:22 AM
Kiro, while going through my truck last night and comparing your Proving Ground setup from last weekend a couple questions came up.
What if any sway bars were you using and what rear hinge pin block were you using, 3-2?
Were you using stock rear hub carriers also or some other degree carriers? What are the angle of the stock rear hub carriers anyway?
Finally what is the proper way to measure ride height? The rear seems obvious (rear directly under the gear box correct?) But the front has several steps to measure from underneath. Which one to use?
Thank you again for your help.
 11-16-2011 | 08:42 AM
Joined: Mar 2008
Posts: 5,717
From: At dirt tracks in Michigan!
Kiro, while going through my truck last night and comparing your Proving Ground setup from last weekend a couple questions came up.
What if any sway bars were you using and what rear hinge pin block were you using, 3-2?
Were you using stock rear hub carriers also or some other degree carriers? What are the angle of the stock rear hub carriers anyway?
Finally what is the proper way to measure ride height? The rear seems obvious (rear directly under the gear box correct?) But the front has several steps to measure from underneath. Which one to use?
Thank you again for your help.
What if any sway bars were you using and what rear hinge pin block were you using, 3-2?
Were you using stock rear hub carriers also or some other degree carriers? What are the angle of the stock rear hub carriers anyway?
Finally what is the proper way to measure ride height? The rear seems obvious (rear directly under the gear box correct?) But the front has several steps to measure from underneath. Which one to use?
Thank you again for your help.
I am running the stock rear hub carriers which don't add any toe to my knowledge.
For the ride height you want to measure on the main center chassis for both front and rear. The rear end steps up like the front end, so if you measure under the rear gearbox you will be a good 4mm lower than I was. Easiest way to make sure you are measuring at the same points I was is to take the measurements at the very back of the battery (if you are running a stick pack) just in front of the rear tire and then at the very front of the battery just before the chassis starts to narrow at the servo mounts. Those points should be the lowest points on the chassis compared to the ground and are where Maifield and other AE drivers measure from when filling out the ride height on the setup sheets.
I measured at home and I was at 20 mm for the rear and 22 for the front. I remember starting at equal ride height front and rear at the start of the day, but the turn in was a touch too aggressive so I raised the front by a couple turns compared to the rear.
11-16-2011 | 08:55 AM
Joined: Mar 2008
Posts: 5,717
From: At dirt tracks in Michigan!
Also, how you compress the car will affect where car sits at "ride height" on the bench. When I go to set my ride height I bounce the car a couple times, bottom the car out, and then roll the car forward a tad (~6") as I release it. This removes any resistance the tires add as the car tries to widen its stance while the arms extend out. Some just compress and let it settle and others just drop the car a foot or so, but to me this mimics what the car sees on the track after landing off a jump the best. The other methods are fine as long as you do it consistently so that any change in ride height is a direct result of preload changes and not a part of the measurement process.
11-16-2011 | 09:46 AM
Prototype top deck/battery hold down for sticks as well as saddles.
Makes the middle chassis very stiff. The draw back: the flex is transfered to the transmission cases!
There is still belt sag from fore-aft flex of the two plastic chassis piece/ transmission case, so I opted to keep the top rod.
Makes the middle chassis very stiff. The draw back: the flex is transfered to the transmission cases!
There is still belt sag from fore-aft flex of the two plastic chassis piece/ transmission case, so I opted to keep the top rod.
11-16-2011 | 09:51 AM
Tech Adept
Joined: Jul 2011
Posts: 203
From: Virginia
http://www3.towerhobbies.com/cgi-bin...?&I=LXCKT0&P=7
ooooh cheaper.
Edit: I hope everyone is aware i've only been harassing about this chassis more for fun than opinion.
ooooh cheaper.
Edit: I hope everyone is aware i've only been harassing about this chassis more for fun than opinion.
 11-16-2011 | 10:02 AM
Joined: Mar 2008
Posts: 5,717
From: At dirt tracks in Michigan!
 11-16-2011 | 10:03 AM
Tech Elite

Joined: Oct 2011
Posts: 2,069
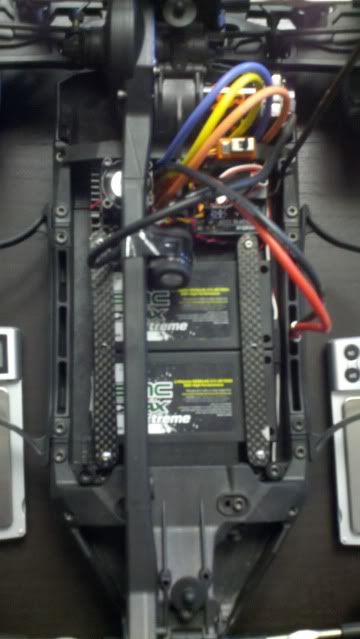
I would charge both packs using an adaptor so you can charge them all in series as if it was one big 4s battery so the cells from both packs are balance togather.
11-16-2011 | 10:10 AM
Tech Elite
Joined: Oct 2011
Posts: 2,069
11-16-2011 | 10:47 AM
Joined: Mar 2008
Posts: 5,717
From: At dirt tracks in Michigan!
Right now I'm almost locked down with my current slipper pad setup letting the pads glaze slightly. I can't bring myself to spend $20 when I only want one disk. Anybody want to split a 3 pack with me that lives near Ann Arbor, MI?
 11-16-2011 | 11:05 AM
I just finished tearing my truck completely apart to check for wear and to get it cleaned up for winter....quick question:
Is there any trick to getting the sun gear out of the diff? The one that is deep down inside the diff housing?
The one that you get easy access to came off easily once I blasted the gears with motor cleaner to get rid of most of the oil, but that's not working for the one inside the diff housing...and I can't get anything looped under the gear that would allow me to pull it out!
Help!
11-16-2011 | 11:33 AM
I have not simply because I can get enough "bite" with these pads to lock the slipper if I sand the pads regularly. I imagine throwing a garodisk on the front and putting two HD pads in the basket would provide a similar front to rear balance while allowing more adjustment on the slipper nut and reducing maintenance.
Right now I'm almost locked down with my current slipper pad setup letting the pads glaze slightly. I can't bring myself to spend $20 when I only want one disk. Anybody want to split a 3 pack with me that lives near Ann Arbor, MI?
Right now I'm almost locked down with my current slipper pad setup letting the pads glaze slightly. I can't bring myself to spend $20 when I only want one disk. Anybody want to split a 3 pack with me that lives near Ann Arbor, MI?
11-16-2011 | 11:45 AM
Joined: Sep 2002
Posts: 3,546
From: Northern VA
I just finished tearing my truck completely apart to check for wear and to get it cleaned up for winter....quick question:
Is there any trick to getting the sun gear out of the diff? The one that is deep down inside the diff housing?
The one that you get easy access to came off easily once I blasted the gears with motor cleaner to get rid of most of the oil, but that's not working for the one inside the diff housing...and I can't get anything looped under the gear that would allow me to pull it out!
Help!
Is there any trick to getting the sun gear out of the diff? The one that is deep down inside the diff housing?
The one that you get easy access to came off easily once I blasted the gears with motor cleaner to get rid of most of the oil, but that's not working for the one inside the diff housing...and I can't get anything looped under the gear that would allow me to pull it out!
Help!