


 22Likes
Tekno RC EB48.3 Thread
 12-13-2015 | 08:22 PM
#901
Tech Fanatic
iTrader: (2)
Joined: May 2013
Posts: 855
From: Kingsport, TN (Still SC tho)
The kit comes with alum vented shock caps tkr6003. The caps have a vent hole in top of the cap. You can buy aluminum non-vented shock caps tkr6003b or buy the plastic shock caps (tkr6018). If you want emulsion shocks, you have to buy the plastic caps (tkr6018) and drill according to the manual. The plastic shock caps are standard by default, but you can drill them according to the manual to achieve vented or emulsion shocks.
 12-14-2015 | 12:09 AM
#902
Thanks for the info guys. I now understand. Vented is default for this kit. The explanation had me confused. Hopefully I get to build them and finish the buggy off tomorrow. Pulled all the electrics out of my old car today. 
12-14-2015 | 06:44 AM
#904
Drove my upgraded 48.2 this weekend for the first time . Bumps and jumps are better , corner exit is better , but this car does give up the off power initial steering the 48.2 has . I cannot wait to get on a track with a groove and see how the new car feels then. I would imagine that's where its going to shine. It does seem less twitchy and more stable which I think will really pay off for me over 10 minutes
12-14-2015 | 08:27 AM
#905
Tech Addict
Joined: Jan 2006
Posts: 504
From: Athens, Greece
Hello everyone!
We have decided to make a series of videos that will help everyone get the most out of their Tekno RC cars. One of the most frequent questions we have received is regarding the turnbuckles and what is the easiest method to build them. Here is a short video that will help you with that!
We have decided to make a series of videos that will help everyone get the most out of their Tekno RC cars. One of the most frequent questions we have received is regarding the turnbuckles and what is the easiest method to build them. Here is a short video that will help you with that!
| + YouTube Video | |
12-14-2015 | 11:31 AM
#906

Drove my upgraded 48.2 this weekend for the first time . Bumps and jumps are better , corner exit is better , but this car does give up the off power initial steering the 48.2 has . I cannot wait to get on a track with a groove and see how the new car feels then. I would imagine that's where its going to shine. It does seem less twitchy and more stable which I think will really pay off for me over 10 minutes
12-14-2015 | 11:58 AM
#907
Yeah . I went to the trailing axle 15 Dg set up . I am going to be patient and drive the car a few more times , in more realistic conditions and decide then . The track was green , and the timing system wasn't on so I have no true comparison yet.
12-14-2015 | 05:31 PM
#908
Tech Regular
Joined: Aug 2003
Posts: 283
From: N Cal
I finally broke something on my buggy, has only taken about forty battery packs to do so. I spent most of Saturday breaking in and setting up a new 22-3, grabbing the 48.3 to have some serious fun, it still puts a grin on my face when driving it.
The weekends are a mix of racers doing practice days and tweaking their setups and quite a few novices right down to kids having just bought a brand new short course and throwing it on the track the first time. At first I was always nervous heading out on the track with the smaller 1/10th scale and the beginners, always hate hitting a turned over buggy, so does the owners of said smaller vehicles. Lately, I have really been enjoying the ability to maneuver through a very packed field of varied skill sets, forces me to see better through periphery visuals and pick better lines to get through the scrum.
About the fourth battery pack I was launching off a very high speed step-down on our back straight, you hit it wide open on the 1/8th scales. Buggy was fully pegged and hauling butt when one of the short course blew the infield and just clipped my buggy as it was leaving the face of the step-down. That was the first time I have seen an 1/8th scale tumble the length of the straight, it was tumbling on it's left side for about thirty or forty feet before coming to a stop. One of the marshal goes over, gives it a visual inspection and says it all appears to be in one piece, tosses it down and in a few feet driving away it was obvious something was wrong. Turns out the rear-right shock shaft was bent! LOL, nearly eight pound vehicle tumbles from wide open along it's left axis, at least 15-18 full revolutions of pounding impacts on front and rear arms and shock towers and all that is damaged is a bent shock shaft

This buggy just rocks!
Two of the other guys on the track, one with a brand new Associated B83 or what ever it is called and one with the HB 1/8th scale were impressed, both admitted that would of likely been a $100.00 dollar crash with their buggies.
12-14-2015 | 08:05 PM
#909
Anyone had a problem with the standard pistons being tight in the shock body? I've built all my shocks and they all rebound about the same. On one of the rears I can't get any rebound because the piston is tight.
12-14-2015 | 11:16 PM
#912
Took the shock back apart and took a few little notches off the plastic rings that go in the bottom of the shock and it worked. Must have been a little bit pushing the ring off centre and into the shaft. Was able to achieve rebound. The hard bit was getting the silly screws that hold the bottom of the shock into the arm. What's wrong with a normal hex screw? For that matter why did Tekno make them left and right hand threads?
12-15-2015 | 01:49 AM
#913
on a normal car they attach like this:
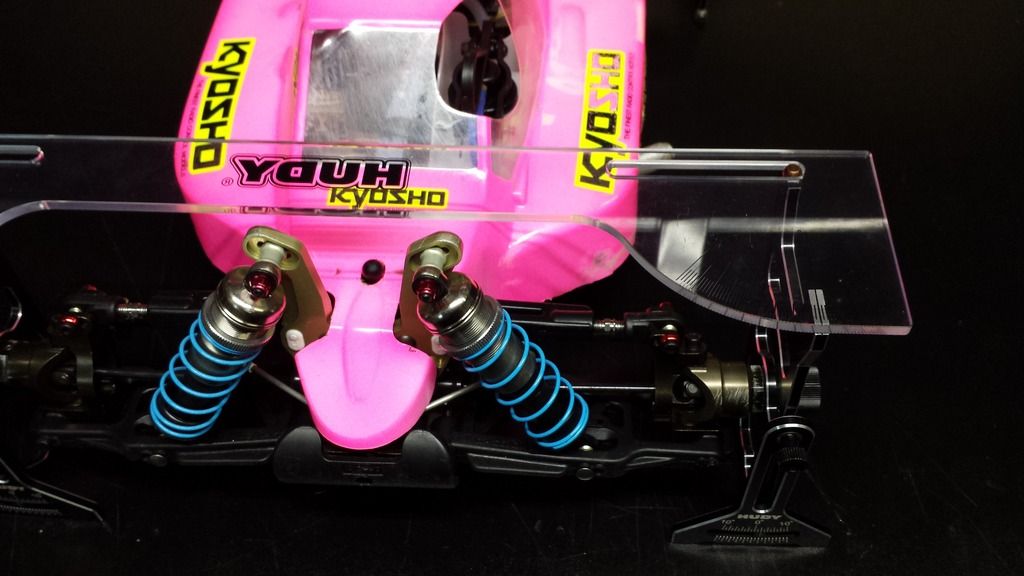
on the shockzilla you have to mount like this:
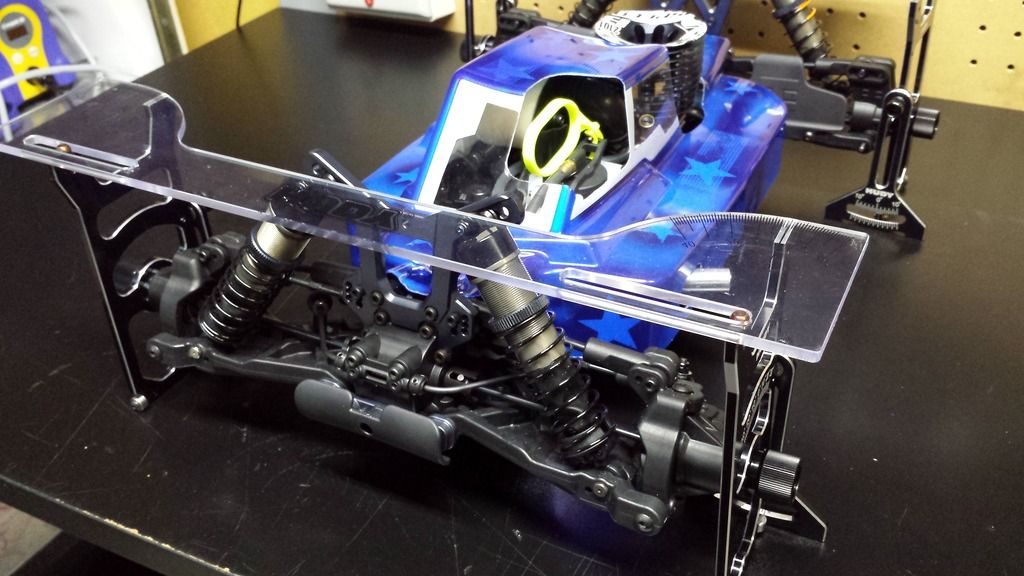
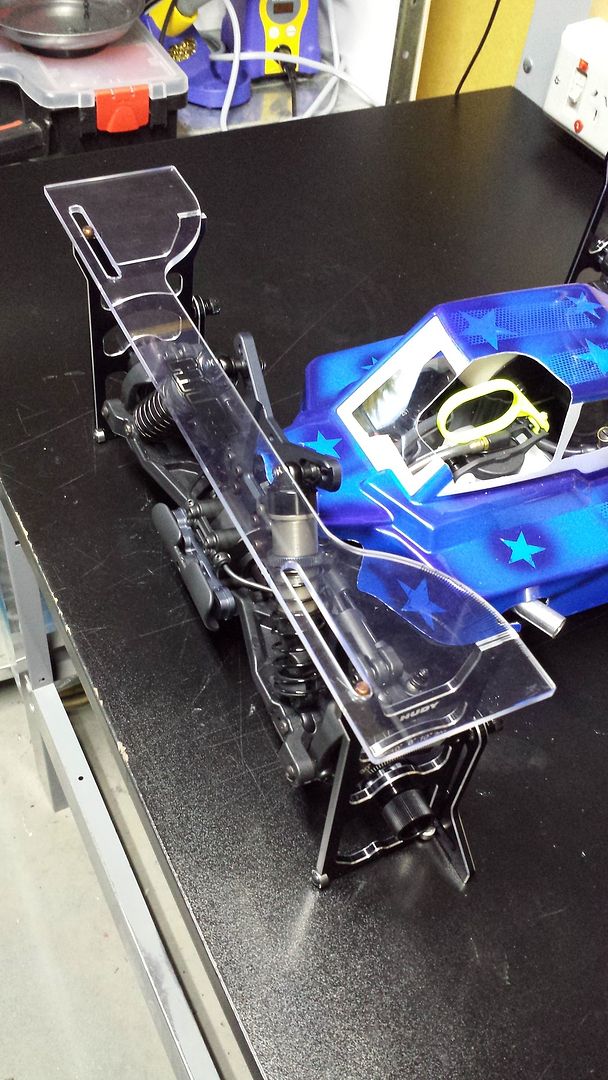
it means that when you read off the camber angle you will have to look from this perspective:
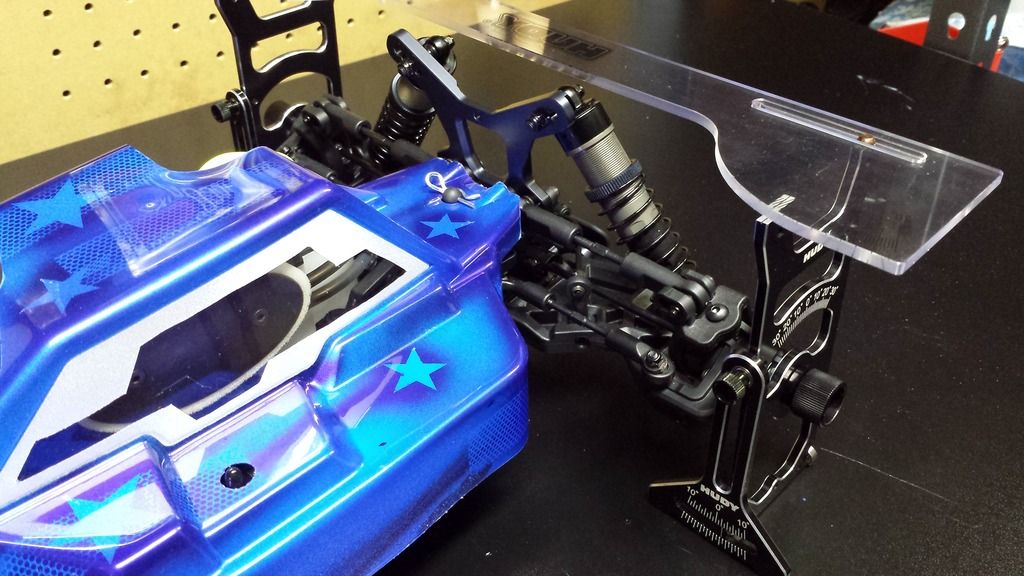
and seeing as the toe plate is reversed, you will want it set on the + positive side in order for it to be - negative or toe out.
also for best results make sure your chassis is sitting on the 30mm blocks for consistent results.
hope that helps
12-15-2015 | 08:41 AM
#915
Took the shock back apart and took a few little notches off the plastic rings that go in the bottom of the shock and it worked. Must have been a little bit pushing the ring off centre and into the shaft. Was able to achieve rebound. The hard bit was getting the silly screws that hold the bottom of the shock into the arm. What's wrong with a normal hex screw? For that matter why did Tekno make them left and right hand threads?
Check your retaining nuts for the top of the shocks, I bet the side opposite the left handed bottom screw has to be re-tightened more often than the other.