Community
Wiki Posts
Search
Like Tree12Likes

Tekno NB48

Thread Tools
 
Search this Thread
 
Old 03-18-2014 | 08:28 AM
  #976  
FastPete's Avatar
Tech Champion
iTrader: (44)
 
Joined: Jan 2009
Posts: 5,311
From: Orland Park IL
Default

Originally Posted by vandalzzz
All three diff cases have very-very tight fit into metal spur gears. Is it ok, anyone experienced same 'feature'? Should i grind some plastic with sandpaper?
Noticed the same thing, they do go on just tight. I thought about breaking the edge on the OD.
FastPete is offline  
Old 03-18-2014 | 04:27 PM
  #977  
Hoese37's Avatar
Tech Elite
iTrader: (5)
 
Joined: Apr 2007
Posts: 3,819
From: Hutchinson, MN
Default

Originally Posted by FastPete
Noticed the same thing, they do go on just tight. I thought about breaking the edge on the OD.
When I did a dry fit, the rear was really tight. I did chamfer the OD and it slid right in with out a problem.
Hoese37 is offline  
Old 03-18-2014 | 05:21 PM
  #978  
vandalzzz's Avatar
Tech Fanatic
 
Joined: Jul 2013
Posts: 762
From: somewhere near Japan
Default

Also i've noticed that web manual says go into 5C holes for rear camber link, but printed version has 6D position for this. Which one is correct for 'kit' setup?
And what about drop screws? They're supposed to be downwards in rear arms, and upwards in front arms.
vandalzzz is offline  
Old 03-18-2014 | 05:59 PM
  #979  
teknorc's Avatar
Tech Elite
iTrader: (2)
 
Joined: Jul 2005
Posts: 3,160
From: So Cal
Default

Originally Posted by vandalzzz
Also i've noticed that web manual says go into 5C holes for rear camber link, but printed version has 6D position for this. Which one is correct for 'kit' setup?
And what about drop screws? They're supposed to be downwards in rear arms, and upwards in front arms.
The setups on the web are newer setups. You could start with one of those rather than the kit setup. Either way, pick one and follow it exactly. Then make changes from there.

Yes the droop screws are reversed in front to get more droop if necessary.
teknorc is offline  
Old 03-18-2014 | 06:31 PM
  #980  
vandalzzz's Avatar
Tech Fanatic
 
Joined: Jul 2013
Posts: 762
From: somewhere near Japan
Default

Originally Posted by teknorc
The setups on the web are newer setups. You could start with one of those rather than the kit setup. Either way, pick one and follow it exactly. Then make changes from there.

Yes the droop screws are reversed in front to get more droop if necessary.
Thanks for info about setups.
About rear droop screws: if they're supposed to be placed heads down, how can i reach their hex sockets after assembling whole buggy? I suppose that they gonna be blocked by the droop pads on the chassis, or i missing something?
vandalzzz is offline  
Old 03-18-2014 | 06:37 PM
  #981  
JsK's Avatar
JsK
R/C Tech Elite Member
iTrader: (10)
 
Joined: Aug 2009
Posts: 1,674
From: S.Oregon
Default

Originally Posted by vandalzzz
Thanks for info about setups.
About rear droop screws: if they're supposed to be placed heads down, how can i reach their hex sockets after assembling whole buggy? I suppose that they gonna be blocked by the droop pads on the chassis, or i missing something?
There is a Hex in both ends.
JsK is offline  
Old 03-18-2014 | 06:54 PM
  #982  
vandalzzz's Avatar
Tech Fanatic
 
Joined: Jul 2013
Posts: 762
From: somewhere near Japan
Default

Originally Posted by JsK
There is a Hex in both ends.
Mine in Bag H looks exactly like that (part no. also from manual) and doesn't have any hex on the end of thread section unlike droop screws on my ebuggy, that's why i'm a bit confused.
vandalzzz is offline  
Old 03-18-2014 | 07:17 PM
  #983  
BigInJapan's Avatar
Tech Addict
iTrader: (18)
 
Joined: Oct 2013
Posts: 747
Default

Yeah the ones in the NB48 don't have a hex in the threaded end. I just adjust mine in small increments by compressing the shocks to get to it
BigInJapan is offline  
Old 03-18-2014 | 07:20 PM
  #984  
YANMAN's Avatar
Tech Master
iTrader: (41)
 
Joined: Nov 2001
Posts: 1,237
From: Austin, Texas
Default

Originally Posted by vandalzzz
Mine in Bag H looks exactly like that (part no. also from manual) and doesn't have any hex on the end of thread section unlike droop screws on my ebuggy, that's why i'm a bit confused.
Mine are the same way. I have no hex head on the screw end. I was thinking you just run full droop all the time.
YANMAN is offline  
Old 03-18-2014 | 09:05 PM
  #985  
DBL15's Avatar
Tech Elite
iTrader: (8)
 
Joined: Dec 2010
Posts: 3,171
From: Gold Coast
Default

Originally Posted by vandalzzz
Thanks for info about setups.
About rear droop screws: if they're supposed to be placed heads down, how can i reach their hex sockets after assembling whole buggy? I suppose that they gonna be blocked by the droop pads on the chassis, or i missing something?
you can get to the droop screws easy as when its all assembled no problem

just lift the arm a bit and the screw head is there
DBL15 is offline  
Old 03-19-2014 | 02:12 AM
  #986  
JsK's Avatar
JsK
R/C Tech Elite Member
iTrader: (10)
 
Joined: Aug 2009
Posts: 1,674
From: S.Oregon
Default

Originally Posted by vandalzzz
Mine in Bag H looks exactly like that (part no. also from manual) and doesn't have any hex on the end of thread section unlike droop screws on my ebuggy, that's why i'm a bit confused.
Serves me right for not checking, i just assumed they had the hex in the end.
JsK is offline  
Old 03-19-2014 | 05:54 AM
  #987  
Bernard_Jr's Avatar
Tech Fanatic
iTrader: (1)
 
Joined: May 2011
Posts: 750
From: Jacksonville, Fl
Default Aluminum Axle Update

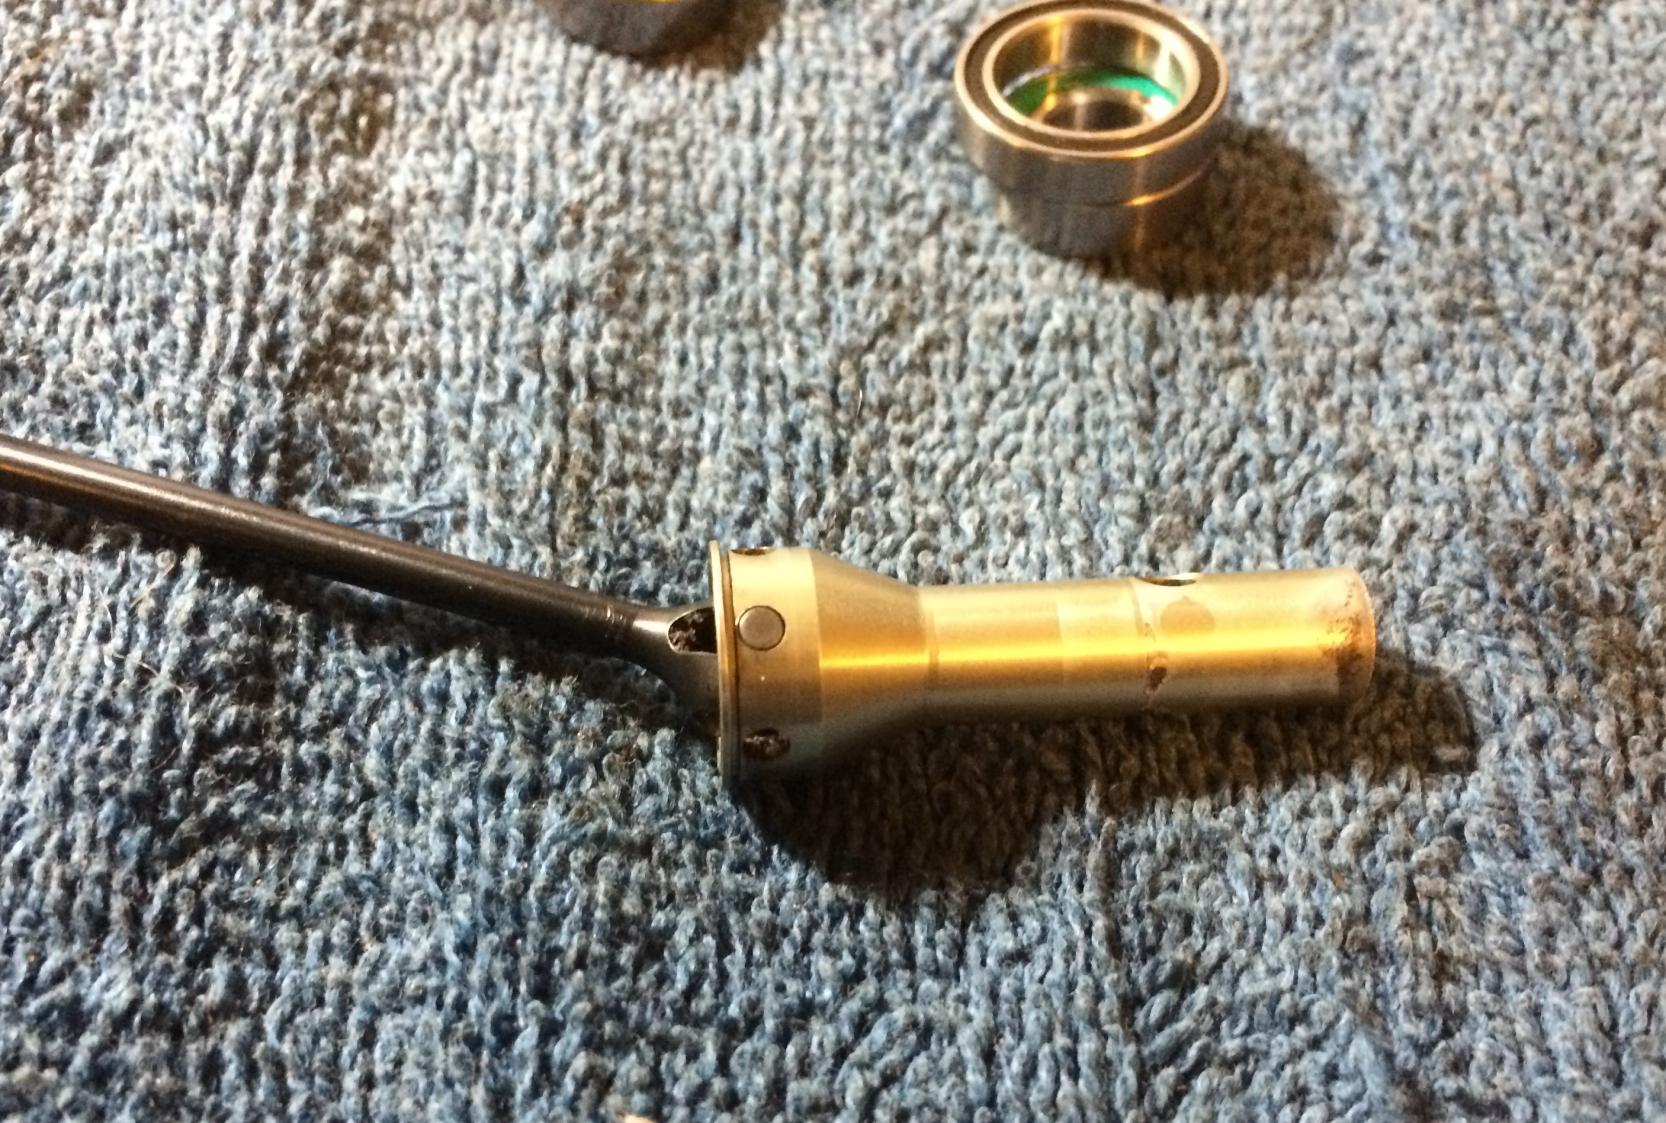
I'm swapping out the bearings in my NB and wanted to give an update on the Sylveris RC aluminum axles. I probably have about 2-3 hours of driving on the axles so far and they show no signs of wear or damage.
Tekno NB48-img_6824-crop.jpg
I'll be heading up to PNB next week and that track can break anything so I'll let you know how they do.
Bernard_Jr is offline  
Old 03-19-2014 | 08:01 AM
  #988  
Numburn's Avatar
Tech Addict
iTrader: (11)
 
Joined: Feb 2010
Posts: 734
From: Byram, MS
Default

Just get some Mugen droop screws. You can adjust from either end.
Numburn is offline  
Old 03-19-2014 | 08:31 AM
  #989  
Tech Fanatic
iTrader: (61)
 
Joined: Feb 2010
Posts: 985
From: Chula Vista, CA
Default

Originally Posted by Numburn
Just get some Mugen droop screws. You can adjust from either end.
mr240 is offline  
Old 03-19-2014 | 09:13 AM
  #990  
Tech Master
iTrader: (16)
 
Joined: Jan 2013
Posts: 1,109
From: Japan
Default

Originally Posted by Numburn
Just get some Mugen droop screws. You can adjust from either end.
+3
masher81 is offline  


Contact Us - Archive - Advertising - Cookie Policy - Privacy Statement - Terms of Service -

Copyright © 2026 MH Sub I, LLC dba Internet Brands. All rights reserved. Use of this site indicates your consent to the Terms of Use.