Go Back  R/C Tech Forums > General Forums > Electric Off-Road
Tekno RC EB410 Thread >

Tekno RC EB410 Thread

Community
Wiki Posts
Search
Like Tree2421Likes

Tekno RC EB410 Thread

    Hide Wikipost
Old 05-13-2019, 06:33 AM   -   Wikipost
R/C Tech ForumsThread Wiki: Tekno RC EB410 Thread
Please read: This is a community-maintained wiki post containing the most important information from this thread. You may edit the Wiki once you have been a member for 90 days and have made 90 posts.
 
Last edit by: tobamiester
Welcome to the EB410 Wiki page.

Basic Stats/Features:
  • Shaft drive (tapered AL for light weight and straightness)
  • Gear differentials (all 3)
  • Low Angle CVAs (with captured pins so no ejecting them!)
  • Durable stub axles with 12mm hexes and optional offset adjustments
  • Reverse bellcrank steering system
  • Quick access bulkheads (for easy diff maintenance and tuning)
  • Spllt center diff holder (for easy diff maintenance and tuning)
  • 8th scale style motor mount (for easy mesh adjustment)
  • 13mm big bore shocks
  • 3.5mm shock shafts
  • Droop screws

Videos
Servo Horns
Tekno included a plastic servo horn but also offers an aluminum one. This is highly recommended. Here's a list of servo horns that have been found to work:
Gearing:
Works out of the box for mod or 13.5.
  • Preference for Associated factory team pinions
  • Start mod gearing around 21t pinion
  • Start 13.5 gearing around 29t pinion with the stock spur (81tooth). If using a Tekin Spec R 13.5, start with a 24t pinion for medium sized indoor tracks.
  • Internal Gear Ratio: 2.5:1
  • For comparison:
  • B64 is 2.47:1
  • 22-4 is 2.4:1
  • YZ4 is 2.6:1

Wheels
  • B6/22/rb6 wheels direct fit
  • 22-4/XB4 front wheels direct fit
  • B64 front wheels will fit, but you need the +1 hexes (can use #TKR1654X, which is a +1mm hex)
  • 22 2wd front wheels will also fit, possibly a good option for carpet.

Setup Sheets and other documentation
Setup sheets for all Tekno RC vehicles can be found here. Please be sure to try our recommended setup. It works very well on most tracks.
Piston Drills:
Some of our setups recommend using pistons that are enlarged. For instance 4x1.9 or 3x2.0. To drill the pistons we recommend the following:
Aftermarket Upgrades:
Warranty Policy:
Tekno RC is the only company in the industry that will give 50% off of parts if returned to them using the General Warranty return policy found on their website. The parts can be lightly used or completely abused, as long as the part is still being produced it's covered!


Build Tips:
  • When fastening the steering posts with a 5.5mm socket wrench, you can back space the socket with some nuts to help drive the post into the bulk head

  • Place an alcohol swab over metal threads and drive screws through the swab to clean both sides of threads before applying thread lock

  • Use a metallic marker to indicate what fluids you have filled in your diffs for easy identification

  • Apply thin layer of grease on crown gears to help hold gaskets in place for easy hole alignment

  • Bags F and H have 2 different size set screws, be sure to use the smaller 3x3mm screws for the hexes or you may run into problems installing wheels over the hex if you use the longer 3x4mm screws
  • To make is easier to slip the o-rings on the shock cap bleeder screws, apply a drop of shock oil and slip them over a 1.5mm hex bit, then line up the bit with the screw and transfer the o-ring over using fingernails or needle nose pliers
  • pinch+rotate shock caps in 17mm hex wrench to improve roundness
    More shock build tips here
  • Use a 3.05mm drill bit or 3.05mm Kyosho arm reamer, 1/8" drill bits are not recommended because they are 3.17mm in diameter and tend to introduce too much slop, the pins are roughly 2.97mm in diameter
  • Replace the stock 3x14mm screws (TKR1405) with 3x20mm screws (TKR1409) in step H-10 in the manual in order to increase durability to the bulkhead.

  • When installing the front and rear differentials into the bulkheads be careful when tightening the 3x8mm screws of the cover that holds the diff in place. Bottom out the screws first (use a hand driver and make it hand tight) then check the diff to make sure it rotates smooth. If it binds up, start by backing out each screw 1/8-1/4 of a turn until the both front and rear diffs move freely. The plastic threads will keep the screws in place so don't worry if you think the screws are not secure.
  • When installing the steering hub kingpins (TKR6596), drive each one in hand tight only. Then check the movement of the steering hub. If it binds up, back out the kingpin screws by 1/8-1/4 of a turn until it moves freely. Then install the set screws (TKR1601) to hold it in place. Only drive the set screw in until you make contact with the kingpin. Do not force it.
  • If using the low profile servo mount, be sure to use smaller OD (outter diameter) washers to avoid rubbing on the center drive shaft. Protek ball stud washers are a good example of the acceptable diameter. You can chose to not run washers though it is recommended to use them as it makes for a more secure mount.

  • Ball Cup Alternative from AE: ASC91453. These are used as a harder composite option if you are not happy with the softer stock plastics. Note that these are approximately 2-3mm shorter and require compensation when building your kit to the manual specs to achieve proper camber/toe settings


  • Wheel Nut Alternative: Yokomo 4mm Thin Aluminum Serrated Flanged Nut

    https://www.amainhobbies.com/yokomo-...-n4flt/p541494


  • Moving Rear Shocks to the Front of the A-arm

    This is the break down of what's required by one of the Eb410 FB users.

    Joey A.

    So since there has been some people wondering about running the shocks in the front of the arm I though I would try explaining everything that I did to get them to work and why. My goal was to run as much stock stuff as possible with the least amount of modifications.

    -Arms- need to be flipped and 1mm shaved off the back (spacing the arm farther back) running it this way the car is still a mm shorter then stock but more material could be removed for more adjustability but I have found no need to make the car longer.

    -Inner ball stud- there are 2 ways of mounting, the first can be used with the stock plastic tower. All you need to do is use a 10mm ball stud instead of the lower shock mount screw and a little clearance from the shock tower and diff case. Using this method will work but the ball stud is moved lower and farther in then the stock locations which requires different pivot locations to try and correct roll centers. The other way (preferred) using the option carbon tower drill a hole higher and farther out if done properly you will be able to get the ball stud location in the correct hight(0mm) and between the two stock locations.

    -Shocks- only 2 changes from stock you will need to space the top shock mount 2mm out. You will also need to run around 1.5-2mm less droop depending on your setup.

    -Sway bar- this is the hardest part of the swap. This can be done a million ways I chose to print a mount in the stock ball stud location which allowed me to use the stock swaybars and arm mounting position. You can also bend your own bar and use the stock mounts on the back. You will have to drill your arms on the other side and closer to the pivot for this to work (remember you will need a thinner bar the closer you mount the lower pickup on the arm to get the same feeling as stock).

    -Other- you will need to remove the drop screws on the rear arm. Depending on rear rims,hubs,ballcups and setup you might need to clearance the outer ball cup so it doesn’t rub on the wheel.

    -Why- the benefits of running the shocks in the front are the ability to run a softer rear shock package without giving up corner speed and pack. The car will land without chassis slapping or packing out as easy allowing you to drive the car harder and it corners flatter and rotates faster without losing rear grip.

    Sorry for the shity grammar,
    TJR

    Sway bar mount for forward mounted shocks: https://www.ebay.com/itm/Tekno-EB410...4AAOSwYNxahFkq

Print Wikipost

Thread Tools
 
Search this Thread
 
Old 12-18-2017, 07:45 AM
  #2851  
Tech Elite
iTrader: (89)
 
Motorman007's Avatar
 
Join Date: Dec 2003
Posts: 3,420
Trader Rating: 89 (100%+)
Default

Wonderful info sir thank you for your time on this.


Originally Posted by billdelong
I got my 13.5T Monster Max motor back from Trinity yesterday... just in time to get 1 qual and a main.. phew

Anyway, several things I've learned.

1) I thought I was having power fade issues and decided to send my motor into Trinity to have them look it over... they said nothing was wrong with the motor. I then went back and examined my car more closely to discover my loss of power was from a stripped hex on one of the front wheels. I had been using AVID +1mm hex spacers and this severely limited the amount of contact to the wheel, so I replaced them with the +1mm hexes for the SCT410: https://www.teknorc.com/shop/tkr1654...d-ae-sc10-4x4/


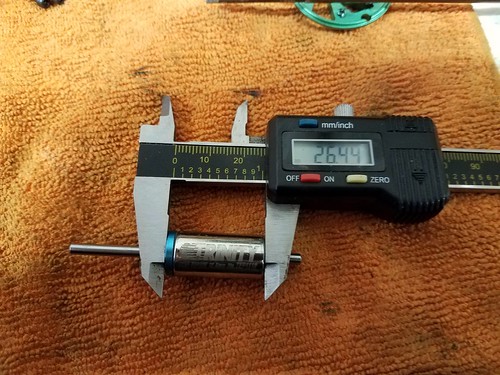
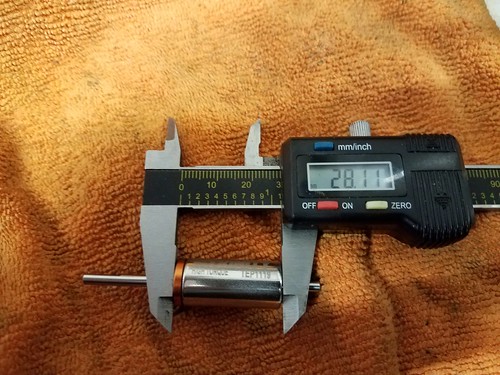
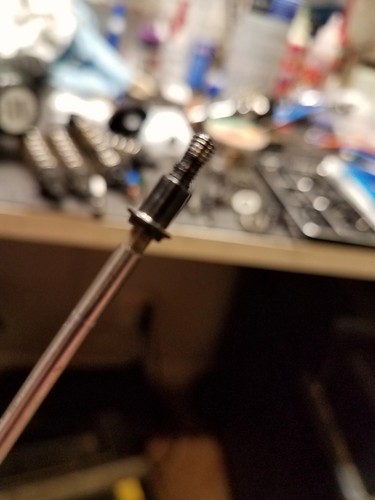
2) Kudos to Trinity on many counts, first I was happy with their honesty, they could've easily said something was wrong with the motor I wouldn't have known the wiser and would've bought whatever they said was broken... at first I was bummed that I sent in a perfectly good motor for service, but as it turned out, they noticed that I was running the TEP1112 (blue) rotor and had recommended that I upgrade to the TEP1119 (copper) rotor which I learned is roughly 1.5mm longer and offers a pinch more torque and is better suited for 4WD Buggy:


3) I had spoke with Kevin over the phone and he was extremely helpful, patient and answered all of my questions. He actually convinced me to invest in a motor analyzer. Simply put if anyone is going to run in 13.5T stock (regardless of the brand of motor) you need to put your motor on an analyzer and set the timing based on the amp draw. Every brand of motor has a different peak draw which I've seen range anywhere from 3-6A and Kevin explained that the MonsterMax does best at 5.6A

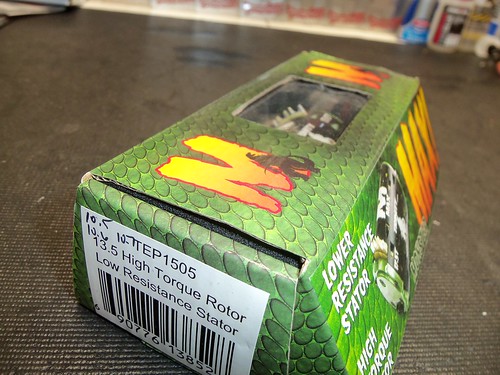
4) Kevin also explained what the markings where on the side of my box (10.5 + 10.6 + 10.7), they were hand written by Eric Anderson who tested/tuned the motor before he shipped it to me originally from Team EA Motorsports, and these markings are the amount of resistance. Apparently when you get a certified motor, they mark the resistance readings on those motors, where Eric Anderson provides this level of service for free. Kevin also mentioned that these resistance readings were exceptionally well for a non certified motor.


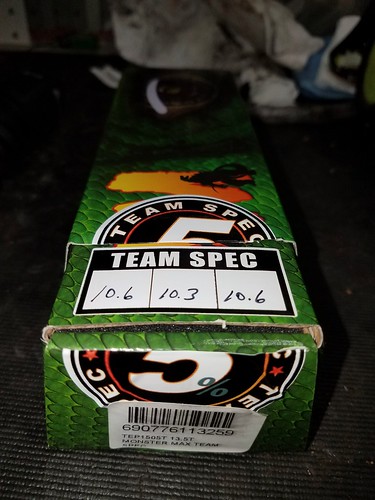
Here is a sample reading of a Team Spec motor which is guaranteed to be within the top 5% of motors produced:


5) Gearing was the last thing we discussed, I explained that I was running on turf with 24/81 gearing and Kevin confirmed this was too low, he said depending on track size that I should bump up to something between 26/81 to 28/81. I really didn't have any time to do any testing so I only ran 26/81 yesterday and was really pleased with the results. Now that I was running without a stripped hex, my lap times were back on pace and I was back in the mix at our local club. I will definitely try 27T and 28T pinions next time if have the opportunity for some practice!

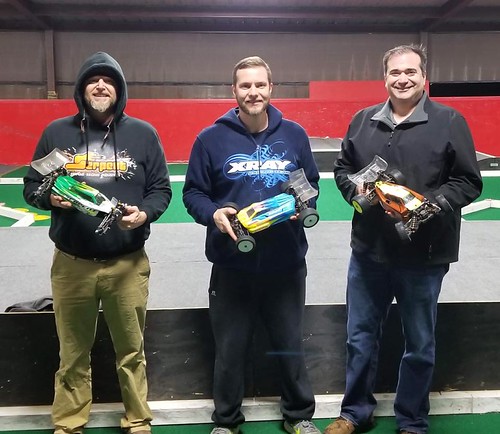
I'm far from the best driver in my area, but every now and then I get a pretty good run. I'd like to think that the stronger rotor and higher gearing I ran this week helped contributed to me getting on the podium (aside from running Tekno, ha!) in a field of 19 drivers ( to a C Main) but the car definitely had some hole shot and this would actually mean the difference between finishing 3rd (after a costly bobble) to a nail biter "Superman Pass" into 2nd on the last jump of the last lap in the main, it was a risky move, but I had nothing to lose and it paid off, thanks Tekno!

https://www.youtube.com/watch?v=-xFvn1gfSCU

+ YouTube Video
ERROR: If you can see this, then YouTube is down or you don't have Flash installed.


I'm the guy on the far right in the pic so you know which car is mine in the video clip:

billdelong likes this.
Motorman007 is offline  
Old 12-18-2017, 10:01 AM
  #2852  
Tech Master
 
Join Date: Oct 2014
Location: Maine
Posts: 1,167
Default

Originally Posted by billdelong
I got my 13.5T Monster Max motor back from Trinity yesterday... just in time to get 1 qual and a main.. phew

Anyway, several things I've learned.

1) I had been using AVID +1mm hex spacers and this severely limited the amount of contact to the wheel, so I replaced them with the +1mm hexes for the SCT410: https://www.teknorc.com/shop/tkr1654...d-ae-sc10-4x4/

It was mentioned early on to not use the avid shims for this exact reason. Thanks for bringing it back up so that the people newer to the EB410 can get a refresher.
ezlight is offline  
Old 12-18-2017, 10:19 AM
  #2853  
Tech Champion
iTrader: (33)
 
Join Date: Mar 2011
Location: Austin,TX
Posts: 6,194
Trader Rating: 33 (97%+)
Default

Originally Posted by ezlight
It was mentioned early on to not use the avid shims for this exact reason. Thanks for bringing it back up so that the people newer to the EB410 can get a refresher.
Yup, I had already ordered the SCT hexes and they arrived just in time too! As luck would have it, I managed to continue running that partially stripped wheel to get me through the day in a pinch... yeah I've got plenty other mounted tires but not with the right treads that I've grown to trust lately for our turf track... anyway, I've got that partially stripped wheel elevated above a bath of acetone fumes right now and hope to re-mount the tire on a fresh wheel in a few days

That stripped out wheel is pretty old anyway, been remounting tires on it for over a year now, ha!
ezlight likes this.
billdelong is offline  
Old 12-18-2017, 10:22 AM
  #2854  
Tech Master
iTrader: (49)
 
Join Date: Feb 2016
Location: Harford Co. Maryland
Posts: 1,414
Trader Rating: 49 (100%+)
Default

Originally Posted by billdelong

That stripped out wheel is pretty old anyway, been remounting tires on it for over a year now, ha!
I reuse wheels too. Frees up my budget for other things
billdelong likes this.
Scott R is offline  
Old 12-18-2017, 10:48 AM
  #2855  
Tech Champion
iTrader: (33)
 
Join Date: Mar 2011
Location: Austin,TX
Posts: 6,194
Trader Rating: 33 (97%+)
Default

Originally Posted by Scott R
I reuse wheels too. Frees up my budget for other things
yup... getting ready to upgrade my old EB48.3 to the .4 and that wouldn't be possible if I didn't pinch and scrape on all the other classes I like to run
billdelong is offline  
Old 12-18-2017, 07:35 PM
  #2856  
Tech Regular
iTrader: (10)
 
cornolio's Avatar
 
Join Date: Dec 2004
Location: Rochester NY
Posts: 278
Trader Rating: 10 (100%+)
Default

Hi everybody,
I need help on my build.How do i screw the kingpin shoulder screws to the spindles?
cornolio is offline  
Old 12-18-2017, 07:55 PM
  #2857  
Tech Regular
iTrader: (4)
 
Join Date: Oct 2017
Location: Ohio
Posts: 271
Trader Rating: 4 (100%+)
Default

Originally Posted by cornolio
Hi everybody,
I need help on my build.How do i screw the kingpin shoulder screws to the spindles?
Fit them to the spindles before trying to install to the carrier. This will get some threads started and make putting it all together a bit easier.
blueflagger is online now  
Old 12-18-2017, 08:28 PM
  #2858  
Tech Regular
iTrader: (10)
 
cornolio's Avatar
 
Join Date: Dec 2004
Location: Rochester NY
Posts: 278
Trader Rating: 10 (100%+)
Default

How do I thread it on?Are they supposed to be hexes?
cornolio is offline  
Old 12-18-2017, 08:34 PM
  #2859  
Tech Regular
iTrader: (4)
 
Join Date: Oct 2017
Location: Ohio
Posts: 271
Trader Rating: 4 (100%+)
Default

Originally Posted by cornolio
How do I thread it on?Are they supposed to be hexes?
Mine were.
blueflagger is online now  
Old 12-18-2017, 08:37 PM
  #2860  
Tech Regular
iTrader: (10)
 
cornolio's Avatar
 
Join Date: Dec 2004
Location: Rochester NY
Posts: 278
Trader Rating: 10 (100%+)
Default

Originally Posted by blueflagger
Mine were.
Mine aren't.I don't understand ,maybe I'm just tired
cornolio is offline  
Old 12-18-2017, 08:42 PM
  #2861  
Tech Champion
iTrader: (33)
 
Join Date: Mar 2011
Location: Austin,TX
Posts: 6,194
Trader Rating: 33 (97%+)
Default

Originally Posted by cornolio
How do I thread it on?Are they supposed to be hexes?
2.5mm hex head... just started working on my rebuild


*** looks like those set screws take their toll over time, my threads are starting to get an hour glass shape to them, ha!
billdelong is offline  
Old 12-18-2017, 08:51 PM
  #2862  
Tech Regular
iTrader: (10)
 
cornolio's Avatar
 
Join Date: Dec 2004
Location: Rochester NY
Posts: 278
Trader Rating: 10 (100%+)
Default

Ah...got it.Thanks for the help guys.
Mine are brand new and have that hourglass figure too.
ezlight likes this.
cornolio is offline  
Old 12-18-2017, 09:07 PM
  #2863  
Tech Champion
iTrader: (33)
 
Join Date: Mar 2011
Location: Austin,TX
Posts: 6,194
Trader Rating: 33 (97%+)
Default

Originally Posted by cornolio
Ah...got it.Thanks for the help guys.
Mine are brand new and have that hourglass figure too.
Good info, I was getting ready to replace them, I didn't take a close look at them before now and figured the set screws might've chamfered the threads but glad to know that's how they're designed in the first place, thanks!
ezlight likes this.
billdelong is offline  
Old 12-19-2017, 01:52 PM
  #2864  
Tech Master
iTrader: (35)
 
Join Date: Jan 2017
Location: Seattle
Posts: 1,243
Trader Rating: 35 (97%+)
Default

Does anybody know if LFR has discount codes I could use towards a new body/wings?

Just curious..am wanting to a second body and some wings. Any money saved this time of year is always helpful as I am sure some can relate.
Tbuggy is offline  
Old 12-19-2017, 01:59 PM
  #2865  
Tech Adept
iTrader: (6)
 
Join Date: Aug 2017
Posts: 147
Trader Rating: 6 (100%+)
Default

Can anyone compare/contrast on the driving characteristics and durability of the Tekno vs the B64D? Thinking about switching as i run alot on a rough, predominantly 1/8 outdoor offroad track that has done a number on my B64. Thanks
TRIPLE 675 is offline  


Contact Us - Archive - Advertising - Cookie Policy - Privacy Statement - Terms of Service -

Copyright © 2024 MH Sub I, LLC dba Internet Brands. All rights reserved. Use of this site indicates your consent to the Terms of Use.