


Another pit trailer build thread!
 10-04-2011, 07:36 PM
#61
Made a good bit of progress the past couple days. Got my wall up as mentioned before and I completed the framing of all my work benches. Tonight I finished up a couple of small items to my half wall.
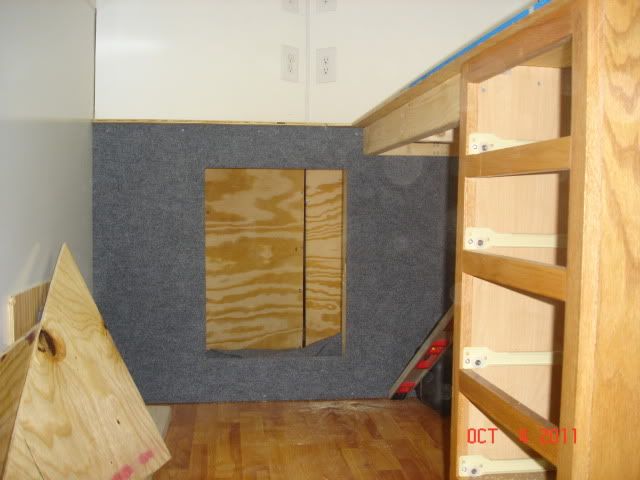
I still need to finish my door, cover it with carpet and put the hinge on.
I did get all my plywood cut and mounted

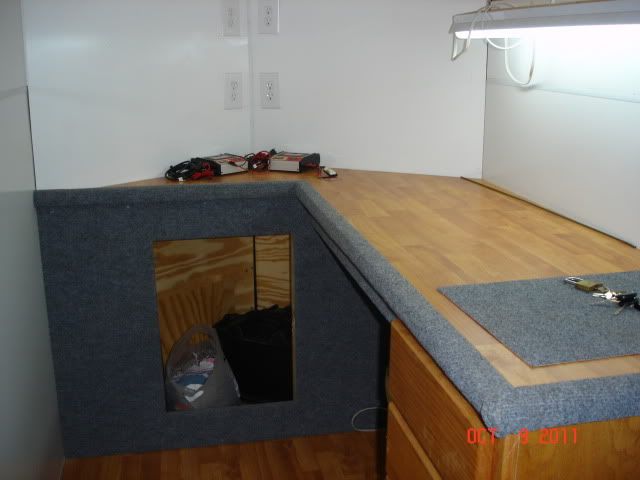
After a lot of thought on what to do for my counter tops, I took a suggestion from a guy at the track last week. He mentioned using the same hardwood that I used for the floor. I thought about it for a while and decided it would look pretty nice, be very dependable and wouldn't scratch evrytime something got drug across it. So I started doing some measuring and cutting and laying some of the wood on the work table and next thing I knew i had this.
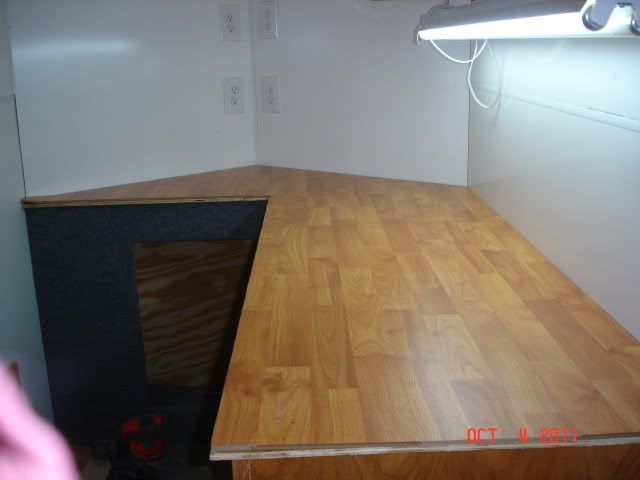

Once it was all down, I took a good look at it and decided it's a keeper!
I've got some 1"x2" trim that I plan to wrap with carpet and wrap around the unfinished edges and staple under the table. I think I may still put a small piece of carpet on the wood just to keep screws and small pieces from rolling around. Hoping to get a couple more of these things done this week before we hit the track Saturday. Gotta get some cars running first!
I still need to finish my door, cover it with carpet and put the hinge on.
I did get all my plywood cut and mounted
After a lot of thought on what to do for my counter tops, I took a suggestion from a guy at the track last week. He mentioned using the same hardwood that I used for the floor. I thought about it for a while and decided it would look pretty nice, be very dependable and wouldn't scratch evrytime something got drug across it. So I started doing some measuring and cutting and laying some of the wood on the work table and next thing I knew i had this.
Once it was all down, I took a good look at it and decided it's a keeper!
I've got some 1"x2" trim that I plan to wrap with carpet and wrap around the unfinished edges and staple under the table. I think I may still put a small piece of carpet on the wood just to keep screws and small pieces from rolling around. Hoping to get a couple more of these things done this week before we hit the track Saturday. Gotta get some cars running first!
 10-05-2011, 05:30 AM
#63
Thanks, It's a labor of love so to speek!
10-05-2011, 05:48 AM
#64
Good idea on using wood flooring for your countertop. Looks good.
10-05-2011, 05:45 PM
#65
Trailer is coming along nicely. I built one last year and its some of the best money I have spent in the hobby. Mine is a 6x12 V nose 6.5 tall. I wish I had gone 14 feet. Maybe next time....
10-06-2011, 07:23 AM
#66
I'm sure one day I'll need/want to go bigger but I'm not sure the Tacoma would like it!
10-10-2011, 06:55 PM
#67
Getting closer to completion guys! My next step was to lay down and carpet my trim pieces. I first mesured and cut my angles and cut a piece of carpet big enough to cover the trim and staple under the bottom. I did make sure to screw through the carpet so it wouldn't pull through on the top.
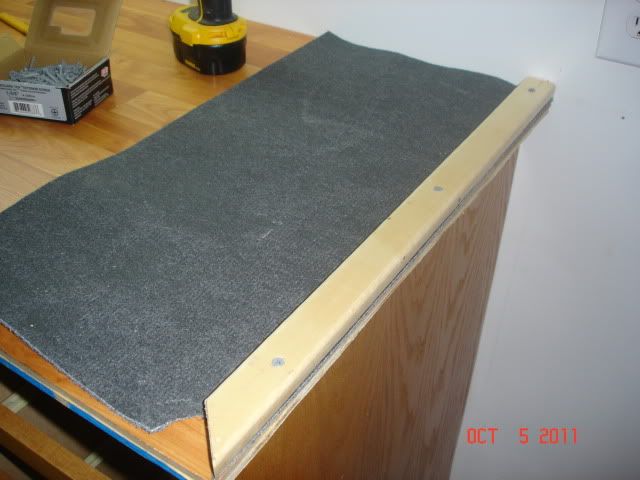
I repeted this step for all three pieces of trim making sure I could cover the
2x4 that was part of my table frame. I thought it turned out well..
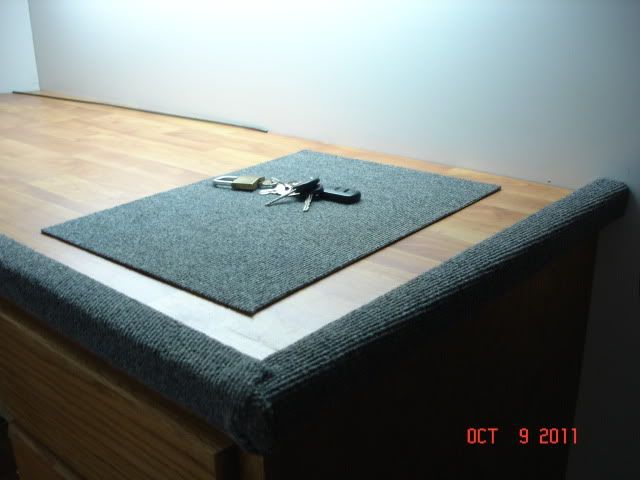
I didn't actually glue the piece of carpet down to the table top just in case I wanted to move it later.
I repeted this step for all three pieces of trim making sure I could cover the
2x4 that was part of my table frame. I thought it turned out well..
I didn't actually glue the piece of carpet down to the table top just in case I wanted to move it later.
10-10-2011, 07:23 PM
#68
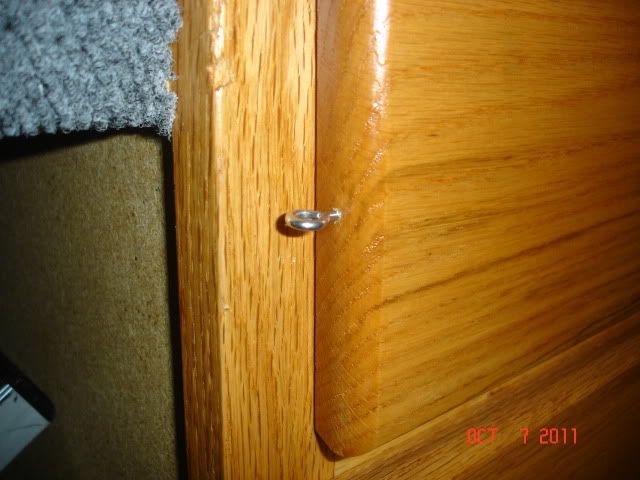
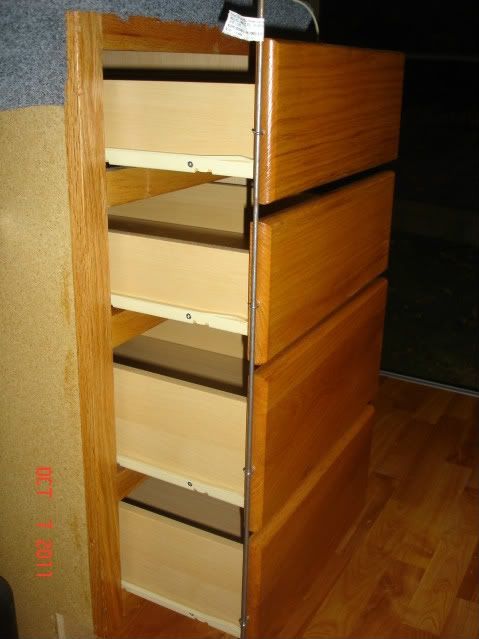
I also wanted to make sure my cabinets stay closed during travel. I considered the baby safety latches for kitchens and such since I already had those but the the way the drawers were faced the baby latches woulden't work. I decided a small diameter steel rod down the side of the drawers, stuck in the floor and through a hole in the table top. With that in mind I made another trip to Lowes and bought one of these
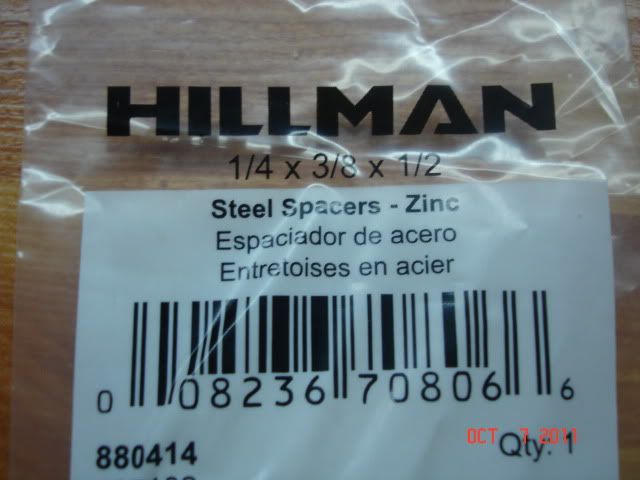
One of these
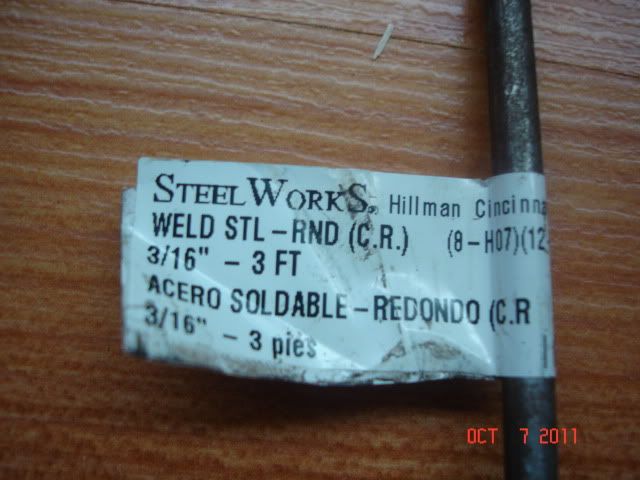
and a bag of these,
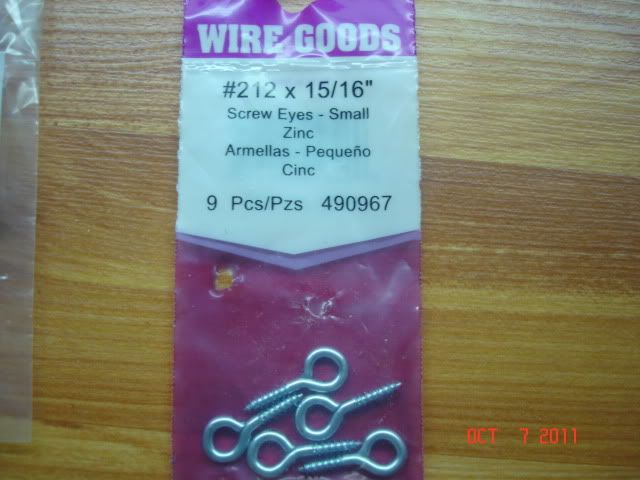
I first drilled a small hole in the side of the drawers and screwed in the eyes.
After all drawers had an eye screw in it I slid the rod in to test fit it. So far so good!
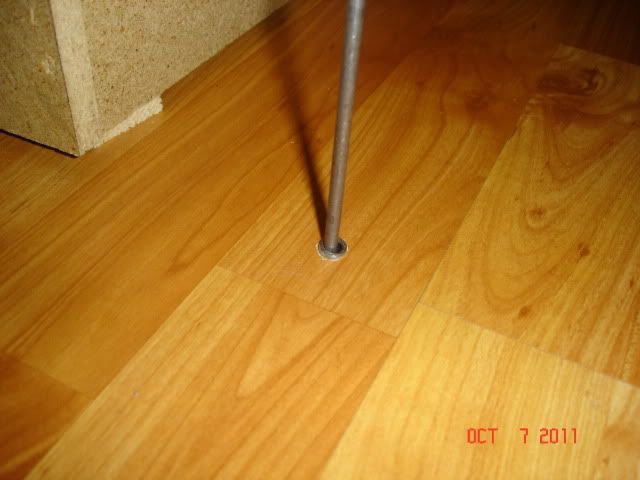
Next I drilled a hole in the floor and inserted the spacer.
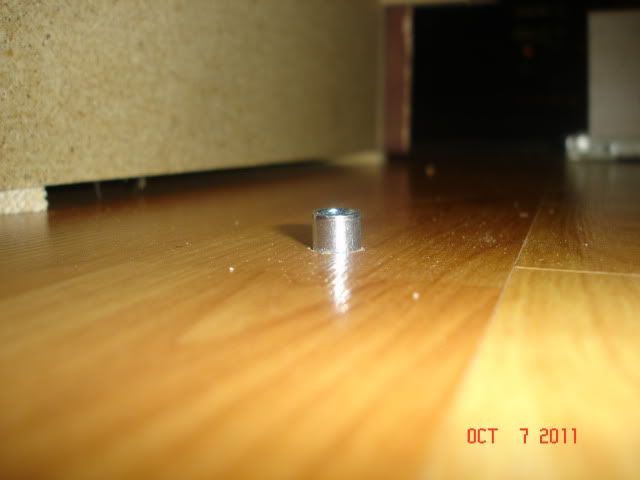
hammered it flush with the floor,
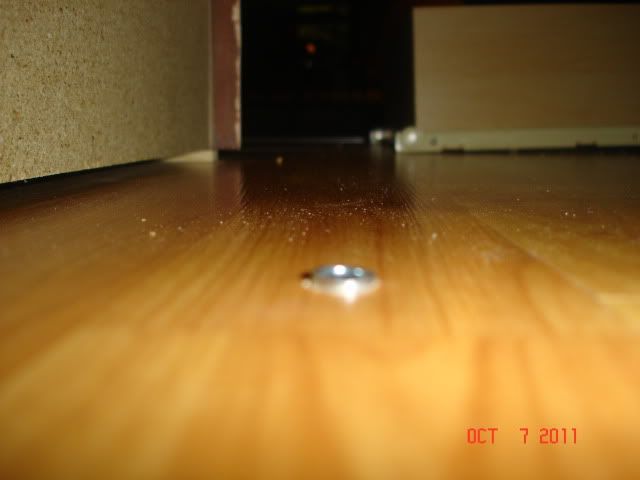
Next I had to drill a hole in the top of the table through the trim so the rod could slide through.
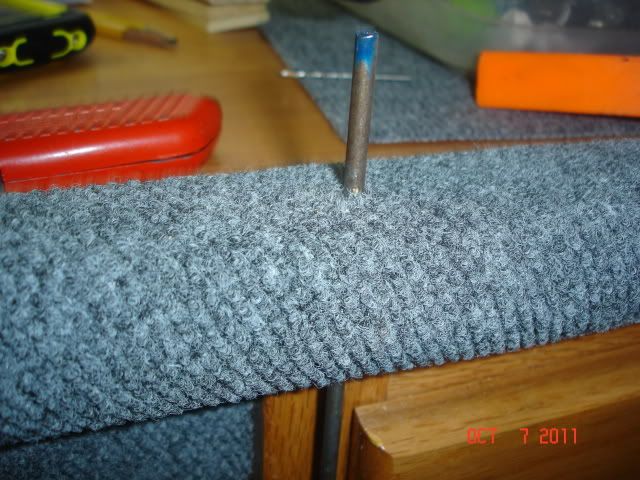
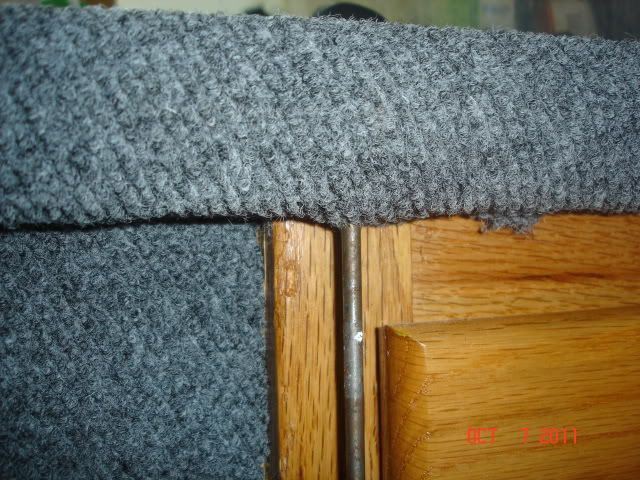
After that it slid in the spacer in the floor perfectly.
I made my first trip to the track Saturday with the latest additions and all went well, the table top worked great and the drawers didn't slide out while traveling.
One of these
and a bag of these,
I first drilled a small hole in the side of the drawers and screwed in the eyes.
After all drawers had an eye screw in it I slid the rod in to test fit it. So far so good!
Next I drilled a hole in the floor and inserted the spacer.
hammered it flush with the floor,
Next I had to drill a hole in the top of the table through the trim so the rod could slide through.
After that it slid in the spacer in the floor perfectly.
I made my first trip to the track Saturday with the latest additions and all went well, the table top worked great and the drawers didn't slide out while traveling.
10-10-2011, 07:45 PM
#69
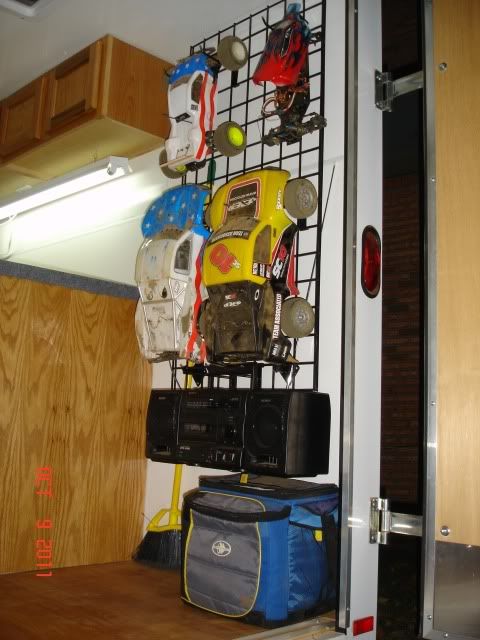
So after my day of racing I quickly learned that if all the trucks were going to be in the trailer then they needed to have their spot on the wall. I had planned on using one of these track systems with hangers but after walking through the garage I noticed a couple of steel racks and hangers they were in the laundry room when we bought our house. I did a little measuring and found that it would work perfectly. I found out how high could mount it and still have a little clearance. I mounted the rack,
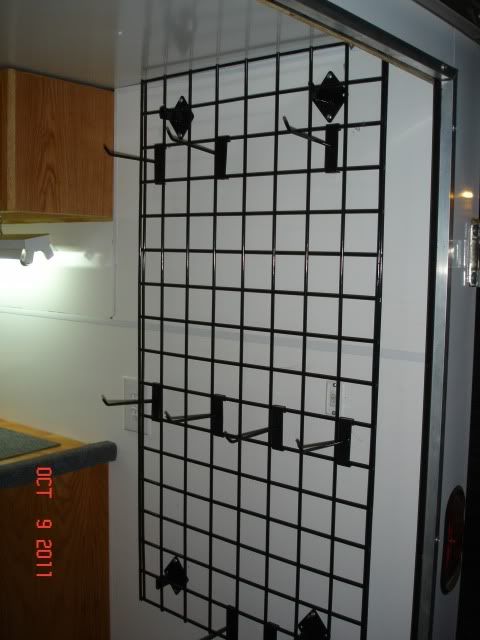
I also decided to throw a few zip ties around the mounts just to keep the rack from falling off in case I hit a larger bump.
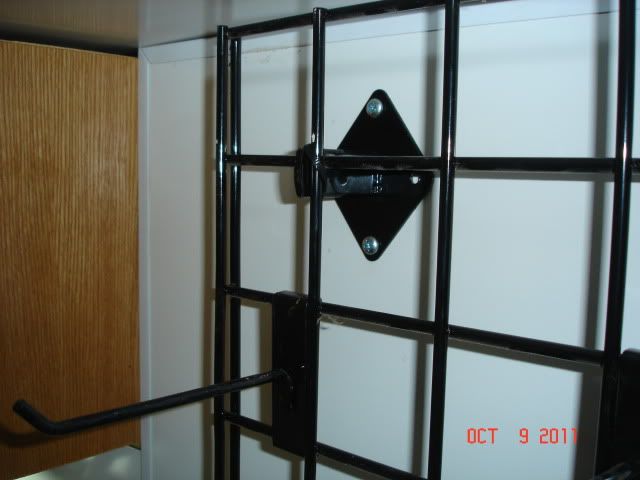
With my hooks being a little longer, they allow me to hang a truck with the tires still on it and not create flat spots.
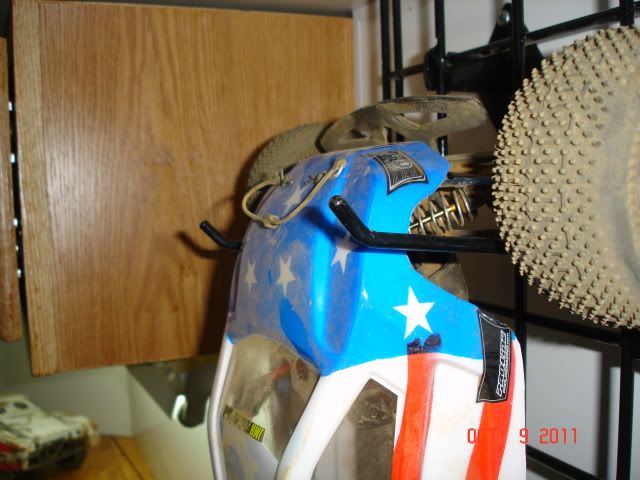
Just as with all my ideas, I moved hooks around to best fit my needs and wants. I had to mount the SC10 a little lower for my son but the rack was the perfect width for the SC10 and the Losi SCTE. The hooks are actually just the perfect length so the truck isn't pressed up against the rack but the hooks stay hidden under the bodies so on the SC trucks it looks like they are just floating there. I was also able to hang my 1980's jam box as well I can keep my broom hid behind the rack and still have enough room to sit the cooler and keep it out of the way.
My next step will be to get my peg board up and a place to keep my tools handy. Maybe sometime in the next week or so that will be done.
I also decided to throw a few zip ties around the mounts just to keep the rack from falling off in case I hit a larger bump.
With my hooks being a little longer, they allow me to hang a truck with the tires still on it and not create flat spots.
Just as with all my ideas, I moved hooks around to best fit my needs and wants. I had to mount the SC10 a little lower for my son but the rack was the perfect width for the SC10 and the Losi SCTE. The hooks are actually just the perfect length so the truck isn't pressed up against the rack but the hooks stay hidden under the bodies so on the SC trucks it looks like they are just floating there. I was also able to hang my 1980's jam box as well
I can keep my broom hid behind the rack and still have enough room to sit the cooler and keep it out of the way.My next step will be to get my peg board up and a place to keep my tools handy. Maybe sometime in the next week or so that will be done.
10-10-2011, 08:01 PM
#70
Tech Legend

iTrader: (51)
Join Date: Sep 2001
Location: Castle Mamba Max Pro. Feel its power!!!!!!!!!!
Posts: 21,220
Trader Rating: 51 (100%+)
Wow your trailer has really come along nicely. What a great job you have done with it. Love the pics and the step by step report on what you are doing to it.
Love the pics and the step by step report on what you are doing to it.
10-11-2011, 08:40 AM
#71
Thanks for kind words. I really have enjoyed the build and trying to come up with some fairly cheap and original ideas for a somewhat custom look. All trailers are differant and some more elaborate than others. I just wanted to find that middle of the road position where I had a trailer that was practical, met my needs and had just enough custom look to it. So far I think I have done just that.
Once my peg board is up I'll mount two more shelves in the nose for a radio and sattelite receiver on one and small tv on the other. I plan to have my speakers at the rear of the trailer pointing in and also to give some what of a surround sound to the TV!
Once my peg board is up I'll mount two more shelves in the nose for a radio and sattelite receiver on one and small tv on the other. I plan to have my speakers at the rear of the trailer pointing in and also to give some what of a surround sound to the TV!
10-11-2011, 08:59 AM
#72
Couple of suggestions: I found some pushbutton drawer latches that are awesome. Push the button in and it is locked. Push again and the button pops out to become the handle to open and close the drawer. I got tired of messing with straps and bungies to keep the cabinets closed while driving. I don't remember where I found them. I had to search online quite a bit but they are well worth the search.
Also well worth the trouble was mounting my power supply under the countertop where I had an outlet for the AC. Then ran DC wires to a recessed DC outlet above the countertop. That way I could plug my DC charger leads directly into the pos and neg posts that fit right into the wall. Don't have a pic at the moment, but hopefully you get the idea.
Also well worth the trouble was mounting my power supply under the countertop where I had an outlet for the AC. Then ran DC wires to a recessed DC outlet above the countertop. That way I could plug my DC charger leads directly into the pos and neg posts that fit right into the wall. Don't have a pic at the moment, but hopefully you get the idea.
10-11-2011, 09:06 AM
#73
Suspended
So after my day of racing I quickly learned that if all the trucks were going to be in the trailer then they needed to have their spot on the wall. I had planned on using one of these track systems with hangers but after walking through the garage I noticed a couple of steel racks and hangers they were in the laundry room when we bought our house. I did a little measuring and found that it would work perfectly. I found out how high could mount it and still have a little clearance. I mounted the rack.....
 I'd be worried that all that stuff would go flying the first pothole you hit.
10-11-2011, 09:47 AM
I'd be worried that all that stuff would go flying the first pothole you hit.
10-11-2011, 09:47 AM
#74
Couple of suggestions: I found some pushbutton drawer latches that are awesome. Push the button in and it is locked. Push again and the button pops out to become the handle to open and close the drawer. I got tired of messing with straps and bungies to keep the cabinets closed while driving. I don't remember where I found them. I had to search online quite a bit but they are well worth the search.
Also well worth the trouble was mounting my power supply under the countertop where I had an outlet for the AC. Then ran DC wires to a recessed DC outlet above the countertop. That way I could plug my DC charger leads directly into the pos and neg posts that fit right into the wall. Don't have a pic at the moment, but hopefully you get the idea.
Also well worth the trouble was mounting my power supply under the countertop where I had an outlet for the AC. Then ran DC wires to a recessed DC outlet above the countertop. That way I could plug my DC charger leads directly into the pos and neg posts that fit right into the wall. Don't have a pic at the moment, but hopefully you get the idea.
Luckly my chargers have power supplies built in so I currently don't have a need for DC power but if I ever do I'll be taking your approach.
10-11-2011, 09:51 AM
#75
I've really enjoyed following along with your thread and your build, how nice and almost plush you have things. But I'm curious if you think or know if the cars and trucks you have hanging (or tools on pegboard) rather loosely will remain once you take it down the road and around a few corners and over a couple of bumps and dips? I'd be worried that all that stuff would go flying the first pothole you hit.
I'd be worried that all that stuff would go flying the first pothole you hit.On my peg board I plan to use the clips to keep the hooks and such in the board and I also plan a "lid" over the top of the things that could bounce out of the holders.