


Another pit trailer build thread!
 08-31-2011, 10:38 AM
#16
Yeah it may get a little slick at times but as for getting wet-dry, wet-dry. I plan to install the flooring, scuff it up a little with a scotch brite pad and then cover it with poly. This will help to seal the flooring and also help to keep the sub-floor dry. The poly may actually make the slippery part worse but most of the time at our track its dry so this may only come in to play occasionally.
Thanks for the heads up, I really had not considered the slippery conditions.
Thanks for the heads up, I really had not considered the slippery conditions.
 08-31-2011, 10:47 AM
#17
Suspended
looking good man cant wait to see the final product.
08-31-2011, 11:14 AM
#18
Awsome thread...I'll be watching...
Good Luck, Racer53
Good Luck, Racer53
08-31-2011, 07:20 PM
#19
They do make a vent with a fan built in it and if you want fancy it can turn on and off with a remote or by temp, it can run either blowing or exhausting. All in all very cool build, i want one now
09-01-2011, 07:25 AM
#21
I did see a few of those but decided to pass for now. I'm hoping by next summer to have the A/C installed.
09-01-2011, 07:27 AM
#22

Thanks for the suggestions guys...keep em' coming and I'll keep working.
This has been a realyl fun build over all but I'm ready to actually use it!
 09-01-2011, 10:18 AM
#24
Hoping to get enough work done this weekend to get some more pictures...
09-03-2011, 08:42 PM
#26
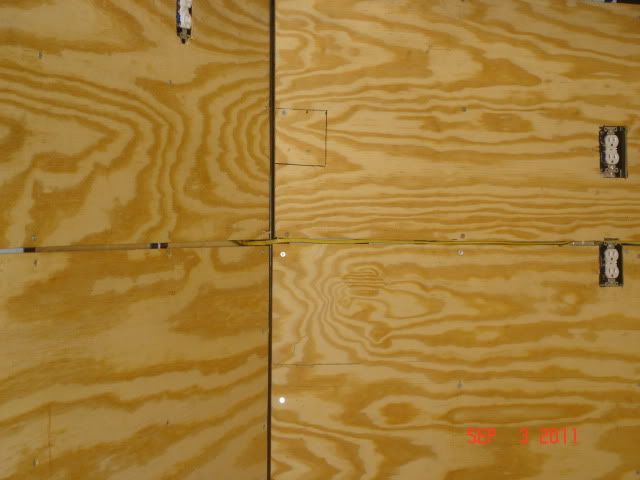
Ok guys, I finally got a chance to get back out to the trailer today and finish up some more items. I finished my incoming power tie in, finished the insulation and got all the plywood back on the walls. So far one of my biggest agrivations has been how to get power into the trailer. I wanted to keep things clean, so everything I can hide behind the walls the better. My origional intention was to have a GFI plug to the outside of the trailer covered with a flip lid type cover. I was going to just make up a double male ended extension cord that would plug in at the track power supply and then plug into my trailer. After talking with a friend he raised a couple of concerns with this method. His first point was that when I plug in to the track power, I then had 110v just sitting there on the other end of the plug. I told him I would just make sure I plugged the trailer in first and then plug in to the track power. His second point was, what if one of the kids or anybody for that matter, tripped over the cord and while trying to plug it back in, touched the contacts and got hurt. Needless to say this is where I changed my mind on a double male cord. After many attempts to make my inital set up work I ended up going plain and simple with a very practical approach.
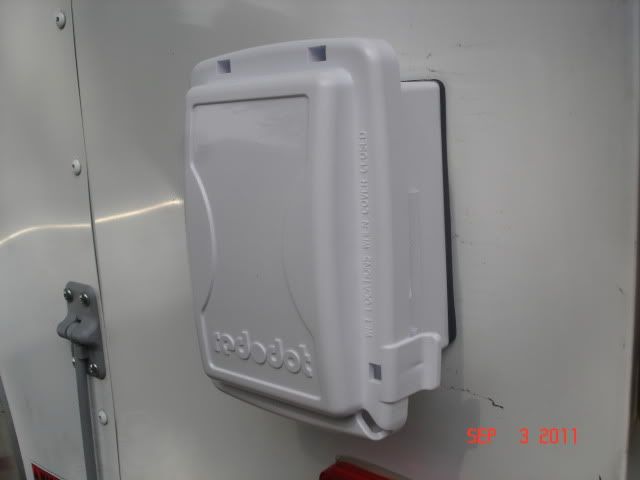
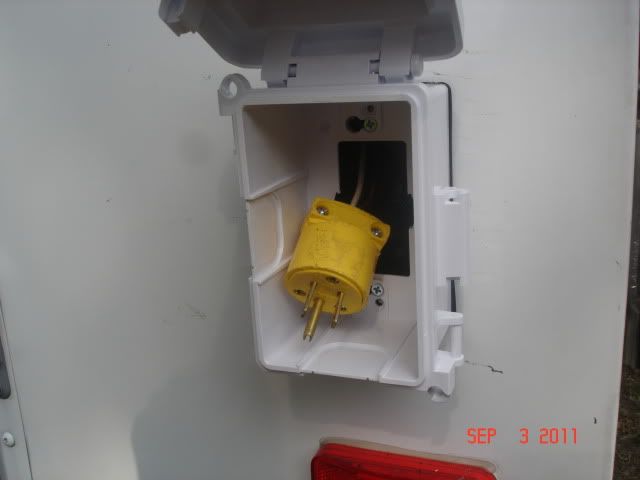
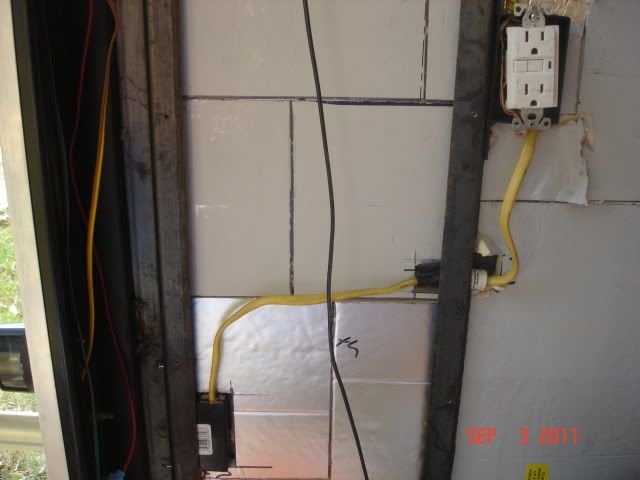
I took the flush fit cover off and replaced it with a thicker box style outlet cover. This gave me the room I needed to store my wiring with a standard heavy duty male plug end. Now I can pull up to the track, take a standard extension cord and plug my trailer into it. As you can see my power comes in through the male plug, to a GFI and then to a standard switch. From the switch all my other outlets are daisy chained together.
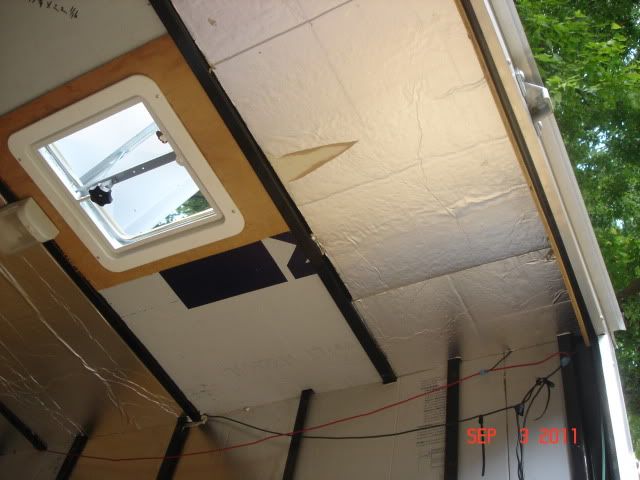
Once this was completed I finished my insulation in this section. So far I had made very good use of my insulation and had very little scrap. I took a few of my left over pieces and used those for my last panel.
You can see here a good way to fit insulation when both sides need to go behind you wall studs. This section was about 11.5" wide on the inside of the wall studs. I cut my pieces 11.5" and then cut that piece in half. This allowed me to slide it in behind the wall on both sides and then squeeze the two together in the center.
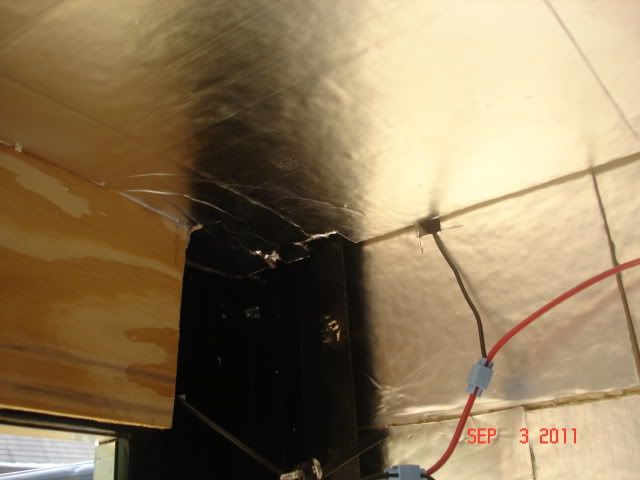
Also finished up my last section of ceiling insulation also.
After all the wire had been run and insulation was in, it was time to start putting the walls back up.
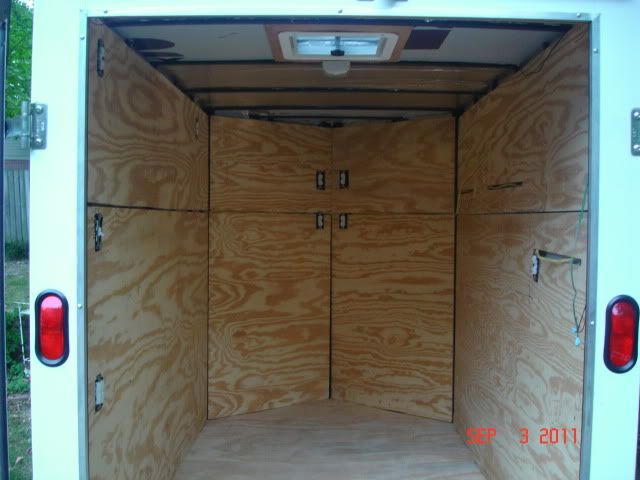
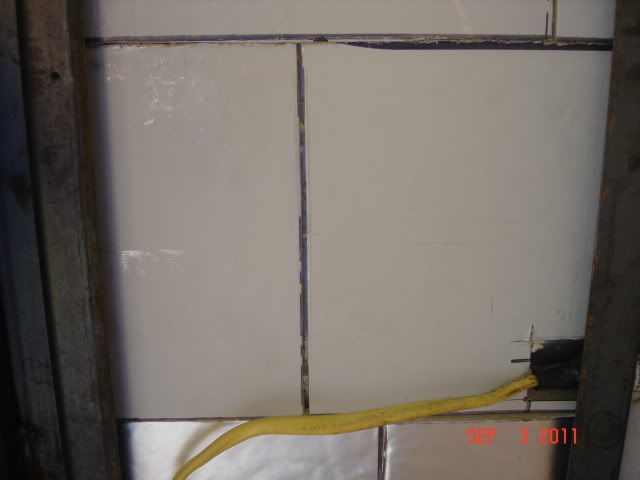
I did have to make a couple of modifications to my wall panels to accomodate my wiring. On the left side and the front, the top and bottom pieces had about a 3/8" gap which allowed me to run the wiring between the grove.
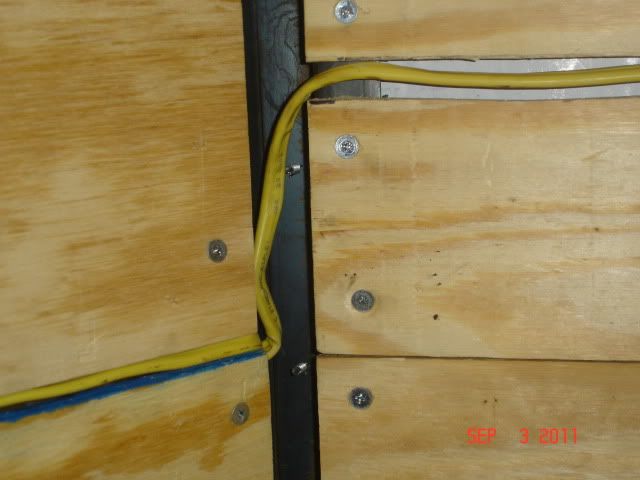
The right side wasn't so kind to me. The gap was almost non-existant. To accomodate the wiring behind the wall, I had to cut a couple of slits in the plywood to allow the wire to go around the wall studs.
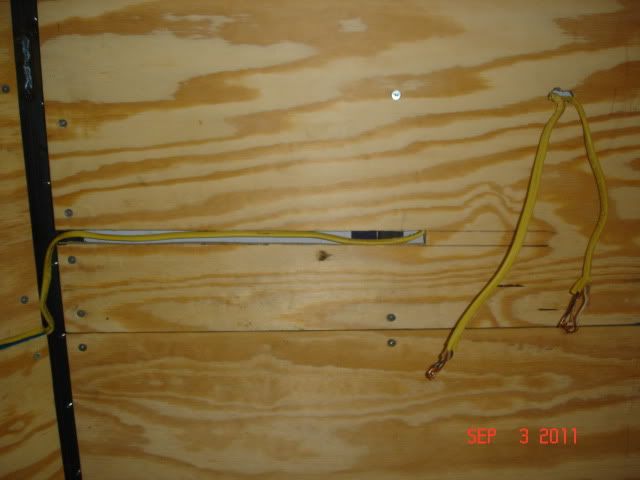
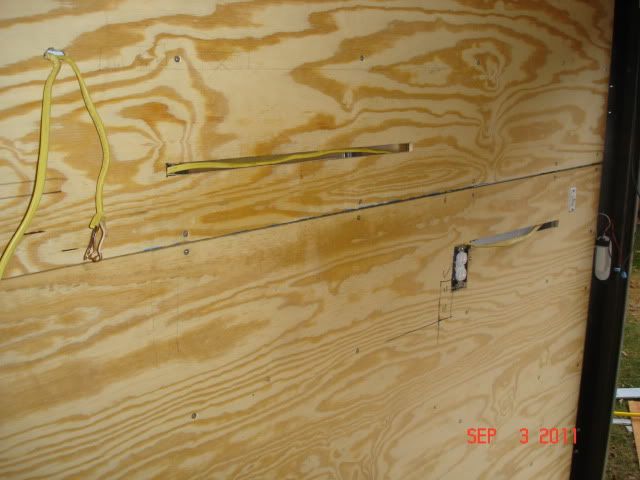
I do still have one more plug to wire in at a later time, thats the wires you see hanging. My plans are to have a plug built into the bottom of a cabinet. The wiring will come through the wall and cabinet, tie into the box and outlet and will allow me one plug that is up and out of the way. Hoping to get the flooring down this weekend and hopfully I can get the tile board on the walls as well. Got the day off Monday so maybe I can get more done then...
I took the flush fit cover off and replaced it with a thicker box style outlet cover. This gave me the room I needed to store my wiring with a standard heavy duty male plug end. Now I can pull up to the track, take a standard extension cord and plug my trailer into it. As you can see my power comes in through the male plug, to a GFI and then to a standard switch. From the switch all my other outlets are daisy chained together.
Once this was completed I finished my insulation in this section. So far I had made very good use of my insulation and had very little scrap. I took a few of my left over pieces and used those for my last panel.
You can see here a good way to fit insulation when both sides need to go behind you wall studs. This section was about 11.5" wide on the inside of the wall studs. I cut my pieces 11.5" and then cut that piece in half. This allowed me to slide it in behind the wall on both sides and then squeeze the two together in the center.
Also finished up my last section of ceiling insulation also.
After all the wire had been run and insulation was in, it was time to start putting the walls back up.
I did have to make a couple of modifications to my wall panels to accomodate my wiring. On the left side and the front, the top and bottom pieces had about a 3/8" gap which allowed me to run the wiring between the grove.
The right side wasn't so kind to me. The gap was almost non-existant. To accomodate the wiring behind the wall, I had to cut a couple of slits in the plywood to allow the wire to go around the wall studs.
I do still have one more plug to wire in at a later time, thats the wires you see hanging. My plans are to have a plug built into the bottom of a cabinet. The wiring will come through the wall and cabinet, tie into the box and outlet and will allow me one plug that is up and out of the way. Hoping to get the flooring down this weekend and hopfully I can get the tile board on the walls as well. Got the day off Monday so maybe I can get more done then...
09-04-2011, 04:18 PM
#27
Didn't get anything done today.. raining.....hopefully tomorrow we will have flooring down.
09-04-2011, 07:06 PM
#28
Tech Regular
How about a platform for a generator. Something that possible could fold down for the generator to sit during the race and fold up during travel.
Something I would do if I was to build one.
I guess I would be skeptical of having all that power through the one tap. Lights, chargers, Fans, A/C, could put a lot on strain on the facilities single outlet. If you tap into theirs during races along with others.
Something I would do if I was to build one.
I guess I would be skeptical of having all that power through the one tap. Lights, chargers, Fans, A/C, could put a lot on strain on the facilities single outlet. If you tap into theirs during races along with others.
09-06-2011, 09:37 AM
#29
Well guys still no luck on the flooring yet. It has been raing here all weekend and I can't get the trailer in the garage. I figured while I was waiting out the rain I would go ahead and get the first coat of poly on the cabinets yesterday. Hoping to get the second coat on today and if the rain quits I hope to get some flooring in.
Thanks again for the ideas guys....keep em coming.
Thanks again for the ideas guys....keep em coming.
09-06-2011, 11:55 AM
#30
I used something similar to this on my trailer
http://www.levitonproducts.com/catal...E7DC2&pid=1208
Got mine at a local RV shop.
http://www.levitonproducts.com/catal...E7DC2&pid=1208
Got mine at a local RV shop.