


 2Likes
Xray T4 '13
 10-29-2012, 09:31 AM
#1186
 10-29-2012, 09:33 AM
#1187

Then I used this stuff called Mothers mag and aluminum polish.. I just took some of that and applied it with a cloth to each part.. then with a clean cloth buffed it and wiped it off.. worked great. It took forever to do it by hand though.. I would recommend a dremel with some type of polishing attachement
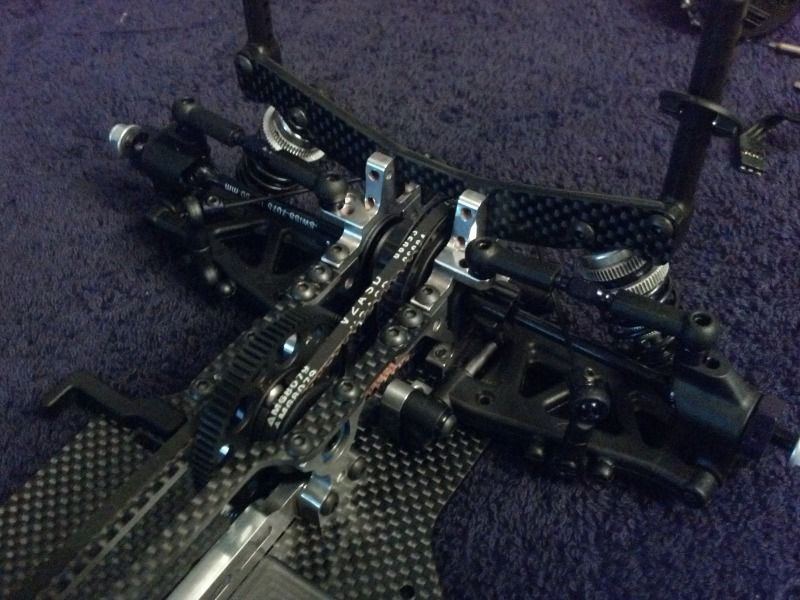
Well guys I got done building the kit last night at around 4am.. it was an absolute dream to build.. once I started I couldn't stop. I used to be an Associated fan..but, now I don't know if I could own another car other than an Xray. I built a TC6 a couple years back and it was a nightmare compared to the Xray. Even the parts I hate building (turnbuckles,shocks,diffs) went to well great. Love the quality it's totally worth the extra money.
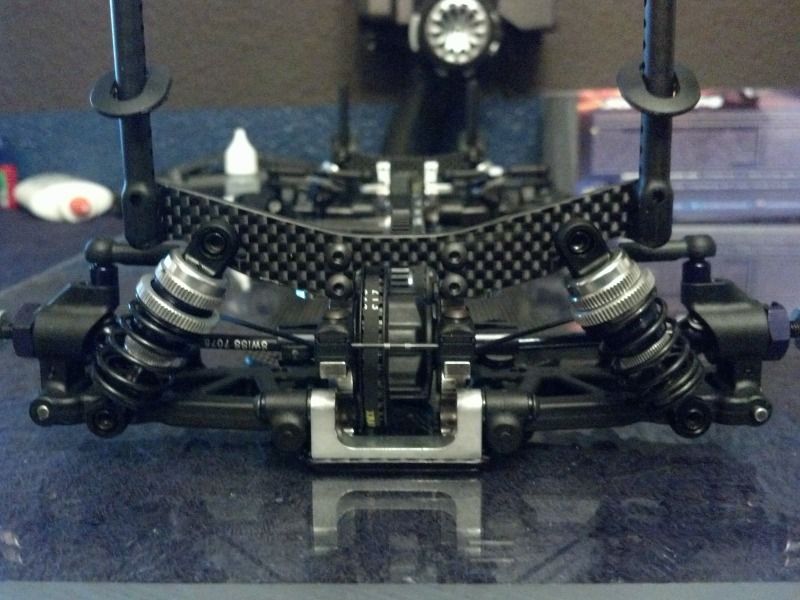
I think the silver turned out looking pretty good on it as well
 oh.. and I know I'm missing my servo post.. I won't be using it
  also noticed I need to adjust my shock collars haha
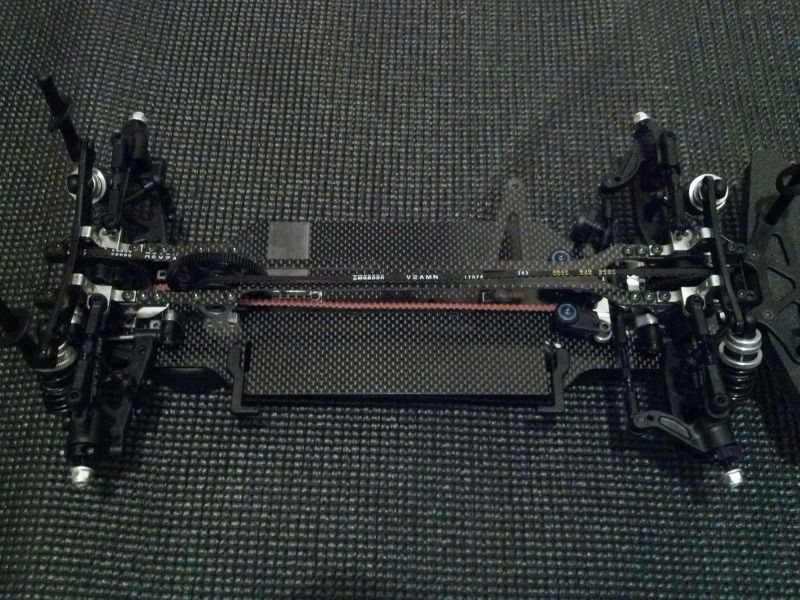

Last edited by eds24; 10-29-2012 at 10:30 AM.
 10-29-2012, 09:37 AM
#1189
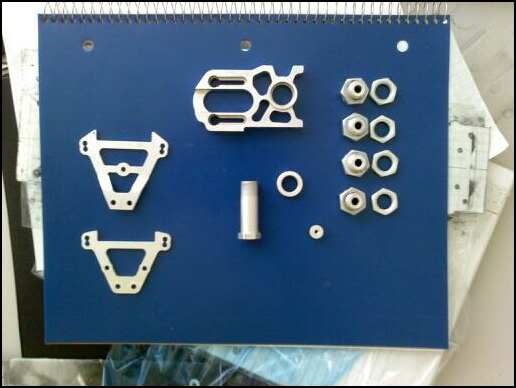
Thanks! well.. first I stripped the anodizing useing easy-off oven cleaner.. ( greased lightening also works) there are many videos on youtube on how to do it.. pretty simple.
Then I used this stuff called Mothers mag and aluminum polish.. I just took some of that and applied it with a cloth to each part.. then with a clean cloth buffed it and wiped it off.. worked great. It took forever to do it by hand though.. I would recommend a dremel with some type of polishing attachement
Well guys I got done building the kit last night at around 4am.. it was an absolute dream to build.. once I started I couldn't stop. I used to be an Associated fan..but, now I don't know if I could own another car other than an Xray. I built a TC6 a couple years back and it was a nightmare compared to the Xray. Even the parts I hate building (turnbuckles,shocks,diffs) went to well great. Love the quality it's totally worth the extra money.
I think the silver turned out looking pretty good on it as well oh.. and I know I'm missing my servo post.. I won't be using it
Then I used this stuff called Mothers mag and aluminum polish.. I just took some of that and applied it with a cloth to each part.. then with a clean cloth buffed it and wiped it off.. worked great. It took forever to do it by hand though.. I would recommend a dremel with some type of polishing attachement
Well guys I got done building the kit last night at around 4am.. it was an absolute dream to build.. once I started I couldn't stop. I used to be an Associated fan..but, now I don't know if I could own another car other than an Xray. I built a TC6 a couple years back and it was a nightmare compared to the Xray. Even the parts I hate building (turnbuckles,shocks,diffs) went to well great. Love the quality it's totally worth the extra money.
I think the silver turned out looking pretty good on it as well
oh.. and I know I'm missing my servo post.. I won't be using it  10-29-2012, 10:06 AM
#1192
Thanks! well.. first I stripped the anodizing useing easy-off oven cleaner.. ( greased lightening also works) there are many videos on youtube on how to do it.. pretty simple.
Then I used this stuff called Mothers mag and aluminum polish.. I just took some of that and applied it with a cloth to each part.. then with a clean cloth buffed it and wiped it off.. worked great. It took forever to do it by hand though.. I would recommend a dremel with some type of polishing attachement
Well guys I got done building the kit last night at around 4am.. it was an absolute dream to build.. once I started I couldn't stop. I used to be an Associated fan..but, now I don't know if I could own another car other than an Xray. I built a TC6 a couple years back and it was a nightmare compared to the Xray. Even the parts I hate building (turnbuckles,shocks,diffs) went to well great. Love the quality it's totally worth the extra money.
I think the silver turned out looking pretty good on it as well oh.. and I know I'm missing my servo post.. I won't be using it
Then I used this stuff called Mothers mag and aluminum polish.. I just took some of that and applied it with a cloth to each part.. then with a clean cloth buffed it and wiped it off.. worked great. It took forever to do it by hand though.. I would recommend a dremel with some type of polishing attachement
Well guys I got done building the kit last night at around 4am.. it was an absolute dream to build.. once I started I couldn't stop. I used to be an Associated fan..but, now I don't know if I could own another car other than an Xray. I built a TC6 a couple years back and it was a nightmare compared to the Xray. Even the parts I hate building (turnbuckles,shocks,diffs) went to well great. Love the quality it's totally worth the extra money.
I think the silver turned out looking pretty good on it as well
oh.. and I know I'm missing my servo post.. I won't be using it  10-29-2012, 10:20 AM
#1193
I wouldn't suggest stripping the aluminum and not polishing it for the reasons bvolts stated..polishing protects the aluminum from corroding. As you can see in the pictures the pieces look to becoming somewhat white. The other thing is its very hard to strip aluminum without oxidizing it atleast alittle bit which makes the part look black. The polishing removes that black look. If your going to do this I highly recommend taking some time and polishing them.
10-29-2012, 10:45 AM
#1196
Tech Regular
Anodizing does something to the surface other than change the colour, it makes the top layer much tougher, I'm not sure but stripping that off may effect the durability of the ali.
Bb
Bb
10-29-2012, 10:47 AM
#1197
hmm that's a good point that slipped my mind.. we will see how long it lasts..it could be a reason to get them anodized eventually anyway. I don't mind if the parts get dull.. only if they start corroding or oxidizing.
Last edited by eds24; 10-29-2012 at 11:16 AM.
10-29-2012, 10:49 AM
#1198
Tech Master
10-29-2012, 11:43 AM
#1200
Well, yet another successful weekend for the T4! We were able to TQ and finish 2nd at the Halloween classic against a small but stout field -Keven Hebert, Josh Cyrul, Ray Darroch, Andrew Knapp to name a few. The car only needed a few tweaks from the setup we have been playing with since IIC. During the weekend, we had a tenth quicker hot lap(consistently I might add) than Keven and Andrew qualified almost 4 seconds ahead of him. This was especially exciting given the fact that Kevin was the only person really giving Ronald Volker a hard time at the IIC. The final was a fantastic race, both almost bumper to bumper for the entire 6 minute up until the final set of corners where Andrew made a last ditched effort to get by after an earlier bobble. Kevin is incredibly good out front and probably the hardest person to pass in RC As they came around the sweeper onto the straight they were side by side and they touched, as a result both needed to be marshalled. Andrew was marshalled a little quicker and therefore could have driven away for the win but he decided to stay put and let Kevin go across the line first. Andrew knew he forced the issue and decided it was not the way he wanted to win - a great move in the eyes of most. Despite losing the main, it was a great weekend and we learned even more about the new car and what it needs to be a legitimate contender.
One thing that I found very interesting was during the prep for the main. I noticed that I had not installed any screws to hold the spool cups securely to the spool itself(we all make mistakes right? )so like a good mechanic, I corrected my "mistake" and installed the screws. Up until the main, every round we had been clear of Keven by a tenth allowing Andrew to control the pace, but for some strange reason we lost that tenth in the main. We went from 9.2 to 9.3 and this small difference allowed Keven(he was also doing 9.3's) to pressure Andrew right from the start. After a debrief with Andrew, he informed me that the car was a little more "edgy" but other than that the car was almost identical to the runs previous. So now I have a suspicion that maybe the screws vs. no screws in the spool had something to do with it. Have I stumbled across something here?  Unfortunately, I will have to wait till the weekend to test this but I thought I would throw it out there for people to discuss.
As they came around the sweeper onto the straight they were side by side and they touched, as a result both needed to be marshalled. Andrew was marshalled a little quicker and therefore could have driven away for the win but he decided to stay put and let Kevin go across the line first. Andrew knew he forced the issue and decided it was not the way he wanted to win - a great move in the eyes of most. Despite losing the main, it was a great weekend and we learned even more about the new car and what it needs to be a legitimate contender.One thing that I found very interesting was during the prep for the main. I noticed that I had not installed any screws to hold the spool cups securely to the spool itself(we all make mistakes right?
)so like a good mechanic, I corrected my "mistake" and installed the screws. Up until the main, every round we had been clear of Keven by a tenth allowing Andrew to control the pace, but for some strange reason we lost that tenth in the main. We went from 9.2 to 9.3 and this small difference allowed Keven(he was also doing 9.3's) to pressure Andrew right from the start. After a debrief with Andrew, he informed me that the car was a little more "edgy" but other than that the car was almost identical to the runs previous. So now I have a suspicion that maybe the screws vs. no screws in the spool had something to do with it. Have I stumbled across something here? Unfortunately, I will have to wait till the weekend to test this but I thought I would throw it out there for people to discuss.