


 321Likes
Kyosho Inferno MP9 TKI4 1/8 Buggy Kit

 11-05-2018, 09:06 AM - Wikipost
|
|||
|
|||
 09-29-2017, 08:40 AM
#2026
optima new set gear differential for mp9
 09-29-2017, 05:33 PM
#2027
 10-02-2017, 05:30 PM
#2029
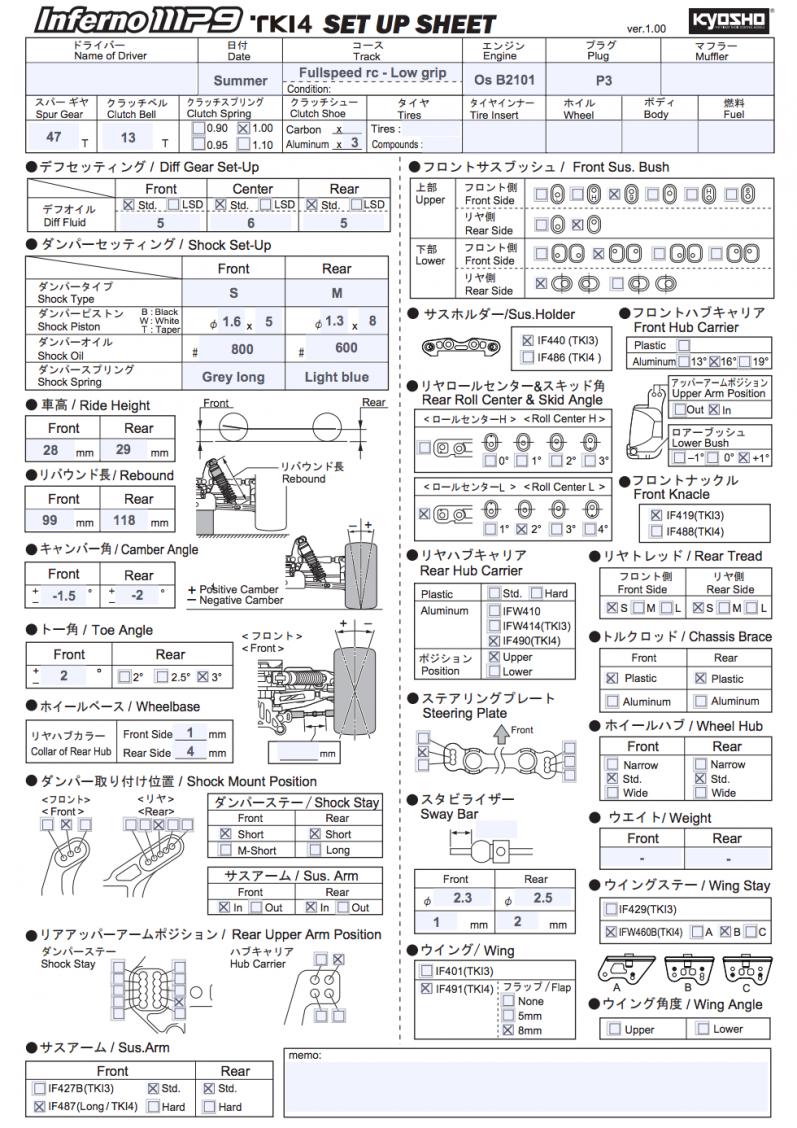
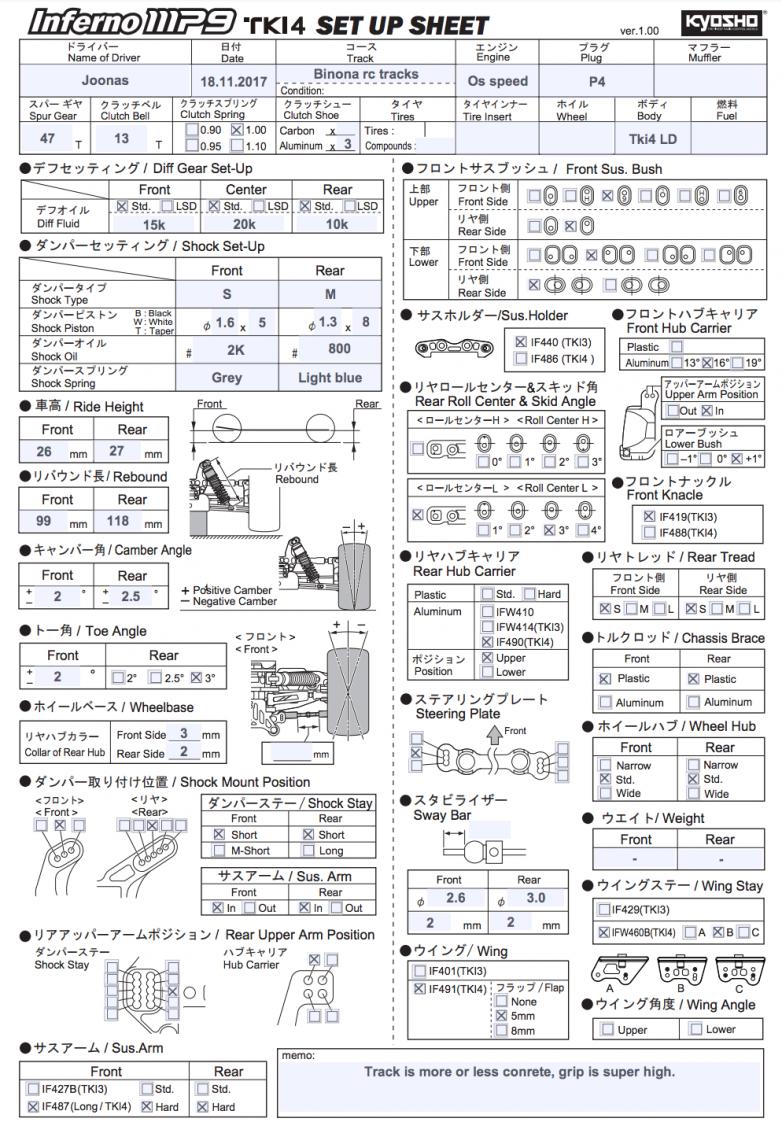
Thank you all that helped me to evolve the HT-LR setup. I managed to correct some errors (sorry  ) and know what was going on.
Things I changed:
1. raised shock oil thickness;
2. used the correct pill setting (disgusted with myself for this blatant error), bonus tip if you are using the TKI3 parts use the old v2 setup as that is correct and if you are running the TKI4 with increased kick up use the "9" pill with the dot up.
3. dotted the standard kick up setting just to clear this setup is catered to lower kick up.
4. VERY IMPORTANT! if you lack on power steering use more caster! Don't use the stock 13 blocks with the long upper arm and lower roll centre. Bonus tip, if you are using the TKI3 parts you can run the higher roll centre bushings and not touch the caster, but is better to increase caster to the 16 or 17.5 blocks on the TKI4.
5. lowered wing and no flap. Stock isn't ideal,far from it. Lower wing and no flap is the best option.
If your track has slower corner speeds then probably the v2 setup with less caster can work very well, don't forget to correct the upper bushing (sorry again).
) and know what was going on.Things I changed:
1. raised shock oil thickness;
2. used the correct pill setting (disgusted with myself for this blatant error), bonus tip if you are using the TKI3 parts use the old v2 setup as that is correct and if you are running the TKI4 with increased kick up use the "9" pill with the dot up.
3. dotted the standard kick up setting just to clear this setup is catered to lower kick up.
4. VERY IMPORTANT! if you lack on power steering use more caster! Don't use the stock 13 blocks with the long upper arm and lower roll centre. Bonus tip, if you are using the TKI3 parts you can run the higher roll centre bushings and not touch the caster, but is better to increase caster to the 16 or 17.5 blocks on the TKI4.
5. lowered wing and no flap. Stock isn't ideal,far from it. Lower wing and no flap is the best option.
If your track has slower corner speeds then probably the v2 setup with less caster can work very well, don't forget to correct the upper bushing (sorry again).
Last edited by 30Tooth; 10-02-2017 at 05:46 PM.
10-05-2017, 07:58 PM
#2030
Tech Apprentice
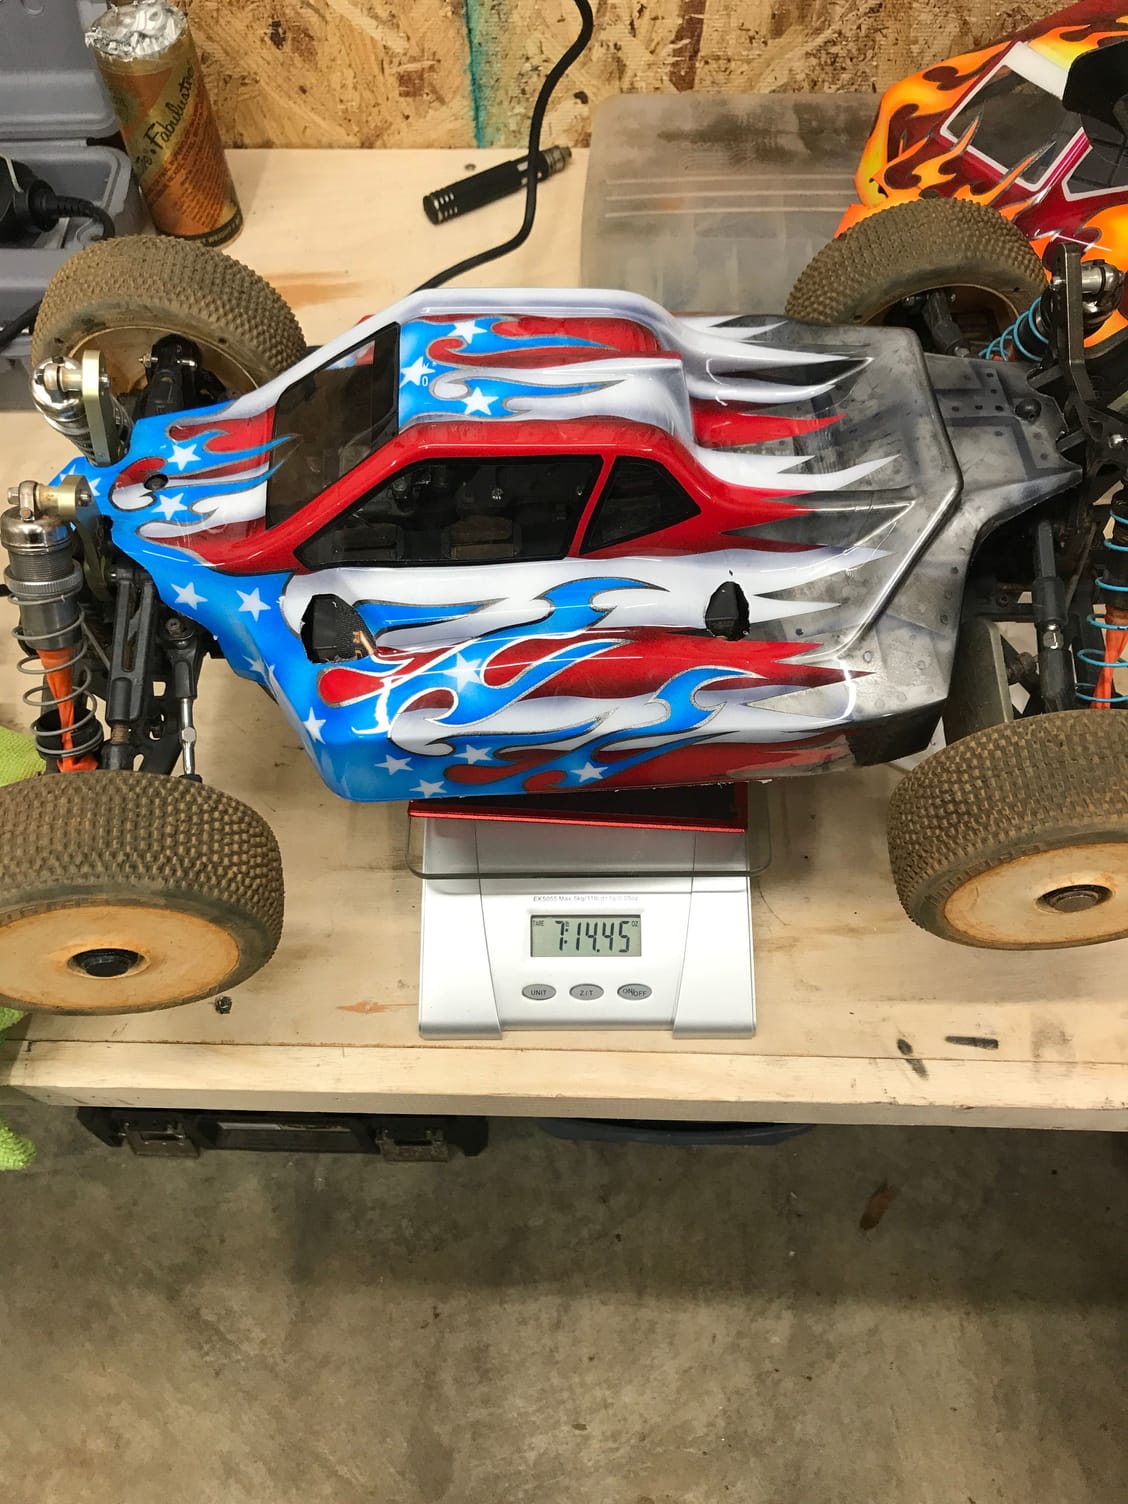
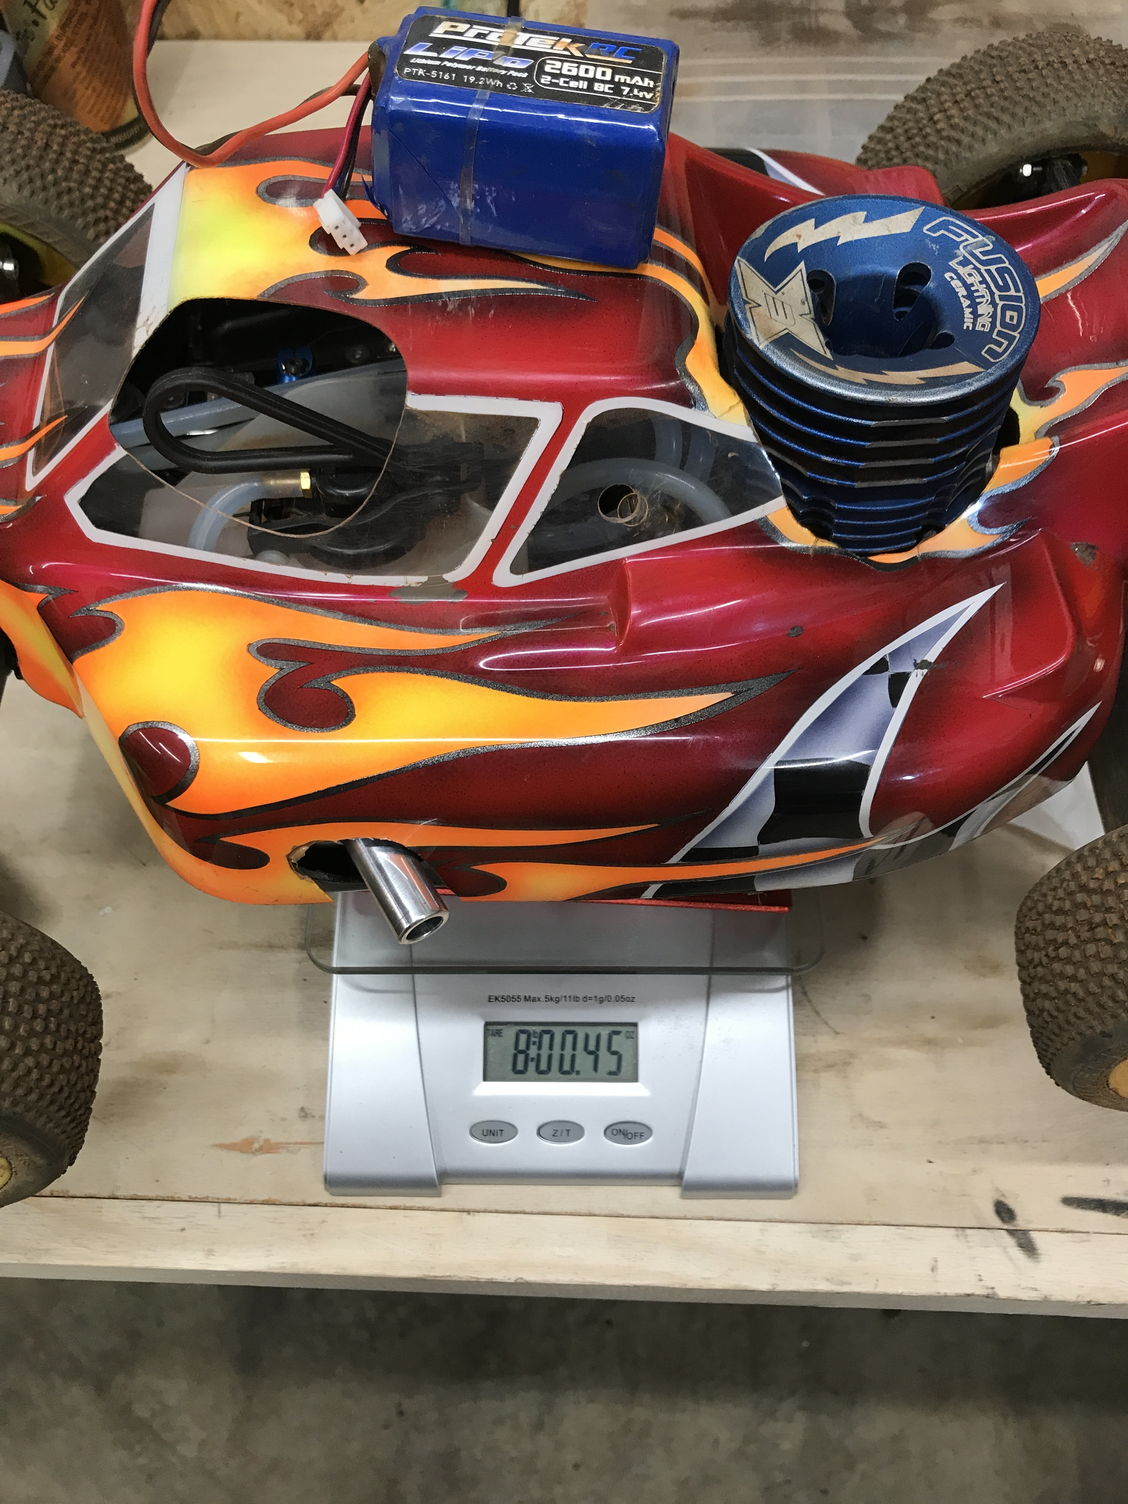
This blew my mind. I couldn�t believe nitro was heavier. Lunsford titanium screw kits on both. Same M2C chassis. Same wheels and tires same bodies Etc.
10-06-2017, 05:55 AM
#2032
Tech Apprentice
10-06-2017, 07:42 PM
#2033
I'm gonna have to weigh mine. last time I checked my nitro was a lot lighter. hmm
10-07-2017, 07:15 AM
#2035
Was your tank full?
 10-07-2017, 07:33 PM
#2037
Hey guys, trying to upgrade my tki3 to a tki4 piece by piece but I came across the universal swing shafts and want to know what's the difference in the capped and non capped. Capped looks legit but the non-capped is more expensive?
I have pictures but they won't let me post. To much of a newbie on the site I guess.
I have pictures but they won't let me post. To much of a newbie on the site I guess.
10-08-2017, 04:03 AM
#2038
Tech Initiate
Hey guys, trying to upgrade my tki3 to a tki4 piece by piece but I came across the universal swing shafts and want to know what's the difference in the capped and non capped. Capped looks legit but the non-capped is more expensive?
I have pictures but they won't let me post. To much of a newbie on the site I guess.
I have pictures but they won't let me post. To much of a newbie on the site I guess.
https://youtu.be/3UHypYselpc
10-08-2017, 11:53 AM
#2039
10-08-2017, 04:39 PM
#2040
Tech Apprentice
I took the bodies off and wheels off and still the nitro was 2 ounces heavier. Full tank of fuel. Crazy right.