


 6Likes
HPI Sprint 2 Mods
 03-07-2013, 09:42 PM
#421
I cuffed this from the U.S. Vintage Trans-Am [PICS & PAINT Discussion ONLY!!!] forum = http://www.youtube.com/watch?v=085nJyj4TBM
I wonder if it works on buggered window tint jobs...
I wonder if it works on buggered window tint jobs...
 03-10-2013, 09:04 AM
#422
Thought i would share a bit of parking lot fun, before last nights race carnage we took a picture of the body's we use that we dont care about the damage they get, my primer gray camaro now has some nasty roof scratches after a tangle with the orange 69 camaro that left me upside down after flipping 3 or 4 times, the red 9 camaro went out early with what seemed like an overheated motor, the damage on the front of the 69 came from a nasty hit on a concrete base from a parking lot light pole on a previous nights carnage.
There is another car that is getting pretty much all of Marves mods done to it that should rule the parking lot racin' we do when it's done
We basically just do a big oval with bright painted gatorade bottles to mark out the distance.
There is another car that is getting pretty much all of Marves mods done to it that should rule the parking lot racin' we do when it's done
We basically just do a big oval with bright painted gatorade bottles to mark out the distance.
03-10-2013, 09:05 PM
#423
Thought i would share a bit of parking lot fun, before last nights race carnage we took a picture of the body's we use that we dont care about the damage they get, my primer gray camaro now has some nasty roof scratches after a tangle with the orange 69 camaro that left me upside down after flipping 3 or 4 times, the red 9 camaro went out early with what seemed like an overheated motor, the damage on the front of the 69 came from a nasty hit on a concrete base from a parking lot light pole on a previous nights carnage.
There is another car that is getting pretty much all of Marves mods done to it that should rule the parking lot racin' we do when it's done
We basically just do a big oval with bright painted gatorade bottles to mark out the distance.
There is another car that is getting pretty much all of Marves mods done to it that should rule the parking lot racin' we do when it's done
We basically just do a big oval with bright painted gatorade bottles to mark out the distance.
+1
03-10-2013, 09:29 PM
#424
Thought i would share a bit of parking lot fun,
There is another car that is getting pretty much all of Marves mods done to it that should rule the parking lot racin' we do when it's done
We basically just do a big oval with bright painted gatorade bottles to mark out the distance.
There is another car that is getting pretty much all of Marves mods done to it that should rule the parking lot racin' we do when it's done
We basically just do a big oval with bright painted gatorade bottles to mark out the distance.
I bought a used 1/8 scale nitro buggy chassis last week, I'll be mounting an engine in it soon and running on my friends awesome huge private dirt track.
But I need to appropriate some funds for an electric car too and maybe find some like minded guys to do some fun racing in the big empty parking lots nearby. Could be great on warm summer nights.
 03-11-2013, 07:12 AM
#425
We got together again last night but i broke a rear belt and the red camaro's motor or esc is out so the orange 69 wins by staying running then we packed it all up and took the wives out to dinner.
03-11-2013, 02:56 PM
#426
KEVLAR BELTS =
REAR BELT = http://www.toughracing.com/zc126d/in...oducts_id=2036
FRONT BELT = http://www.toughracing.com/zc126d/in...oducts_id=2037
03-11-2013, 10:01 PM
#427
Tech Addict
so if you look at a xray or any other high end chassis, it is cut out under the diffs. so I cut away ,never had any problems untill a huge stone was stuck(took over a year)
please not its a older s2

i did this to both diffs
could some one post a pic of new orange s2 under side of the chassis plz
so on stock diffs they have bushings in them? not bearings? can some one post some pics of open diff
does the diff have any seals?
please not its a older s2
i did this to both diffs
could some one post a pic of new orange s2 under side of the chassis plz
so on stock diffs they have bushings in them? not bearings? can some one post some pics of open diff
does the diff have any seals?
03-11-2013, 11:39 PM
#428
OEM chassis = http://www.rctech.net/forum/11713961-post308.html
Orange chassis = http://www.rctech.net/forum/11821911-post374.html
Seal kit for S2 diffs = HPI86016
If you rebuild your diffs don't forget to shim = http://www.rctech.net/forum/11400616-post149.html
Exploded view of diff (does NOT include the springs or washers) =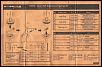
You can also find an exploded view in the manual on page 44
Manual for S2 = http://www.rctech.net/forum/11400616-post149.html
OEM diffs have bushings in them = HPIB070
Bearing upgrade = 5x8x2.5mm =
Either eBay or www.VXB.com
Orange chassis = http://www.rctech.net/forum/11821911-post374.html
Seal kit for S2 diffs = HPI86016
If you rebuild your diffs don't forget to shim = http://www.rctech.net/forum/11400616-post149.html
Exploded view of diff (does NOT include the springs or washers) =

You can also find an exploded view in the manual on page 44
Manual for S2 = http://www.rctech.net/forum/11400616-post149.html
OEM diffs have bushings in them = HPIB070
Bearing upgrade = 5x8x2.5mm =
Either eBay or www.VXB.com
Last edited by Marv; 03-12-2013 at 11:35 AM.
03-12-2013, 11:18 AM
#429
Tech Regular
iTrader: (4)
I'm still rebuilding mine for the race season. I upgraded the chassis to the Exotek chassis http://www.exotekracing.com/sprint-spx-pro-chassis-set/ which seems to be a great kit. The parts fit well on it with little, if any, modification. The mods I'm doing are more related to this thread. I'm sorting out some steering binding and I'll post some pix once I'm done with that. I'm getting stoked about getting out for on-road again! 
03-12-2013, 11:40 AM
#430
Hi nubie-wan, how've ya been?
Yeah - - - I got's that Cabin Fever too...
A couple of questions for you =
Do the fancy Allen head chassis screws come with the Exotek chassis and upper deck?
Are you having any issues with component placement on the Exotek chassis?
Do you have the weights on the Exotek upper deck and chassis?
Yeah - - - I got's that Cabin Fever too...
A couple of questions for you =
Do the fancy Allen head chassis screws come with the Exotek chassis and upper deck?
Are you having any issues with component placement on the Exotek chassis?
Do you have the weights on the Exotek upper deck and chassis?
I'm still rebuilding mine for the race season. I upgraded the chassis to the Exotek chassis http://www.exotekracing.com/sprint-spx-pro-chassis-set/ which seems to be a great kit. The parts fit well on it with little, if any, modification. The mods I'm doing are more related to this thread. I'm sorting out some steering binding and I'll post some pix once I'm done with that. I'm getting stoked about getting out for on-road again!
03-12-2013, 11:50 AM
#431
Tech Regular
iTrader: (4)
Hi nubie-wan, how've ya been?
Yeah - - - I got's that Cabin Fever too...
A couple of questions for you =
Do the fancy Allen head chassis screws come with the Exotek chassis and upper deck?
Are you having any issues with component placement on the Exotek chassis?
Do you have the weights on the Exotek upper deck and chassis?
Yeah - - - I got's that Cabin Fever too...
A couple of questions for you =
Do the fancy Allen head chassis screws come with the Exotek chassis and upper deck?
Are you having any issues with component placement on the Exotek chassis?
Do you have the weights on the Exotek upper deck and chassis?
No screws come with the set. The existing screws work for the most part.
I put everything on the lower deck. I got a low profile Spektrum servo which gives me the needed space. I'll get some pictures up soon. My motor fits much better with great clearance for the wires. The belts seem a tad tighter and I had to remove a bit of material on the battery swing arm to clear the front belt. I did my own twist on some of your mods there and I'll detail them. Your thread has been a HUGE inspiration to me. Thanks for that!
I'm still working out weights but nothing came with the kit. I put a strip of lead weights under the foam bumper as close to the front diff as possible as the rear is significantly heavier. I'm planning on running this car in USGT with a 21.5 motor with a Losi ESC in blinky mode. I have a Mustang GT-R body waiting for paint.
Last edited by nubie-wan; 03-12-2013 at 11:53 AM. Reason: Added more detail.
03-12-2013, 12:39 PM
#433
I'm working on battery migration voodoo =
Move the battery further forward by about an inch =
That's all I can go using a ROAR approved hard case & existing chassis holes
The mod is basically done, but I have to locate the angle aluminum for the posting of the mod =
One of the guys I race with, rare5spd, gave me a piece that worked perfectly
But he forgot where he got it from -
So that's one Easter egg hunt I'm on - Two more places to check
Before the move =
It would take 155 grams to balance front to rear
After the move = only about 50-55 grams
I made up some of that 50-55 grams of needed weight by making an aluminum transponder holder for the AMB RC4Hybrid
And a bolt on brass bar...
The transponder weight should about even things out (when I get it)
Still need to track test it...
03-12-2013, 08:49 PM
#434
Tech Regular
iTrader: (4)
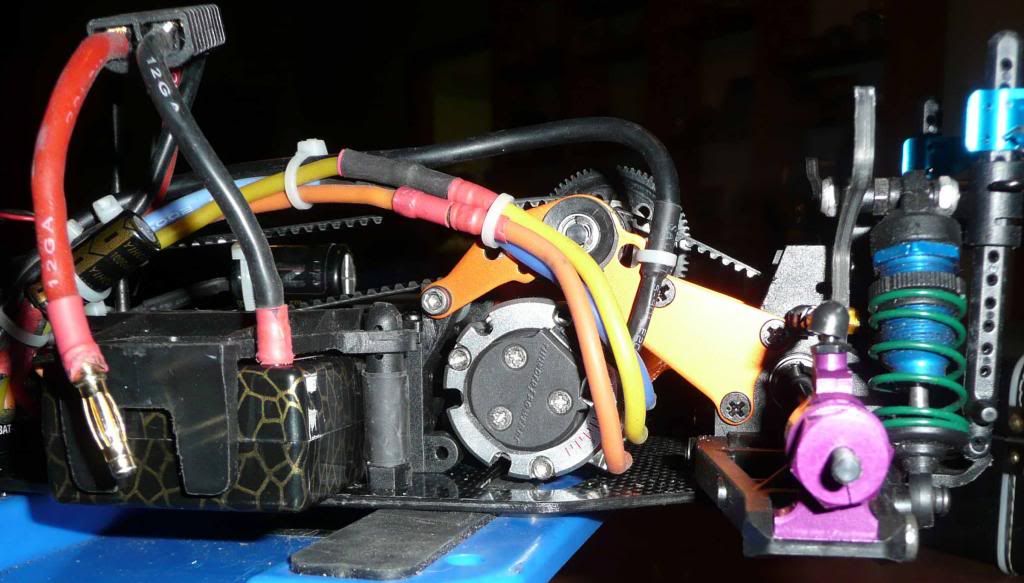
I hope the pictures aren't too large. The first is my adaptation of the front belt tensioner with a socket head cap screw with 2 small bearings, a washer on the far side and a locknut holding it together.
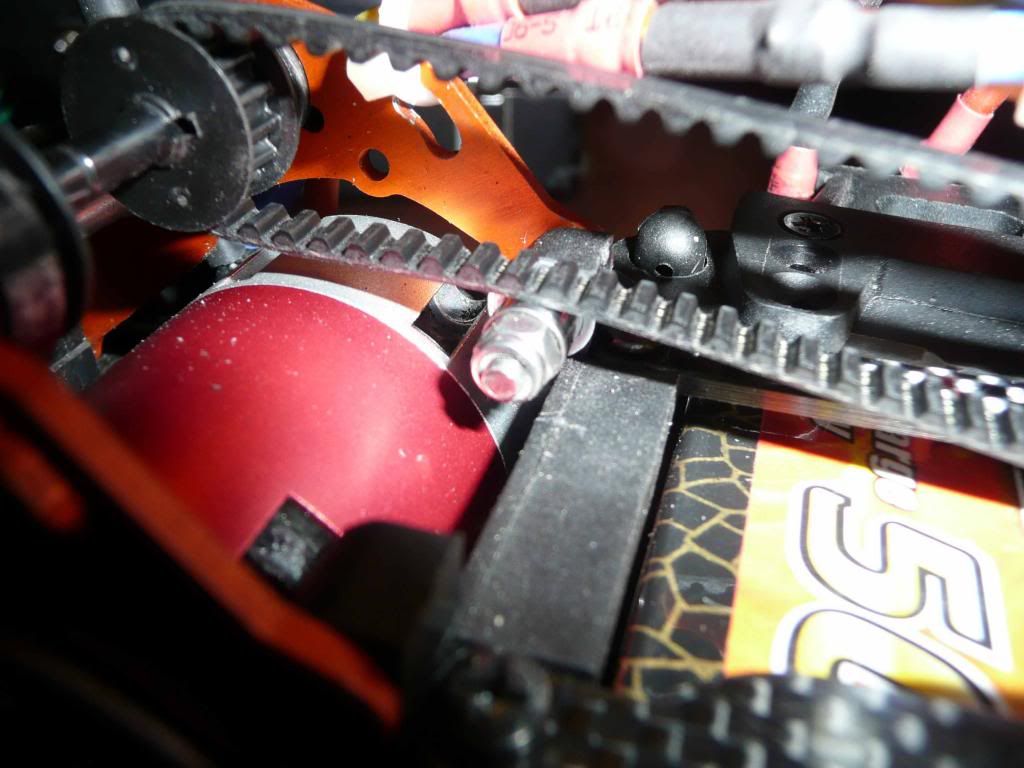
Next is a close up of my shrink tube fix for excess battery travel font to back. Two layers of tube on the post. I could have added a third but I want the battery to slide in and out quickly.
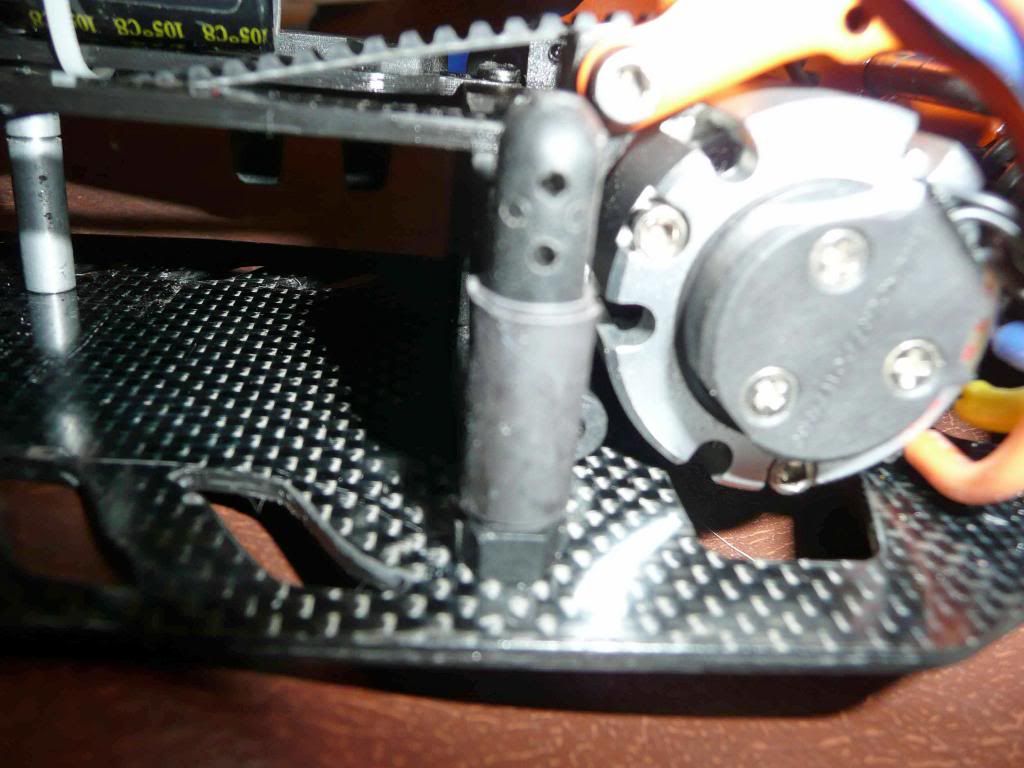
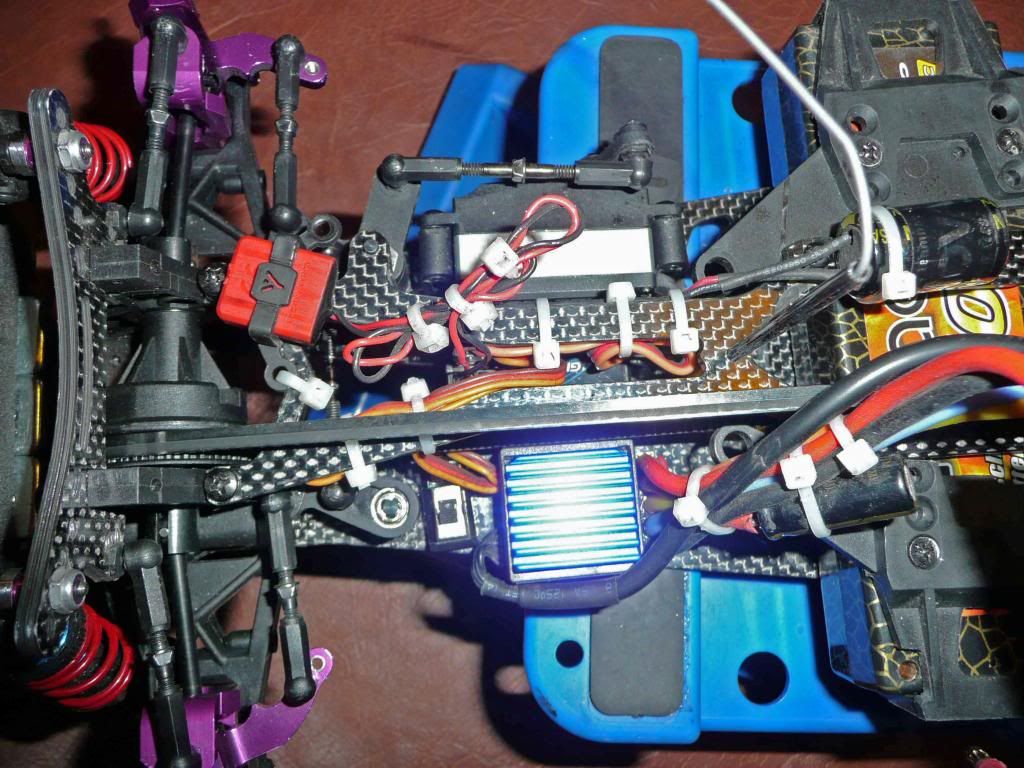
Next is my fuzzy pic showing the material I milled out to allow for the battery to fit without inducing tweak. I did the same for the other side. Note the notches for the battery leads.
This one shows the battery in position. You can just see the clearance it has now. Also note the motor position and the leads clearance. Much better than the old chassis.
More to come.
Next is a close up of my shrink tube fix for excess battery travel font to back. Two layers of tube on the post. I could have added a third but I want the battery to slide in and out quickly.
Next is my fuzzy pic showing the material I milled out to allow for the battery to fit without inducing tweak. I did the same for the other side. Note the notches for the battery leads.
This one shows the battery in position. You can just see the clearance it has now. Also note the motor position and the leads clearance. Much better than the old chassis.
More to come.
Last edited by nubie-wan; 03-12-2013 at 09:03 PM. Reason: More detail.
03-12-2013, 09:00 PM
#435
Tech Regular
iTrader: (4)
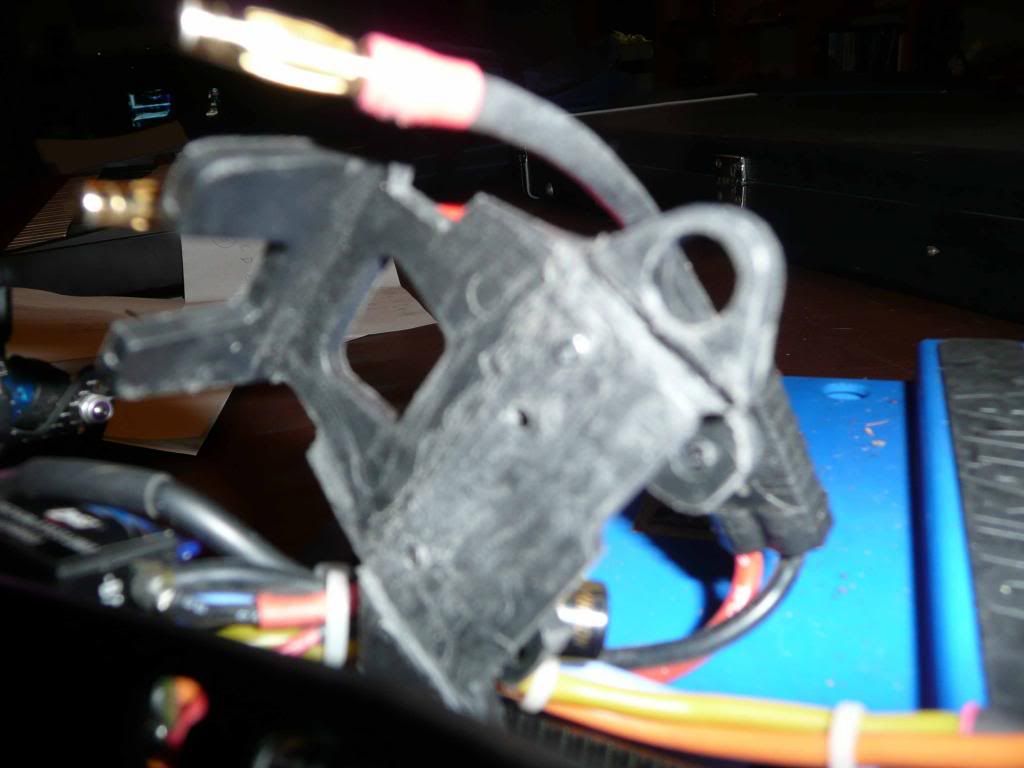
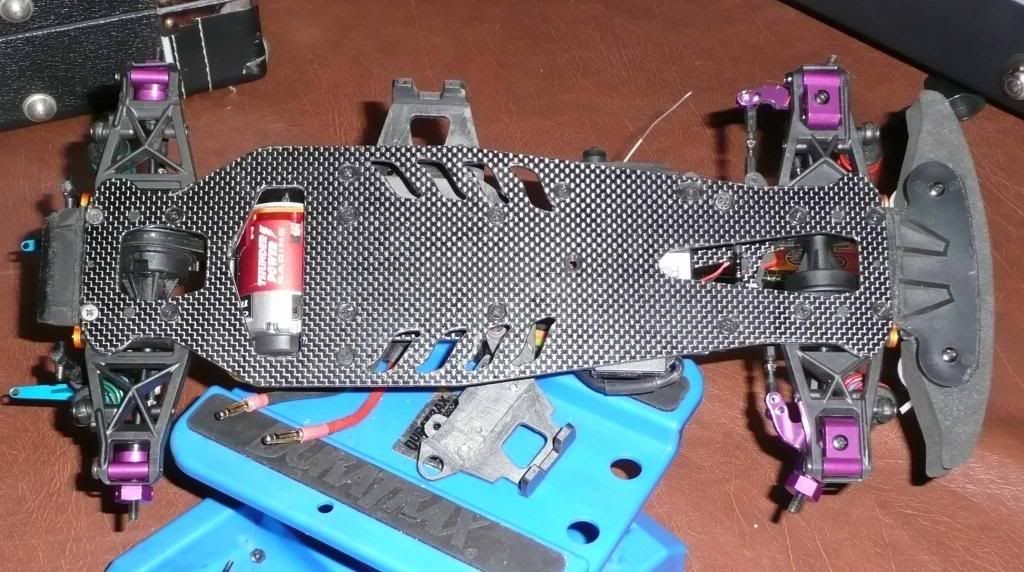
Some more pics. This one shows the bottom of the chassis built out. It's nice and narrow. More slender than the HPI graphite kit. Well vented too and has the proper cutouts for debris to fall through.
This one shows the top 3/4 view. Too bad the top deck is obscured by the electrics. It is also svelte, yet sturdy and minimal in dimensions while allowing better access than the original.
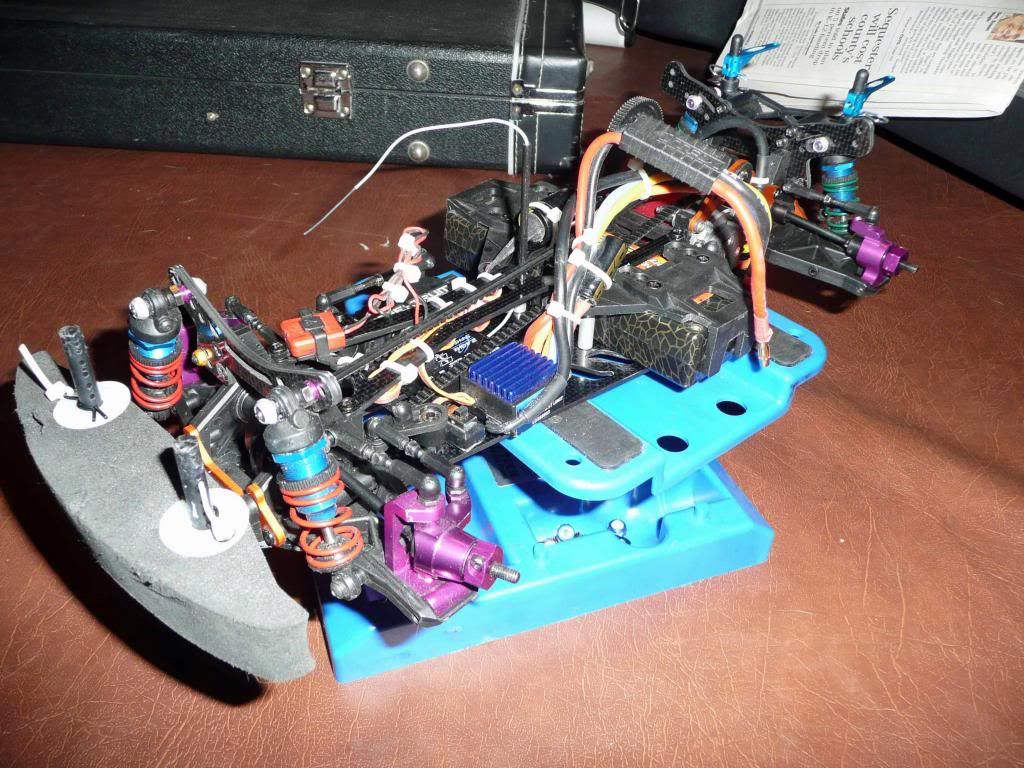
A closer top angle showing the electronics mounting positions. The receiver is in-between the ESC and servo, which is a high speed, coreless, low profile Spektrum. You can see a bit more of the top deck here and note the use of Associated ball cups versus RPMs. I find them to bind less and still blow away the HPI cups. Ironically, I use the RPMs on my Associated TC4.
A bit more to come.
This one shows the top 3/4 view. Too bad the top deck is obscured by the electrics. It is also svelte, yet sturdy and minimal in dimensions while allowing better access than the original.
A closer top angle showing the electronics mounting positions. The receiver is in-between the ESC and servo, which is a high speed, coreless, low profile Spektrum. You can see a bit more of the top deck here and note the use of Associated ball cups versus RPMs. I find them to bind less and still blow away the HPI cups. Ironically, I use the RPMs on my Associated TC4.
A bit more to come.