9Likes
T.O.P. Racing "Photon" 1/10 EP Touring Car


 06-25-2009, 07:27 PM
#977
My point wasn't that they failed.. Just saying if they do... They are there to fix it... "FAIL" on my part... My bad 
Internet ftw
Internet ftw
Last edited by smoke81; 06-25-2009 at 07:59 PM.
06-25-2009, 09:51 PM
#980
In the old car you needed to trim the top deck as it would bow the chassis. I have not tried to remove them again, but they were in a later step, and they all just slipped in nice.
06-25-2009, 10:01 PM
#981
Anyone had any trouble with the servo mounts?
Using the stock servo mounts with a Ko low profile servo or with a savox/team orion servo the servo horn catches the top deck. I have had to use HB mounts which move the servo out from the centerline.....Also whats the difference in running the servo in the rearward postion (back hole) compared to the forward postion.....except the arm catches the side of my servo.
Ive manged to get a 45 tooth pinion on a 100t spur
Honestly, id be more into KO stuff if it wasn't so spendy. I really don't think that the KO stuff is worth the extra money. Thats just my personal opinion. I wont go into detail and clutter up the thread though..
Yeah I love my 9551, I need to send it in for repair, but I soldered black wire on it, so I dont think it will go over very well with them lol. But im not sure, they replaced my 9550 with the 9551 last time, but I didnt open that one up and do anything to it. And I dont have any experience with there BL servos
Now anyhow. We need more pics of everyone TOP car! Hurry and build LOL.
EJ, what gearing did you end up running at swr?
Dustin and Chris, your kits are on the way. I believe Michael got them out today.
Couple other things: Run a servo saver with the car. I use a kimbrough black medium but there are other good ones out there. There might be some reaming required with the C hubs and also shaving from the top to make sure the insert comes all the way through.
06-25-2009, 10:09 PM
#982
We over 4 different types of these wings.
TC-PCHC09 Wing Soft 2.0mm - Rubber Spec. Standard with rubber kit
PO-PCHC005 Rubber Wing Medium Set this is one piece it connects the two pieces together ("U" shape)
TC-PCHC10 Wing Hard 2.0mm - Foam Spec. Standard with foam kit
PO-PCHC006 Foam Wing Extra Hard Set this is one piece and has wings
06-25-2009, 10:28 PM
#983
EJ,
Thanks for answering all the questions, I appreciate it. I just got done reaming out the c-hubs a bit so the steering was smooth. Glad to come here and see I'm on the right track.
Another issue I encountered is that the grub screws that go into the CVD cross-joints wouldn't work well with any of my wrenches, and didn't really want to thread. I grabbed some from the Tamiya parts bin and they worked like a charm.
I notice you guys don't mention running any kind of grease on the CVD assembly. Is it assumed you should grease them, or do you guys really run them dry?
Do you guys not run a thin washer between the hub and the CVD pin? I noticed there were two thin ones in that parts bag, but didn't see mention of them in the manual.
06-25-2009, 10:38 PM
#984
EJ,
Thanks for answering all the questions, I appreciate it. I just got done reaming out the c-hubs a bit so the steering was smooth. Glad to come here and see I'm on the right track.
Another issue I encountered is that the grub screws that go into the CVD cross-joints wouldn't work well with any of my wrenches, and didn't really want to thread. I grabbed some from the Tamiya parts bin and they worked like a charm.
I notice you guys don't mention running any kind of grease on the CVD assembly. Is it assumed you should grease them, or do you guys really run them dry?
Do you guys not run a thin washer between the hub and the CVD pin? I noticed there were two thin ones in that parts bag, but didn't see mention of them in the manual.
Thanks for answering all the questions, I appreciate it. I just got done reaming out the c-hubs a bit so the steering was smooth. Glad to come here and see I'm on the right track.
Another issue I encountered is that the grub screws that go into the CVD cross-joints wouldn't work well with any of my wrenches, and didn't really want to thread. I grabbed some from the Tamiya parts bin and they worked like a charm.
I notice you guys don't mention running any kind of grease on the CVD assembly. Is it assumed you should grease them, or do you guys really run them dry?
Do you guys not run a thin washer between the hub and the CVD pin? I noticed there were two thin ones in that parts bag, but didn't see mention of them in the manual.
I run light grease on the CVD's. I use this stuff called X gear, not sure where you can get it here. I've also used some of the mugen stuff, that's pretty good. Just as long as you don't use anything too thick you'll be fine.
I don't really know if it makes that big a difference if you run them on the inside or the outside of the block. I run them on the outside.
That reminds me, everyone run the thin axle spacer in the rear...you don't need any in the front. The thin axle spacer is included in the kit.
06-25-2009, 10:54 PM
#985
for the sway bar assembly, I glue the ball and setscrew together and not run the 2mm spacer. This make is easier to adjust the sway bar.
06-25-2009, 10:55 PM
#986
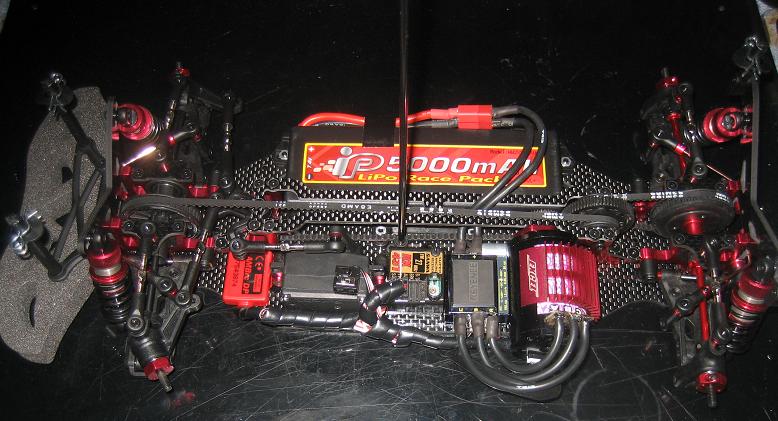
Picture of the servo in my car in the forward position.
06-25-2009, 11:30 PM
#987
Whew! What a week it has been. I have personally built or (heavily helped build) FIVE Photons so far this week. 
One for me, and the rest are local racers.
So far things are going great. No real issues. Ill leave a build tip or two tomorrow after getting some sleep.
Thanks to Josh and all of the T.O.P. Team who has helped to get this car together. I am truly impressed. And whats even better is when the price of this kit and it's parts are considered, Im even more impressed.
06-26-2009, 01:02 AM
#988
I just got back from doing some testing at the track and I'm pretty happy with the results. I got to try all 3 ackerman settings, some front and rear RC changes, and I also tried running hole 1 on the front arm (which worked great). By the time I was done I really had the car hooking. The cars first event is this weekend, I'll post a setup if it goes well
06-26-2009, 01:39 AM
#989
I think the cone washers are more cost effective and are not subject to coil bind. Where as the washers can be stacked accordingly to load conditions and adjustibility. Or something like that