


 6Likes
Tamiya Ta06
 03-21-2012, 12:42 PM
#1756
Ok I did a bit more playing around and since a few people are interested in this I will post my findings. This is starting to become an obsession for 50/50 Front/Back and Left/Right weight distribution. 
I moved my electronics around and the best balance I could get is how the kit shows it. (Go figure! ) I haven't gone as far as the re-wire yet, but when placing the electronics in the recommended place I came up with these figures:
LR - 344g
RR - 356g
RF - 290g
LF - 310g
Total = 1300g (No body and I took out the weights I had in the front right from the picture and have also changed to ti-scews and the graphite battery holder.)
So this is 54% weight in the back /46% front. Once again this is running the IFS so with the shocks all the way in the front I can see it being 52/48. Add that shorty lipo and mount it towards the front I am sure you could get the 50/50. I am tempted to buy one just to see if I can get to 50/50 running the IFS shocks.
Weights of my electronics:
Servo with screws: 60g
ESC: 57g
Battery: 274g
Rec: 13.5g
Motor: 175g (3mm spacer is another 5.5g)
Transponder: 5.5g
I moved my electronics around and the best balance I could get is how the kit shows it. (Go figure!
) I haven't gone as far as the re-wire yet, but when placing the electronics in the recommended place I came up with these figures: LR - 344g
RR - 356g
RF - 290g
LF - 310g
Total = 1300g (No body and I took out the weights I had in the front right from the picture and have also changed to ti-scews and the graphite battery holder.)
So this is 54% weight in the back /46% front. Once again this is running the IFS so with the shocks all the way in the front I can see it being 52/48. Add that shorty lipo and mount it towards the front I am sure you could get the 50/50. I am tempted to buy one just to see if I can get to 50/50 running the IFS shocks.
Weights of my electronics:
Servo with screws: 60g
ESC: 57g
Battery: 274g
Rec: 13.5g
Motor: 175g (3mm spacer is another 5.5g)
Transponder: 5.5g
Now my car is 575g in the front and 660g in the rear. So as the car sits it is 46.5% weight in the front and 53.5% in the back. This isn't much different except for the fact that to make X class minimum weight I can use that extra 65g of weight savings and put it in the front of the car making it closer to the 50/50.
I have not run the car this way yet, but I will on Sunday.
 03-21-2012, 07:47 PM
#1757
I'm at 1420 with body... I removed the aluminum tensioner that i bought and modded the plastic one, removed the center wire keep, removed the front sway and changed all the m3 x 10 mm screws with m3 x8mm. Next step, servo...
I am also selling a new(open and soldered but never ran) tekin RS esc and a Spektrum sr3520 receiver. Both on eBay... I am going to a 4.5 r and sticking with my SpeedPassion 2.0 gt that I have been running.
I am also selling a new(open and soldered but never ran) tekin RS esc and a Spektrum sr3520 receiver. Both on eBay... I am going to a 4.5 r and sticking with my SpeedPassion 2.0 gt that I have been running.
03-21-2012, 09:05 PM
#1758
Tech Elite

iTrader: (89)
Join Date: Aug 2009
Location: " The World's Most Famous Beach "
Posts: 2,307
Trader Rating: 89 (100%+)
ok, I am finally done acquiring parts for my ta06 and want to build it on the Exotek chassis I have but I am thinking of building it on the composite chassis and then switching it over to the Exotek, that way it is easier to go back to the composite for the local TCS race this summer. Is this smart or to much work?
03-22-2012, 10:45 AM
#1759
ok, I am finally done acquiring parts for my ta06 and want to build it on the Exotek chassis I have but I am thinking of building it on the composite chassis and then switching it over to the Exotek, that way it is easier to go back to the composite for the local TCS race this summer. Is this smart or to much work?
Below is the link to my items...
http://www.ebay.com/sch/thundercatsg...id=p4340.l2562
03-22-2012, 01:01 PM
#1760
Tech Elite
iTrader: (89)
Join Date: Aug 2009
Location: " The World's Most Famous Beach "
Posts: 2,307
Trader Rating: 89 (100%+)
Just build on the exotek.
Below is the link to my items...
http://www.ebay.com/sch/thundercatsg...id=p4340.l2562
Below is the link to my items...
http://www.ebay.com/sch/thundercatsg...id=p4340.l2562
03-24-2012, 10:30 AM
#1761
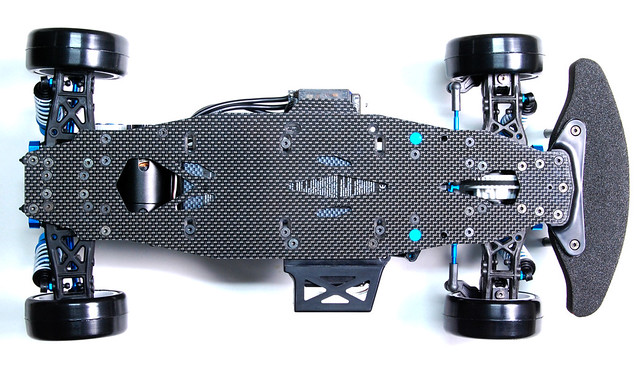
Just thought I would update this with my current build. (See attached pic) I am now using an Exotech Chassis, IFS shocks, and a shorty lipo. Overall weight is 1235g with no body. The shorty pack is about 60g less then my other battery.
Now my car is 575g in the front and 660g in the rear. So as the car sits it is 46.5% weight in the front and 53.5% in the back. This isn't much different except for the fact that to make X class minimum weight I can use that extra 65g of weight savings and put it in the front of the car making it closer to the 50/50.
I have not run the car this way yet, but I will on Sunday.
03-24-2012, 12:19 PM
#1762
$11 Diff locker to replace the gear sets... I wonder what the weight difference is between this and a spool...(it works for the front OR rear!


http://banzaihobby.com/index.php?mai...hupsv2uh9fdu27
http://banzaihobby.com/index.php?mai...hupsv2uh9fdu27
03-24-2012, 09:45 PM
#1764
Can i used TA05 FOW on my TA06?
03-24-2012, 10:11 PM
#1766
I got my car to 1323 in ifs mode with alum front bulkhead, center one way, alum rear bulkhead, alum steering plus alum pulley holder.
I was able to shave off 55 grams by converting it to rhd. I'm looking for ways to shave weight. I'm getting a shorty lipo that will save another 40 or so. Anyone running shorty lipo and can post a pict of how it's secure on the exotek chassis?
I was able to shave off 55 grams by converting it to rhd. I'm looking for ways to shave weight. I'm getting a shorty lipo that will save another 40 or so. Anyone running shorty lipo and can post a pict of how it's secure on the exotek chassis?
Last edited by silverhkswrx; 03-25-2012 at 06:18 AM.
03-25-2012, 06:15 AM
#1767
So i did it... Here is my in-depth step by step guide to make the TA06 RHD.
Parts needed:
Dremel.
2 m3x.3mm shims
4 m3x1mm spacer (Tamiya part #53539)
1 m3x17mm tweak screw
***Exotek EX06 chassis HIGHLY RECCOMENDED!!!(If you do not have it, you will need to dremel TONS off the tub, IFS mount and other mods I WILL NOT be discussing ont his step by step. guide.
Step 1: Disassemble your entire steering setup.
Step 2: Dremel off the knob off the steering rack. Make it flat.

Step 3: take one of the extra IFS suspension spacers(the plastic that raises the drive cup) and measure 13mm and dremel it at that mark.
Step 4: Remove the spacers behindthe steering ball studs on the steering rack and reinstall the ball studs on the tweak screws without any spacers
(rubbing of the belt will result if this step is skipped)

Step 5: reinstall the steering rack upside down (and backwards)
**note: The spacers that USED to be on the bottom of the steering rack, now needs to be placed on top.

Step 6:When reinstalling the top of the steering rack support, place the m3x.3mm shims UNDER the carbon fiber between the carbon fiber and the aluminum support.
***It helps is you do step 7 at the same time
Step 7: Unscrew the 4 screws that hold the pulley holder and top deck to the alum support. place 1mm spacers under the screws(Tamiya shim set comes with 4 aluminum ones. Tamiya part #53539)

Step 8: Take the m3x17mm tweak screw and screw it into the slot in the steering rack. Place the IFS spacer that you dremeled earlier onto the screw, then install the ball stud.
Step 9: Move your servo mounts to the opposite side of the chassis.(this is where the Exotek helps DRAMATICALLY! move it to the EXACT screw/slot on the other side. As you see in the picture below, the holes are mirrored on both sides of the chassis. If you do not install the esc bottom "cage" you will save about 5 grams on the plastic one and 8 on the graphite one from eagle racing.
Step 10: move your batter holder screws and esc mount to the same location, just the opposite side of the chassis.(you will need to remove anything mounted to the mount and re-secure it with fresh servo/double sided tape.
**Side note/trick: Get another collar for your c-hub and dremel the back hole a little larger(about .25-.5mm) and slide that collar with the larger portion facing down, slide a slightly longer screw through the chassis, through the collar and secure with a nut. It will now rotate and pivot easier for a much easier battery removal. You will also need a spacer between the screw and the nut on the center part of the esc support.

Enjoy the atleast 30 grams you just shaved off removing atelast 40mm off 5 wires. I am sure I can save more if I were to remove the slider that helps remove the lipo, but I dont want to have to remove the topdeck everytime I want to replace a battery...
Parts needed:
Dremel.
2 m3x.3mm shims
4 m3x1mm spacer (Tamiya part #53539)
1 m3x17mm tweak screw
***Exotek EX06 chassis HIGHLY RECCOMENDED!!!(If you do not have it, you will need to dremel TONS off the tub, IFS mount and other mods I WILL NOT be discussing ont his step by step. guide.
Step 1: Disassemble your entire steering setup.
Step 2: Dremel off the knob off the steering rack. Make it flat.
Step 3: take one of the extra IFS suspension spacers(the plastic that raises the drive cup) and measure 13mm and dremel it at that mark.
Step 4: Remove the spacers behindthe steering ball studs on the steering rack and reinstall the ball studs on the tweak screws without any spacers
(rubbing of the belt will result if this step is skipped)
Step 5: reinstall the steering rack upside down (and backwards)
**note: The spacers that USED to be on the bottom of the steering rack, now needs to be placed on top.
Step 6:When reinstalling the top of the steering rack support, place the m3x.3mm shims UNDER the carbon fiber between the carbon fiber and the aluminum support.
***It helps is you do step 7 at the same time
Step 7: Unscrew the 4 screws that hold the pulley holder and top deck to the alum support. place 1mm spacers under the screws(Tamiya shim set comes with 4 aluminum ones. Tamiya part #53539)
Step 8: Take the m3x17mm tweak screw and screw it into the slot in the steering rack. Place the IFS spacer that you dremeled earlier onto the screw, then install the ball stud.
Step 9: Move your servo mounts to the opposite side of the chassis.(this is where the Exotek helps DRAMATICALLY! move it to the EXACT screw/slot on the other side. As you see in the picture below, the holes are mirrored on both sides of the chassis. If you do not install the esc bottom "cage" you will save about 5 grams on the plastic one and 8 on the graphite one from eagle racing.
Step 10: move your batter holder screws and esc mount to the same location, just the opposite side of the chassis.(you will need to remove anything mounted to the mount and re-secure it with fresh servo/double sided tape.
**Side note/trick: Get another collar for your c-hub and dremel the back hole a little larger(about .25-.5mm) and slide that collar with the larger portion facing down, slide a slightly longer screw through the chassis, through the collar and secure with a nut. It will now rotate and pivot easier for a much easier battery removal. You will also need a spacer between the screw and the nut on the center part of the esc support.
Enjoy the atleast 30 grams you just shaved off removing atelast 40mm off 5 wires. I am sure I can save more if I were to remove the slider that helps remove the lipo, but I dont want to have to remove the topdeck everytime I want to replace a battery...
03-25-2012, 06:20 AM
#1768
 )
)I can EASILY see this getting banned from ROAR. A third party changing setting mid-race? RC pitcrew?
03-26-2012, 03:24 AM
#1770