


 140Likes
Roche Rapide P12V
 10-05-2023, 09:33 PM
#16
 10-06-2023, 04:27 AM
#17
Just ordered mine!
10-06-2023, 04:41 AM
#18

I started the build last night and got rear assembled and front started. So far really nice quality kit with regards to fit and finish.
The instruction manual is well done and great illustrations.
Only hiccup to date is front screw for bumper really should be 1mm shorter as they just about touch carbon lower arm.
Front end will go together over next day and will report back.
The instruction manual is well done and great illustrations.
Only hiccup to date is front screw for bumper really should be 1mm shorter as they just about touch carbon lower arm.
Front end will go together over next day and will report back.
10-06-2023, 04:42 PM
#20
That's wonderful news! I know the Evo2 chassis made the car pretty heavy, so it's great to hear the new car isn't quite as heavy.
10-07-2023, 06:45 PM
#21
Car is complete and overall very nice build. Few small detail could be improved other than the afore mentioned shorter bumper screws.
Getting oring on rear bearing is a pia and need 3 hands. Little 3d print tool would be nice addition to kit to easily stretch oring over bearing.
Front kingpin could use a slightly better surface finish but can easily be polished. I used my old standby for kingpin lube of Losi Smart Grease and feels pretty smooth but dampening on heavy side. When using something thinner like 5k the surface finish will need to be improved on kingpin to get smooth "feeling" on bench.
Shock bushing for shaft does have a little friction but still operates nicely just not that butter smooth feel.
Few mini tubes of lube and oil would be nice to compete build but most racers have this stuff...just pet peeve when kits don't include any type of required lube.
Does all this matter....probably not.
If using sanwa servo I would recommend getting one of the sagami/srf servo saver adapter and sagami/srf sanwa carbon spacer. It will get bump steer more normal range without crazy spacers on steering knuckle ball stud.
https://srf-online-store.com/product...a90f09a4&_ss=r
https://srf-online-store.com/product...5e88ddef&_ss=r
I would think sagami fab/srf should also be coming out with 3d printed bumper in near future. The foam bumper is so....2020 hahah.
Last edited by J.Gonzalez; 10-07-2023 at 06:56 PM.
10-07-2023, 08:53 PM
#22
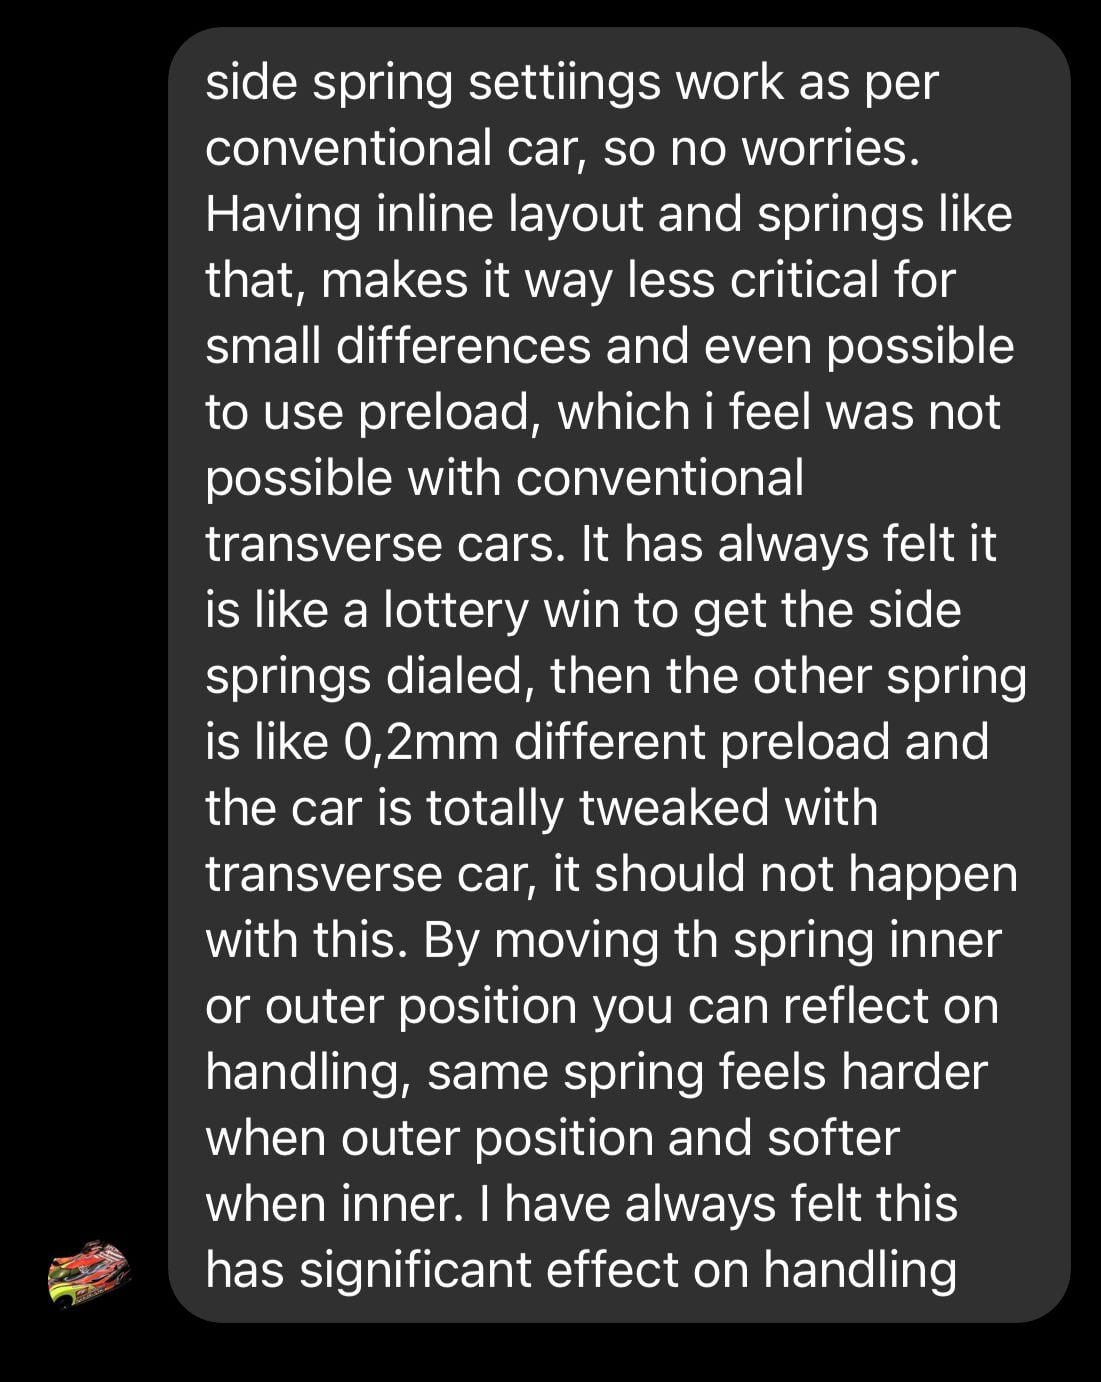
I asked Vesa about the side springs being in a different location than that of a traditional car and this is what he told me. He�s been great about answering questions.
10-08-2023, 08:39 AM
#23
Tech Regular
iTrader: (4)
Maybe the side springs will pretty much only control tweak in a straight line? Corraly didn't use side springs at all for the longest time. All of the side weight was controlled by the front springs/crossbar.
Last edited by MC Hamilton; 10-09-2023 at 06:05 AM.
10-08-2023, 10:32 AM
#24
Can anyone confirm yet whether a standard 1/12 servo will fit? I know the manual states to use a Sanwa or PowerHD servo, but wondering if a standard servo without mounting wings will fit.
10-09-2023, 06:17 AM
#25
my greatest bit of feedback is "don't be cheap" with the polishing compound on the king pins. I polished the kingpins and upon final setup work I saw one of the two kingpins sticking still slightly. so i then used an excessive amount of mothers polish to resolve the one kingpin.
other build points-
other build points-
- be careful on how tight you make the "left hub" locking screw. the alloy screw wants to pop its head off. ask me how i know
 . thankfully a steel 2.5mm screw can easily replace this very fancy looking aluminum screw.
 - for the rear axle bearing -- stretching the bearing with two hex drivers will make applying it over the 1/4" bearing easier
- my car received 15g under its tekin esc
- another 16g weight added directly next to the esc (opposite side of receiver/servo) to enable a proper balance on balance pins.
10-10-2023, 05:49 AM
#27
my greatest bit of feedback is "don't be cheap" with the polishing compound on the king pins. I polished the kingpins and upon final setup work I saw one of the two kingpins sticking still slightly. so i then used an excessive amount of mothers polish to resolve the one kingpin.
other build points-
other build points-
- be careful on how tight you make the "left hub" locking screw. the alloy screw wants to pop its head off. ask me how i know . thankfully a steel 2.5mm screw can easily replace this very fancy looking aluminum screw.
- for the rear axle bearing -- stretching the bearing with two hex drivers will make applying it over the 1/4" bearing easier
- my car received 15g under its tekin esc
- another 16g weight added directly next to the esc (opposite side of receiver/servo) to enable a proper balance on balance pins.
10-10-2023, 06:58 AM
#28
Another option is to get a reamer to clean up the holes in the knuckle. Not sure what the diameter is on the P12V but on the old Xrays they were 3mm and the 2021-2023 they are 4mm. You can buy an expensive reamer like the Hudy ones (which are very nice), but I just ordered two long jobber drill bits in 3.0mm and 4.0mm and use them on all plastic parts that have a precise hole (steering knuckles, rear hubs if plastic, etc). You just run the bit (by hand) in and out a few passes and it'll clean up any imperfections in the mold.
10-10-2023, 11:18 AM
#29
Oh wow! I didn't realize they were aluminum. Thanks for the clarification. I have to say I'm very interested in this car. My buddy just ordered one and I'm looking forward to seeing it in person and seeing how it is on the track. I currently have 2020, 2022 and 2023 Xray X12 cars.