2421Likes
Tekno RC EB410 Thread

 05-13-2019, 06:33 AM - Wikipost
|
|||
|
|||


 12-14-2017, 01:20 AM
#2806
I'm currently debating on buying raceform shock towers, I just like the durability aspect but will these affect handling due to the flex? Has anyone tried these yet?
 12-14-2017, 05:41 AM
#2807
Tech Master
iTrader: (49)
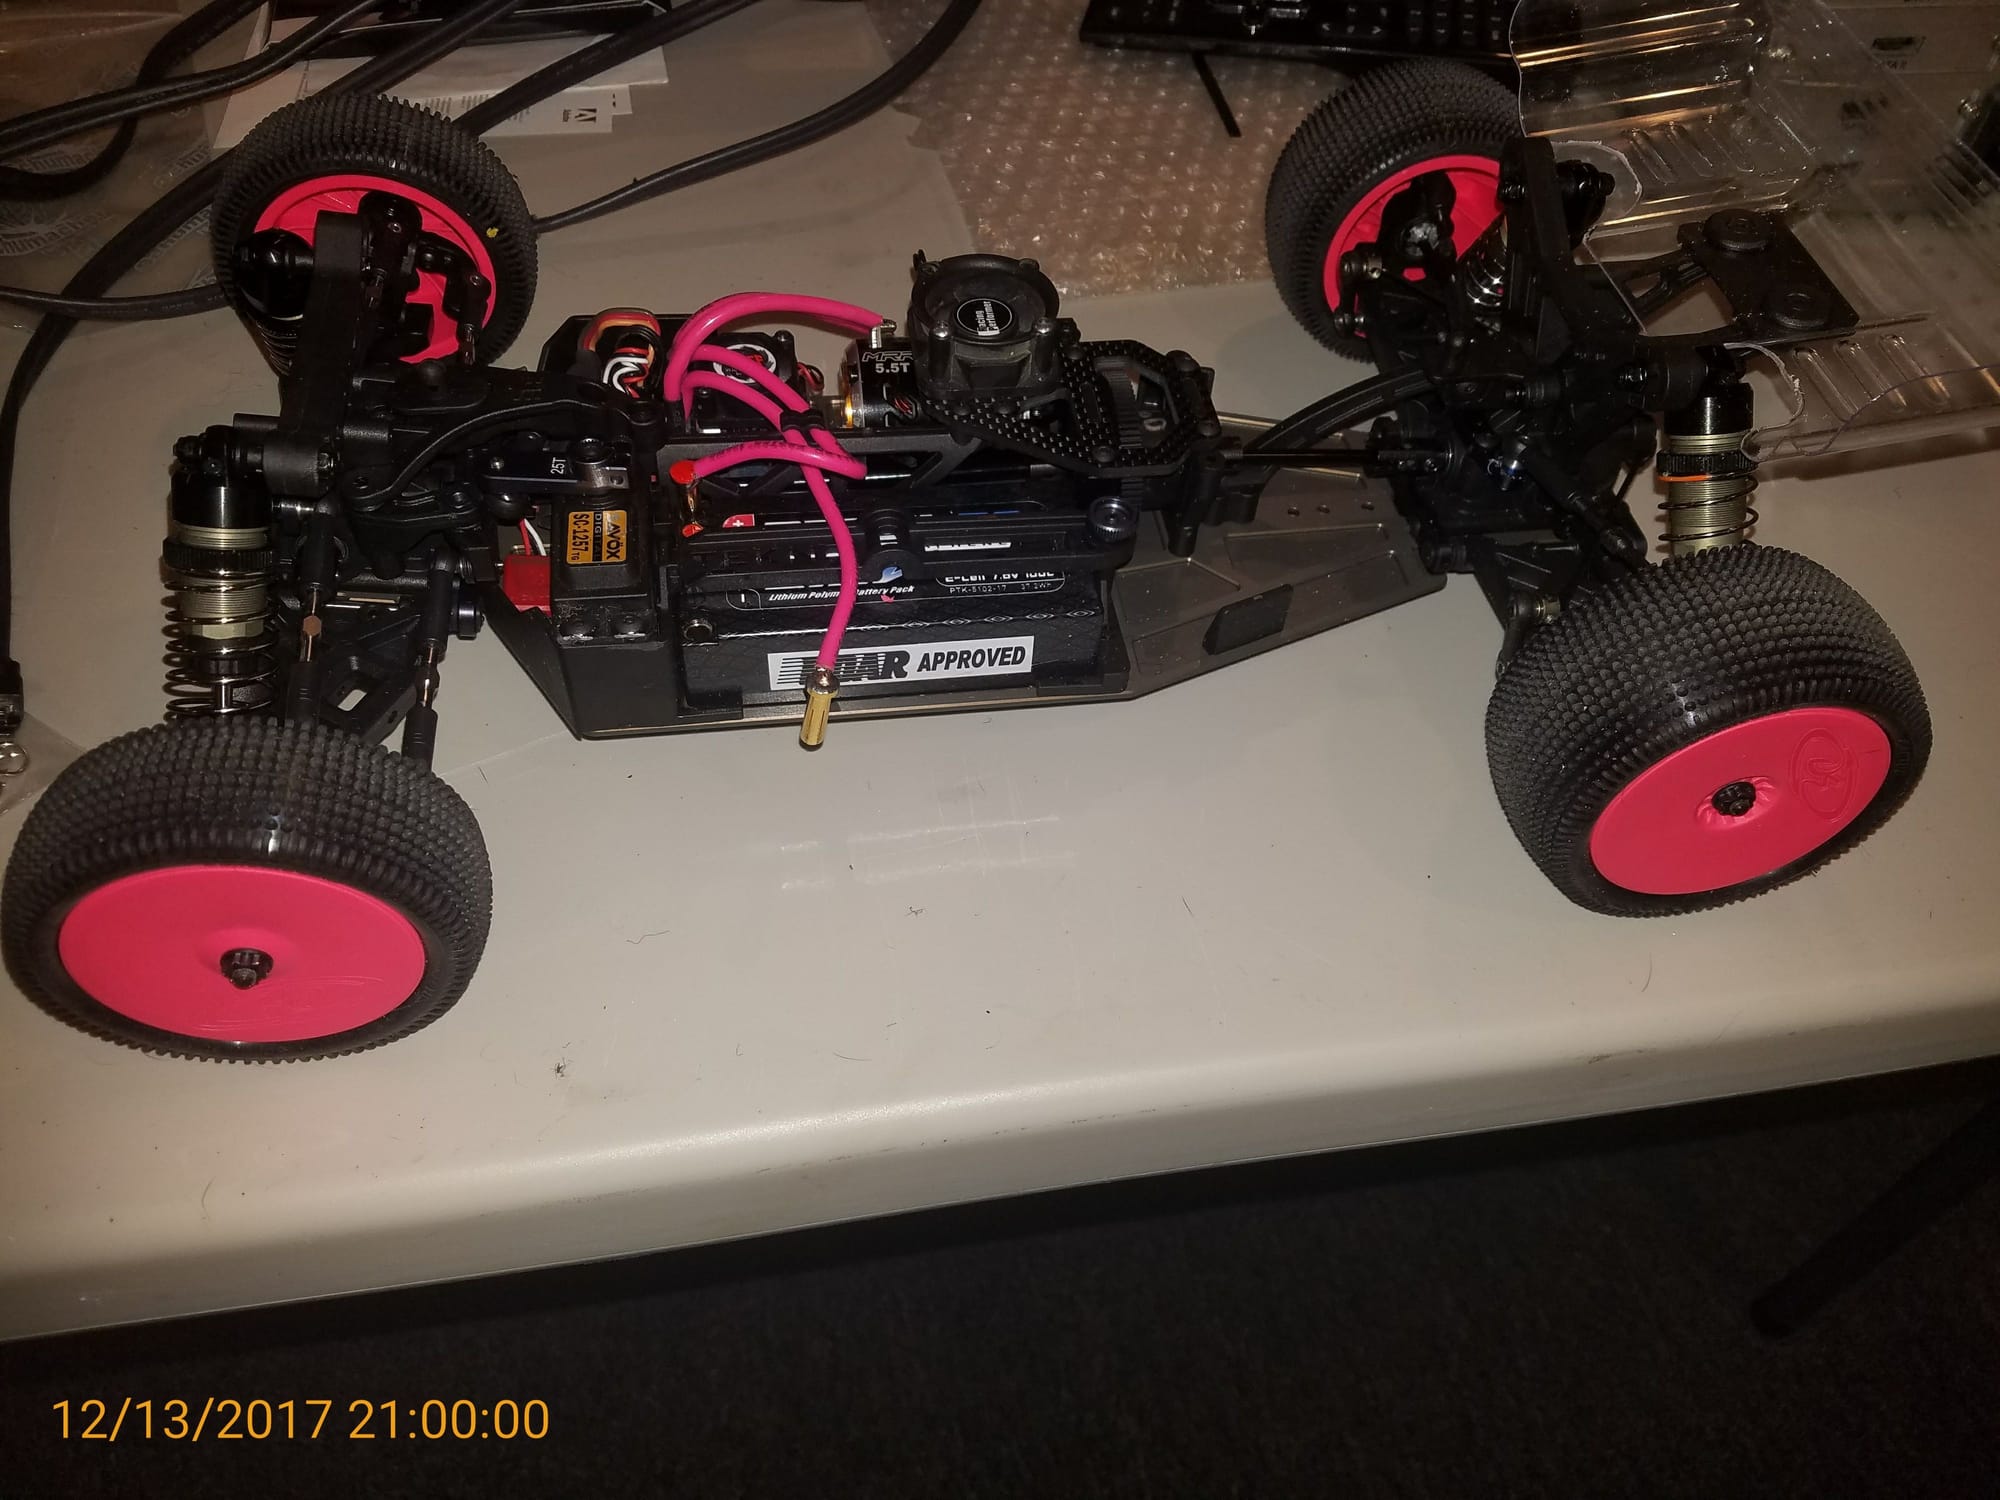
Completed my build last night, just waiting for the body.
I only have 2 complaints, about my kit,
1. The wheel hexes we're too tight on the axles, I had to sand away the anodizing in the inside the hole to make them fit.
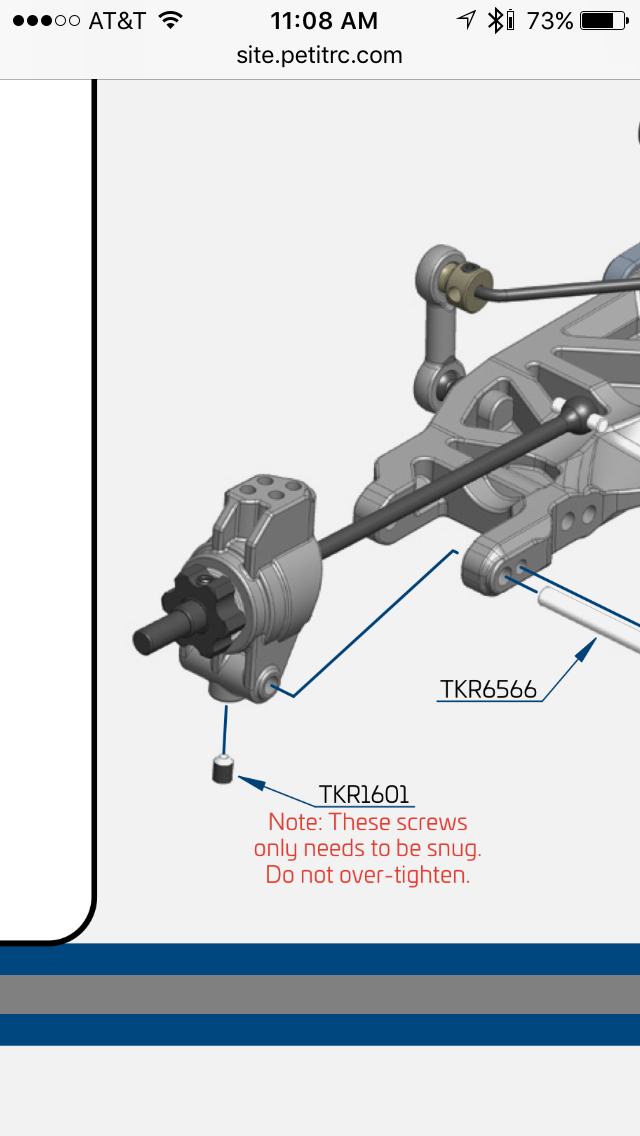
2. The kit didn't come with the 3x3mm set screws for the hexes, they were all 3x5mm which are too long and don't allow the wheel to go in without damaging it.(I double checked every set screw in the kit to make certain I didn't miss them and install the shorter ones somewhere else.)
I only have 2 complaints, about my kit,
1. The wheel hexes we're too tight on the axles, I had to sand away the anodizing in the inside the hole to make them fit.
2. The kit didn't come with the 3x3mm set screws for the hexes, they were all 3x5mm which are too long and don't allow the wheel to go in without damaging it.(I double checked every set screw in the kit to make certain I didn't miss them and install the shorter ones somewhere else.)
12-14-2017, 05:52 AM
#2808
Tech Master
iTrader: (90)
Completed my build last night, just waiting for the body.
I only have 2 complaints, about my kit,
1. The wheel hexes we're too tight on the axles, I had to sand away the anodizing in the inside the hole to make them fit.
2. The kit didn't come with the 3x3mm set screws for the hexes, they were all 3x5mm which are too long and don't allow the wheel to go in without damaging it.(I double checked every set screw in the kit to make certain I didn't miss them and install the shorter ones somewhere else.)
12-14-2017, 05:55 AM
#2809
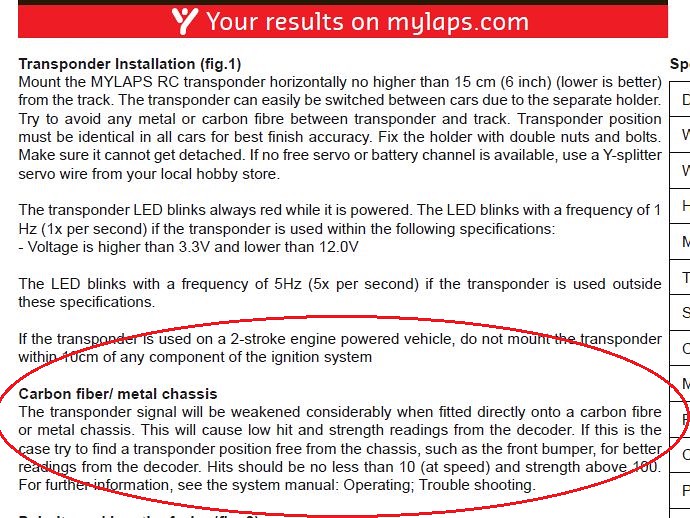
Huh? Been running my transponder on the chassis in Tekno's recommended position since mid-October. Not a single lap was missed. You'll find many others here who have mounted theirs in the same position w/o issue.
12-14-2017, 06:00 AM
#2810
Tech Master
iTrader: (90)
Wierd, I was told to never run directly on chassis as I did one time and missed a bunch of laps. Everyone at the track told me to move it and when I did I had no more issues. Thought it was common knowledge to not mount to aluminum chassis. Guess I was mis informed.
12-14-2017, 06:08 AM
#2811

 12-14-2017, 06:54 AM
#2814

...The kit didn't come with the 3x3mm set screws for the hexes, they were all 3x5mm which are too long and don't allow the wheel to go in without damaging it.(I double checked every set screw in the kit to make certain I didn't miss them and install the shorter ones somewhere else.)...
Bags F and H have 2 different size set screws, be sure to use the smaller 3x3mm screws for the hexes or you may run into problems installing wheels over the hex if you use the longer 3x4mm screws

12-14-2017, 07:15 AM
#2816
I couldn't tell a difference in handling after switching from the Tekno carbon towers (running on low to med bite hard packed dirt). They are supposed to offer a bit more flex when crashing to help absorb some of the force going to the bulkhead though. The clear look is also unique
12-14-2017, 08:09 AM
#2817
Completed my build last night, just waiting for the body.
I only have 2 complaints, about my kit,
1. The wheel hexes we're too tight on the axles, I had to sand away the anodizing in the inside the hole to make them fit.
2. The kit didn't come with the 3x3mm set screws for the hexes, they were all 3x5mm which are too long and don't allow the wheel to go in without damaging it.(I double checked every set screw in the kit to make certain I didn't miss them and install the shorter ones somewhere else.)
I only have 2 complaints, about my kit,
1. The wheel hexes we're too tight on the axles, I had to sand away the anodizing in the inside the hole to make them fit.
2. The kit didn't come with the 3x3mm set screws for the hexes, they were all 3x5mm which are too long and don't allow the wheel to go in without damaging it.(I double checked every set screw in the kit to make certain I didn't miss them and install the shorter ones somewhere else.)