


 2421Likes
Tekno RC EB410 Thread

 05-13-2019, 06:33 AM - Wikipost
|
|||
|
|||


 10-19-2017, 10:41 AM
#1726
Tech Regular
iTrader: (6)
Just wanted to give you guys a starting point if you are using a Tekin Gen3 Spec R 13.5 since they gear quite differently than typical motors.
Start with around a 24t pinion for a medium sized clay track. On a small indoor carpet track we used a 23t and at IOCC (carpet with sweeping corners and long straight) I was using a 25t.
Also be sure to use a high-velocity fan and vent the body behind the motor and near the fan so it can get cool air. This helped keep punch consistent for the entire 7min race.
Oh and no one was pulling me on the straight, these motors are fast and only used about 1700mah in a 7min main!
 10-19-2017, 10:45 AM
#1727
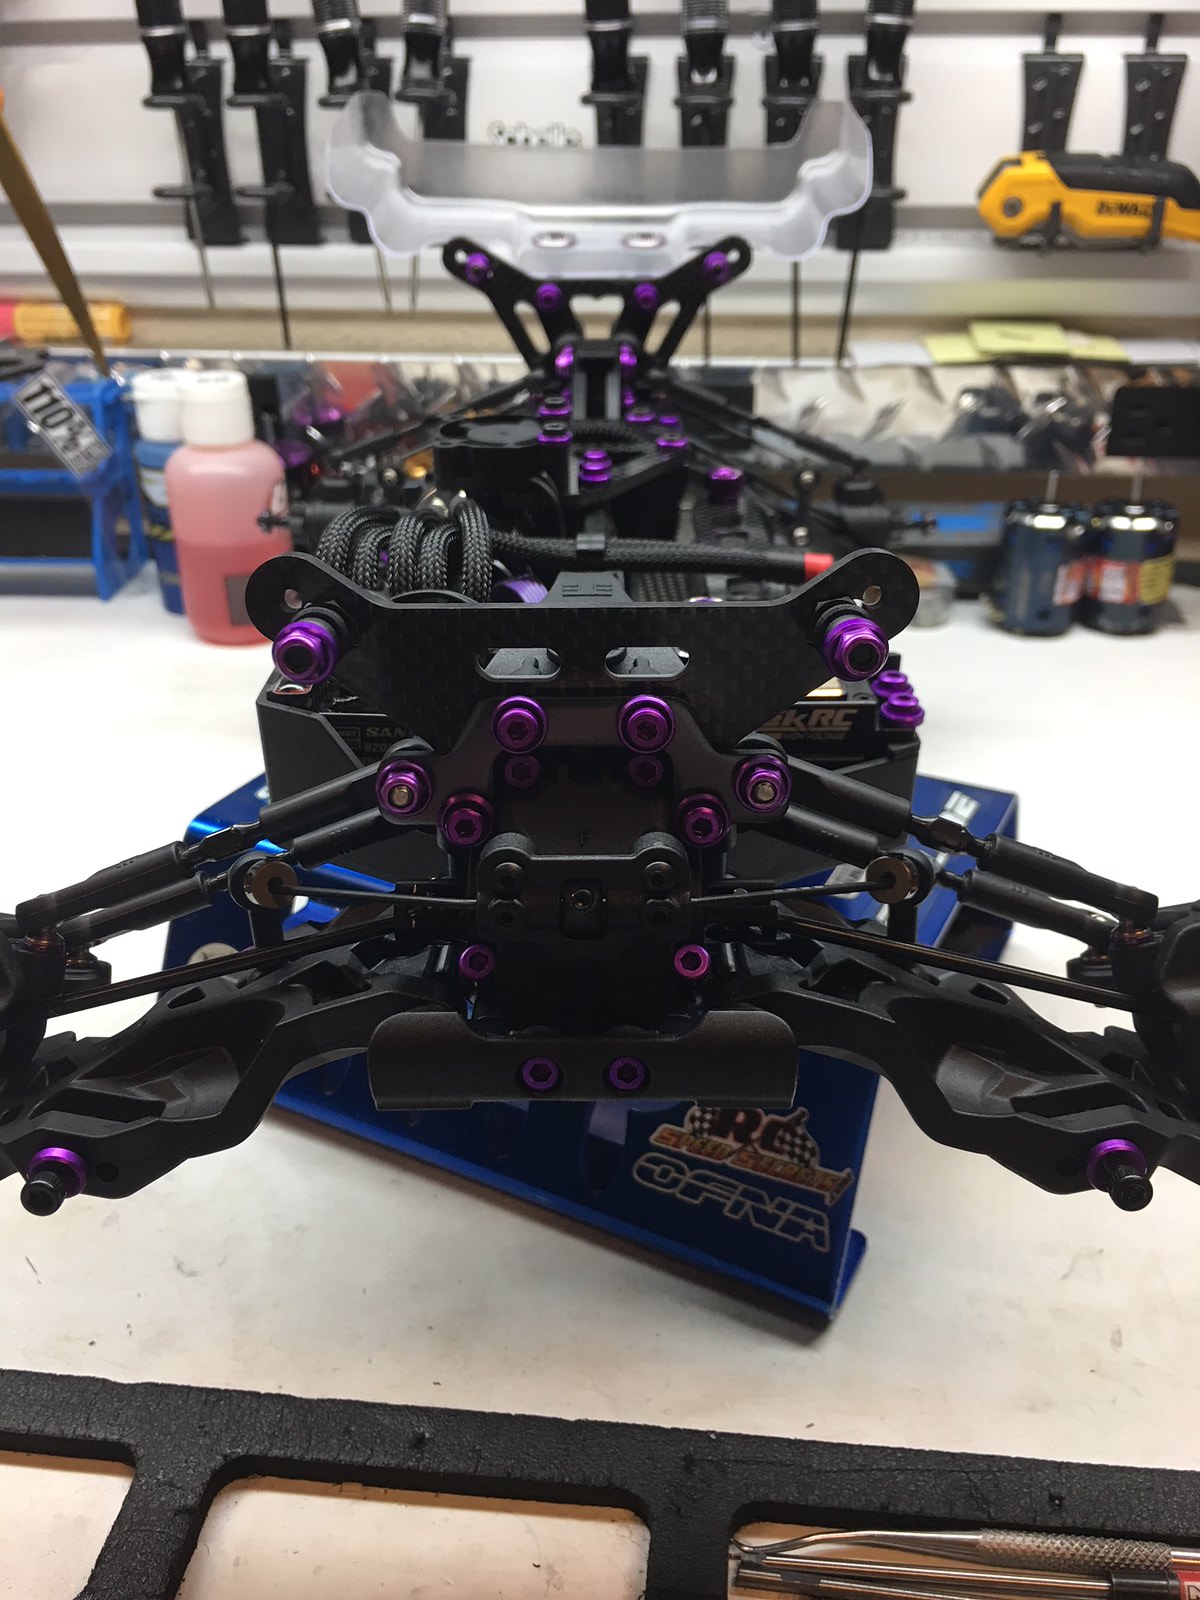
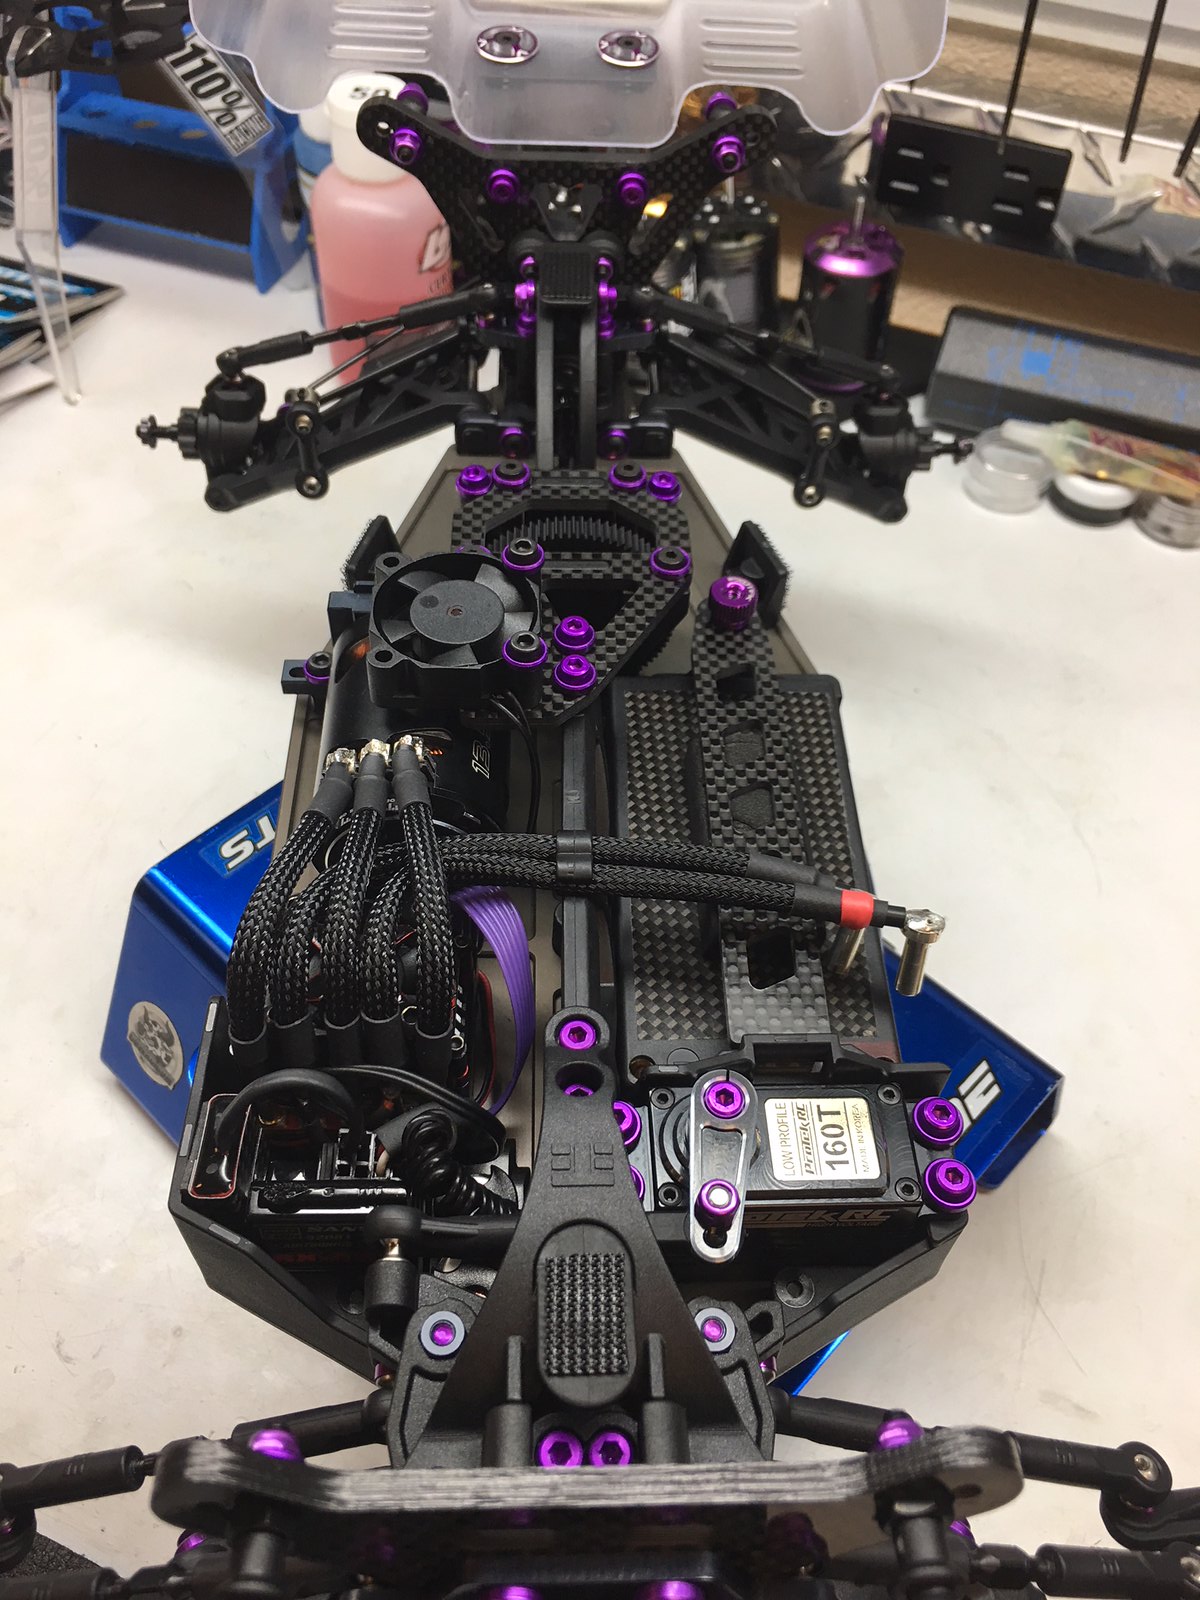
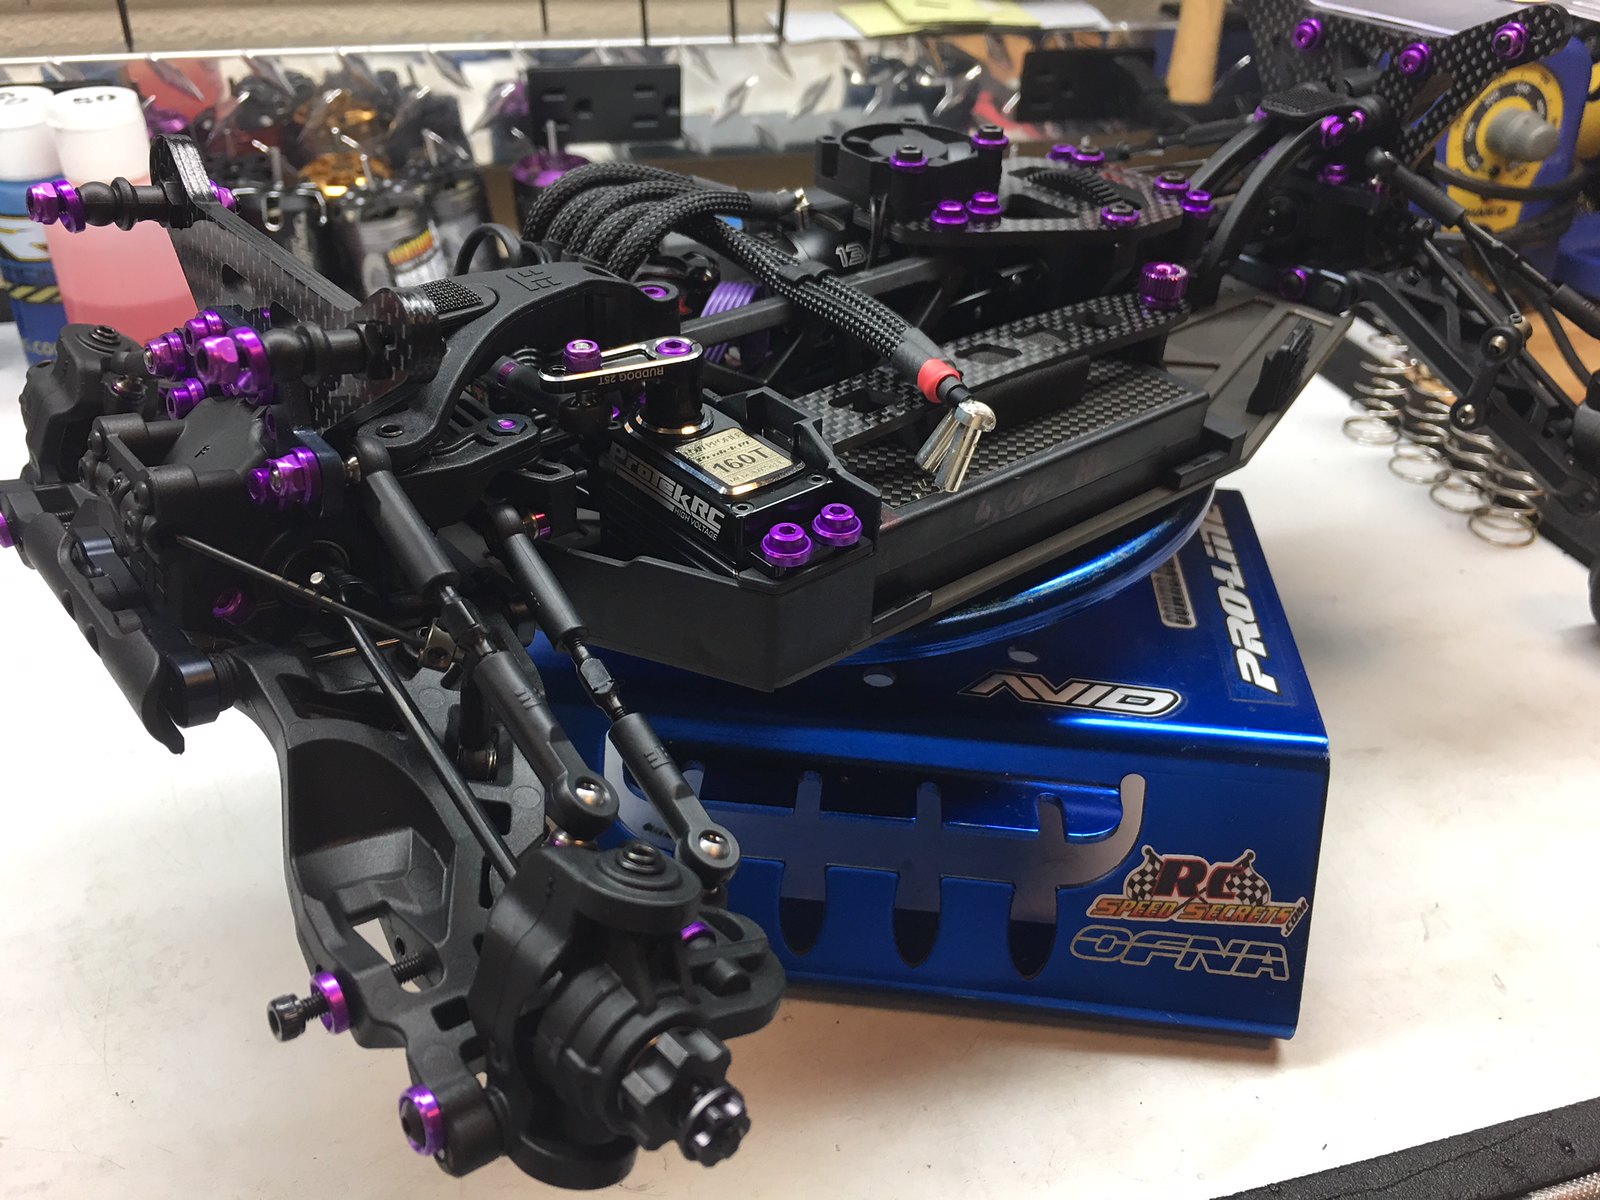
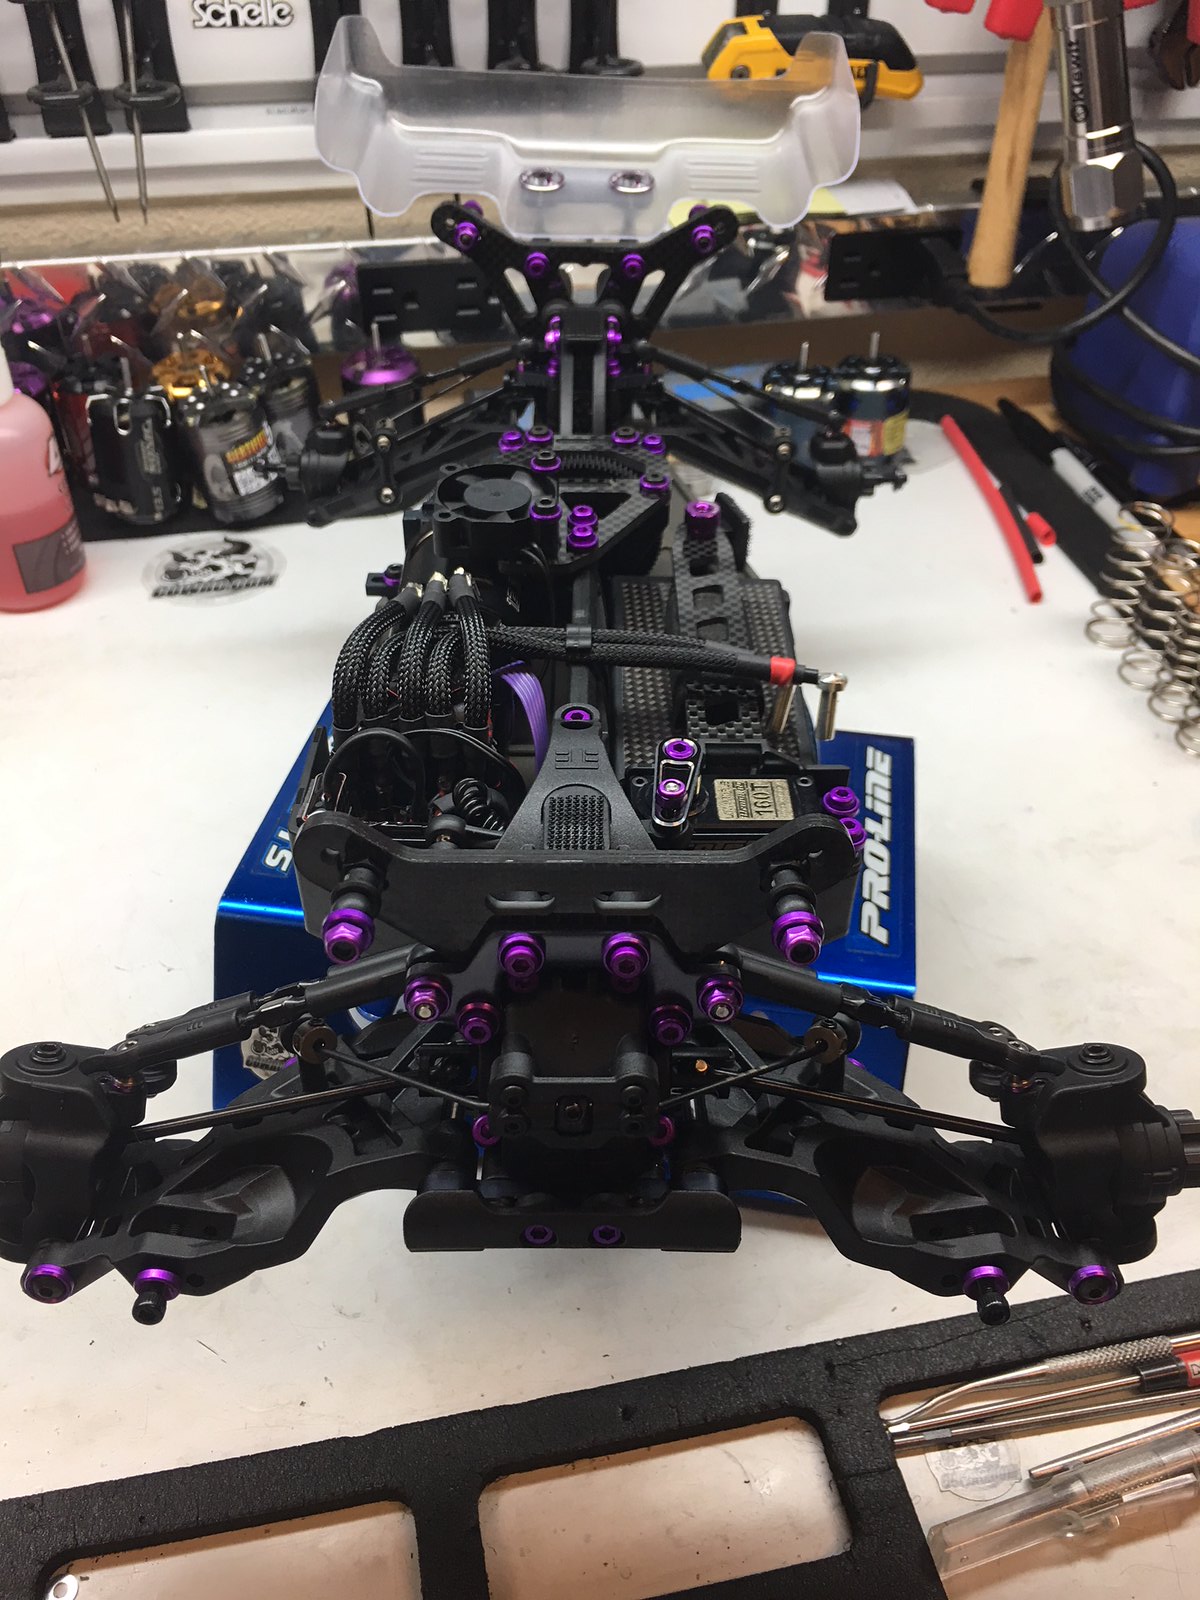
now if I could only paint bodies!
EB410 Purple Edition
 IMG_3192 by Allen Drebi, on Flickr
 IMG_3203 by Allen Drebi, on Flickr
 IMG_3200 by Allen Drebi, on Flickr
 IMG_3199 by Allen Drebi, on Flickr
 IMG_3195 by Allen Drebi, on Flickr
 IMG_3194 by Allen Drebi, on Flickr
EB410 Purple Edition
IMG_3192 by Allen Drebi, on FlickrIMG_3203 by Allen Drebi, on FlickrIMG_3200 by Allen Drebi, on FlickrIMG_3199 by Allen Drebi, on FlickrIMG_3195 by Allen Drebi, on FlickrIMG_3194 by Allen Drebi, on Flickr
 10-19-2017, 11:35 AM
#1729
Just wanted to give you guys a starting point if you are using a Tekin Gen3 Spec R 13.5 since they gear quite differently than typical motors.
Start with around a 24t pinion for a medium sized clay track. On a small indoor carpet track we used a 23t and at IOCC (carpet with sweeping corners and long straight) I was using a 25t.
Also be sure to use a high-velocity fan and vent the body behind the motor and near the fan so it can get cool air. This helped keep punch consistent for the entire 7min race.
Oh and no one was pulling me on the straight, these motors are fast and only used about 1700mah in a 7min main!
Start with around a 24t pinion for a medium sized clay track. On a small indoor carpet track we used a 23t and at IOCC (carpet with sweeping corners and long straight) I was using a 25t.
Also be sure to use a high-velocity fan and vent the body behind the motor and near the fan so it can get cool air. This helped keep punch consistent for the entire 7min race.
Oh and no one was pulling me on the straight, these motors are fast and only used about 1700mah in a 7min main!
10-19-2017, 12:10 PM
#1730
OK...so just got back from OCRC. Track was medium to slightly high grip in some spots today. So the car was not good...it was GREAT!!! I initially had a on power push, but that was because I put on transistors on the front anticipating insane steering, I then switched to electrons and moved the rear arms forward 2mm..BAM!! full second faster than my 22 4 and Xray and that was after 2 runs. Car felt very easy yet nimble to drive, felt very comfortable with it quickly. I ran the car box stock, stock fluids and setup except for the wheel base change per Jake Thayers recommendation. I also tried space Bars, Positrons and Dirt Webs, I settled on slightly worn Dirt webs as it hooked up great, Space Bars were great also. The car was little too planted in the back with the Space Bars and this was with brand new ones. Anyone concerned about this car being loose on medium grip clay track with stock setup should have no concerns at all. Car jumps, lands as good if not better than my 22 4 2.0...This thing sticks and goes like no other I have driven. I honestly have zero issues with this car from the build to driving, as a matter a fact I would have raced it tonight over my Losi or Xray, but could'nt stay for racing..that is how good the car felt. I seriously would suggest trying it box stock first before changing anything. One thing to note, I removed the center diff just to inspect and it is a little tricky getting it back in..not a big deal, once you do it a few times it goes right in.
I have to say for Tekno's first shot at 4wd 1/10 buggy they got it right..hats off
I have to say for Tekno's first shot at 4wd 1/10 buggy they got it right..hats off
10-19-2017, 12:39 PM
#1731
yes you are correct it was 1mm, not sure why I was thinking 2mm. arms are all the way forward.
10-19-2017, 12:45 PM
#1733
Yes it turns , just not that much with stock setup(on power push) imo. I believe the stock setup is intended for medium grip with an intermediate driver, so it my be fine for someone like that.On the first day I did some very minimal stuff to see a good improvement, but as I get more used to the car I will probably want even more steering, so Ill be changing diff fluid and a couple other things. Car is very planted and just drives realy nice..steering should be very easy to dial in as needed
10-19-2017, 03:01 PM
#1735
10-19-2017, 03:43 PM
#1736
When making final camber adjustments on the car I had a rod end pop off. I' ll reserve judgement of the stock ball cups until I actually get some run time on the car, but with a quick test fit, B5 rod ends should work too.
10-19-2017, 03:55 PM
#1737
Yes it turns , just not that much with stock setup(on power push) imo. I believe the stock setup is intended for medium grip with an intermediate driver, so it my be fine for someone like that.On the first day I did some very minimal stuff to see a good improvement, but as I get more used to the car I will probably want even more steering, so Ill be changing diff fluid and a couple other things. Car is very planted and just drives realy nice..steering should be very easy to dial in as needed
For the record, we never had a single rod end pop off during on track testing.
And yes, B5 and B6 ends should fit as our ball studs are 5.5mm. There is a slight height difference on the ball studs though.
10-19-2017, 03:58 PM
#1738
How much lube/grease/chapstick did you use on the threads? This was my first build and went the chapstick route. Haven't had a rod-end pop yet.
10-19-2017, 05:22 PM
#1739
 I pre threaded the others using a drill with the camber link. I haven't heard of this being an issue while driving, but it is good to know the B5/6 rod ends will work if you break as Tekno rod ends are currently unavailable.
10-19-2017, 08:17 PM
I pre threaded the others using a drill with the camber link. I haven't heard of this being an issue while driving, but it is good to know the B5/6 rod ends will work if you break as Tekno rod ends are currently unavailable.
10-19-2017, 08:17 PM
#1740
now if I could only paint bodies!
EB410 Purple Edition
IMG_3192 by Allen Drebi, on Flickr
IMG_3203 by Allen Drebi, on Flickr
IMG_3200 by Allen Drebi, on Flickr
IMG_3199 by Allen Drebi, on Flickr
IMG_3195 by Allen Drebi, on Flickr
IMG_3194 by Allen Drebi, on Flickr
EB410 Purple Edition
IMG_3192 by Allen Drebi, on FlickrIMG_3203 by Allen Drebi, on FlickrIMG_3200 by Allen Drebi, on FlickrIMG_3199 by Allen Drebi, on FlickrIMG_3195 by Allen Drebi, on FlickrIMG_3194 by Allen Drebi, on FlickrWhen you replaced the stock shock screws did you need to tap the left side for the cap head screws to thread?