


 80Likes
Durango DEX210 Thread
 11-19-2011, 03:10 PM
#2116
I received mine in the second batch and it had a bag of extra screws, nuts and shims. The shock screws are 1.3mm or .050. The pistons can either be plugged with a tooth pick and cut flush (what I did) or glue and zip kicked. I used the instruction online and built off of that and used the paper book for screw sizes.

 11-19-2011, 03:25 PM
#2117

that's such a sigh of relief on the screws (I have a small collection of randoms), mines from the 2nd batch as well, I've been studying the digital manual front to back, shock and diff are about the only things I'm nervous about, Im switching over from Kyosho stuff so if its similar (the shocks primarily) I should be alright
11-19-2011, 06:21 PM
#2118
Hey guys please help me out. I am not a complete expert on ball difs and slipper clutches. I have a problem. I do the whole build and everything goes together great. I break the diffs in on the workbench and go out to drive the car for the first time. I hit the gas and the car barely moves and something is slipping sounds like the slipper clutch. I go to tighten it down and when i twist on the nut, it spins the whole shaft and you can see the outer plate on the slipper pad turning with it. What am I doing wrong here? Any chance it might be the diff instead. It is fine holding the car up in the air, but as soon as you put it on the ground it really will not go anywhere? What is th edeal?
11-19-2011, 07:07 PM
#2119
Hey guys please help me out. I am not a complete expert on ball difs and slipper clutches. I have a problem. I do the whole build and everything goes together great. I break the diffs in on the workbench and go out to drive the car for the first time. I hit the gas and the car barely moves and something is slipping sounds like the slipper clutch. I go to tighten it down and when i twist on the nut, it spins the whole shaft and you can see the outer plate on the slipper pad turning with it. What am I doing wrong here? Any chance it might be the diff instead. It is fine holding the car up in the air, but as soon as you put it on the ground it really will not go anywhere? What is th edeal?
11-19-2011, 07:10 PM
#2120
Hey guys please help me out. I am not a complete expert on ball difs and slipper clutches. I have a problem. I do the whole build and everything goes together great. I break the diffs in on the workbench and go out to drive the car for the first time. I hit the gas and the car barely moves and something is slipping sounds like the slipper clutch. I go to tighten it down and when i twist on the nut, it spins the whole shaft and you can see the outer plate on the slipper pad turning with it. What am I doing wrong here? Any chance it might be the diff instead. It is fine holding the car up in the air, but as soon as you put it on the ground it really will not go anywhere? What is th edeal?
11-19-2011, 07:47 PM
#2121
Yes the pin is in it. I was affraid the clip came out and was thinking that was it or something else wrong with the diff. Oh boy, I guess I wiull be tearing this whole thing apart tonight!!!! Yes I know it has been talked about, but do not feel like going back and looking for it as it is late. Refresh my mind on which way the circlip goes in as far as the stamped edge goes?
11-19-2011, 08:10 PM
#2123
Yes the pin is in it. I was affraid the clip came out and was thinking that was it or something else wrong with the diff. Oh boy, I guess I wiull be tearing this whole thing apart tonight!!!! Yes I know it has been talked about, but do not feel like going back and looking for it as it is late. Refresh my mind on which way the circlip goes in as far as the stamped edge goes?
11-19-2011, 08:54 PM
#2125
I cant find a post on it. How do you asseble the shock cap on the body without pushing out the o-ring?
11-19-2011, 09:01 PM
#2126
You tighten it hand tight....it doesn't need to be cranked down. I just went over this with a new 210 owner last night at the track. He had the same problem with the o-rings. I went over, assembled one of his shocks for him as he watched. O-ring didnt push out and no leaks...he assembled the other three and I didnt hear from him the rest of the night about it
. Hand tight is all you need..if feel you need tools then its too tight!
Last edited by hopsing; 11-19-2011 at 09:19 PM.
11-19-2011, 09:50 PM
#2128
Hey guys please help me out. I am not a complete expert on ball difs and slipper clutches. I have a problem. I do the whole build and everything goes together great. I break the diffs in on the workbench and go out to drive the car for the first time. I hit the gas and the car barely moves and something is slipping sounds like the slipper clutch. I go to tighten it down and when i twist on the nut, it spins the whole shaft and you can see the outer plate on the slipper pad turning with it. What am I doing wrong here? Any chance it might be the diff instead. It is fine holding the car up in the air, but as soon as you put it on the ground it really will not go anywhere? What is th edeal?
11-19-2011, 10:00 PM
#2129
oh yeah! it is built and ready for testing tomorrow!
VERY nice kit, the dif is superb, best engineered ball dif i have seen. the only thing i dont like about the kit is the ballcups, i cant even adjust the camber without them popping off, kinda pisses me off that i am going to have to buy better ones but no biggie, the rest of the car makes up for it!
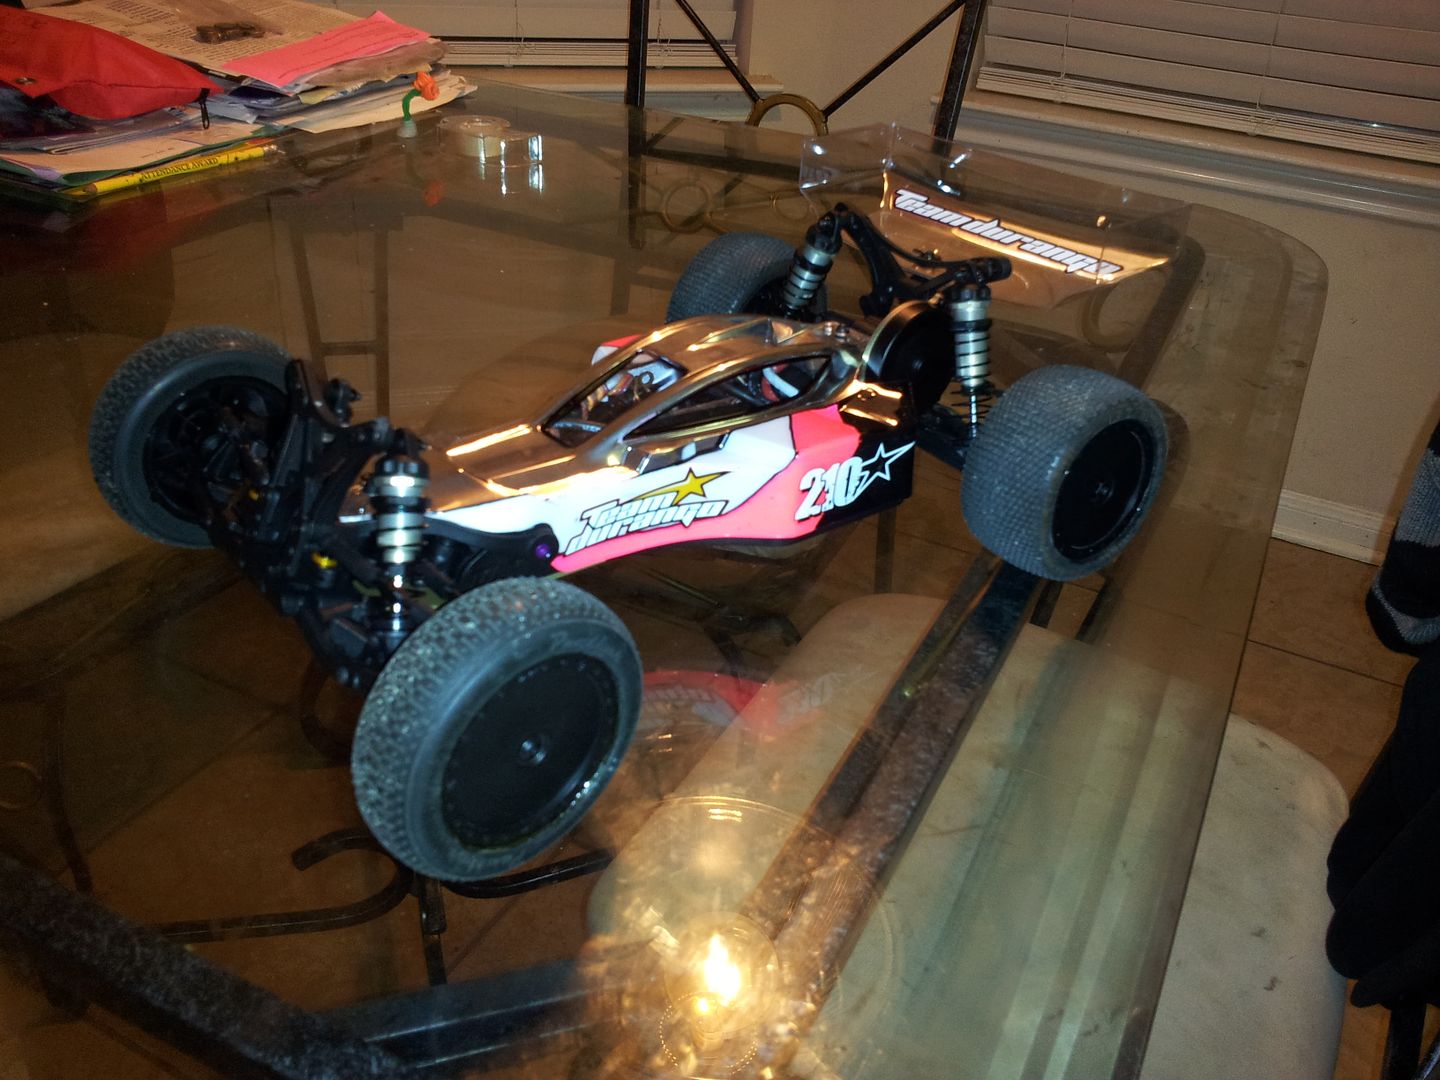
VERY nice kit, the dif is superb, best engineered ball dif i have seen. the only thing i dont like about the kit is the ballcups, i cant even adjust the camber without them popping off, kinda pisses me off that i am going to have to buy better ones but no biggie, the rest of the car makes up for it!
11-19-2011, 10:30 PM
#2130
oh yeah! it is built and ready for testing tomorrow!
VERY nice kit, the dif is superb, best engineered ball dif i have seen. the only thing i dont like about the kit is the ballcups, i cant even adjust the camber without them popping off, kinda pisses me off that i am going to have to buy better ones but no biggie, the rest of the car makes up for it!
VERY nice kit, the dif is superb, best engineered ball dif i have seen. the only thing i dont like about the kit is the ballcups, i cant even adjust the camber without them popping off, kinda pisses me off that i am going to have to buy better ones but no biggie, the rest of the car makes up for it!
You just need to work the turnbuckle back and forth in the ballcups a few times during assembly to get the threads cut into the plastic real good. Also tighten past the assembled length specified in the manual and then back off to where it "should" be. A touch of black grease or vaseline, etc wouldnt hurt during assembly but I didnt do it. Just dont use a driver through the hole in the end of the cup as a "T" wrench as I feel it will slightly stretch/deform the ball cup slightly and cause you problems
