


Serpent 1:10 F1
 08-22-2013, 01:00 AM
#151
Tech Adept
Hey guys need some help, would a TRG3001B body fit on the F110? I'm having trouble finding a body that clears the carbon fibre chassis just in front of the battery holders. Wondering if anyone else has used this body?
Thanks, Andrew
Thanks, Andrew
 08-24-2013, 04:18 PM
#152
Hi What will be the best "Final Gear Ratio" for the F110. I am new to electrical/F1.
Thanks
Claus
Thanks
Claus
08-25-2013, 08:16 PM
#153

Could one of you compare the F110 to, say, a Tamiya F104v2? I'm considering my first F1 car and the Serpent looks delicious. However, most people here seem to run Tamiya, we have a carpet track with rubber tires. How does the F110 handle in that setup?
08-26-2013, 03:17 AM
#154
Hello
i'll make a video soon for rcf1.fr.
as far as i've tested , the car is realy well born. i had no issues with broken parts or something like that. The only thing to do that's not in the manual is to use thread lock on almost every ball joint.
for the build , the kit comes with no wheel , no body and no spur gear.
it's very solid and very performant.
comparing to the box setup, i've just put some softer spring in the front and voila
09-06-2013, 10:18 PM
#155
 09-07-2013, 04:25 AM
#157
09-07-2013, 11:09 PM
#158
well, I was in the process of my build, and the write up is correct, be sure to have pivot ball ends on hand in case you snap one as you snap on the rod ends onto a pivot ball. I have cracked 2 so far. pretty frustrating, if you ask me. they are very brittle.
does anyone else find that the lower center pivot ball connecting the chassis and rear pod, can be pushed out of it's holder w/ VERY little effort? I can feel a slight snap as I push it back together, put comes apart very easily.
I hope once i get it together, w/ the center tube and shock, that it won't be that easy anymore.
my build has come to a halt till I get more ends....
09-08-2013, 01:12 PM
#160
this is my 1st serpent car, so following these directions, compared to Xray manuals, was a challenge. again, the user....
09-08-2013, 03:58 PM
#161
hey Metalnut. after retracing all the steps, comes to find out I mixed up the ball ends. I found it interesting only a couple ends I had trouble w/ snapping on, and when I took things apart, I noticed some ball ends were larger than others. slight, but noticeable. so chalk my last post down as user error. I thought I had separated the parts accordingly, (building the car at 1am) but I guess I did not. sadly I followed the manual too, I opened 1 bag at a time. I fully expect to the car to go together rather easier now once I get the replacement parts in. the car is finished, except for the 2 rod ends that will only take a few minutes to do. I can't wait to get my esc, motor, body and tires by next week to get this car on the track. I expect great things from this car.
this is my 1st serpent car, so following these directions, compared to Xray manuals, was a challenge. again, the user....
this is my 1st serpent car, so following these directions, compared to Xray manuals, was a challenge. again, the user....
In any case, I'm still following this thread
09-08-2013, 10:39 PM
#162
Tech Addict
iTrader: (38)
They certainly aren't brittle as I had the same issue with my S100 World GT car. The kit had an extra link pivot ball and was missing the shock pivot ball. I believe the link balls are 5mm and the shock was 4.5mm. It took quite a bit of force to snap the smaller ball cup over the larger ball which caused the plastic to split.
09-11-2013, 01:04 PM
#163
Nearly done the problem is I lent out my gun and paints and not returned yet "mudder plucker" never again.......
Also FGX (with the Rx and ESC side plates not fitted, really they are not needed), YOKOMO, F113, SPEED PASSION F-68 (fits perfectly as far as I'm concerned), As said all F104 TAMIYA'S, F103 TAMIYA'S to bulky in the rear for me, TRG's will fit. Now with the bit not fitting where the battery starts will happen with all (so far anyway) just need to pull body out when fitting and it will be fine, you can also just trim out that area if you wish.
F-68 BODY MORE HERE OF THE BODY http://www.rcformula1.com.au/index.p...ound-3-results about 12 rows down. Hope this all helps......
well, I was in the process of my build, and the write up is correct, be sure to have pivot ball ends on hand in case you snap one as you snap on the rod ends onto a pivot ball. I have cracked 2 so far. pretty frustrating, if you ask me. they are very brittle.
There hasn't been a problem with these yet, they loosen a little more after the build but no breaks so far. One thing to check is the front bulk head, "DONT SCREW IN TO FAR AND LOCTITE IT, THE TOP BALL AS WELL THE SAME. The drama is if tightened to far they will strip out. I'm getting this looked at NEWS TO COME ?
does anyone else find that the lower center pivot ball connecting the chassis and rear pod, can be pushed out of it's holder w/ VERY little effort? I can feel a slight snap as I push it back together, put comes apart very easily.
I hope once i get it together, w/ the center tube and shock, that it won't be that easy anymore.
They will be fine. With the side spring screws just screw the holding set screw down at least 3mm also put in a 8mm flat head instead of the 6mm, this is for the side links
my build has come to a halt till I get more ends....: BUGGER(
Damn, that doesn't sound encouraging at all. Maybe this isn't the chassis I want 
Yes it is the one you want, with every new car there will be some problems, the TEAM DRIVERS dont smash much and these small things can be over looked no excuses just a fact. Every F1 so far I've built and driven needs tweaking
Yes it is the one you want, with every new car there will be some problems, the TEAM DRIVERS dont smash much and these small things can be over looked no excuses just a fact. Every F1 so far I've built and driven needs tweaking
I appreciate the update. But.. if the cups split, wouldn't that also mean they're pretty brittle? I realize F1 cars are brittle to begin with, but I'd expect the plastic to hold up a bit longer.
In any case, I'm still following this thread
As in my write I made note of this, so far so good
In any case, I'm still following this thread
As in my write I made note of this, so far so good
F-68 BODY MORE HERE OF THE BODY http://www.rcformula1.com.au/index.p...ound-3-results about 12 rows down. Hope this all helps......
Last edited by DIRTMONKEY; 09-11-2013 at 05:08 PM.
09-24-2013, 03:41 AM
#164
Not much happening here, must be all apples with the F1.
The 200mm front is now available part numbers #411313
Front set wide F110 and spare arms #411314
Suspension arm L+R wide carbon F110, I know most if not all of the US is 180mm but I thought I'd put it out there.
So far things have been going well with the F110 each run is getting better with the car.
We've had the front bulkhead revised here in OZ. My team mate (a fitter and turner) has made it from aliuminium with great results I'll post pics tomorrow.
Other things I've done to date is 2mm spacers under the front top arm giving more roll center, caster is now also at 6 deg, and the side springs are now 6.25 AE springs. Next test is to try out all front springs. Here in OZ the tracks are slightly more rougher and the softer springs that the TAMIYA drivers are using aren't working as well for me with the F110 so I'll try going harder and see what happens.
This body is for use only for the camera when videoing races.
Until next time WILL
Last edited by DIRTMONKEY; 09-24-2013 at 03:56 AM.
09-29-2013, 08:51 AM
#165
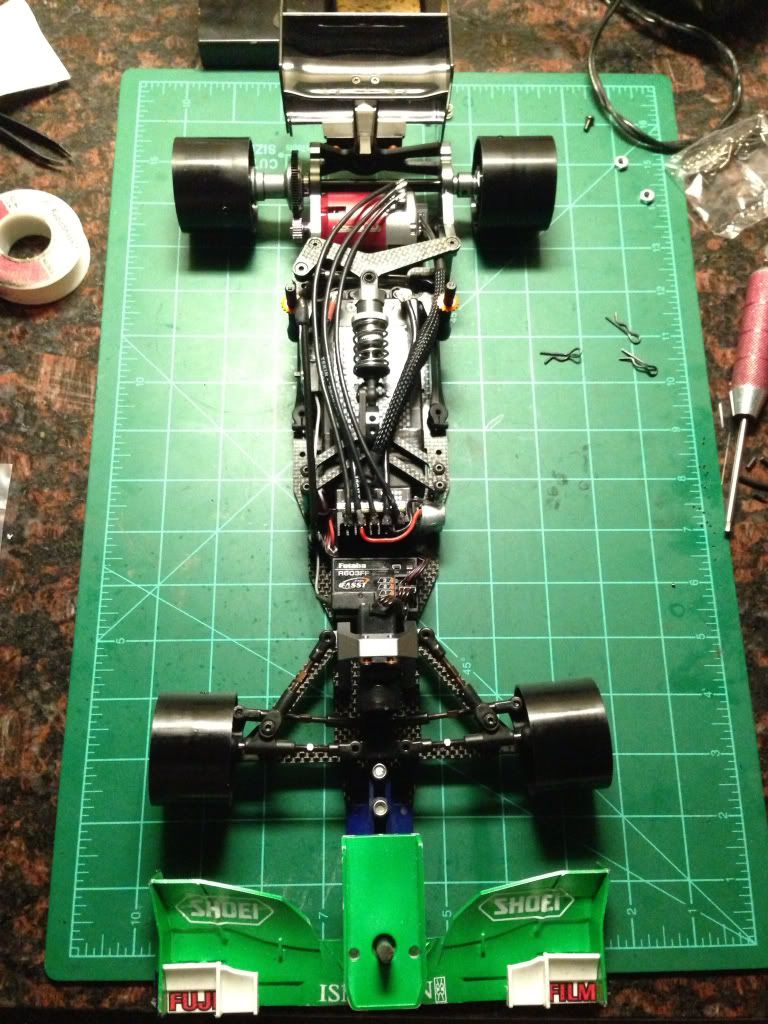
has anyone gotten the front wing to fit on the f110, if so, how did you manage to do it?
took the car out for the 1st time, and for never driving an f1, it ran ok. no where close to racing speed yet, but I think it will be soon as I will be making some small changes to the stock setup.
any help on the front wing would be appreciated.
thanks
took the car out for the 1st time, and for never driving an f1, it ran ok. no where close to racing speed yet, but I think it will be soon as I will be making some small changes to the stock setup.
any help on the front wing would be appreciated.
thanks