


 18Likes
Xray NT1
 04-23-2009, 07:01 PM
#4096
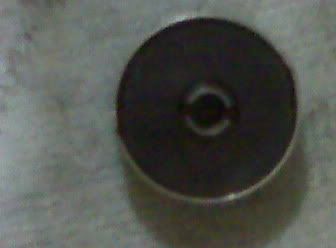
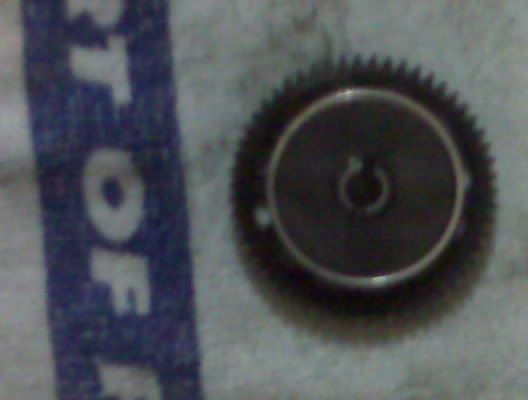
Guys I am having an issue with my 2 speed housing Option v2, when I place my transmission shoe in it the shoes has to be fully closed to fit in the housing which means it does not allow for 2nd gear adjustments when running on smaller tracks. The original housing allowed for adjustments but I damaged mine and thought the optional was a direct replacement.
How do you guys get adjustments made when it is so tight?
Here is picture of my Original housing
And here is a picture of the optional with shoe and full close
How do you guys get adjustments made when it is so tight?
Here is picture of my Original housing
And here is a picture of the optional with shoe and full close
 04-23-2009, 10:45 PM
#4097
You should loosen the setscrews to make it fit.
04-24-2009, 03:12 AM
#4098

Guys I am having an issue with my 2 speed housing Option v2, when I place my transmission shoe in it the shoes has to be fully closed to fit in the housing which means it does not allow for 2nd gear adjustments when running on smaller tracks. The original housing allowed for adjustments but I damaged mine and thought the optional was a direct replacement.
How do you guys get adjustments made when it is so tight?
Here is picture of my Original housing
And here is a picture of the optional with shoe and full close
How do you guys get adjustments made when it is so tight?
Here is picture of my Original housing
And here is a picture of the optional with shoe and full close
.........mmmh..... maybe try first to loosen only the middle screws completely.
04-24-2009, 09:40 PM
#4099
Guys I am a little confused, isn't the set screw suppose to be set at the same level of the shoe and must not pertrude out of the shoe ?
I have everything set as per manual and if I loosen the set screw it pertrudes out of the shoe and I am unable to get it into the housing.
Remember guys it is jammed tight in the housing at full close,when I loosen the srews to adjust for earlier engagement I am unable to spin the 2nd gear.
I have everything set as per manual and if I loosen the set screw it pertrudes out of the shoe and I am unable to get it into the housing.
Remember guys it is jammed tight in the housing at full close,when I loosen the srews to adjust for earlier engagement I am unable to spin the 2nd gear.
04-24-2009, 10:25 PM
#4100
Guys I am a little confused, isn't the set screw suppose to be set at the same level of the shoe and must not pertrude out of the shoe ?
I have everything set as per manual and if I loosen the set screw it pertrudes out of the shoe and I am unable to get it into the housing.
Remember guys it is jammed tight in the housing at full close,when I loosen the srews to adjust for earlier engagement I am unable to spin the 2nd gear.
I have everything set as per manual and if I loosen the set screw it pertrudes out of the shoe and I am unable to get it into the housing.
Remember guys it is jammed tight in the housing at full close,when I loosen the srews to adjust for earlier engagement I am unable to spin the 2nd gear.
im sure if you ask Grub (shoot him a PM) he will know and can offer some help for you.
04-26-2009, 04:26 AM
#4103
I also adjust the 2nd speed thru the middle screw. I loosen it (both sides) so it just misses engaging the 2nd gear, and fine tune with the two side screws.
This is much more effective than just playing with the side ones.
Have fun!
This is much more effective than just playing with the side ones.
Have fun!
04-26-2009, 05:18 PM
#4104
use the 2 middle set screw to take the slop out of the two speed drum make shore the screws are not protruding.or it will reck the drum
if the 2 speed is new screw them in till they just touch the two speed adapter ...
then adjust the timing of the 2 speed with the two side screws start off with the screw heads being level with the hole bottom edge..
thhe shoe should spin when you put in the two speed drum
if you have an old two speed shaft assemble it on there and see if it spins freely but with mininal gap...
hope you understand what i mean
hope this helps
04-26-2009, 05:28 PM
#4105
as above with more
Earlier shift point
(looser screws)
� 2nd gear engages earlier
� Lower engine RPM and engine tone before 2nd gear engages
Later shift point
(tighter screws)
� 2nd gear engages later
� Higher engine RPM and engine tone before 2nd gear engages
ADJUSTING SHIFT POINT
Shift-point Screws � Initial Setting : Top of screw head fl ush with hole edge
Initially set the two spring-loaded shift-point screws so the top edges of the screw heads are fl ush
with the bottom edges of the holes. Both screws must be set equally.
You can adjust shift point with the two spring-loaded shift-point screws.
� LATER shifting: TIGHTEN both shift-point screws equally.
� EARLIER shifting: LOOSEN both shift-point screws equally.
IMPORTANT: Make equal adjustments on both shift point screws.
TRANSMISSION SHOE GAP
The 2-speed transmission shoes have gap-setting setscrews that allow you to adjust the gap between the shoes and the 2nd gear drum.
Always adjust the shoe gap to minimum, without the shoes touching the 2nd gear drum.
The shoe gap should be checked and adjusted periodically to compensate for wear.
ADJUSTING TRANSMISSION SHOE GAP
Transmission Shoe Gap � Default Setting: 1/2 turn loose (from tight)
When building the 2-speed shoe assembly, set the gap so that the two shoes are
equal distance from the 2nd gear drum.
1. Assemble the 2nd gear shoe assembly, and set both gap-setting setscrews
equally so that each one just lightly touches the central adaptor. The
setscrews MUST NOT protrude beyond the shoes.
2. Install the drive pin in the layshaft.
3. Slide the 2nd gear shoe assembly onto layshaft and seat it over the pin.
4. Slide the 2nd gear onto the layshaft; the drum goes over the 2nd gear shoes.
There should be equal but minimal spacing between the 2-speed shoes and
the inside of the 2nd gear drum.
5. Rotate the 2nd gear until you can see a gap-setting setscrew through the
hole in the drum.
6. Insert a hex key through the hole and into the setscrew.
7. Tighten the gap-setting setscrew until the 2-speed shoe just touches the
inside of the alu. 2nd gear drum.
8. Loosen the setscrew by � turn (CCW).
9. Repeat steps 5�8 for the other shoe; be careful not to adjust the same shoe
twice.
10. Spin the 2nd gear; it should spin freely without binding or dragging.
11. Install the 1st gear.
Adjust the gap by loosening or tightening both setscrews equally:
� LARGER gap (shoes further from drum): LOOSEN both setscrews equally.
� SMALLER gap (shoes closer to drum): TIGHTEN both setscrews equally.
IMPORTANT: Make equal adjustments on both gap-setting setscrews.
Setscrews must
NOT protrude
Top of screw head
should be level
with hole bottom
edge
Do not overtighten gap-setting
setscrews. Only tighten until roller
pins contact the center hub.
TO SHIFT LATER
Tighten both screws equally
TO SHIFT EARLIER
Loosen both screws equally
hope this helps
04-27-2009, 05:17 AM
#4106
Good morning guys, thanks for the explanation on setting earlier adjustments on the transmission but the problem here is when trying to adjust the screws by the slightest mm from fully closed causes the shoe to jam within the housing.
From the pictures you may notice the stock housing is much thinner than the new V2 LIght weight housing, which means the internal diameter is smaller than the original, therefore less room for adjustments.
Some guys at the track with Serpents and G4 advised me to cut the screws but still no dice. I am also using the V2 shoe which comes with the thicker silver spring.
Hope this makes things clearer
04-27-2009, 09:00 AM
#4107
does the car ride any better with all the upgrades on it and if so what were the differences
04-29-2009, 12:56 AM
#4108
Tech Addict
Hello from France,
the chassis is the same as 2008 and 2007.
You won't will go 1 second faster because you have a 2009 model.
But, for sure, you will go longer (reliability increase with harder plastics, larger belt, larger gear, hard spring gearbox, alu shocks, rear CVD...), and easier on building (radio plate and servo mounts...).
Here's my 09 car:

And the thread
http://www.automodelisme.com/index.p...opic=25415.270
Au revoir.
the chassis is the same as 2008 and 2007.
You won't will go 1 second faster because you have a 2009 model.
But, for sure, you will go longer (reliability increase with harder plastics, larger belt, larger gear, hard spring gearbox, alu shocks, rear CVD...), and easier on building (radio plate and servo mounts...).
Here's my 09 car:
And the thread
http://www.automodelisme.com/index.p...opic=25415.270
Au revoir.
04-29-2009, 12:15 PM
#4110
Hello from France,
the chassis is the same as 2008 and 2007.
You won't will go 1 second faster because you have a 2009 model.
But, for sure, you will go longer (reliability increase with harder plastics, larger belt, larger gear, hard spring gearbox, alu shocks, rear CVD...), and easier on building (radio plate and servo mounts...).
Here's my 09 car:
And the thread
http://www.automodelisme.com/index.p...opic=25415.270
Au revoir.
nice car romuald!!how the t9 goes?