13Likes
1/35 scale Orlandoo OH35A01 Jeep crawler build
 10-26-2017, 12:56 PM
#31
love the body colour
 11-12-2017, 04:50 PM
#32
Painted first layer of grey acrylic paint on my Orlandoo track. Probably would take a week to completed the paints/airbrushing works.
Photos:

Photos:
11-26-2017, 04:03 AM
#33
80% progress..looking good.
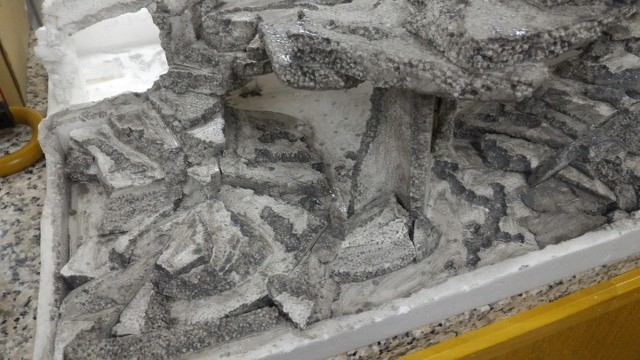
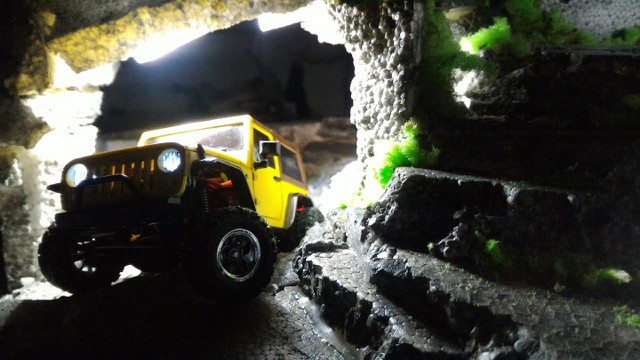
Ok, here the latest updates on development of 1:35 scale 4x4 Orlandoo DIY track, have added vegetation and some track objects. Looking good..yet still at 80% WIP.
Photos:
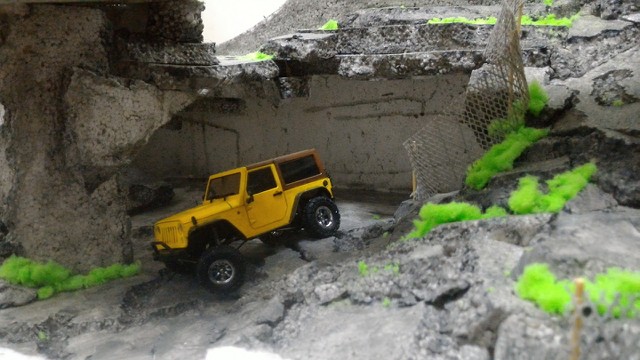


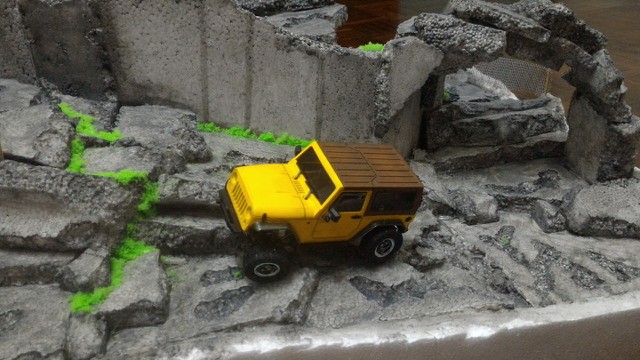
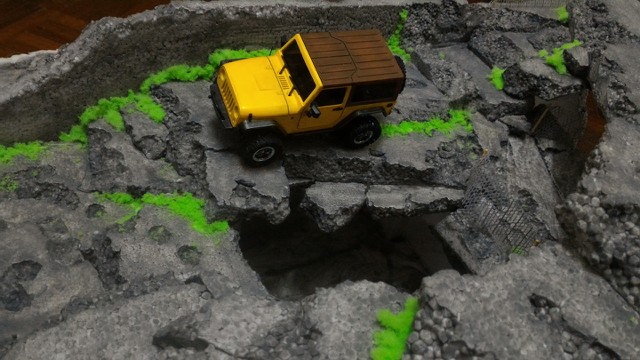
Ok, here the latest updates on development of 1:35 scale 4x4 Orlandoo DIY track, have added vegetation and some track objects. Looking good..yet still at 80% WIP.
Photos:
12-03-2017, 04:28 AM
#34
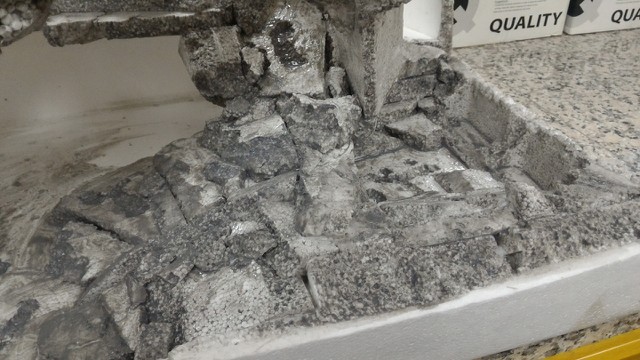
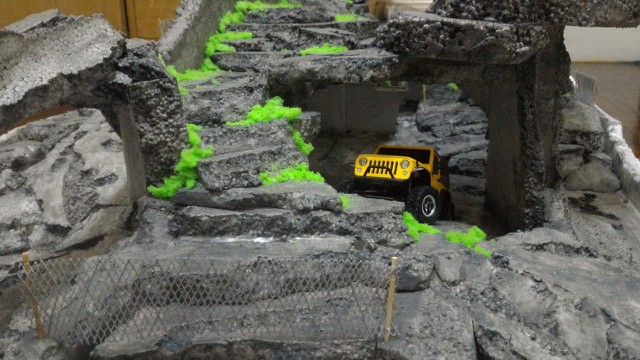
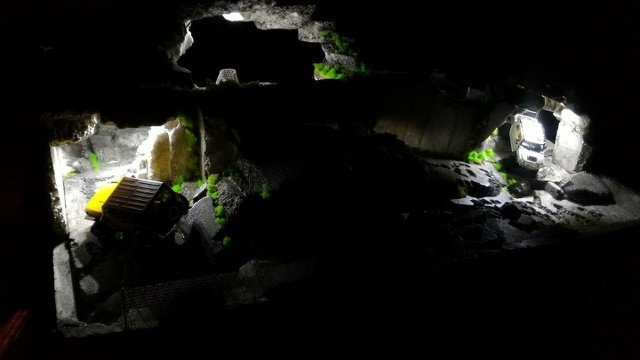
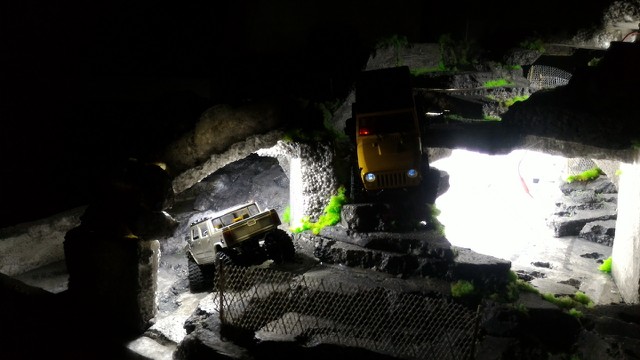
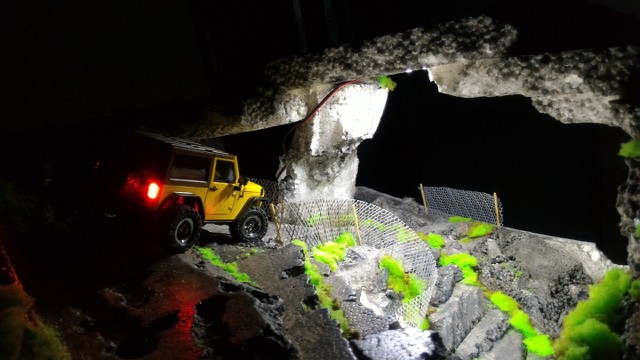
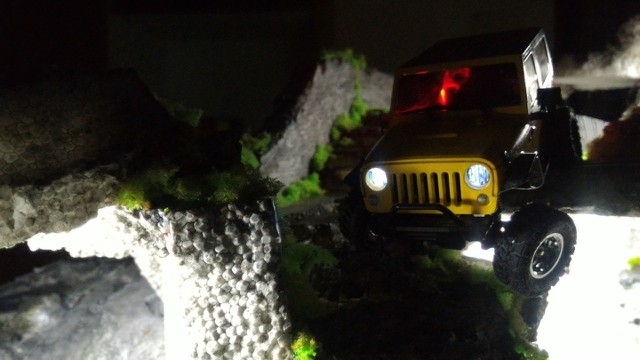
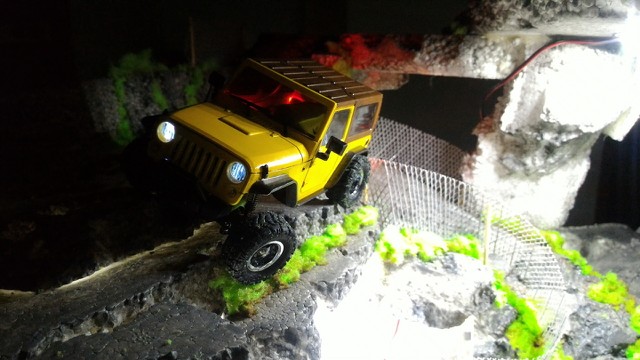
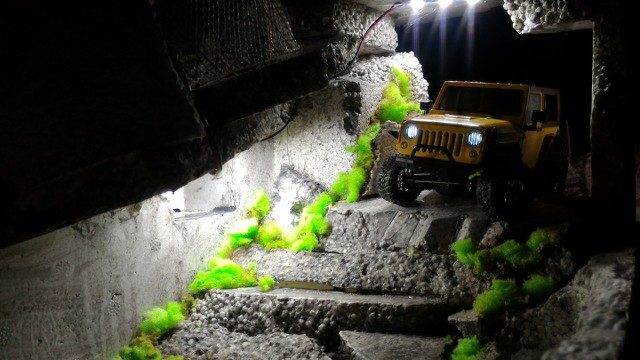
Latest track updates: LEDs lighting added for night track adventures
I've added strips of leds on the ceiling inside the caves and also around the rocky arch structure to make the track more enjoyable to drive and view around at night/in the dark for rock crawling activity indoor. Today i inviteda friend around to test around my new track, he's on hummer while i'm on my Jeep as usual. Had lots of fun climbing over lots of artificial rubbles and rocks. Glad i build this track, had super awesome time with it, i need to buy more Orlandoos soon!
Photos:
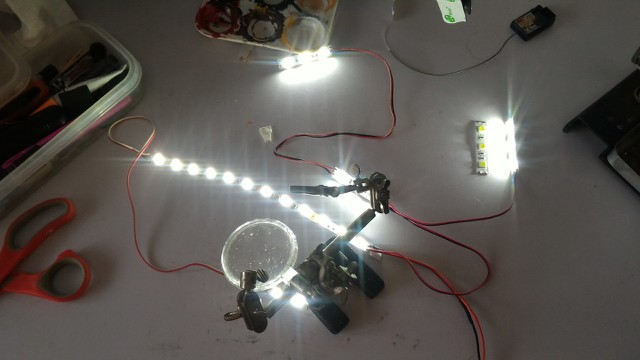
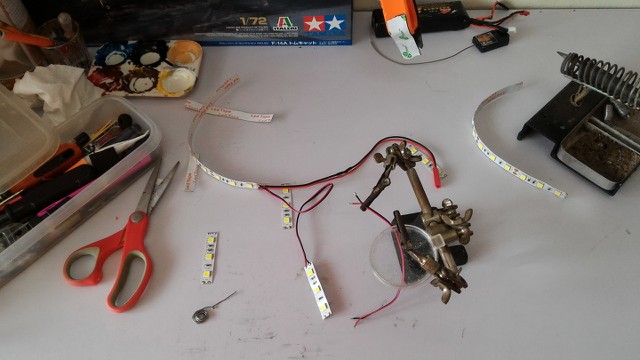
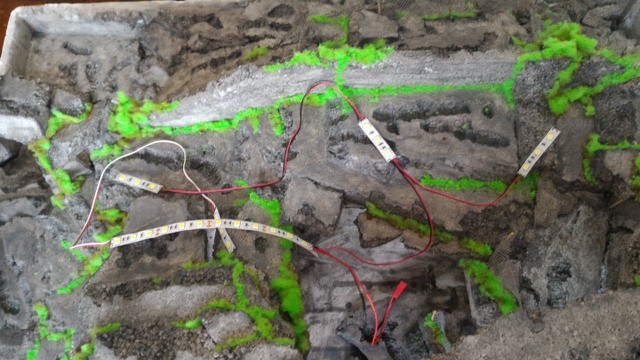
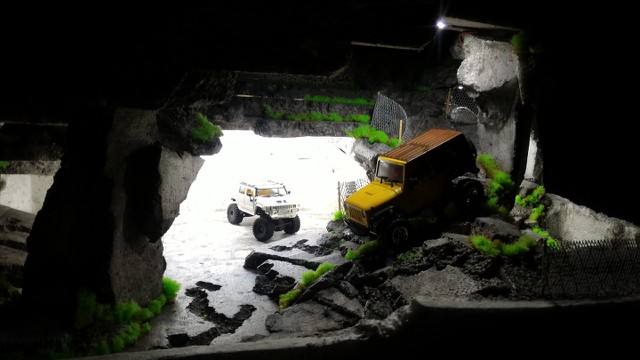
12-25-2017, 10:13 PM
#35
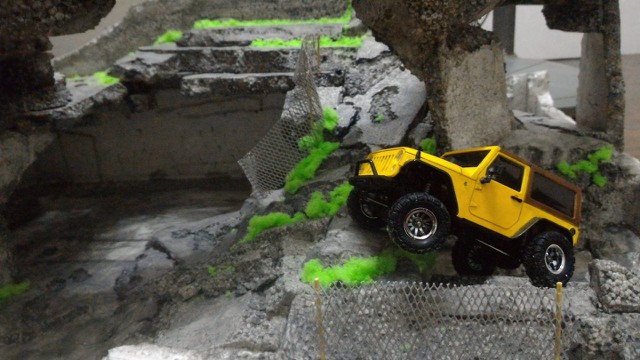
"Rubble Wasteland" 4x4 track
Sharing video of my homemade track in action with my 1:35 scale Orlandoo Jeep roaming around the extreme axle twisting obstacles, extreme climbing and vertical drops. Enjoy the adventures!
Video:
https://www.youtube.com/watch?v=HVqGO92tZJc
Sharing video of my homemade track in action with my 1:35 scale Orlandoo Jeep roaming around the extreme axle twisting obstacles, extreme climbing and vertical drops. Enjoy the adventures!
Video:
| + YouTube Video | |
https://www.youtube.com/watch?v=HVqGO92tZJc
01-09-2018, 09:10 PM
#36
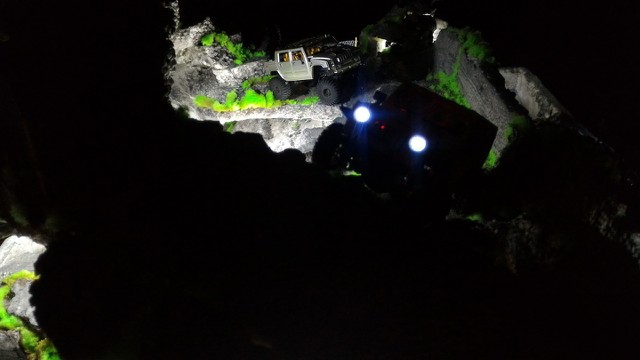
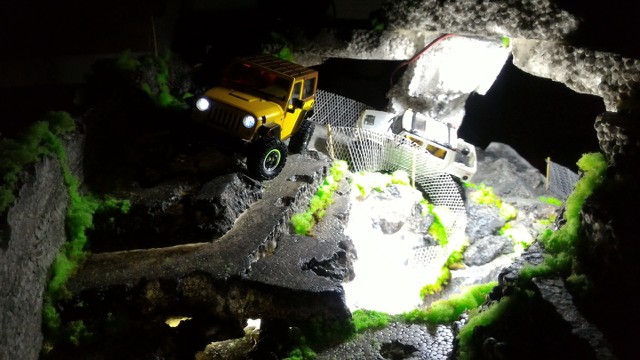
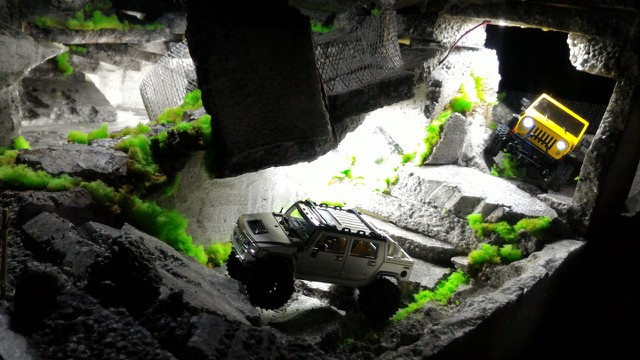
Extreme Night Crawler adventures
Just sharing another of my 2018 new year adventure in the dark at night on my "Rubble Wasteland" LED lit track. Challenging dark side of this kick ass micro Jeep.
Video:
https://www.youtube.com/watch?v=3Nv2hPf7Tdg
...keep on Jeeping!
Just sharing another of my 2018 new year adventure in the dark at night on my "Rubble Wasteland" LED lit track. Challenging dark side of this kick ass micro Jeep.
Video:
| + YouTube Video | |
https://www.youtube.com/watch?v=3Nv2hPf7Tdg
...keep on Jeeping!
01-10-2018, 04:02 PM
#37
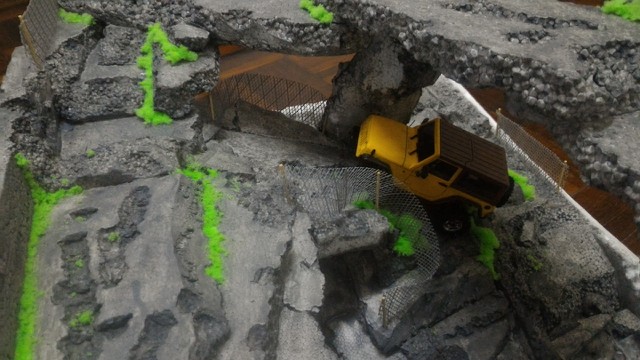
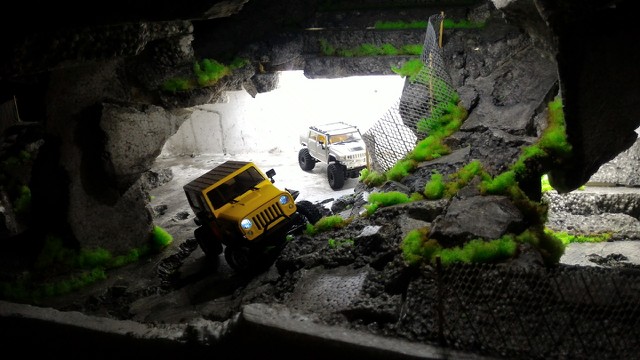
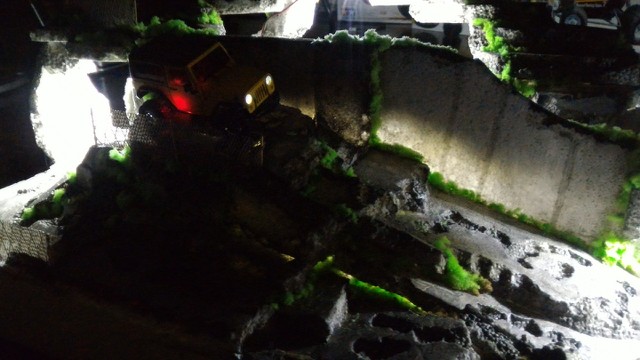
Here are some HD night snapshots during track crawling.
Photos:


Photos:
02-04-2018, 05:08 PM
#38
Here is documentation of my track build if you like to read all about it to get inspired: https://www.supermotoxl.com/designs-...crawling-track
02-08-2018, 07:07 PM
#40
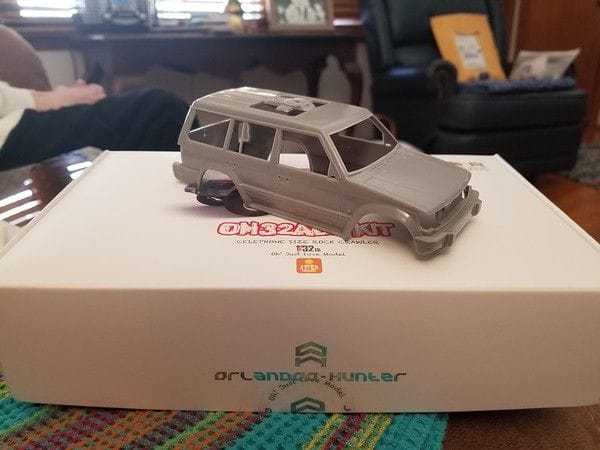
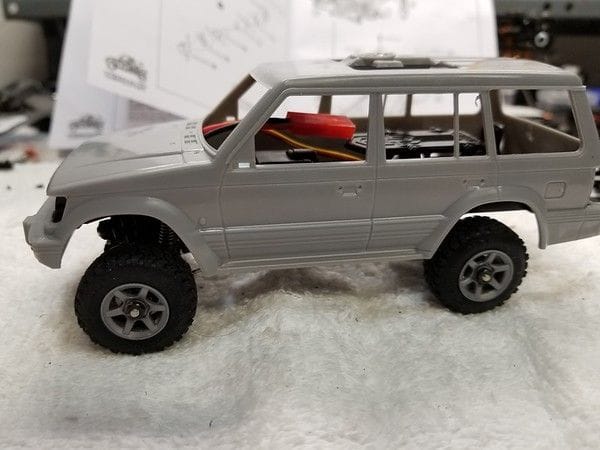
After stumbling on this thread I was impress with this tiny scale crawler. Read about it on several forums and watched a ton of Youtube videos I decided to order on for myself. I should be here is a few days I can't wait. I ordered the Orlandoo Hunter Mitsubishi Pajero 1/32
02-09-2018, 04:58 AM
#41
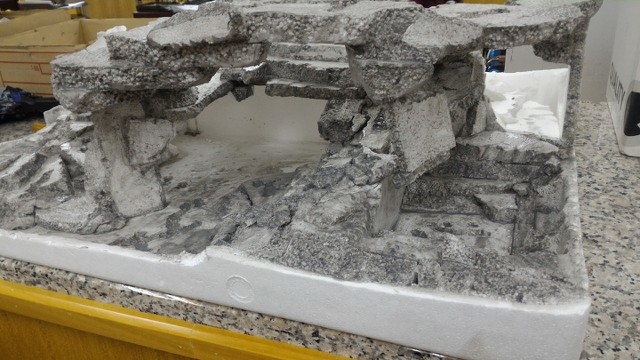
 The track dimension is 86cm in length, 67cm in width and 25cm in height.
 After stumbling on this thread I was impress with this tiny scale crawler. Read about it on several forums and watched a ton of Youtube videos I decided to order on for myself. I should be here is a few days I can't wait. I ordered the Orlandoo Hunter Mitsubishi Pajero 1/32


 02-13-2018, 07:53 PM
#43
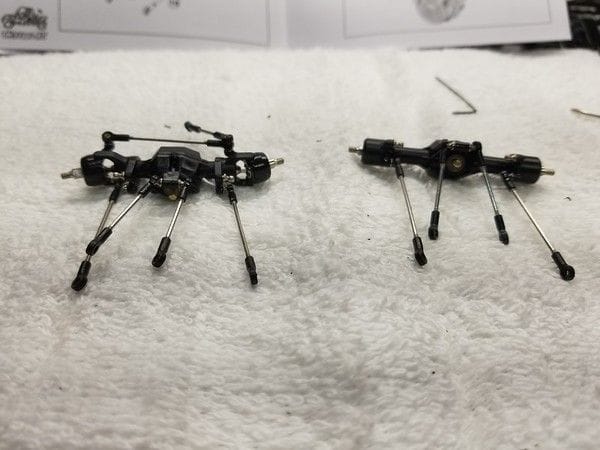
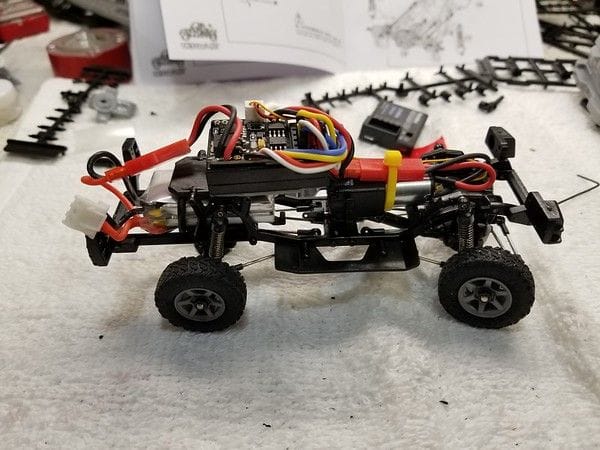
Did some more work on the Pajero this evening, it's now a roller.
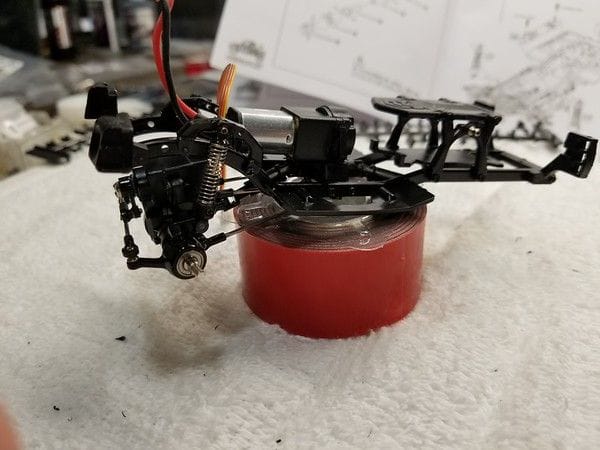
Frame together with the front diff mounted

Rear diff mounted and tires installed
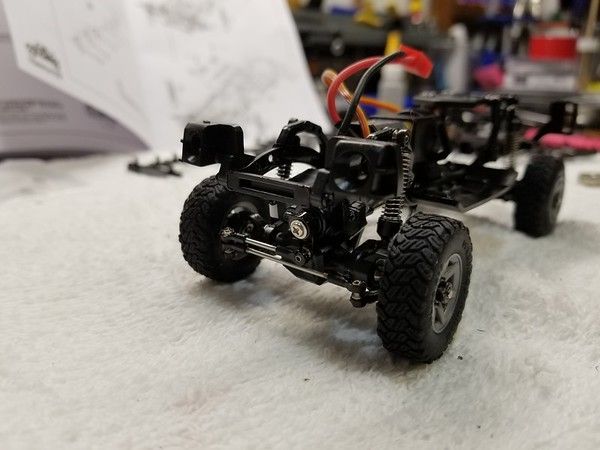
For now I have the servo mounted on the diff but will probably end up doing the mod where you mount it to the front of the frame with the servo standing on end
Need to install the electronics then I can take it for a test drive.
My biggest issue with this step was that in making the drive shafts I managed to break off 1 of the little post on 2 different little square blocks. Thought about pinning it but I didn't have a drill bit small enough to get the job done. Ordered the driveshaft tree so hopefully it will hold together until it arrives.
Frame together with the front diff mounted
Rear diff mounted and tires installed
For now I have the servo mounted on the diff but will probably end up doing the mod where you mount it to the front of the frame with the servo standing on end
Need to install the electronics then I can take it for a test drive.
My biggest issue with this step was that in making the drive shafts I managed to break off 1 of the little post on 2 different little square blocks. Thought about pinning it but I didn't have a drill bit small enough to get the job done. Ordered the driveshaft tree so hopefully it will hold together until it arrives.
02-14-2018, 08:28 PM
#44
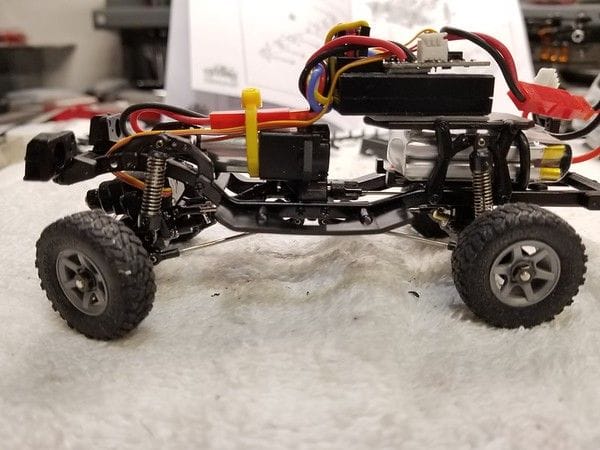
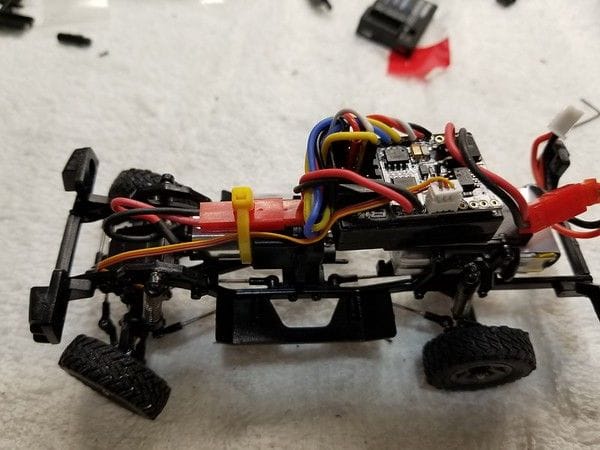
Put the electronics in today, sure not a lot of room in there. Ended up leaving the rx n it's case and mounting the esc to it. I have the smallest rx that Futaba makes so it's still pretty big. I'm using a Futaba 4PL for the tx, which is over kill for this little car. I'm thinking that I want a dedicated tx/rx. 3ch should be fine I don't see myself putting the sound module in.
What are you using for a radio for your Orlandoo?
What are you using for a radio for your Orlandoo?
02-14-2018, 08:54 PM
#45
Put the electronics in today, sure not a lot of room in there. Ended up leaving the rx n it's case and mounting the esc to it. I have the smallest rx that Futaba makes so it's still pretty big. I'm using a Futaba 4PL for the tx, which is over kill for this little car. I'm thinking that I want a dedicated tx/rx. 3ch should be fine I don't see myself putting the sound module in.
What are you using for a radio for your Orlandoo?
What are you using for a radio for your Orlandoo?
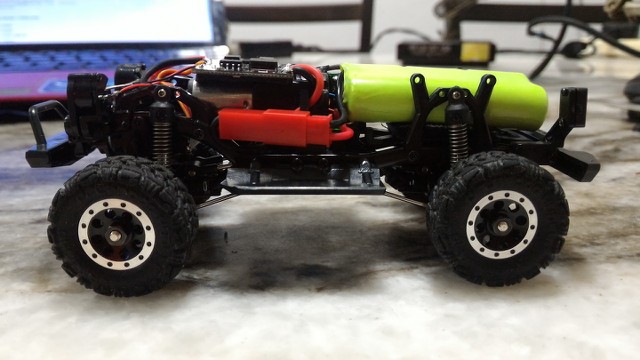
Great to see your Pajero arrived and assembled. I'm using affordable FlySky GT3B radio unit that have almost the same receiver size as your. I'm remove the case and solder the connection behind the receiver PCB board to make it compact. I've put the receiver beside the motor gear case which have huge space rather than putting on top and great Center Gravity (CG) point. I've use thinner wires and trim overall wire short to reduce the weight. The all the electronics i placed at the base of the chassis to get lower CG for excellent climbing and reduce tilting problem when crawling. I didn't use the rear plastic deck because it caused much problem with the height CG placement and ease to fit battery. So the result my CG is lower and improve stability as shown attachment below photos:
Photos: