


 110Likes
Tamiya Direct Drive Touring Car
 02-08-2019, 11:40 AM
#1606

Last post for today 
In the evening I started cutting the body and its 12 little parts. Will be interesting to see how it will turn out.

Tomorrow then detail work, coloring and hundreds of sticker
In the evening I started cutting the body and its 12 little parts. Will be interesting to see how it will turn out.

Tomorrow then detail work, coloring and hundreds of sticker
 02-08-2019, 11:22 PM
#1607
...
I also installed the Rear Suspension Ball Mount Set. This makes more sense to me than squeeze a o-ring. But now the pod is free to roll and has nearly no dampening  The friction plate is to weak to correct this. Therefore the TRF special damper seems kind of overkill by beeing a second damper. Well, it looks fantastic and also the set came with a blue damper mount, the real reason I bought it
The friction plate is to weak to correct this. Therefore the TRF special damper seems kind of overkill by beeing a second damper. Well, it looks fantastic and also the set came with a blue damper mount, the real reason I bought it I can't speak for others but in my experience running f103's and f103GT's over the years, the Ball mount set is the most pointless hop-up Tamiya ever made for a car - it essentially removes any side spring action from the T-bar which is why your friction damper can't control it. It might look good but the o-ring mount works much better. A common mod in the day was to solid mount the front screw and put 2x2mm screws through the mount to act as tweak screws
02-09-2019, 01:47 PM
#1608
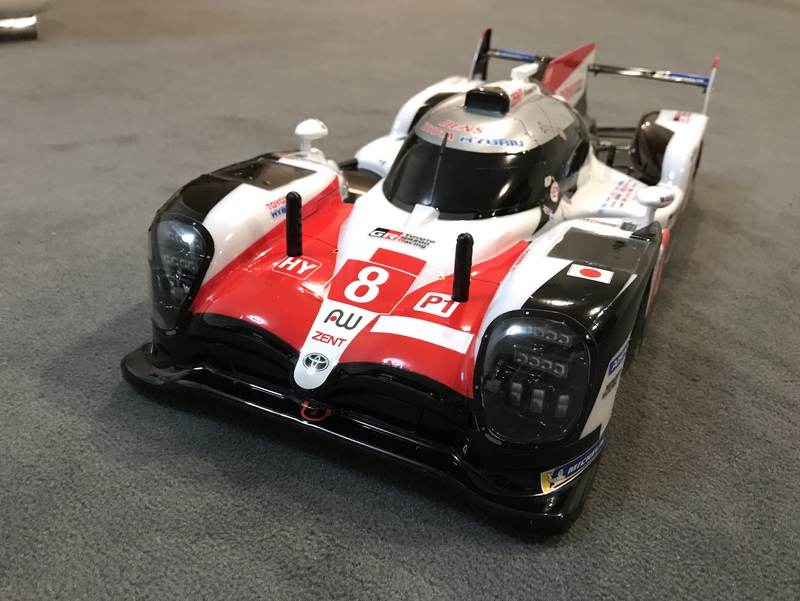
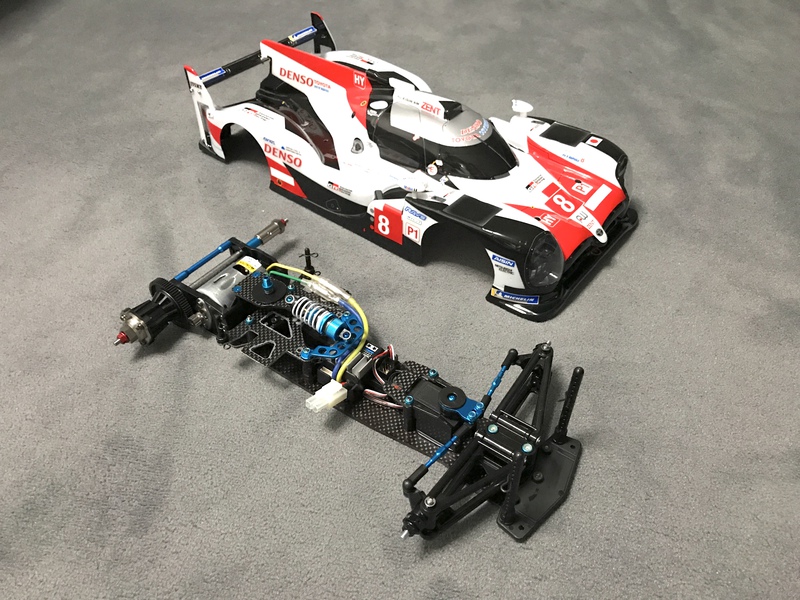
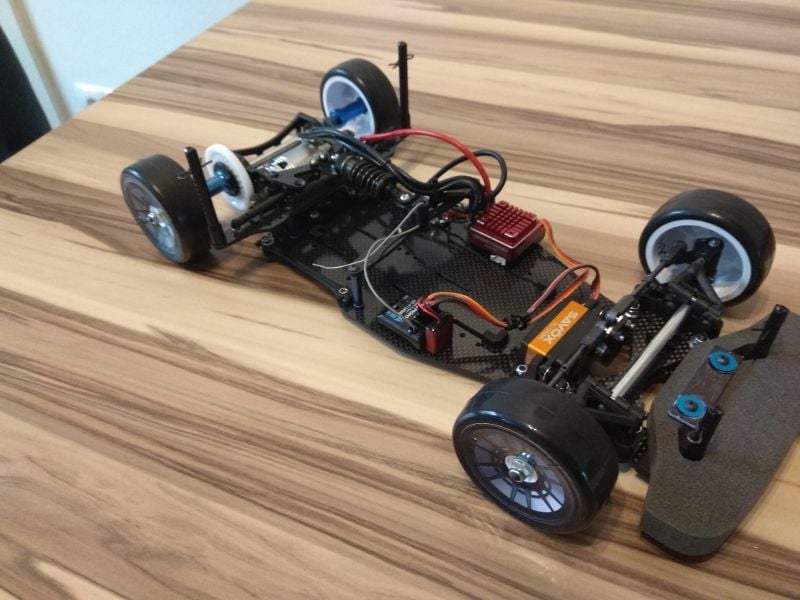
This hobby starts to be real work... I finished the body. It took full 12 hours. Sanding edges, washing, masking, spraying, putting on all 100 stickers and assemble everything. While this body could only be recommended for the experienced builder and needs full attention through all stages of the build, the result is stunning. Right now I would say, it is the best replica 1/10 scale RC body Tamiya ever made. The body height Tamiya recommends then makes clear, that it is intended to become a shelf queen and not to do laps with it (yeah it nearly touches the ground).


Then throughout the day my vintage topdeck arrived.
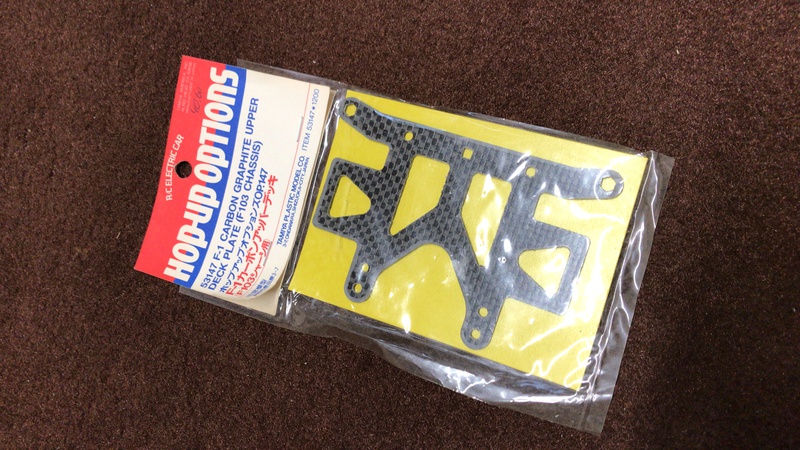
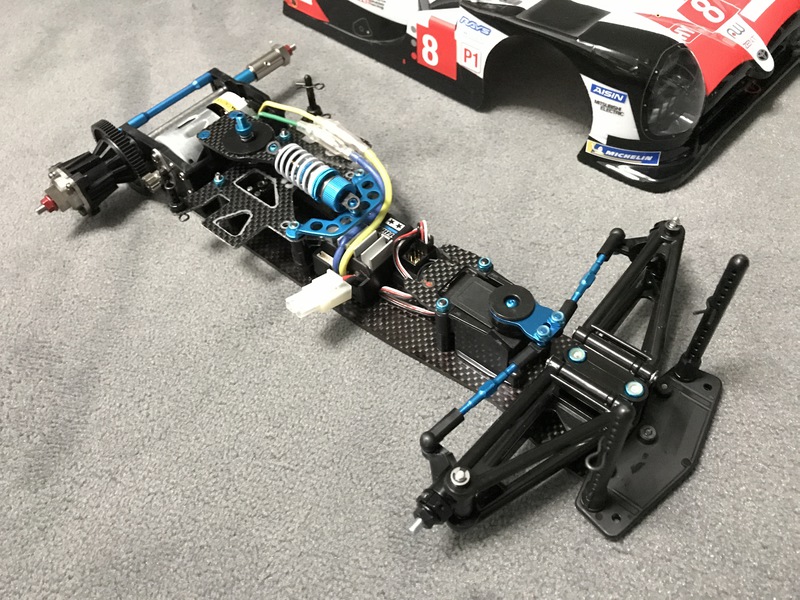
Of course I had to install it right after I finished the body. And the new look it gives the chassis is worth the money. Negative is the materials it is made of. Maybe on the pictures you can see that the edges look white. This is because a transparent vinyl seperates from a matte carbon layer that is laminated on a glassfiber plate") Now after 12 or more years in the hobby shop, it shows its aging process. Still I love the look. I added some blue nuts and a carbon brace for the servo mounts. The chassis really transformed:
Now after 12 or more years in the hobby shop, it shows its aging process. Still I love the look. I added some blue nuts and a carbon brace for the servo mounts. The chassis really transformed:

Tomorrow I will do some laps with my two beauties


Then throughout the day my vintage topdeck arrived.

Of course I had to install it right after I finished the body. And the new look it gives the chassis is worth the money. Negative is the materials it is made of. Maybe on the pictures you can see that the edges look white. This is because a transparent vinyl seperates from a matte carbon layer that is laminated on a glassfiber plate
Now after 12 or more years in the hobby shop, it shows its aging process. Still I love the look. I added some blue nuts and a carbon brace for the servo mounts. The chassis really transformed:

Tomorrow I will do some laps with my two beauties
 02-09-2019, 02:48 PM
#1609
Tech Initiate
No Tamiya, but it Looks cool too. @wtcc maybe i will take it to the RCK Race at Crailsheim

Last edited by Brinni; 02-10-2019 at 11:36 AM.
02-10-2019, 11:46 AM
#1610
This would be awesome! And I am pretty sure you will have a good chance of winning.
I say that, because my first outing with my F103GT was very encouraging
In the morning I did a quick change to the chassis. ShadowAus words in my mind about the ball mount set. I changed the front ball mount with the stock mount and secured the front end of the t-bar. So I got the side spring function back.


The first laps were interesting and it took a few minutes to adapt to the braking and cornering character of this car. Step by step I reduced the steering throw to stop the car from grip roll. This was mostly generated by the narrow stance with the 0mm offset Sorex 28 tires. For the next run I did widen the stance by 2.5mm hex spacing each wheel. Now the grip roll was eliminated and I could take more speed into and through the corners. Steering and cornering was very good today.
Most problems did I have entering a corner. The car had a tendency to suddenly do an ultrafast 180 turn on the spot. I couldn‘t fully observe it, but my guess would be that the rear inner tire lifted and like that lost grip suddenly.
What do you think?


My next steps will be:
1. Experiment with the t-bar: Change the rear ball mount to standard o-ring, Is the Option Part Flex t-bar a useful upgrade?
2. Height of the pod: The power pod has a 7mm ride height with Sorex tires and the 2 insert at the axle. How can I reduce the ride height further? The 2 insert is already the lowest possible insert...
I tried to hide the mentioned problems with an adapted driving rhythm and it worked very good. The overall speed was very impressive. I could manage a 12.2 lap and a lot of 12.3 laps throughout a run. For comparison: In the LMP class of the RCK series (where I participate with my TT02 KR) , the overall winner drove laptimes between 11.8 and 12.0 in the A-Finals with LiPo and LRP X20 21.5t. So this car is already blistering fast. And I drove old tires.
@Brinni: Go for it
 02-10-2019, 01:54 PM
#1611
My next steps will be:
1. Experiment with the t-bar: Change the rear ball mount to standard o-ring, Is the Option Part Flex t-bar a useful upgrade?
2. Height of the pod: The power pod has a 7mm ride height with Sorex tires and the 2 insert at the axle. How can I reduce the ride height further? The 2 insert is already the lowest possible insert...
2. Height of the pod: The power pod has a 7mm ride height with Sorex tires and the 2 insert at the axle. How can I reduce the ride height further? The 2 insert is already the lowest possible insert...
I can't remember now if the optional t-bar was softer or harder - I think it may be softer which would be helpful in lower grip but not on carpet IMO
A couple of companies make inserts that go lower that the std Tamiya ones - Team Saxo make a molded set that go to 5 and Tuning Haus make individual alloy ones that I think go to 3.5
 02-11-2019, 01:31 AM
#1613
My next steps will be:
1. Experiment with the t-bar: Change the rear ball mount to standard o-ring, Is the Option Part Flex t-bar a useful upgrade?
2. Height of the pod: The power pod has a 7mm ride height with Sorex tires and the 2 insert at the axle. How can I reduce the ride height further? The 2 insert is already the lowest possible insert...
We run an almost standard chassis, kit gearing, Mabuchi, stock battery, GT body's and Sorex tyres. Only options were damper en better servosaver.
Fun to drive on our medium grip asphalt track and very cheap and still competative.
The standard rear height with normal touring tyres like Sorex should be about 5mm. Did you use the 2mm plates under the motorpod? (T2 in the manual). You can easily increase.
The standard T bar should be fine on carpet, on asphalt the Soft is better. Front screw should be tight, experiment with the second one.
You can also try the servo in the "according to the manual" position. This will give a different steering caracteristic. The F104 holder gives more room for normal servosavers.
And finaly put your car on scales and you find the rear left/right balance needs correction. We used up to 100gr at the rear of the car to get it right.
It is a good car, but has it limitations. Tamiya did not design this for high level races. Remember the original F103 design is now 25 (?) years old.
02-12-2019, 10:00 AM
#1614
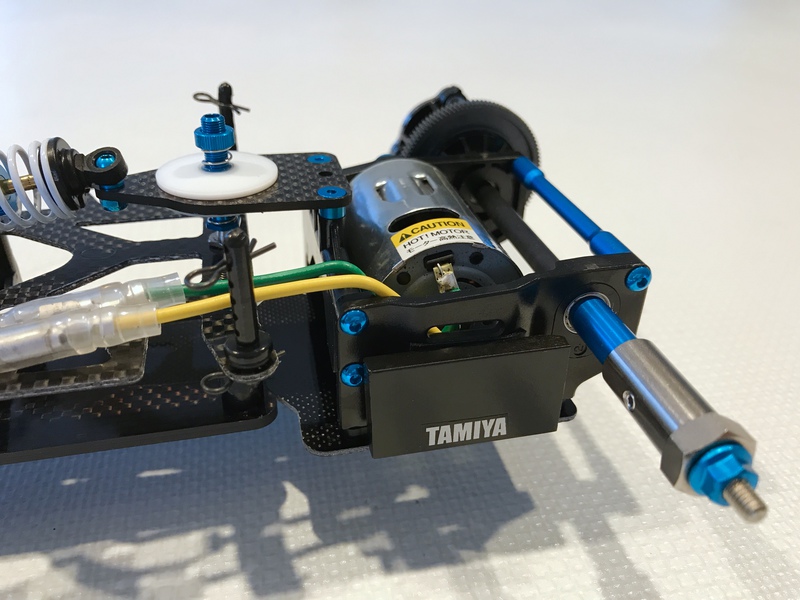
I had to look twice in the manual to recognize this part. I don’t really like having the motor high in the pod, but at least the battery is low now. Thanks for this observation Some more parts arrived.

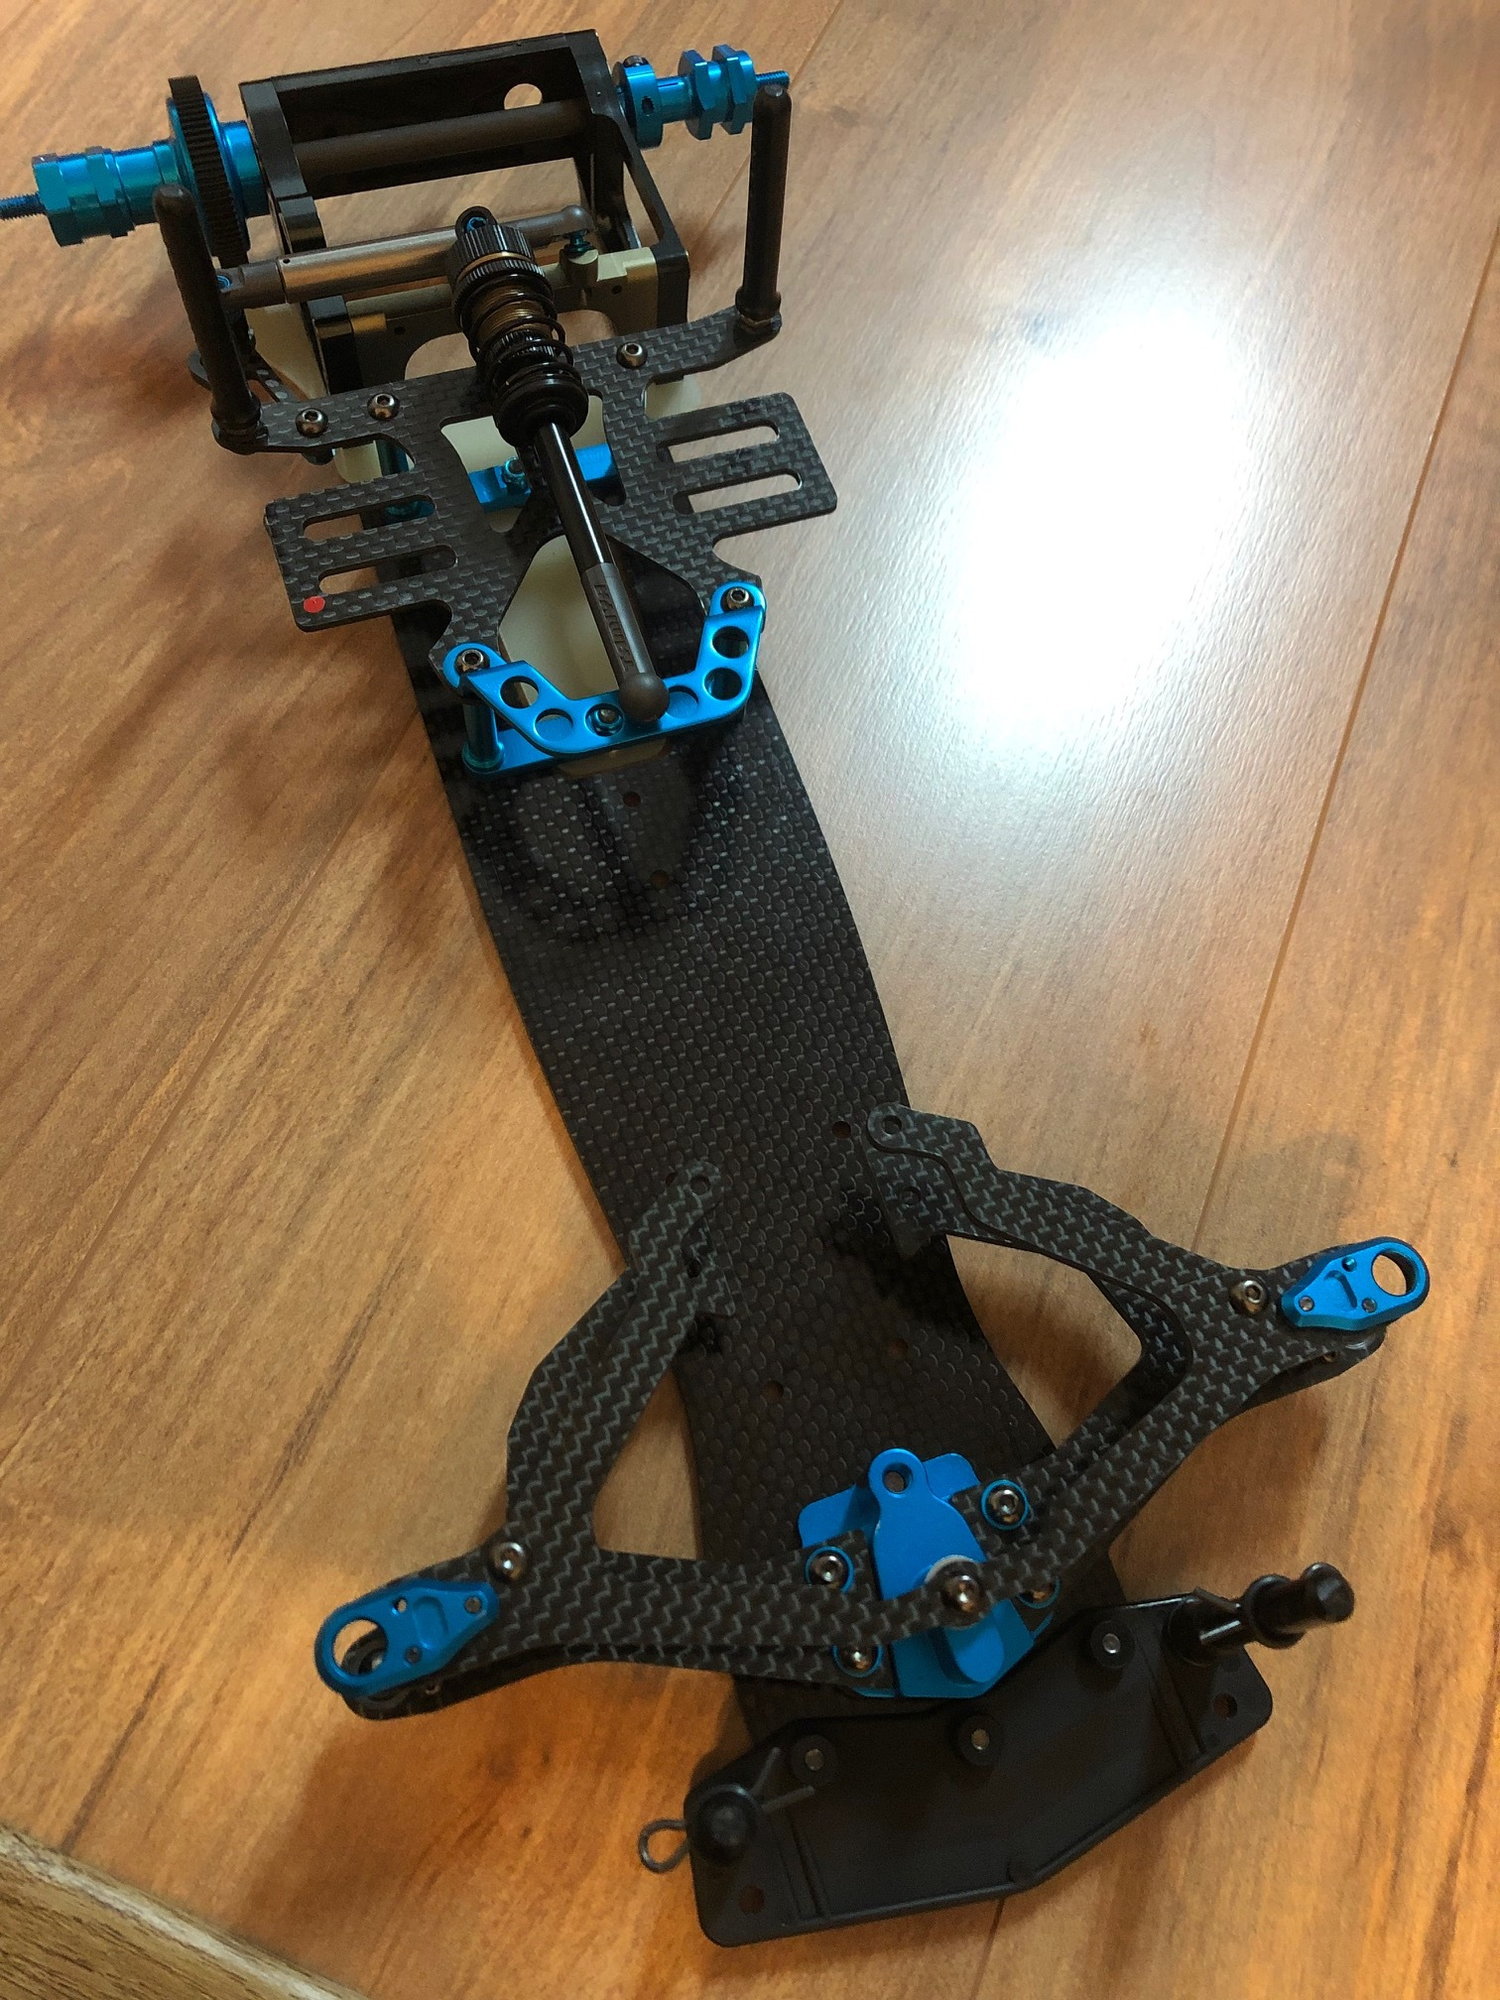
I finally found use for the upper carbon brace with receiving the standard GT bumper. Tamiyas design of the TS050 bumper is very unfortunate. The body posts are located with less distance to the arms. I would need to make new holes using the standard bumper with the TS050 body. And I don’t want to. So the standard bumper will remain in the box for later or as long as I use the Toyota body...

The rear experienced several changes. The one leftover brace of the ball mount set flew off the car and was replaced by the stock o-ring mount. This change already feels better suited for carpet. Then the black friction plates had to make space for the white low friction pads. I also added the thicker Tamiya friction damper grease. In the shop, I stumbled over the carbon shaft and couldn‘t resist. The gears were replaced by modul 0,4 ones as well as several steel screws with blue ones.

A last change concerns the topdeck. I removed the vinyl cover and sprayed some clearcoat to make it glossy. It now fits very got to all the other shiny carbon. After looking at the promo picture of the full optioned F103GT again, it looks like Tamiya sold the topdeck in a matte finish... Can anybody shed some light into this case?

So sad I have a race at the weekend. I would really like to find two more tenths
02-12-2019, 10:29 AM
#1615
Tech Regular
02-12-2019, 02:03 PM
#1616
Tech Addict
You could be thinking of the F104. It had a model where there was a small brass weight next to the outshaft for the wheel closest to the diff. so that the rotating mass was the same for both sides or something.
02-14-2019, 05:08 AM
#1617
I finally managed to upload the video of my first day with the F103GT on the track ( https://indoor-racing-senden.de/ ).
You can easily see, that I had a hard time under braking and that setup work is needed. Well, the look is nice and with the torque tuned motor it is not slow at all.
In the video I am driving with my friends. One has a TT02S (white and grey PF Ford GT body) and the other one a M-07 concept (orange body). Just a typical day at my hometrack
02-14-2019, 08:41 AM
#1618
One more thing that was mentioned/suggested to do to make the car more stable to drive, was to proper balance the pod.
In preparation I marked the middle axis on the pod. Then I put the chassis on needles.

First I wanted to hide the weight directly in front of the can on the pod plate, but that would have needed a lot more weights and space is limited there. I then decided for a solid brass block of 34g on the outside of the pod. I painted it black and put a Tamiya sticker on to make it look as if it belongs there (black box for cheating reasons ).
).
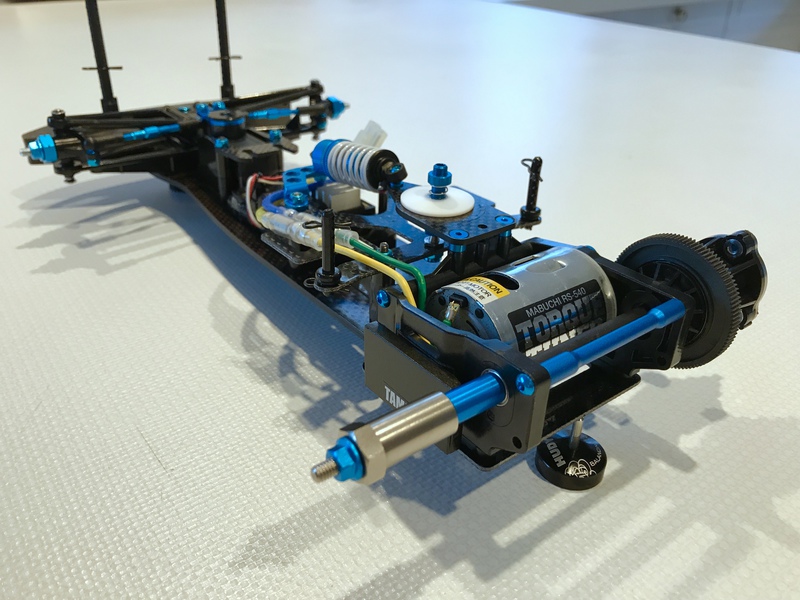
In preparation I marked the middle axis on the pod. Then I put the chassis on needles.

First I wanted to hide the weight directly in front of the can on the pod plate, but that would have needed a lot more weights and space is limited there. I then decided for a solid brass block of 34g on the outside of the pod. I painted it black and put a Tamiya sticker on to make it look as if it belongs there (black box for cheating reasons
).
 02-14-2019, 08:58 AM
#1619
Nice! I don't need this kit but now you're making me want one lol.. Looks like it's no slouch from the video