


HPI Sprint Flux 2 modifications
 01-02-2012, 09:46 AM
#1
Tech Initiate
Thread Starter
I have been a member of this form for about 7 months now, and have been researching projects and gathering information as far chassis set ups, electronics, things of that nature. I would like to start an official (if allowed) thread on modded HPI Sprint cars for both bashing and actual racing. I have searched for something like that on here, and threads related to the Sprint tend to be VTA specific cars. I would like to see what other people are doing with their cars.
I've been driving and building cars for about two years now. I bought an HPI Sprint FLux 2 new about two years ago, and it was the first "real" r/c car that I have ever owned. I was fortunate to have an excellent place to drive the car on street with very little traffic. I ran the car in its stock form with the 1966 Mustang body and 4200 NiMh pack.
This was fun until I took it on vacation to see my sister and my niece and nephew. During that time, I decided to upgrade to LiPo with a Dynamite 3200mAh 25C 3S hard pack. The LiPo nearly doubled the car's speed. This proved catastrophic. Even though I had the Castle Link programming cable, I didn't fully understand the settings at the time. Long story short, I didn't set the LiPo cut off properly. The voltage cut shut down power while I was making a top end run with my nephew. I estimate the car was traveling at about 50 MPH when I lost control and struck a car parked on the street. I looked as though my car bounced off all four of the parked car's tires, hit a curb, hit a mail box post, and landed in the yard. It was on its wheels when we walked up to it, but it looked heavily damaged. And it was, both the upper and lower chassis were broken, the body was ruined, and everything that was attached with double sided tape was loose. Closer inspection revealed damage to the steering servo and ESC. At that point, what was left went into box and sat dormant for about a year.
 01-02-2012, 09:48 AM
#2
Tech Initiate
Thread Starter
While it was in storage, I started collecting new parts. I had been reading forums like this, looking at different options for parts and ideas on how to improve the car. Some of those parts are a Mamba Max ESC with a cooling fan, HPI aluminum body adjustable shocks, and a Turnigy 3000 mAh 30-40C 3S LiPo pack. I am running the stock 5700kV motor with a 16 tooth pinion and 96 tooth spur gear.
01-02-2012, 09:49 AM
#3
Tech Initiate
Thread Starter
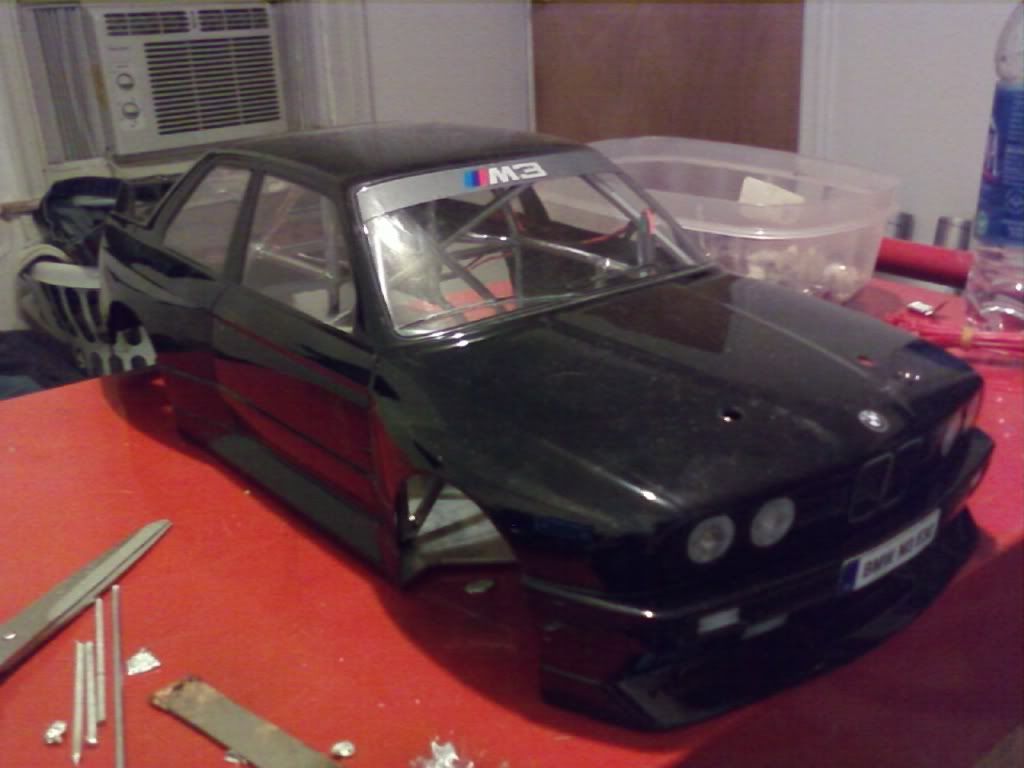
I also upgraded the radio to a Spektrum DX3S and integrated telemetry receiver. Since I had purchased a 1984 BMW 318 project car during that time, I thought it appropriate to get the M3 body from HPI as well.
01-02-2012, 09:55 AM
#4
Tech Initiate
Thread Starter
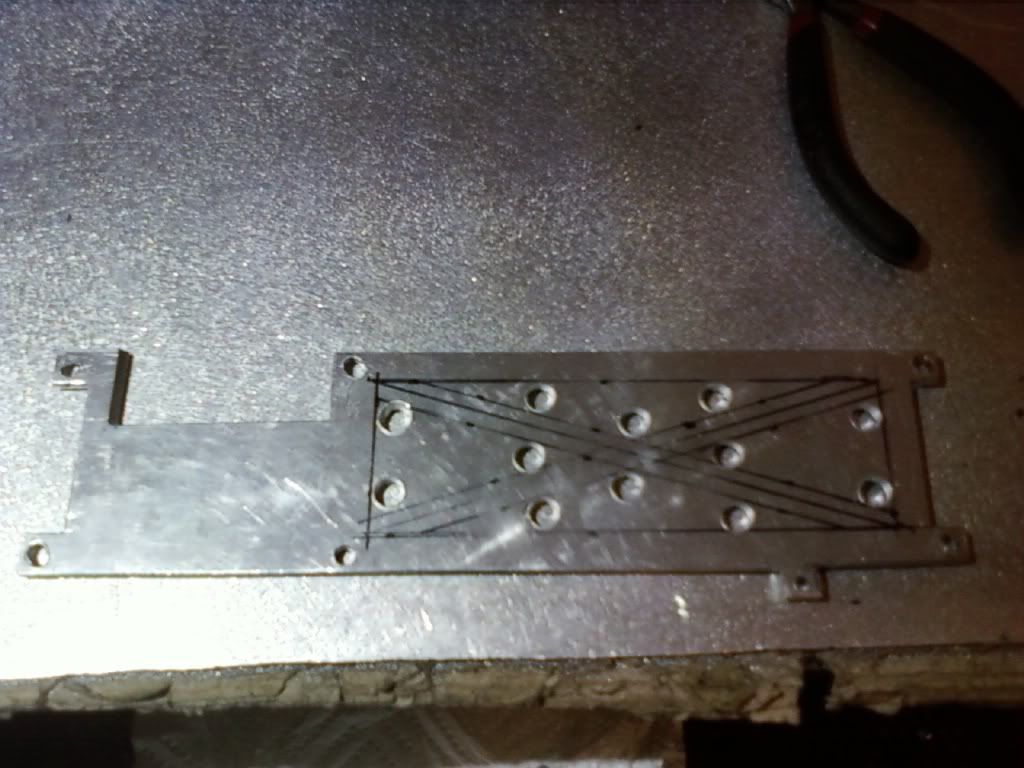
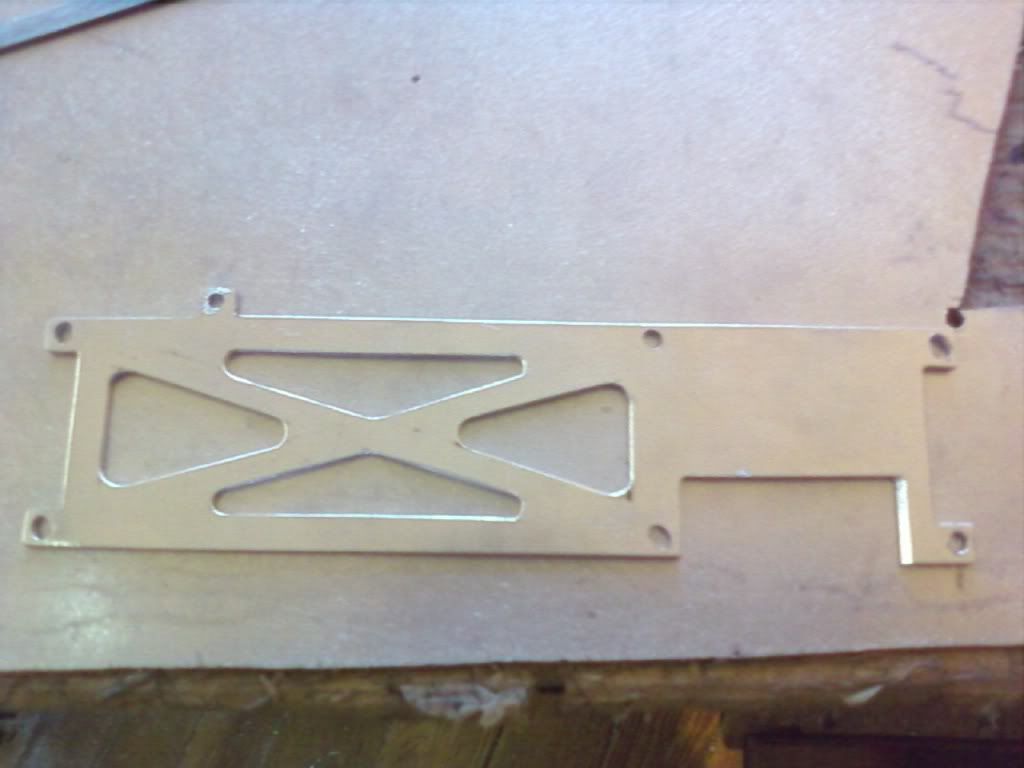
I decided to cut the new chassis plates out of aluminum for structural rigidity and ease of fabrication. I used the original chassis as a template for the location of the holes and as a base for measurements. I countersunk all of the holes from underneath so that all of the fasteners would fit into the chassis like the original.
01-02-2012, 09:57 AM
#5
Tech Initiate
Thread Starter
Once I was satisfied with the location and fitment of the parts, I could position the electronics.
01-02-2012, 10:00 AM
#6
Tech Initiate
Thread Starter
Then I could make a light harness. Most of the parts came from Radio Shack for about $20. The HPI body came with head and tail light buckets, so that made things much easier.
01-02-2012, 10:06 AM
#7
Tech Initiate
Thread Starter
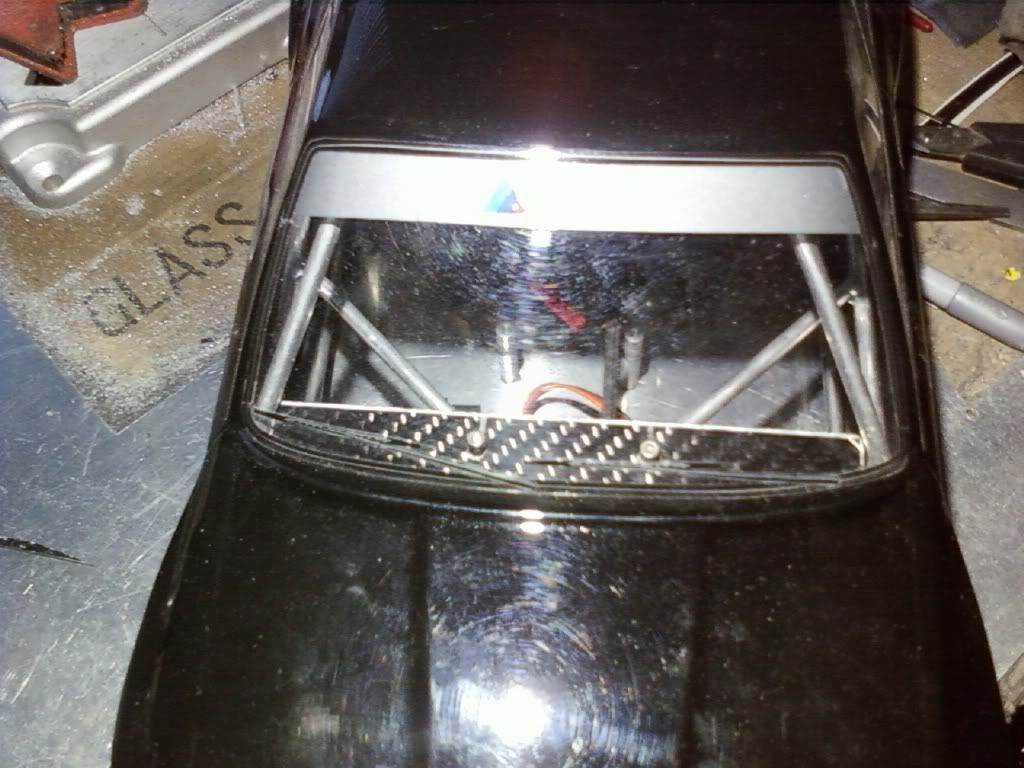
After some trail and error, I found out that the high intensity LED's I used for the headlights required a higher amperage than the rest of the system. I plugged them into a spare 3.3v channel on my receiver and installed a battery pack for the tails and markers. Honestly, I thought they would have been brighter than what they were. I have to replace them since one is dim and a different color. I mounted the LiPo alarm in the back window so it could be seen while driving.
01-02-2012, 10:14 AM
#8
Tech Initiate
Thread Starter
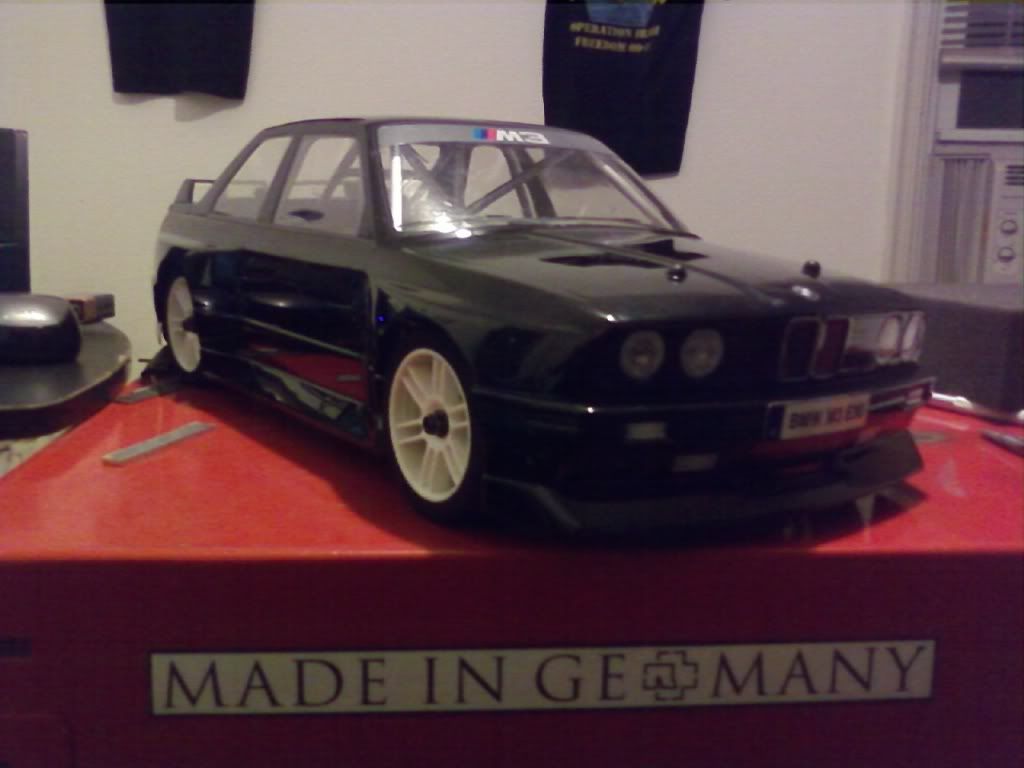
And this is the finished product. I put on a set of Traxxas Nitro 4-tec tires that I had as spares. The car handles and performs much better than it did before and overall I'm pretty happy with how it turned out. I plan on building a roll cage out of 3/16'' solid aluminum tubing, and I might cut a new chassis out of carbon fiber since I found out that it isn't that expensive.
Let me know what you guys think of this project, and getting a thread started for these cars!
Let me know what you guys think of this project, and getting a thread started for these cars!
03-30-2012, 10:16 AM
#9
Verry nice man!
03-30-2012, 06:36 PM
#10
Tech Initiate
I was actually considering buying one of these, how easy are they to work on?
03-30-2012, 07:28 PM
#11
Tech Initiate
Thread Starter
Thanks! A lot of time and energy went into this project. I actually need to update this thread with progress on the car. I did learn a rather expensive lesson in my choice of batteries, more specifically Turnigy LiPos. DO NOT PUT THEM IN ANYTHING OF VALUE!!! I melted the Mamaba Max Pro ESC and Flux 5,700 kV brushless motor. And this isn't an isolated incident. A Turnigy LiPo burned up the stock Velineon VXL ESC in my Slash as well. No more. I made a point of getting rid of every Turnigy battery that I owned.
03-30-2012, 07:30 PM
#12
Tech Initiate
Thread Starter
These cars aren't particularly easy to work on. The stock build quality is decent, and as long as you read the manual and take your time it isn't too bad. You can download the manual for free in PDF file from HPI. Hopefully you can get a good deal on it.
03-31-2012, 03:50 PM
#13
Haha, that's funny. I have an e39 m5 and got the HPI body to match.
I can't find a body to match my e34 or e39 touring though
I've toyed with the idea of getting one of these cars to dink around with
I can't find a body to match my e34 or e39 touring though
I've toyed with the idea of getting one of these cars to dink around with
03-31-2012, 04:11 PM
#14
Tech Initiate
Thread Starter
That's cool you were able to find the ///M5 body to match your actual car. I'm going to experiment with sheet lexan and a homemade vacuum former so that I can make my own molds of cars that aren't available. I still have to build the vacuum former, so once that's done I can attempt it.
03-31-2012, 08:40 PM
#15
Tech Initiate
Thread Starter
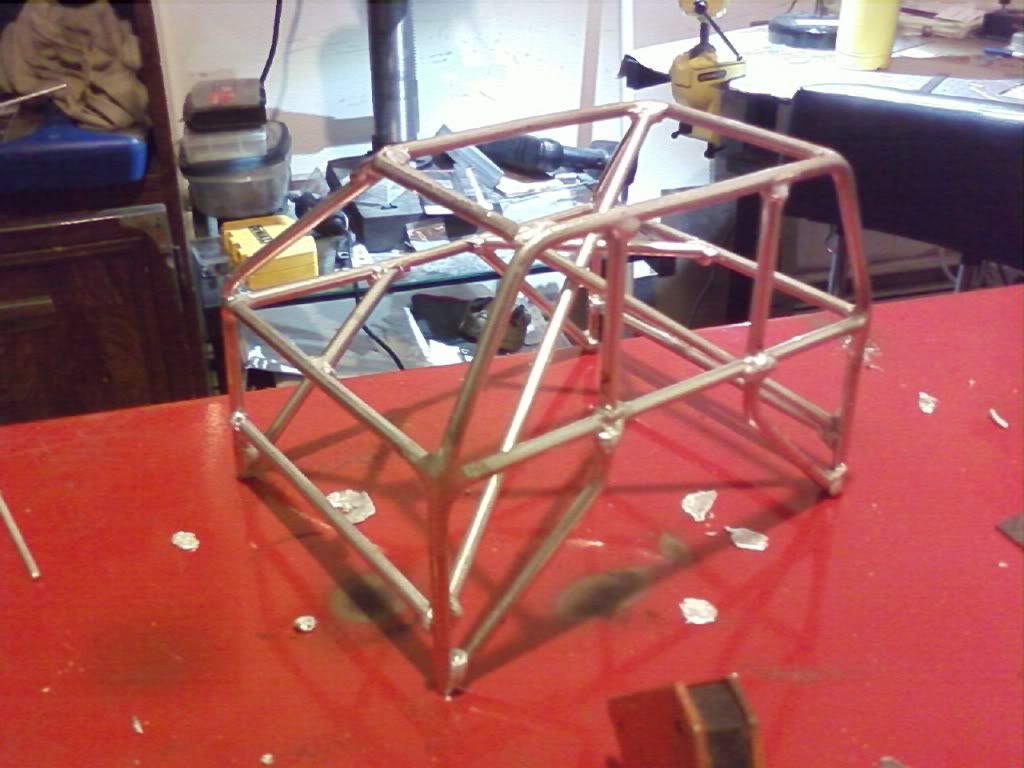
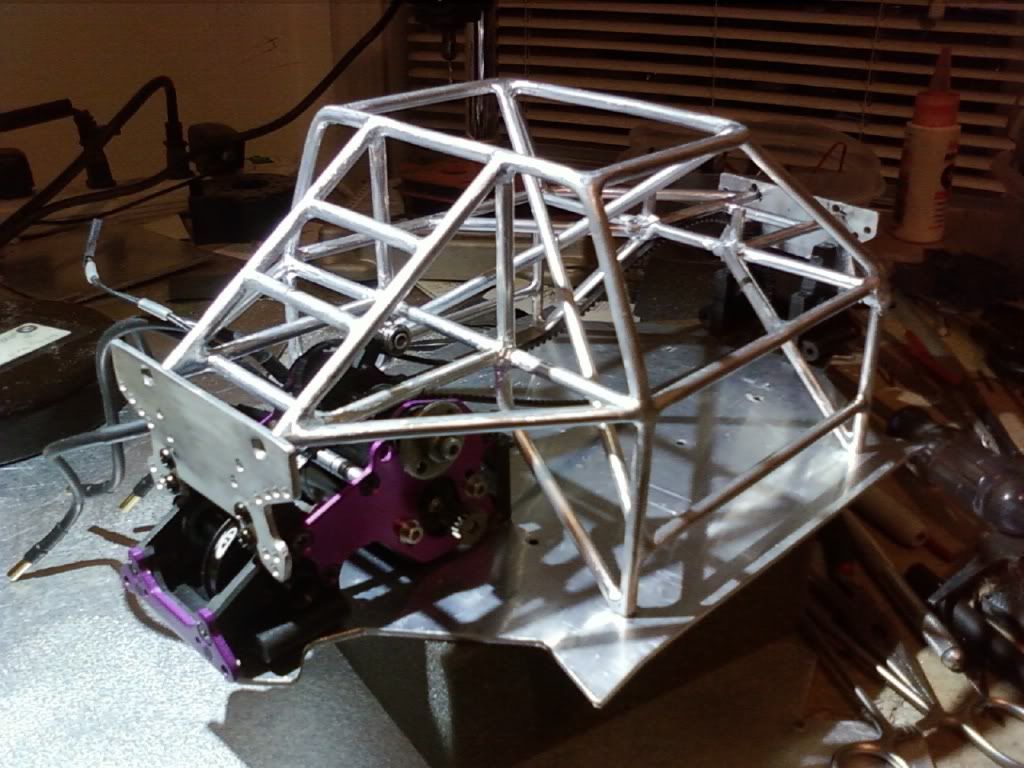
As promised, I will post the long overdue pictures. It seems a bit like going back in time with these since the car was completed, driven, broken, taken apart, repaired, and the electronics were destroyed by a Turnigy battery. Well, without further ado here is the construction of the roll cage from 4.7mm diameter aluminum tubing which I bent by hand and soldered together.
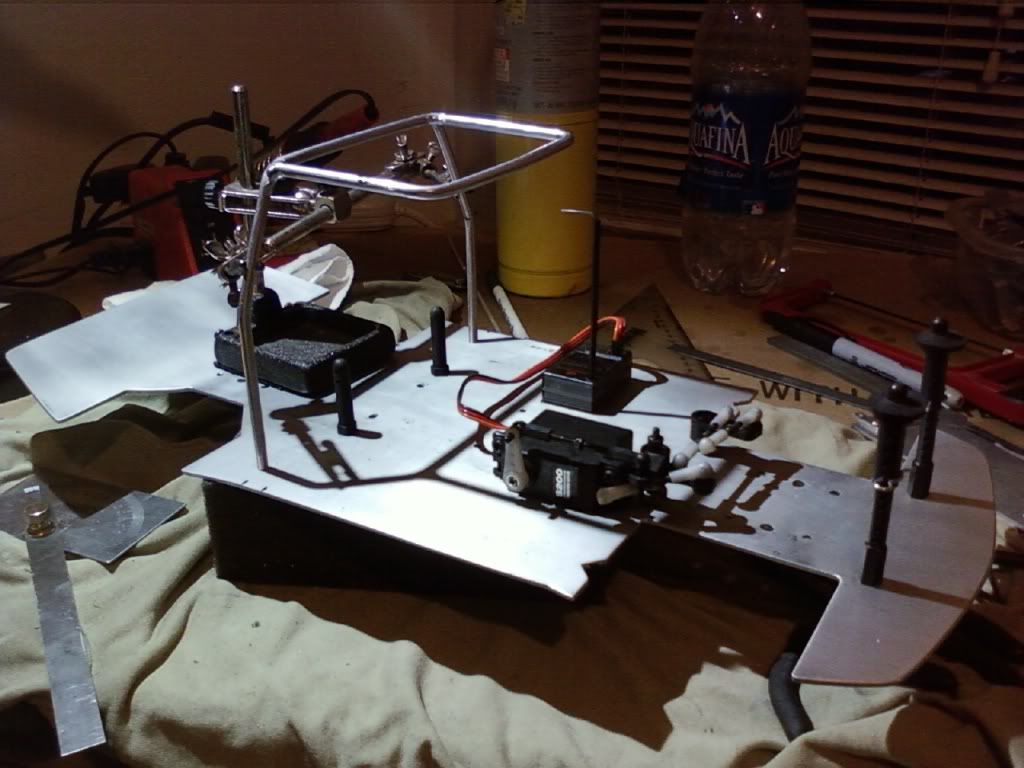
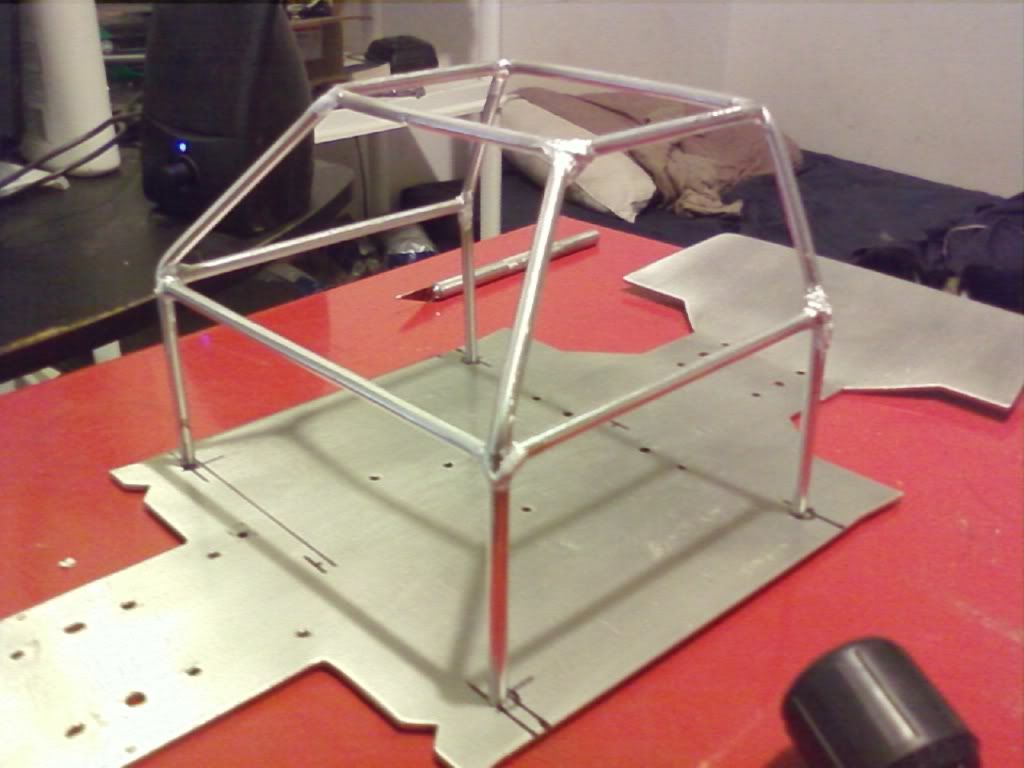
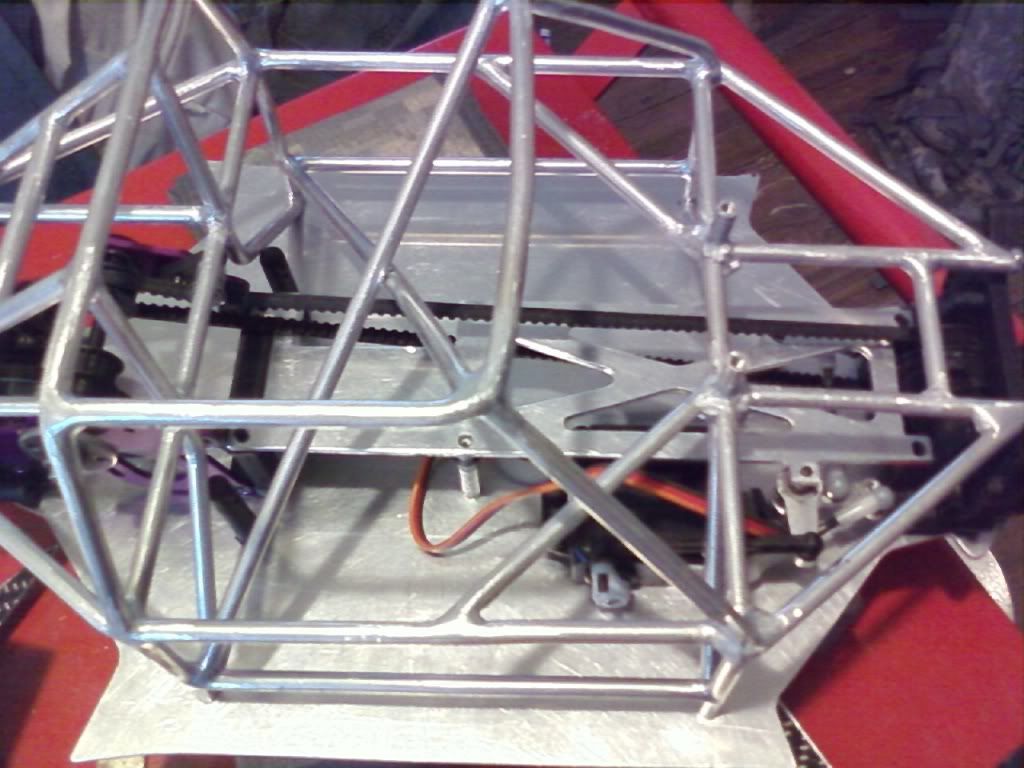
Here is the main cage on the chassis for test fitment:

Rear view:
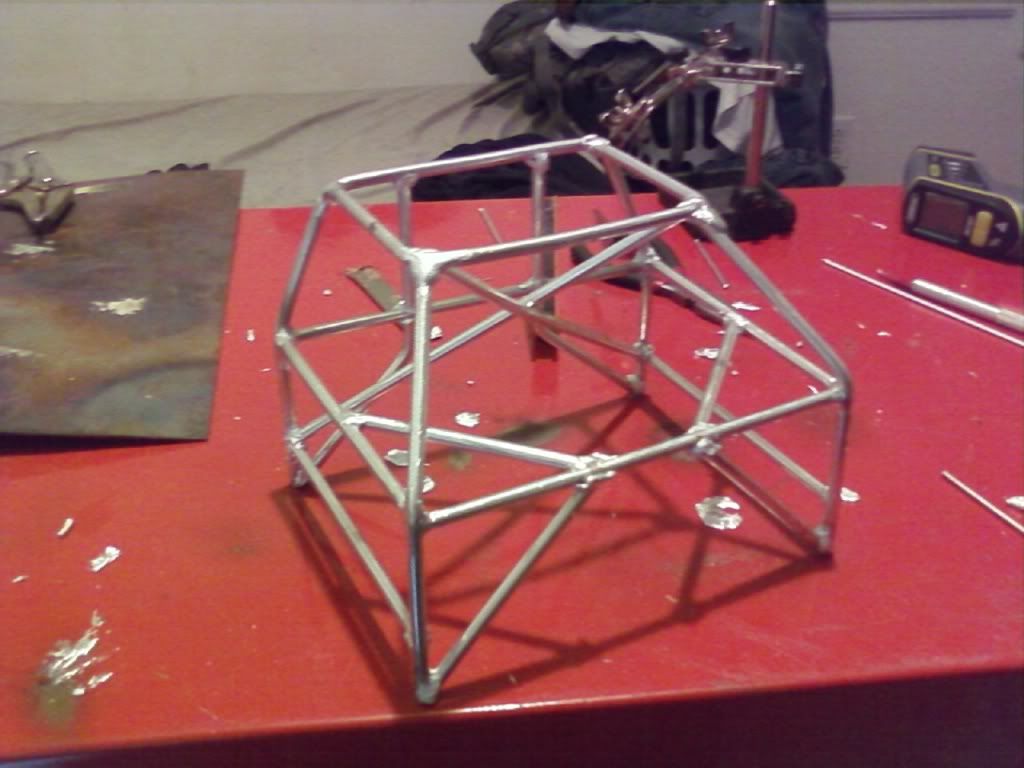
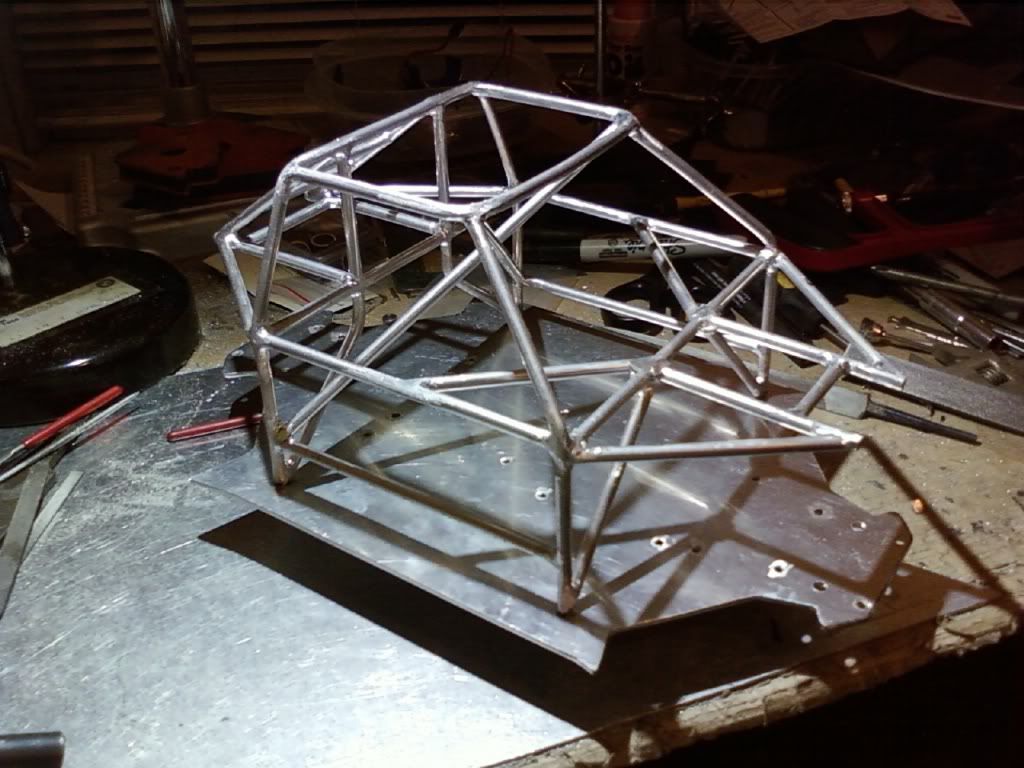
Time for more structural reinforcement:
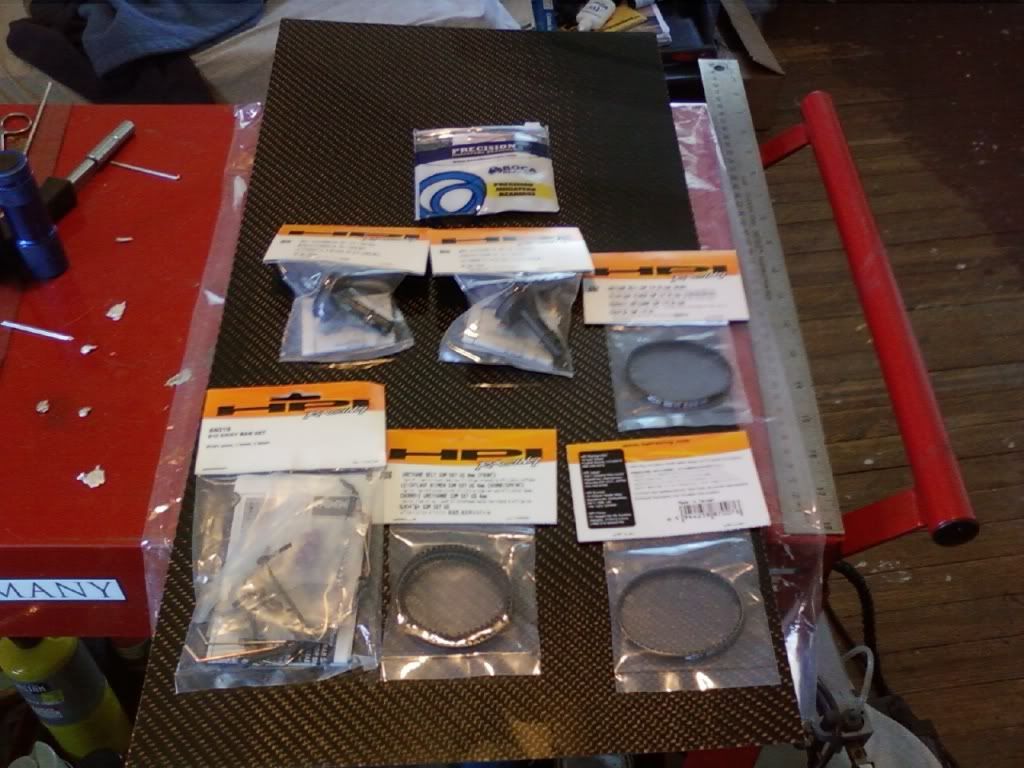
All of the much anticipated parts arrived, along with the plate of carbon fiber which I will cut a new main chassis from:
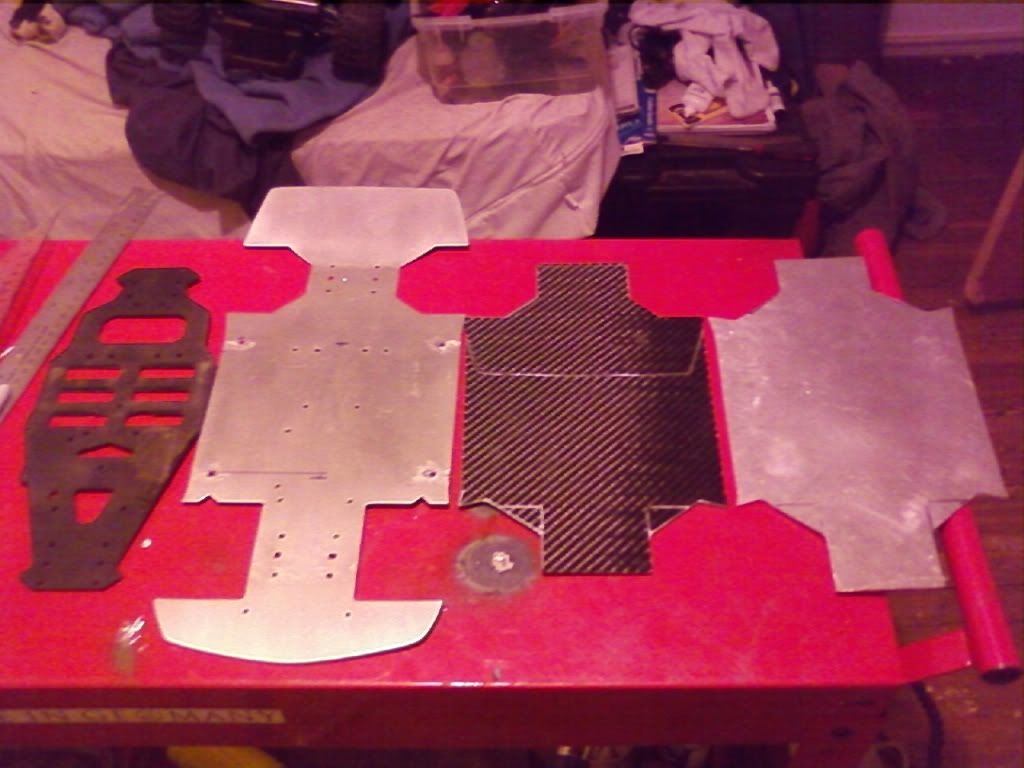
I decided to experiment with some carbon fiber plate for the main chassis. These pics illustrate the development of the chassis from stock form, to the first (heavy) aluminum plate, to carbon fiber(which at only 1.5mm thick proved to be too thin and susceptible to warpage), and to the last aluminum version.
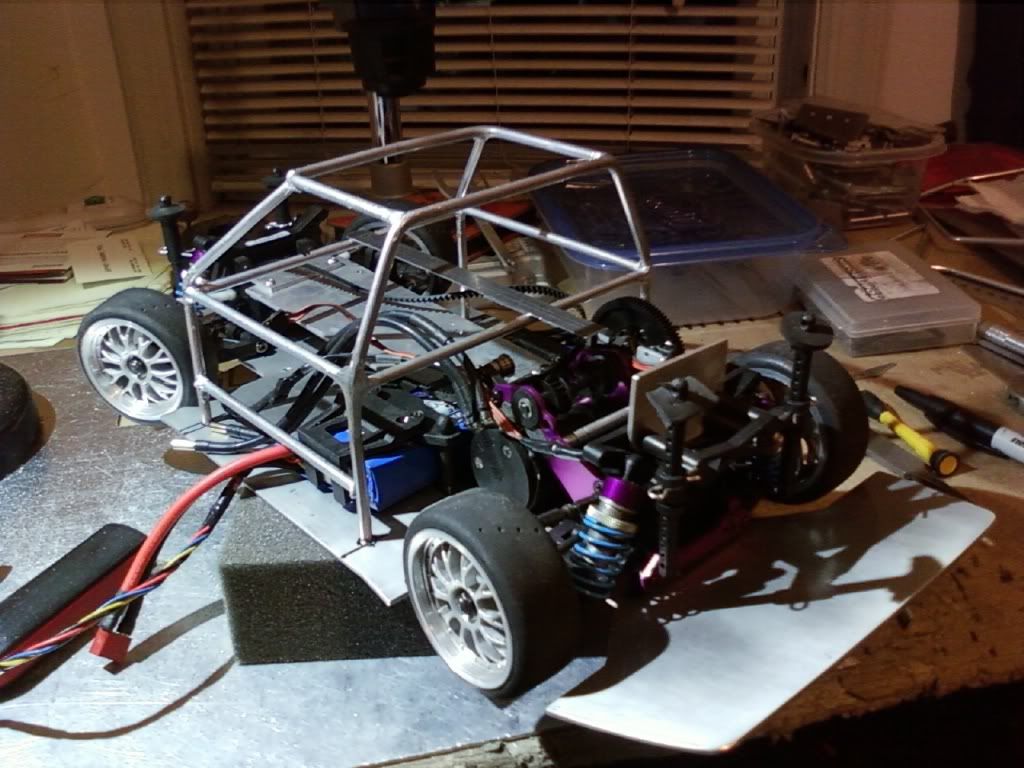
I added connective bars from the main cage to the front and rear shock towers in order to reduce chassis flex:
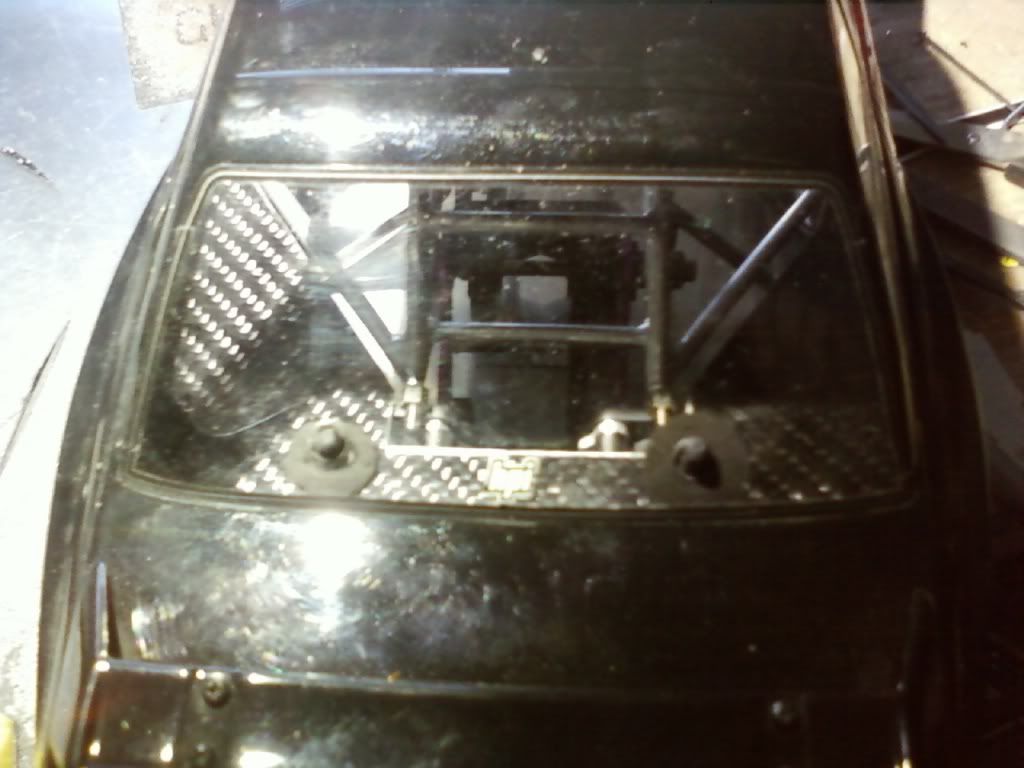
Here is the cage as it can be seen through the windows:
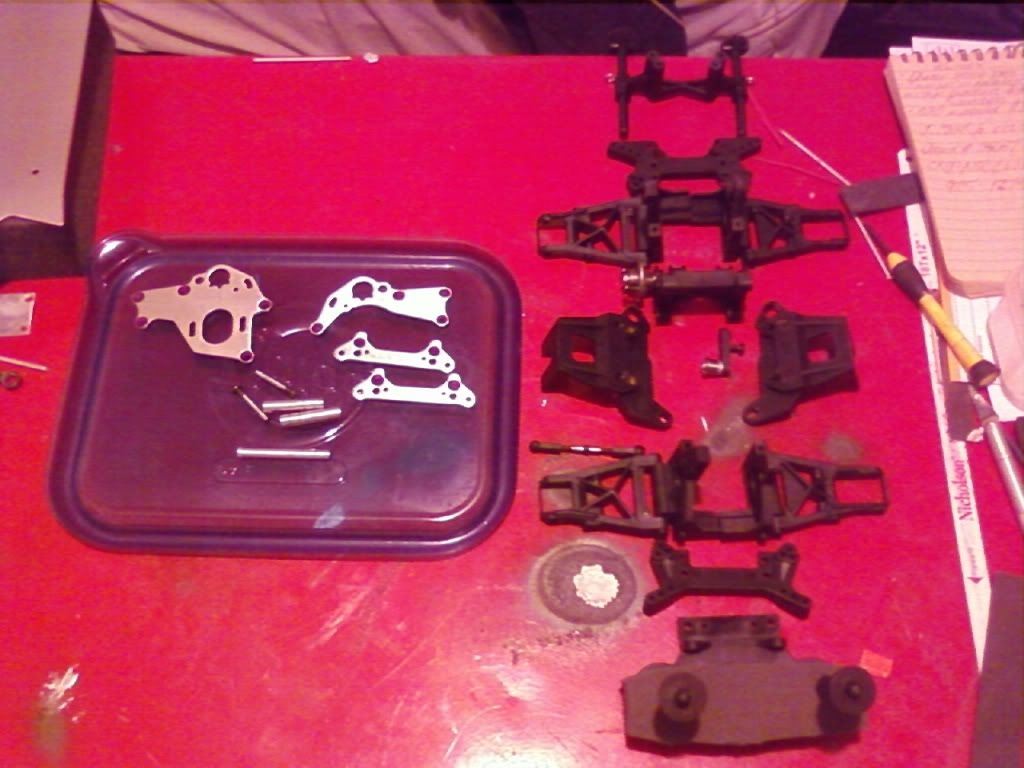
These are the only original parts used in the build:
I decided to lighten up the center chassis brace with some "speed holes"
And some cutting:
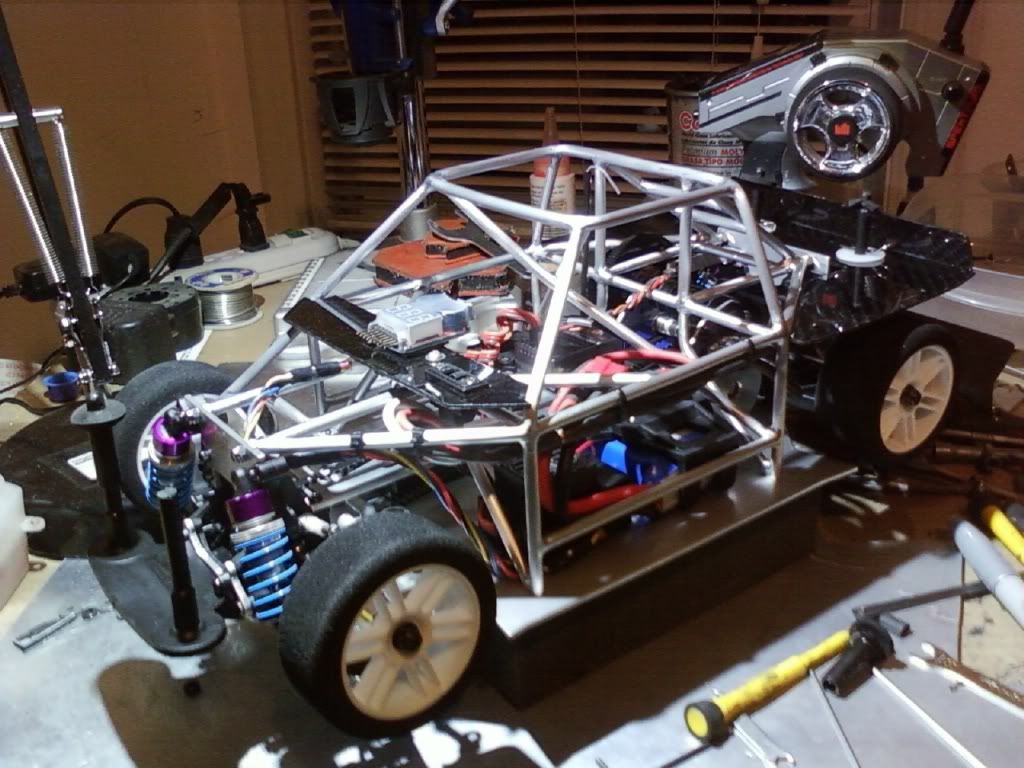
This is how it looks assembled:
And even more assembled:
I decided to use the carbon fiber for trim pieces, like a dash and rear shelf:
Bottom view of the chassis:

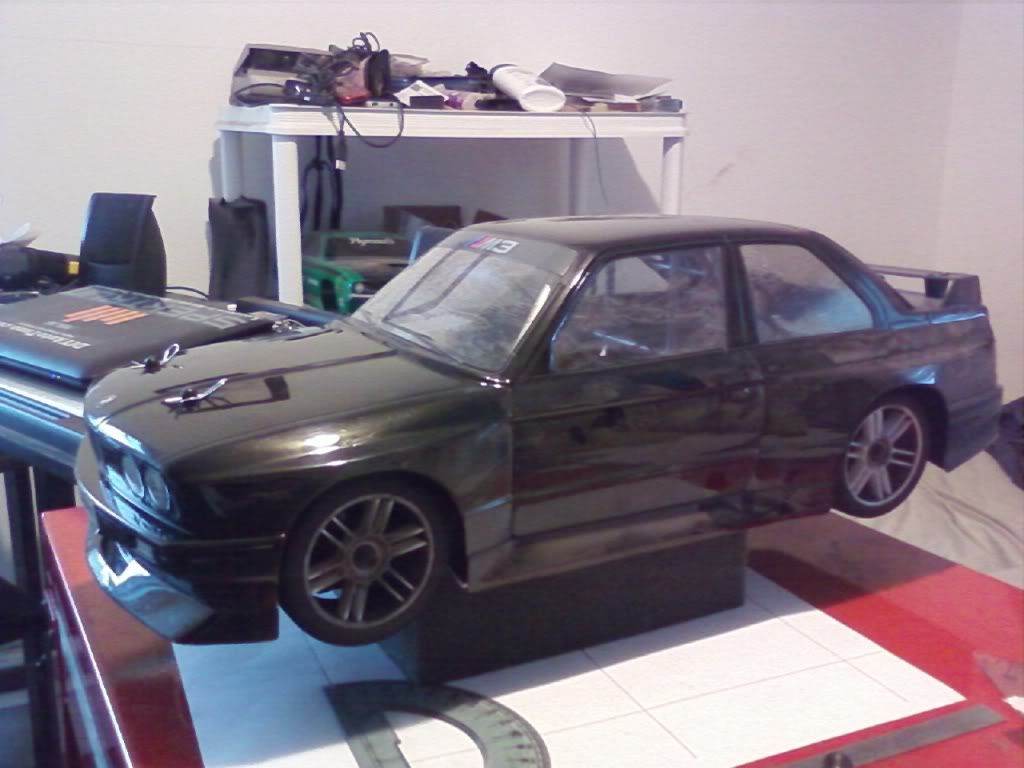
Rear view, with the body on:

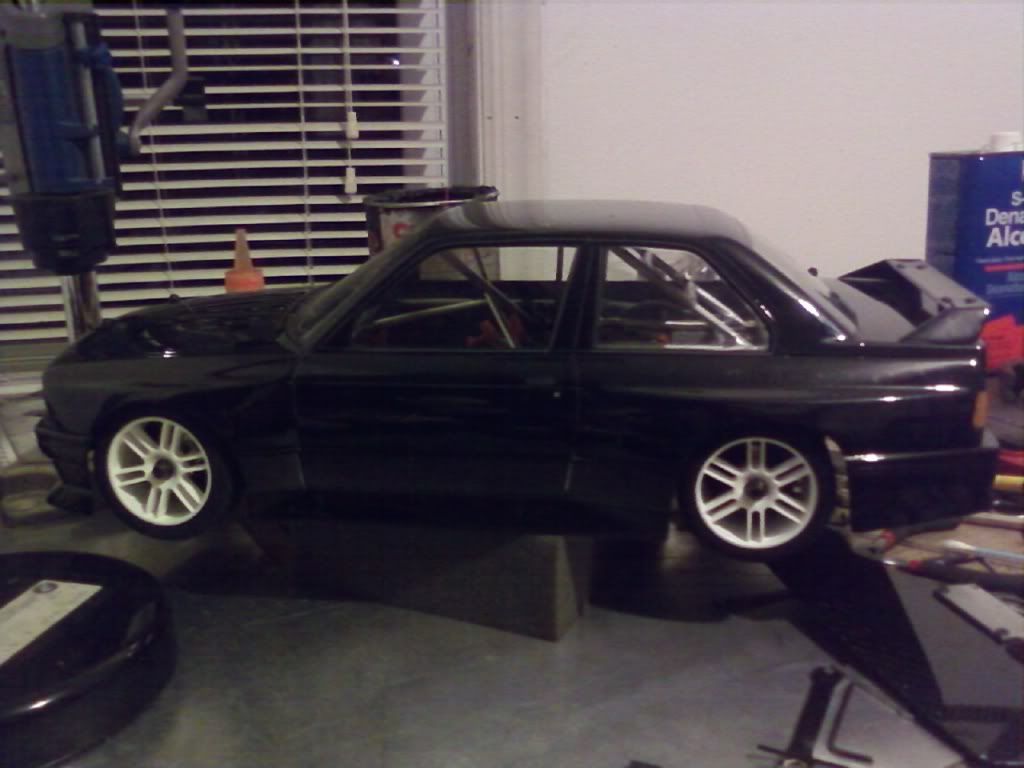
Side view through the windows:
Appropriate sticker I made for my work bench:
How it looked after some testing and tuning of the suspension:
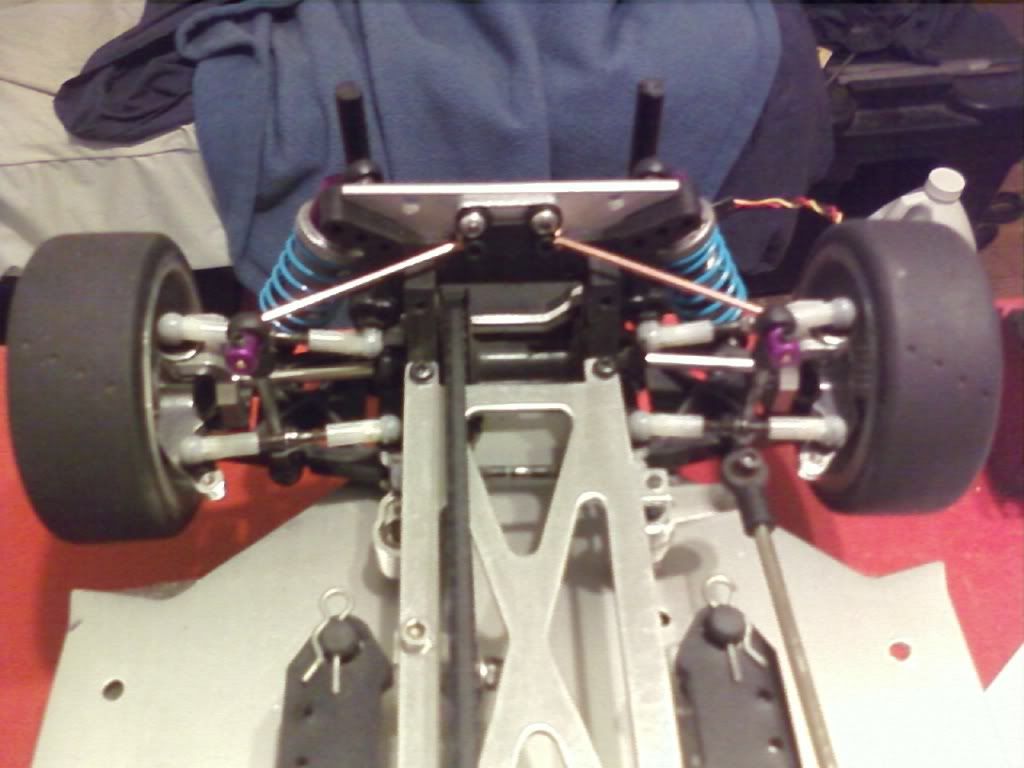
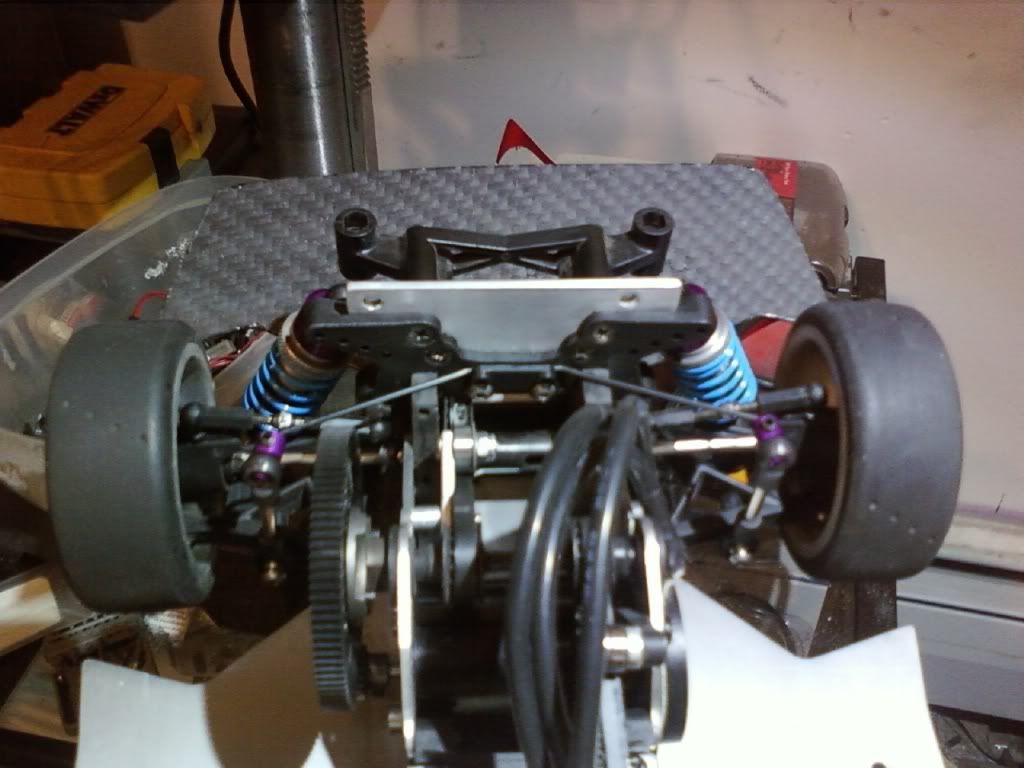
To be honest, I felt the added weight of the roll cage and use of aluminum degraded the car's handling. I removed the cage and decided a set of sway bars would help. Since they don't exist for this car, I modified a set of E10 bars to fit. This is how I attached them to the shock towers:

Front:
Rear:
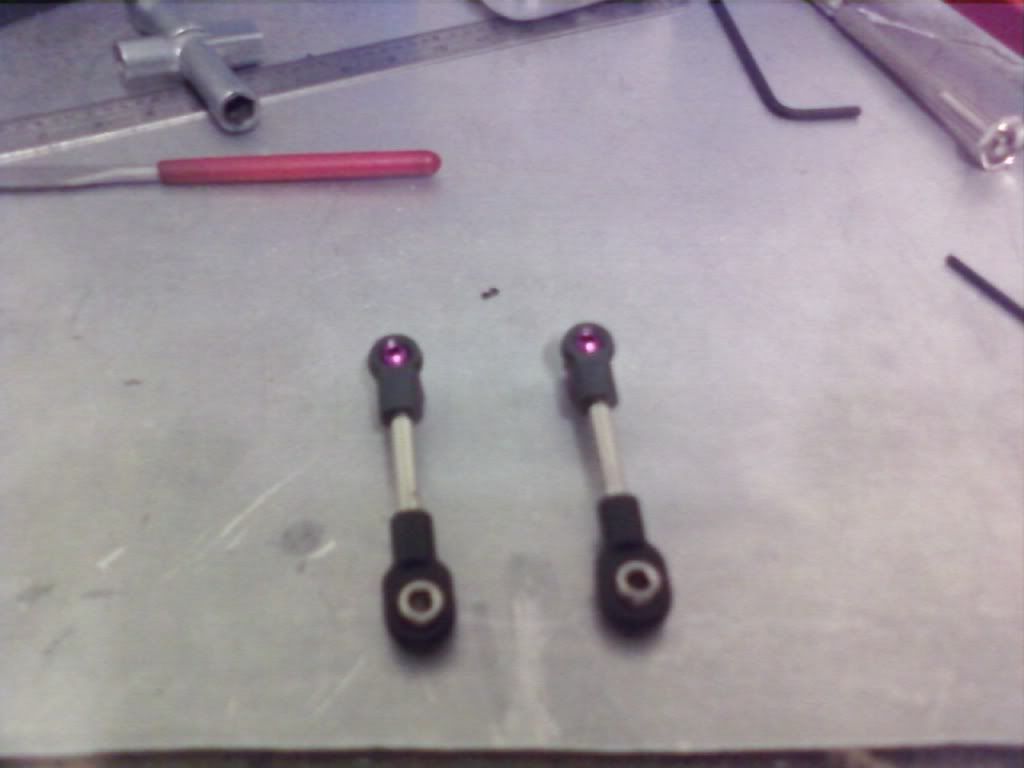
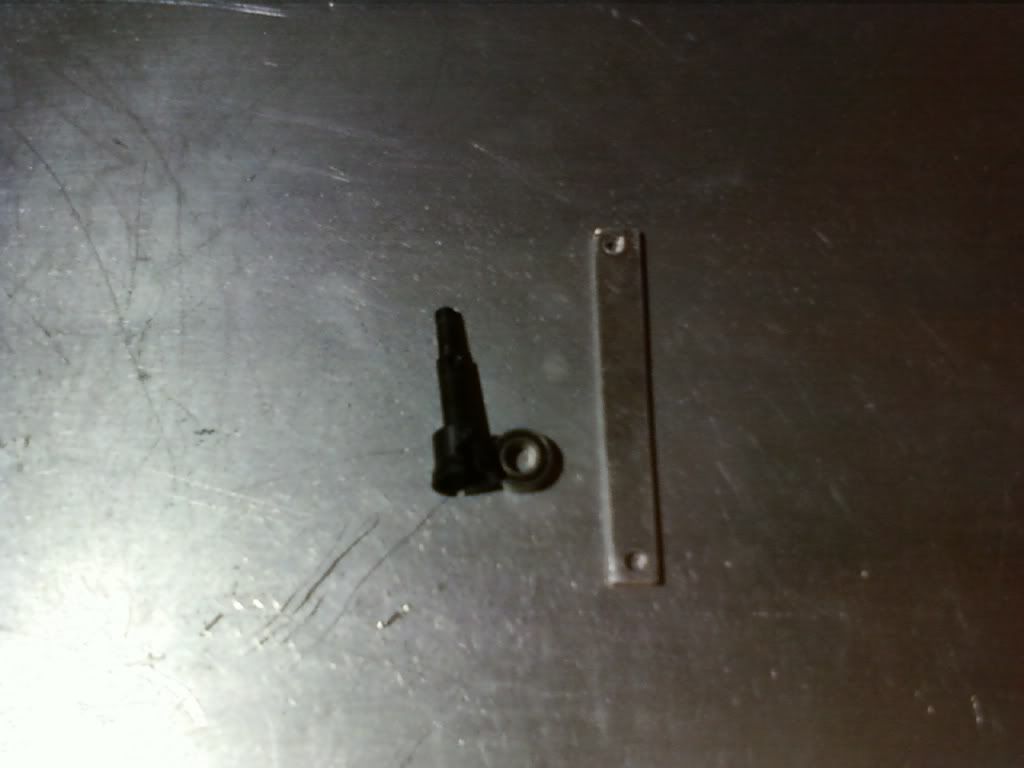
And end links made from old shock absorber shafts:
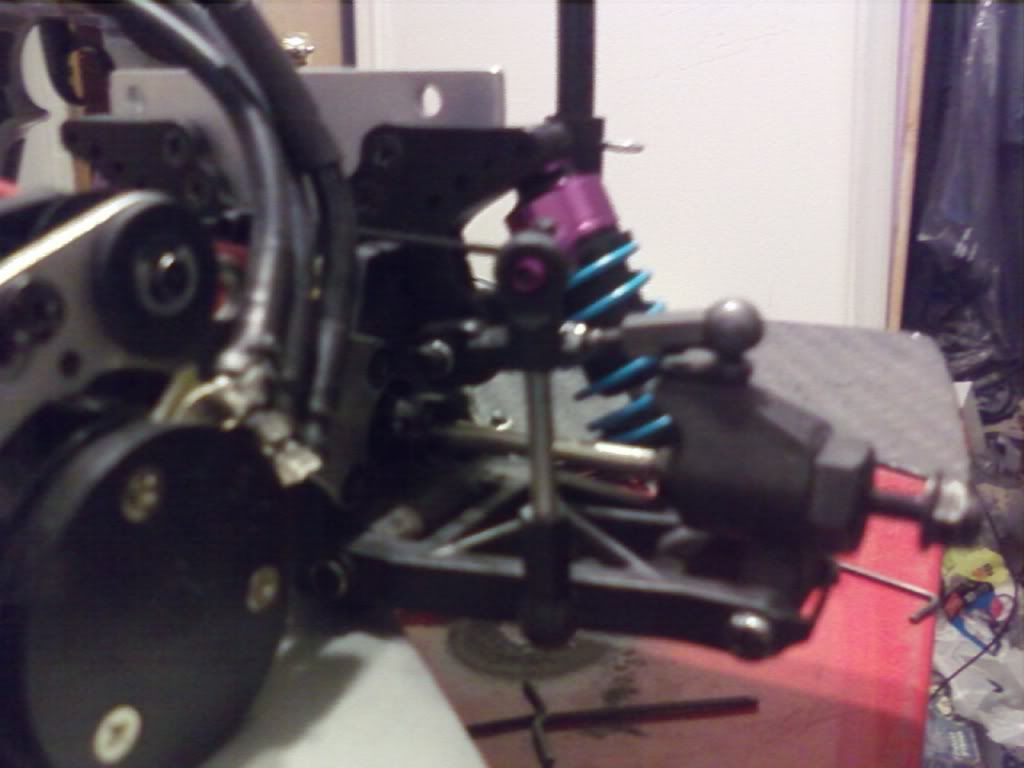
Installed:
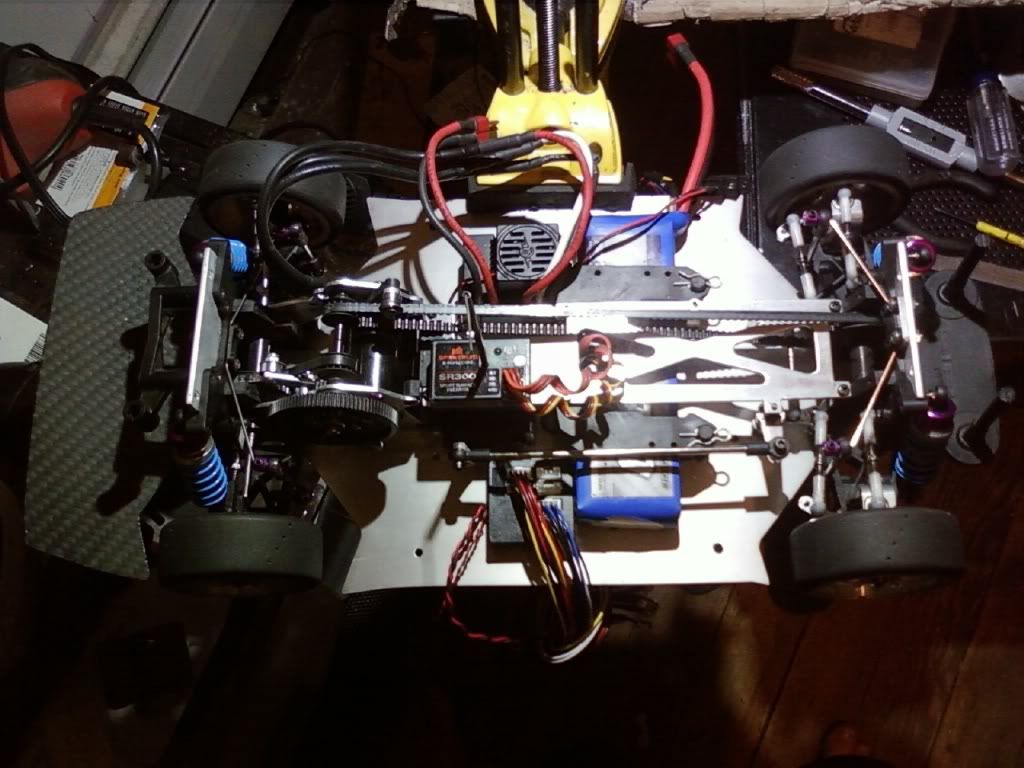
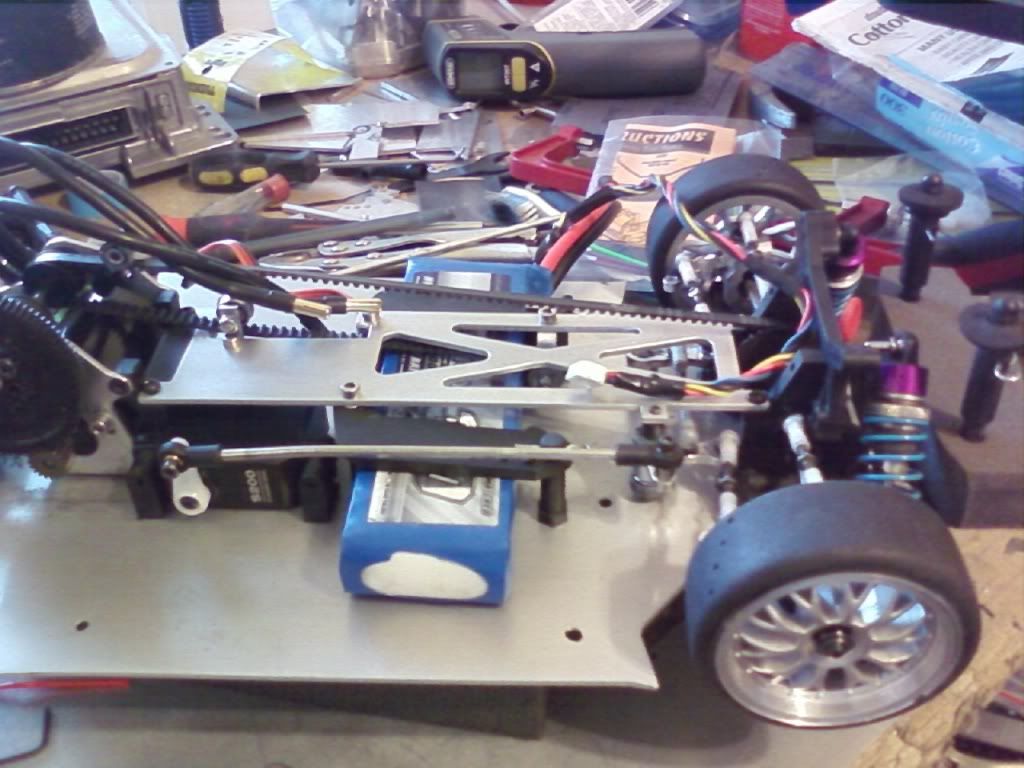
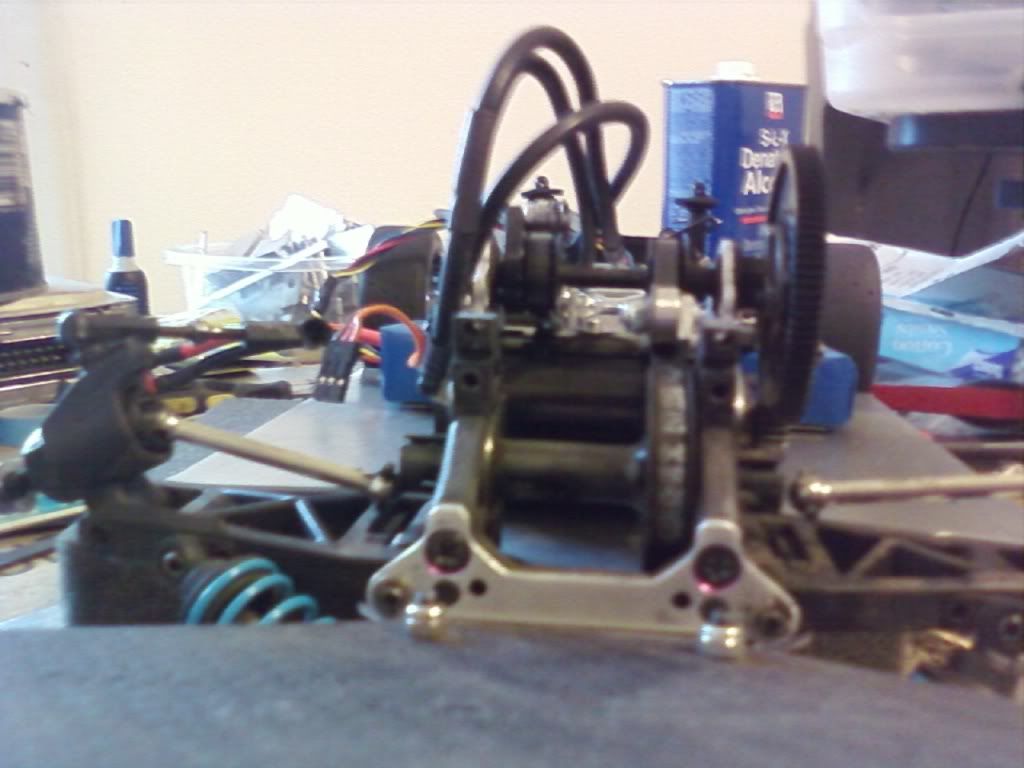
The next issue I wanted to address was the weight distribution. I moved the battery forward, and relocated the steering servo further back and closer to the chassis centerline. I also moved the ESC closer to the center:
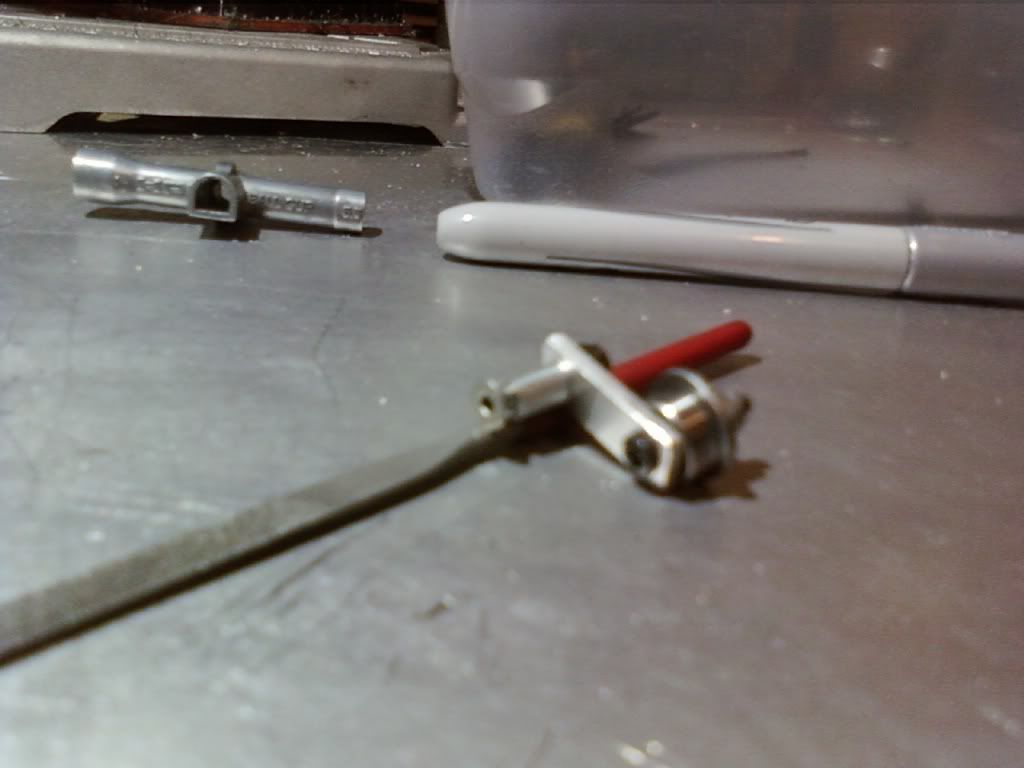
This required the fabrication of two belt tensioners so the front drive belt could clear the battery. I made them from part of the original drive cups, sealed bearings, and aluminum strips:
Finished product:
I also made one for the rear drive belt:
After all of this, I decided to swap bodies for a 1970 Plymouth 'Cuda. This was the originally intended body for this car, but after seeing that HPI made an E30 ///M3 I decided to keep it as a spare:
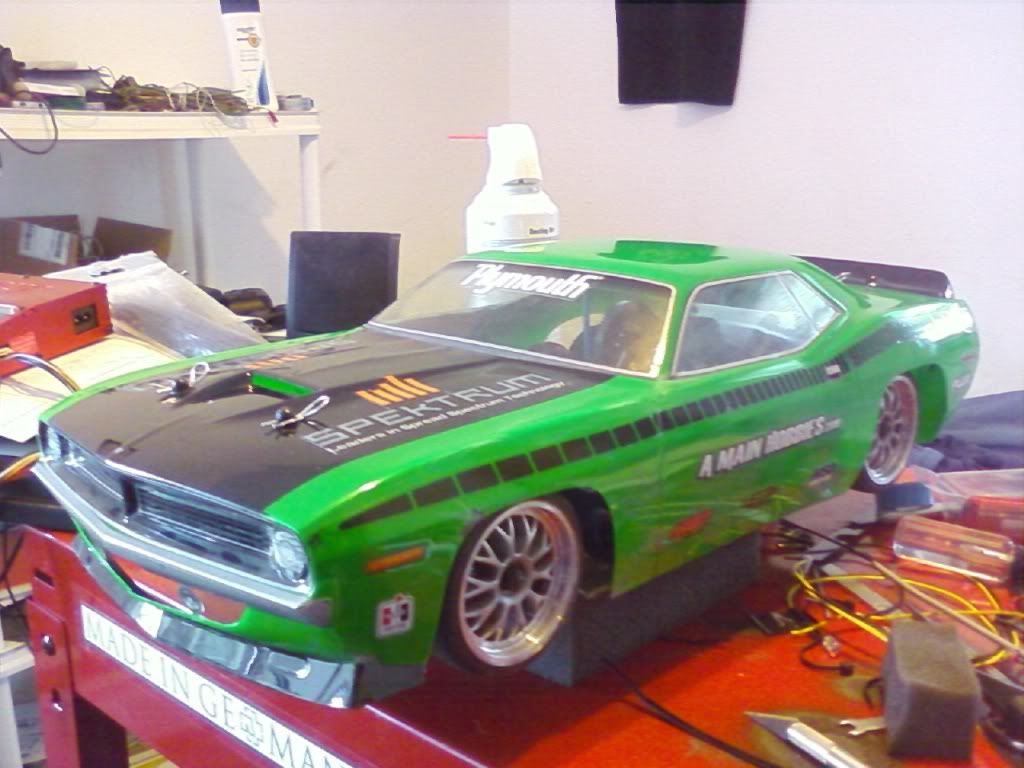
To be honest, it felt as though the car handled better with the Mopar body. I attribute that to be psychological, as I was getting sick of my black ///M3 spinning out from uncontrollable oversteer. I dove back into the forums, and began making adjustments to the suspension based on what I was reading about handling characteristics. I feel like I was heading in the right direction, then the battery dead shorted and took my electronics with it. So, it has been shelved since. Once the funds are available, I'll bring this project back.
Here is the main cage on the chassis for test fitment:
Rear view:
Time for more structural reinforcement:
All of the much anticipated parts arrived, along with the plate of carbon fiber which I will cut a new main chassis from:
I decided to experiment with some carbon fiber plate for the main chassis. These pics illustrate the development of the chassis from stock form, to the first (heavy) aluminum plate, to carbon fiber(which at only 1.5mm thick proved to be too thin and susceptible to warpage), and to the last aluminum version.
I added connective bars from the main cage to the front and rear shock towers in order to reduce chassis flex:
Here is the cage as it can be seen through the windows:
These are the only original parts used in the build:
I decided to lighten up the center chassis brace with some "speed holes"
And some cutting:
This is how it looks assembled:
And even more assembled:
I decided to use the carbon fiber for trim pieces, like a dash and rear shelf:
Bottom view of the chassis:
Rear view, with the body on:
Side view through the windows:
Appropriate sticker I made for my work bench:
How it looked after some testing and tuning of the suspension:
To be honest, I felt the added weight of the roll cage and use of aluminum degraded the car's handling. I removed the cage and decided a set of sway bars would help. Since they don't exist for this car, I modified a set of E10 bars to fit. This is how I attached them to the shock towers:
Front:
Rear:
And end links made from old shock absorber shafts:
Installed:
The next issue I wanted to address was the weight distribution. I moved the battery forward, and relocated the steering servo further back and closer to the chassis centerline. I also moved the ESC closer to the center:
This required the fabrication of two belt tensioners so the front drive belt could clear the battery. I made them from part of the original drive cups, sealed bearings, and aluminum strips:
Finished product:
I also made one for the rear drive belt:
After all of this, I decided to swap bodies for a 1970 Plymouth 'Cuda. This was the originally intended body for this car, but after seeing that HPI made an E30 ///M3 I decided to keep it as a spare:
To be honest, it felt as though the car handled better with the Mopar body. I attribute that to be psychological, as I was getting sick of my black ///M3 spinning out from uncontrollable oversteer. I dove back into the forums, and began making adjustments to the suspension based on what I was reading about handling characteristics. I feel like I was heading in the right direction, then the battery dead shorted and took my electronics with it. So, it has been shelved since. Once the funds are available, I'll bring this project back.