


Tamiya TA05MS vs TRF415 MSXX

 07-22-2007, 04:48 AM
#107
There is one, but you also have to buy new bulkheads...
by the way, couldn't run the TA05MS yesterday, my son Daniel his birthday is today (5 years) and the wife grab me to the world of shopping (supermarket, shopping mall and so on)

by the way, ,the TA05MS is ready to race!!!
 07-22-2007, 05:54 AM
#108
There is one, but you also have to buy new bulkheads...
by the way, couldn't run the TA05MS yesterday, my son Daniel his birthday is today (5 years) and the wife grab me to the world of shopping (supermarket, shopping mall and so on)
by the way, ,the TA05MS is ready to race!!!
by the way, couldn't run the TA05MS yesterday, my son Daniel his birthday is today (5 years) and the wife grab me to the world of shopping (supermarket, shopping mall and so on)
by the way, ,the TA05MS is ready to race!!!
07-22-2007, 01:47 PM
#109
Tech Master
I'm sure most the owners noticed this, but the steering arm hits the belt at full lock R/L. The instructions say to "carve" the arms to clear this wtf? I mean, you have to carve quite a lot to completely clear it so this is what I did.
Flip the steering post so the longer side is on the bottom. This way, you can raise the steering assembly using spacers/shims. Becareful to not raise it too much. I still had to round the inside corner of the R steering arm, but it clears the belt at about 1mm.
Ooo, how I agonized to file the blue anodize... but it's better than ripping the belt since no replacement is available yet.
Last edited by redbones; 07-22-2007 at 02:35 PM.
07-22-2007, 01:58 PM
#110
I'm sure most the owners noticed this, but the steering arm hits the belt at full lock R/L. The instructions say to "carve" the arms to clear this wtf? I mean, you have to carve quite a lot to completely clear it so this is what I did.
Flip the steering post so the longer side is on the bottom. This way, you can raise the steering assembly using spacers/shims. Becareful to not raise it too much. I still had to round the inside corner of the R steering arm, but it clears the belt at about 1mm.
Ooo, how I agonized to file the blue anodize... but it's better than ripping the belt since no replacement is available yet.
Flip the steering post so the longer side is on the bottom. This way, you can raise the steering assembly using spacers/shims. Becareful to not raise it too much. I still had to round the inside corner of the R steering arm, but it clears the belt at about 1mm.
Ooo, how I agonized to file the blue anodize... but it's better than ripping the belt since no replacement is available yet.
I just ordered 2 sets of belts from champ....
 they have them in stock at least...
btw, I didn't carve anything...

 07-22-2007, 02:59 PM
#112

I'm sure most the owners noticed this, but the steering arm hits the belt at full lock R/L. The instructions say to "carve" the arms to clear this wtf? I mean, you have to carve quite a lot to completely clear it so this is what I did.
Flip the steering post so the longer side is on the bottom. This way, you can raise the steering assembly using spacers/shims. Becareful to not raise it too much. I still had to round the inside corner of the R steering arm, but it clears the belt at about 1mm.
Ooo, how I agonized to file the blue anodize... but it's better than ripping the belt since no replacement is available yet.
Flip the steering post so the longer side is on the bottom. This way, you can raise the steering assembly using spacers/shims. Becareful to not raise it too much. I still had to round the inside corner of the R steering arm, but it clears the belt at about 1mm.
Ooo, how I agonized to file the blue anodize... but it's better than ripping the belt since no replacement is available yet.
this allows you to use the short side of the steering post. i built it like you initially, but went back and referenced the instruction manual and it will clear the belts. let me know if you need a photo posted.
 07-22-2007, 03:05 PM
#113
redbones.. you built the steering assembly wrong. remove that thick spacer underneath your steering post and use the thin spacers that came with it. there should be no spacers above the steering arms.
this allows you to use the short side of the steering post. i built it like you initially, but went back and referenced the instruction manual and it will clear the belts. let me know if you need a photo posted.
this allows you to use the short side of the steering post. i built it like you initially, but went back and referenced the instruction manual and it will clear the belts. let me know if you need a photo posted.

btw,
1)did you carve the steering?
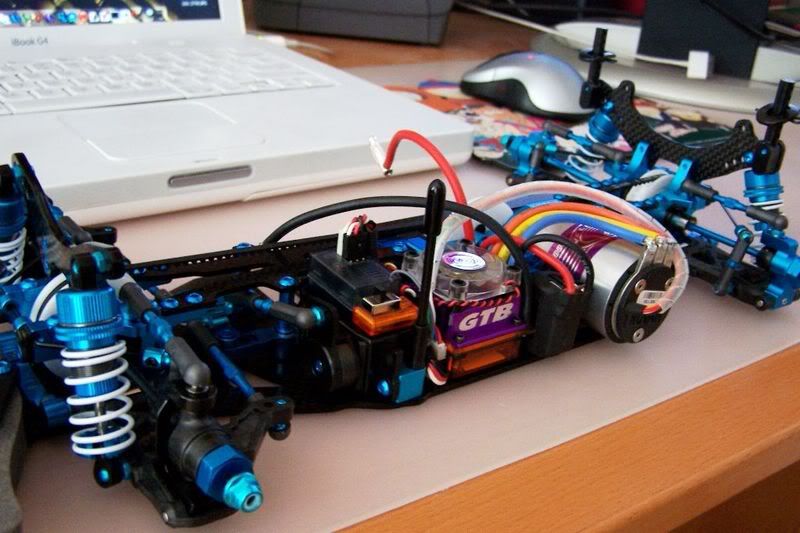
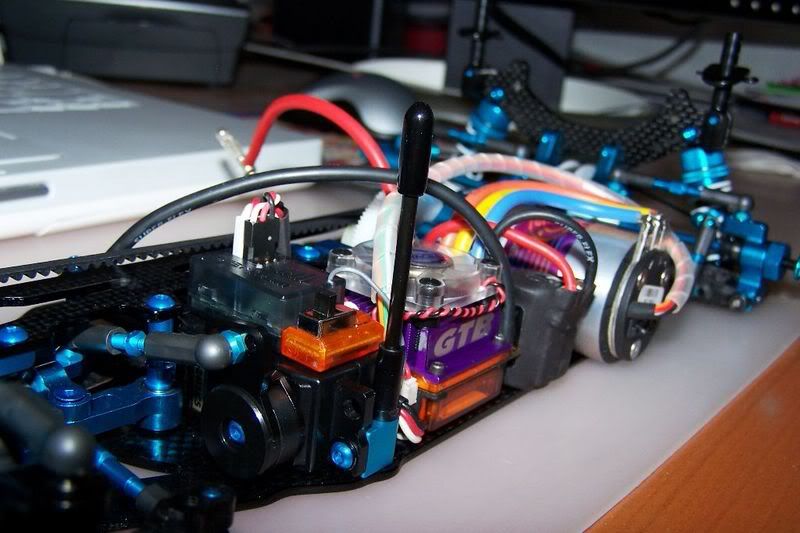
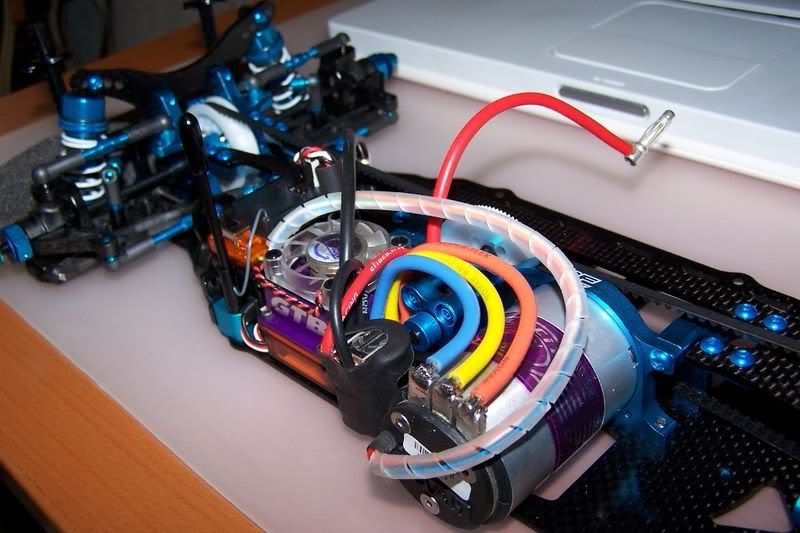
2) electronics side pictures, please
cheers,
al
07-22-2007, 04:10 PM
#115
I also put the wrong shims under the steering assembly. I only realized when finishing the car that I put two .1 mm shims on one side of the steering instead of the two .3 mm shims that the manual calls for.
Did anyone fit a GTB directly behind the servo without using a low profile servo? Or will a GTB fit behind the motor? I had to wire up an old Tekin G12cIII (which is also pretty darned big) for the time being because I can't afford another GTB at the moment.
Did anyone fit a GTB directly behind the servo without using a low profile servo? Or will a GTB fit behind the motor? I had to wire up an old Tekin G12cIII (which is also pretty darned big) for the time being because I can't afford another GTB at the moment.
07-22-2007, 05:20 PM
#116
 is the best. Did you see the guy who placed 2nd at JP? I think Tommi says he was using a 415. He's the only guy who did not get lapped by Taka san. His name is Ian Aquino. I think he's a tamiya fan boy also like Taka san. Pretty good result since that's his first race at JP right? 415 na!!!
07-22-2007, 07:11 PM
is the best. Did you see the guy who placed 2nd at JP? I think Tommi says he was using a 415. He's the only guy who did not get lapped by Taka san. His name is Ian Aquino. I think he's a tamiya fan boy also like Taka san. Pretty good result since that's his first race at JP right? 415 na!!!
07-22-2007, 07:11 PM
#117
415 is the best. Did you see the guy who placed 2nd at JP? I think Tommi says he was using a 415. He's the only guy who did not get lapped by Taka san. His name is Ian Aquino. I think he's a tamiya fan boy also like Taka san. Pretty good result since that's his first race at JP right? 415 na!!!
is the best. Did you see the guy who placed 2nd at JP? I think Tommi says he was using a 415. He's the only guy who did not get lapped by Taka san. His name is Ian Aquino. I think he's a tamiya fan boy also like Taka san. Pretty good result since that's his first race at JP right? 415 na!!! He's an avid rc collector and has a lot of Tamiya cars. I'll be very surprised if he doesnt add the TA05MS to his collection  07-22-2007, 07:14 PM
#118
posted my race report in the TA05MS thread. Once I figured out what tires to use, my 05MS was as easy to drive as the MRE i had practiced with back before the Reedy race.
For my level of driving (and comfort level with the TA05 platform), I definitely prefer this car over the MRE. 1. nope. didnt touch a thing.
i am a little worried about the steering links hitting the rear suspension block if ackerman is adjusted.2. i have a low profile ko servo, with a 3PK Fasst receiver. The GTB is placed in the rear of the motor. but after seeing your pix, i think i will reorganize everything and put the GTB in front of the motor. and from a birdeye view, this will centralize all electronics and all the weight.
07-22-2007, 08:31 PM
#119
Tech Master
I did build the steering assembly exactly as the instructions said the first time around. I also noticed that the instructions do say to "cut/carve" the steering arm to clear the belt. I was experimenting to see if I can get around it.
BTW, is RCChamp the only place that sells those 3X5mm titanium hex screws?
BTW, is RCChamp the only place that sells those 3X5mm titanium hex screws?
07-22-2007, 09:23 PM
#120
Tech Master
I did more adjustments, and was able to put it back how it orginally was intended(shorter side bottom of steering post). You have to shim the hell out the bottom to give it near zero play, and round off the edge on the right steering arm where it comes close to the belt. I now have about 1mm of clearence.