Go Back  R/C Tech Forums > General Forums > Electric Off-Road
Tekno RC EB410 Thread >

Tekno RC EB410 Thread

Community
Wiki Posts
Search
Like Tree2421Likes

Tekno RC EB410 Thread

    Hide Wikipost
Old 05-13-2019, 06:33 AM   -   Wikipost
R/C Tech ForumsThread Wiki: Tekno RC EB410 Thread
Please read: This is a community-maintained wiki post containing the most important information from this thread. You may edit the Wiki once you have been a member for 90 days and have made 90 posts.
 
Last edit by: tobamiester
Welcome to the EB410 Wiki page.

Basic Stats/Features:
  • Shaft drive (tapered AL for light weight and straightness)
  • Gear differentials (all 3)
  • Low Angle CVAs (with captured pins so no ejecting them!)
  • Durable stub axles with 12mm hexes and optional offset adjustments
  • Reverse bellcrank steering system
  • Quick access bulkheads (for easy diff maintenance and tuning)
  • Spllt center diff holder (for easy diff maintenance and tuning)
  • 8th scale style motor mount (for easy mesh adjustment)
  • 13mm big bore shocks
  • 3.5mm shock shafts
  • Droop screws

Videos
Servo Horns
Tekno included a plastic servo horn but also offers an aluminum one. This is highly recommended. Here's a list of servo horns that have been found to work:
Gearing:
Works out of the box for mod or 13.5.
  • Preference for Associated factory team pinions
  • Start mod gearing around 21t pinion
  • Start 13.5 gearing around 29t pinion with the stock spur (81tooth). If using a Tekin Spec R 13.5, start with a 24t pinion for medium sized indoor tracks.
  • Internal Gear Ratio: 2.5:1
  • For comparison:
  • B64 is 2.47:1
  • 22-4 is 2.4:1
  • YZ4 is 2.6:1

Wheels
  • B6/22/rb6 wheels direct fit
  • 22-4/XB4 front wheels direct fit
  • B64 front wheels will fit, but you need the +1 hexes (can use #TKR1654X, which is a +1mm hex)
  • 22 2wd front wheels will also fit, possibly a good option for carpet.

Setup Sheets and other documentation
Setup sheets for all Tekno RC vehicles can be found here. Please be sure to try our recommended setup. It works very well on most tracks.
Piston Drills:
Some of our setups recommend using pistons that are enlarged. For instance 4x1.9 or 3x2.0. To drill the pistons we recommend the following:
Aftermarket Upgrades:
Warranty Policy:
Tekno RC is the only company in the industry that will give 50% off of parts if returned to them using the General Warranty return policy found on their website. The parts can be lightly used or completely abused, as long as the part is still being produced it's covered!


Build Tips:
  • When fastening the steering posts with a 5.5mm socket wrench, you can back space the socket with some nuts to help drive the post into the bulk head

  • Place an alcohol swab over metal threads and drive screws through the swab to clean both sides of threads before applying thread lock

  • Use a metallic marker to indicate what fluids you have filled in your diffs for easy identification

  • Apply thin layer of grease on crown gears to help hold gaskets in place for easy hole alignment

  • Bags F and H have 2 different size set screws, be sure to use the smaller 3x3mm screws for the hexes or you may run into problems installing wheels over the hex if you use the longer 3x4mm screws
  • To make is easier to slip the o-rings on the shock cap bleeder screws, apply a drop of shock oil and slip them over a 1.5mm hex bit, then line up the bit with the screw and transfer the o-ring over using fingernails or needle nose pliers
  • pinch+rotate shock caps in 17mm hex wrench to improve roundness
    More shock build tips here
  • Use a 3.05mm drill bit or 3.05mm Kyosho arm reamer, 1/8" drill bits are not recommended because they are 3.17mm in diameter and tend to introduce too much slop, the pins are roughly 2.97mm in diameter
  • Replace the stock 3x14mm screws (TKR1405) with 3x20mm screws (TKR1409) in step H-10 in the manual in order to increase durability to the bulkhead.

  • When installing the front and rear differentials into the bulkheads be careful when tightening the 3x8mm screws of the cover that holds the diff in place. Bottom out the screws first (use a hand driver and make it hand tight) then check the diff to make sure it rotates smooth. If it binds up, start by backing out each screw 1/8-1/4 of a turn until the both front and rear diffs move freely. The plastic threads will keep the screws in place so don't worry if you think the screws are not secure.
  • When installing the steering hub kingpins (TKR6596), drive each one in hand tight only. Then check the movement of the steering hub. If it binds up, back out the kingpin screws by 1/8-1/4 of a turn until it moves freely. Then install the set screws (TKR1601) to hold it in place. Only drive the set screw in until you make contact with the kingpin. Do not force it.
  • If using the low profile servo mount, be sure to use smaller OD (outter diameter) washers to avoid rubbing on the center drive shaft. Protek ball stud washers are a good example of the acceptable diameter. You can chose to not run washers though it is recommended to use them as it makes for a more secure mount.

  • Ball Cup Alternative from AE: ASC91453. These are used as a harder composite option if you are not happy with the softer stock plastics. Note that these are approximately 2-3mm shorter and require compensation when building your kit to the manual specs to achieve proper camber/toe settings


  • Wheel Nut Alternative: Yokomo 4mm Thin Aluminum Serrated Flanged Nut

    https://www.amainhobbies.com/yokomo-...-n4flt/p541494


  • Moving Rear Shocks to the Front of the A-arm

    This is the break down of what's required by one of the Eb410 FB users.

    Joey A.

    So since there has been some people wondering about running the shocks in the front of the arm I though I would try explaining everything that I did to get them to work and why. My goal was to run as much stock stuff as possible with the least amount of modifications.

    -Arms- need to be flipped and 1mm shaved off the back (spacing the arm farther back) running it this way the car is still a mm shorter then stock but more material could be removed for more adjustability but I have found no need to make the car longer.

    -Inner ball stud- there are 2 ways of mounting, the first can be used with the stock plastic tower. All you need to do is use a 10mm ball stud instead of the lower shock mount screw and a little clearance from the shock tower and diff case. Using this method will work but the ball stud is moved lower and farther in then the stock locations which requires different pivot locations to try and correct roll centers. The other way (preferred) using the option carbon tower drill a hole higher and farther out if done properly you will be able to get the ball stud location in the correct hight(0mm) and between the two stock locations.

    -Shocks- only 2 changes from stock you will need to space the top shock mount 2mm out. You will also need to run around 1.5-2mm less droop depending on your setup.

    -Sway bar- this is the hardest part of the swap. This can be done a million ways I chose to print a mount in the stock ball stud location which allowed me to use the stock swaybars and arm mounting position. You can also bend your own bar and use the stock mounts on the back. You will have to drill your arms on the other side and closer to the pivot for this to work (remember you will need a thinner bar the closer you mount the lower pickup on the arm to get the same feeling as stock).

    -Other- you will need to remove the drop screws on the rear arm. Depending on rear rims,hubs,ballcups and setup you might need to clearance the outer ball cup so it doesn’t rub on the wheel.

    -Why- the benefits of running the shocks in the front are the ability to run a softer rear shock package without giving up corner speed and pack. The car will land without chassis slapping or packing out as easy allowing you to drive the car harder and it corners flatter and rotates faster without losing rear grip.

    Sorry for the shity grammar,
    TJR

    Sway bar mount for forward mounted shocks: https://www.ebay.com/itm/Tekno-EB410...4AAOSwYNxahFkq

Print Wikipost

Thread Tools
 
Search this Thread
 
Old 12-29-2017, 02:48 PM
  #2986  
Tech Adept
iTrader: (1)
 
Join Date: Aug 2012
Posts: 241
Trader Rating: 1 (100%+)
Default

These kit looks amazing! Probably an even better basher. Tekno builds some strong kits. And while it would be a high end luxury basher. You would save money in the long run, vs going with a RTR or something like that.

I raced and bashed my last sct410.3 kit, it was tough as nails!

Then i moved on the 2wd mod class with a RB6 kit.
tps3443 is offline  
Old 12-29-2017, 04:06 PM
  #2987  
Tech Master
iTrader: (5)
 
RazorRC's Avatar
 
Join Date: Oct 2017
Posts: 1,898
Trader Rating: 5 (100%+)
Default

Originally Posted by JRSlash
Extotek released new brass weights for the EB410. Way to go exotek. Now waiting for a nice steering rack.


Random question, but how does Exotek get that black finish on brass? Is it powder coated or oxidized or something? Looks nice.
RazorRC is offline  
Old 12-29-2017, 05:56 PM
  #2988  
Tech Addict
iTrader: (9)
 
Join Date: Mar 2008
Posts: 628
Trader Rating: 9 (100%+)
Default

Regarding the shock springs for the eb410. Looking to change the rear springs to orange and the fronts to red. Based on the spring chart on the Tekno site, would these springs be stiffer than the stock yellow springs?
Borik is offline  
Old 12-29-2017, 05:59 PM
  #2989  
Tech Elite
iTrader: (39)
 
EbbTide's Avatar
 
Join Date: Nov 2012
Location: Bay Area, Ca
Posts: 4,264
Trader Rating: 39 (100%+)
Default

Originally Posted by Borik
Regarding the shock springs for the eb410. Looking to change the rear springs to orange and the fronts to red. Based on the spring chart on the Tekno site, would these springs be stiffer than the stock yellow springs?
I believe going up the chart makes for a softer spring and down the chart for harder springs. So those I think are harded.
EbbTide is offline  
Old 12-29-2017, 06:02 PM
  #2990  
Tech Regular
iTrader: (4)
 
Join Date: Oct 2017
Location: Ohio
Posts: 271
Trader Rating: 4 (100%+)
Default

Originally Posted by EbbTide
I believe going up the chart makes for a softer spring and down the chart for harder springs. So those I think are harded.
There shouldn't be any ambiguity here. The spring rate is noted in the last column on the chart found on TeknoRC.com.

Yellow Front Rate = 3.41
Red Front Rate = 3.85
blueflagger is offline  
Old 12-29-2017, 06:24 PM
  #2991  
Tech Addict
iTrader: (9)
 
Join Date: Mar 2008
Posts: 628
Trader Rating: 9 (100%+)
Default

Originally Posted by EbbTide
I believe going up the chart makes for a softer spring and down the chart for harder springs. So those I think are harded.
Thank you. That was my guess as well. Also, why is it necessary to bleed these shocks after every run? Do they build up that much pressure that they need to be blead that often?
Borik is offline  
Old 12-29-2017, 06:42 PM
  #2992  
Tech Elite
iTrader: (39)
 
EbbTide's Avatar
 
Join Date: Nov 2012
Location: Bay Area, Ca
Posts: 4,264
Trader Rating: 39 (100%+)
Default

Originally Posted by blueflagger
There shouldn't be any ambiguity here. The spring rate is noted in the last column on the chart found on TeknoRC.com.

Yellow Front Rate = 3.41
Red Front Rate = 3.85
Excuse me but my rookie is showing! lol that's why I assumed what I assumed but I wasn't 100% sure
blueflagger likes this.
EbbTide is offline  
Old 12-29-2017, 06:43 PM
  #2993  
Tech Elite
iTrader: (39)
 
EbbTide's Avatar
 
Join Date: Nov 2012
Location: Bay Area, Ca
Posts: 4,264
Trader Rating: 39 (100%+)
Default

Originally Posted by Borik
Thank you. That was my guess as well. Also, why is it necessary to bleed these shocks after every run? Do they build up that much pressure that they need to be blead that often?
I've heard that this is due to a vacuum effect from running the emulsion setup but I am terrible with these technicalities so hopefully someone can explain it better. But the process seems pretty simple, you don't even have to take the shocks off of the buggy. Just unscrew the bleeder, push the shaft up and hold it there until you reinstall the bleeder screw.
EbbTide is offline  
Old 12-29-2017, 06:52 PM
  #2994  
Tech Addict
iTrader: (9)
 
Join Date: Mar 2008
Posts: 628
Trader Rating: 9 (100%+)
Default

I ran a couple packs and blead the shocks after each run. Didn't really notice a difference. Did the same without bleeding the shocks....same result, didn't notice a change in performance. Maybe i'm not trying hard enough to be one with the car.
Thanks for the info though.
Borik is offline  
Old 12-29-2017, 06:55 PM
  #2995  
Tech Elite
iTrader: (39)
 
EbbTide's Avatar
 
Join Date: Nov 2012
Location: Bay Area, Ca
Posts: 4,264
Trader Rating: 39 (100%+)
Default

Originally Posted by Borik
I ran a couple packs and blead the shocks after each run. Didn't really notice a difference. Did the same without bleeding the shocks....same result, didn't notice a change in performance. Maybe i'm not trying hard enough to be one with the car.
Perhaps you just used the best possible grease for the o-rings and it sealed that baby up nice and tight lol I still need to check my ride height to see if my shocks need a bleeding. It's been a week and I've done squat with my car since it's maiden run =/
EbbTide is offline  
Old 12-30-2017, 08:06 AM
  #2996  
Tech Adept
iTrader: (14)
 
Join Date: Aug 2010
Location: Buffalo NY
Posts: 156
Trader Rating: 14 (100%+)
Default

Originally Posted by EbbTide
Grumpy's RC garage has them in stock. Check out their site and search for it. The owner said they have them so be quick

Grumpysrcgarage.com
Thanks for the info. Got one on order!
Slimrc is offline  
Old 12-30-2017, 08:37 AM
  #2997  
Tech Regular
iTrader: (1)
 
Join Date: Dec 2017
Posts: 416
Trader Rating: 1 (100%+)
Default

I am limited on the number of post I can make per day, so I am going to ask a few questions in one post and hopefully I can respond if necessary

1. Are Ti turnbuckles stronger or just lighter?
2. What is the reason for the rear weights? What does it correct
3. On Amain I see some Exotec making "heavy duty" parts. Are these stronger or just altenatives?
4. Exotek Camber saver? Is this a replacement or go over the existing
5. In the manual it says use longer screws in the bulkhead block. Anyone done this?
6. I have a bent shock shaft - do any other brands or models fit this shock. Not a whole lot of suppliers of Tekno locally, I wanted to band aid until I can get a new one.
ryan391 is offline  
Old 12-30-2017, 09:31 AM
  #2998  
Tech Elite
iTrader: (39)
 
EbbTide's Avatar
 
Join Date: Nov 2012
Location: Bay Area, Ca
Posts: 4,264
Trader Rating: 39 (100%+)
Default

Originally Posted by ryan391
I am limited on the number of post I can make per day, so I am going to ask a few questions in one post and hopefully I can respond if necessary

1. Are Ti turnbuckles stronger or just lighter?
2. What is the reason for the rear weights? What does it correct
3. On Amain I see some Exotec making "heavy duty" parts. Are these stronger or just altenatives?
4. Exotek Camber saver? Is this a replacement or go over the existing
5. In the manual it says use longer screws in the bulkhead block. Anyone done this?
6. I have a bent shock shaft - do any other brands or models fit this shock. Not a whole lot of suppliers of Tekno locally, I wanted to band aid until I can get a new one.
1: yes the titanium turnbuckles will be stronger. The stock steel isn't of very high quality.

2: rear weights are just a tuning option that some people prefer. I believe it is to help plant the rear end better on certain surfaces but I feel no need for it on our clay track.

3: the heavy duty part that exotek makes is indeed a bit beefier so should be stronger but I've seen no need to replace that part with anything stronger.

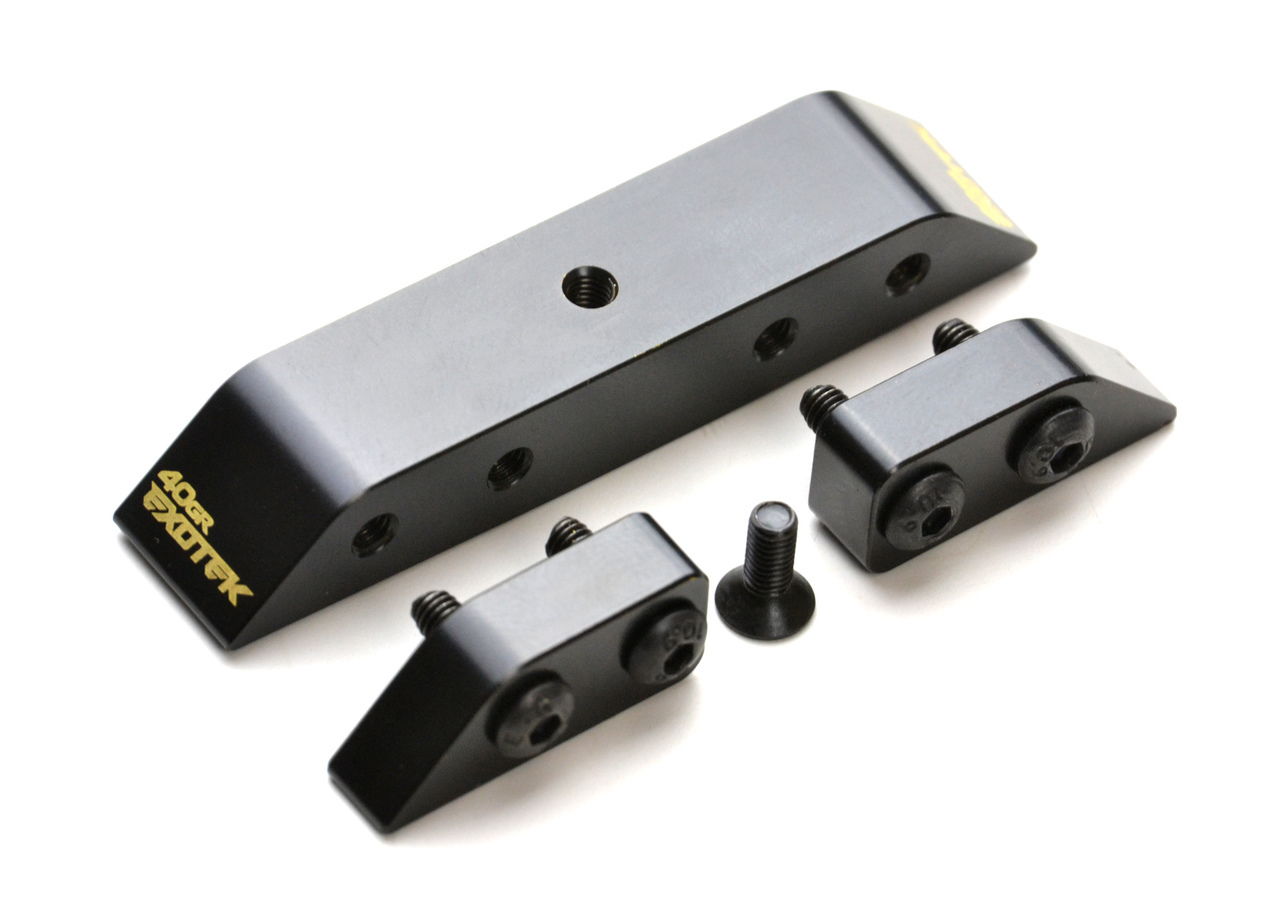
4: this replaces the existing one and adds material to help prevent bulkhead breaks.

5: yes most that have been with the kit early on have been told to add those screws to strengthen the bulkhead.

6: no shafts that I know of to fit. It's 3.5mm diameter so might be a stretch.
EbbTide is offline  
Old 12-30-2017, 04:47 PM
  #2999  
Tech Fanatic
iTrader: (43)
 
Join Date: Jul 2015
Posts: 760
Trader Rating: 43 (100%+)
Default Still having problem s

Losi rims just won't fit because it rubs the rear turnbuckle s I have tried adjusting shock length but I built it 28mm per manual. Yet the losi wheels rubs the turnbuckle still, what am I doing wrong? Everyone says its a direct fit. Mines is not.

Last edited by RodRC; 12-30-2017 at 05:29 PM. Reason: More context
RodRC is offline  
Old 12-30-2017, 06:05 PM
  #3000  
Tech Rookie
 
Join Date: Feb 2017
Posts: 17
Default

Just ordered a kit but i cant see if fluids are included . What would be a good starting point for diff and shock fluids for 17.5 on med-low grip outdoor dirt?
henoos is offline  


Contact Us - Archive - Advertising - Cookie Policy - Privacy Statement - Terms of Service -

Copyright © 2024 MH Sub I, LLC dba Internet Brands. All rights reserved. Use of this site indicates your consent to the Terms of Use.