


 2Likes
TLR 8IGHT E 3.0 THREAD
 03-16-2016 | 09:44 PM
#3691
Tech Apprentice
Joined: Mar 2010
Posts: 98
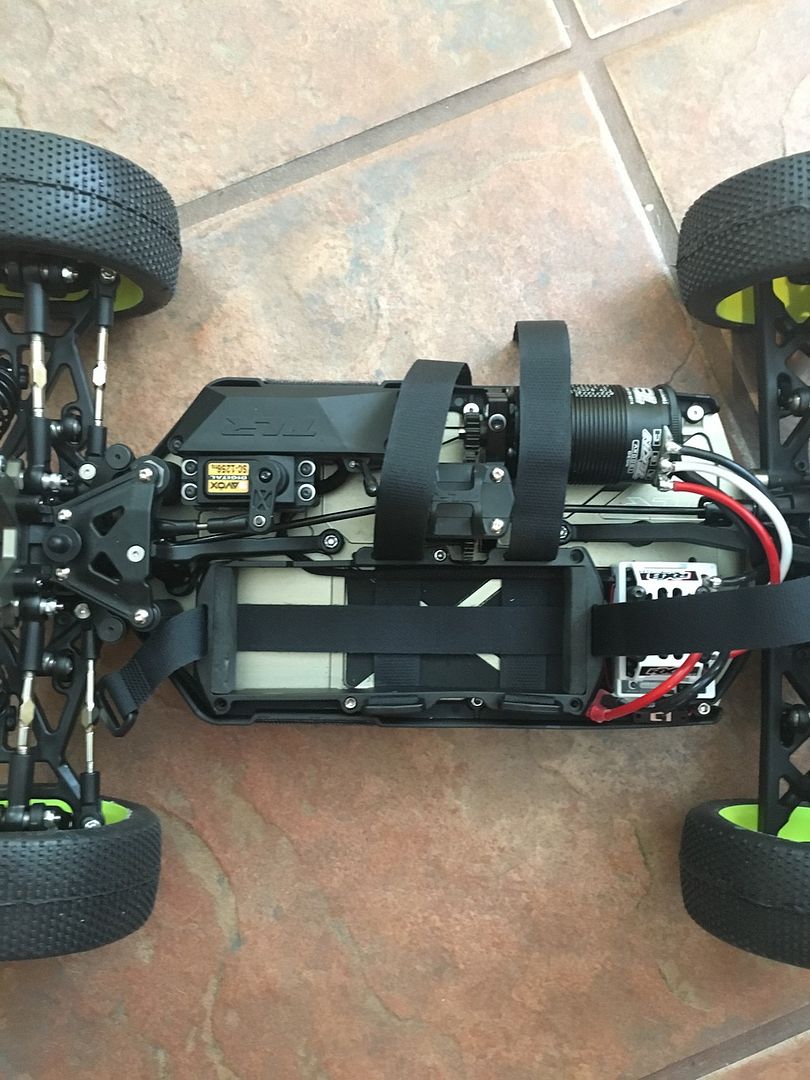
Guys I have done the basic conversion, well I would say the reason I did the conversion was for the battery location option and motor orientation option. I have a race meet this weekend and will share my findings on the change. I can confirm you will need the battery tray, which is the same as the 3.0 truggy. The chassis, motor mounts which comes in a set (0 and 4,4 deg) and the body. Everything else is a nice to have. The only other parts I will recommend is the front spindles and carriers, next on my list. There is no need for a new motor mount, if you study the exploded diagram the only difference between the 3.0 and 4.0 motor mounts is the alum. bit that gets attached to the motor, mine (3.0) went on just fine.
The other parts I have done to date prior to the 4.0 change above is the bearing spacer (sleeve) that goes inside the fr and rr diffs. Other than that its as simple as the above, no other parts needed unless you want to go the full 4.0 route I suggest buy the 4.0 kit rather. See attached completed pic.
The other parts I have done to date prior to the 4.0 change above is the bearing spacer (sleeve) that goes inside the fr and rr diffs. Other than that its as simple as the above, no other parts needed unless you want to go the full 4.0 route I suggest buy the 4.0 kit rather. See attached completed pic.


 03-17-2016 | 06:47 PM
#3694
Tech Addict
iTrader: (16)
Joined: Aug 2013
Posts: 542
From: NY
Very nice. I think that's a good way to go, I would have done the same but needed the parts from my 3.0 to upgrade my truggy to a 3.0. imo your not missing a think not having 4.0 spindles and carriers...mine binded up bad so I used my 3.0 spindles. I'm sure they could have been massaged but my 3.0 ones were already perfect.
Looks clean man.
Looks clean man.
03-17-2016 | 07:07 PM
#3695
Looks good. I cut the little down box completely out and put a sticker over it. I would recommend the tlr cab forward body
03-17-2016 | 07:24 PM
#3696
Tech Addict
iTrader: (11)
Joined: May 2009
Posts: 718
thanks bro.
that's what im going to do so that I can at least run until my new bodies come in. I contemplated the tlr cab forward but got a great deal on the jconcepts silencer and the lfr assassin body (which was specifically designed for batt forward). ill cut them both out, see which fits better and keep the other for backup. hell I may like the stocker with a sticker! lol
that's what im going to do so that I can at least run until my new bodies come in. I contemplated the tlr cab forward but got a great deal on the jconcepts silencer and the lfr assassin body (which was specifically designed for batt forward). ill cut them both out, see which fits better and keep the other for backup. hell I may like the stocker with a sticker! lol
03-18-2016 | 03:50 AM
#3697
thanks bro.
that's what im going to do so that I can at least run until my new bodies come in. I contemplated the tlr cab forward but got a great deal on the jconcepts silencer and the lfr assassin body (which was specifically designed for batt forward). ill cut them both out, see which fits better and keep the other for backup. hell I may like the stocker with a sticker! lol
that's what im going to do so that I can at least run until my new bodies come in. I contemplated the tlr cab forward but got a great deal on the jconcepts silencer and the lfr assassin body (which was specifically designed for batt forward). ill cut them both out, see which fits better and keep the other for backup. hell I may like the stocker with a sticker! lol
03-18-2016 | 11:42 AM
#3698
Tech Apprentice
iTrader: (1)
Joined: Apr 2015
Posts: 52
Haven't really considered Losi for a 1/8 buggy, but now that they are on sale I am considering it. I don't know a lot about the Losi's. Is there any thing I need to know about the kit before I buy? Issues, tips, upgrades etc?
Any input would be appreciated
Any input would be appreciated
Last edited by Horby32; 03-18-2016 at 12:24 PM.
03-18-2016 | 06:25 PM
#3703
I used tooth paste on the cups to work them down, and it worked, but took a lot of time. I had to cut the head off a long 2 mm screw and run flanged nuts on it to hold the ball. I then put the screw in a drill and ran it for a couple of minutes. After that I cleaned out the tooth paste and added lithium grease. Now they are very smooth and move freely. I finished my diffs and don't really know how to install the rear plastic inserts for the hinge pin, is it 0* in the front, or the other ? And how are they oriented??? I had to stop there for now.
03-18-2016 | 06:34 PM
#3705
I used tooth paste on the cups to work them down, and it worked, but took a lot of time. I had to cut the head off a long 2 mm screw and run flanged nuts on it to hold the ball. I then put the screw in a drill and ran it for a couple of minutes. After that I cleaned out the tooth paste and added lithium grease. Now they are very smooth and move freely. I finished my diffs and don't really know how to install the rear plastic inserts for the hinge pin, is it 0* in the front, or the other ? And how are they oriented??? I had to stop there for now.