


TLR 22 BUILD WALK-THRU
 03-12-2011 | 09:03 AM
#1
Thread Starter
Tech Master
iTrader: (5)
Joined: May 2005
Posts: 1,716
From: Having fun racing toy cars in beautiful AZ
Hey guys I figured I would take pictures though the build of the TLR 22. The car is actually done and I have raced it already but I will be adding the pics in a few lumps at a time enjoy and feel free to ask any questions
here is the cool box


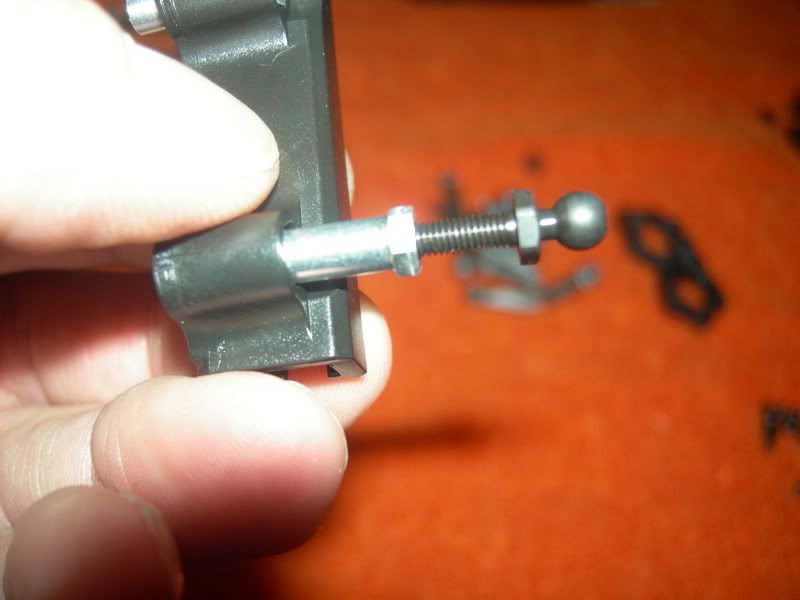
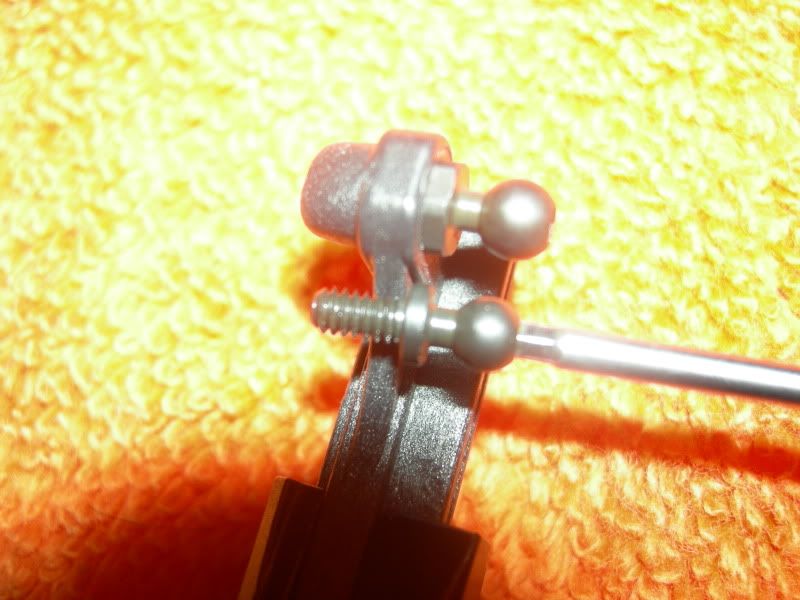
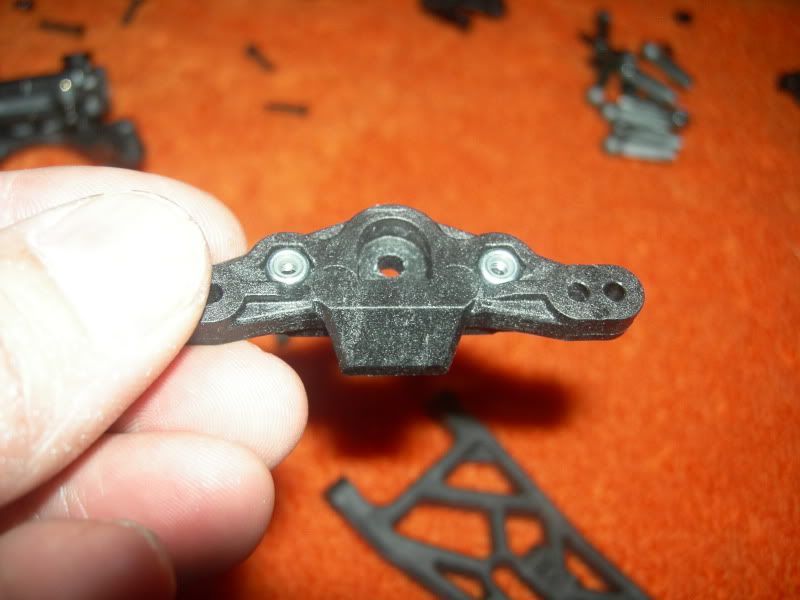
and then the servo horn and link built and installed

here are the servo spacers required for the spktrum servo make sure you use the correct ones for your servo


and the chassis with stiffener , braces

That's it for now more to follow
here is the cool box
and then the servo horn and link built and installed
here are the servo spacers required for the spktrum servo make sure you use the correct ones for your servo
and the chassis with stiffener , braces
That's it for now more to follow


 03-12-2011 | 12:11 PM
#5
Hello Casey, I hope you and your loved ones are doing well.....thanks for the pics.....I cant wait to get my car.........all brand new elctronics going in it, I look forward to taking my time on building this wonderful car. Then, I will have the pleasure of running it every day @ our new indoor facility being built....120x88 of 70/30 clay/soil mix, nothing like racing in central AC in midwest summer with the new TLR car, Im still racing gas as well occasionally but I have been bitten badly by the 1/10 bug....hahaha......anyways, I look forward to more pics......peace and cheers Casey!
TW
TW
 it will take way too long if I try to do it from my phone.
 03-14-2011 | 08:15 PM
#12
Thread Starter
Tech Master
iTrader: (5)
Joined: May 2005
Posts: 1,716
From: Having fun racing toy cars in beautiful AZ
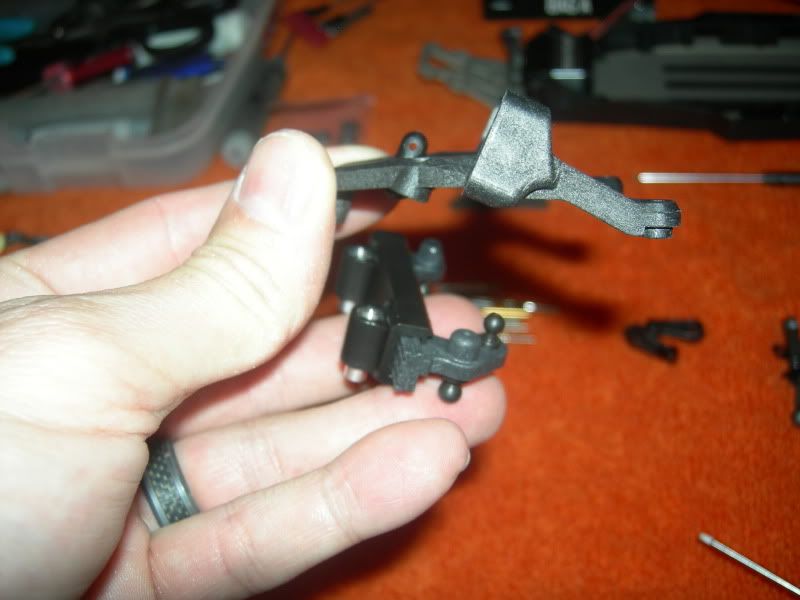
ok round 2 
bolting in the the servo / chassis brace

and what it looks like all tightened up

installing body mounts

installed body mounts * note you want the holes to be parallel to the chassis not perpendicular like I have them in the pic. ( I figured this out when I put the body on the first time)

install sticky foam chassis pads

it should now look like this

bolting in the the servo / chassis brace
and what it looks like all tightened up
installing body mounts
installed body mounts * note you want the holes to be parallel to the chassis not perpendicular like I have them in the pic. ( I figured this out when I put the body on the first time)
install sticky foam chassis pads
it should now look like this
03-14-2011 | 08:26 PM
#14
Thread Starter
Tech Master
iTrader: (5)
Joined: May 2005
Posts: 1,716
From: Having fun racing toy cars in beautiful AZ
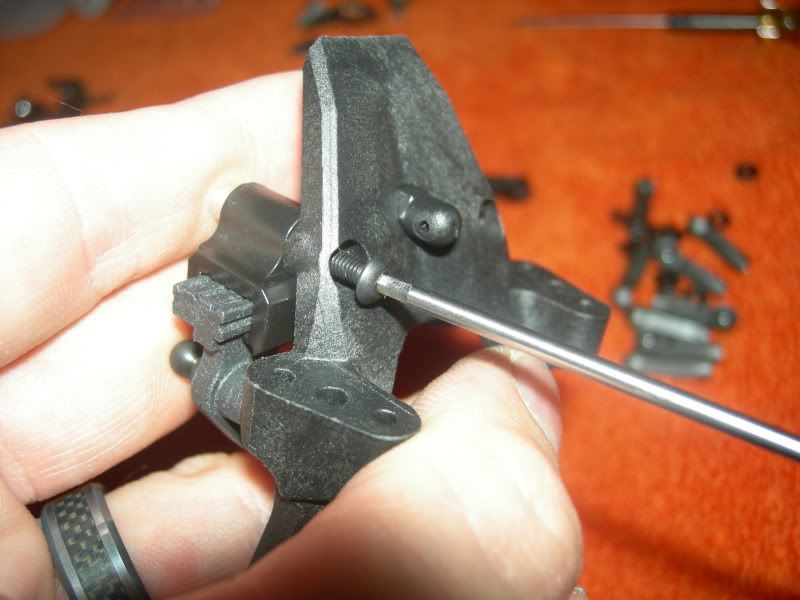
install rack inserts
I like to use a screw (ball stud this time) to install the insert, this way you can control the way it go into the molded hex in the plastic. And remove it if you need to try again

install ball studs into the rack. There are 2 large diameter ones that go to the outside of the rack and the small one (shown next to the larger one in the pic) The small one is the odd ball stud as the larger ones are common through out the rest of the car.
completed rack going onto the bulkhead
install nuts into camber link mount
install cone shaped spacers
I like to use a screw (ball stud this time) to install the insert, this way you can control the way it go into the molded hex in the plastic. And remove it if you need to try again
install ball studs into the rack. There are 2 large diameter ones that go to the outside of the rack and the small one (shown next to the larger one in the pic) The small one is the odd ball stud as the larger ones are common through out the rest of the car.
completed rack going onto the bulkhead
install nuts into camber link mount
install cone shaped spacers