


My RC10T SC conversion
 03-11-2011, 10:23 PM
#16
Did get quite a bit of the small stuff done this week. Its the little details that take forever. Redid the front shock tower. The old one was a practice one and it was needed. It looked like hell. Second attempt looks much better. Heck the holes are even straight.
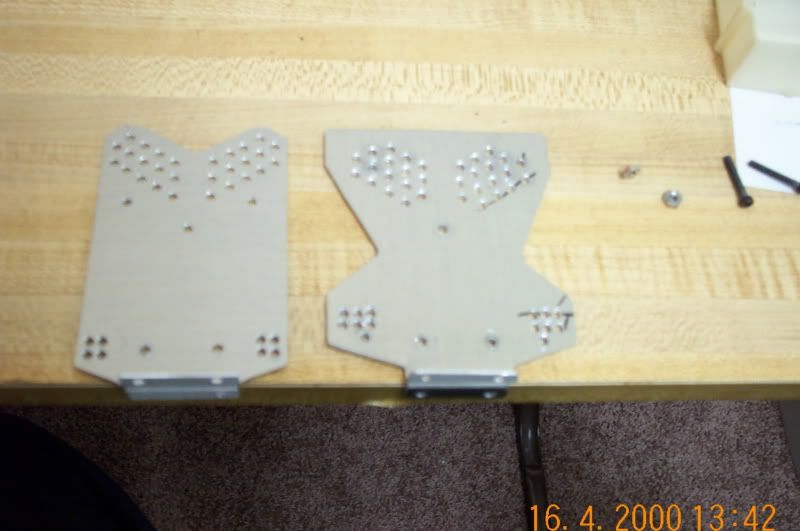
Finally made a rear tower brace. Took longer than I wanted for no more than it is but it works and looks somewhat decent at least. Not that it matters that much but the stock plastic brace weighs 4 grams, the carbon and the aluminum one are both 3.
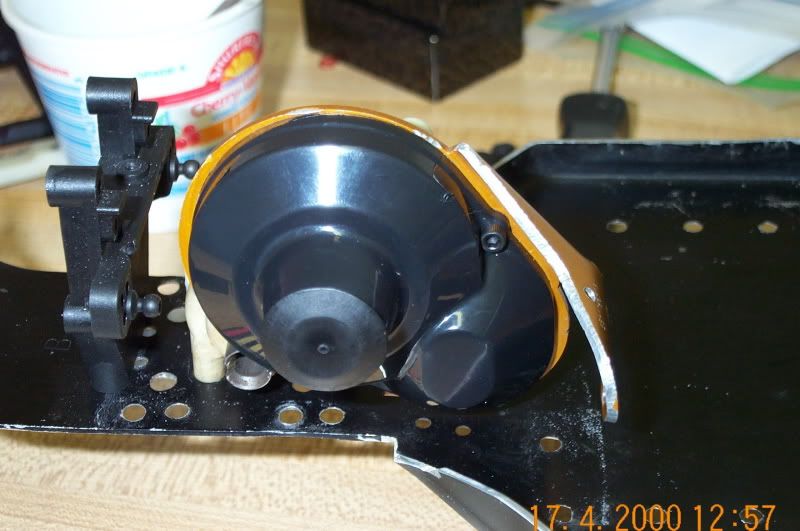
Couple of ebay scores. Bought a t4 motor plate and gear cover for 4.52 shipped. Previously I had no gear cover that would fit due to the plate being reversed. The motor plate wont bolt on without drilling and taping all 4 holes. I might go that route after everything else is done and running but for now I just used the old plate.
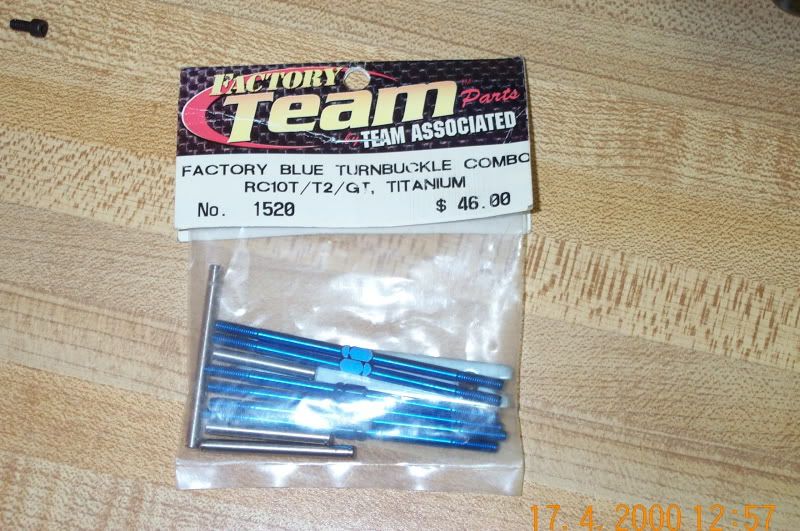
Also was looking for turnbuckes. At some point I broke one of the front ones and originally was looking for a pair. Came across these and had to. For $33 it aint too bad.
I also picked up a full set of ballstuds with the foam rings for $6 shipped.Most of them on the truck now are 20 years old and some are wore .010 to .015 under what they are new. Even with new rod ends there was way too much slop.Plus added weight bonus. All the original studs are stainless. The new ones are aluminum. The way its looking it should be around 76 ounces finished. I can deal with a couple ounces over if its balanced right. Track meeting is sunday so ill find out what the motor rules are for this year and get something ordered next week. Almost to the point of painting the body. Not really looking forward to that part.
Nick
Finally made a rear tower brace. Took longer than I wanted for no more than it is but it works and looks somewhat decent at least. Not that it matters that much but the stock plastic brace weighs 4 grams, the carbon and the aluminum one are both 3.
Couple of ebay scores. Bought a t4 motor plate and gear cover for 4.52 shipped. Previously I had no gear cover that would fit due to the plate being reversed. The motor plate wont bolt on without drilling and taping all 4 holes. I might go that route after everything else is done and running but for now I just used the old plate.
Also was looking for turnbuckes. At some point I broke one of the front ones and originally was looking for a pair. Came across these and had to. For $33 it aint too bad.
I also picked up a full set of ballstuds with the foam rings for $6 shipped.Most of them on the truck now are 20 years old and some are wore .010 to .015 under what they are new. Even with new rod ends there was way too much slop.Plus added weight bonus. All the original studs are stainless. The new ones are aluminum. The way its looking it should be around 76 ounces finished. I can deal with a couple ounces over if its balanced right. Track meeting is sunday so ill find out what the motor rules are for this year and get something ordered next week. Almost to the point of painting the body. Not really looking forward to that part.
Nick
 03-15-2011, 08:56 PM
#18
Thanks. The rear tower would be pretty easy to make from carbon. The front would probably have to be made from multiple pieces with the bottom bolting to the top of the bulkhead. I got the bottom noseplate painted tonight. probably leave the towers and upper deck raw aluminum. hopefully my stuff will get here this week and I can start putting it together for good this weekend. Hadar starts up in 2 months and that will go fast. Really interested to see how well it does.
Nick
Nick
03-19-2011, 01:02 PM
#19
Small update. The rear bumper is finally mounted. The slash 4wd rear bumper fits pretty good. bottom mount was a simple matter of drilling two more holes in the pan and bolting it down. The upper mounts were made from some plastic blocks that I had laying around. Not sure what kind they are but I think they will work pretty good.
The two upper tubes from the trans forward are needed to keep the chassis from bending after the sides were cut down. The old ones were 4-40 threaded rod inside of 3/16 steel tube. They worked fine but weighed 3/4 ounce each. Version 2 is waiting on parts but will be 5/32 aluminum tube over top of 1/8 carbon rods. each one will be right at 1/4 ouch each.
My esc is supposed to be in today but all the rest of the stuff I am waiting on wont be here till monday. Good excuse to work on all the little stuff I have been putting off.
Nick
03-19-2011, 07:12 PM
#21
Nick
03-20-2011, 10:03 PM
#22
Sundays update. batteries are pretty much mounted. I have some foam to put down on the chassis yet but other than that they are done. Same unknown plastic blocks were used for the mounts. Wish they were a different color but you cant have everything.
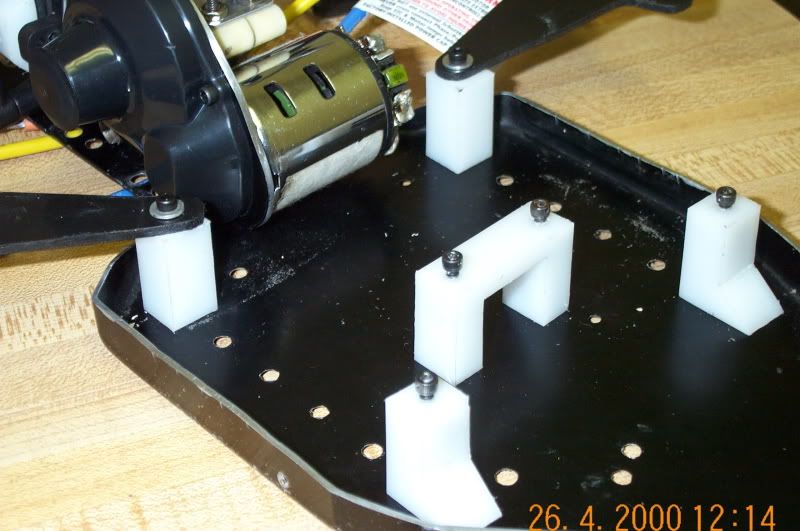
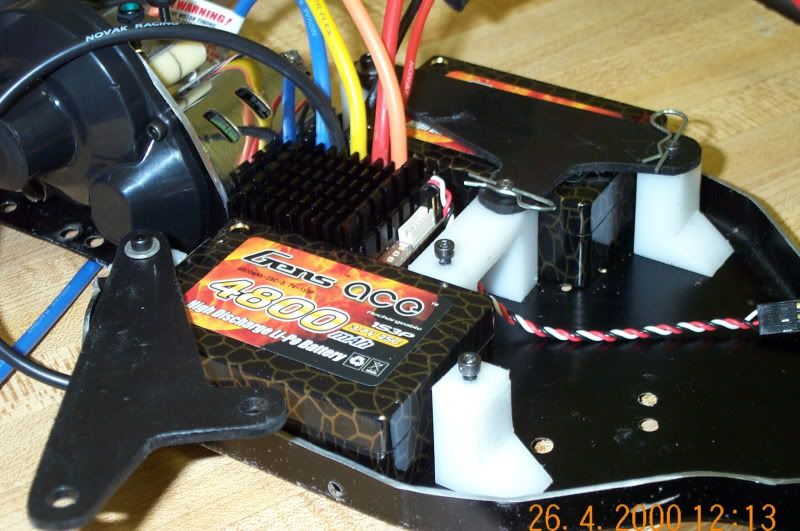
esc fits nicely right in the center. I will probably run the fan that came with it and maybe an air scoop to direct air between the batteries to keep temps in line.
The last of the parts come in tomorrow so depending on how the week goes it could be back together by next weekend.
By the way if anyone wants to recomend a starting point for shocks, pistons and springs id be glad to hear it.
Nick
03-23-2011, 11:52 AM
#23
Sorted through the parts and started with the back. new ti turnbuckles(which are too long for the back??) bottomed out in the shortened cups to get camber set, new ball studs and Ti hingepins. The slash protrac hubs will work out just like I wanted but it took a bit of work to get it together.
The axles are from a blitz, carriers and bearings for a slash, cone spacer from a t4 and modified bearing spacers from a blitz.
The hole in the spacer was opened up .010" to fit over the 5mm shaft. Holes in the rear wheels were opened up the same amount. I didnt see a bearing spacer listed with the slash hubs so I used some HPI spacers between the bearings. one spacer wasnt enough and 2 was too wide. You know how much of a pain it is making a .060 thick spacer .030?
In the end it came together ok. 1:30 this morning that is. Plus the way it sits I can take the traxxas 12mm hubs and put them on without changing anything and run different wheels if I want to.
Also weighed the ballstuds and hingepins. The difference between the old studs and pins compared to the aluminum ones and Ti hingepins was 11g. Not alot but every bit helps.
More to come.
Nick
03-25-2011, 10:31 PM
#24
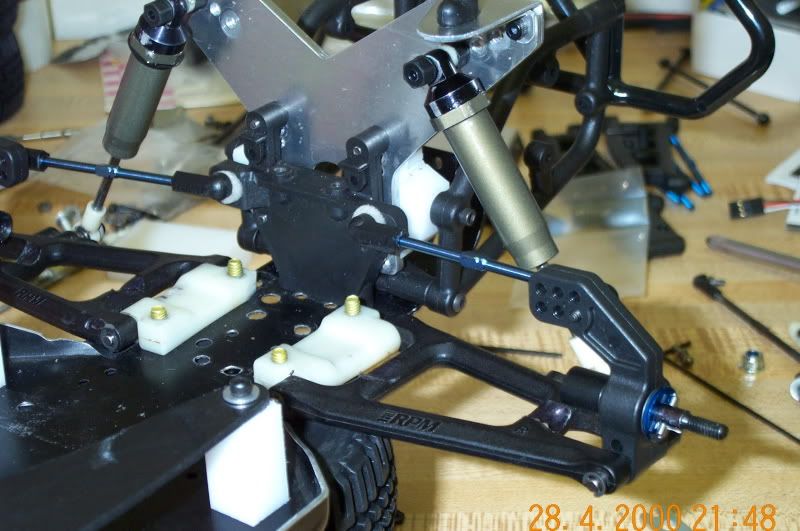
Made some more progress the last couple of nights. The front end is together for the most part. need to set bump steer and put a couple of e-clips on then rebuild the shocks. I found out that one of the turnbuckles has the notch that shows what side is left hand thread is on the wrong side. Trying to set camber while watching tv and took a sec to figure out why the wheel was tipping out instead of in. Not a big deal. rest of it went together great. I went with the wide front GT axles which put the front tires at exactly 11.5 inches with 2 degrees negative camber.
I have to admit I really like the black and silver theme for the chassis. It wont make any difference on the track but it looks good any way. At least for now.
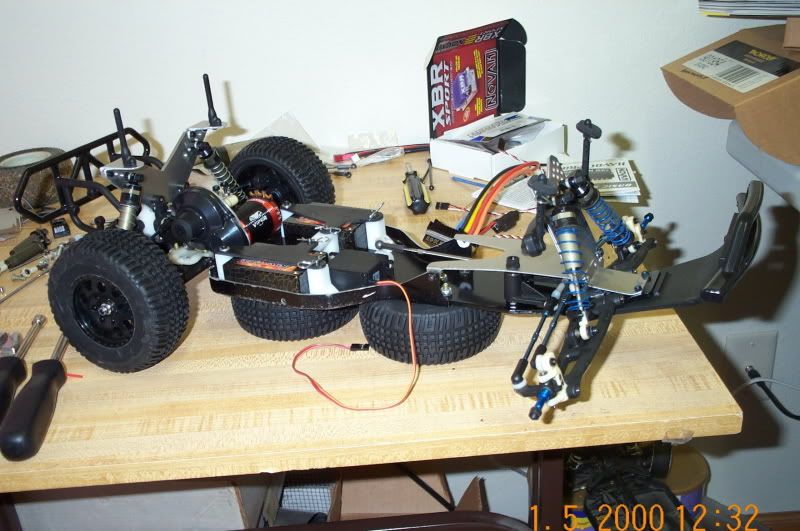
Also threw it on the scale tonight. with the body still untrimmed and a foot of wire on the esc it came in a 76.2 by the time I trim the wires and the body i will be sitting low enough where i am happy with the weight. I know there is lighter trucks out there but considering that its all aluminum except for the suspension arms and mounts i think thats pretty good. I will try to take some less cluttered pics this weekend.
Nick
I have to admit I really like the black and silver theme for the chassis. It wont make any difference on the track but it looks good any way. At least for now.
Also threw it on the scale tonight. with the body still untrimmed and a foot of wire on the esc it came in a 76.2 by the time I trim the wires and the body i will be sitting low enough where i am happy with the weight. I know there is lighter trucks out there but considering that its all aluminum except for the suspension arms and mounts i think thats pretty good. I will try to take some less cluttered pics this weekend.
Nick
03-26-2011, 02:57 PM
#26
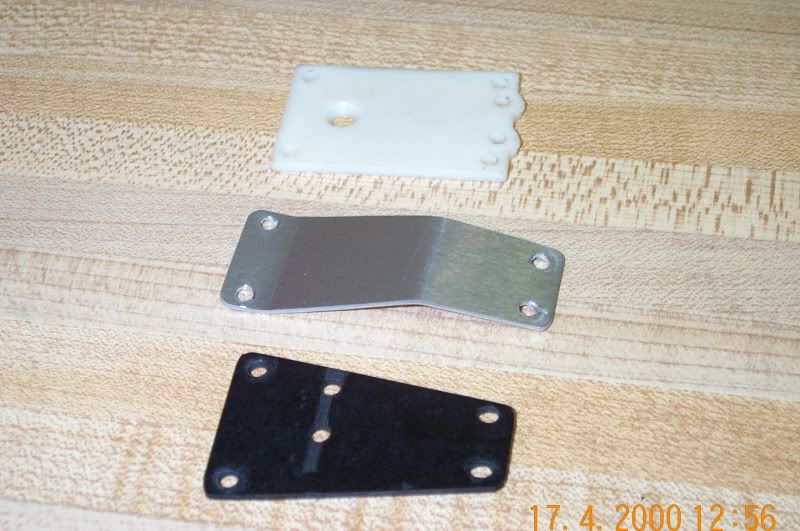
The body mounts are two seperate pieces. upper and lower with only the mounting screws holding them together. as solid as they are I didnt see any reason to add glue. The layers of the shock tower were held together with red loctite. It was an experiment of sorts and worked but I wont do it again. It took over a week for it to dry but as it sits the rear tower is as stiff as a steel plate. I would be suprised if it ever bent.
Nick
Nick
03-26-2011, 03:14 PM
#27
Just a tip.. keep your eyes peeled on ebay for rear arm mounts. It's the most fragile part on an otherwise indestructible car, and hard to find.
I was able to score some discontinued RPM ones, I forget the p/n.
There's also aluminum, but I avoid it if I can. I left my rear arms and hubs alone, just stuck 3/16" ID bearings in there to run T4 axles and wheels.
I was able to score some discontinued RPM ones, I forget the p/n.
There's also aluminum, but I avoid it if I can. I left my rear arms and hubs alone, just stuck 3/16" ID bearings in there to run T4 axles and wheels.
03-27-2011, 10:15 AM
#28
Right now it has a set of RPM rear mounts and I have a set of black AE mounts for spares. That is a good idea though.
Nick
Nick
04-01-2011, 12:36 AM
#29
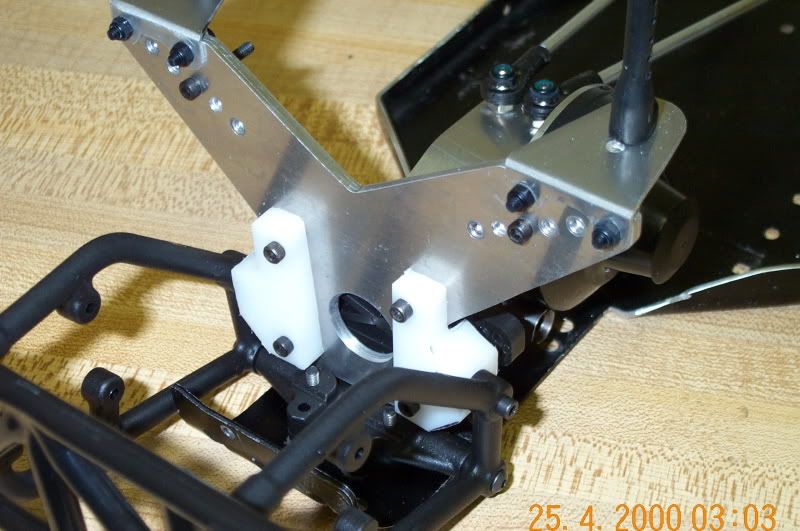
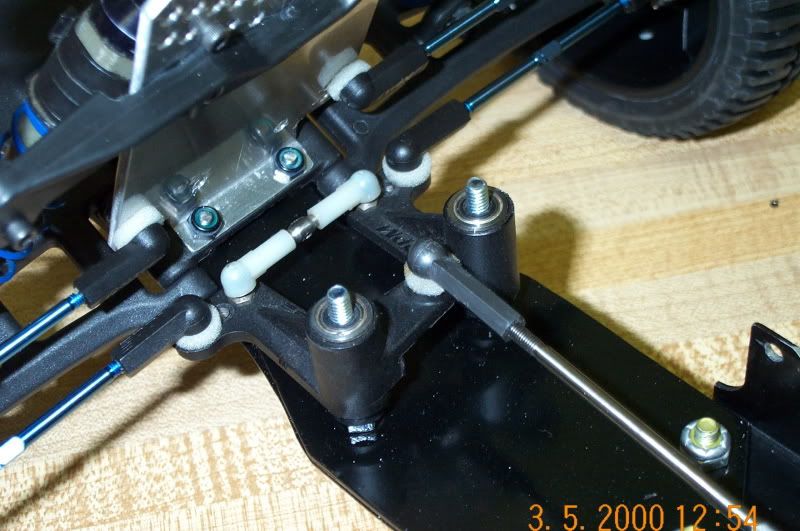
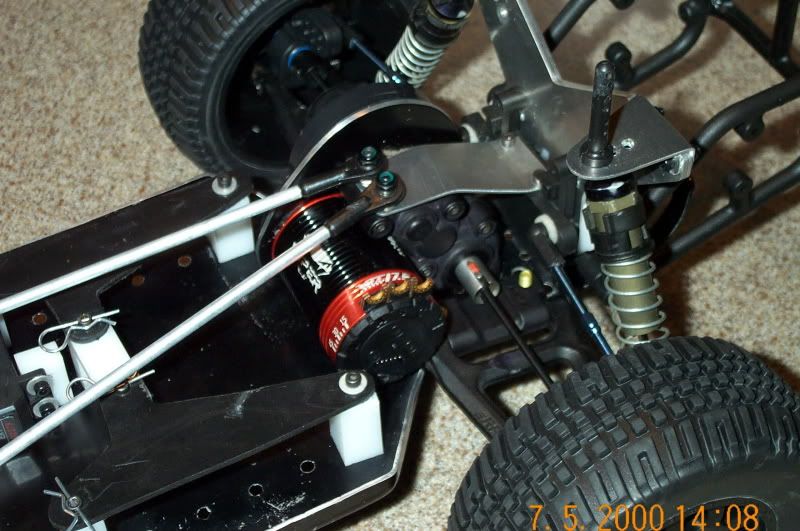
Time for more pictures. The chassis is all together except for electronics and rebuilding the shocks. This is a good shot of the steering before putting the top deck on.
Gives you a good idea of how empty the nose is. BTW If anyone has an extra RPM steering set for th 10T that you would like to part with shoot me a pm. I robbed this one from the RPM chassis that I have sitting that will probably be put back together after this.
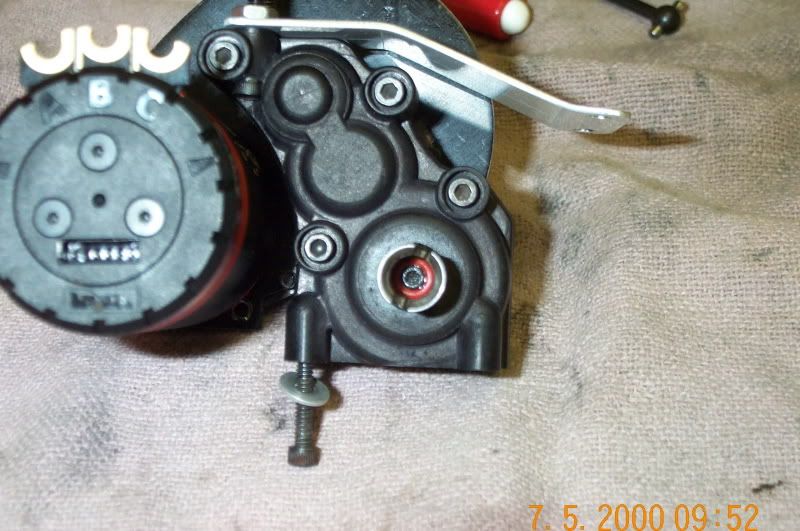
Tried dying parts for the first time the other night. I didnt really care for the off white rear arm mounts and transmission case. The main thing however that I wanted to dye was the blocks for the battery hold downs and servo mount. Most of it came out pretty good though.
The case and arm mounts look like they came that way. same with the caster blocks and antenna mount. However, notice the off color block in the middle. That was a test piece of the same material that the battery mounts are made of after it soaked in the pot with the heat on for 30 min. Looks like im stuck with the white unless I get mad and spray paint them.
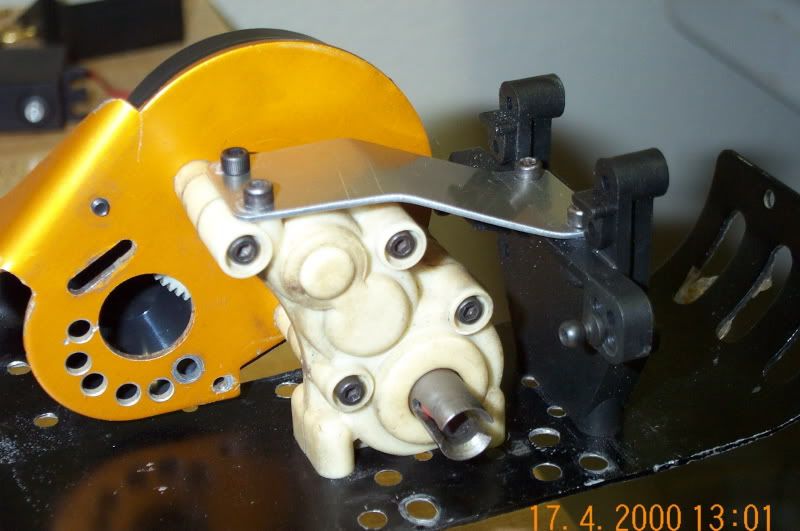
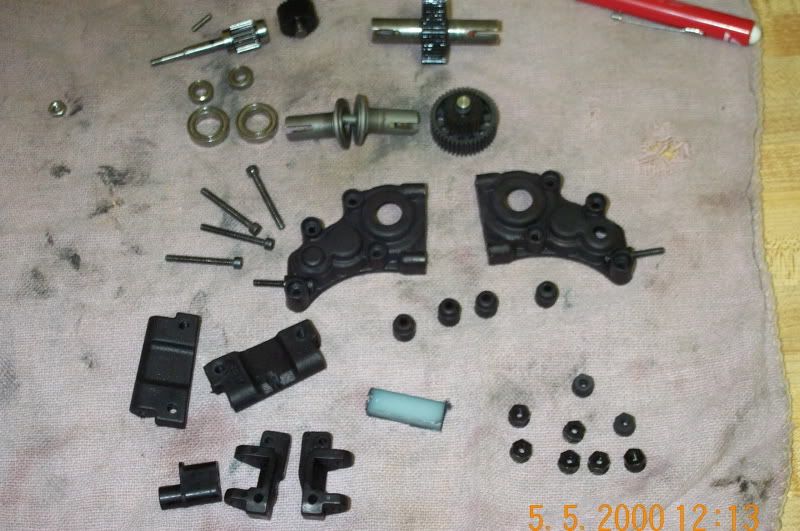
Transmission is back together with new main and idler gears as well as new balls and rings. Noticed something on the diff adjusting screw. An old shock o-ring fits perfectly around the head of the screw and seals the thrust bearing from the outside. It should work well to keep dirt out and provided its an old shock seal there is hardly any extra resistance when turning the outdrives. If it was tight on the screw i would be worried about diff adjustment but it isnt.
I doubt im the first one to figure it out but I thought I would share it anyway.
The back half looks tons better with the black case and mounts.
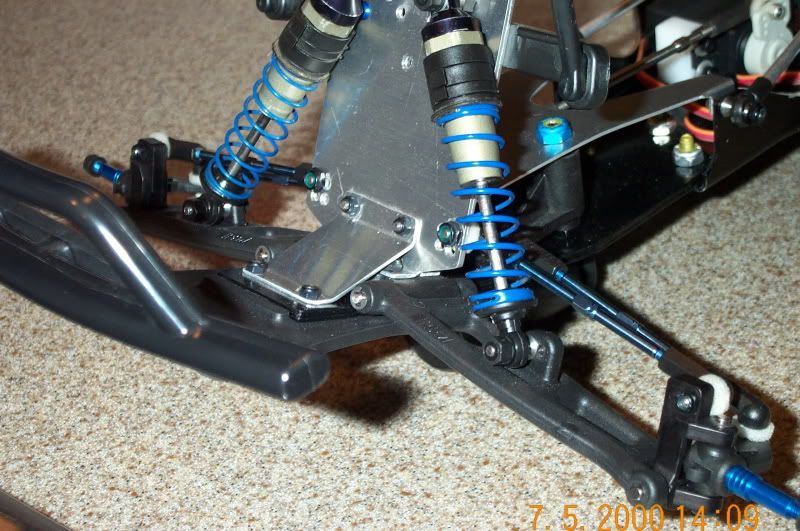
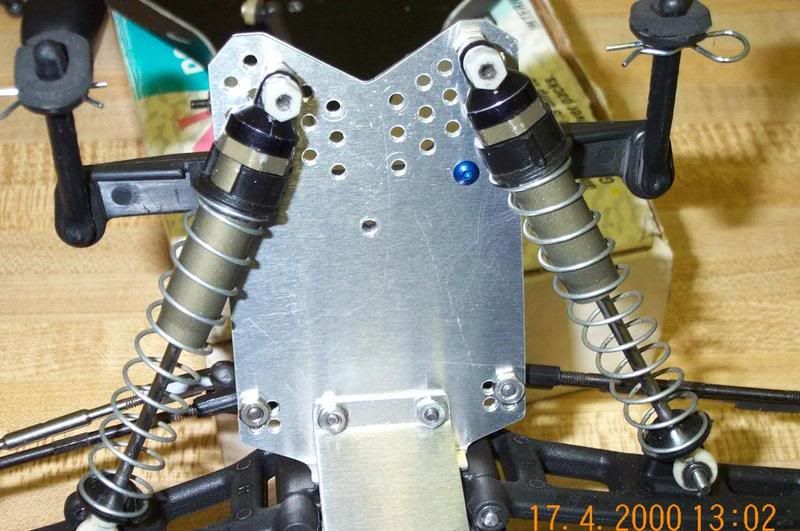
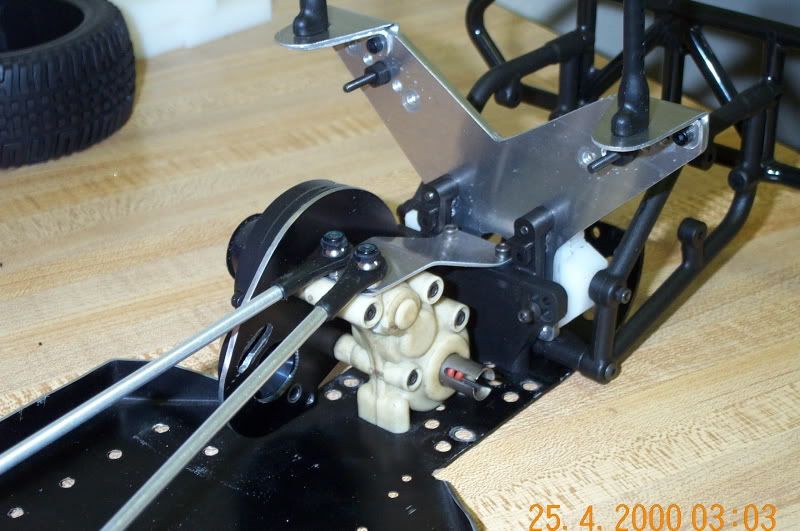
Front end all pimped out ready to go other than shocks. Still cant believe the bump steer came out perfect. Ive never had a truck with good bumpsteer. Should be interesting.
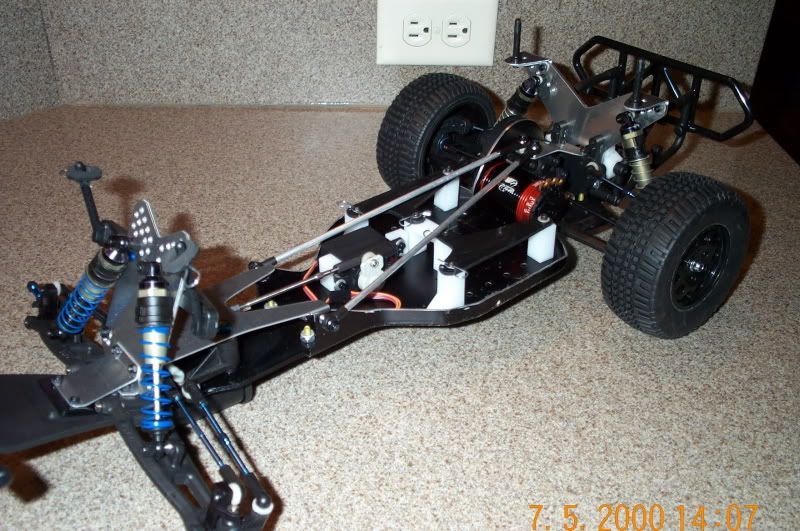
As promised an uncluttered overall shot. The top braces came out exactly like I wanted. aluminum tube over 1/8 carbon rod. Just under 1/2 ounce for the pair vs 1.5 ounces for the old ones.
Running out of excuses to paint the body so I suppose I should get at it this weekend. That comnined with wiring the esc and motor as well as taking a foot of wire off of the steering servo should give be a bit to do.
Nick
Gives you a good idea of how empty the nose is. BTW If anyone has an extra RPM steering set for th 10T that you would like to part with shoot me a pm. I robbed this one from the RPM chassis that I have sitting that will probably be put back together after this.
Tried dying parts for the first time the other night. I didnt really care for the off white rear arm mounts and transmission case. The main thing however that I wanted to dye was the blocks for the battery hold downs and servo mount. Most of it came out pretty good though.
The case and arm mounts look like they came that way. same with the caster blocks and antenna mount. However, notice the off color block in the middle. That was a test piece of the same material that the battery mounts are made of after it soaked in the pot with the heat on for 30 min. Looks like im stuck with the white unless I get mad and spray paint them.
Transmission is back together with new main and idler gears as well as new balls and rings. Noticed something on the diff adjusting screw. An old shock o-ring fits perfectly around the head of the screw and seals the thrust bearing from the outside. It should work well to keep dirt out and provided its an old shock seal there is hardly any extra resistance when turning the outdrives. If it was tight on the screw i would be worried about diff adjustment but it isnt.
I doubt im the first one to figure it out but I thought I would share it anyway.
The back half looks tons better with the black case and mounts.
Front end all pimped out ready to go other than shocks. Still cant believe the bump steer came out perfect. Ive never had a truck with good bumpsteer. Should be interesting.
As promised an uncluttered overall shot. The top braces came out exactly like I wanted. aluminum tube over 1/8 carbon rod. Just under 1/2 ounce for the pair vs 1.5 ounces for the old ones.
Running out of excuses to paint the body so I suppose I should get at it this weekend. That comnined with wiring the esc and motor as well as taking a foot of wire off of the steering servo should give be a bit to do.
Nick
04-01-2011, 01:21 AM
#30
Tech Elite

iTrader: (10)
Join Date: Nov 2004
Location: Norwood, OH...and CCRCR and The OhioRCFactory
Posts: 2,974
Trader Rating: 10 (100%+)
Projects like this make ThunderbirdJunkie moist.
It is made of nothing but boobs and sex, even if it is a crappy performer.
Kudos. Been following this, and it is just pure awesome.
It is made of nothing but boobs and sex, even if it is a crappy performer.
Kudos. Been following this, and it is just pure awesome.