


PSI Racing Mid Motor Conversion Products
 03-11-2010, 07:14 AM
#1
Got an update on the Academy PSI Racing SCT Conversion:
It came in!
Got it yesterday, and started the build right away.
Item came in well packaged, everything wrapped deep in bubble wrap:
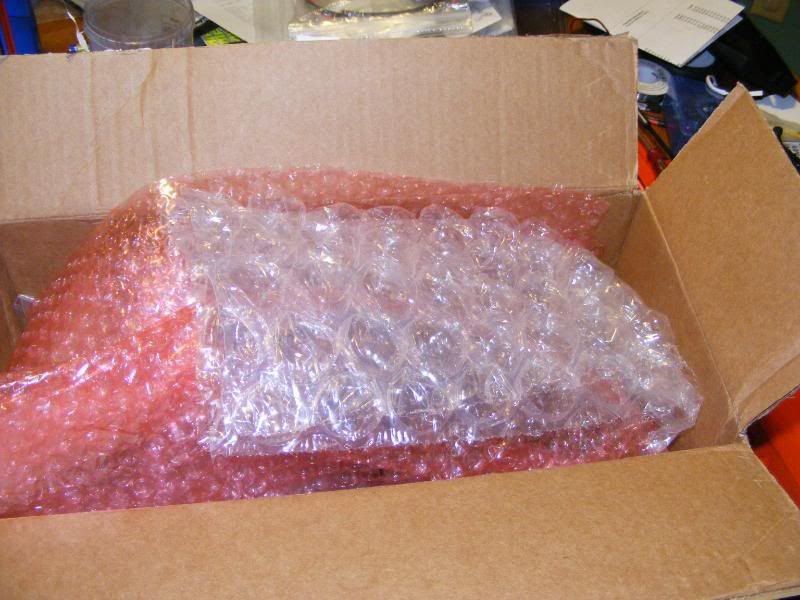
Here is what was in all of it:

I am not sure if production kits will come this much assembled, but by the looks of it, should not be much to do if they don't.
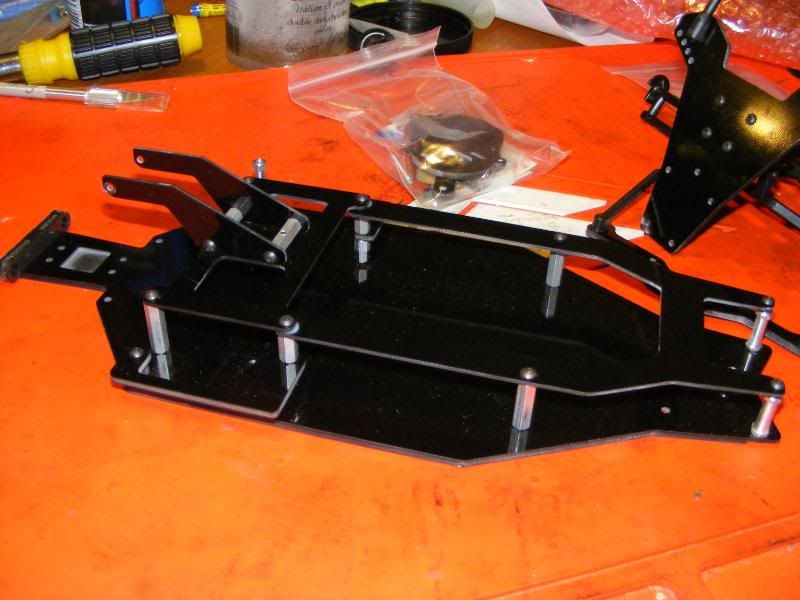

Now, me in my excitedness neglected to read the instructions I was sent by PSI Racing via email for the order of the build, and came up with this:
Pretty much right on, but there is a part you will modify slightly that necessitates me removing the motor plate to do it. no big deal. removed the screws, and modified the part. (will describe later on).
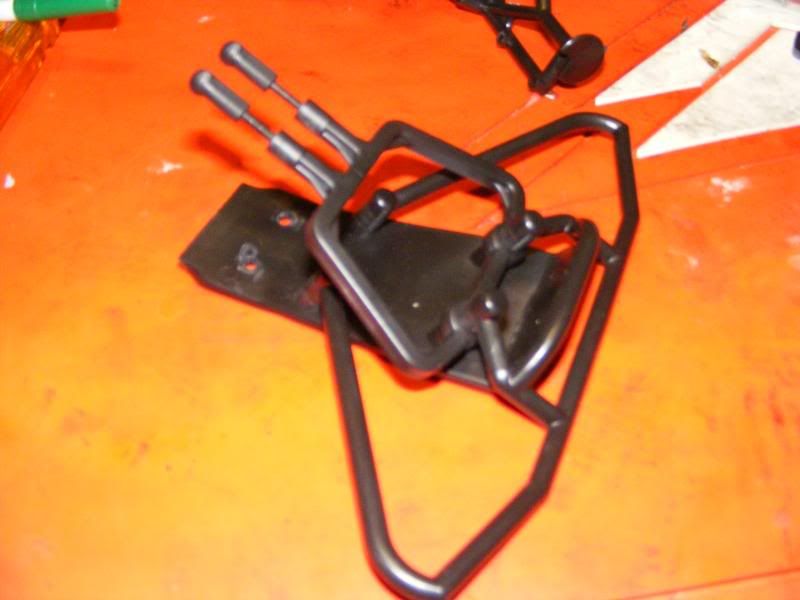
Anyway, to start correctly, I went ahead and got out all the rear a-arms that I would need to modify. The kit comes with a guide so you can modify the a-arms to bolt the shocks on:
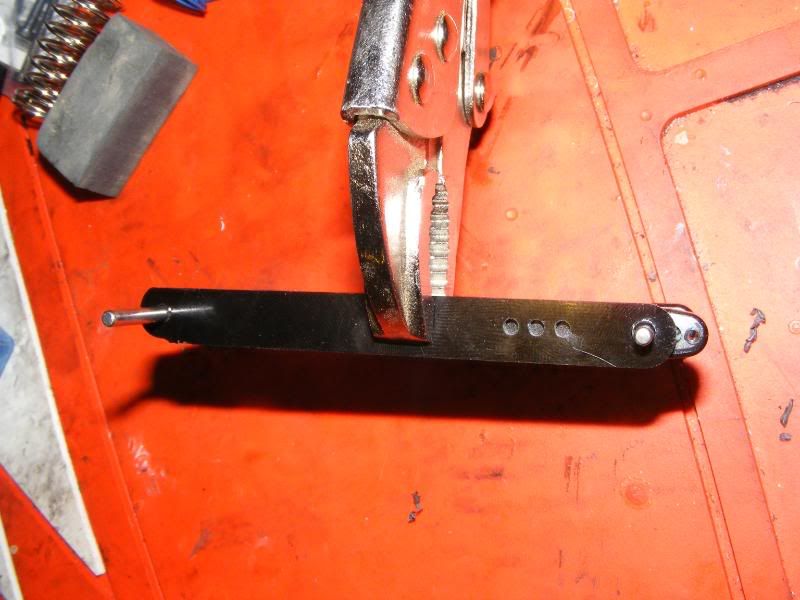
I did about 8 arms this way and it worked great. PSI Racing includes the drill bit for you too! I did find that by using the end of my 2.5mm ball wrench and working the drilled hole opening a bit, it makes it easier to thread in the screw.
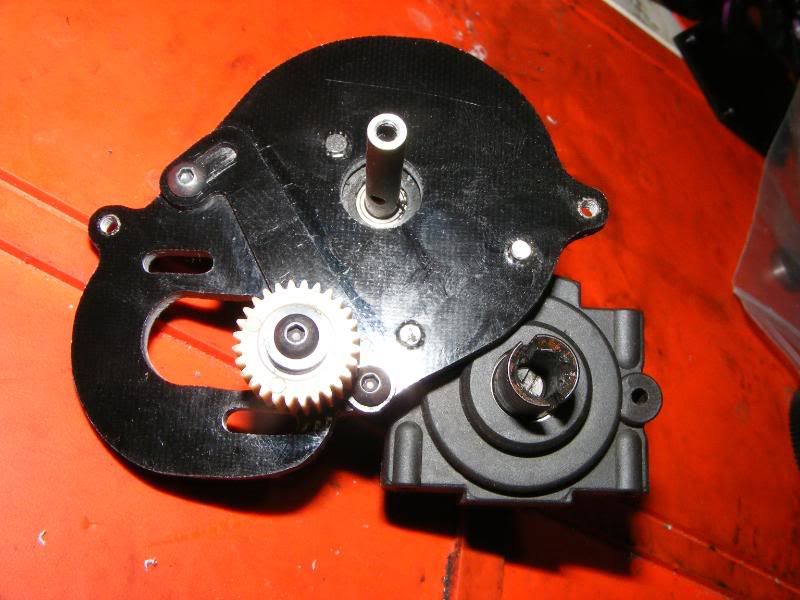
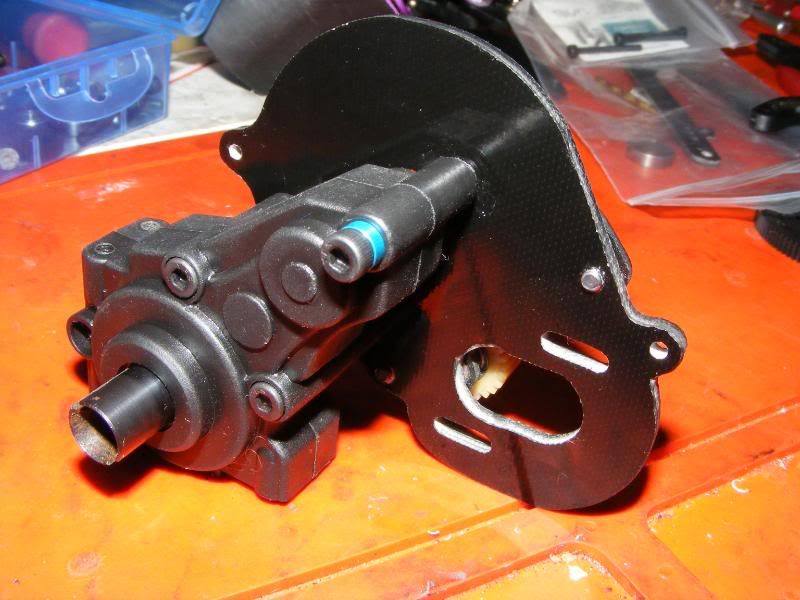
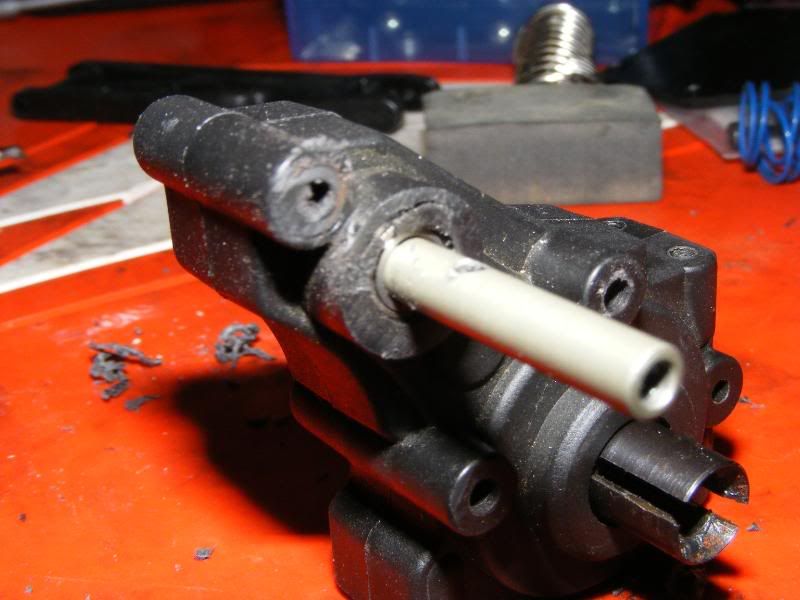
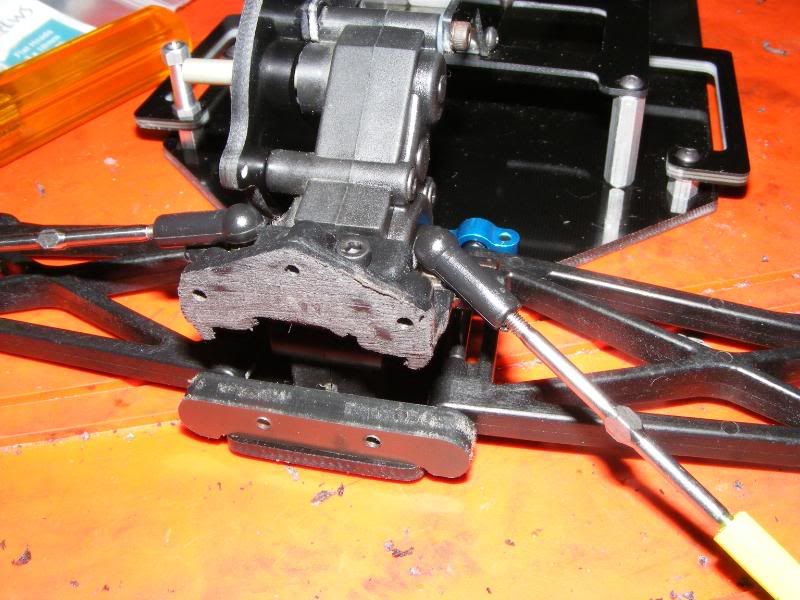
Moving on from this part, I went back to the tranny case to modify it. As you can see, a simple modification needed (NOTE: you are only cutting off the lip where the top screw goes through, my case looks rough around the output shaft as that is how it came, this is NOT because of a required mod for the kit!):
I then proceded to bolt it on to the chassis:

Now, here I would recommend doing one of the following (production instructions will most likely detail this better), you will want to put the rear a-arm assembly on the chassis first before mounting up the tranny case AND motor mount plate. If you don't, you will have a hard time getting the forward hingpin brace to hold.
Also as a recommendation if you are converting a GV2T for added security, you may want to pickup the GV2 buggy forward rear hingepin brace since that is an alloy and the stocker is plastic. I used one from a spare GV2. PSI Racings back rear hingepin brace is a pretty thick material however, and I don't expect any failures there, just alittle extra insurance.
Continuing on, as my kit was mostly assembled already, I needed to just mount up the rear tranny brace to the case with it already mounted to the chassis. PSI Racing includes a nice long screw for this as well as a spacer for it too. As I like to use 2.5mm cap head screws, I replaced the included screw with this for personal preference.
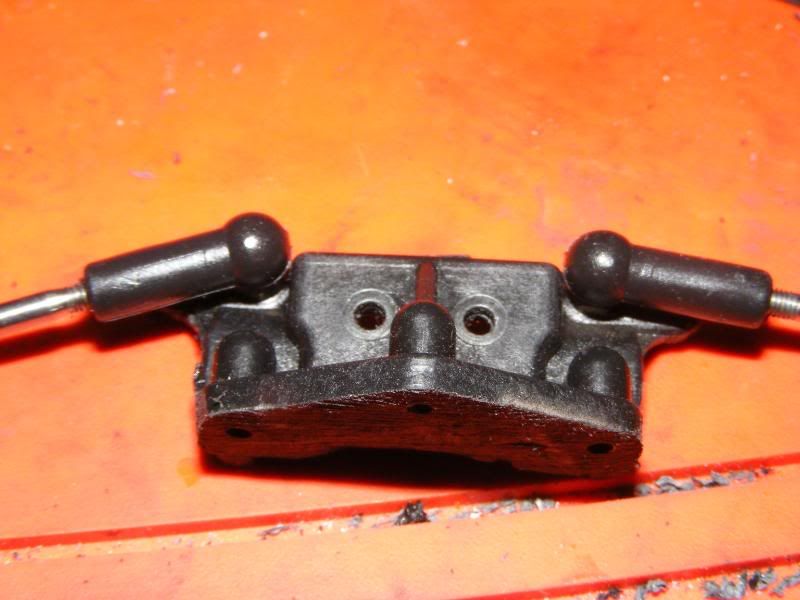
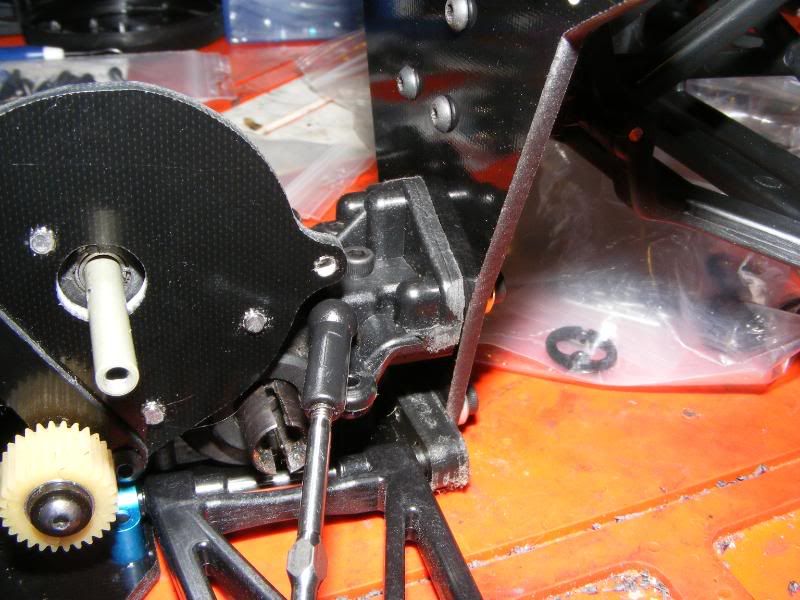
I then proceded to modify the rear bulkhead. This probably will be the most difficult, if you can actually call it that, part to modify as you need to chop off a portion of the rear bulkhead. A good rotary tool will make short work of it.
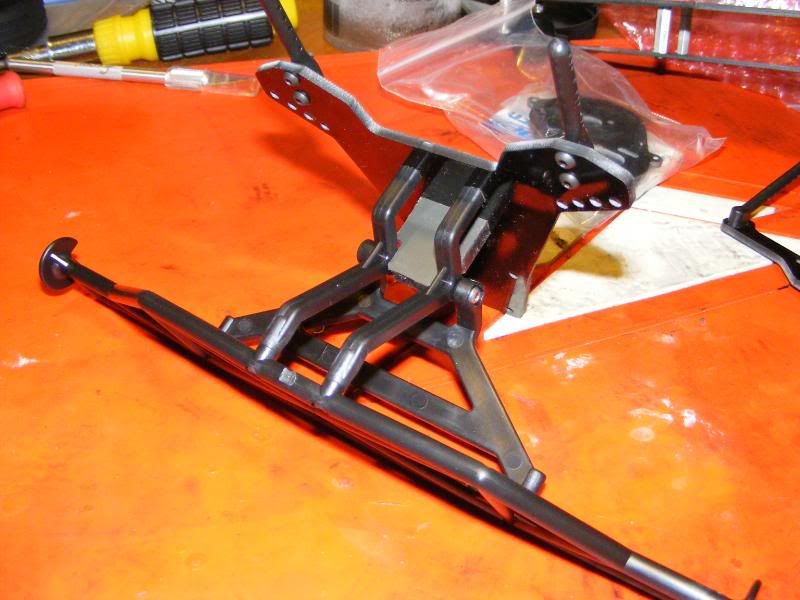
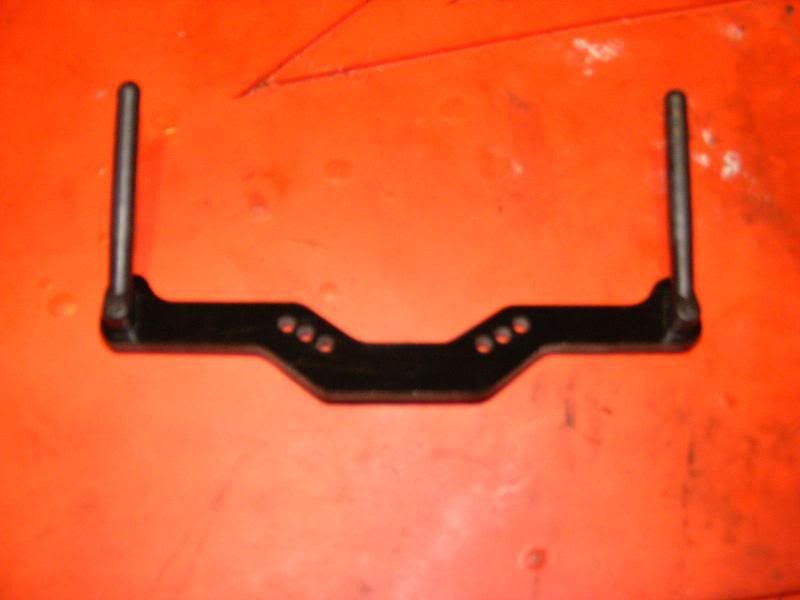
I proceded then to mount everything up on the rear:
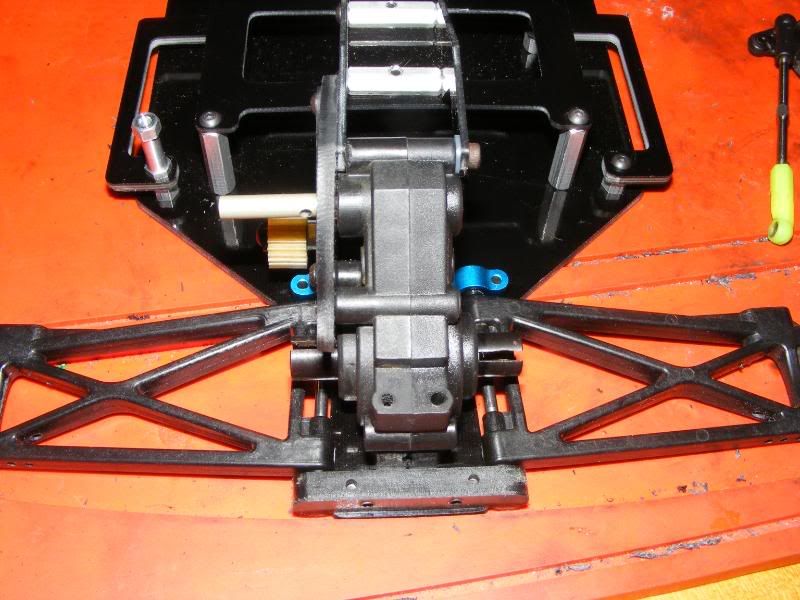
Now, here is a part where its important to just continue building and not arm chair manufacturer the car. When I went to bolt up the rear shock tower assembly, I noticed there was a gap between the rear bulkhead and the shower tower. Initially I thought I cut the bulkhead wrong. checking the pictures from PSI Racing I received there where correct. So I proceeded with the bolting on of the shock tower and as I tightened everything down, it snugged right up:
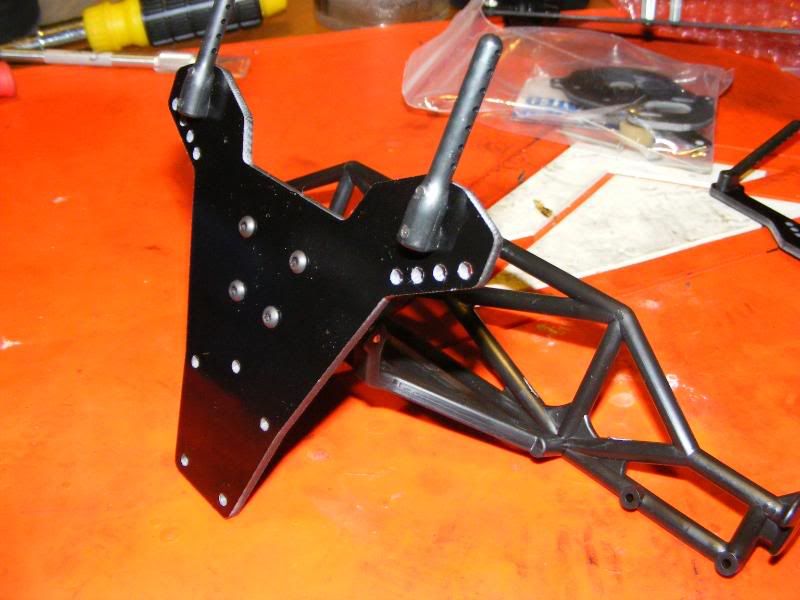
So with that done, was time to move to the front end of the car. I went ahead and assembled the front end and used the stock bumper as well as wasn't sure on this step (production instructions probably mention this ). I then mounted up the front bumper brace piece with the thread rods:

This bolted on fine as well, and appears to be a thick piece of material similar to Delrin.
Now, during assembly of the front end to the chassis, make sure that you have no binding in the steering. Initially I was getting slight binding that wasn't prevalent when not assembled. I took a look and the steering arm lower part was touching the chassis slightly causing the binding. A quick dremel touch, or, let it work in and the binding will go away. WIth this conversion, you also get the benefit of maximum steering through which was problematic on the GV2T with mods.
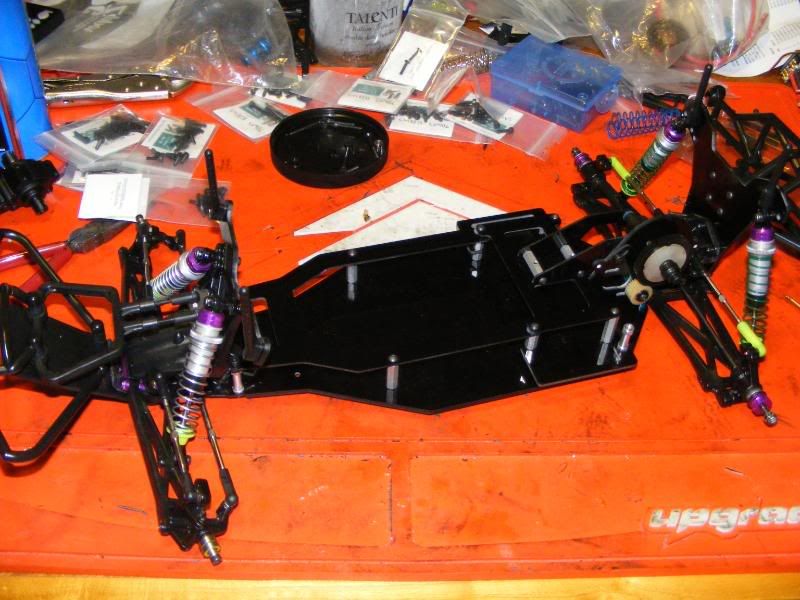
And now we are all done!
It came in!
Got it yesterday, and started the build right away.
Item came in well packaged, everything wrapped deep in bubble wrap:
Here is what was in all of it:
I am not sure if production kits will come this much assembled, but by the looks of it, should not be much to do if they don't.
Now, me in my excitedness neglected to read the instructions I was sent by PSI Racing via email for the order of the build, and came up with this:
Pretty much right on, but there is a part you will modify slightly that necessitates me removing the motor plate to do it. no big deal. removed the screws, and modified the part. (will describe later on).
Anyway, to start correctly, I went ahead and got out all the rear a-arms that I would need to modify. The kit comes with a guide so you can modify the a-arms to bolt the shocks on:
I did about 8 arms this way and it worked great. PSI Racing includes the drill bit for you too! I did find that by using the end of my 2.5mm ball wrench and working the drilled hole opening a bit, it makes it easier to thread in the screw.
Moving on from this part, I went back to the tranny case to modify it. As you can see, a simple modification needed (NOTE: you are only cutting off the lip where the top screw goes through, my case looks rough around the output shaft as that is how it came, this is NOT because of a required mod for the kit!):
I then proceded to bolt it on to the chassis:
Now, here I would recommend doing one of the following (production instructions will most likely detail this better), you will want to put the rear a-arm assembly on the chassis first before mounting up the tranny case AND motor mount plate. If you don't, you will have a hard time getting the forward hingpin brace to hold.
Also as a recommendation if you are converting a GV2T for added security, you may want to pickup the GV2 buggy forward rear hingepin brace since that is an alloy and the stocker is plastic. I used one from a spare GV2. PSI Racings back rear hingepin brace is a pretty thick material however, and I don't expect any failures there, just alittle extra insurance.
Continuing on, as my kit was mostly assembled already, I needed to just mount up the rear tranny brace to the case with it already mounted to the chassis. PSI Racing includes a nice long screw for this as well as a spacer for it too. As I like to use 2.5mm cap head screws, I replaced the included screw with this for personal preference.
I then proceded to modify the rear bulkhead. This probably will be the most difficult, if you can actually call it that, part to modify as you need to chop off a portion of the rear bulkhead. A good rotary tool will make short work of it.
I proceded then to mount everything up on the rear:
Now, here is a part where its important to just continue building and not arm chair manufacturer the car. When I went to bolt up the rear shock tower assembly, I noticed there was a gap between the rear bulkhead and the shower tower. Initially I thought I cut the bulkhead wrong. checking the pictures from PSI Racing I received there where correct. So I proceeded with the bolting on of the shock tower and as I tightened everything down, it snugged right up:
So with that done, was time to move to the front end of the car. I went ahead and assembled the front end and used the stock bumper as well as wasn't sure on this step (production instructions probably mention this ). I then mounted up the front bumper brace piece with the thread rods:
This bolted on fine as well, and appears to be a thick piece of material similar to Delrin.
Now, during assembly of the front end to the chassis, make sure that you have no binding in the steering. Initially I was getting slight binding that wasn't prevalent when not assembled. I took a look and the steering arm lower part was touching the chassis slightly causing the binding. A quick dremel touch, or, let it work in and the binding will go away. WIth this conversion, you also get the benefit of maximum steering through which was problematic on the GV2T with mods.
And now we are all done!
Last edited by Cain; 03-17-2010 at 08:29 AM.
 03-11-2010, 08:02 AM
#2
Thanks Cain for the detailed build pics! Lokks really well done.Congrats to
2wdmod for the awsome progress on the mid mtored kit.Im expecting more cool things soon!
2wdmod for the awsome progress on the mid mtored kit.Im expecting more cool things soon!

 03-11-2010, 10:06 AM
#7
Tech Elite

iTrader: (42)
Join Date: Jun 2008
Location: anywhere I can race 2wd dirt,and 1/12 onroad in MI.
Posts: 3,891
Trader Rating: 42 (100%+)
I am going to try and work that in somewhere between the losi conversions, and the Kyosho conversions.
Thanks to Cain for starting this thread on such a positive note.
For a while we will be shipping kits out pretty much assembled just as Cain's was.It just makes it Easy to 100% quality check all the peices in the kit.But as Cain said, when we do start shipping them unassembled it doesnt take long to get the chassis in sub assembly form and ready for parts from the donor vehicle.I can do one in under 15 min.
03-11-2010, 10:34 AM
#8
Tech Elite
iTrader: (42)
Join Date: Jun 2008
Location: anywhere I can race 2wd dirt,and 1/12 onroad in MI.
Posts: 3,891
Trader Rating: 42 (100%+)
Also all 3 academy conversion kits will be available in our ebay store by the end of the weekend.Pictured below is the last peice for the academy conversions.This is the master 3D model for our gear covers.Todd and I are going to cast a negative to use to cast up about a dozen positives to vac-form with.I wish we could have had this part ready sooner, but we live about an hour and a half away from each other so right now working together on something means a 3hr round trip drive for one of us. Thank god for the internet or we wouldnt know what the other is doing!!
03-11-2010, 10:48 AM
#9
Tech Elite
iTrader: (42)
Join Date: Jun 2008
Location: anywhere I can race 2wd dirt,and 1/12 onroad in MI.
Posts: 3,891
Trader Rating: 42 (100%+)
Also I just wanted to post up a link to video of all of the current PSI Mid-motored projects being tested under real race conditions http://www.youtube.com/user/academyrulz
http://www.youtube.com/user/academyrulz
03-11-2010, 11:45 AM
#12
Tech Elite
iTrader: (42)
Join Date: Jun 2008
Location: anywhere I can race 2wd dirt,and 1/12 onroad in MI.
Posts: 3,891
Trader Rating: 42 (100%+)
NirtoLuver- PM sent back.
Brandon-
The MM2-SCT kit will sell for $115 shipped in the lower for 48. The Main reason for the higher price on the sct conversion is all the AE Bumper work and body mounts we have to pay retail for to include with the kit.
MM2-T $90.00 shipped to lower 48
MM2-B $80.00 shipped to lower 48.
Brandon-
The MM2-SCT kit will sell for $115 shipped in the lower for 48. The Main reason for the higher price on the sct conversion is all the AE Bumper work and body mounts we have to pay retail for to include with the kit.
MM2-T $90.00 shipped to lower 48
MM2-B $80.00 shipped to lower 48.
03-11-2010, 12:22 PM
#13
Thanks to Cain for starting this thread on such a positive note.
For a while we will be shipping kits out pretty much assembled just as Cain's was.It just makes it Easy to 100% quality check all the peices in the kit.But as Cain said, when we do start shipping them unassembled it doesnt take long to get the chassis in sub assembly form and ready for parts from the donor vehicle.I can do one in under 15 min.
For a while we will be shipping kits out pretty much assembled just as Cain's was.It just makes it Easy to 100% quality check all the peices in the kit.But as Cain said, when we do start shipping them unassembled it doesnt take long to get the chassis in sub assembly form and ready for parts from the donor vehicle.I can do one in under 15 min.
 Would have done the 15 minute thing too but my digits aren't as thin as they used to be.
NirtoLuver- PM sent back.
Brandon-
The MM2-SCT kit will sell for $115 shipped in the lower for 48. The Main reason for the higher price on the sct conversion is all the AE Bumper work and body mounts we have to pay retail for to include with the kit.
MM2-T $90.00 shipped to lower 48
MM2-B $80.00 shipped to lower 48.
Brandon-
The MM2-SCT kit will sell for $115 shipped in the lower for 48. The Main reason for the higher price on the sct conversion is all the AE Bumper work and body mounts we have to pay retail for to include with the kit.
MM2-T $90.00 shipped to lower 48
MM2-B $80.00 shipped to lower 48.
Also, any plans for an inner body cover or some sort? Would be pretty cool if one could be made with an integrated driver figure!
03-11-2010, 12:37 PM
#14
Tech Elite
iTrader: (42)
Join Date: Jun 2008
Location: anywhere I can race 2wd dirt,and 1/12 onroad in MI.
Posts: 3,891
Trader Rating: 42 (100%+)
The quality was such that it makes it easy to make a positive thread on the vehicle! Would have done the 15 minute thing too but my digits aren't as thin as they used to be.
Any idea on when pricing for individual components will be up and available? I wouldn't mind having a spare for the rear shock tower with the way I drive. Its beefy for sure though, very nice.
Also, any plans for an inner body cover or some sort? Would be pretty cool if one could be made with an integrated driver figure!
Would have done the 15 minute thing too but my digits aren't as thin as they used to be. Any idea on when pricing for individual components will be up and available? I wouldn't mind having a spare for the rear shock tower with the way I drive. Its beefy for sure though, very nice.
Also, any plans for an inner body cover or some sort? Would be pretty cool if one could be made with an integrated driver figure!
On the individual component pricing-you have just hit the key issue i am having right now-giving each part a part # and putting that part # into place within the system.
For right now just contact me with what you need and i will give you a price on it.For the rear tower that you mentioned the price will be in the $8.00 neighborhood.
Undertrays, and innerdirt guards are in order for the sct.Just have to find the time to squeek those into the schedule.