


 14Likes
M548 tracked vehicle
 07-24-2022, 02:29 AM
#1
Hi guys!
I fell in love with a truck some time ago. It's big, heavy and ugly and I didn't see any built until today(as far as my research went)
Your halftrack builds left me with a feeling that i need one of those to but not an halftrack, I should go to a full tracked vehicle.
The Unimog build it's in a bit of a standstill because it needs a good amount of metal fabrication and I needed a styrene build to do on the weekends. And when I revealled the idea to a coworker, he said that rode those in the army so he is my official consultor
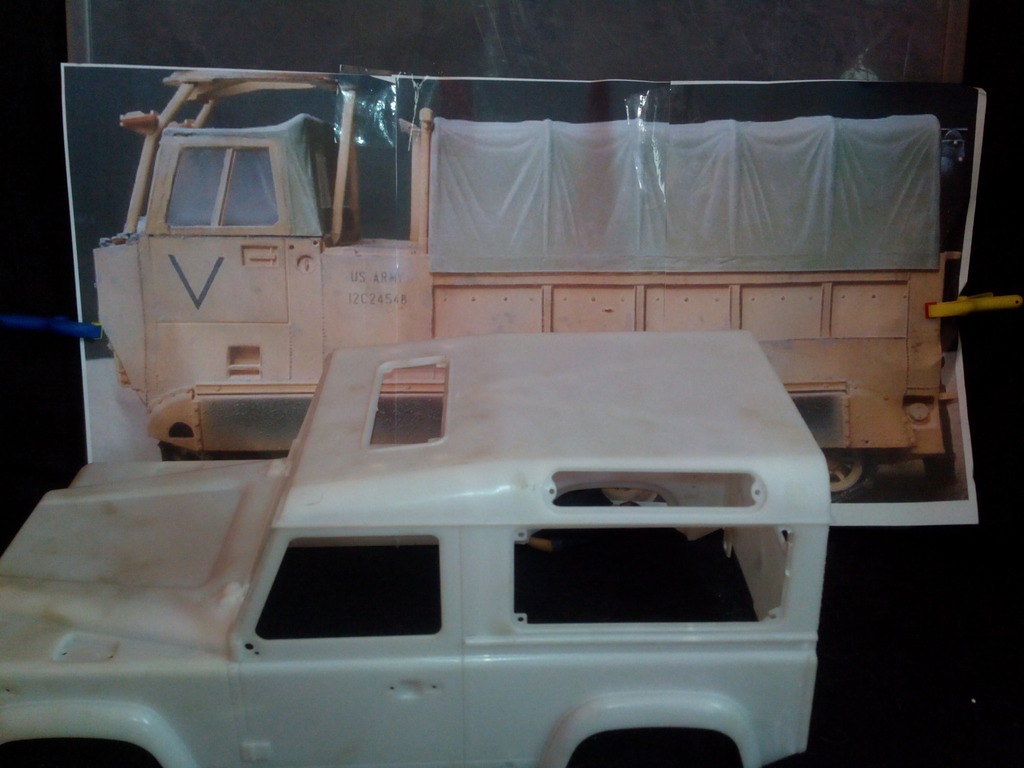
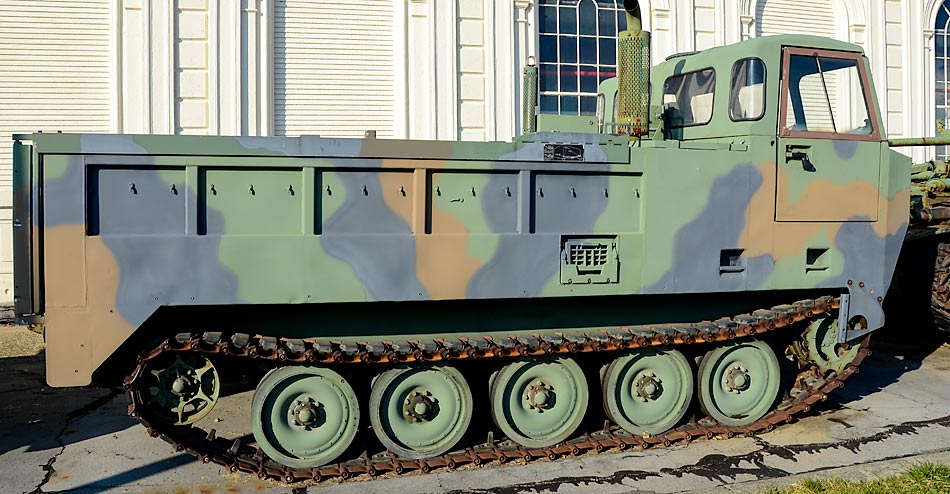
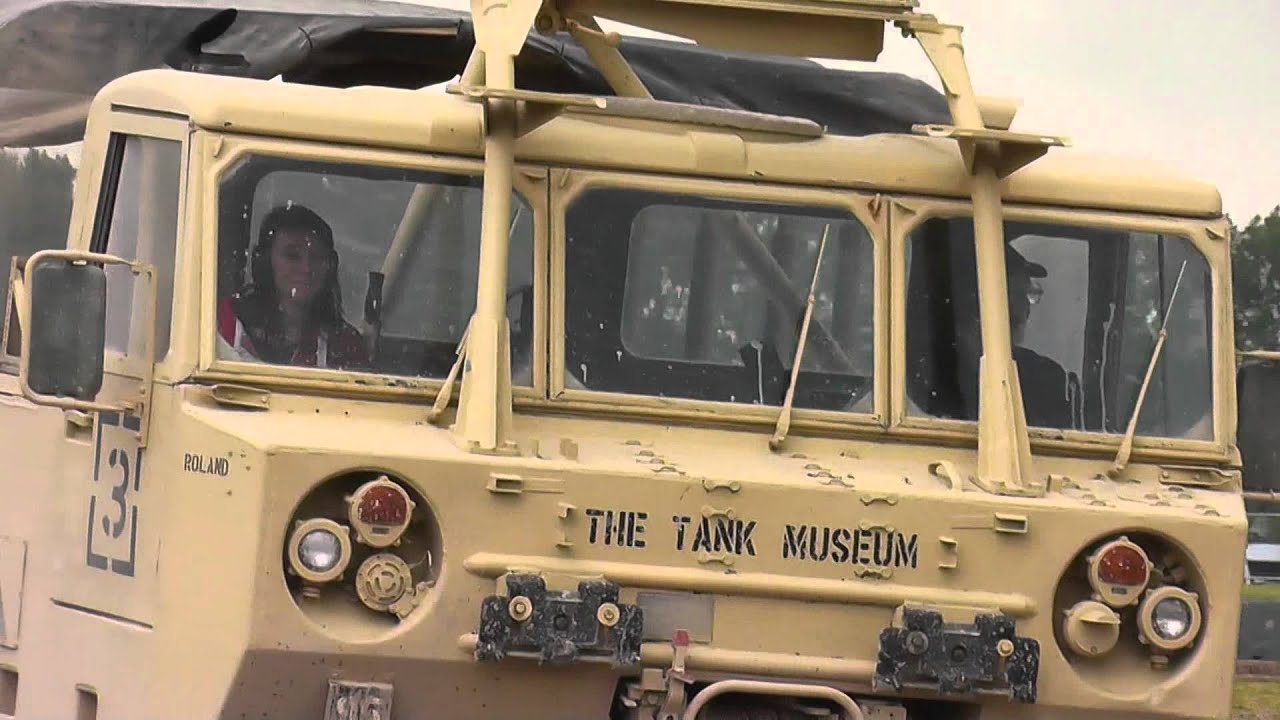
Introducing the M548, a cargo and transport vehicle from the 60s:

To the build!
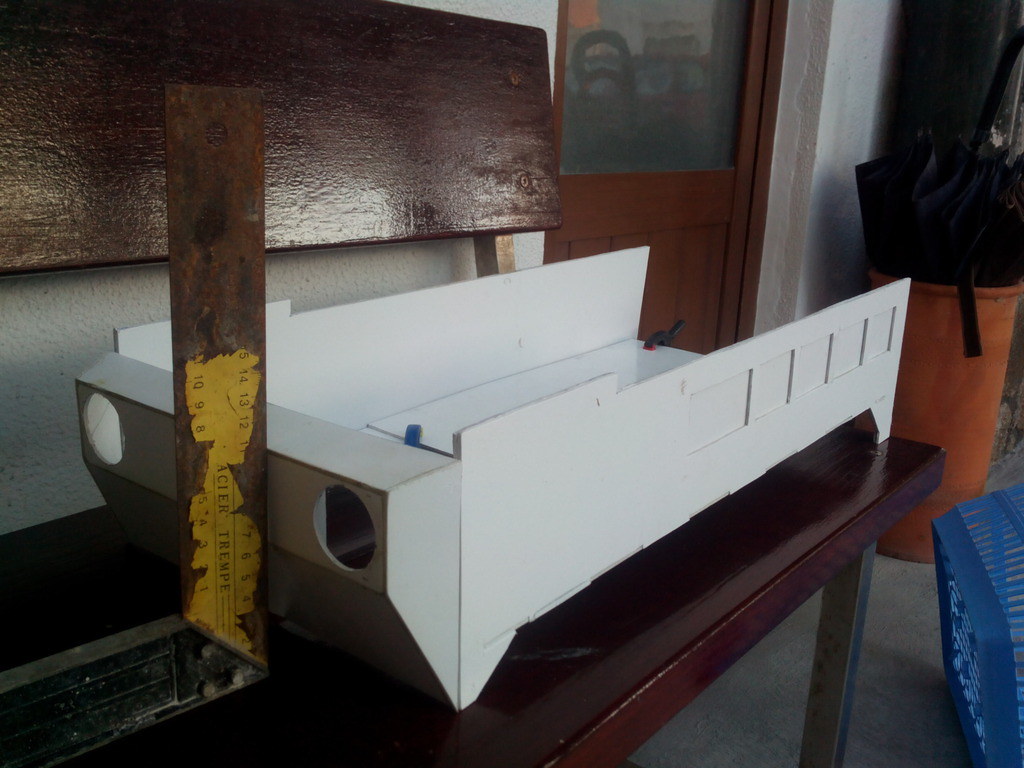
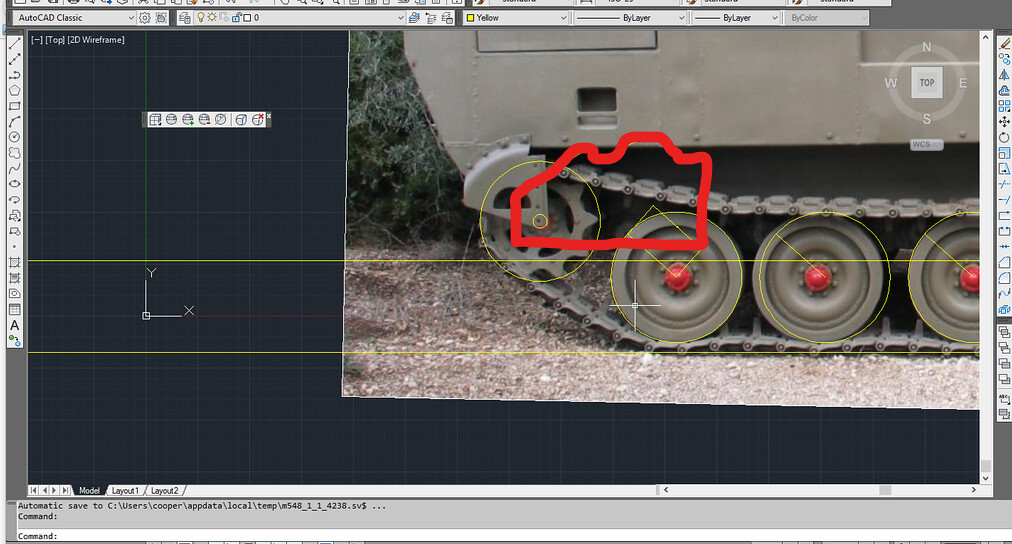
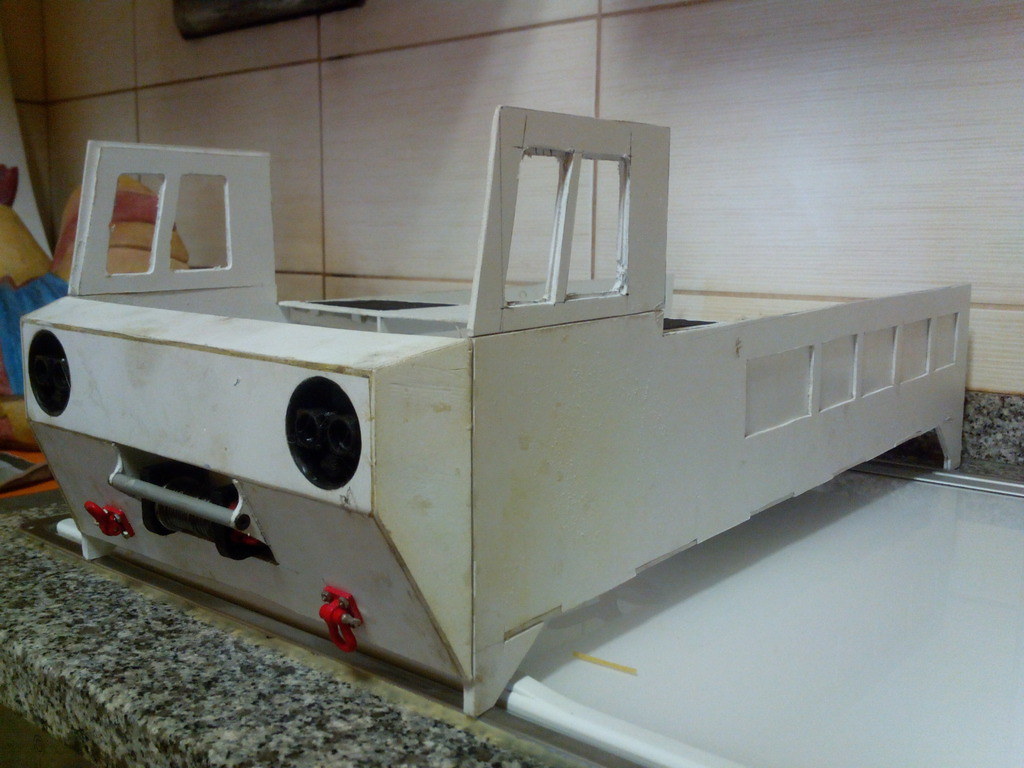
It's a big one, measuring 25x58cm, in true 1/10 scale:
First cuts:
the nose:

Test fit:
Back to the nose:
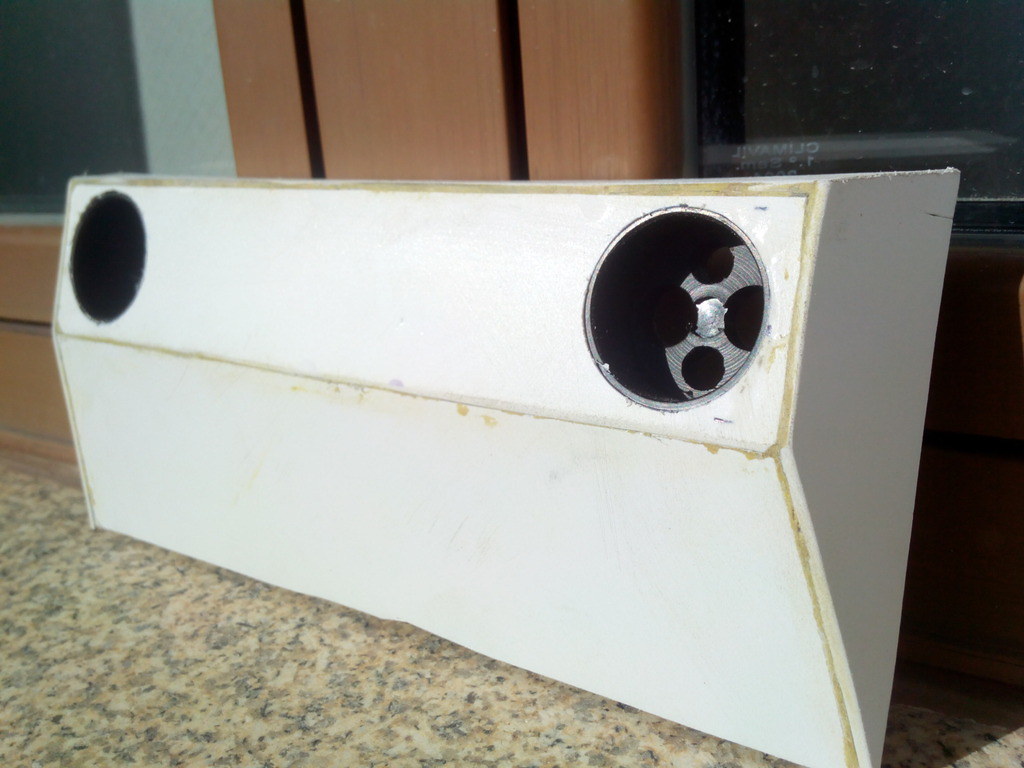
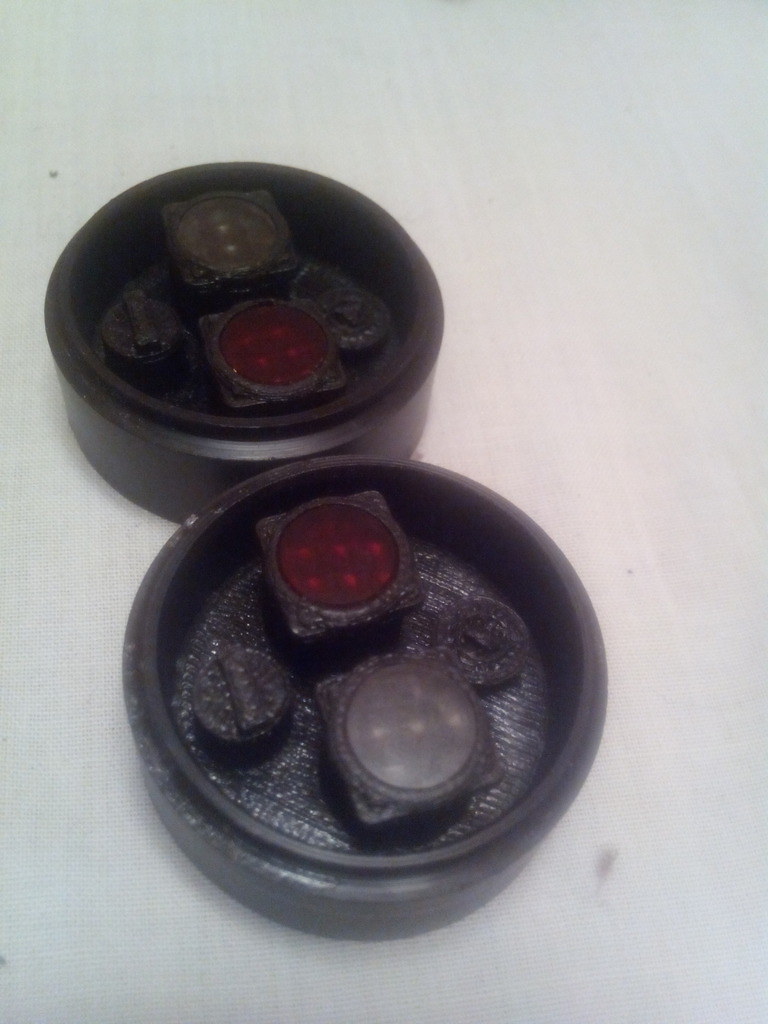
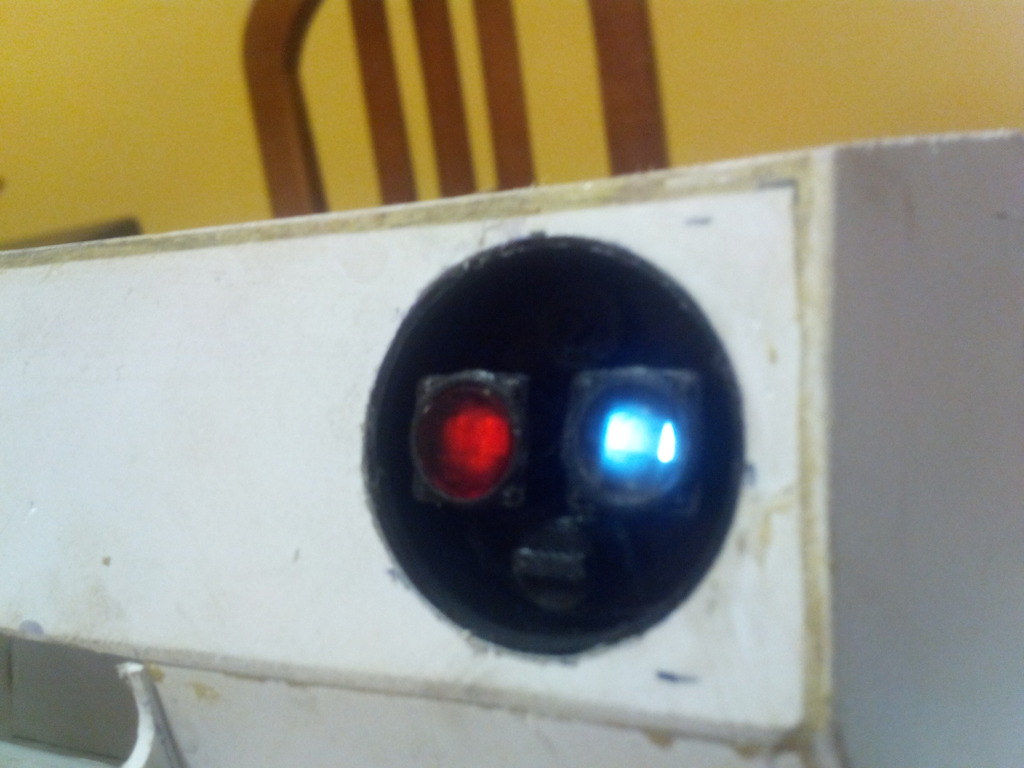
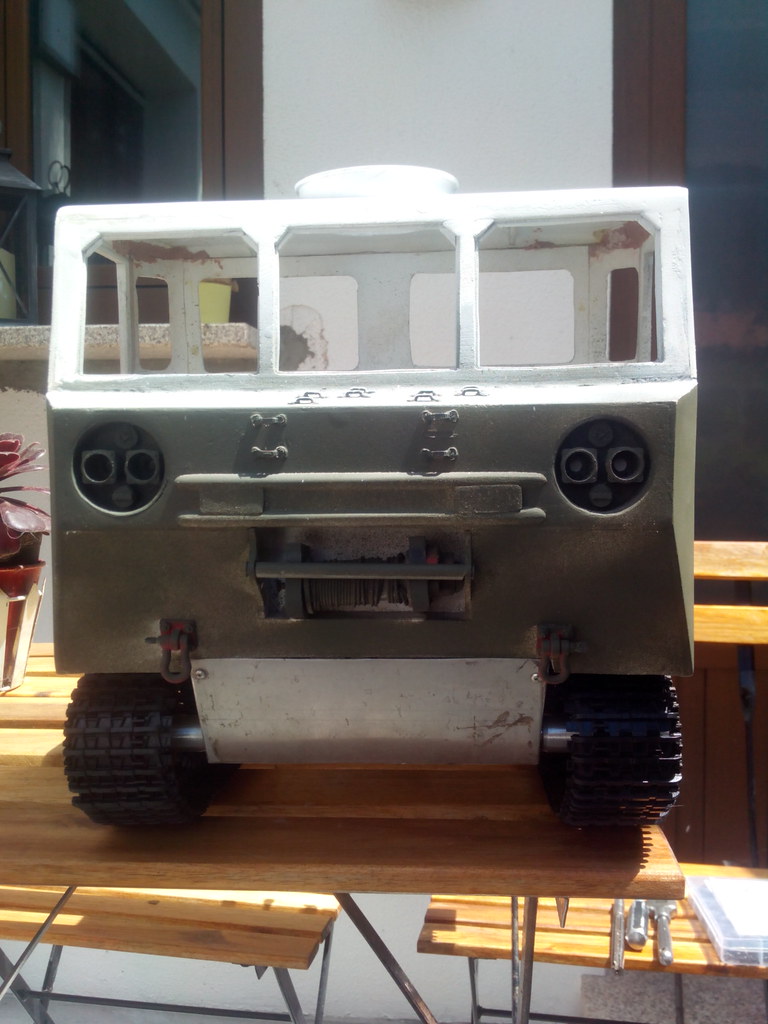
The 1:1 has 2 headlight clusters, containing regular headlights, blacklights for stealthiness, horn, blinkers,etc(depends on the variant). on mine I went for regular lights, red lights to simulate the blacklights and horn

Tought in machine them but 3d print makes it easier,machined only the housing and the lenses were cut from 1:1 car lights:

The running gear will be metal Heng Long gearboxes:
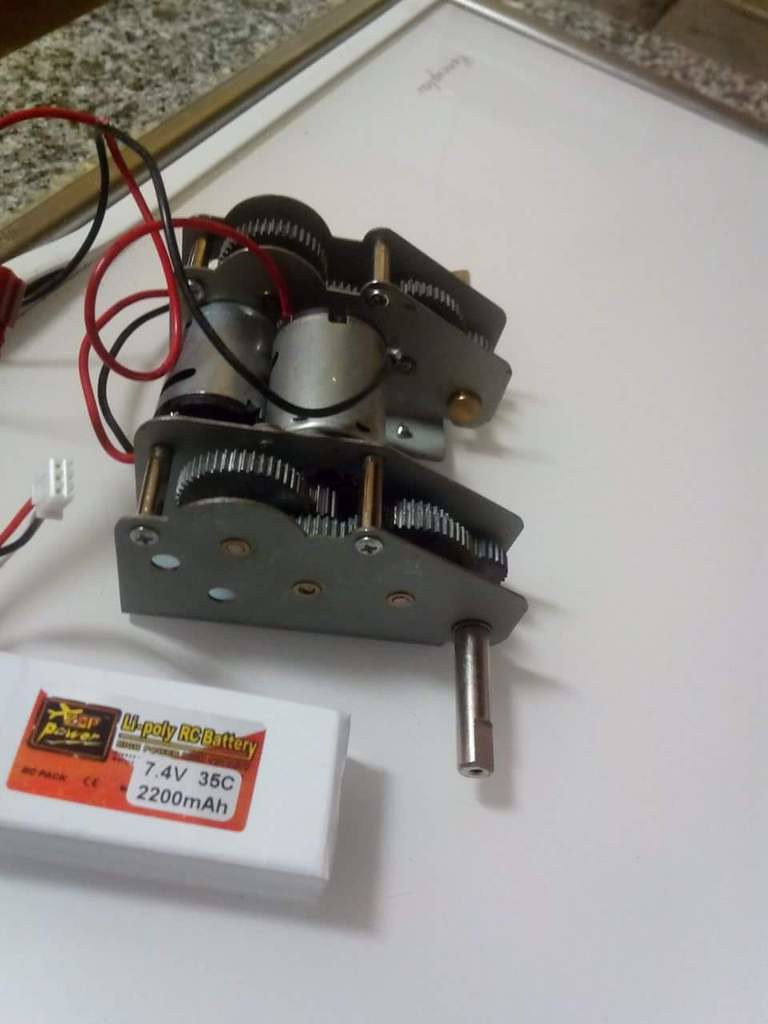
They came with tiny motors(280 or 370) so I'm in a process of adapting them to 540 motors. Seemed easier, one it's done
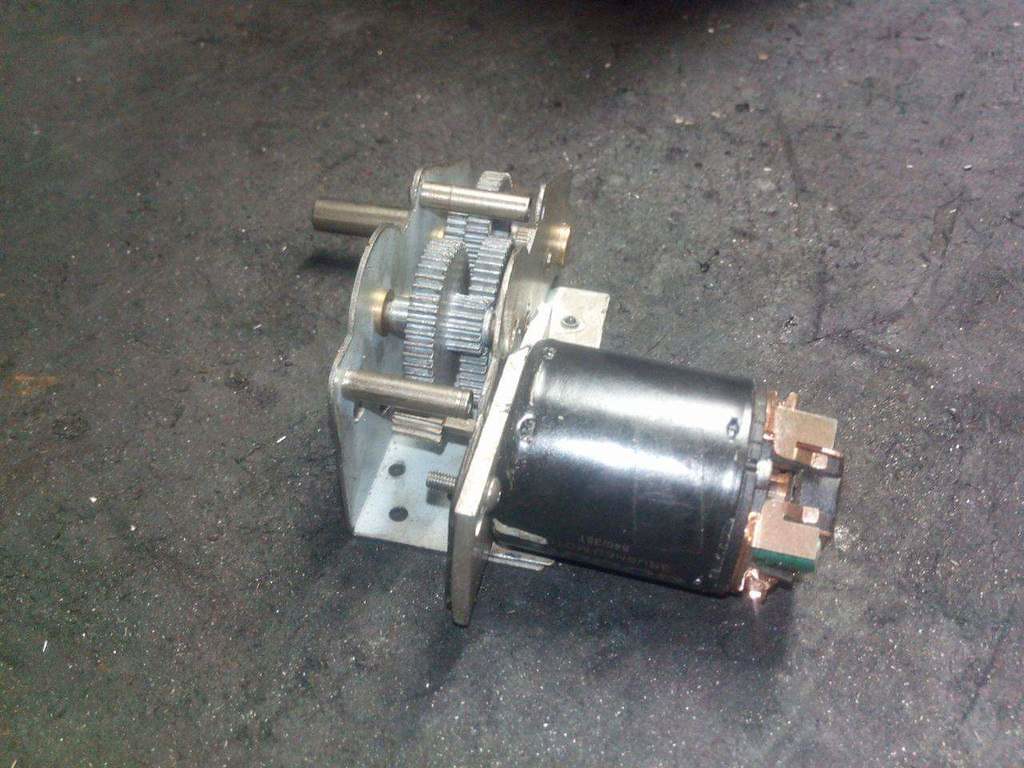
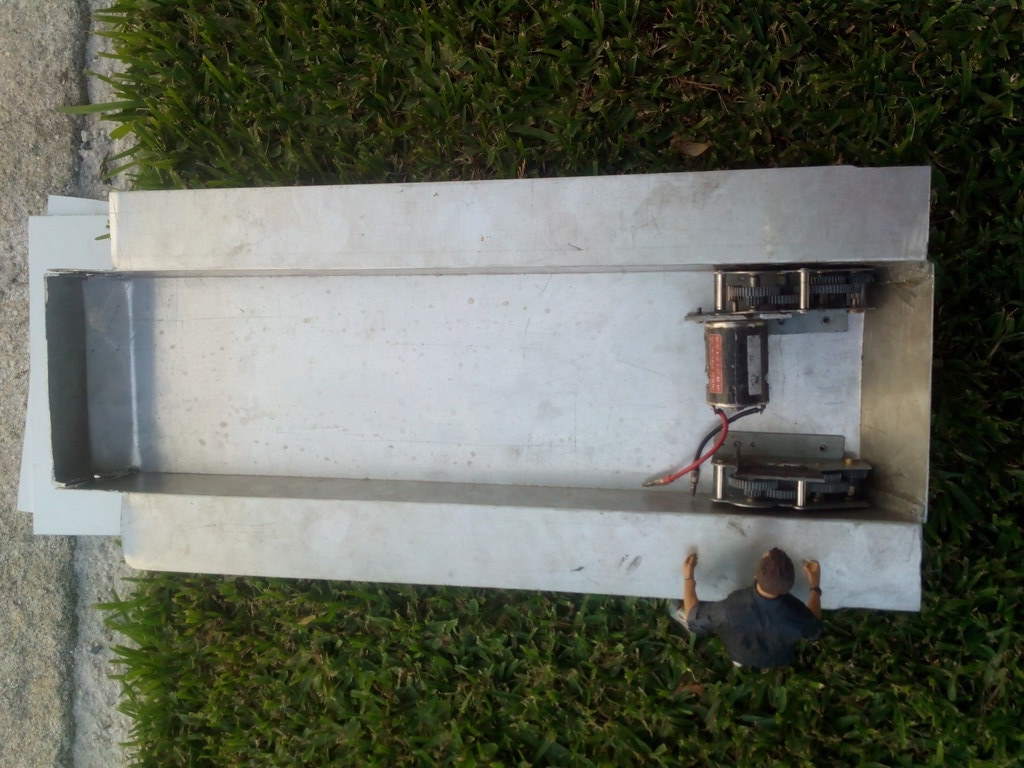
This running gear is perfect for this truck. 2 gearboxes with 1 motor each seems that would take too much space but no:
They sit perfectly under the cab floor like the 1:1 and the bottom of the gearboxes align perfectly with the underside
The complete running gear it's 2 motors, 2 ESCs, 1 (or 2) bats. I was afraid of having to buy a stick radio like all tank guys have but I've tinkered with my usual radio that offers 4 mixing slots and have found the perfect way. Progressive control in both throtle and steering
I fell in love with a truck some time ago. It's big, heavy and ugly and I didn't see any built until today(as far as my research went)
Your halftrack builds left me with a feeling that i need one of those to but not an halftrack, I should go to a full tracked vehicle.
The Unimog build it's in a bit of a standstill because it needs a good amount of metal fabrication and I needed a styrene build to do on the weekends. And when I revealled the idea to a coworker, he said that rode those in the army so he is my official consultor
Introducing the M548, a cargo and transport vehicle from the 60s:
To the build!
It's a big one, measuring 25x58cm, in true 1/10 scale:
First cuts:
the nose:
Test fit:
Back to the nose:
The 1:1 has 2 headlight clusters, containing regular headlights, blacklights for stealthiness, horn, blinkers,etc(depends on the variant). on mine I went for regular lights, red lights to simulate the blacklights and horn
Tought in machine them but 3d print makes it easier,machined only the housing and the lenses were cut from 1:1 car lights:
The running gear will be metal Heng Long gearboxes:
They came with tiny motors(280 or 370) so I'm in a process of adapting them to 540 motors. Seemed easier, one it's done
This running gear is perfect for this truck. 2 gearboxes with 1 motor each seems that would take too much space but no:
They sit perfectly under the cab floor like the 1:1 and the bottom of the gearboxes align perfectly with the underside
The complete running gear it's 2 motors, 2 ESCs, 1 (or 2) bats. I was afraid of having to buy a stick radio like all tank guys have but I've tinkered with my usual radio that offers 4 mixing slots and have found the perfect way. Progressive control in both throtle and steering
 07-24-2022, 04:13 PM
#2
More stuff:
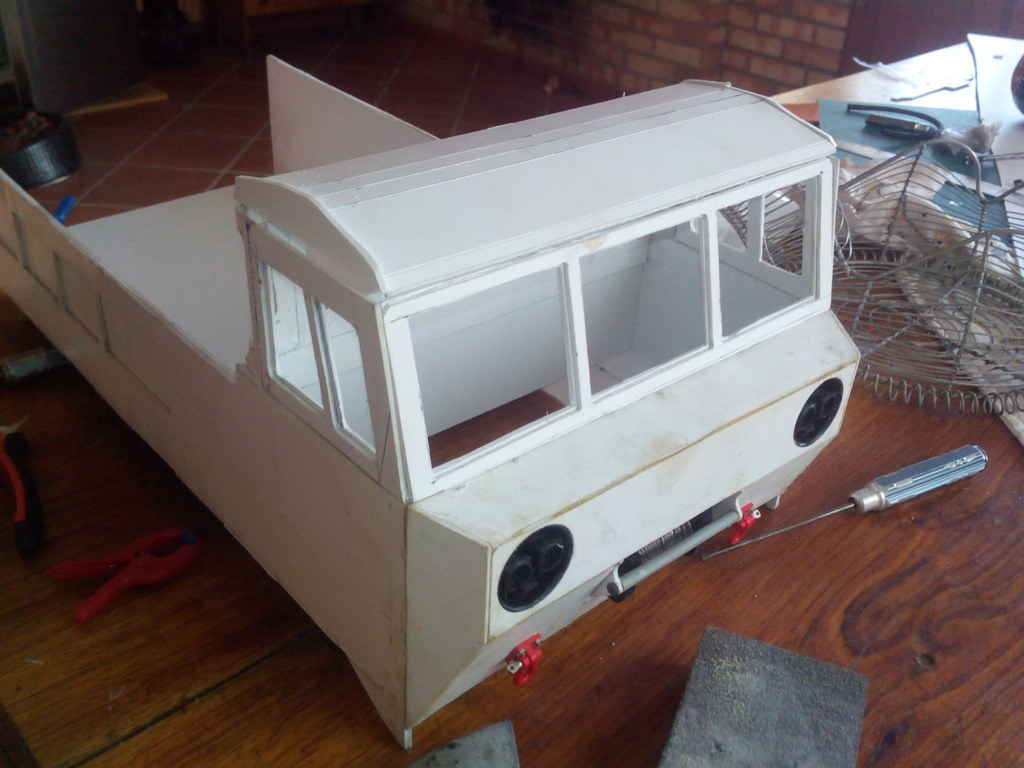
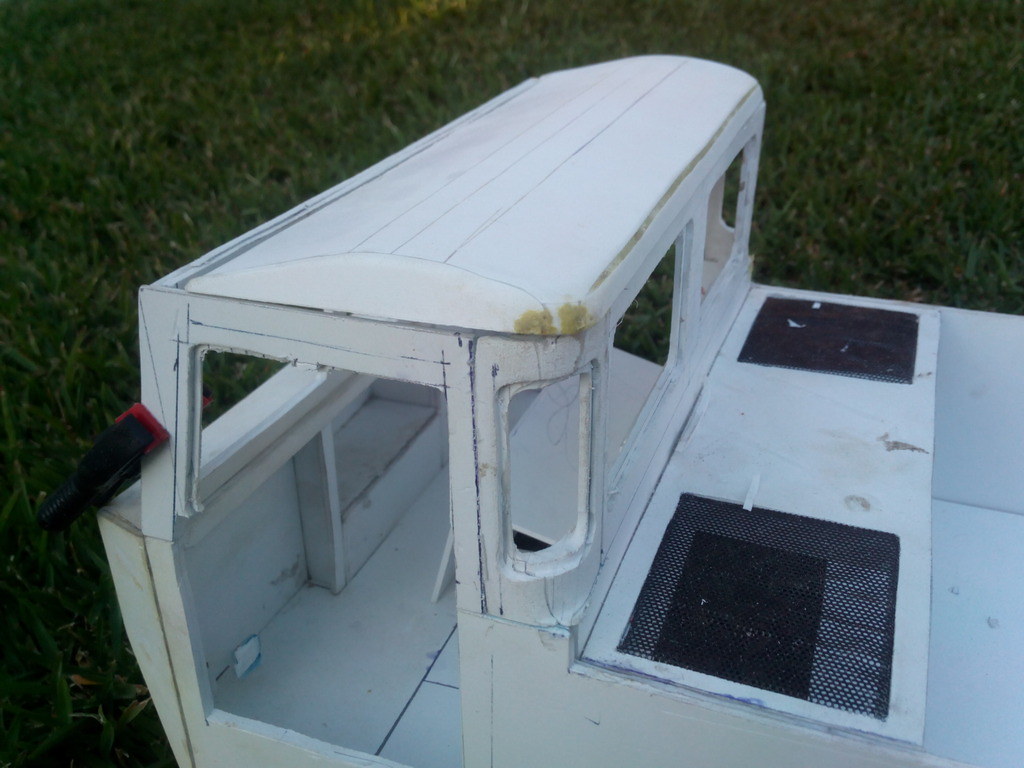
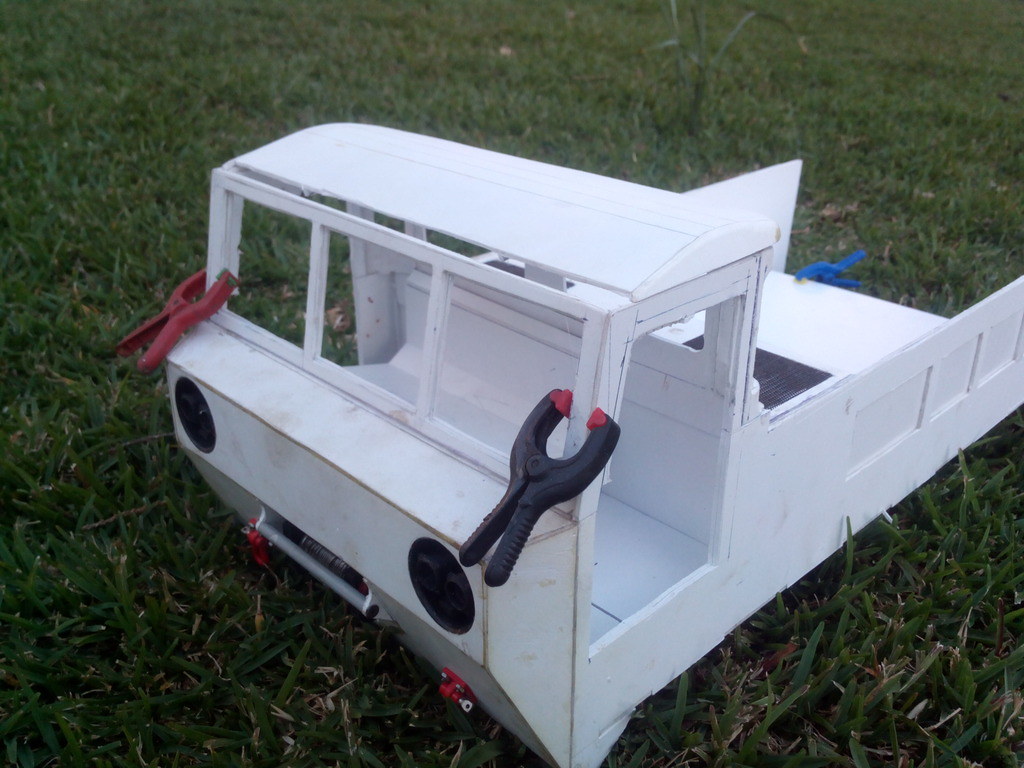
Added the side windows
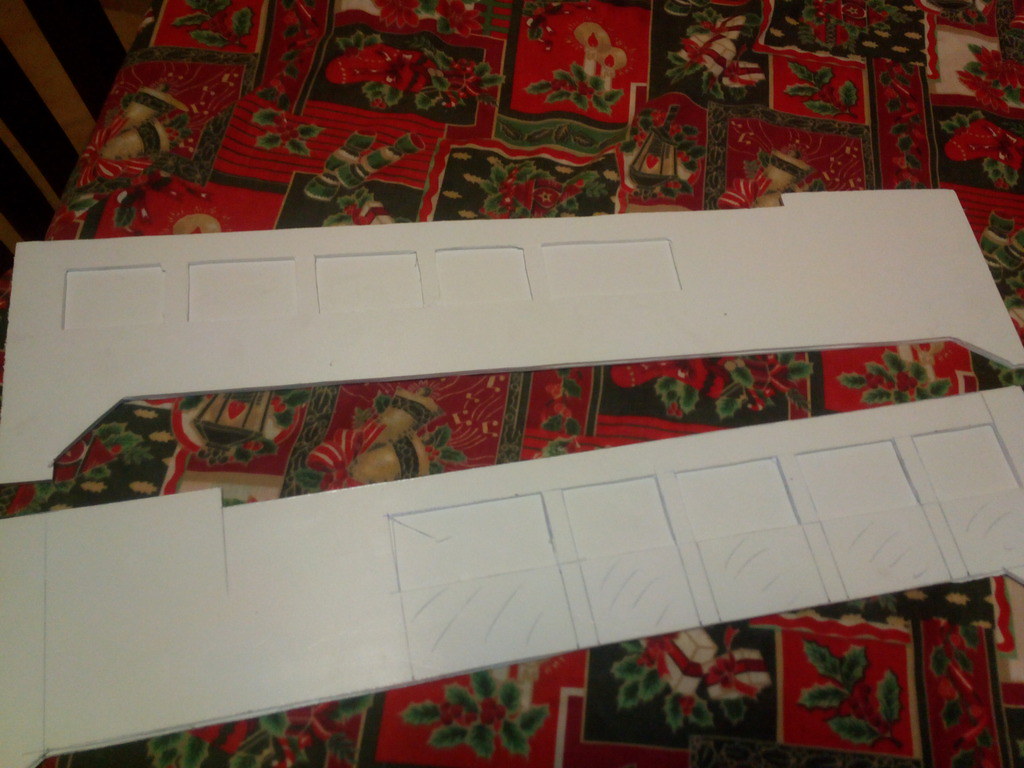
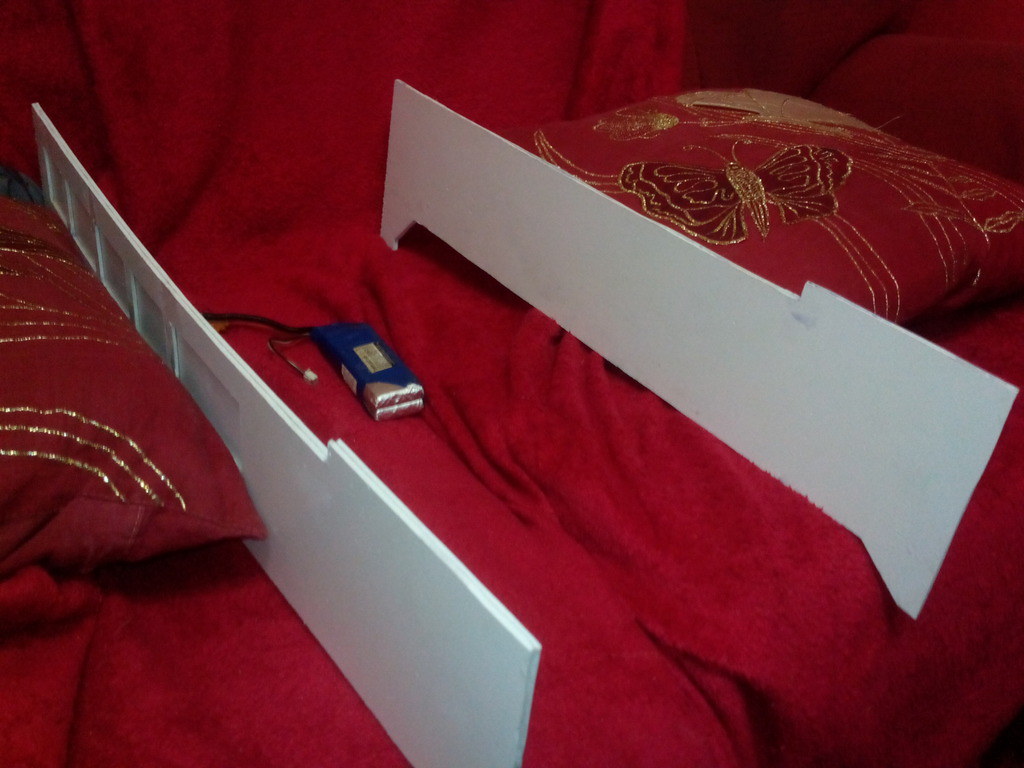
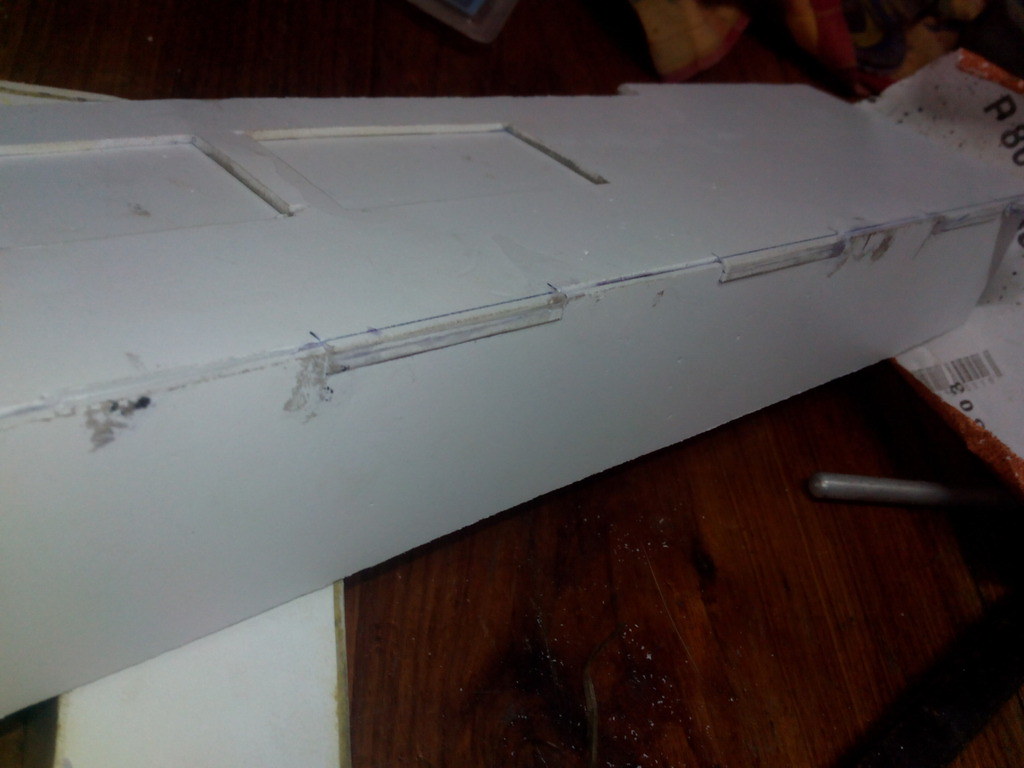
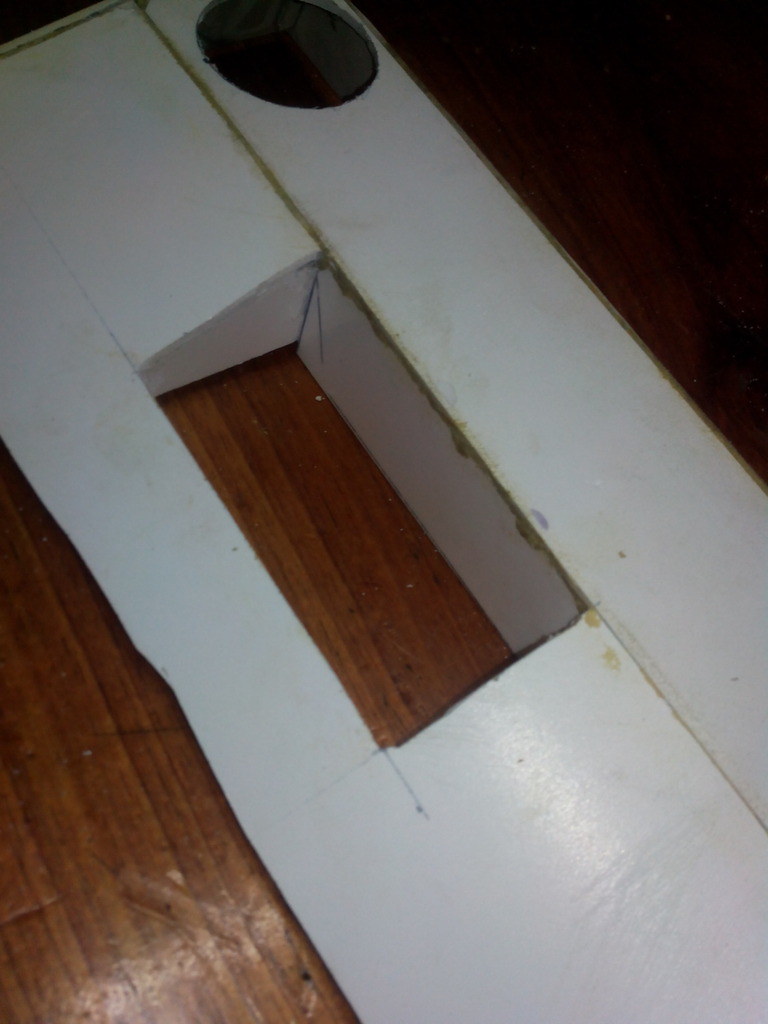
these rear vents:
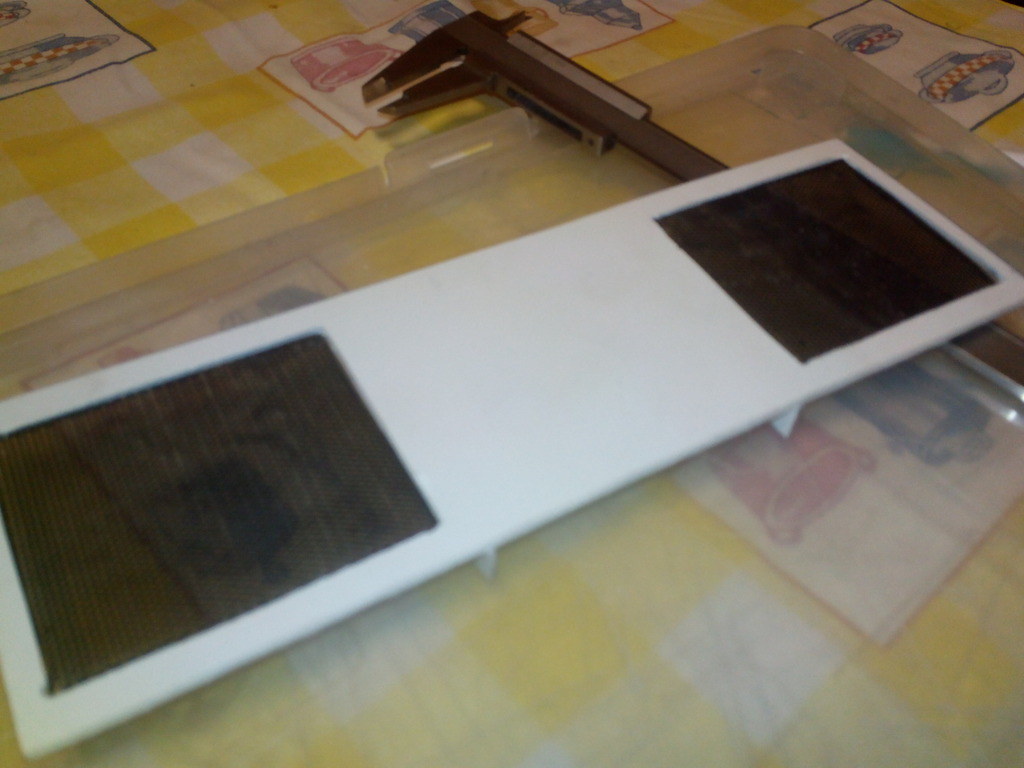
Most of the m548 I've seen online(and the ones on our national army) have canvas top but i found that are hardtop variants and knew right away that's the best option:
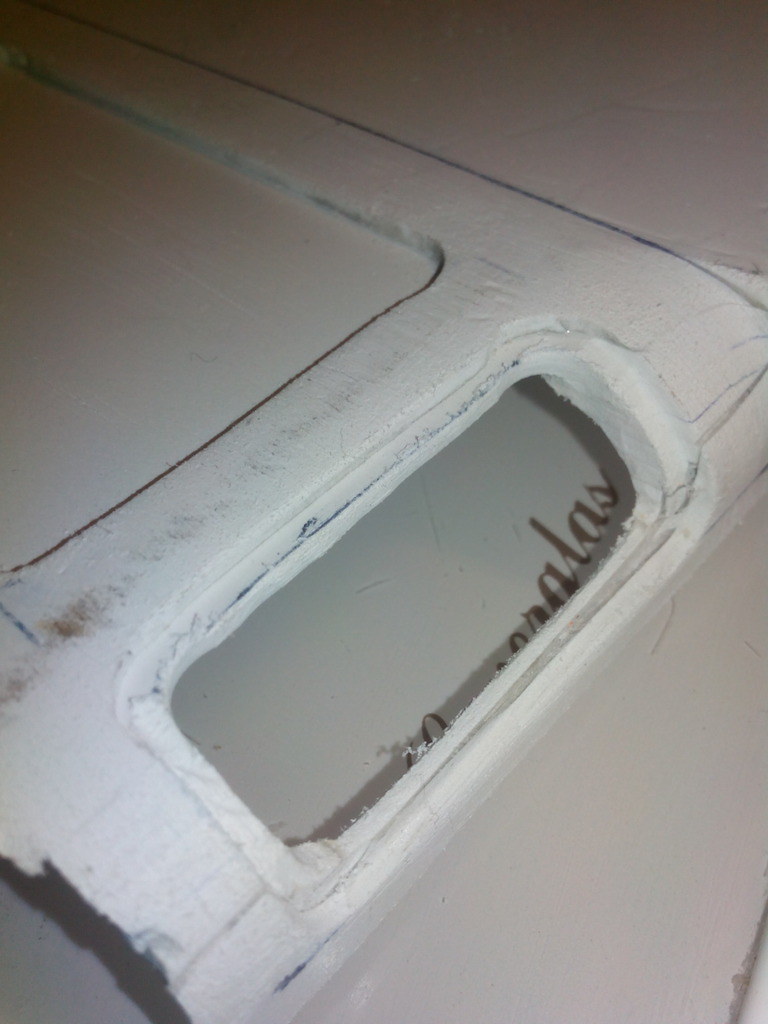
So, stacked a couple of layers of pvc and tried to do the round corner windows


Added the side windows
these rear vents:
Most of the m548 I've seen online(and the ones on our national army) have canvas top but i found that are hardtop variants and knew right away that's the best option:
So, stacked a couple of layers of pvc and tried to do the round corner windows
07-25-2022, 10:46 AM
#3
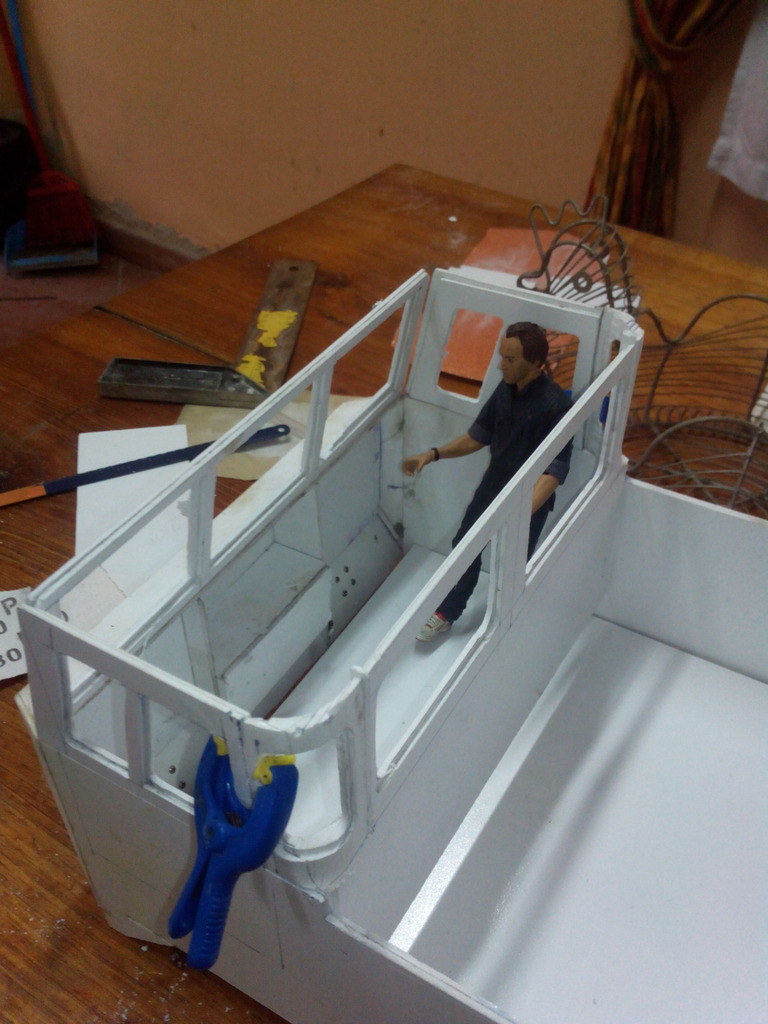
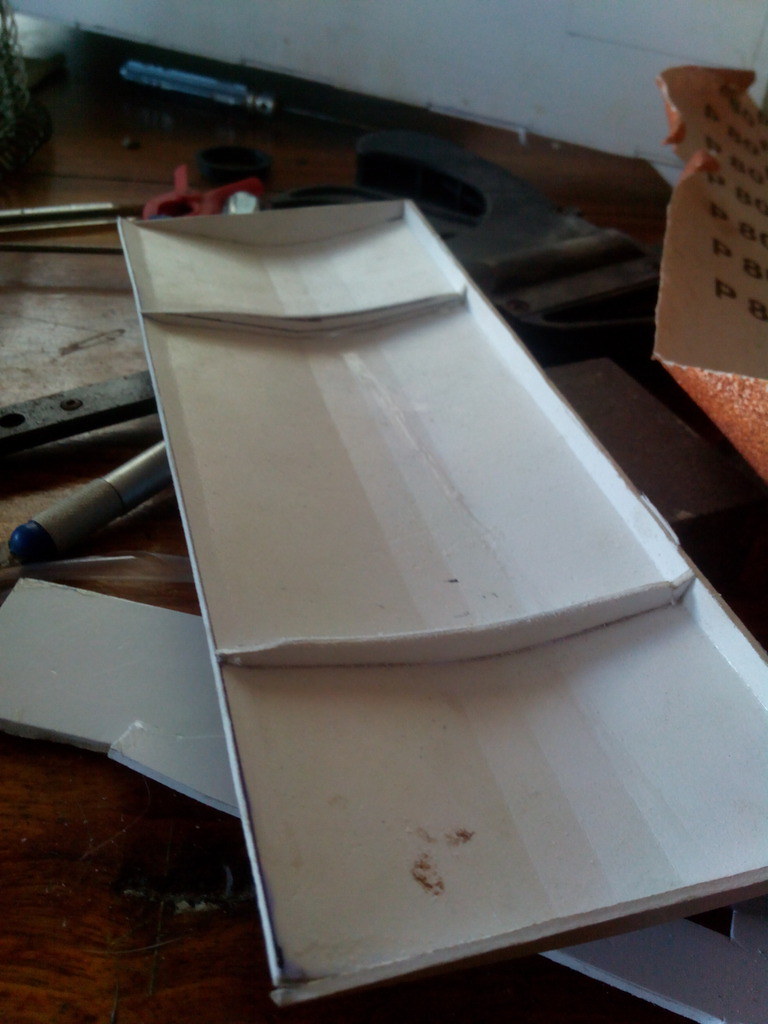
Took care of the passenger door. Driver's one was already made a couple days
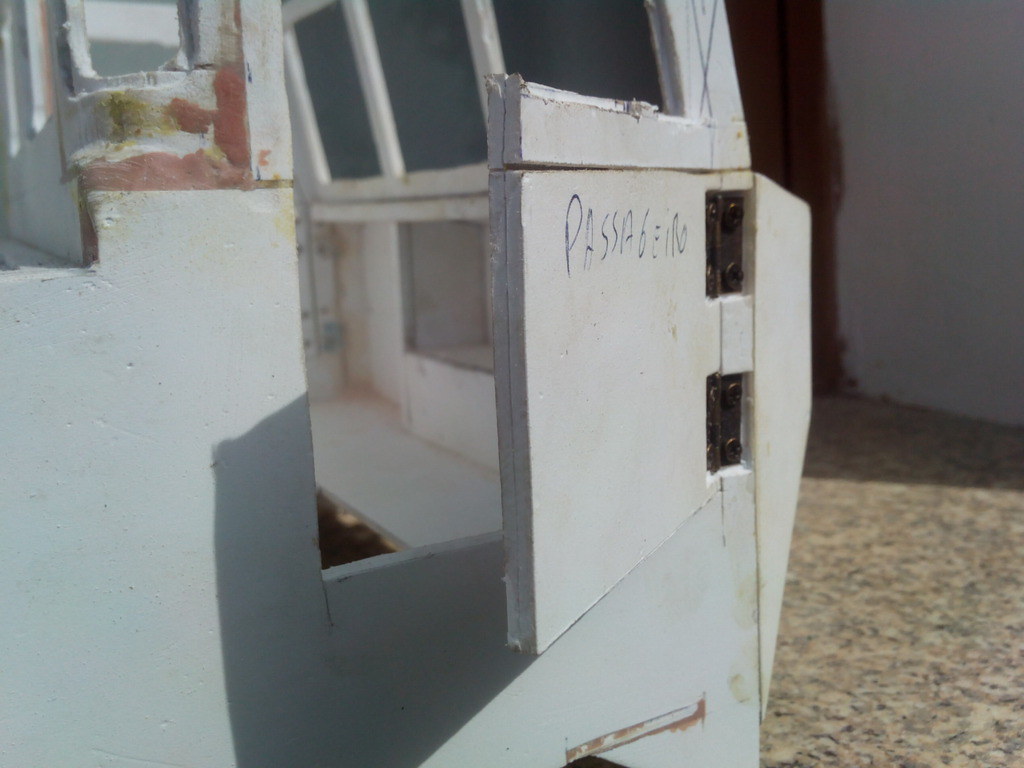
I wasn't planning on opening doors but someone ( ) convinced to do them and being honest,looks better and helps with the interior
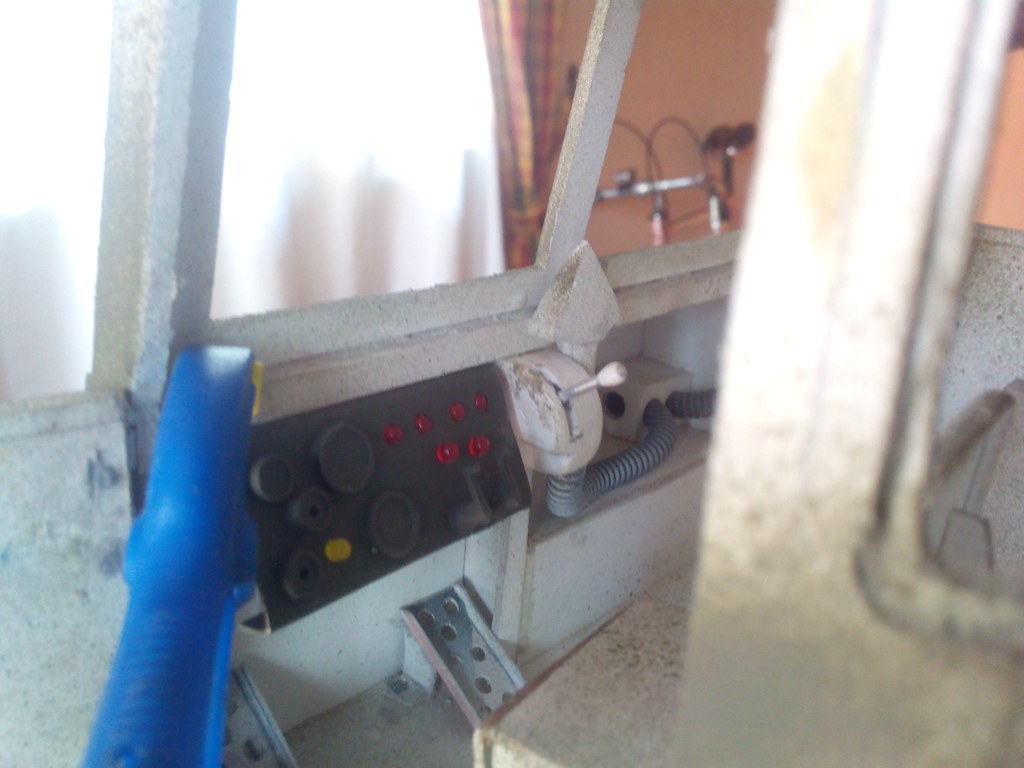
Next, I progress on the "dash",the real one it's barebones,military style

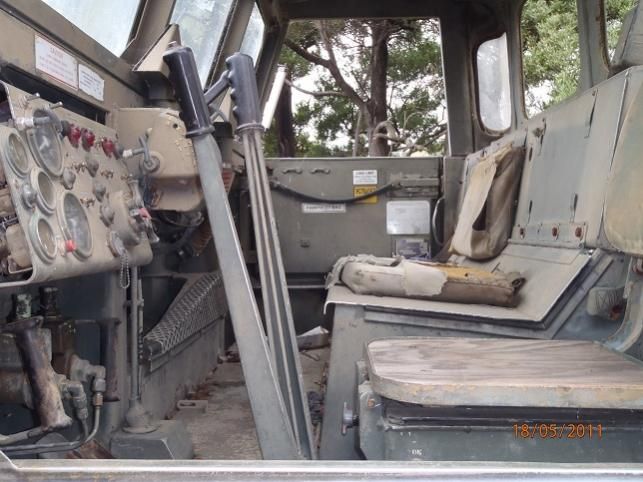
Mine it's not 100% accurate but after paint and details, I think it will look good enough
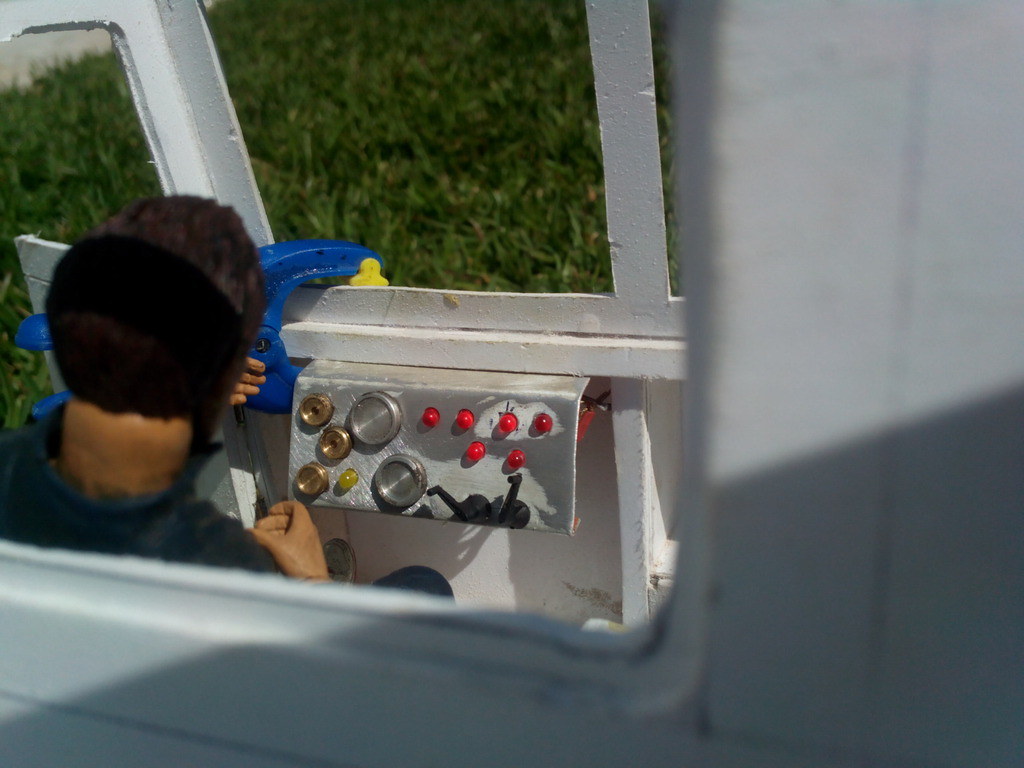
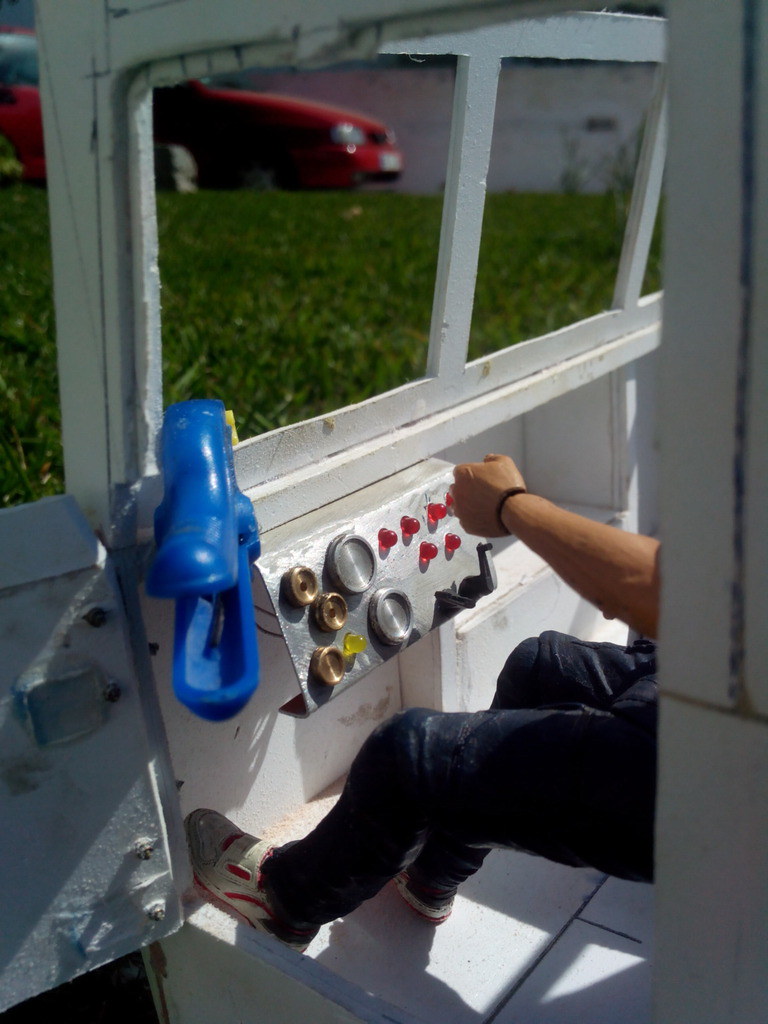
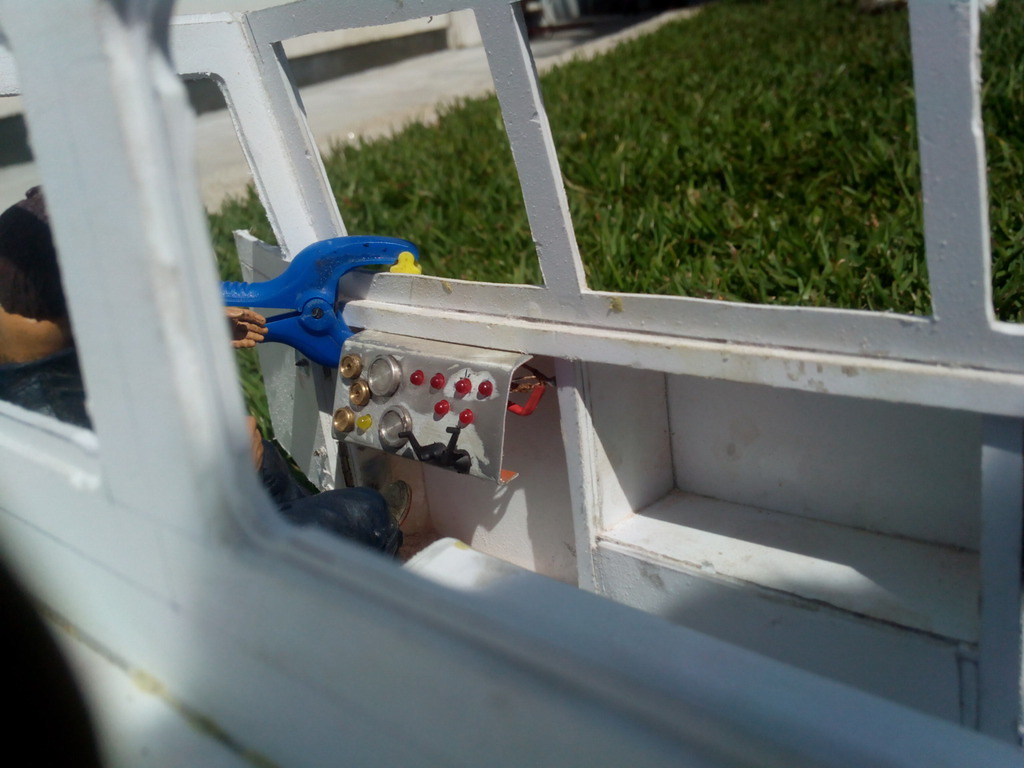
The dials extend to the other side of the sheet,will have wires behind to simulate the connections and only the tip of the LEDs will be showing
Keep tuned, this project will no be abandoned...
I wasn't planning on opening doors but someone (
) convinced to do them and being honest,looks better and helps with the interiorNext, I progress on the "dash",the real one it's barebones,military style
Mine it's not 100% accurate but after paint and details, I think it will look good enough
The dials extend to the other side of the sheet,will have wires behind to simulate the connections and only the tip of the LEDs will be showing
Keep tuned, this project will no be abandoned...
07-26-2022, 03:46 AM
#4
Tech Regular
Nice project
07-26-2022, 06:32 AM
#5
Looks like a really fun project. You�ll have to post the finished product.
07-27-2022, 11:33 AM
#6
Thanks!
Thanks! I'll post the struggles ...errr....the progress
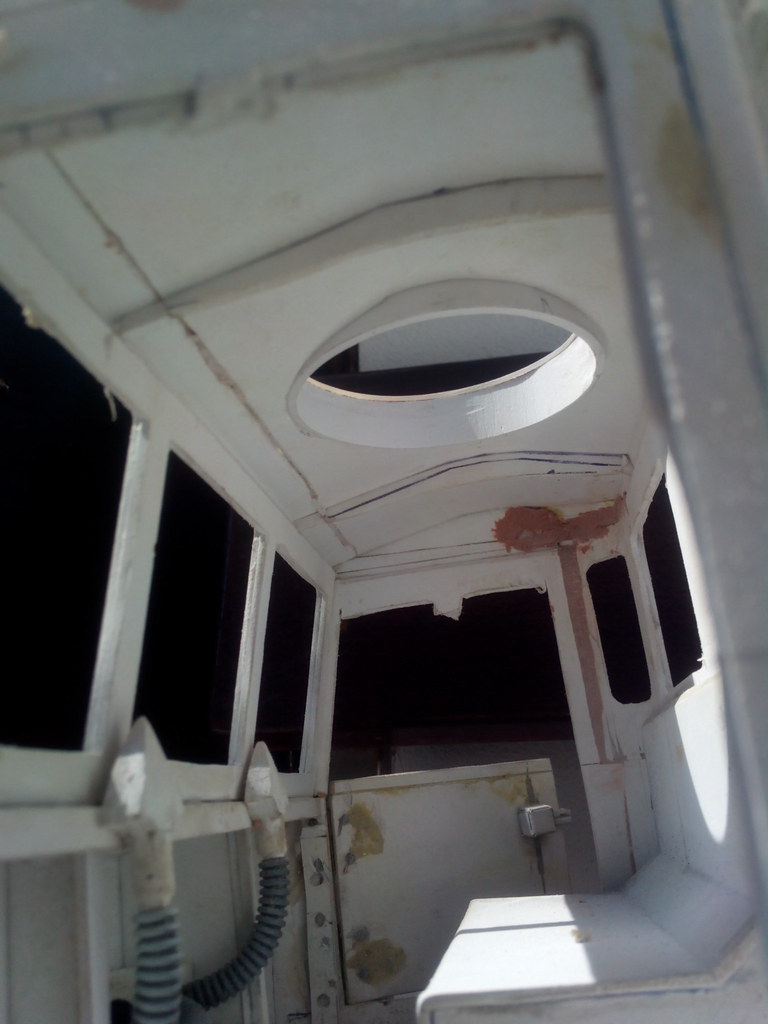
Tackled the roof:
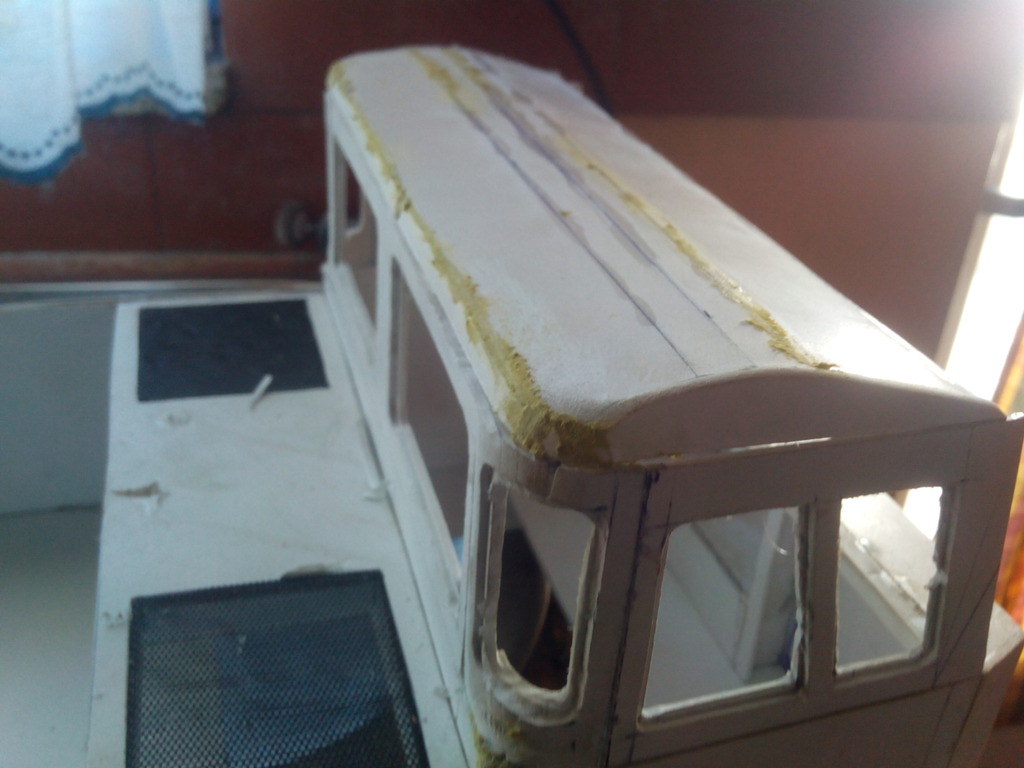
It's far from finished but I need to sort out the interior before gluing the roof and give the final touches
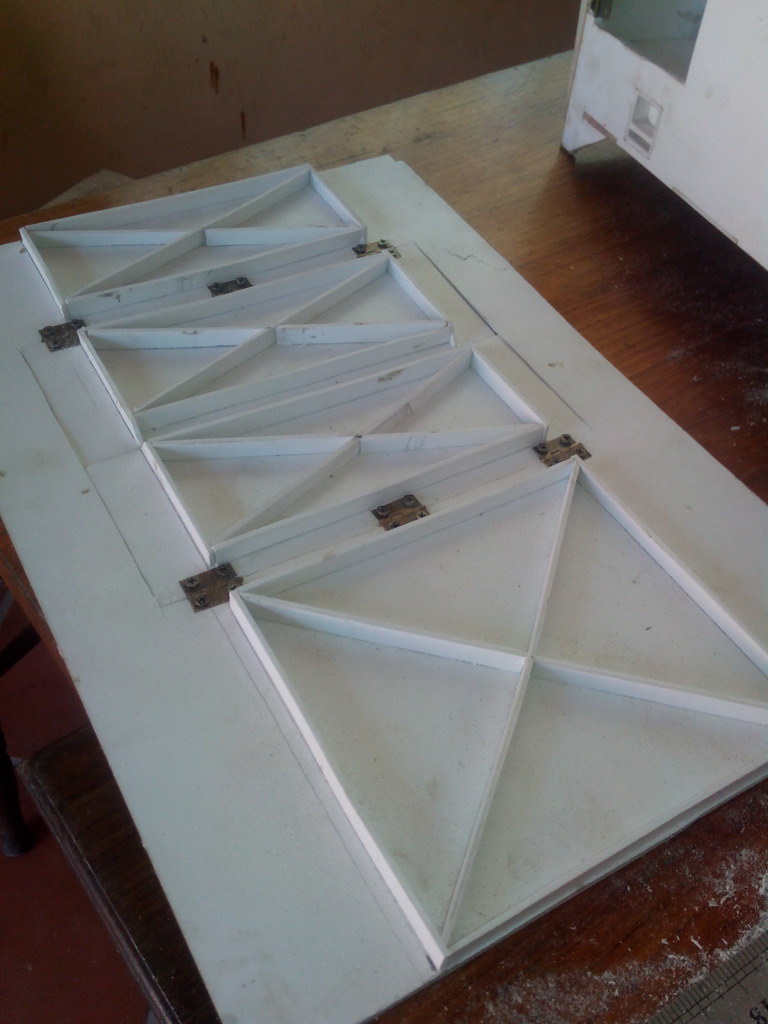
Start of the rear tailgate
The 1:1:


I assumed that the tailgate can be opened to both sides so I went with it
Basic shape, 2 layers of PVC and one of the hinges:

Closed:

One way....

...or another
Tackled the roof:
It's far from finished but I need to sort out the interior before gluing the roof and give the final touches
Start of the rear tailgate
The 1:1:
I assumed that the tailgate can be opened to both sides so I went with it
Basic shape, 2 layers of PVC and one of the hinges:
Closed:
One way....
...or another
07-28-2022, 11:58 AM
#7
Did a small change on the tailgate. Went with the inicial idea of using 2 long rods with dual function depending on which side the tailgate opens

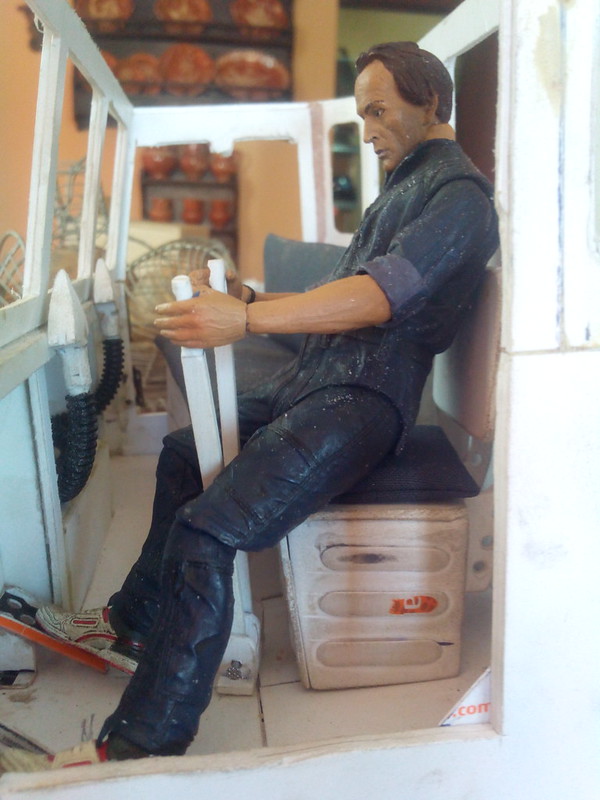
Also took the chance to do something more on the interior


Also added the steps:
I sanded them better after these photos
Sometimes the photos trick the size of things because there's no reference points. So this is....
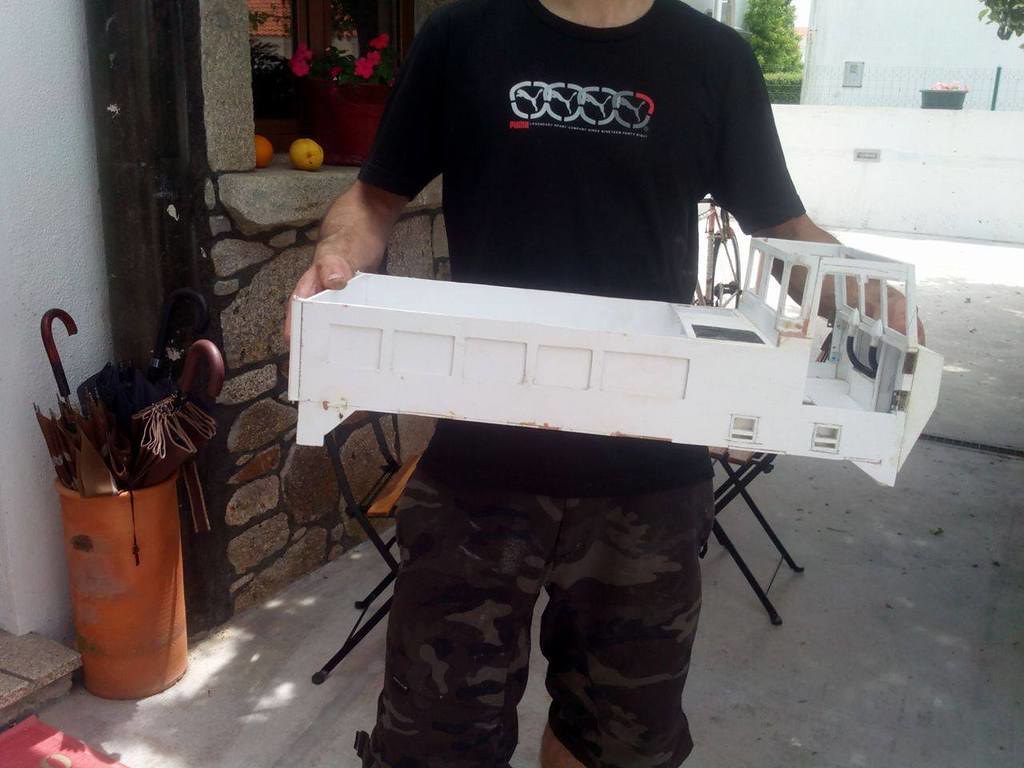
...the truck's actual size
Also took the chance to do something more on the interior
Also added the steps:
I sanded them better after these photos
Sometimes the photos trick the size of things because there's no reference points. So this is....
...the truck's actual size
07-29-2022, 04:55 PM
#8
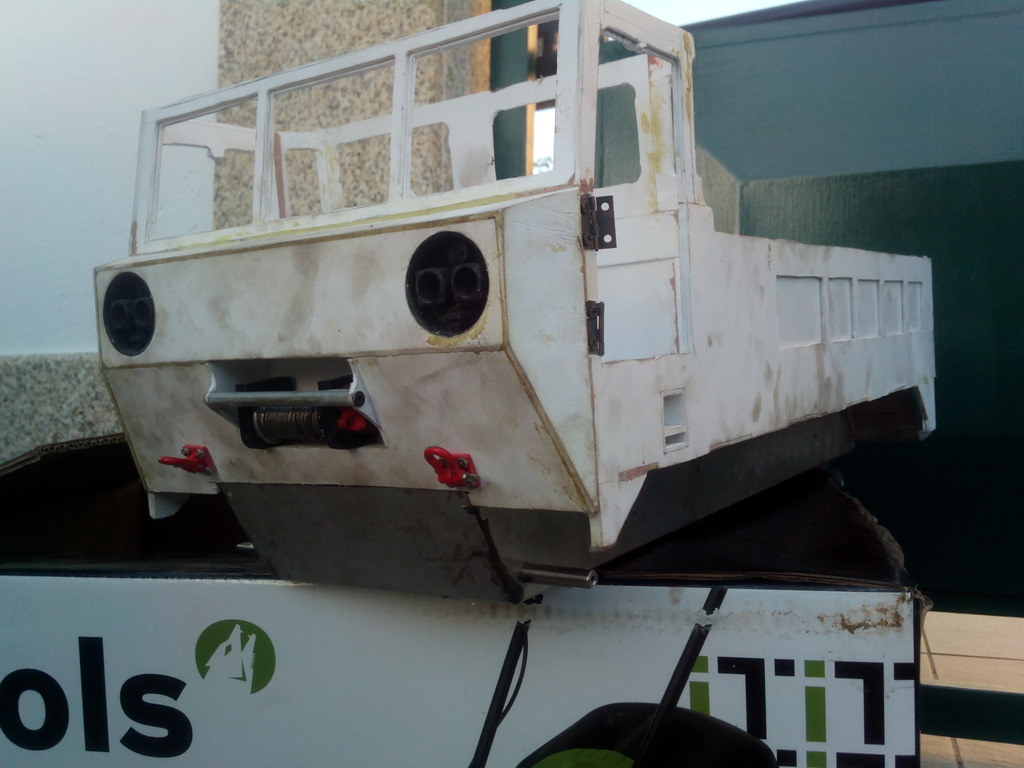
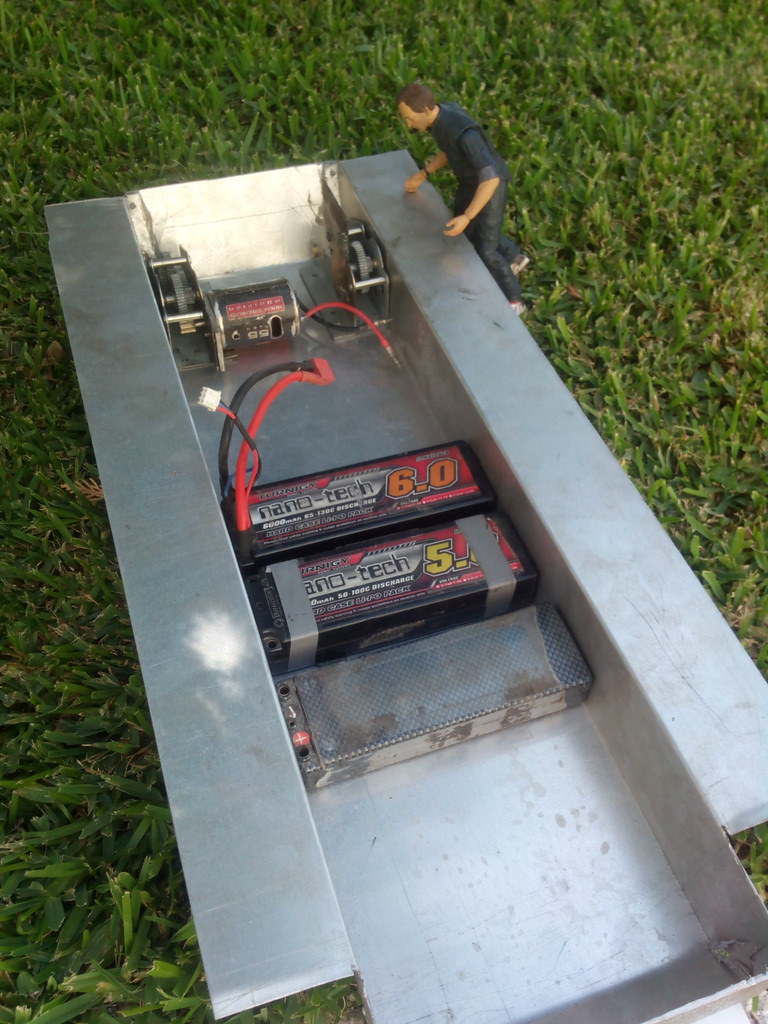
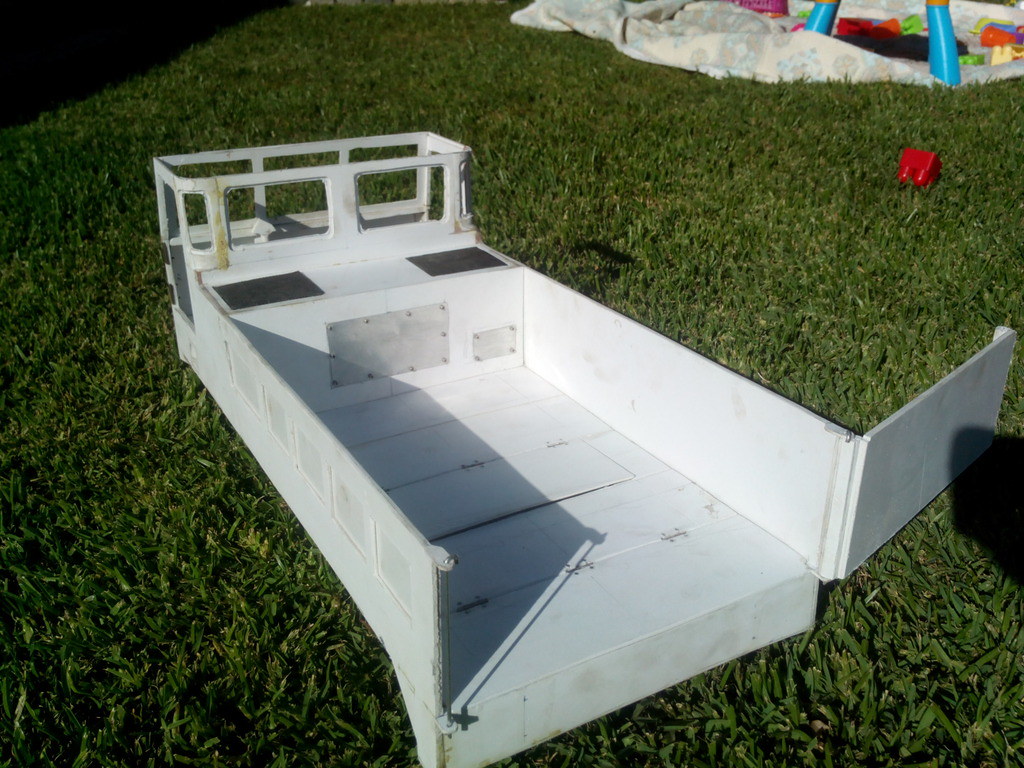
By the way, this M548 is 58cm long and 25cm wide
Had the chance to make the hull. Had to bent a 0.8mm aluminium sheet and now with the angle grinder I'm making the last bends. Rivets to hold the corners and epoxy to reinforce
The truck it's very dirty because of handling it at the shop to fit the hull
Front:
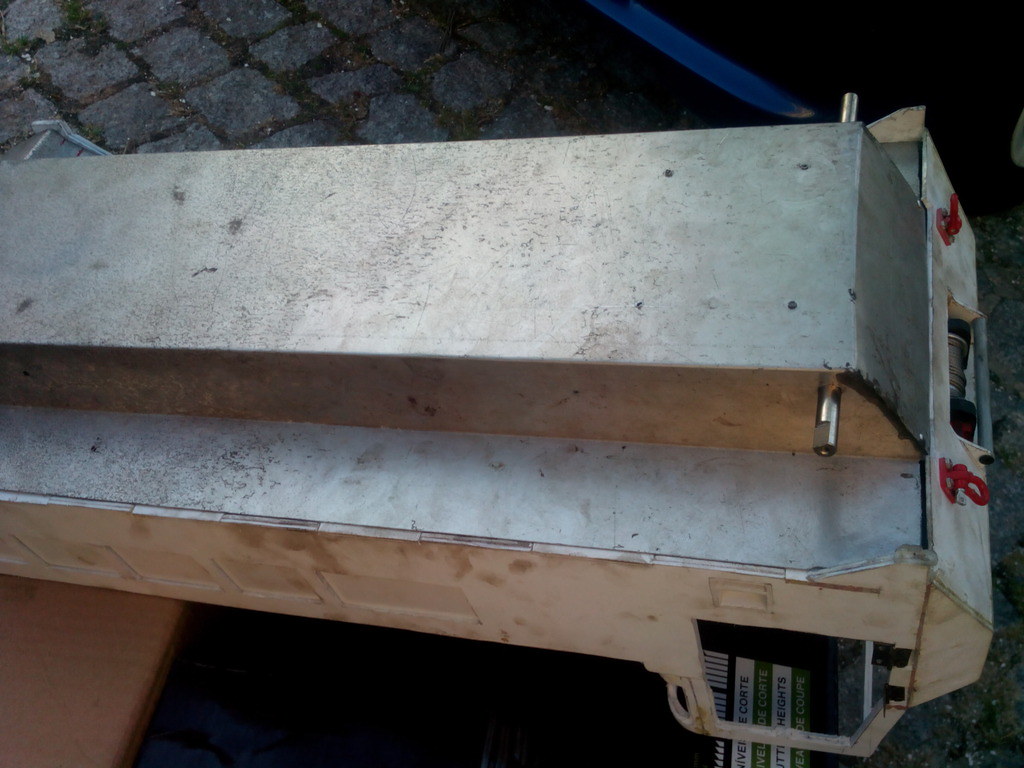
Bottom:
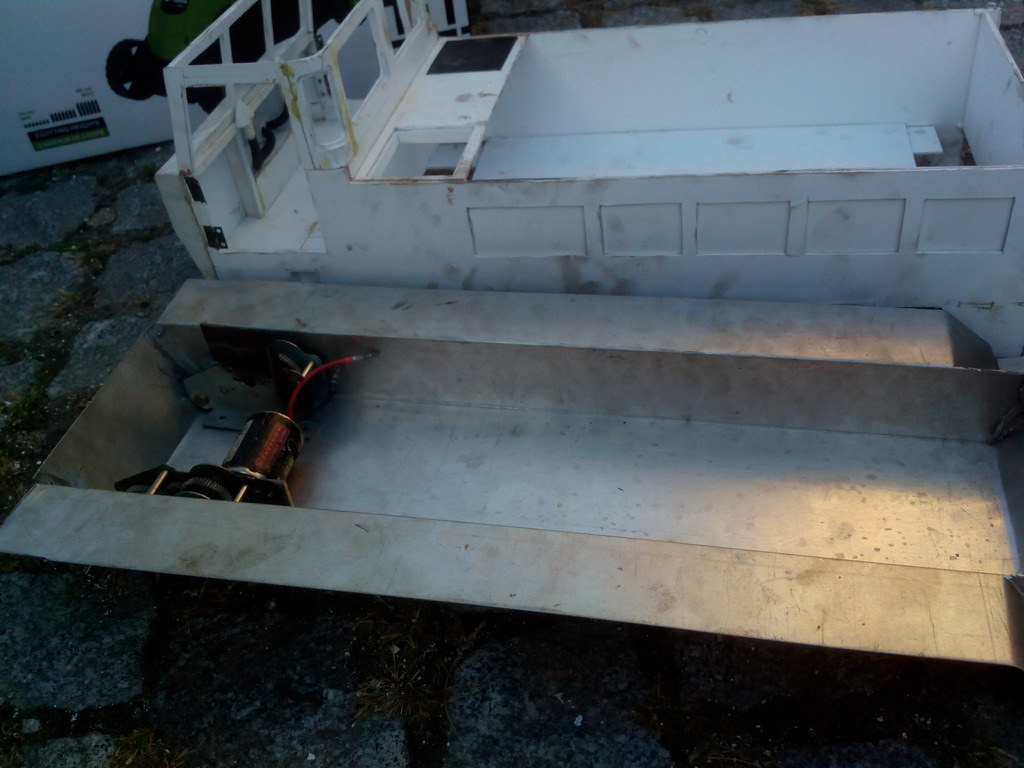
Gearboxes in place:
Not having the "hull" done, delayed progressing on the body. With the hull, everything is figured out.
Another view of it,to show better how much space it has for transmission and eletronic
mAh for days....(actually, I'll use only 1 battery, 2 if the stress it's too much)
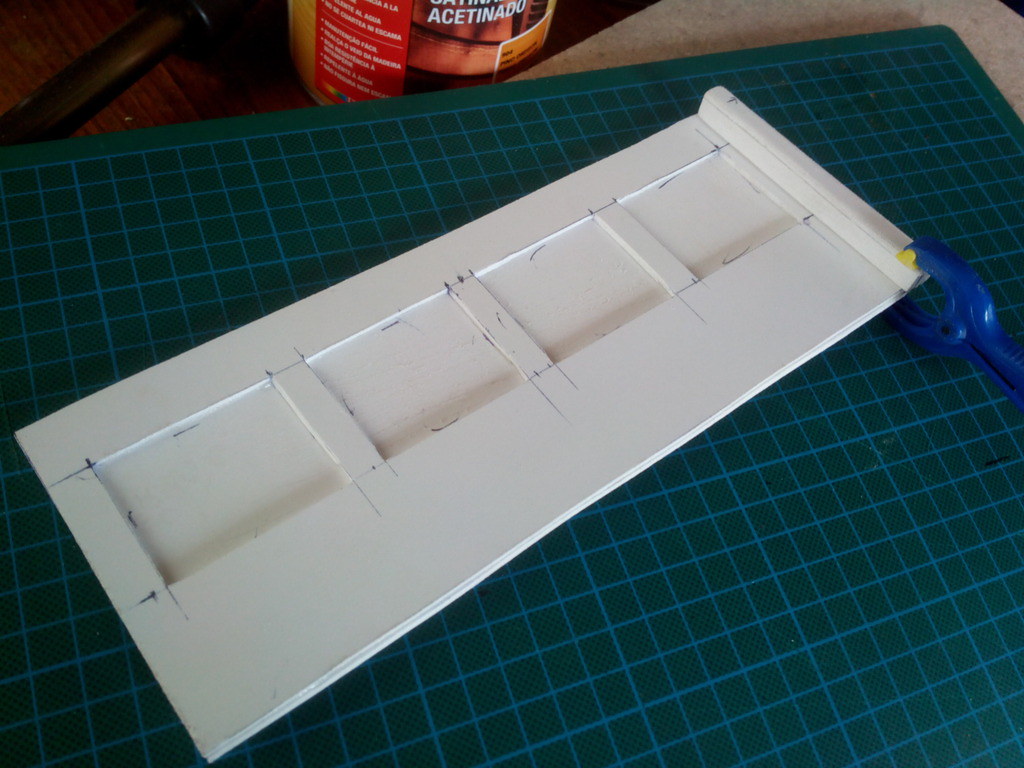
Was planing to do these "fenders" as part of the hull but they were looking bad:
This section was also to be in aluminium but because the hull is removable, there will be gaps showing, so I enclosed it in PVC. Now it's easier to add details
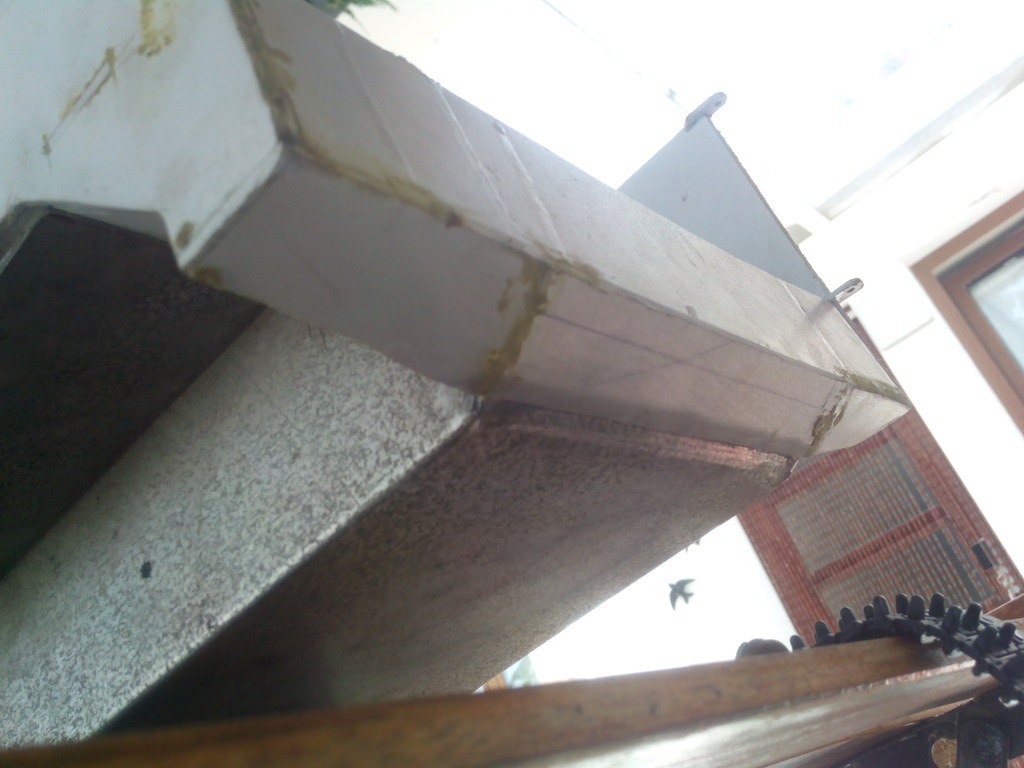
Then, made this bulkhead(?) with service panels for the engine
Had the chance to make the hull. Had to bent a 0.8mm aluminium sheet and now with the angle grinder I'm making the last bends. Rivets to hold the corners and epoxy to reinforce
The truck it's very dirty because of handling it at the shop to fit the hull
Front:
Bottom:
Gearboxes in place:
Not having the "hull" done, delayed progressing on the body. With the hull, everything is figured out.
Another view of it,to show better how much space it has for transmission and eletronic
mAh for days....(actually, I'll use only 1 battery, 2 if the stress it's too much)
Was planing to do these "fenders" as part of the hull but they were looking bad:
This section was also to be in aluminium but because the hull is removable, there will be gaps showing, so I enclosed it in PVC. Now it's easier to add details
Then, made this bulkhead(?) with service panels for the engine
07-31-2022, 11:11 AM
#9
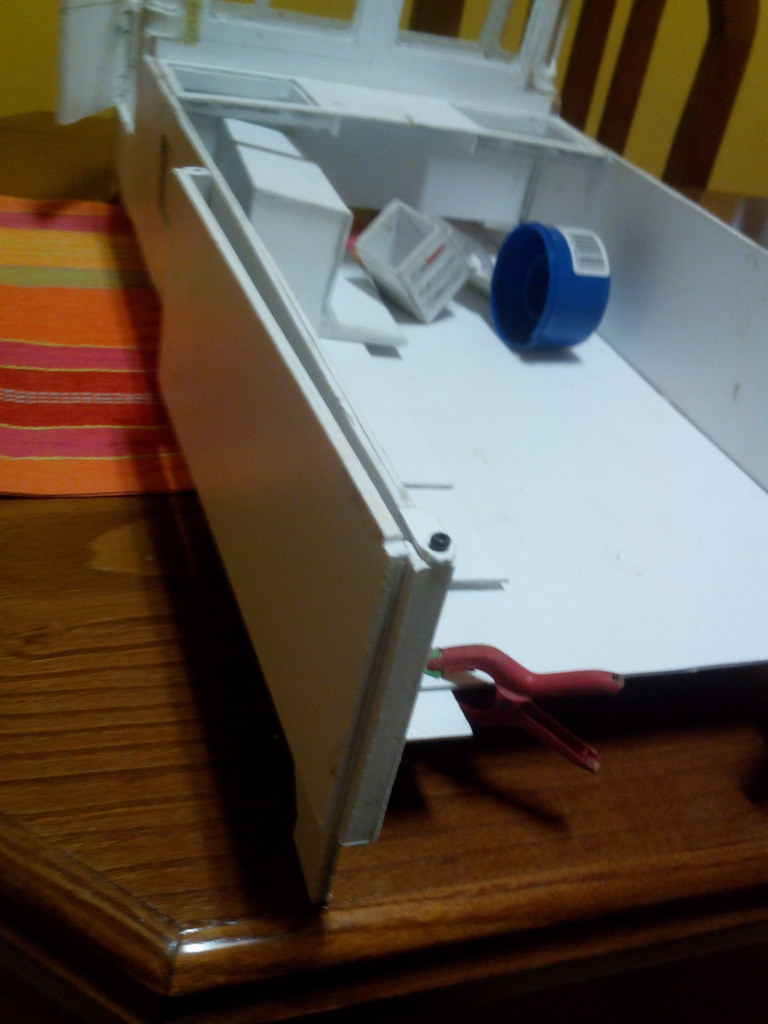
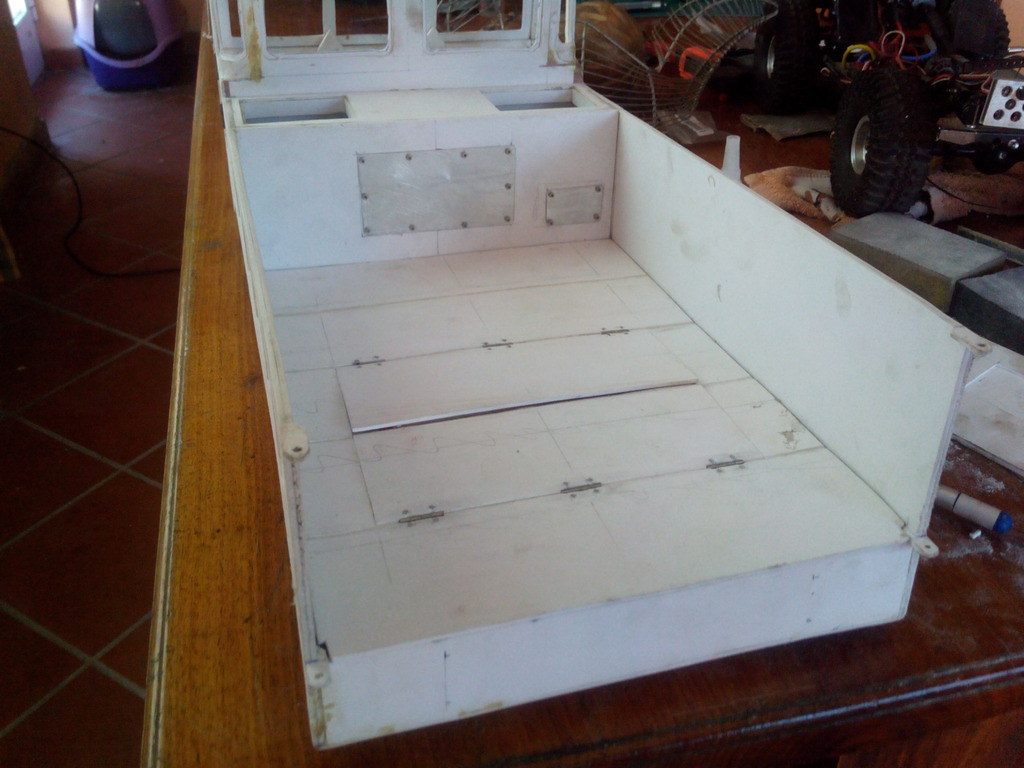
The most visible change was the floor of the cargo bay. Had the piece cut from the beginning and now it found it's place
First, some reinforcements :
Then, a kind of hatch to change batteries:

Maybe some magnets to close properly:
Tailgate on:
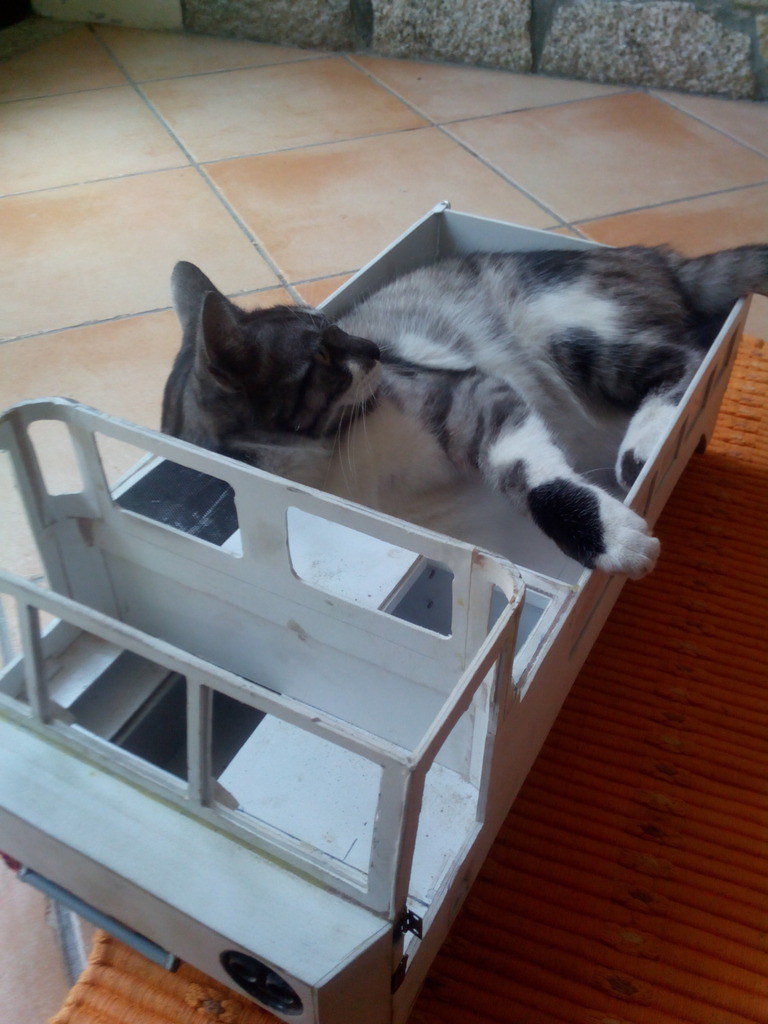
Well, I can't leave the truck unattended...Seriously,cat?
Another was figuring out how to close the doors. Seems to work
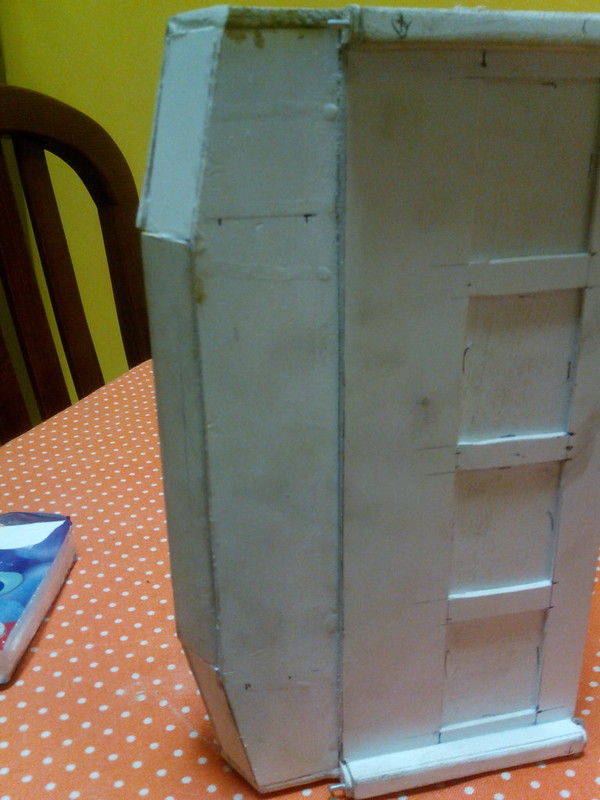
I wasn't liking the squareness of the rear. Looking at more photos, realize that was a mistake. Redone it with angled sides:
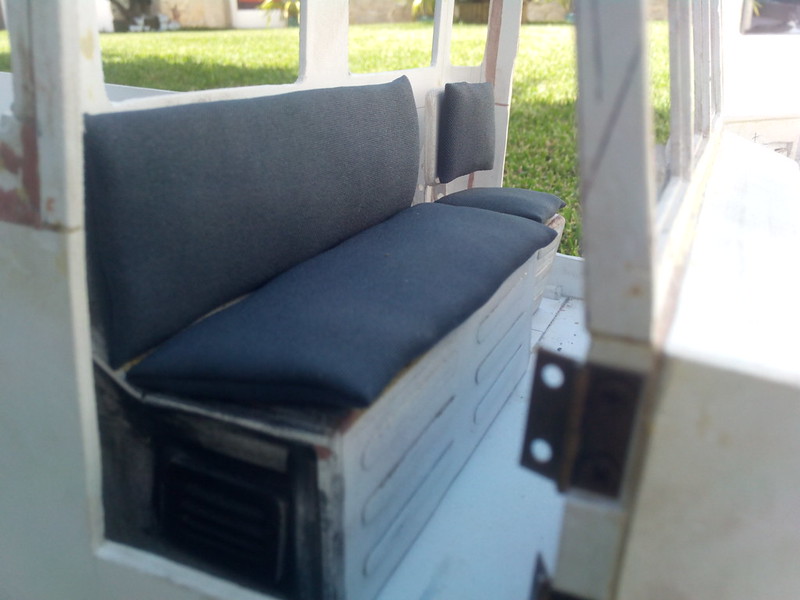
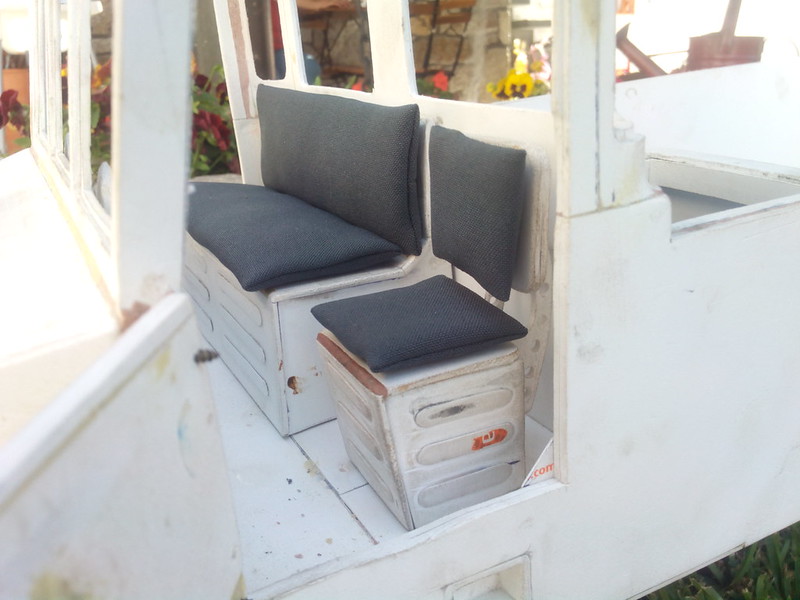
Got the cushions for the seats:
The footrests:
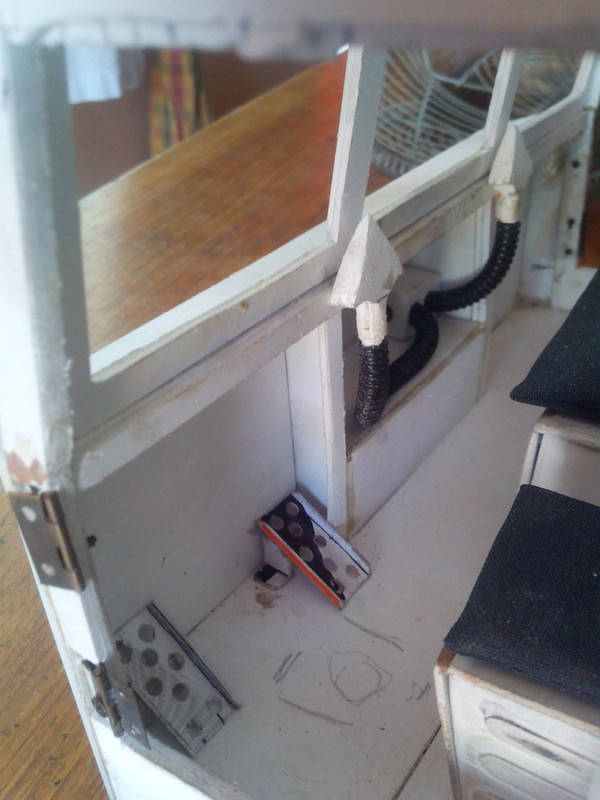
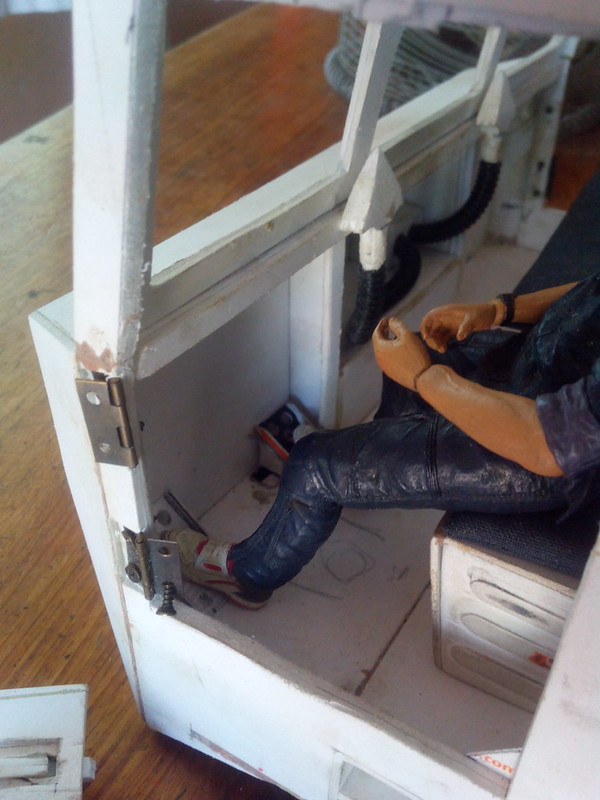
And the levers to steer:
Tried running a gearbox on the hull. The gearbox is loud and the metal hull amplify that. Guess I'm not needing a sound generator
First, some reinforcements :
Then, a kind of hatch to change batteries:
Maybe some magnets to close properly:
Tailgate on:
Well, I can't leave the truck unattended...Seriously,cat?
Another was figuring out how to close the doors. Seems to work
I wasn't liking the squareness of the rear. Looking at more photos, realize that was a mistake. Redone it with angled sides:
Got the cushions for the seats:
The footrests:
And the levers to steer:
Tried running a gearbox on the hull. The gearbox is loud and the metal hull amplify that. Guess I'm not needing a sound generator
08-01-2022, 11:32 AM
#10
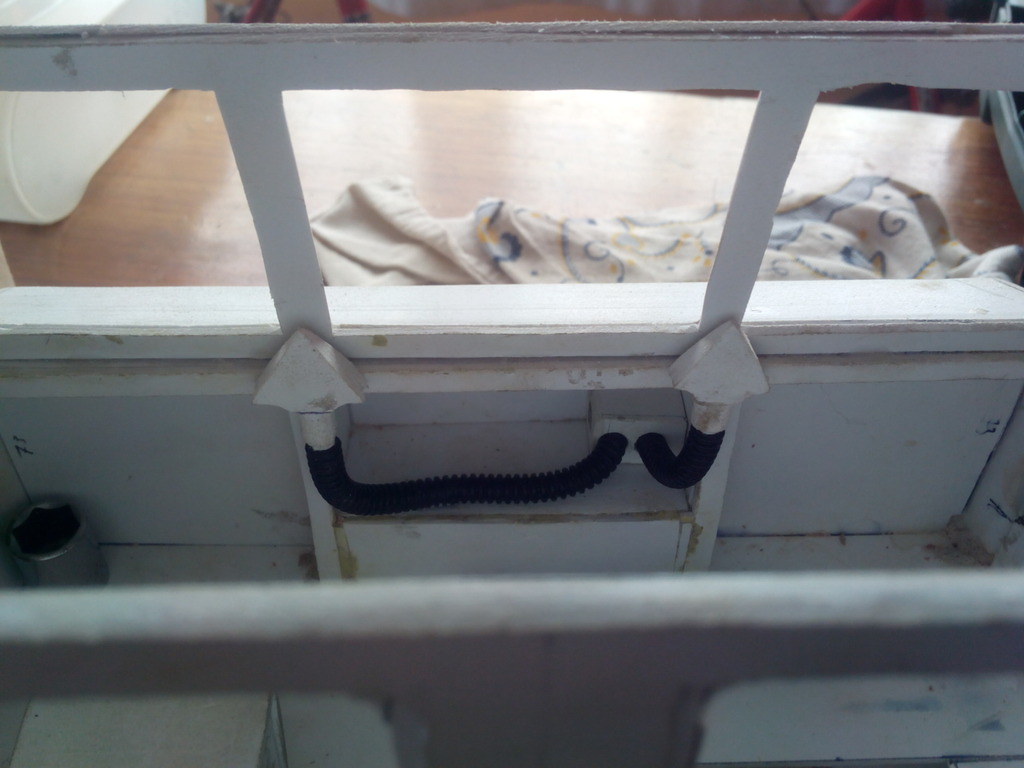
I needed an idea for these "hooks" (?):

They are all over the cab,inside also. My logical way to do them was in metal but i needed a bunch. Already did ones for a 1/6 willys but were bigger and only 4 of them..
So I tried to model and 3d print them . Are a bit small but the printer handled well
Are a bit rough but sanding and paint will improve


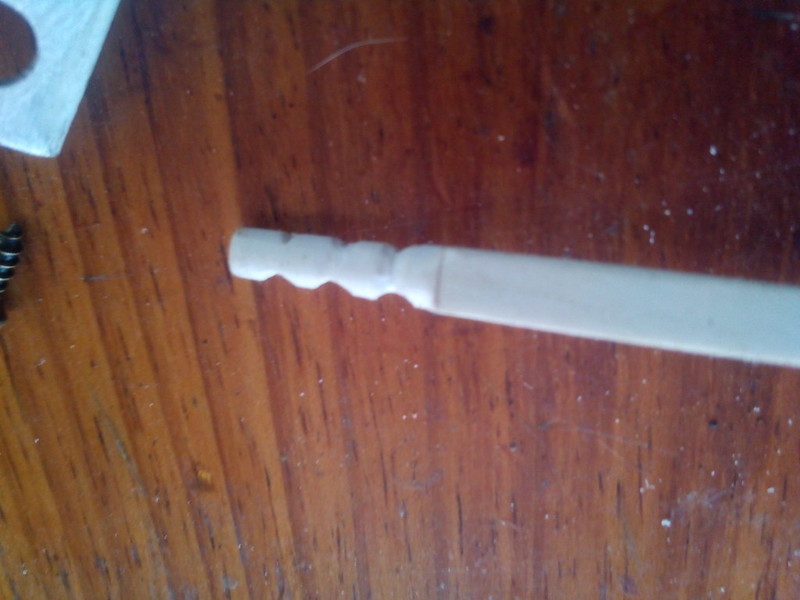
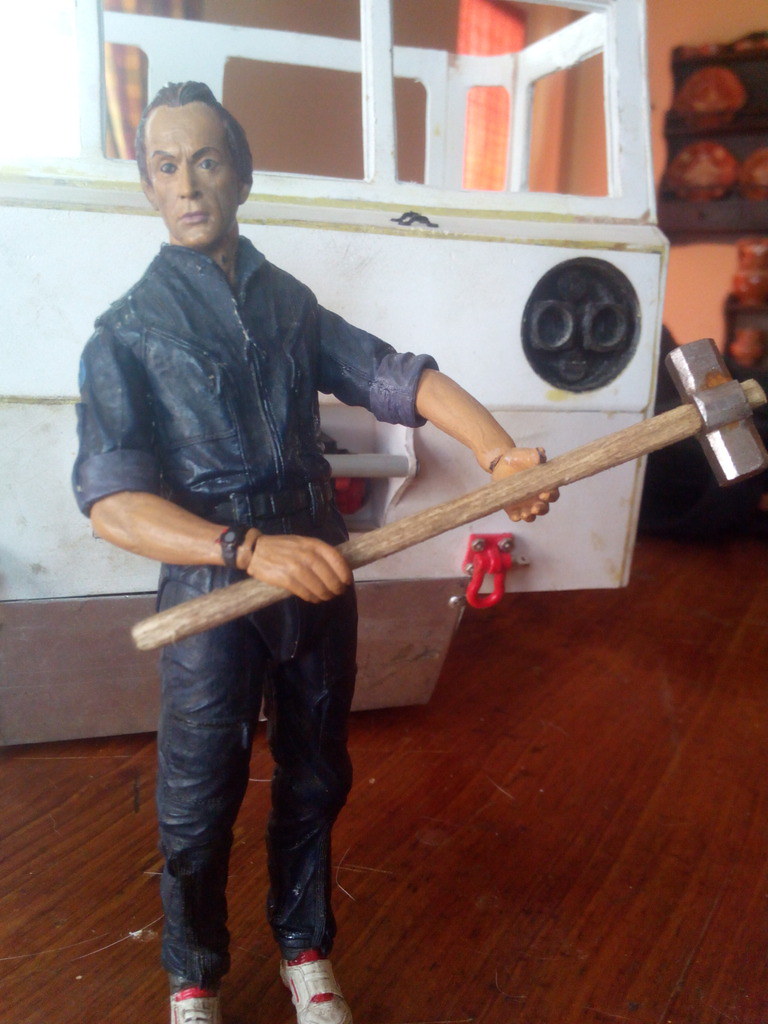
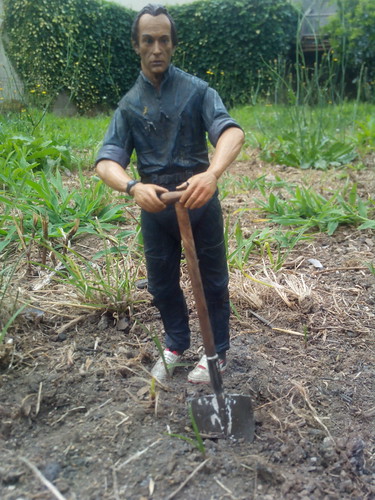
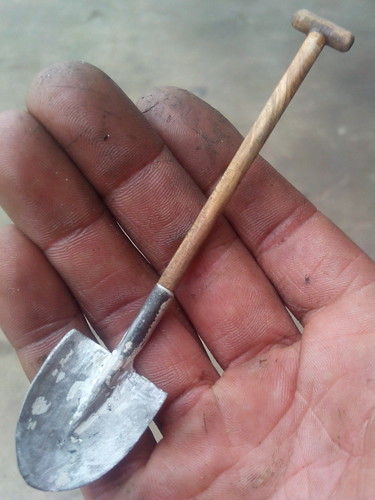
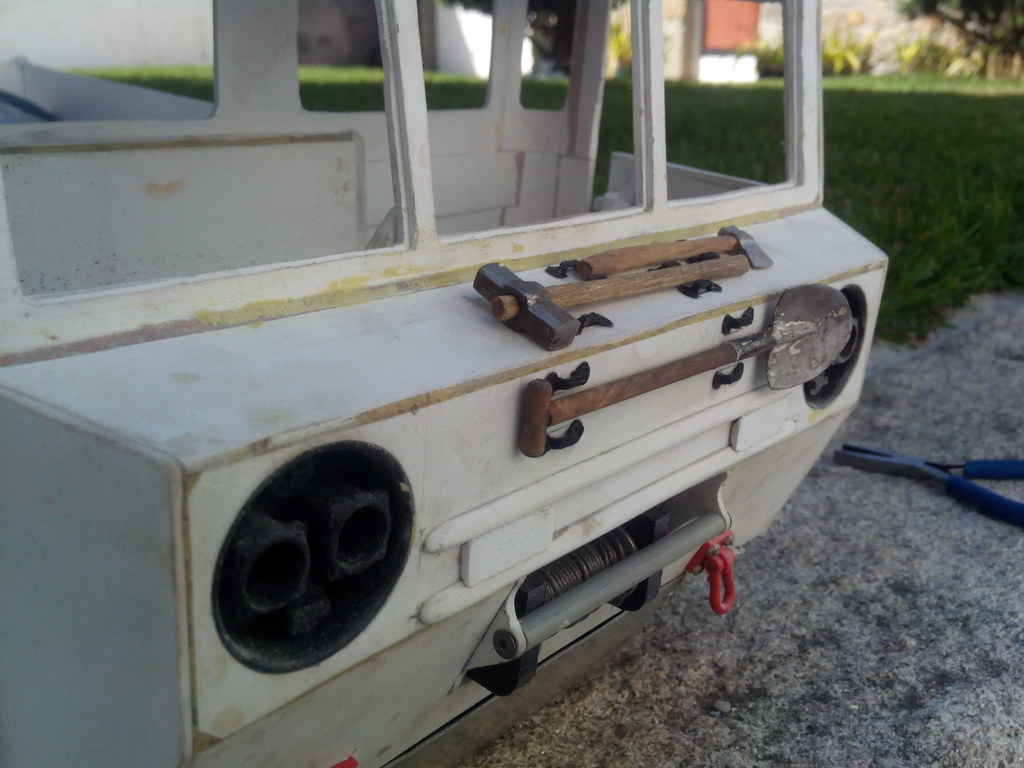
M548 carry a set of tools on the front. Sledgehammer,shovel, picaxe and axe
Started with the sledgehammer:

I think the shovel exceed my skill level...let's see
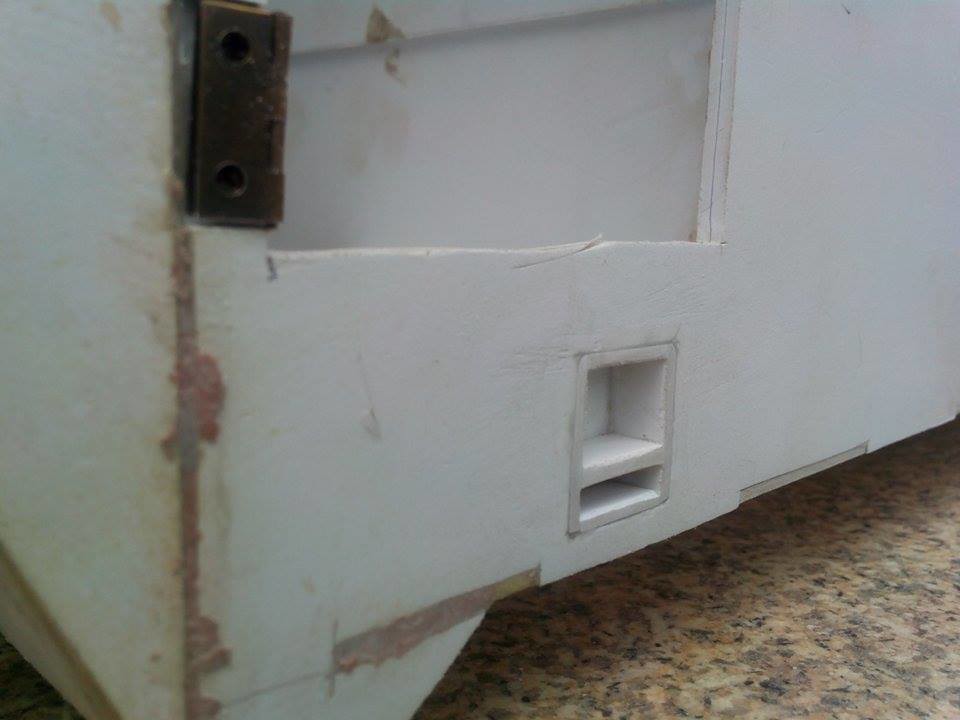
Also worked on the rear section, that small door to the cargo area
the paint will do wonders
They are all over the cab,inside also. My logical way to do them was in metal but i needed a bunch. Already did ones for a 1/6 willys but were bigger and only 4 of them..
So I tried to model and 3d print them . Are a bit small but the printer handled well
Are a bit rough but sanding and paint will improve
M548 carry a set of tools on the front. Sledgehammer,shovel, picaxe and axe
Started with the sledgehammer:
I think the shovel exceed my skill level...let's see
Also worked on the rear section, that small door to the cargo area
the paint will do wonders
08-02-2022, 11:14 AM
#11
Axe done and put to work


glued the roof and did the opening of the hatch
A splash of color to see how it looks

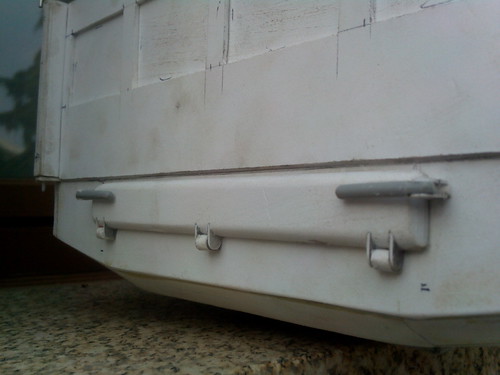
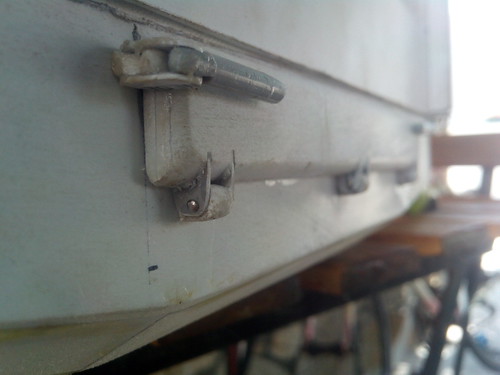
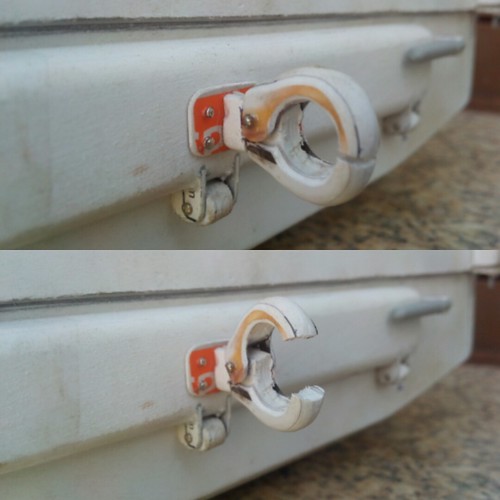
I have the rear lights, but they'll be painted separately. The d-ring shackles were designed by me and printed in one piece but they move freely
also got to take care of those scratches
glued the roof and did the opening of the hatch
A splash of color to see how it looks
I have the rear lights, but they'll be painted separately. The d-ring shackles were designed by me and printed in one piece but they move freely
also got to take care of those scratches
08-03-2022, 04:10 PM
#12
Well, when the windows were cut, didn't notice that the real ones weren't square. Small detail but bothered me ...
So...

Another job was making the hooks for the canvas. Was thinking in buying those tiny hooks for bras but then, i preferred to do only to see how it could look


So...
Another job was making the hooks for the canvas. Was thinking in buying those tiny hooks for bras but then, i preferred to do only to see how it could look
08-04-2022, 10:44 AM
#13
Gear lever:
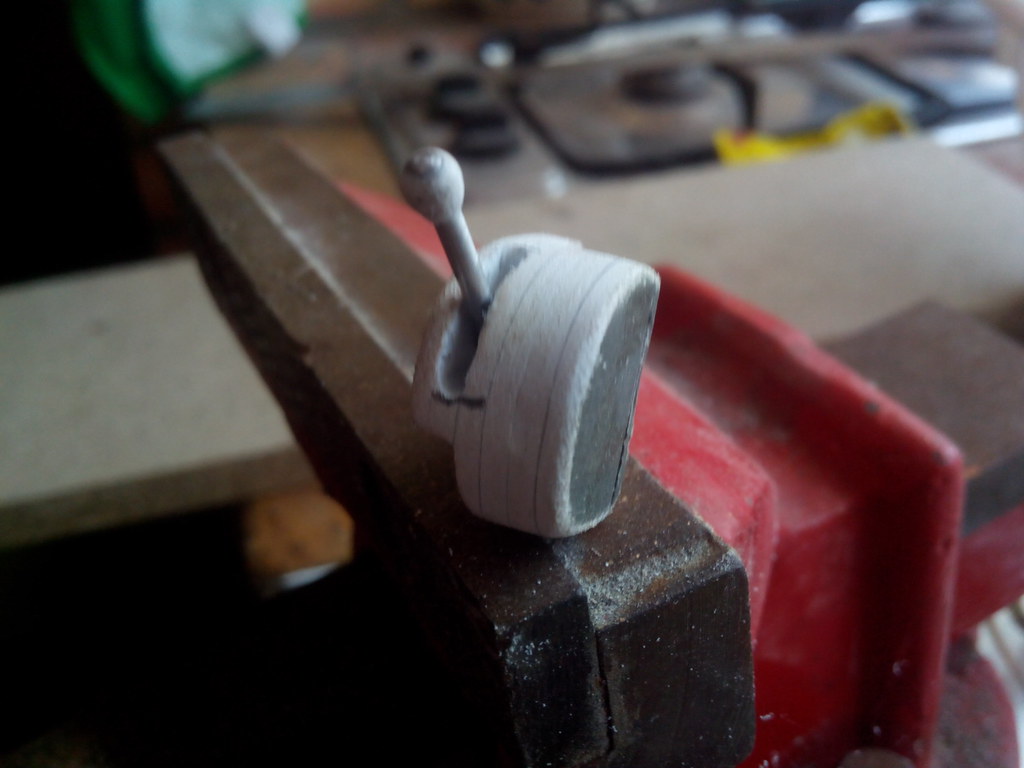
goes next to the dash:

goes next to the dash:
08-05-2022, 10:56 AM
#14
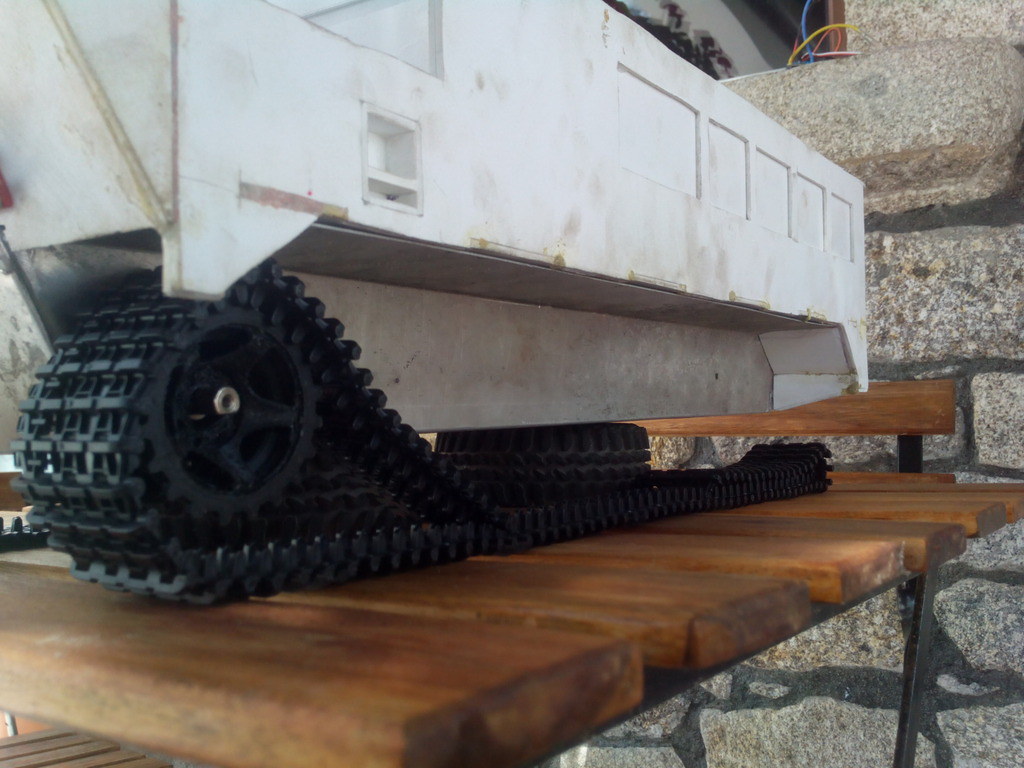
Well,the looks are important but it also has to move...
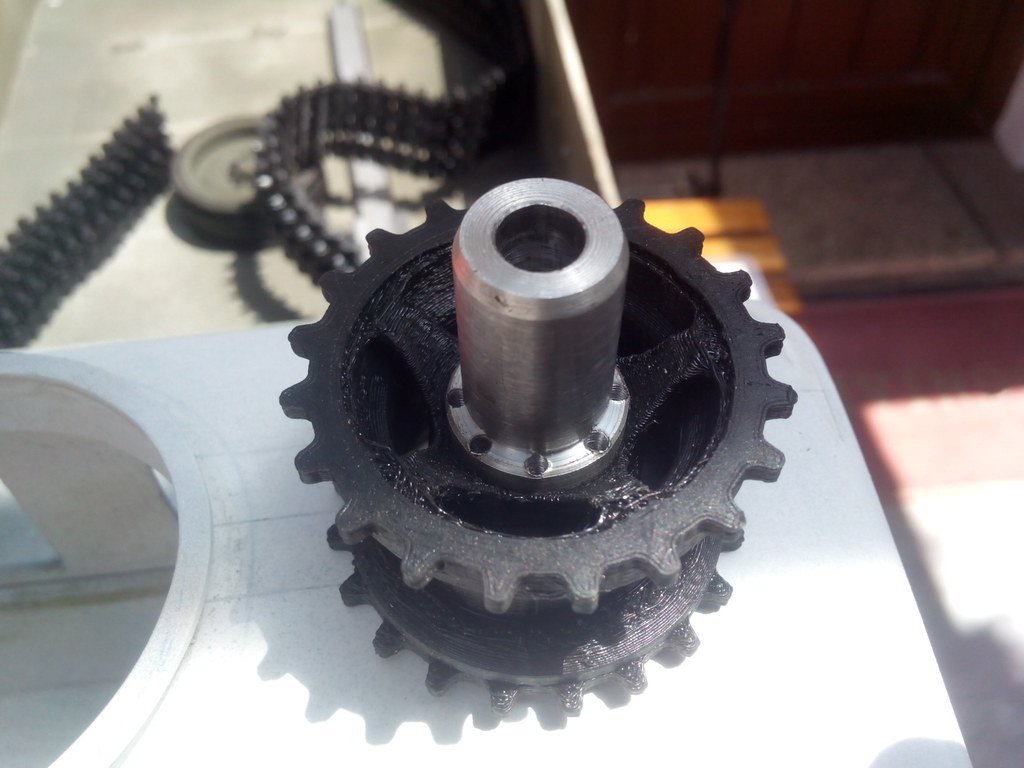
My attempt of replicate the real traction wheels:

made the hubs for the traction wheels:
quick mockup:
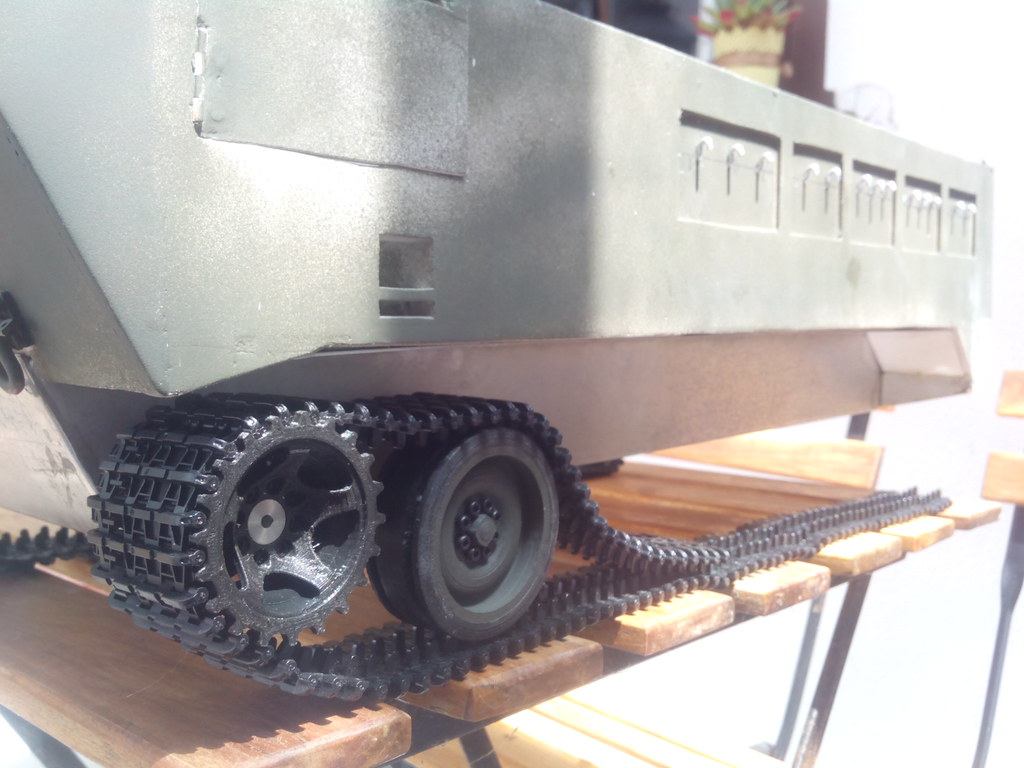
I had the idea of machining the road wheels from aluminium and use rubber around like the 1:1 but it was 2 much trouble with the tracks I've got
Speaking of tracks, I know they're are not similar to the 1:1 but they were the best cheap ones I've found
My attempt of replicate the real traction wheels:
made the hubs for the traction wheels:
quick mockup:
I had the idea of machining the road wheels from aluminium and use rubber around like the 1:1 but it was 2 much trouble with the tracks I've got
Speaking of tracks, I know they're are not similar to the 1:1 but they were the best cheap ones I've found
08-06-2022, 05:19 AM
#15
how about this road wheel?
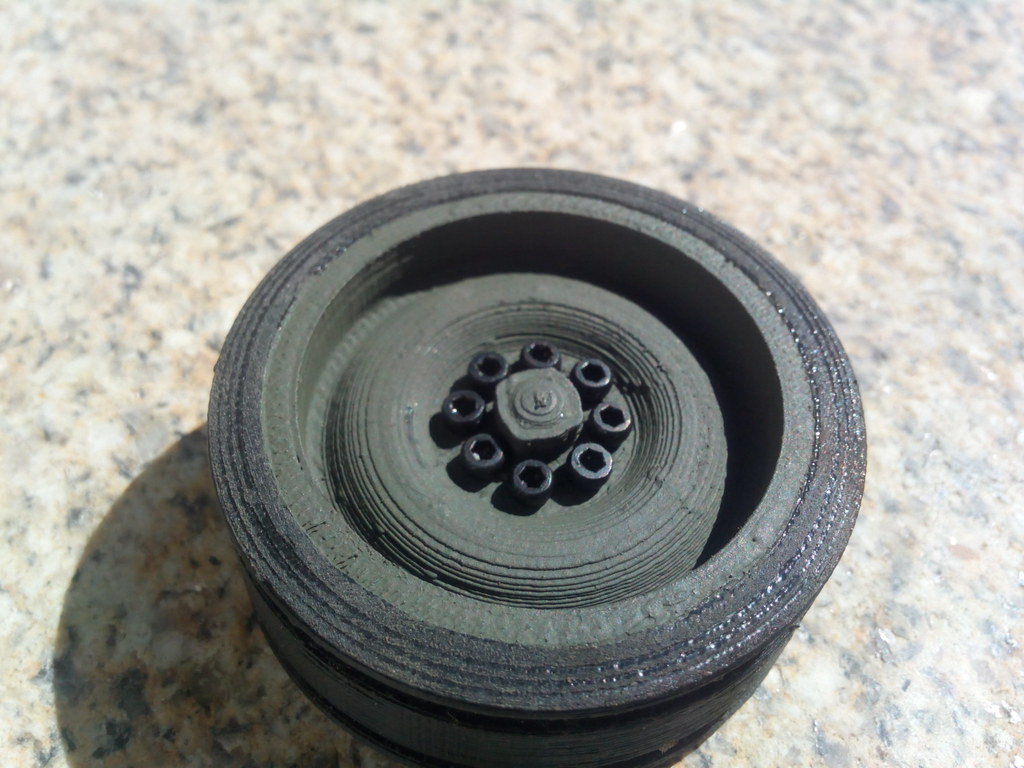
And this:
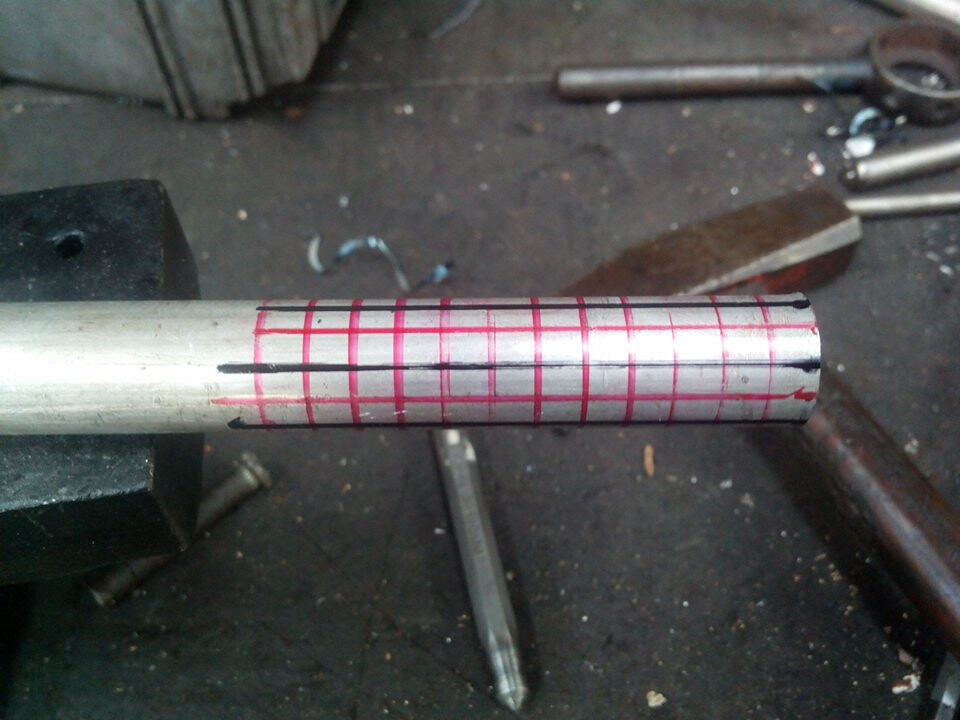
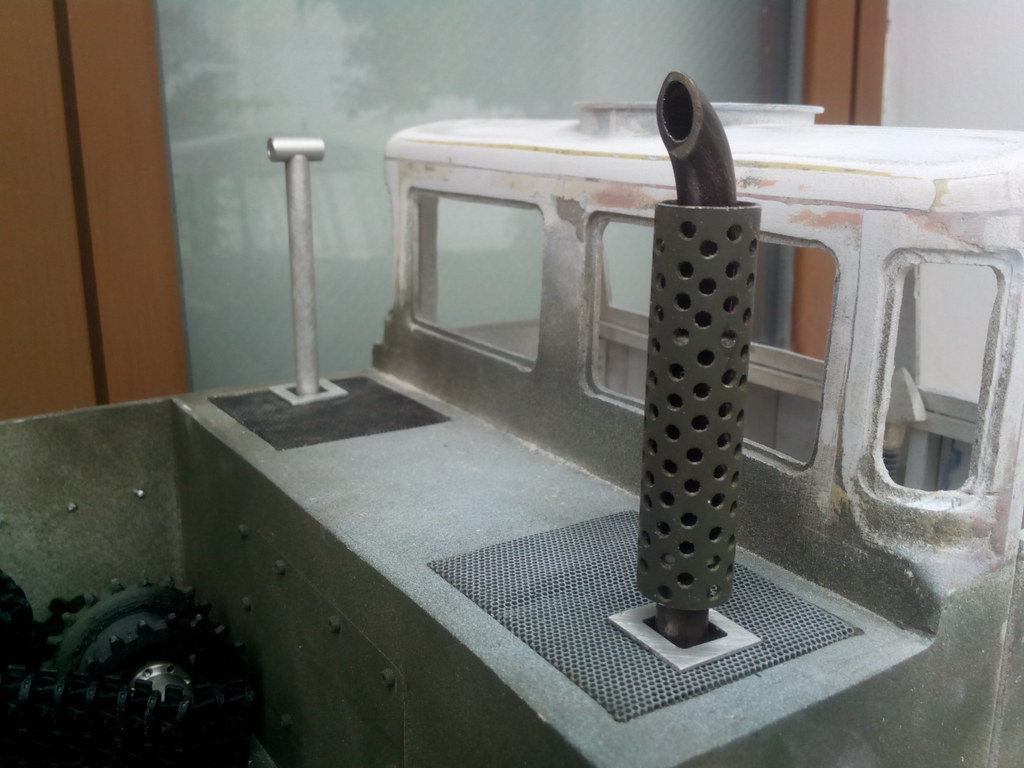
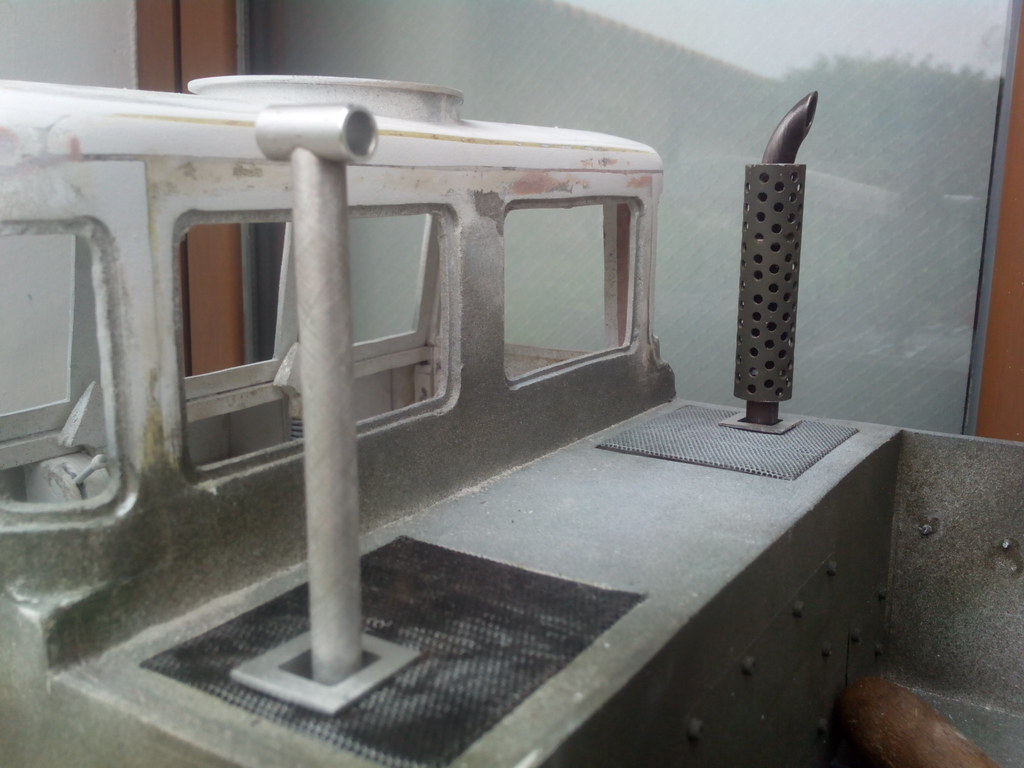
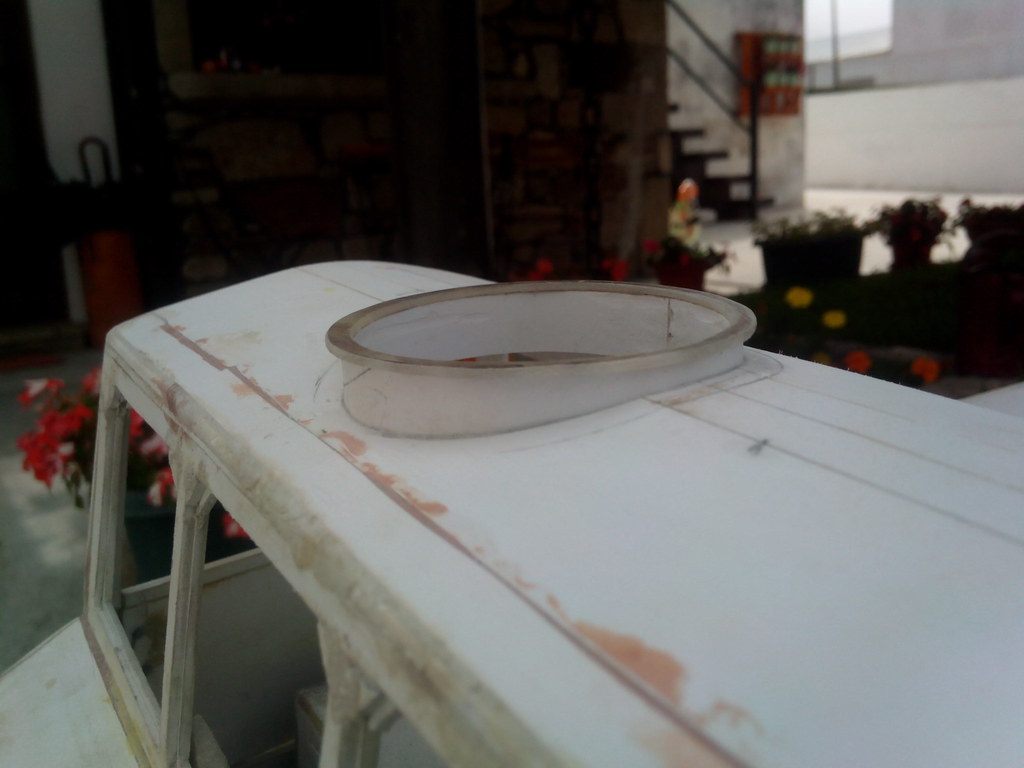
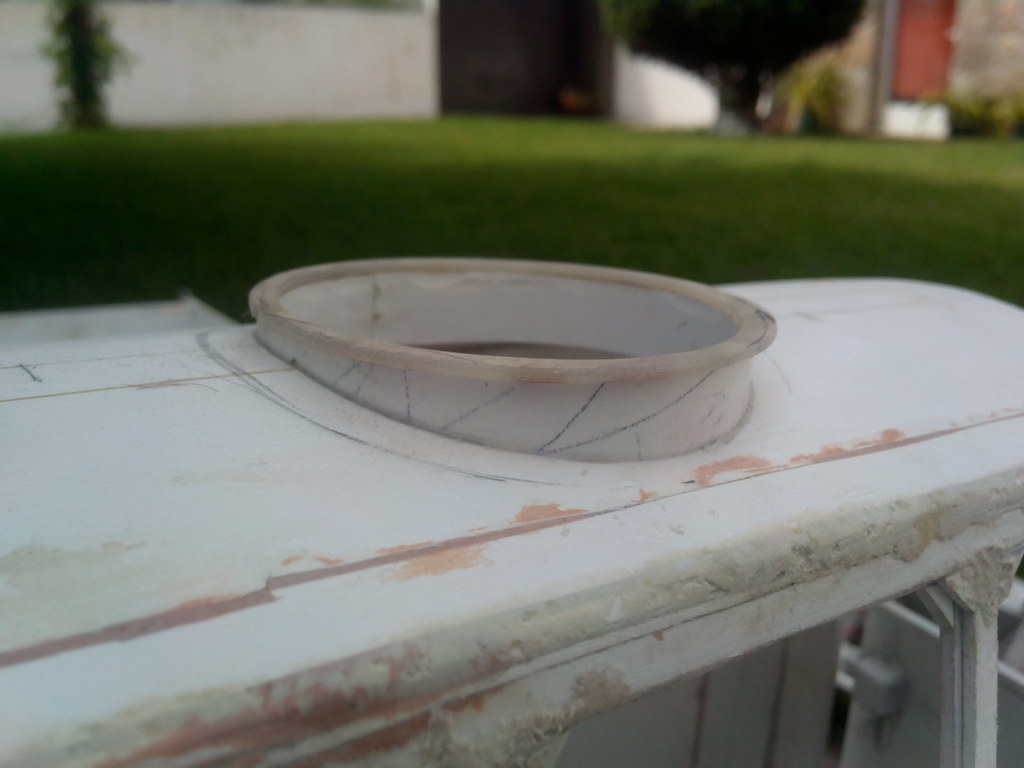
So, most of them have that truck style exhaust with the cap on top that opens but I've found this one with another exhaust type and went for it:
The reason? It's easier to add the smoke generator later
And this:
So, most of them have that truck style exhaust with the cap on top that opens but I've found this one with another exhaust type and went for it:
The reason? It's easier to add the smoke generator later