


Messuring engine timings
 04-14-2011, 02:06 PM
#1

I had some time to compleete my tool to messure all engine timings. In the past I did find out that just some light was needed to determ the opening and closing moments of the crankshaft and ports in an easy way
What I was using for a while:
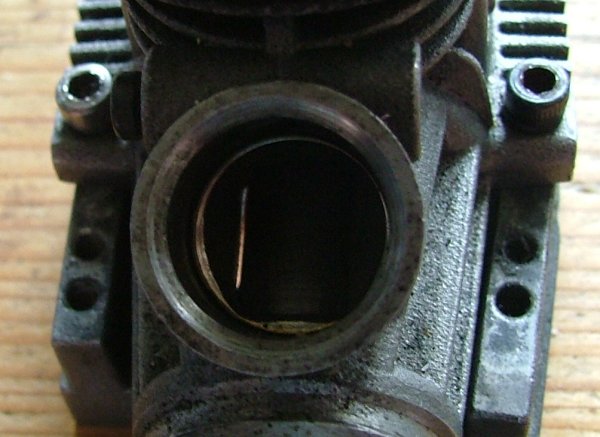
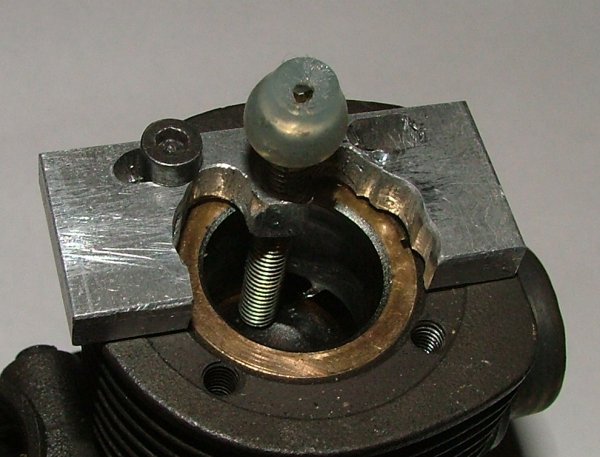
Using a piston stopper to fix the moment of opening/closing
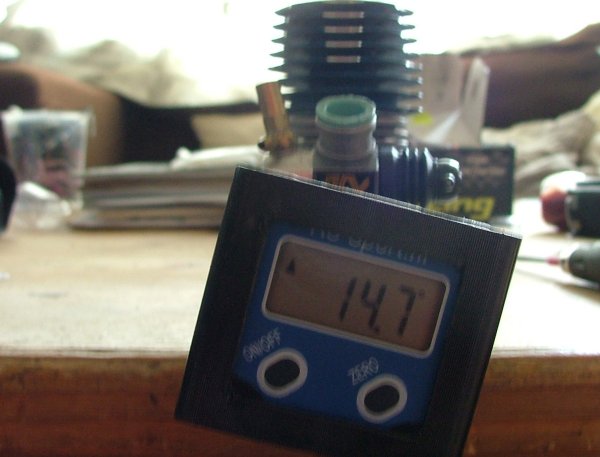
And the digital angle meter on the crankshaft:
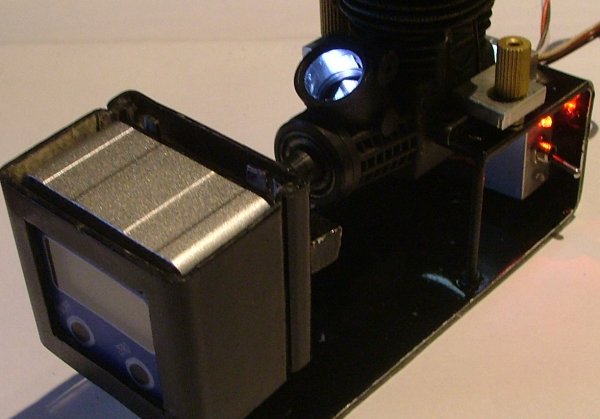
The main problem was I did not had a good stand to mount the engine and the lights. Then I came up to this project:
A PCB with 7 very bright LED's in a stand and a seperate LED
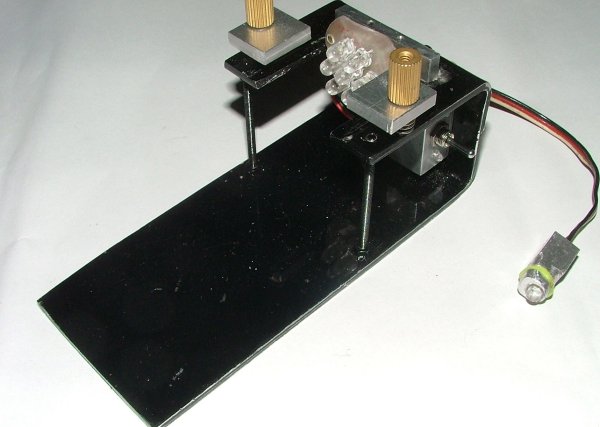
A 3 position switch can set to off, the one LED or the 7 LED's
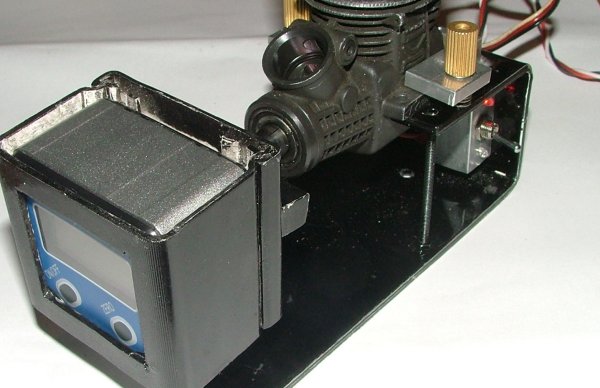
When mounting the engine with angle meter it looks like this:
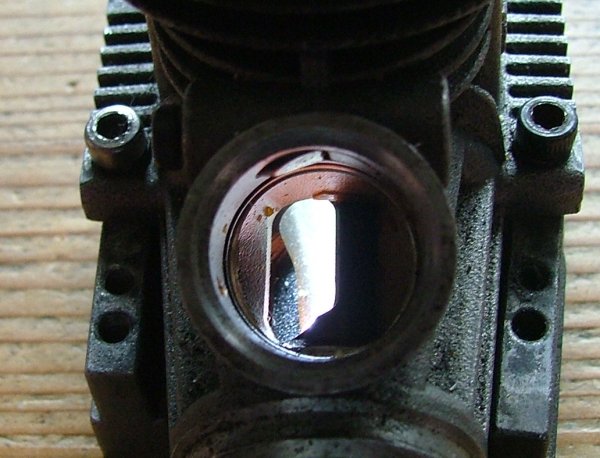
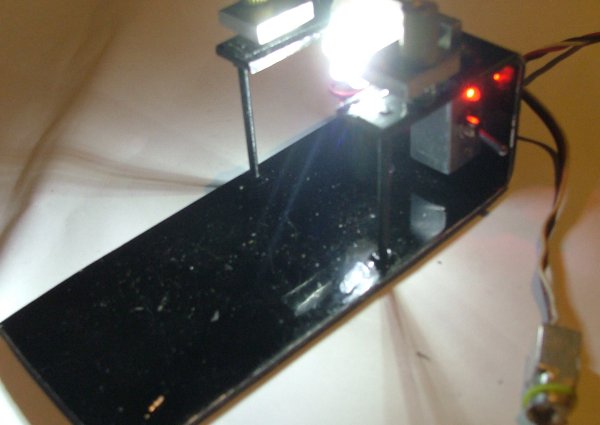
Enough light to find the right timings (the light is also clear at the intake ports):
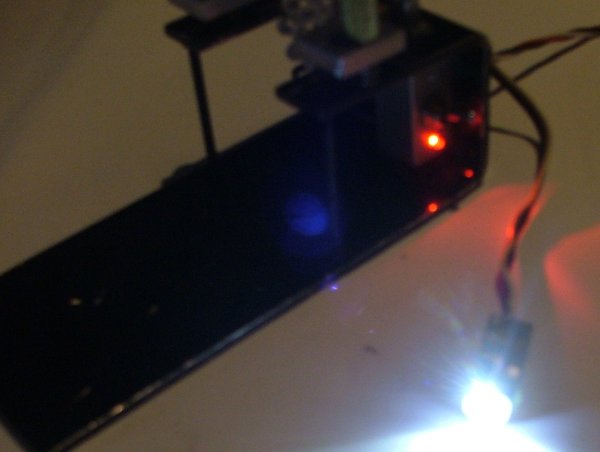
As seen from the side:
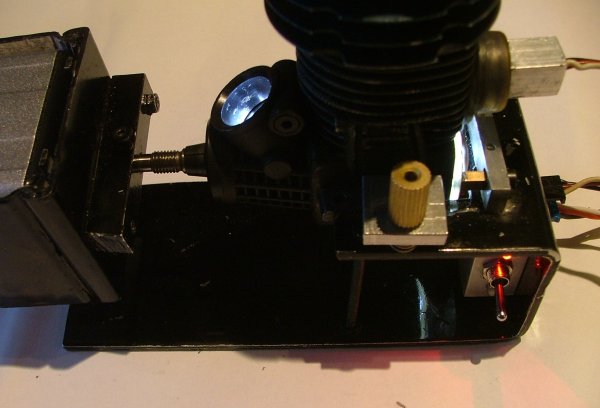
It is a direct fit for all rear exhaust small and bigblocks, it has an very quick and easy mount and in a few minutes you have all the timings without much handeling.
Now it does need a finishing touch like a good paintjob and 3 rubber feet for a steady placement.
What I was using for a while:
Using a piston stopper to fix the moment of opening/closing
And the digital angle meter on the crankshaft:
The main problem was I did not had a good stand to mount the engine and the lights. Then I came up to this project:
A PCB with 7 very bright LED's in a stand and a seperate LED
A 3 position switch can set to off, the one LED or the 7 LED's
When mounting the engine with angle meter it looks like this:
Enough light to find the right timings (the light is also clear at the intake ports):
As seen from the side:
It is a direct fit for all rear exhaust small and bigblocks, it has an very quick and easy mount and in a few minutes you have all the timings without much handeling.
Now it does need a finishing touch like a good paintjob and 3 rubber feet for a steady placement.


 Why? Thats a little sketchy. One scratch and in the garbage it goes.
04-14-2011, 03:01 PM
Why? Thats a little sketchy. One scratch and in the garbage it goes.
04-14-2011, 03:01 PM
#4
The bolt has a rounded endtip, it does not make damaging scratches, only some small markings, nothing to worry about.
Last edited by Roelof; 04-15-2011 at 05:34 AM.
 04-15-2011, 05:32 AM
#6
04-15-2011, 06:04 AM
#8
I use exactly the same angle meter! I find a bit annoying the 180 degrees measuring range... beacuse you'll end systematically further, both with the valve and the exhaust. So I have to be aware of that, specially for the exhaust: it's easy to read 178� when actually it's 182� !! It's very accurate, though.
Because of the hi sensitivity of the digital goniometer i cut a stripe from a thin sheet of paper and use it as a "stop". It's meaningless in the read, and basically acts just like your piston stopper.
I have to ask you 2 things:
1- How can I set the perfect BDC - TDC ? I'm having issues beacuse of the rod-play. Even with a new engine once you have sprayed it with motor cleaner you find at least 3� of play...
2- Which is the best method to make clear visible sign ( scratch? ) on the crank as a reference before dremel?
Thank you very much!!!
04-15-2011, 06:19 AM
#9
I set the stopper arround 90 degrees. The angle meter is not screwed tight so on the stop I can turn the meter a little bit further with some force.
Then I will try to find the same angle on the stop when turning left arround and right arround. When I do not get that exactly I do use both messured angles (left and right) and take the middle of it.
Then I will try to find the same angle on the stop when turning left arround and right arround. When I do not get that exactly I do use both messured angles (left and right) and take the middle of it.
04-15-2011, 08:22 AM
#10
Tech Initiate
I'm using a protracter and pointer how much more acurate is your set up? I just reacently ruined a jp by advancing the rotory valve leading edge 3deg. wich also added 3deg. of durration. No low end power no mid power lotsa top end power your on the brakes by the time it wakes up. My point? drastic change for little mod or little mod for lots of detune. I think a half deg. could make a noticable differance. I also use light as indicater of port open-close glad to see its an accepted method
I think a half deg. could make a noticable differance. I also use light as indicater of port open-close glad to see its an accepted method
04-15-2011, 08:48 AM
#11
I'm using a protracter and pointer how much more acurate is your set up? I just reacently ruined a jp by advancing the rotory valve leading edge 3deg. wich also added 3deg. of durration. No low end power no mid power lotsa top end power your on the brakes by the time it wakes up. My point? drastic change for little mod or little mod for lots of detune. I think a half deg. could make a noticable differance. I also use light as indicater of port open-close glad to see its an accepted method
I think a half deg. could make a noticable differance. I also use light as indicater of port open-close glad to see its an accepted methodI also have done 3 degree mods and had no issues....
04-15-2011, 10:17 AM
#12
I do have some RB WS7-II/III models and all my messured timings are the same with a list published online at first-racing so I do think it is accurate. Also I do messure the exhast height wit a caliper and the distance is indeed comparing with the angle (there is also a comparing table somewhere online).
I also have done 3 degree mods and had no issues....
I also have done 3 degree mods and had no issues....
Now just teach me what to do with the numbers and I'll be good!!!!
 04-15-2011, 10:41 AM
#13
And ofcourse not to mention the book Jennings 2-stroke tuning guide
04-15-2011, 10:57 AM
#14
Well... if you do have several (same based) engines you can (for a part) translate their behavior into the numbers. With the list on first-racing you can see some box stock and modified engines next to each other so you can learn the basic ideas of some modders about changing timings. And if you go to some kids in the neighburehood who are into modifying 2-stroke motorcycles you can learn from them.
And ofcourse not to mention the book Jennings 2-stroke tuning guide
And ofcourse not to mention the book Jennings 2-stroke tuning guide
Pass you soon...
04-17-2011, 11:36 AM
#15
very nice tool !
Myself I have found that its more important to measure each engine consistently then anything else...I have used all sorts of methods and have found with the light method that the brighter the light you use, the higher the timing numbers you get...I myself prefer a dull light, but I base all my timings off using a dull light....So lets say on a bright light a crank times out at 210 degrees, but on a dull light measures out at 205 degrees.... Which is correct ? I say it really doesn't matter, as all my timing changes are trial and error, I usually push the timing in small increments and dyno test between each change... When I find the sweet spot I mark down how many degrees of change and repeat the same timing change on the next one......I am more concerned with how much change, and less concerned with final numbers..the key is to be consistent when measuring..measure each engine in the exact same manner, using the same light intensity and measuring technique....Different techniques can give you variances in the final measurement....
Myself I have found that its more important to measure each engine consistently then anything else...I have used all sorts of methods and have found with the light method that the brighter the light you use, the higher the timing numbers you get...I myself prefer a dull light, but I base all my timings off using a dull light....So lets say on a bright light a crank times out at 210 degrees, but on a dull light measures out at 205 degrees.... Which is correct ? I say it really doesn't matter, as all my timing changes are trial and error, I usually push the timing in small increments and dyno test between each change... When I find the sweet spot I mark down how many degrees of change and repeat the same timing change on the next one......I am more concerned with how much change, and less concerned with final numbers..the key is to be consistent when measuring..measure each engine in the exact same manner, using the same light intensity and measuring technique....Different techniques can give you variances in the final measurement....