


 365Likes
Kyosho MP10T

 10-22-2019, 05:00 AM
#62
Super Moderator

iTrader: (63)
Join Date: May 2005
Location: a very small town in wisconsin that is in the middle of absolutely no where
Posts: 5,155
Trader Rating: 63 (100%+)
[QUOTE=flap jack;15532138]^^^^ great footage thanks!!! Nice driving btw!. Where is that track?[/QUOT
thank you. first race with the brand and obviously the truck. buddy bill ryan took the video and the track is part of the mnrc race series over the summer. this was motocity race track in motley Minnesota we go to in the spring and fall to start the series and end the series without and rain delays.
thank you. first race with the brand and obviously the truck. buddy bill ryan took the video and the track is part of the mnrc race series over the summer. this was motocity race track in motley Minnesota we go to in the spring and fall to start the series and end the series without and rain delays.
10-22-2019, 05:58 AM
#63
How easy is it for fuel gun access ?
Pictures may be deceptive but the opening doesn't look that large
Pictures may be deceptive but the opening doesn't look that large
10-22-2019, 06:16 AM
#64
Super Moderator
iTrader: (63)
Join Date: May 2005
Location: a very small town in wisconsin that is in the middle of absolutely no where
Posts: 5,155
Trader Rating: 63 (100%+)
I do not use a fuel gun and I don't believe there is any cut out lines for it. but with the body so thin I will not be cutting anymore than I need to on the next 2 bodies and I will re-enforce the areas that broke.
10-22-2019, 06:37 AM
#65
Problem with a lot of these truggies(I have the same issue with my Tekno) is the roof of the body is real far from the top of the tank... so you would need a very large hole to have room for a fuel gun because of the distance to the tank filler neck.
this weekend I saw someone using a fuel �tube� with a type of trigger on the top. Not sure who makes it as a search didn�t turn up anything, but it would work better with a truggy than a gun.
this weekend I saw someone using a fuel �tube� with a type of trigger on the top. Not sure who makes it as a search didn�t turn up anything, but it would work better with a truggy than a gun.
10-23-2019, 01:25 PM
#66
I did have some issue with the front body mount holes tearing. I added some shoe goo type stuff between the windshield and the holes and even though it was previously torn it held up fine. I also removed about 1/2� from the front bumper area to avoid it getting caught up in the �chassis� bumper. This may have been the reason that I didn�t have issues with the post holes at race 2.
11-04-2019, 06:16 AM
#67

Finished the build Friday hoping to get out to a track at least once before it gets too cold.
11-04-2019, 12:24 PM
#68
Did anyone get the headlight and grill sticker sheet in their kit? Mine didn't have one.
11-04-2019, 07:35 PM
#70
Super Moderator
iTrader: (63)
Join Date: May 2005
Location: a very small town in wisconsin that is in the middle of absolutely no where
Posts: 5,155
Trader Rating: 63 (100%+)
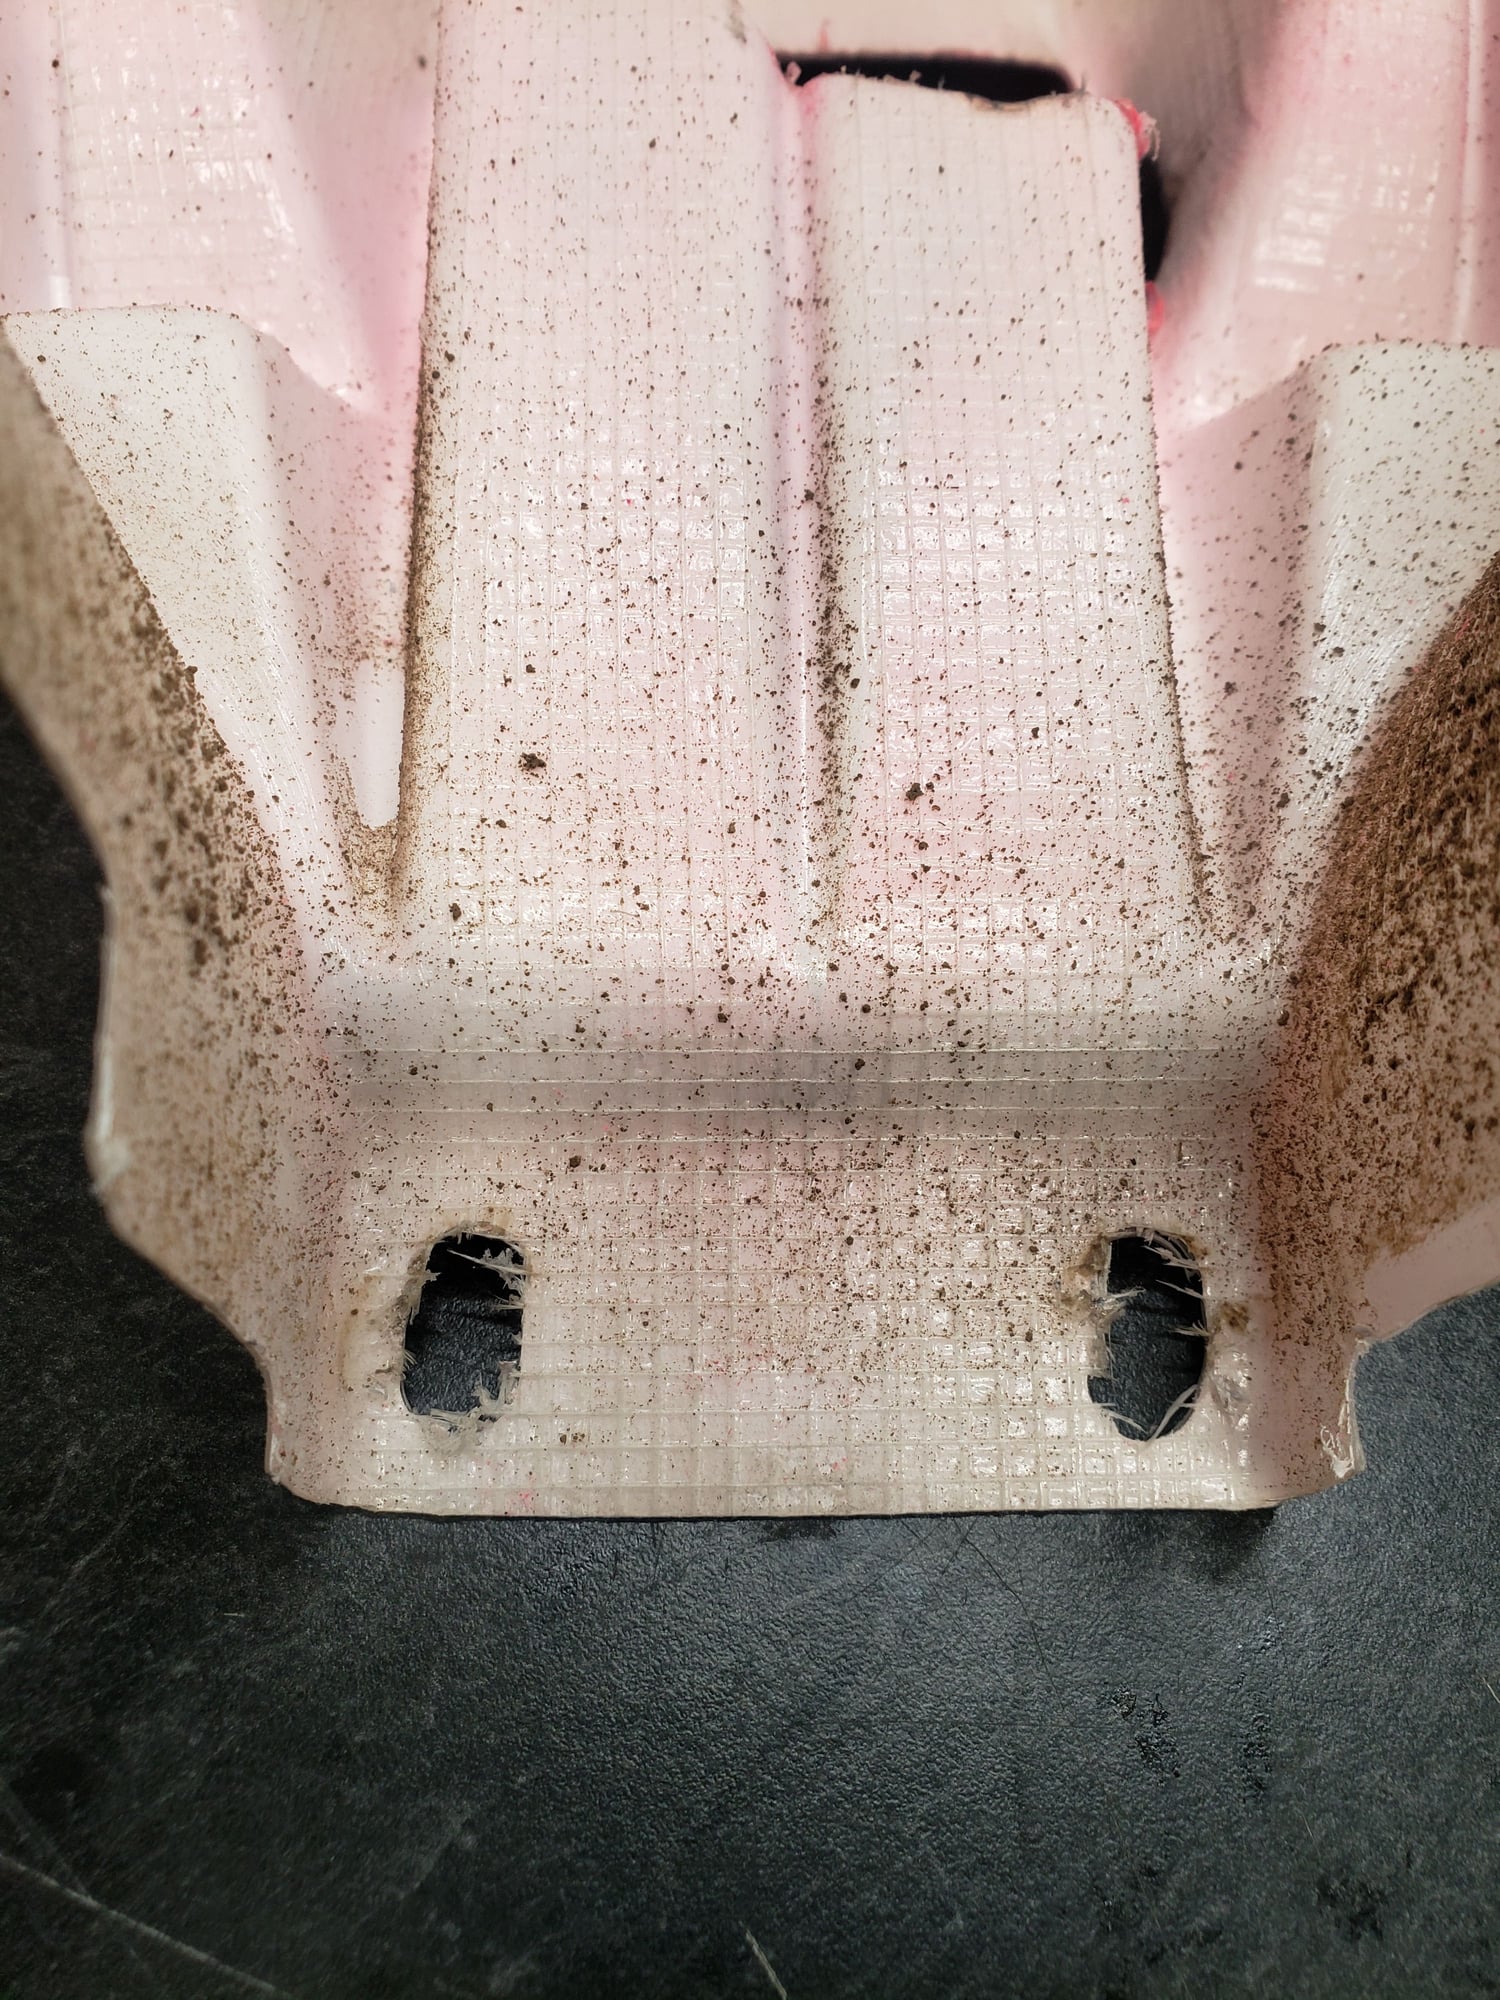
make sure the body holes are loser fitting or more oval.. also make sure you cut extra off the back so body does not hit the rear shock tower. do that by holding the rear shock tower and pushing on the front tower towards the rear and make sure there is a gap. also shoe goo or your choice of body glue up on the top of the body seems by the windows and all around the front body posts. seems to be the areas that the body likes to crack or break.
11-04-2019, 07:38 PM
#71
Super Moderator
iTrader: (63)
Join Date: May 2005
Location: a very small town in wisconsin that is in the middle of absolutely no where
Posts: 5,155
Trader Rating: 63 (100%+)
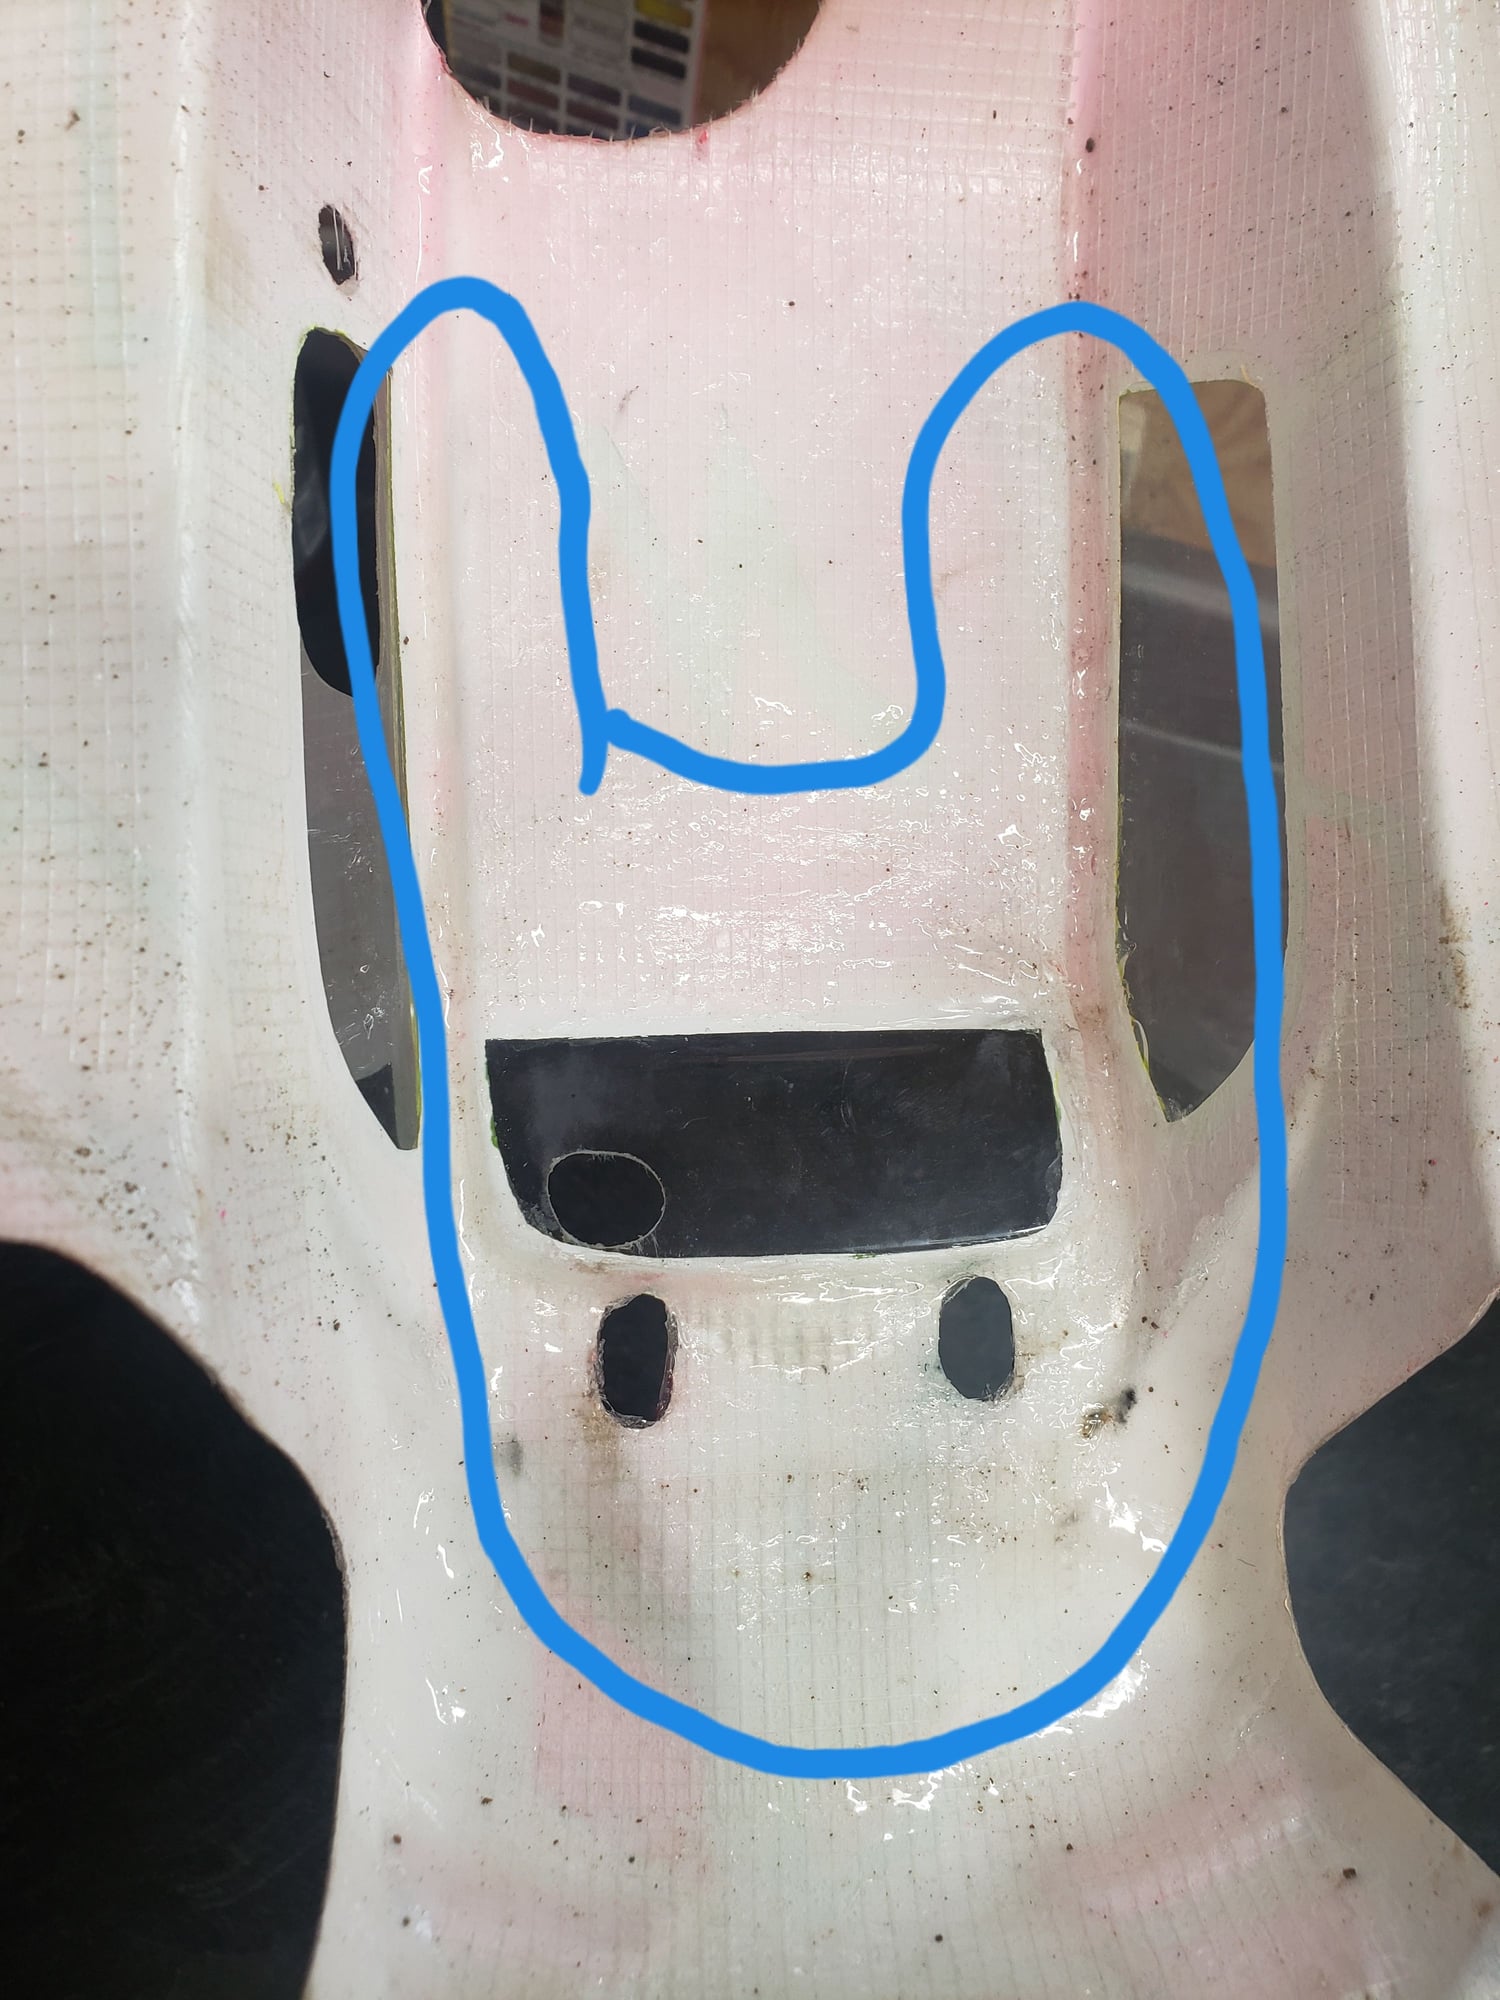
shoe goo in the blue are as this is where it likes to crack
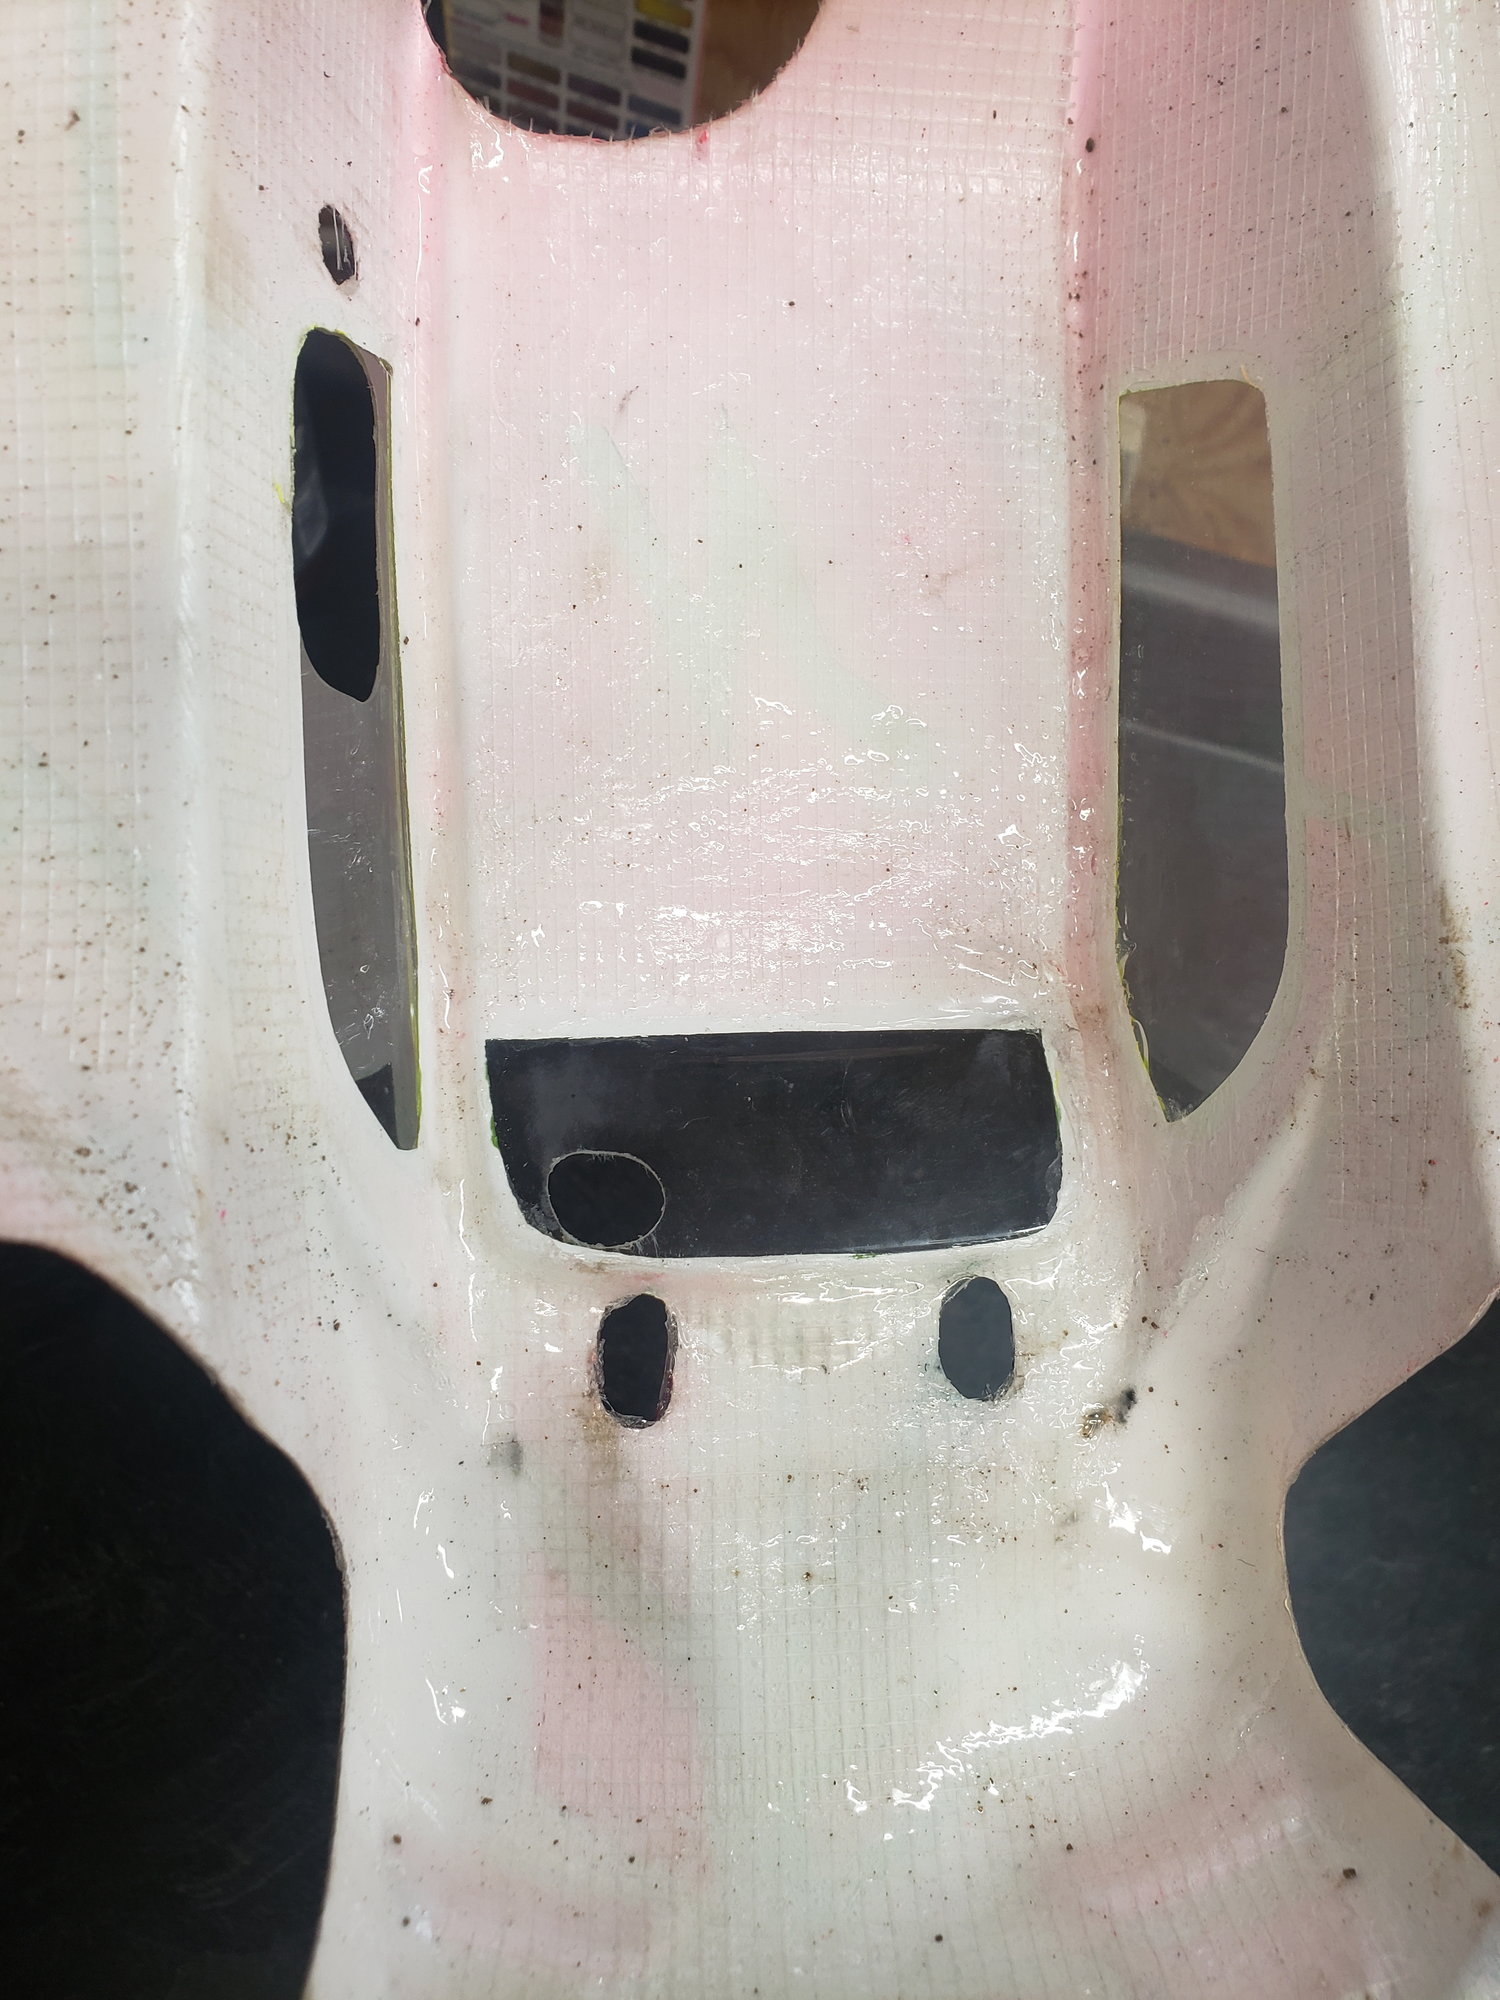
make holes similar to this.
 11-05-2019, 04:54 AM
#73
Super Moderator
iTrader: (63)
Join Date: May 2005
Location: a very small town in wisconsin that is in the middle of absolutely no where
Posts: 5,155
Trader Rating: 63 (100%+)
I run 2 starter boxes but the chassis seems to be very close for both as I grabbed my truggy box by accident and started the buggy up with it.. the rear pegs were about 5mm longer or away from the rear of the chassis.
what I have done in the past with my other brand I ran was get the front pegs in place then get both buggy and truggy rear mars set and drill a few holes in box. add a few screws to hold the rear peg mount in place.. leave the rear peg mount a little loose and slide the mount between the preset holes for the rear of each vehicle. I will try to get a few picks later when I get home.. but in all honesty when traveling 4* hours for I race I prefer 2 starter boxes just incase 1 fails you have a back up.. just my opinion.
what I have done in the past with my other brand I ran was get the front pegs in place then get both buggy and truggy rear mars set and drill a few holes in box. add a few screws to hold the rear peg mount in place.. leave the rear peg mount a little loose and slide the mount between the preset holes for the rear of each vehicle. I will try to get a few picks later when I get home.. but in all honesty when traveling 4* hours for I race I prefer 2 starter boxes just incase 1 fails you have a back up.. just my opinion.
11-05-2019, 08:09 AM
#74
11-05-2019, 07:01 PM
#75
I did what J.Whiting said he's done in the past.
I've set the front pegs so there in position for both the 10 and 10T. I have the rear set so I slide it all the way back for the 10T and have made a mark inside for where it needs to be for buggy just need to drill a whole and put a stop screw so I can slide it forward for 10 and have a stop point without having to look inside.
Flywheel hits directly in the center for 10T and about a mm forword for 10.