


 2Likes
Tamiya TRF418

 08-15-2014, 09:22 AM
#1637
 08-15-2014, 10:05 AM
#1638
Just answering your question from a few days ago. Me personally sand them because the steel gears seemed to mesh perfectly and have very little notchiness. I noticed all the plastic gears (especially the two large ones) are quite a bit thicker than the steel ones so by sanding the plastic I figured it would make the plastic gears less notchy.
I know when the white Tamiya gear diff came out Jilles had a video on sanding the plastic gears as I believe the team was having issues with them lasting, sanding the gears seemed to help that.
08-15-2014, 10:27 AM
#1639
Good to hear Todd. I'll give the medium sway bar in the rear a try next time I'm at the track! I need to pick up the kit, I'd like a thinner one for the front as well. I've been looking for ways to make the front of the car roll more.
I've got the gumby c-hubs on my car now too while I wait for parts to arrive. On carpet they make the car push and rather inconsistent in the middle of the turn, but like you said, they're easily the most durable c-hub in existence. For practice nights, it's easy enough to abide by.
I've got the gumby c-hubs on my car now too while I wait for parts to arrive. On carpet they make the car push and rather inconsistent in the middle of the turn, but like you said, they're easily the most durable c-hub in existence. For practice nights, it's easy enough to abide by.
08-15-2014, 02:24 PM
#1642
Moving onto my Square aluminum chubs. I got them to fit with minimal dremeling. I'll post pics later. I passed out in my chair and now I'm heading into work.
08-15-2014, 09:13 PM
#1643
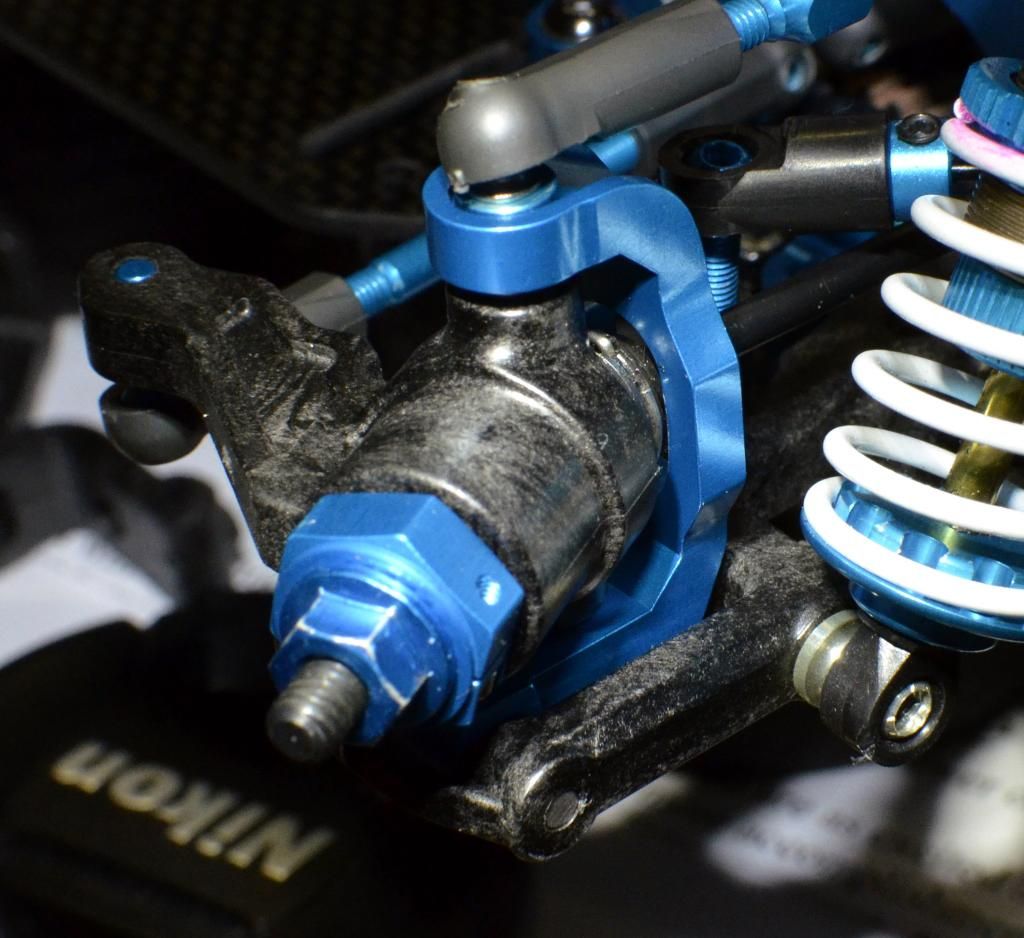
Here are the Square chubs. Like I said before, I won't get to test them out until next weekend on carpet. This weekend is asphalt with the Yok. I will also check out the VBC chubs tomorrow. There are several at the track.
The first pic is where I dremeled the chub. This was all that was needed to clear the double cardans. I did elongate the cut just a hair and on the other side I took the edge off ever so slightly to clear the axle when it went full lock the other way. Not needed I don't think but just in case. It was that close.

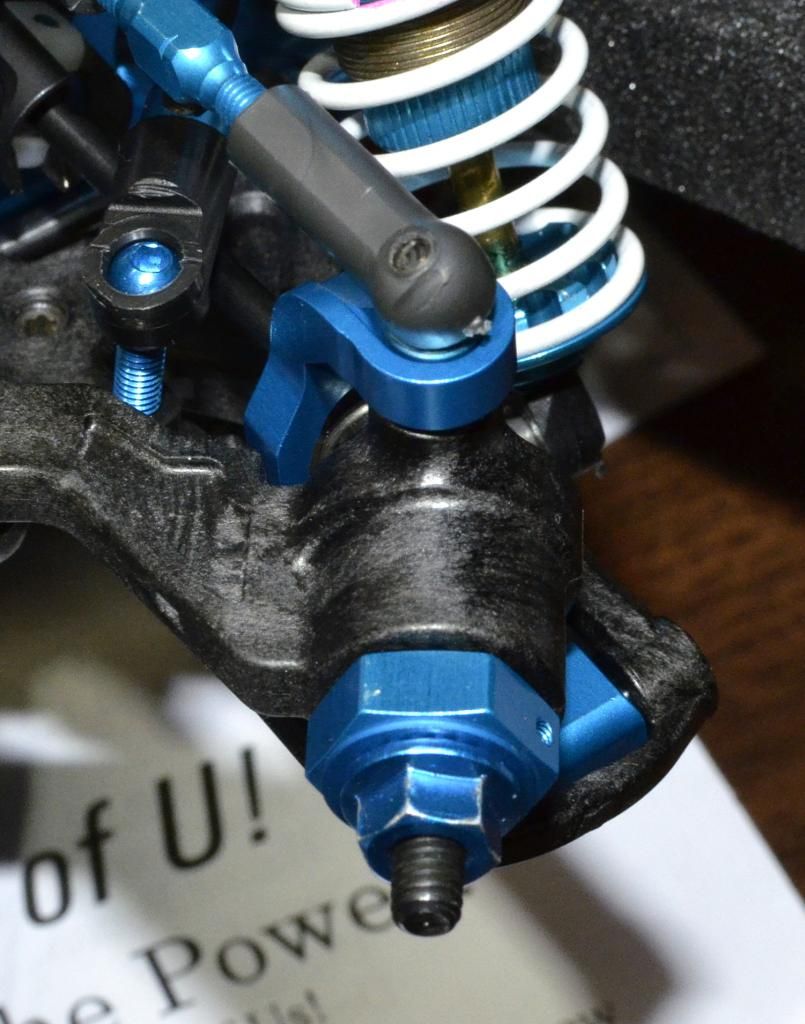
Here are two pics full lock to lock and how much clearance is there now.
The first pic is where I dremeled the chub. This was all that was needed to clear the double cardans. I did elongate the cut just a hair and on the other side I took the edge off ever so slightly to clear the axle when it went full lock the other way. Not needed I don't think but just in case. It was that close.
Here are two pics full lock to lock and how much clearance is there now.
08-15-2014, 09:21 PM
#1644
Also note that the added elongated cut (not pictured) helps the double cardon clear the chub at full suspension compression.
08-15-2014, 10:13 PM
#1645
Well, I finally broke something.
Family commitments mean I can't race at my normal (outdoor) track, so went to the other option in town. Indoors, perimeter boards.
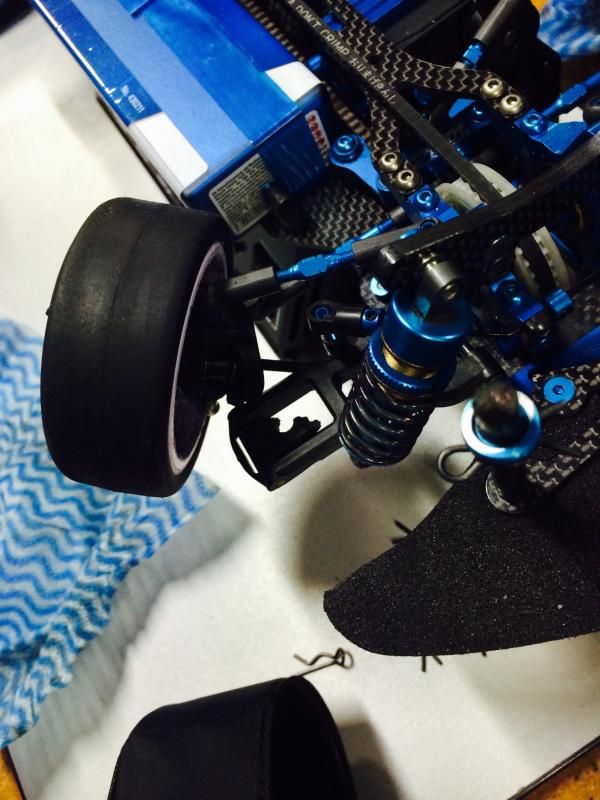
I was driving quite well, managed to work from the back of the pack to 1st and was leading for a couple of laps, then bang. Brain fart and smashed the right front into the wall. Fast left hand sweeper and the track has the boards painted the same colour as the run off, I struggled with depth perception.
Big hit. Battery came out. Right wheel looked at a sick angle.
Here's the damage.
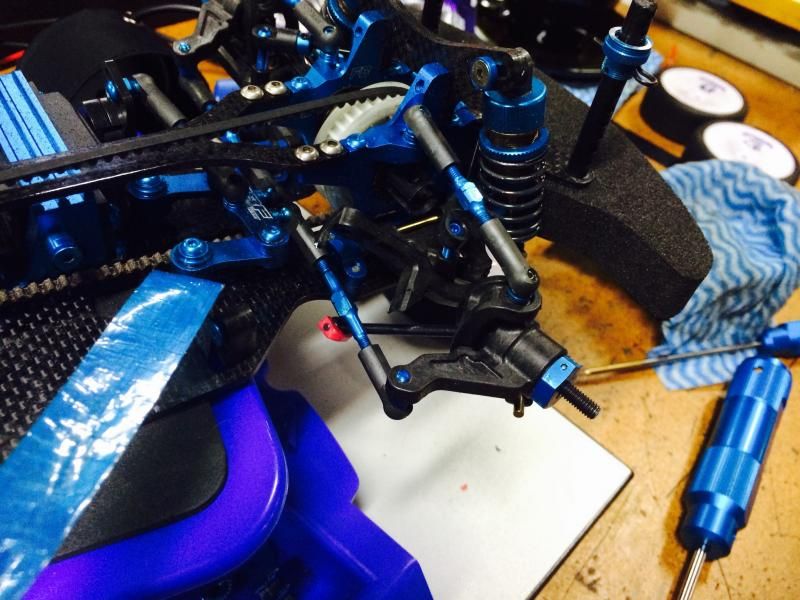
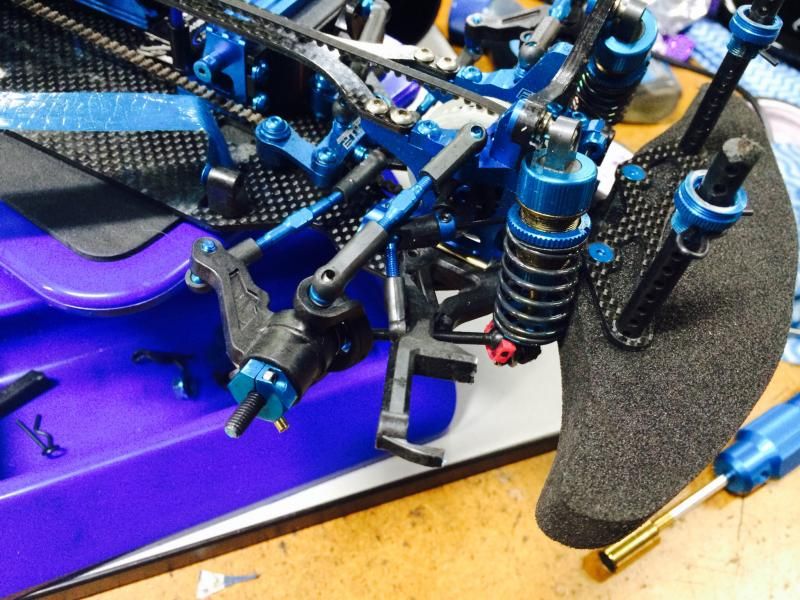
And after a quick pull down, all the broken bits. Bottom arm was REALLY broken
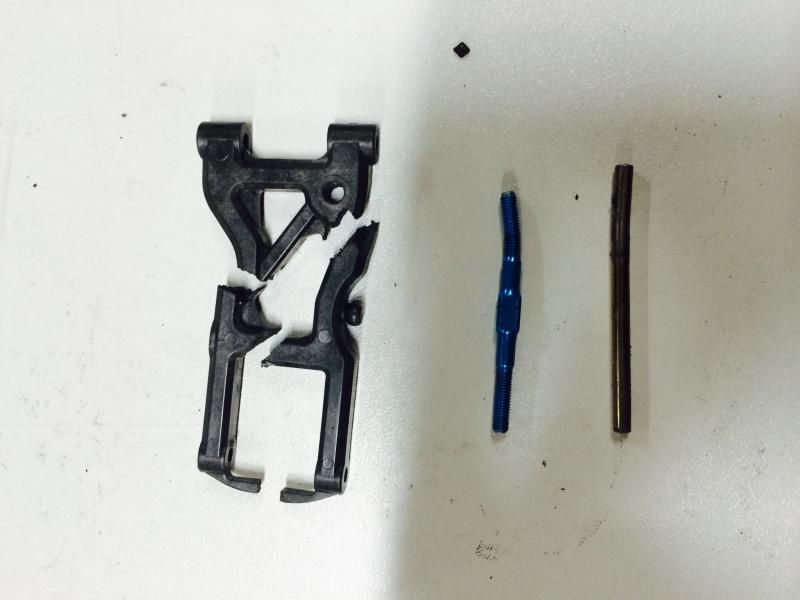
Something must be very wrong with these pictures, no broken C Hub!!! Wtf! How did that happen!
Don't worry, next race I fixed that over a curb. And completely trashed the rim on a brand new set of tyres! Doh!
I'm guessing it was stressed from the previous stack, well probably anyway. It didn't look it at the time and nothing was off on the setup station after the first rebuild, so who knows.
I packed up and called it a night then. Lucky these tamiya parts are so cheap. $4 hubs, $5 arms. The damage bill would be double on a yokomo, for example, I worked out.
Family commitments mean I can't race at my normal (outdoor) track, so went to the other option in town. Indoors, perimeter boards.
I was driving quite well, managed to work from the back of the pack to 1st and was leading for a couple of laps, then bang. Brain fart and smashed the right front into the wall. Fast left hand sweeper and the track has the boards painted the same colour as the run off, I struggled with depth perception.
Big hit. Battery came out. Right wheel looked at a sick angle.
Here's the damage.


And after a quick pull down, all the broken bits. Bottom arm was REALLY broken

Something must be very wrong with these pictures, no broken C Hub!!! Wtf! How did that happen!
Don't worry, next race I fixed that over a curb. And completely trashed the rim on a brand new set of tyres! Doh!

I'm guessing it was stressed from the previous stack, well probably anyway. It didn't look it at the time and nothing was off on the setup station after the first rebuild, so who knows.
I packed up and called it a night then. Lucky these tamiya parts are so cheap. $4 hubs, $5 arms. The damage bill would be double on a yokomo, for example, I worked out.
08-15-2014, 11:39 PM
#1646
That's one of the... if not the worst broken arm I've ever seen on any chassis haha. Be proudof that one buddy.
But on a serious note. to do that much damage bending pins and camber links to that degree. U might want to check bulkheads and motor mount and even chassis flatness. Seems like u took a very hard hit. A whole tear down would be required in my book haha
But on a serious note. to do that much damage bending pins and camber links to that degree. U might want to check bulkheads and motor mount and even chassis flatness. Seems like u took a very hard hit. A whole tear down would be required in my book haha
08-16-2014, 01:05 AM
#1647
Tamiya has lightened the arms and has managed to now have two weak spots instead of just one. The old reversible suspension arms would bend the hingepin but the arm wouldn't break (ask how I know). This being the case, I gave up buying Tamiya hingepins (which are expensive crap anyway, including the Ti coated ones) and got some tool steel and made my own hingepins. You can also use the spring steel of hex drivers with worn out tips you might find lying about in your toolbox (if they have 3mm shafts). Those are not going to bend ever again, and since the arm breaks anyway, is just as well. I didn't manage to break anything on my 418 yet, but I expect similar problems (which is why I have all the parts ready on hand).
Nah, the Tamiya hingepins bend very easily. A Yokomo pin would take a lot more to bend (yes I know). The old Yok carbon arms would break first. Newer (plastic) arms don't break that easy. Of course, when you bend a Yok hingepin you can't make one from spring steel, because theirs is a weird diameter. That is wny i converted mine to Tamiya sized hingepins and replaced the pins with home made ones as above.
With the Tamiya arms being so skinny, they need to bring out some plastic option or need to get the carbon version right, otherwise there's going to be a lot of arm replacing.
As for prices, I don't think Yokomo would have been more expensive ( I just bought some spares for my BD7). Then again, I buy everything overseas.
That's one of the... if not the worst broken arm I've ever seen on any chassis haha. Be proudof that one buddy.
But on a serious note. to do that much damage bending pins and camber links to that degree. U might want to check bulkheads and motor mount and even chassis flatness. Seems like u took a very hard hit. A whole tear down would be required in my book haha
But on a serious note. to do that much damage bending pins and camber links to that degree. U might want to check bulkheads and motor mount and even chassis flatness. Seems like u took a very hard hit. A whole tear down would be required in my book haha
With the Tamiya arms being so skinny, they need to bring out some plastic option or need to get the carbon version right, otherwise there's going to be a lot of arm replacing.
As for prices, I don't think Yokomo would have been more expensive ( I just bought some spares for my BD7). Then again, I buy everything overseas.
08-16-2014, 01:30 AM
#1648
That's one of the... if not the worst broken arm I've ever seen on any chassis haha. Be proudof that one buddy.
But on a serious note. to do that much damage bending pins and camber links to that degree. U might want to check bulkheads and motor mount and even chassis flatness. Seems like u took a very hard hit. A whole tear down would be required in my book haha
But on a serious note. to do that much damage bending pins and camber links to that degree. U might want to check bulkheads and motor mount and even chassis flatness. Seems like u took a very hard hit. A whole tear down would be required in my book haha
And yes, full rebuilt is happening this week. I did stick it on the setup station, including tweak, and it wasn't that bad actually. But yes, strip down happening.
I was comparing prices on Banzai, part v part, tamiya vs yokomo. Tamiya won.
08-16-2014, 01:45 AM
#1649
Tech Fanatic
So far i haven't broke any part on my 418 and i do like the quality of tamiya.
The parts are much cheaper then yokomo or Xray, the prices i've seen are twice as the price of a tamiya part.
And i rather have a car with those parts that will take the impact and brake then i would have parts let the impact go through to the chassis part or bulkheads.
From what i've seen in the picture above the cost would be about $15 and it's an easy fix, If it were yokomo parts it would costs easily twice as much.
08-16-2014, 05:09 AM
#1650
I can attest to the 46mm stainless and t-nitride hinge pins being junk. In on road I have had ok luck with them but any decent hit will tweak them. I used to run the same pins in my old 501x and without hitting anything--simply landing from doubles and triples they would be bent at the end of a race day. I would literally have to replace them every race day!! So I did the same thing as Niznai mentioned: bought some 3mm tool steel drill blank from McMaster, cut to length, polished and never bent another pin.