


 5Likes
*****YOKOMO BMAX 4*****
 11-08-2013, 04:35 PM
#961
painys bmax looked dialled to the max last night
 11-08-2013, 04:44 PM
#962
11-08-2013, 11:02 PM
#963

yes... mine arrived at the local lhs today, i juz picked it up.... yippee...
now, time to get busy....
11-08-2013, 11:15 PM
#964
11-09-2013, 01:22 AM
#965
Tech Addict
Hi guys
Just finished building mine and it was a awesome build! One question I have is what difference to handling does it make when you revers the rear shocks?
Thanks
Brett
Just finished building mine and it was a awesome build! One question I have is what difference to handling does it make when you revers the rear shocks?
Thanks
Brett
11-09-2013, 03:54 AM
#967
 11-09-2013, 11:59 AM
#968
Tech Apprentice
Hmmm roll bars. Anybody know a part number please?
Car looks nice!
Car looks nice!
11-09-2013, 12:02 PM
#969
 11-09-2013, 09:30 PM
#971
Left shocks, electronics and body shell
Have taken quite abit of pic as a build review. U guys tink i should start a new thread or to use back this thread
Have taken quite abit of pic as a build review. U guys tink i should start a new thread or to use back this thread
11-10-2013, 01:00 AM
#972

personally I think that we should start a new thread with the B-MAX4 III so as not to mix the new with the old model but what do others think?
Last edited by dMITIj; 11-10-2013 at 01:21 AM.
11-10-2013, 04:06 AM
#973
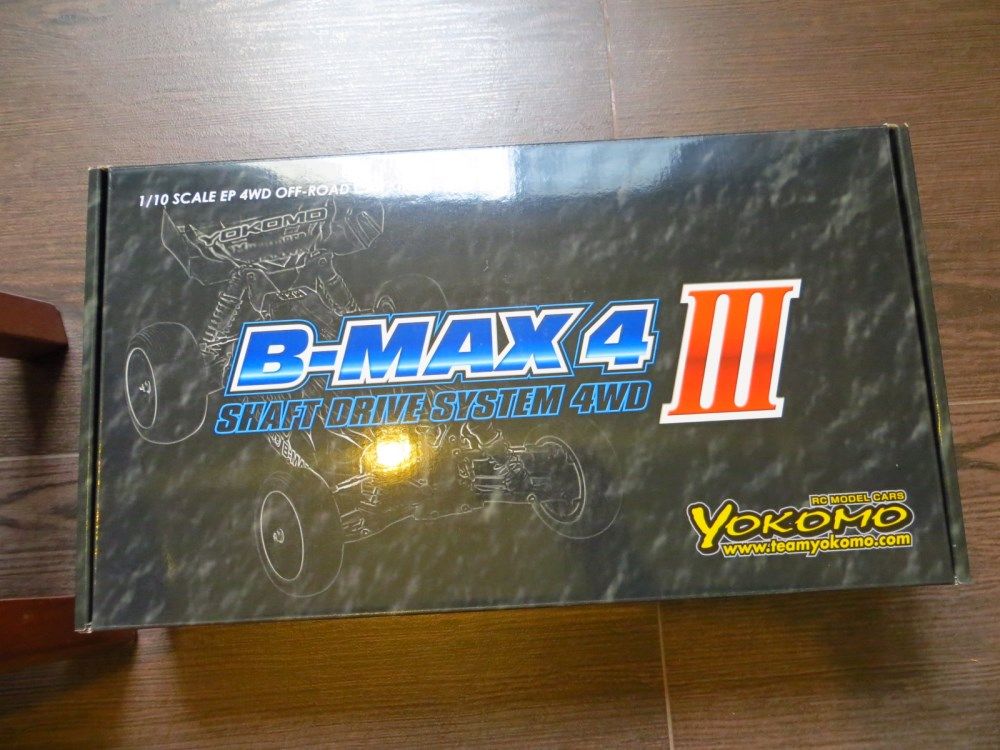
Here�s my quick build on the Bmax 4-3. To be honest, I�m so excited on building it, that I never read the manual properly, and the extra apendium that comes with it. So, please, do read through before the build. I ended up having to re-do certain steps to rectify it.
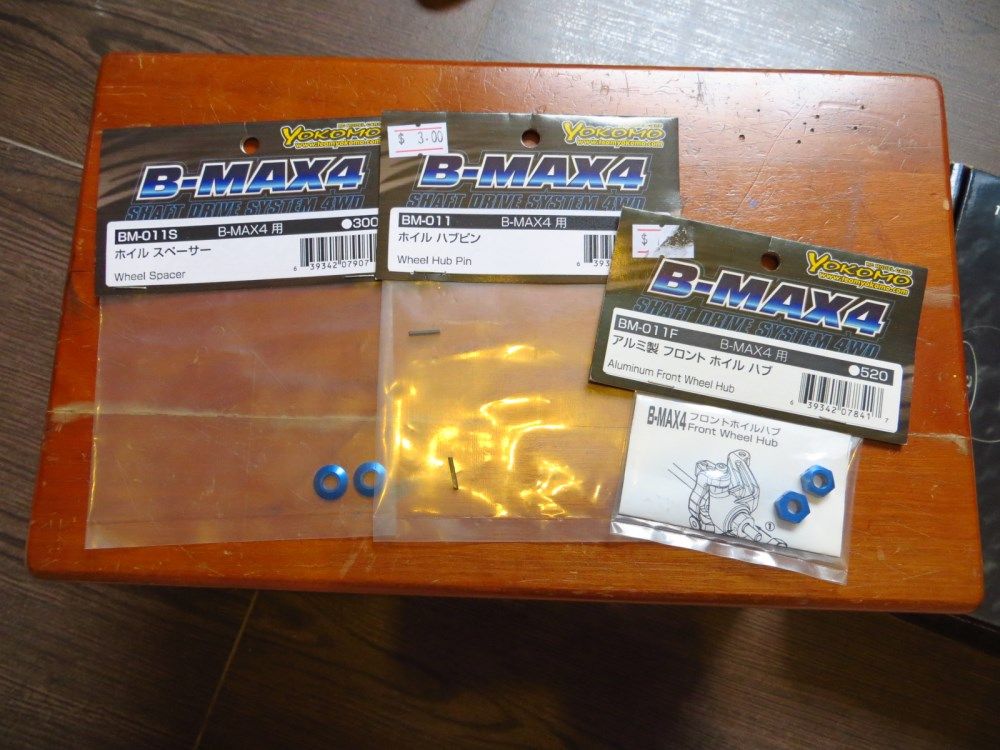
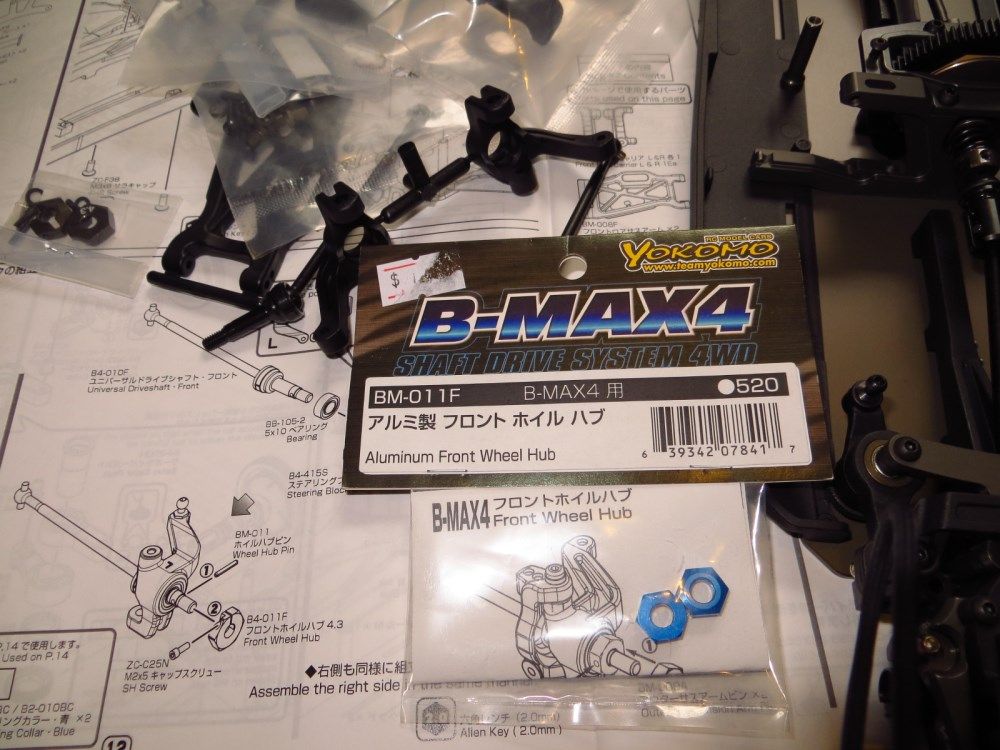
Needless to say, a build would start off with the brand new kit. So here�s my kit and the 10mm hex & wheel pin conversion. Reason being all my existing wheels are based on this format.
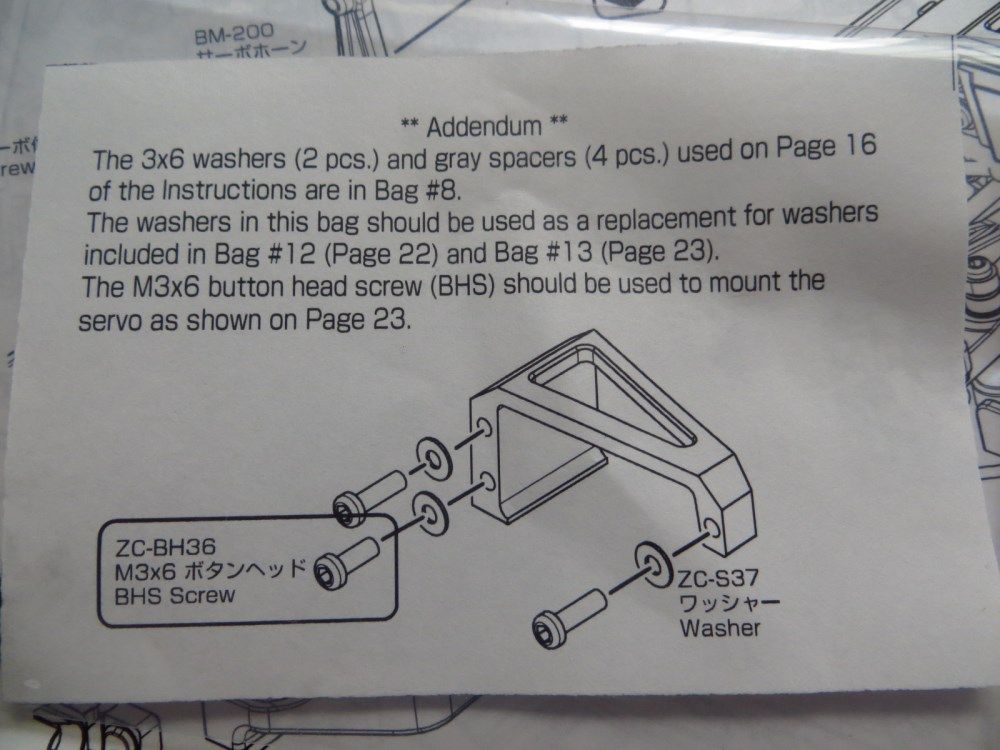
And read this first, before starting build.
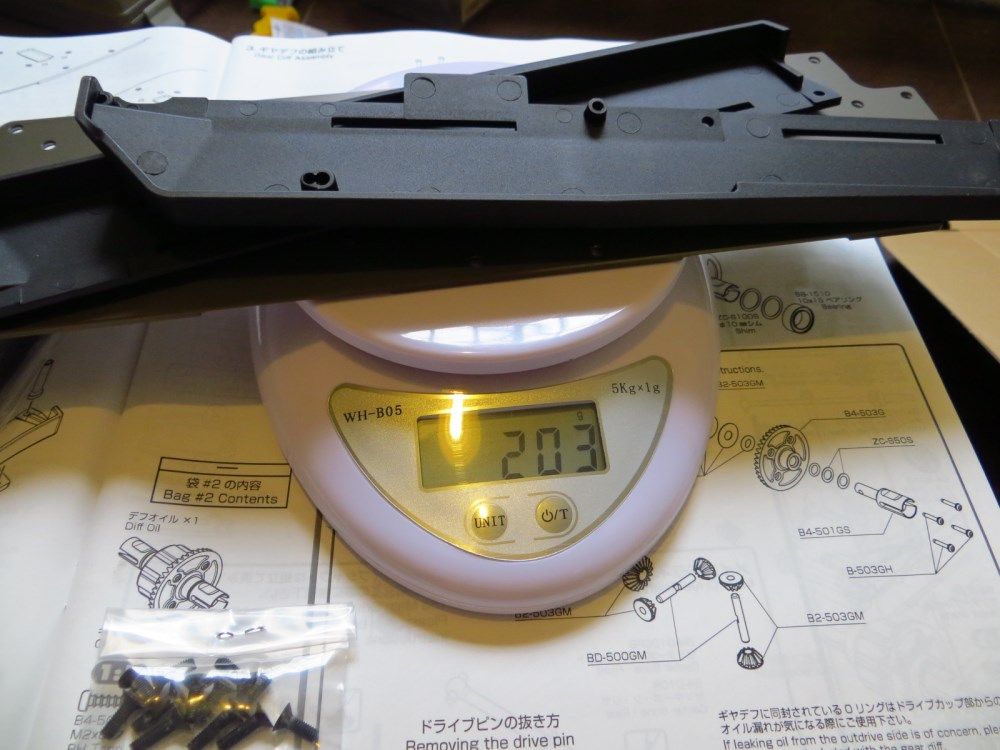
When I held up the side pods, I was shocked with the heavier weight and very sturdy build. Thus, I weigh it, and it seems not too heavy on the scale. A slight textured carbon surface on the side pods.
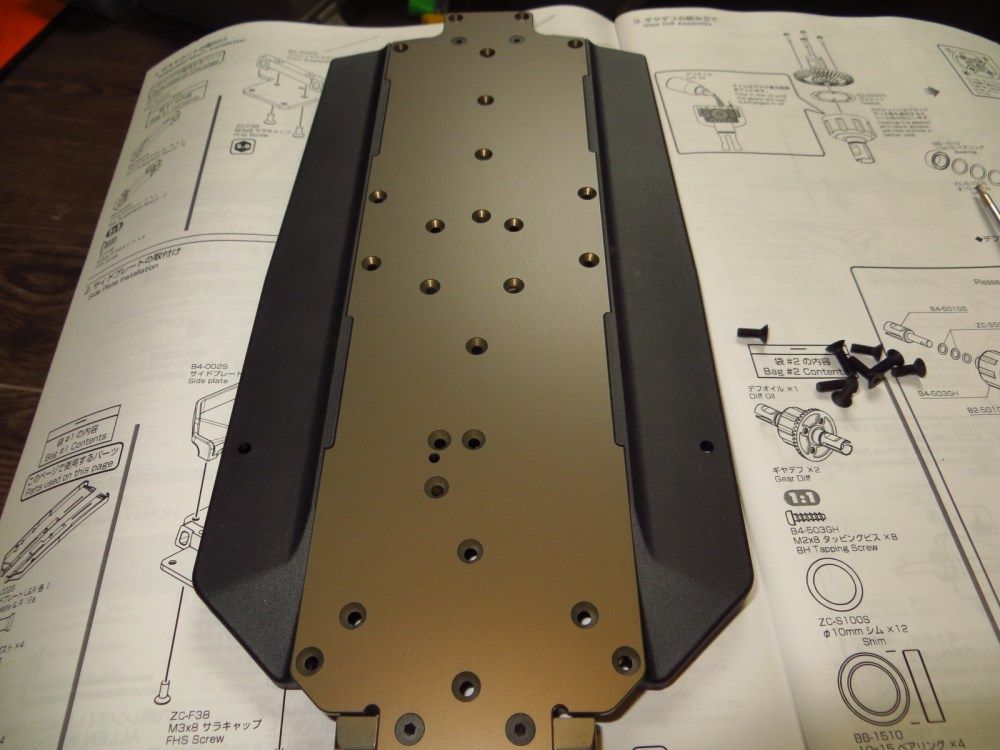
The alu chassis itself had grooves to fit in the side pods snugly.

Combined weight and assembly
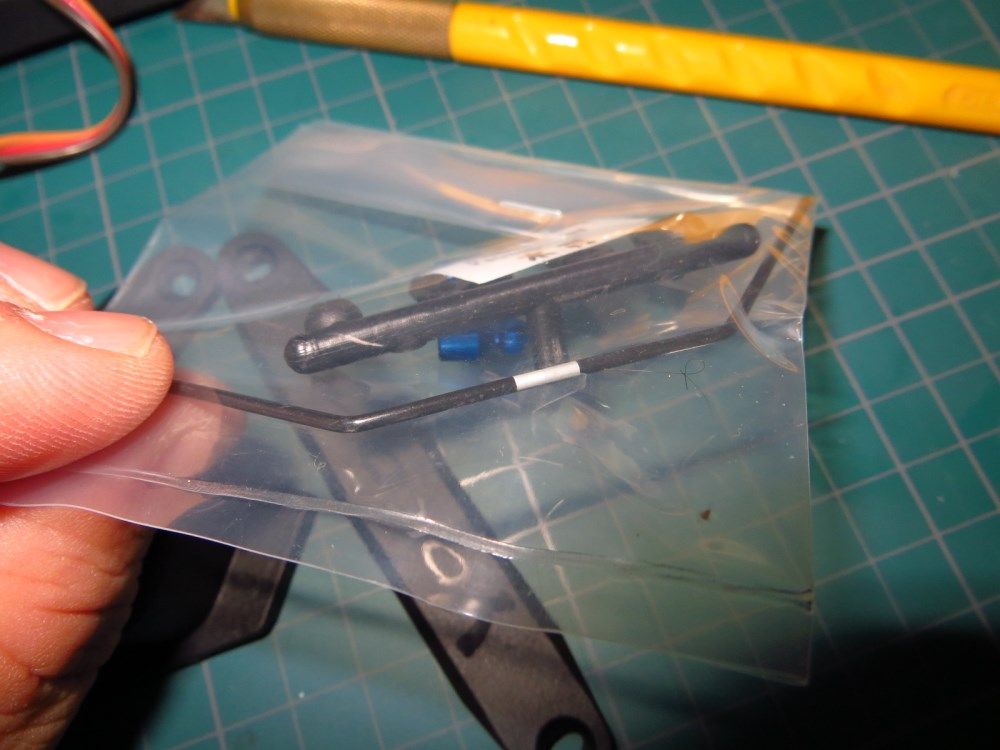
note that all bags have been labeled and even the person who pack it is being labeled. guess easy to trace back on issues and such.
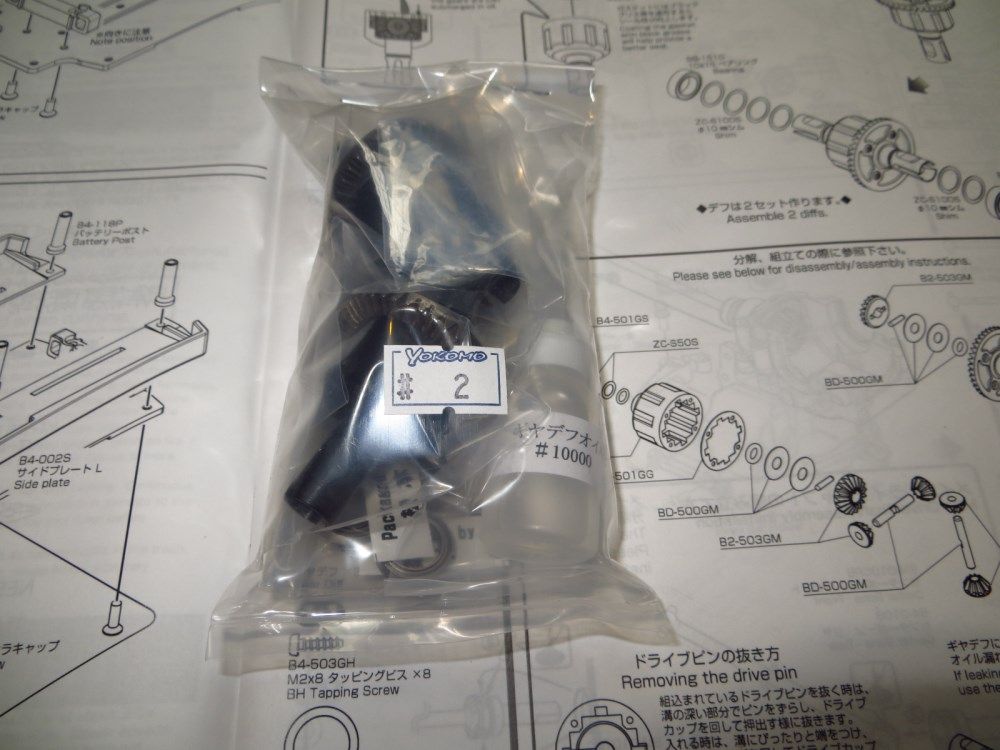
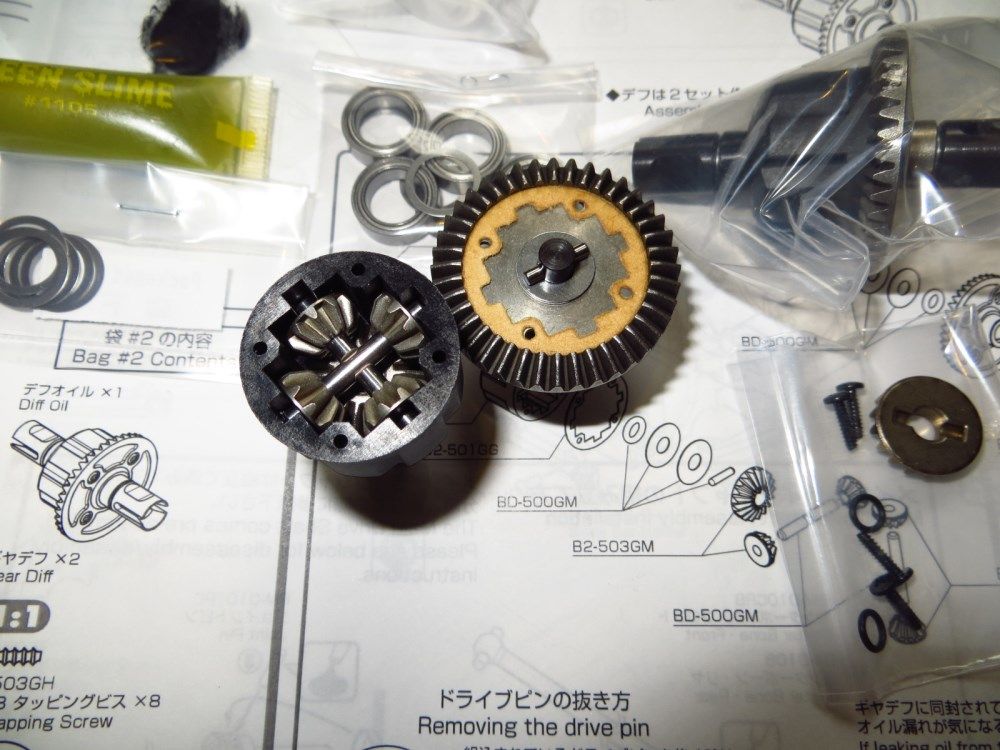
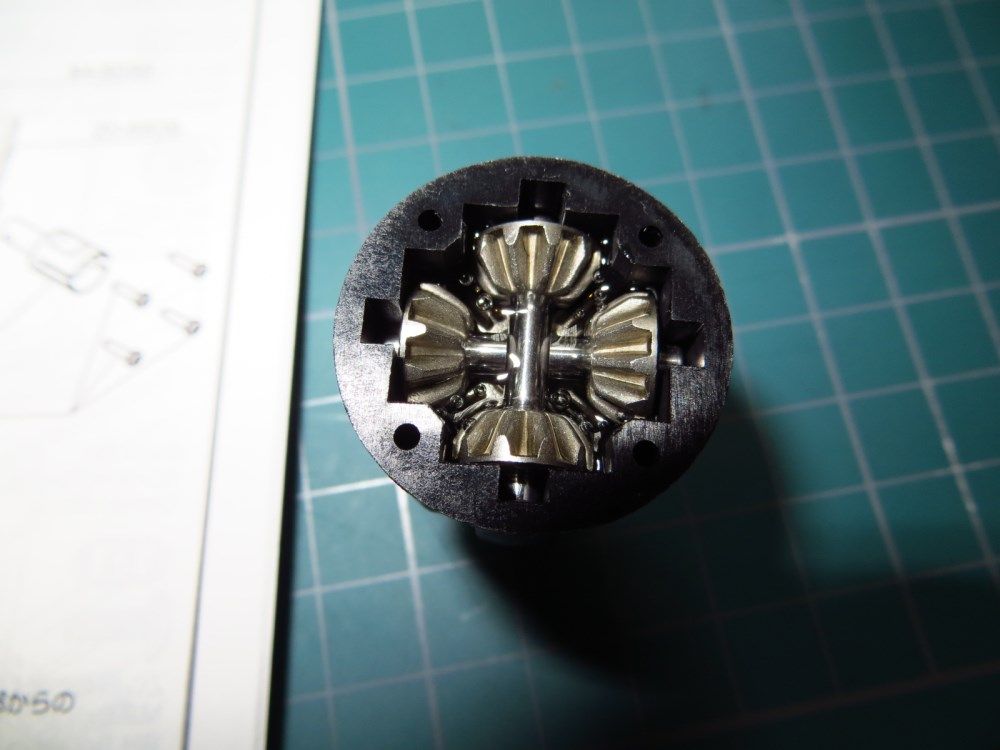
after the chassis is done up, we move on to the gear diff.
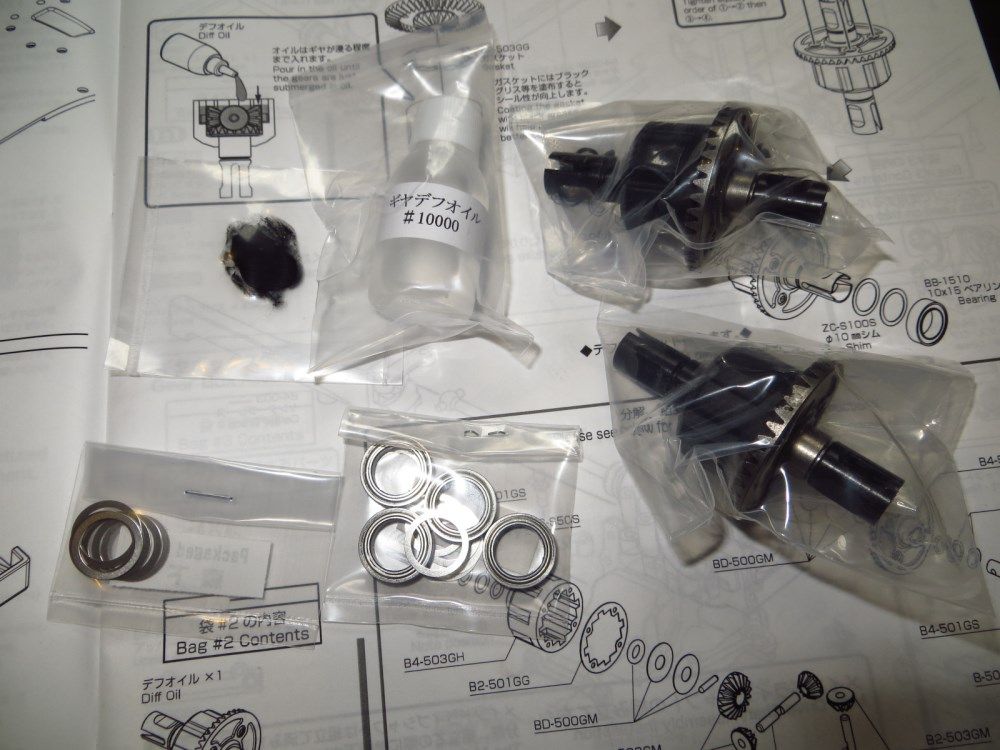
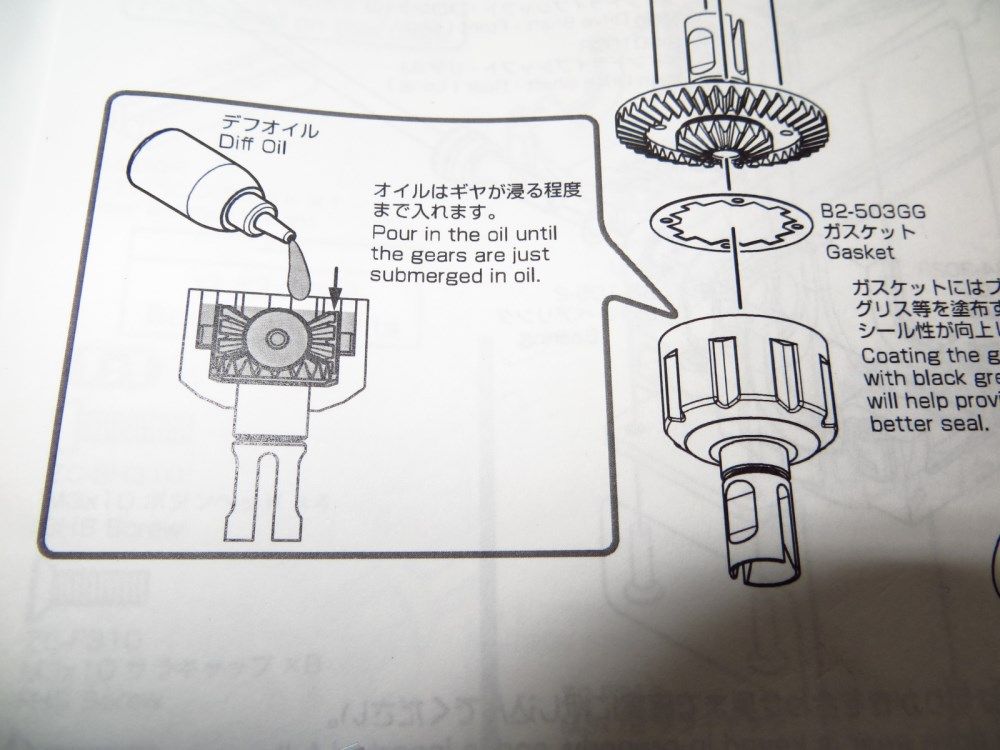
diff comes pre-assembled, minus the oil. supplied black grease is recommended to be applied on the gasket to seal it. however, i opt for green slime.
remove all shims and washer, slime all orings, and reassemble back. instruction state to fill with oil till gear level, and i got pretty bad experience of
leaky diff when i does that. as such, i only filled it till the center shaft plus 1mm using the supplied 10k diff oil.
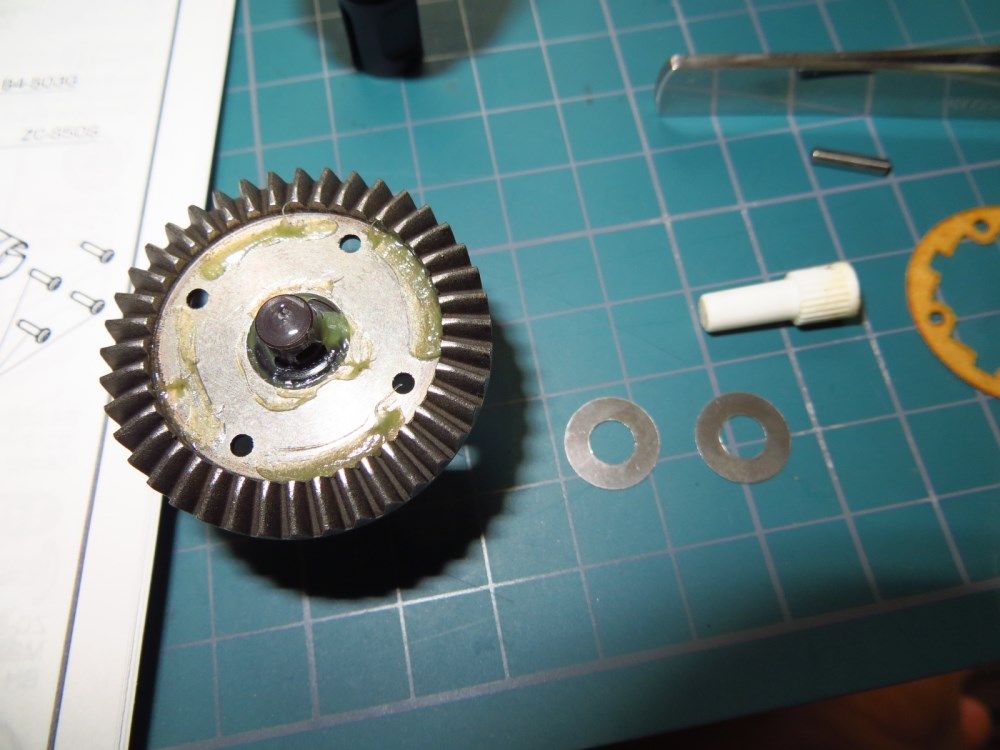
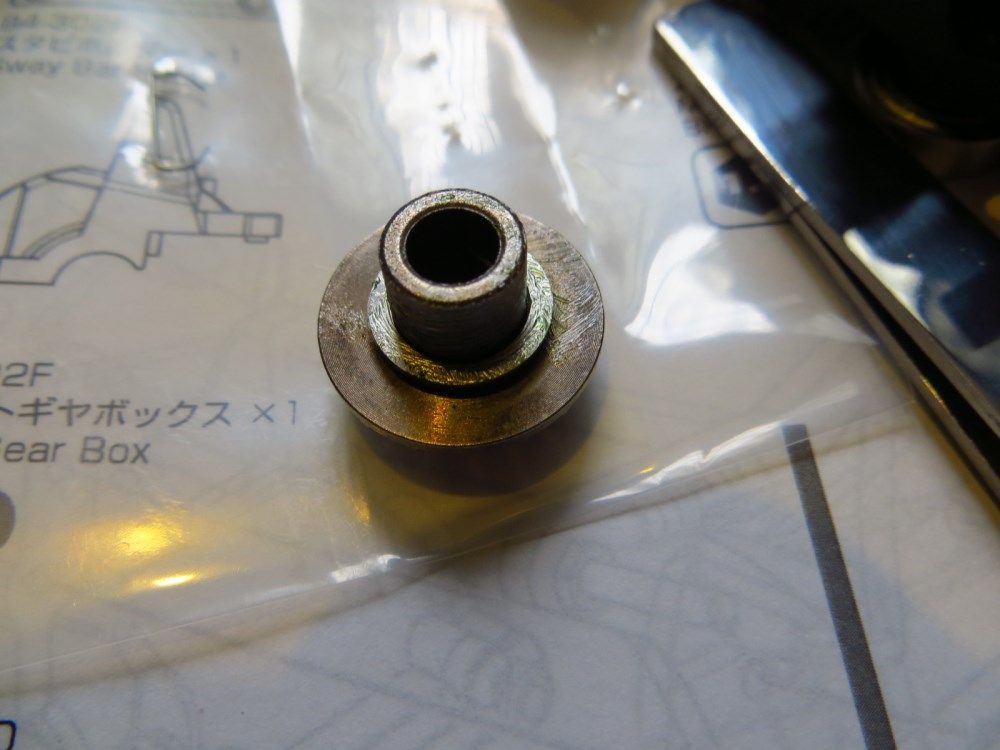
After gear diff, Main drive shaft assemble begins. the shaft is basically built ready out of box.

the drive gear had shims, and tho manual did not mention it, i took the liberty to apply some hi-temp lithium grease on the gear with shim side, and subsequently, on the teeth side.
application is done via a brush.
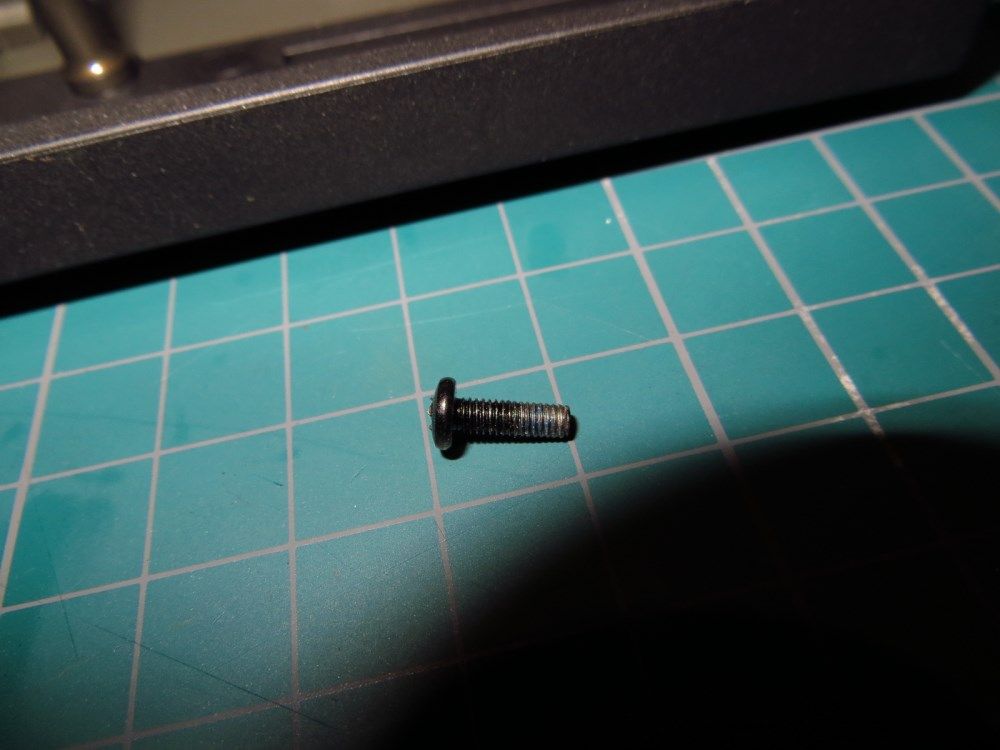
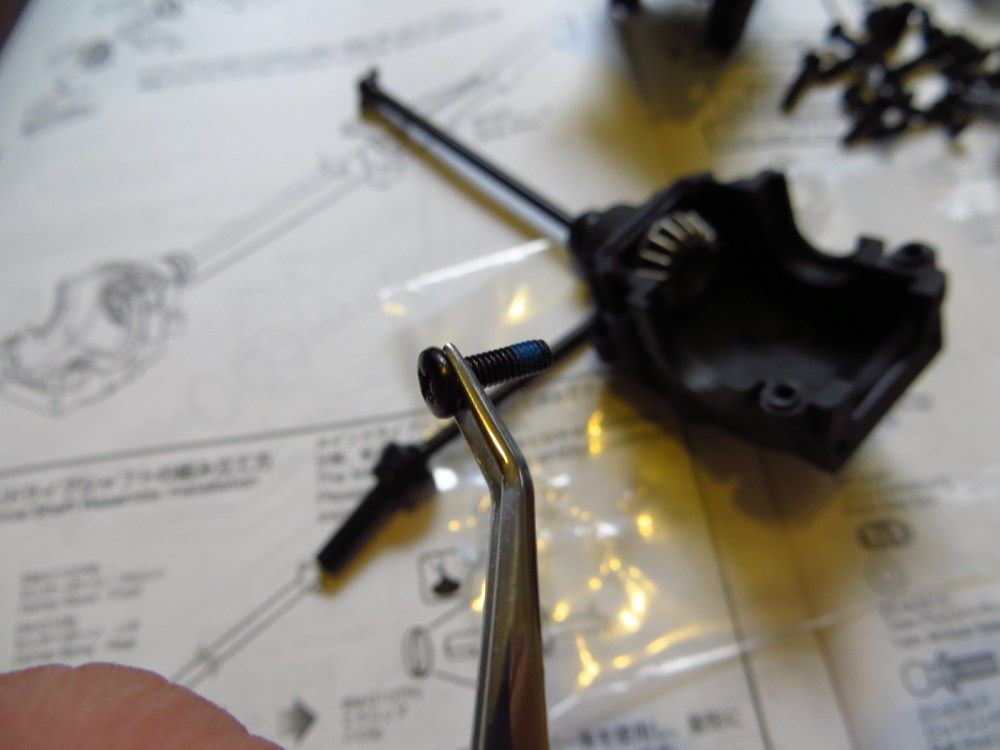
i believe that there's someone mentioning that the screw had some minor issue. i had no problem with the front shaft, however, on the rear shaft, i had a problem with the screw.
it juz wont screw in, thus, left with no choice, i used a 2.6 x 6mm to lock it. stock screw is 8mm, and it just wont turn in no matter what. same screw used in front shaft had no issues.
Needless to say, a build would start off with the brand new kit. So here�s my kit and the 10mm hex & wheel pin conversion. Reason being all my existing wheels are based on this format.


And read this first, before starting build.

When I held up the side pods, I was shocked with the heavier weight and very sturdy build. Thus, I weigh it, and it seems not too heavy on the scale. A slight textured carbon surface on the side pods.

The alu chassis itself had grooves to fit in the side pods snugly.

Combined weight and assembly


note that all bags have been labeled and even the person who pack it is being labeled. guess easy to trace back on issues and such.

after the chassis is done up, we move on to the gear diff.
diff comes pre-assembled, minus the oil. supplied black grease is recommended to be applied on the gasket to seal it. however, i opt for green slime.
remove all shims and washer, slime all orings, and reassemble back. instruction state to fill with oil till gear level, and i got pretty bad experience of
leaky diff when i does that. as such, i only filled it till the center shaft plus 1mm using the supplied 10k diff oil.


After gear diff, Main drive shaft assemble begins. the shaft is basically built ready out of box.

the drive gear had shims, and tho manual did not mention it, i took the liberty to apply some hi-temp lithium grease on the gear with shim side, and subsequently, on the teeth side.
application is done via a brush.

i believe that there's someone mentioning that the screw had some minor issue. i had no problem with the front shaft, however, on the rear shaft, i had a problem with the screw.
it juz wont screw in, thus, left with no choice, i used a 2.6 x 6mm to lock it. stock screw is 8mm, and it just wont turn in no matter what. same screw used in front shaft had no issues.
 11-10-2013, 04:07 AM
#974
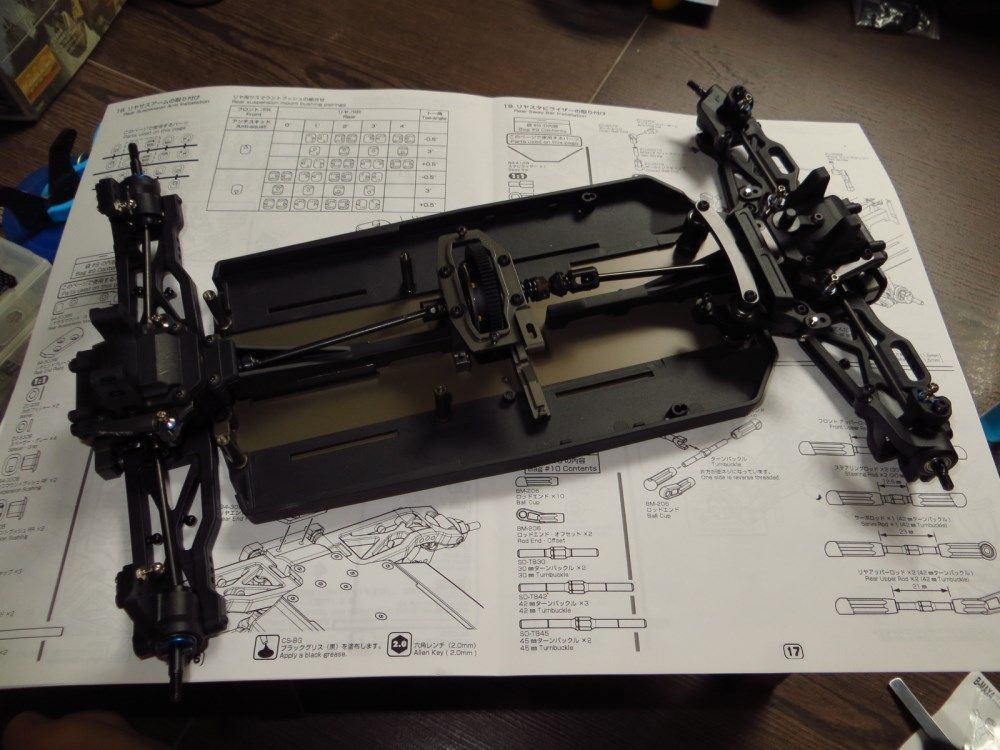
After the shaft are done, lower bulkhead aseembly begins.
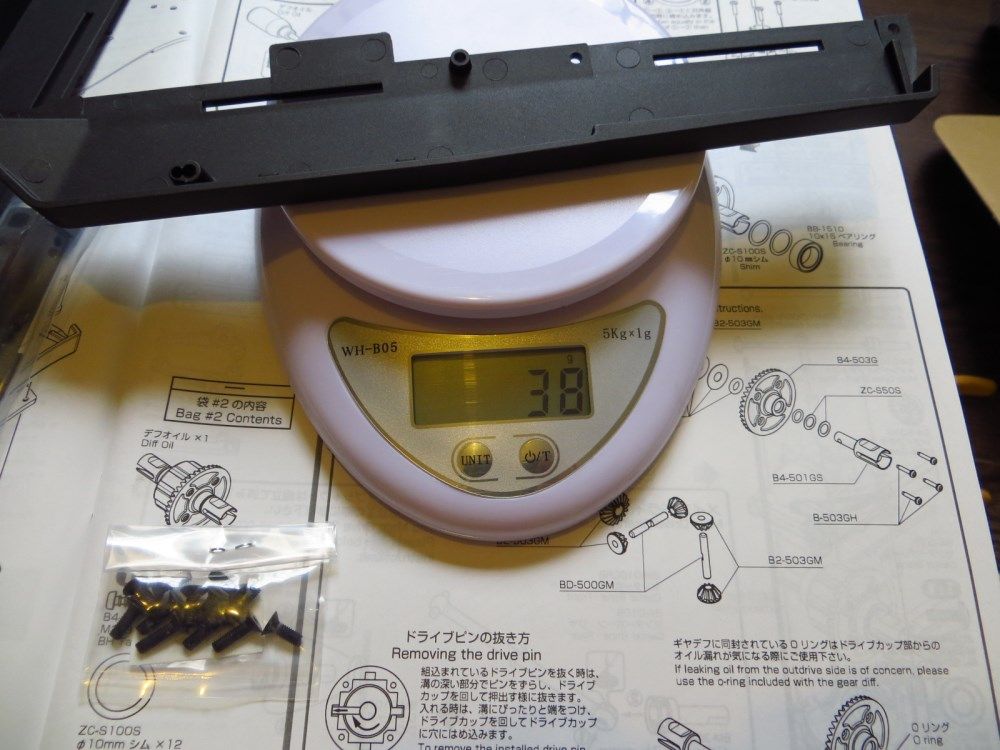
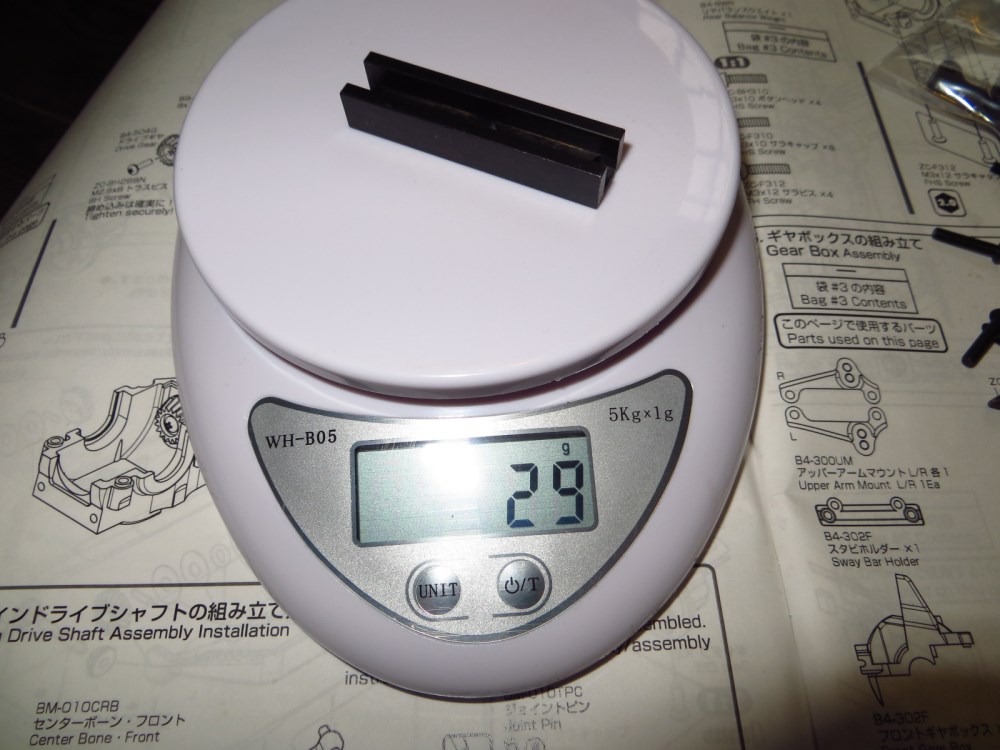
but before that, the weight in question.
an additional of 29gms to be placed inbetween the saddles.
though the manual did not state this to be an option in assembly, i build it as manual states, thus in it goes.
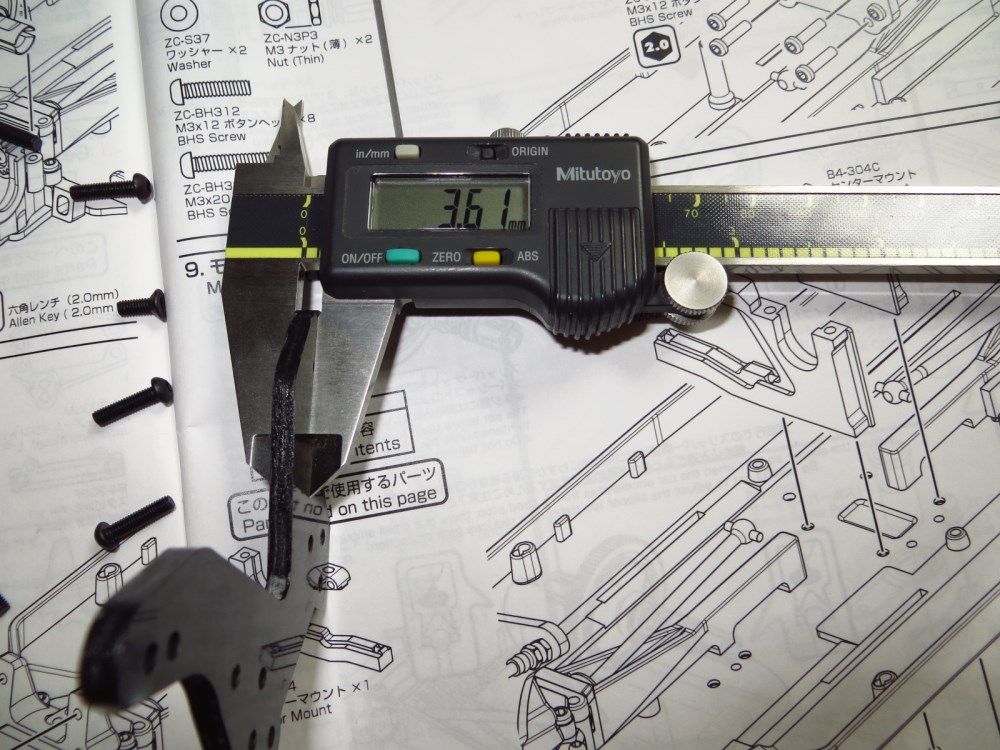
the next step is supposed to be building the shock towers, and as it's CF parts, i had the edges applied with CA first, left it to cure and move on to the next step.
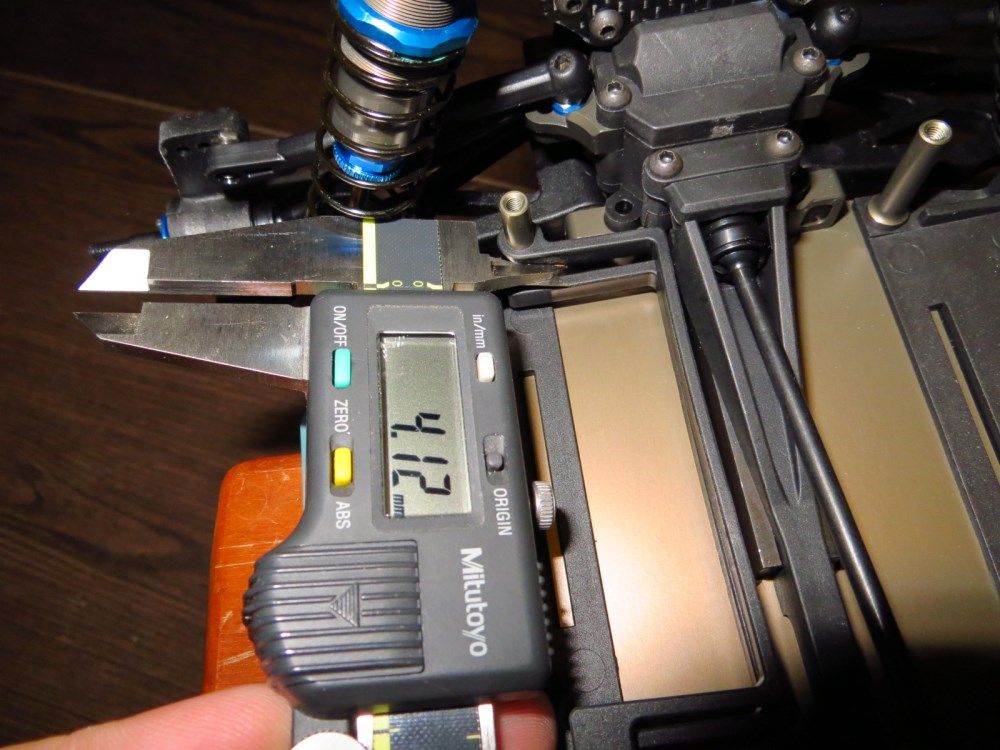
thickness of the shock tower. plus minus 0.1mm??
now, we move on to center motor mount and spur/ slipper assembly.
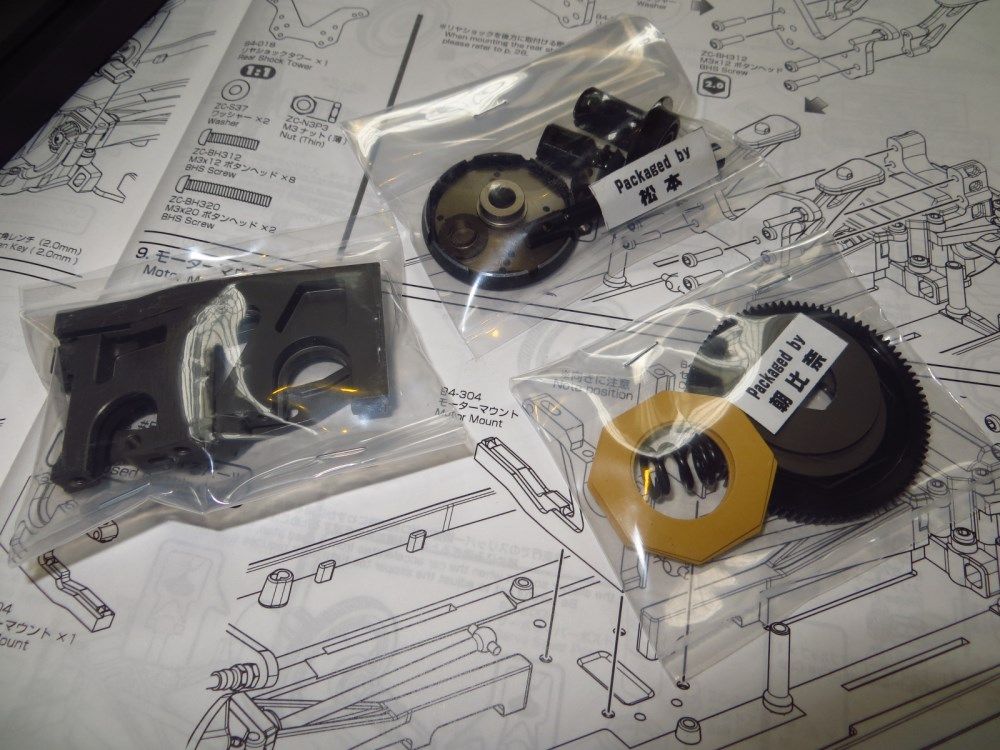
a 3 pad slipper assembly.
note the pin position.
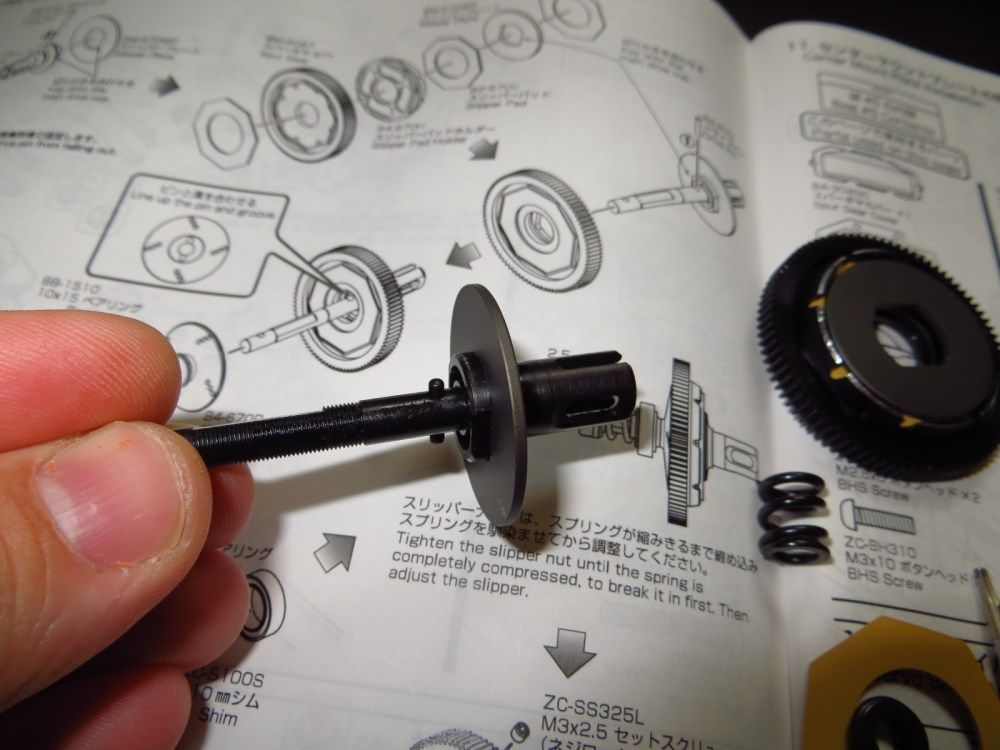
note on where to tighten in the grub screw on the flat side, not the thread side.
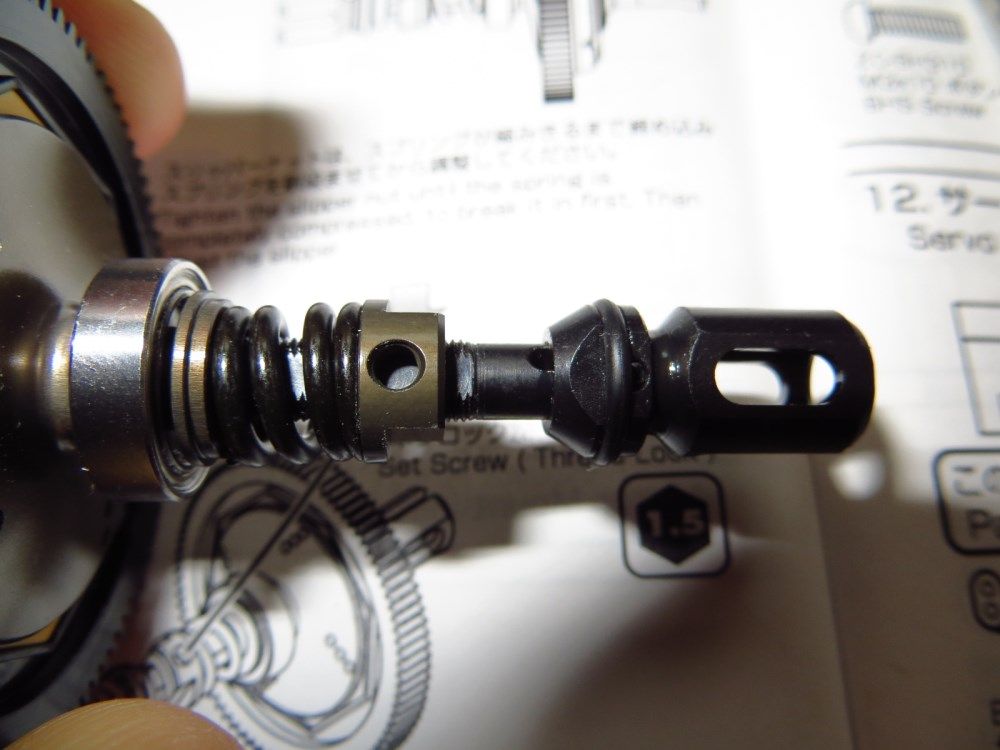
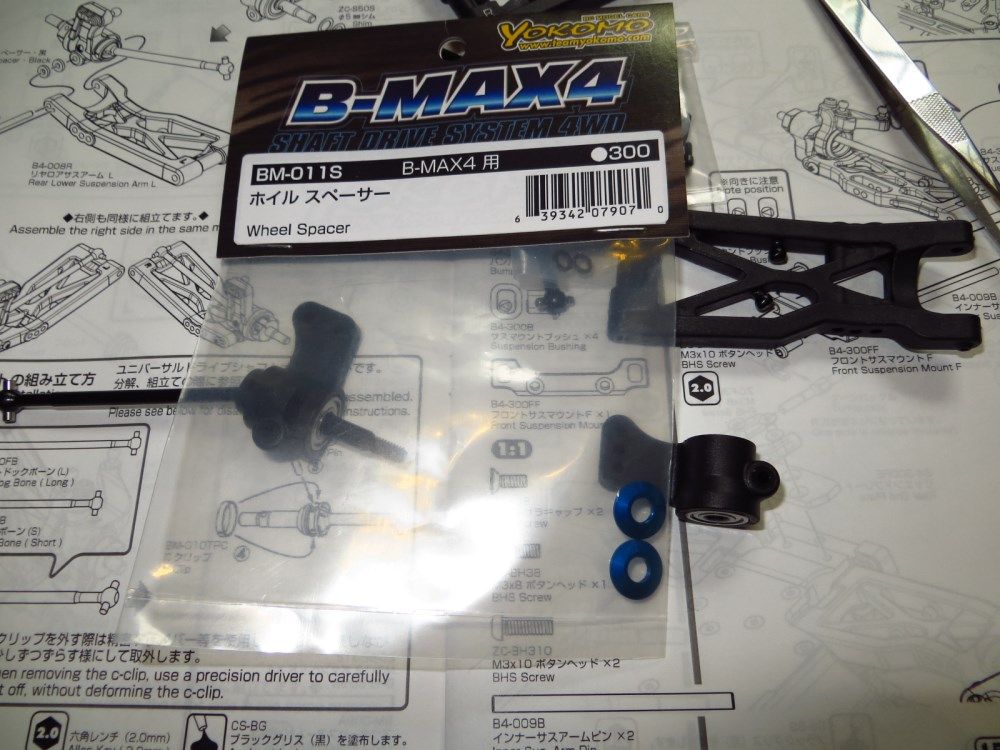
arms and drive shaft assemble comes next.
and there, i wld say ard 70% done.
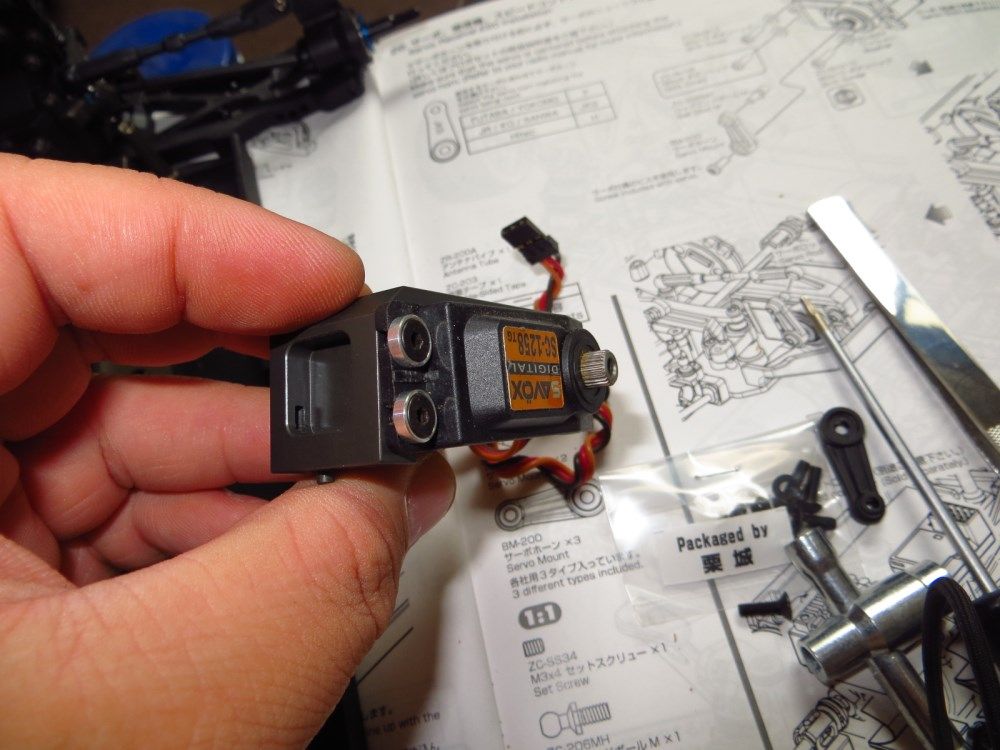
next up, on the servo side, this is my personal taste, as i've been quite used to this setup on my schumacher cars. instead of using button head screws and washers, i used countersucnk washer and counersunk screws.
after effects, not too bad, if only i have black countersunk washers.

but before that, the weight in question.
an additional of 29gms to be placed inbetween the saddles.
though the manual did not state this to be an option in assembly, i build it as manual states, thus in it goes.


the next step is supposed to be building the shock towers, and as it's CF parts, i had the edges applied with CA first, left it to cure and move on to the next step.

thickness of the shock tower. plus minus 0.1mm??

now, we move on to center motor mount and spur/ slipper assembly.

a 3 pad slipper assembly.
note the pin position.

note on where to tighten in the grub screw on the flat side, not the thread side.

arms and drive shaft assemble comes next.


and there, i wld say ard 70% done.

next up, on the servo side, this is my personal taste, as i've been quite used to this setup on my schumacher cars. instead of using button head screws and washers, i used countersucnk washer and counersunk screws.
after effects, not too bad, if only i have black countersunk washers.

Last edited by viktozzz; 11-10-2013 at 04:24 AM.
11-10-2013, 04:07 AM
#975
alrite, next up, we have the Bmax lightweight body.
weighing in only at 34grams uncut... OMG
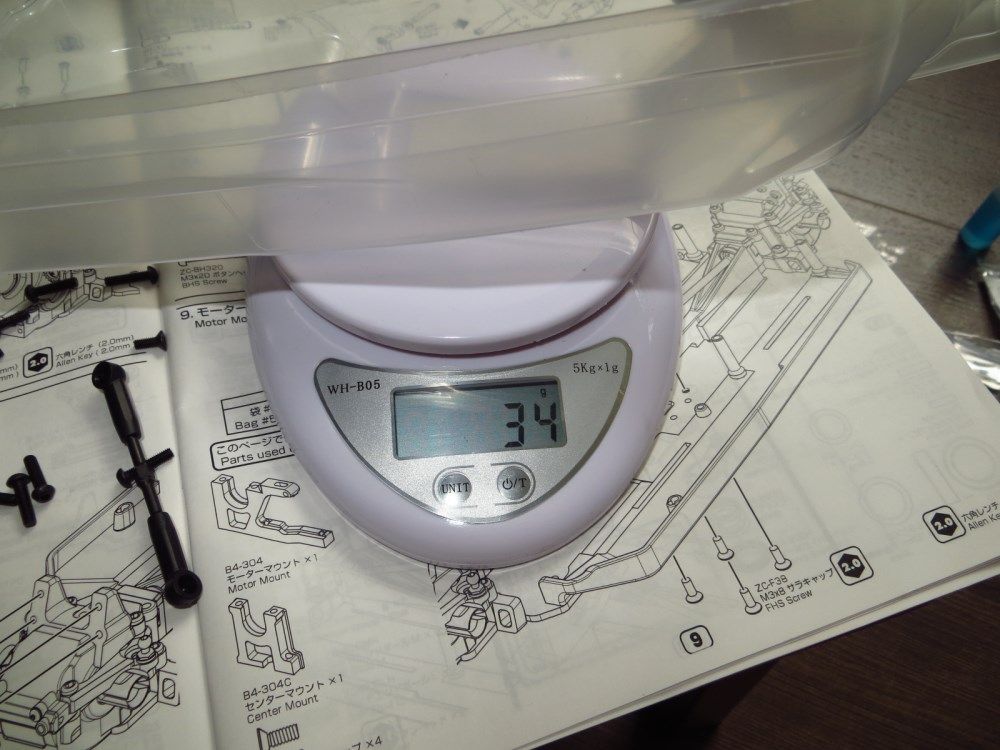
when it's cut, it only weighs 26grams. that's one of the lightest body i've come across..
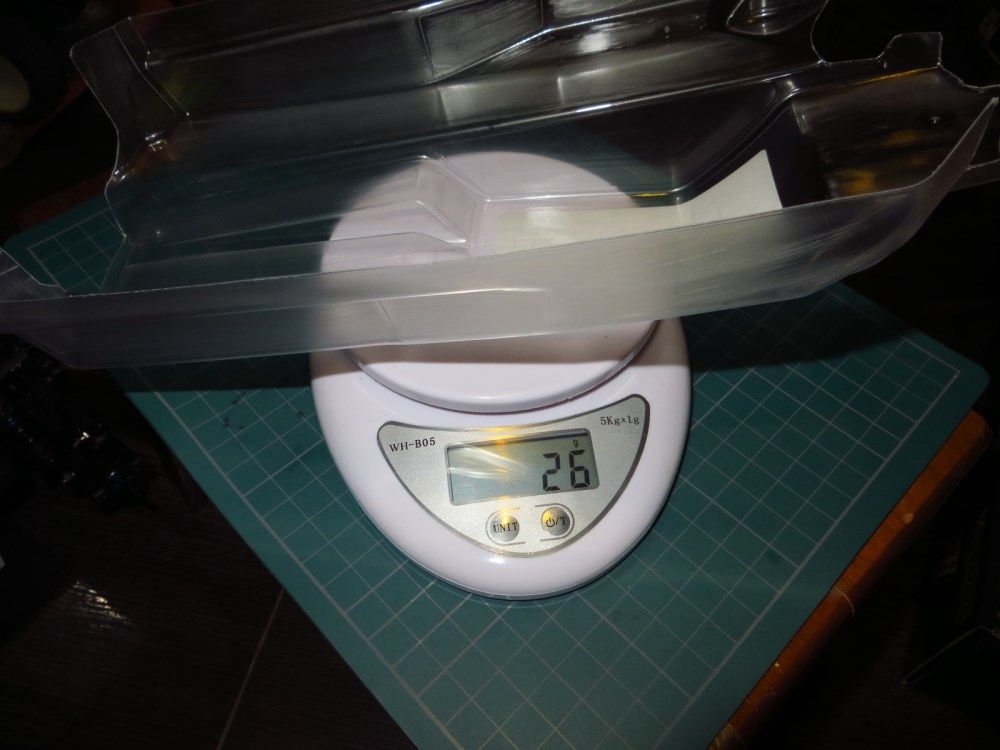
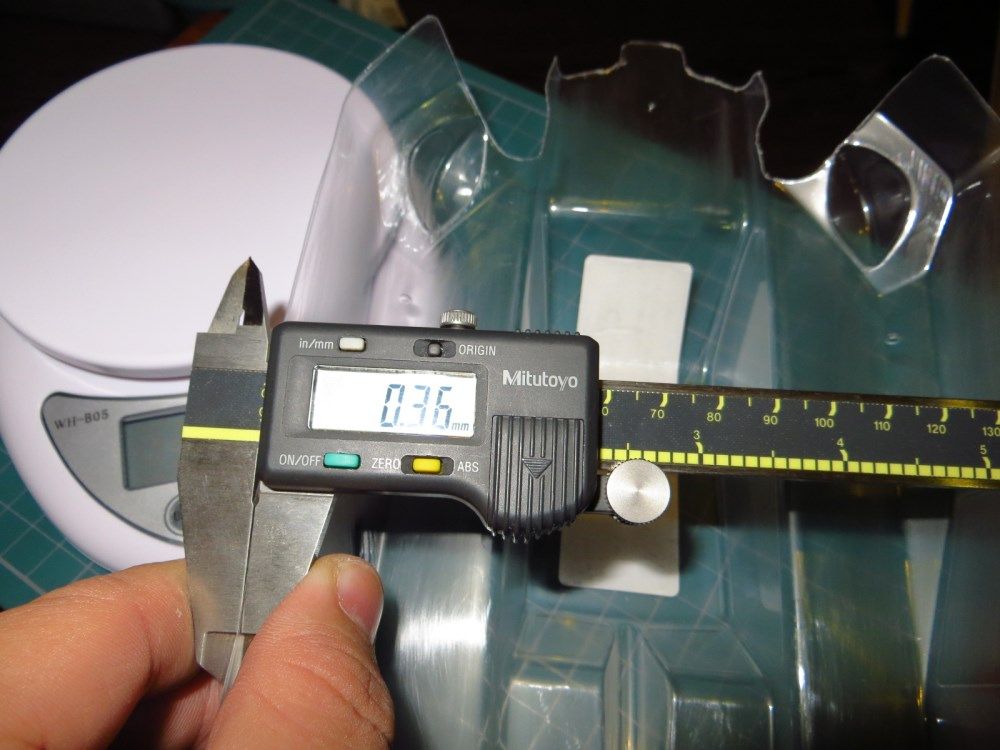
though we have seen the youtube unboxing video that the body could well be flimsy, i found it to be interesting that the side measure in 0.3mm and the top/ front measures in 0.5xmm.

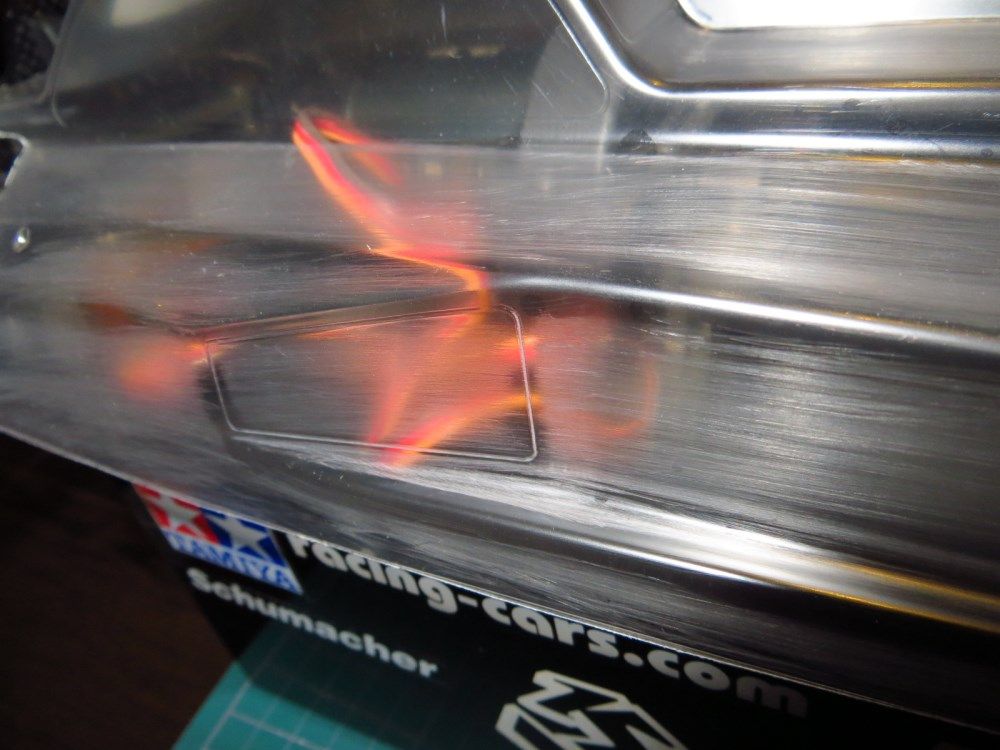
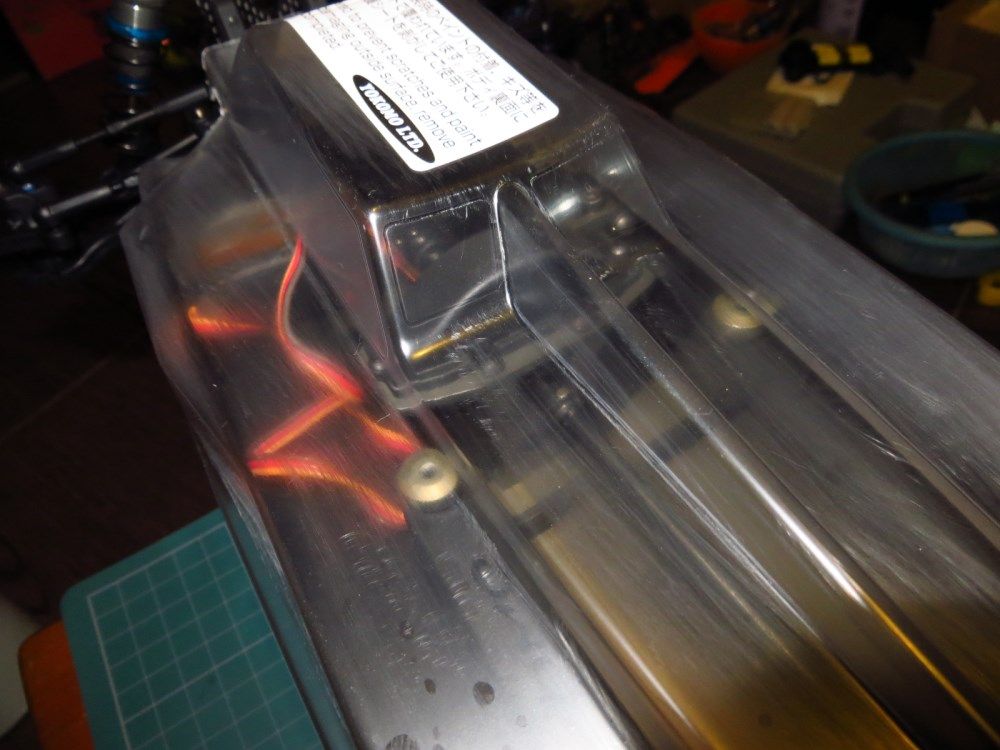
options to open up airvents on the side for motor/ ESC and air outlet behind the windscreen is available. for me, i leave it as it is first, without any opening.
There is 2 position for the battery tray, rearward or forward position.
i stack the tray on top of each other to let all have a gauge of how much more forward.
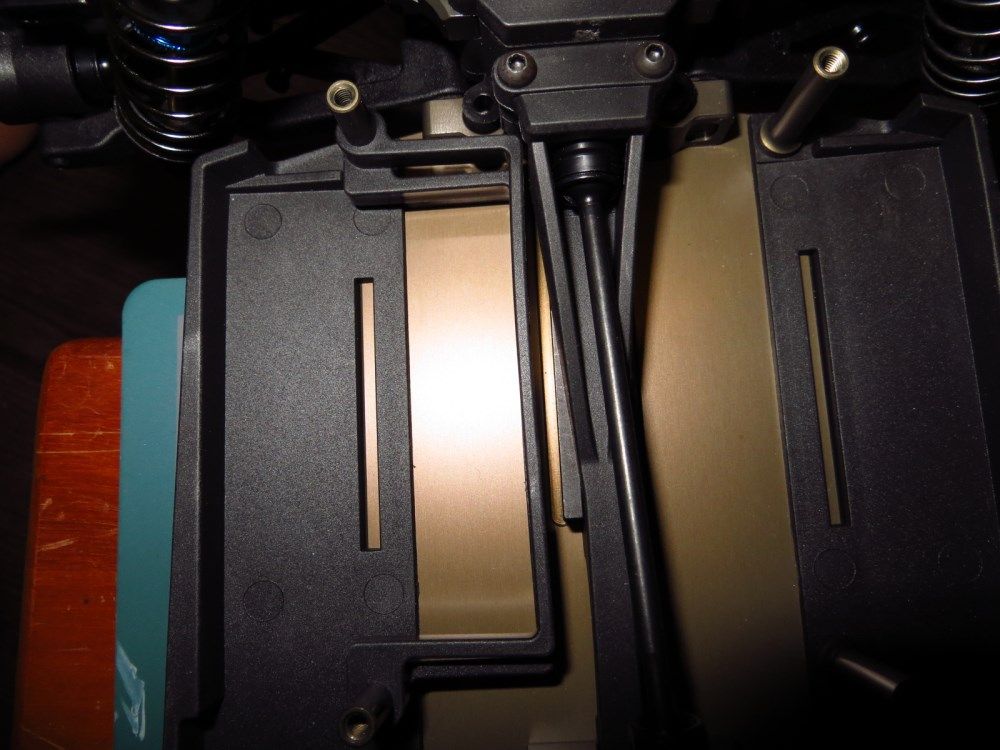
about 4mm forward from the rearward postion. another cool and quick tuning option from Yokomo, as it simply slips on. no screws to tighten or loose it.
the rear weight in-between the battery. i built it as per instructions, and if i'm not wrong, we can move it forward or rearward for more tuning options.
with battery stray and thumb screw to hold down the stray. now, if only the strap is in carbon fibre, purely for cosmetic.
a single anti-roll bar is included. i left it out of my build as our local track is lacking traction. would have to run it first before decide if i would have it installed in.
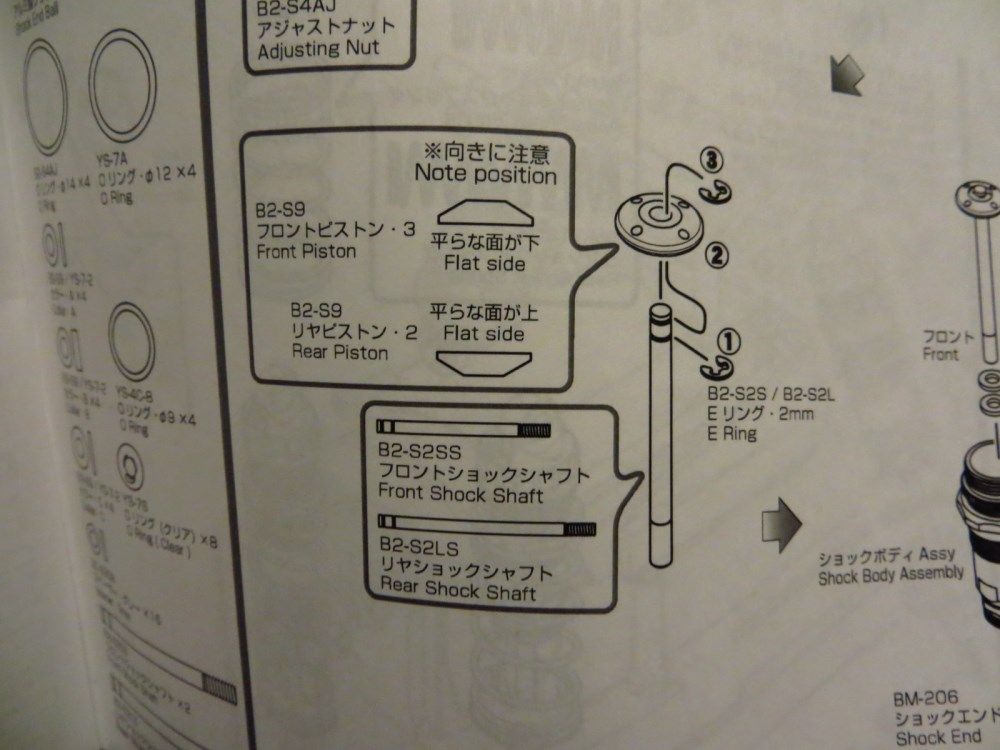
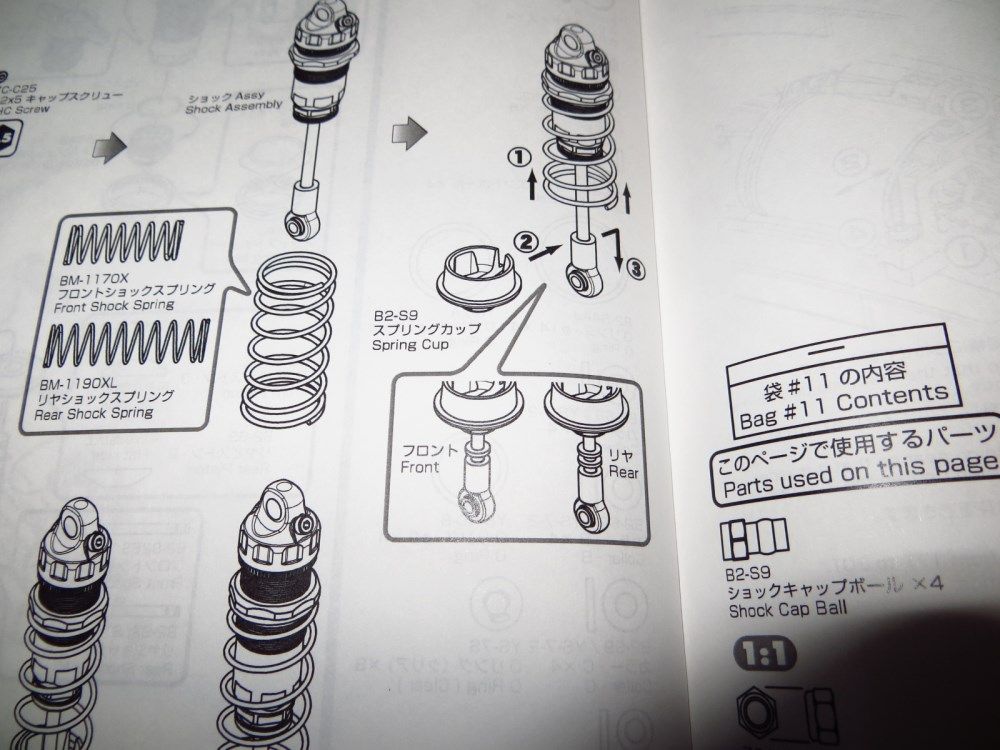
Shocks building are pretty standard affairs. shock oil of 550 for front along with inverted piston, as in tapered face up, rear shocks with 500 oil and piston face down. only disappointing stuff is that it comes with the regular clear oring instead of the blue orings.
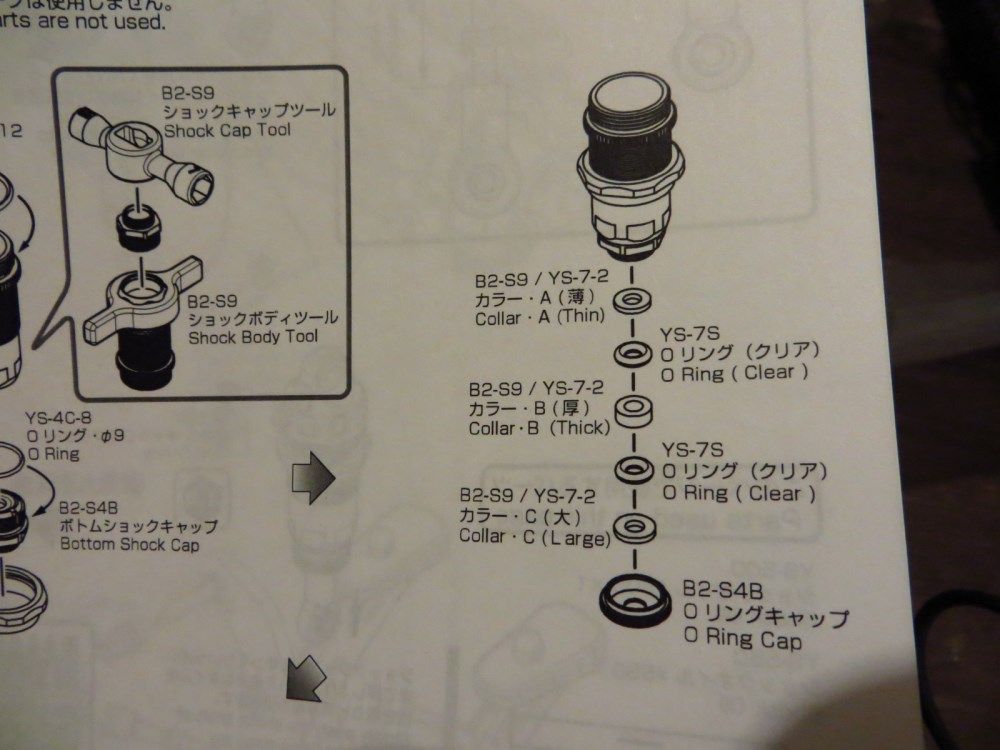
Part C on the diagram had 2 sides. one is the smooth side, and the other is slightly grooved. i had the groove facing the orings and the flat smooth side facing the bottom screw cap.
apologies for the lack of picture on this, as i just can't get a clear nice shot of it.
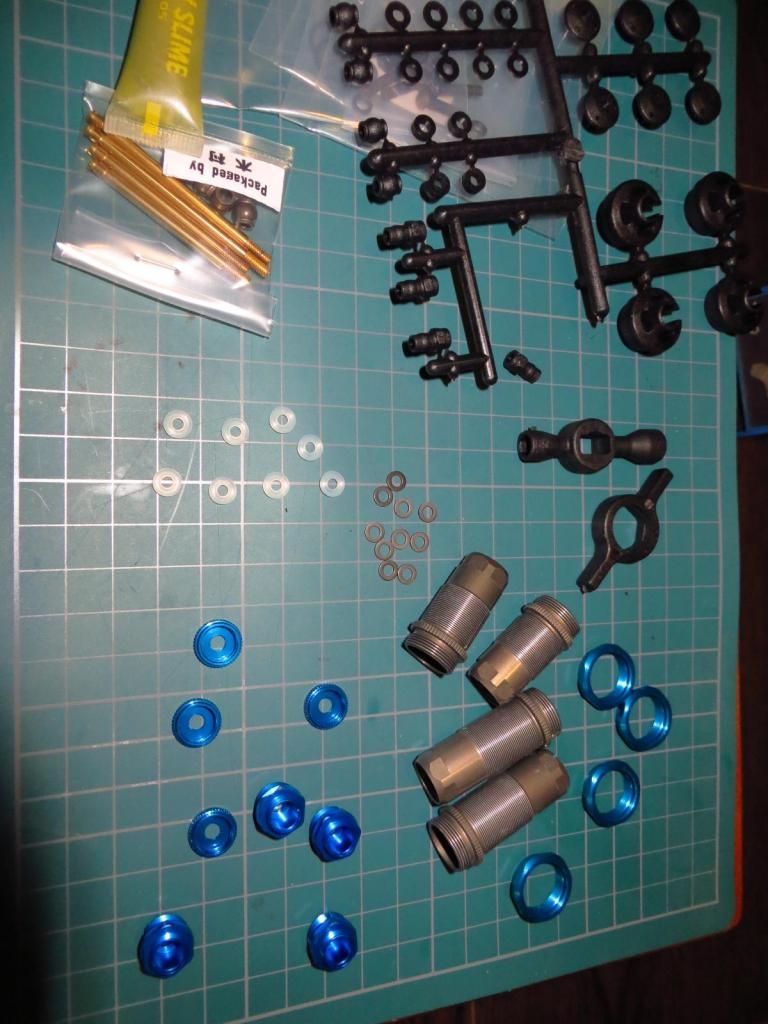
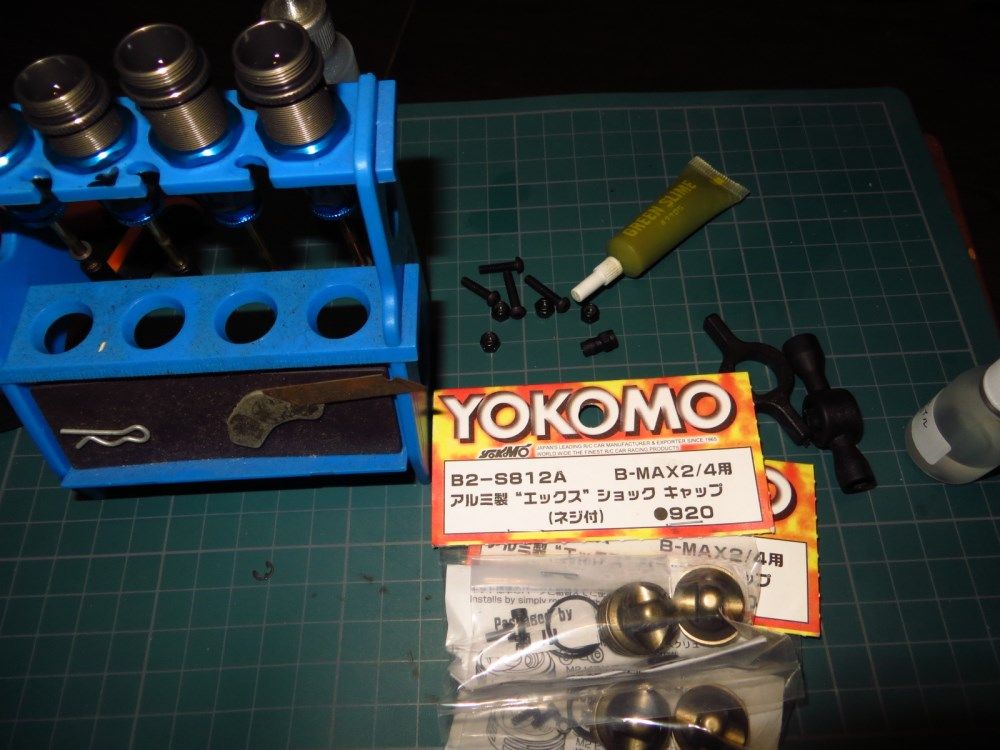
personally, i opt for the alu shock caps instead of the stock plastic caps, tho it looks sturdy as well.
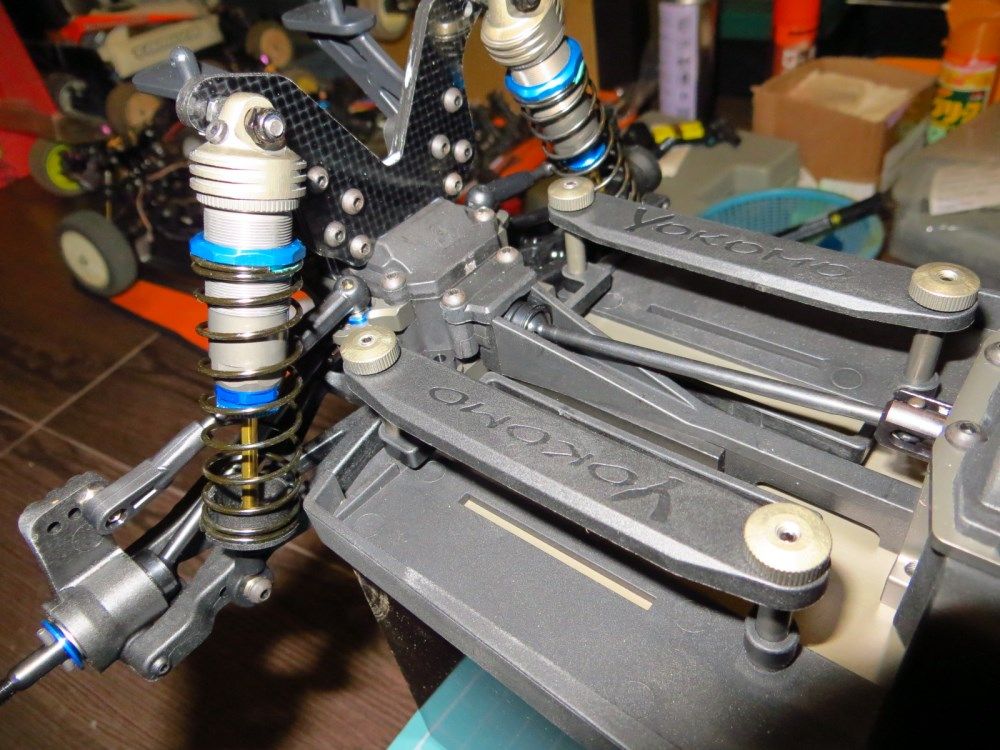
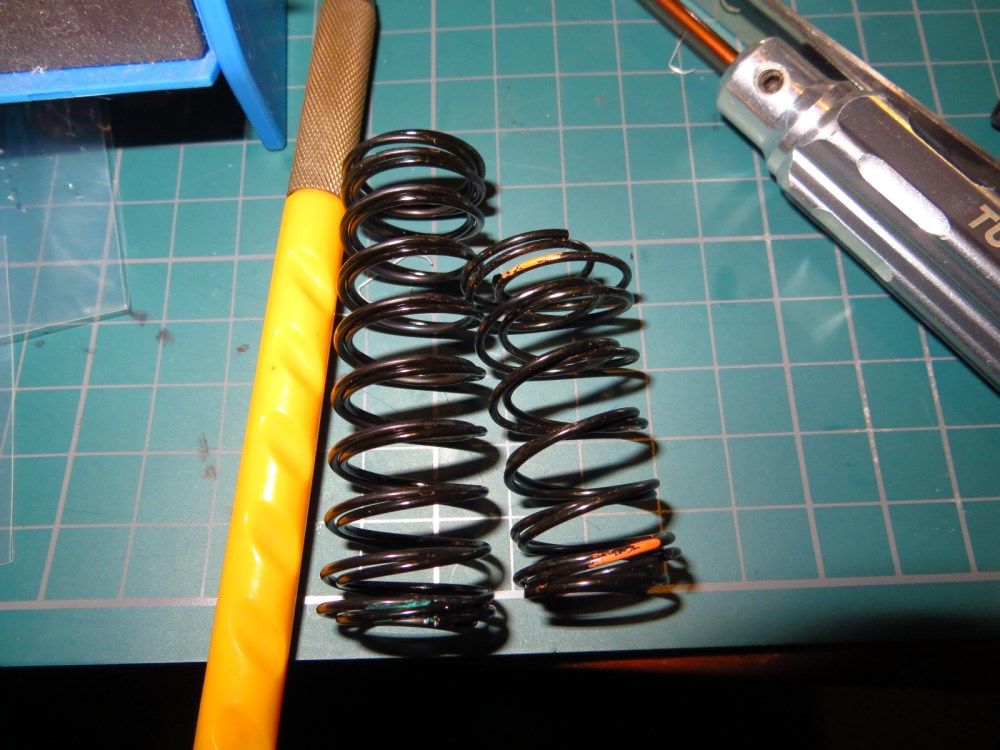
Big bore springs. front orange, rear green.
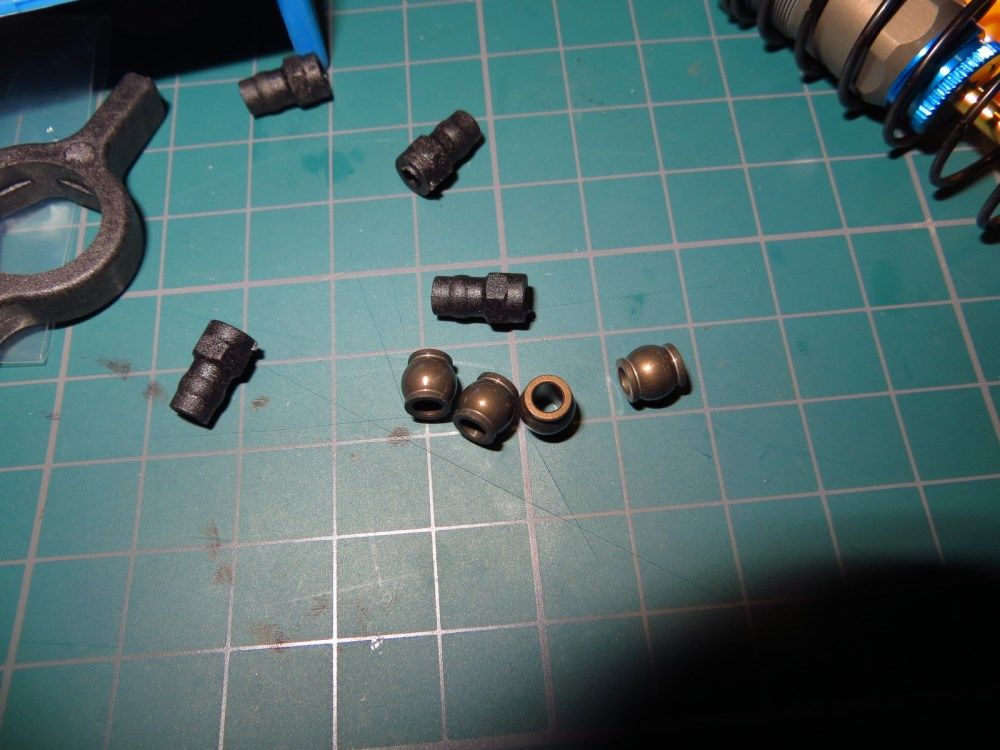
alu lower shock ends, but carbon plastic upper shock holder. my alu part is en-route now as i'm typing this out.
note on spacer location. the shaft spacer is to be under the lower shock retainer, not on top.
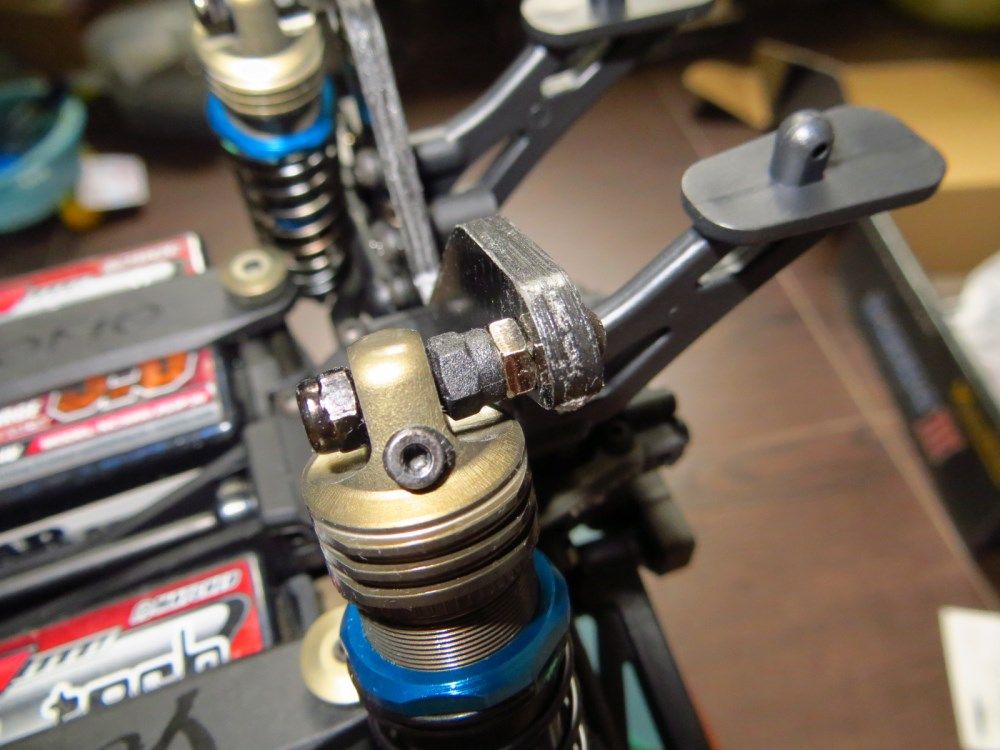
realised that the spring rubs against the turnbuckles for the rear shock. thus, some minor mods to minimise the rubbing.
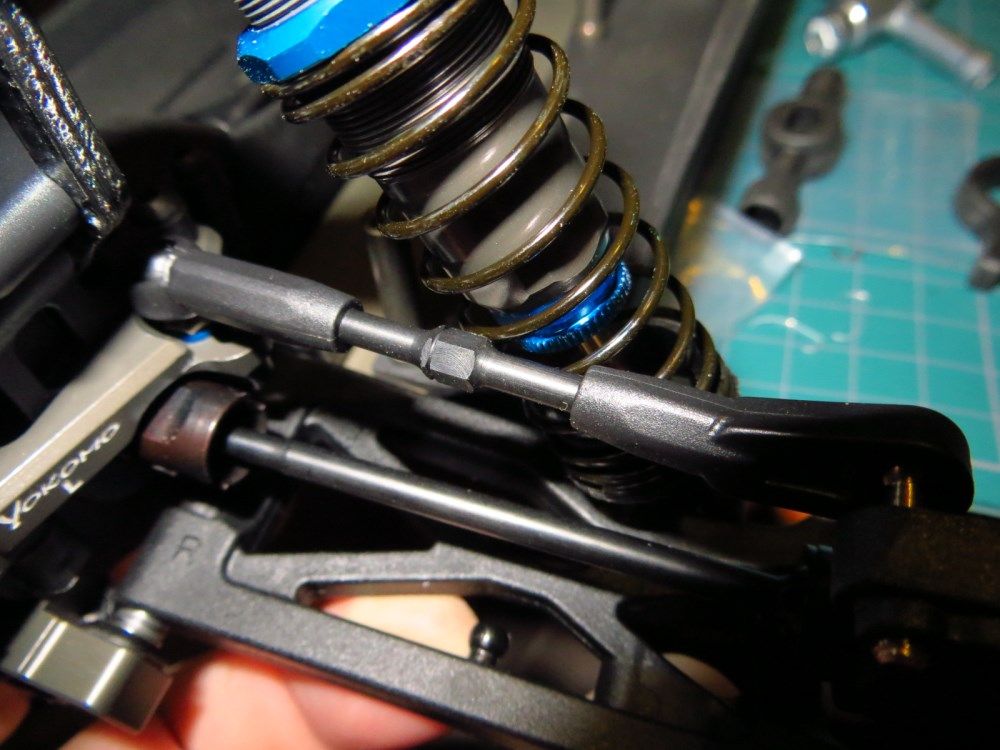
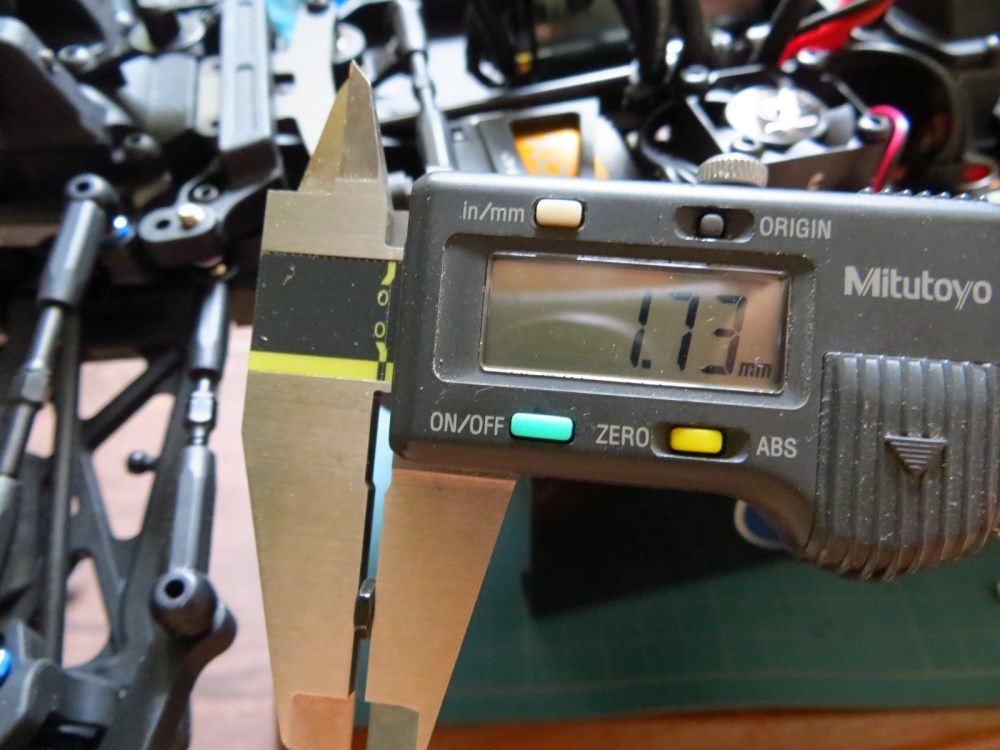
after minor mods. i replace the hex nut with a thicker one, measuring in at 2.4mm, and a 1mm spacer below. the rubbing minimises quite abit, tho there is still chance that it would be in contact.
ideally would be to use back the stock nut, and 1mm spacer up and down. as i'm only left with 2pcs of 1mm spacers, thus search for a thicker nut in my spares box. would switch back to spacer up adn down once i got it.
original nut measure in around 1.75mm.

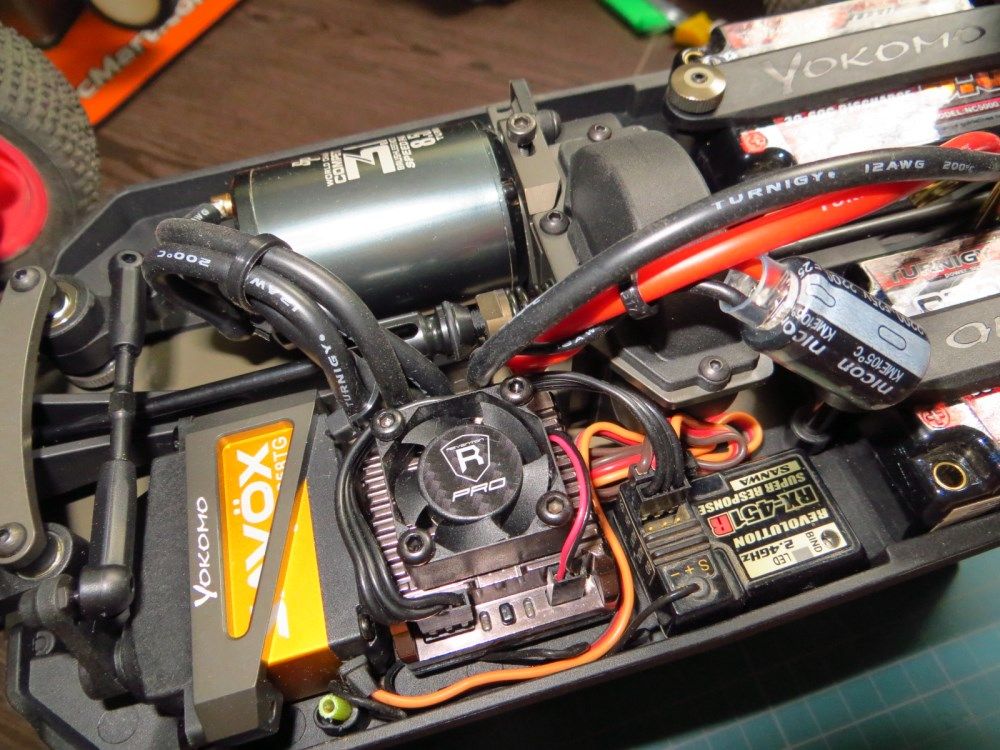
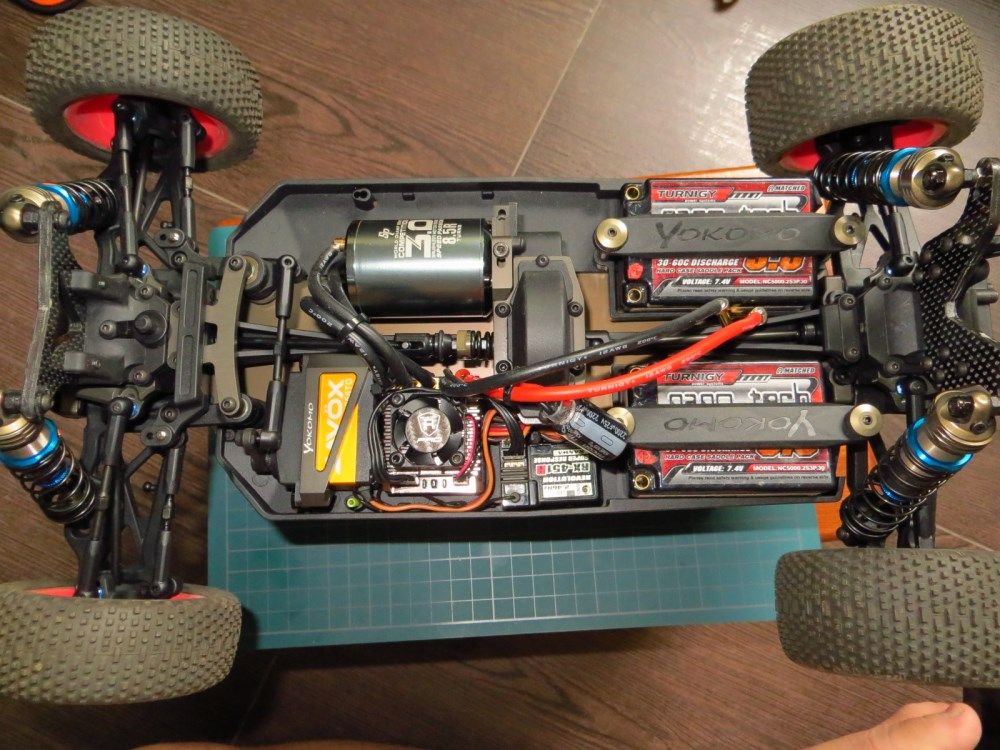
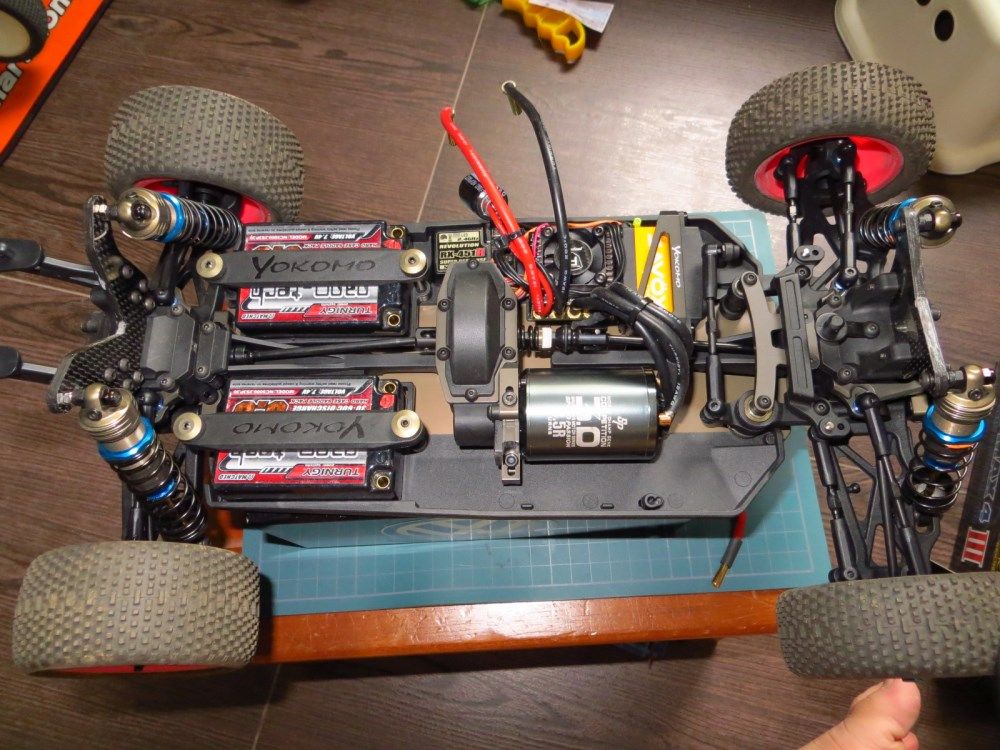
last but not least, electronics. though it's quite spacious, i sort of miss my tekin combo. do note that the cables are routed on top is due to me using 12awg cables. if using 14awg cable, u should be able to route it below.
That's all folks, on my quick build review. hope this pictures ahve shown more or less of the buggy itself.
a few notes based on my observation, tho it is note stated in the manual.
1. the center brace mounts is mounted on via 4 10mm screws for both front and back. i suspect that the 10mm screws would provide the most rigid configuration, and if using a shorter screw, we should be able to have more flex in the chassis.
2. the gear diff does somes with 4 more orings to use for both front and rear. however, i chose not to use them, as i wanted to see how good the 'stock' configuration would be.
3. the shocks oring are clear in color, is the softest in the yokomo range. i'm personally using the blue orings in my trf shocks, and it held pretty well for the past one year without leak and such. it might be a good idea to use the blue orings OOB, IMO.
and now, would be painting up the body and running it in this weekend.
weighing in only at 34grams uncut... OMG

when it's cut, it only weighs 26grams. that's one of the lightest body i've come across..

though we have seen the youtube unboxing video that the body could well be flimsy, i found it to be interesting that the side measure in 0.3mm and the top/ front measures in 0.5xmm.


options to open up airvents on the side for motor/ ESC and air outlet behind the windscreen is available. for me, i leave it as it is first, without any opening.


There is 2 position for the battery tray, rearward or forward position.
i stack the tray on top of each other to let all have a gauge of how much more forward.

about 4mm forward from the rearward postion. another cool and quick tuning option from Yokomo, as it simply slips on. no screws to tighten or loose it.

the rear weight in-between the battery. i built it as per instructions, and if i'm not wrong, we can move it forward or rearward for more tuning options.


with battery stray and thumb screw to hold down the stray. now, if only the strap is in carbon fibre, purely for cosmetic.

a single anti-roll bar is included. i left it out of my build as our local track is lacking traction. would have to run it first before decide if i would have it installed in.

Shocks building are pretty standard affairs. shock oil of 550 for front along with inverted piston, as in tapered face up, rear shocks with 500 oil and piston face down. only disappointing stuff is that it comes with the regular clear oring instead of the blue orings.


Part C on the diagram had 2 sides. one is the smooth side, and the other is slightly grooved. i had the groove facing the orings and the flat smooth side facing the bottom screw cap.
apologies for the lack of picture on this, as i just can't get a clear nice shot of it.

personally, i opt for the alu shock caps instead of the stock plastic caps, tho it looks sturdy as well.

Big bore springs. front orange, rear green.

alu lower shock ends, but carbon plastic upper shock holder. my alu part is en-route now as i'm typing this out.

note on spacer location. the shaft spacer is to be under the lower shock retainer, not on top.

realised that the spring rubs against the turnbuckles for the rear shock. thus, some minor mods to minimise the rubbing.

after minor mods. i replace the hex nut with a thicker one, measuring in at 2.4mm, and a 1mm spacer below. the rubbing minimises quite abit, tho there is still chance that it would be in contact.
ideally would be to use back the stock nut, and 1mm spacer up and down. as i'm only left with 2pcs of 1mm spacers, thus search for a thicker nut in my spares box. would switch back to spacer up adn down once i got it.
original nut measure in around 1.75mm.


last but not least, electronics. though it's quite spacious, i sort of miss my tekin combo. do note that the cables are routed on top is due to me using 12awg cables. if using 14awg cable, u should be able to route it below.


That's all folks, on my quick build review. hope this pictures ahve shown more or less of the buggy itself.
a few notes based on my observation, tho it is note stated in the manual.
1. the center brace mounts is mounted on via 4 10mm screws for both front and back. i suspect that the 10mm screws would provide the most rigid configuration, and if using a shorter screw, we should be able to have more flex in the chassis.
2. the gear diff does somes with 4 more orings to use for both front and rear. however, i chose not to use them, as i wanted to see how good the 'stock' configuration would be.
3. the shocks oring are clear in color, is the softest in the yokomo range. i'm personally using the blue orings in my trf shocks, and it held pretty well for the past one year without leak and such. it might be a good idea to use the blue orings OOB, IMO.
and now, would be painting up the body and running it in this weekend.
Last edited by viktozzz; 11-12-2013 at 06:00 PM.