


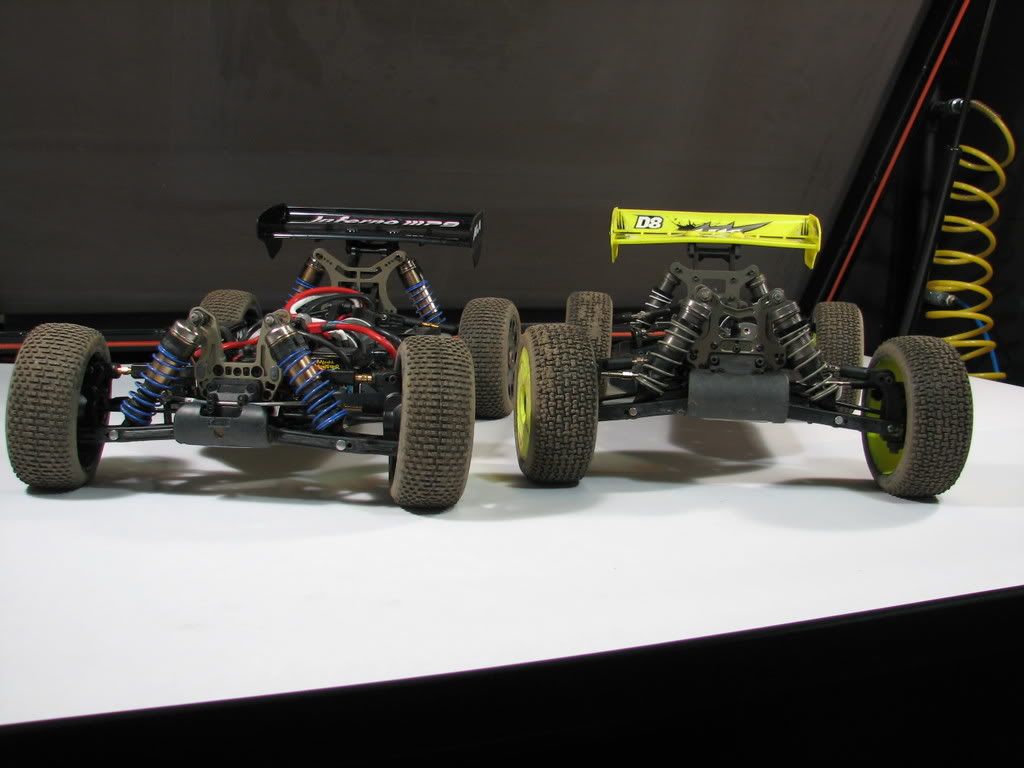
Drove a D8 but love my Kyosho MP9 conversion!
 01-28-2009, 11:54 PM
#1
Tech Rookie
Thread Starter
Kyosho MP9 or D8 Conversion??
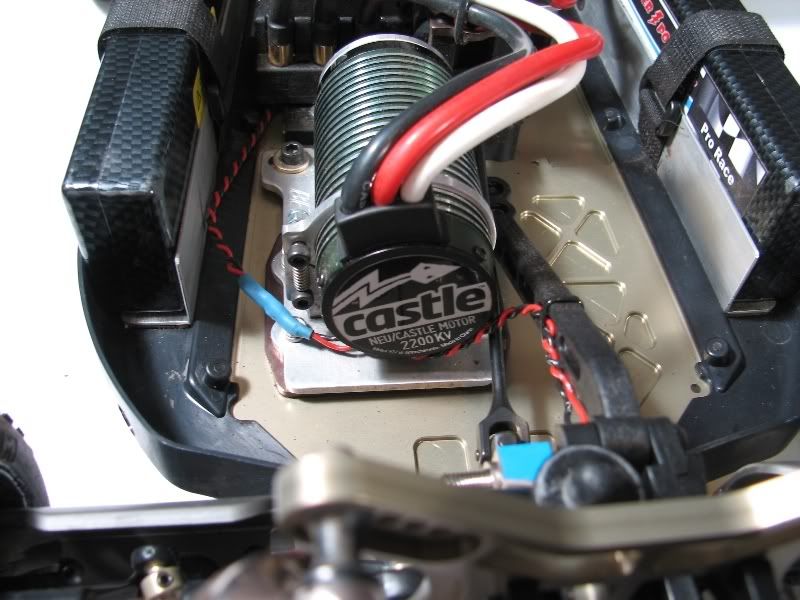
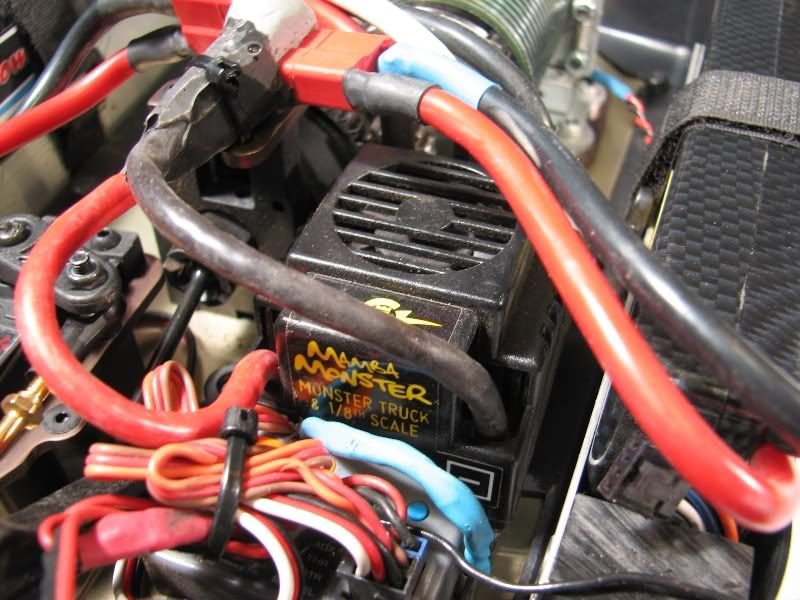
Well I have had a lot of people ask me to post my experiences playing with the Hot Bodies D8 and Kyosho MP9 so here you go! I started with the D8 and I have to say the D8 is an unbelievable car for the money!! Drives good and remarkably strong! Believe me I tested it to extremes!! I built the D8 with a Castle Creations Mamba Monster 2200kv brushless. This motor is an animal for sure! I have a lot of time on the motor and it has preformed awesome right out of the box. I am not easy on it I run with three sets of 5000ma battery packs and run for 20 minutes each time I go out only letting it cool 20-30 minutes before going back out. Coming off the track the motor is only warm temping out at about 125f- 130f the speed controller is fantastic by design, holding up great to some major pounding.
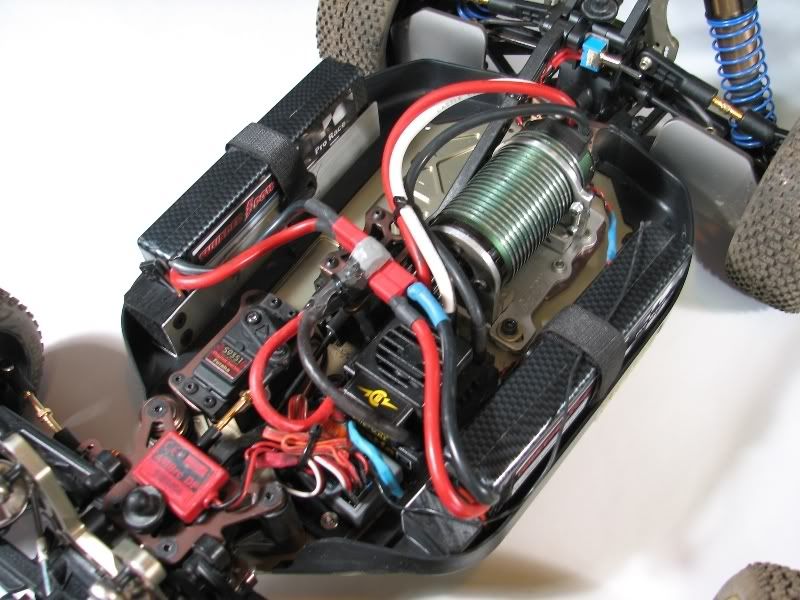
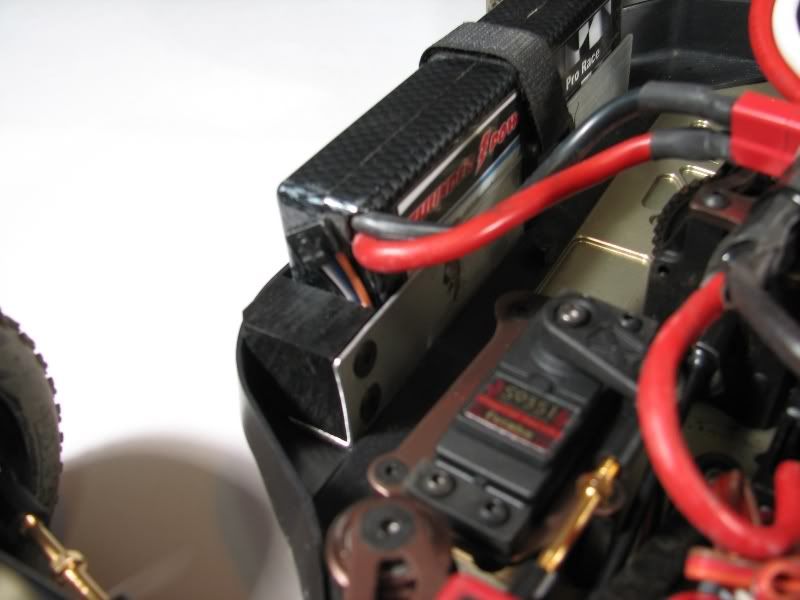
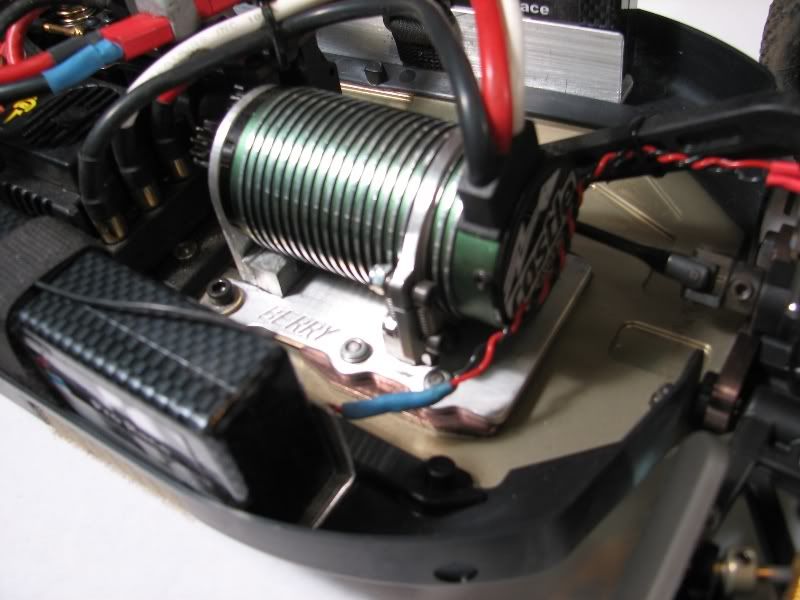
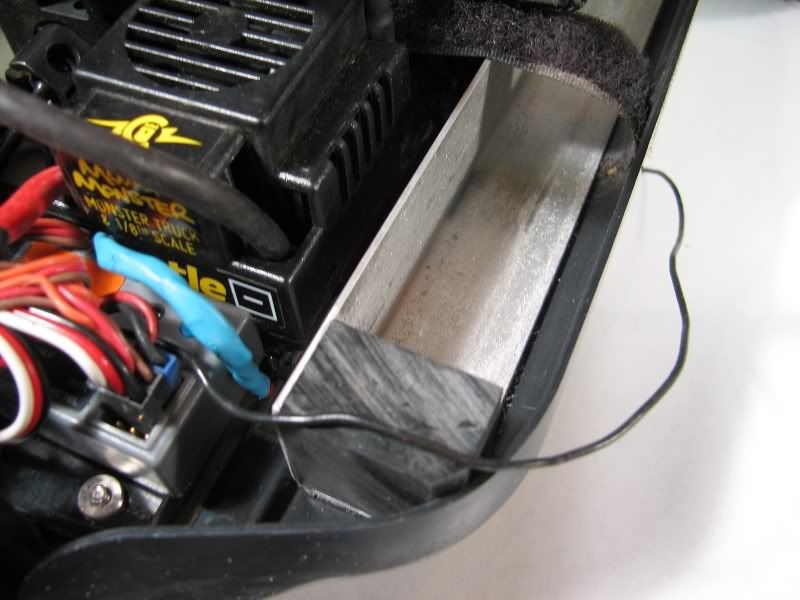
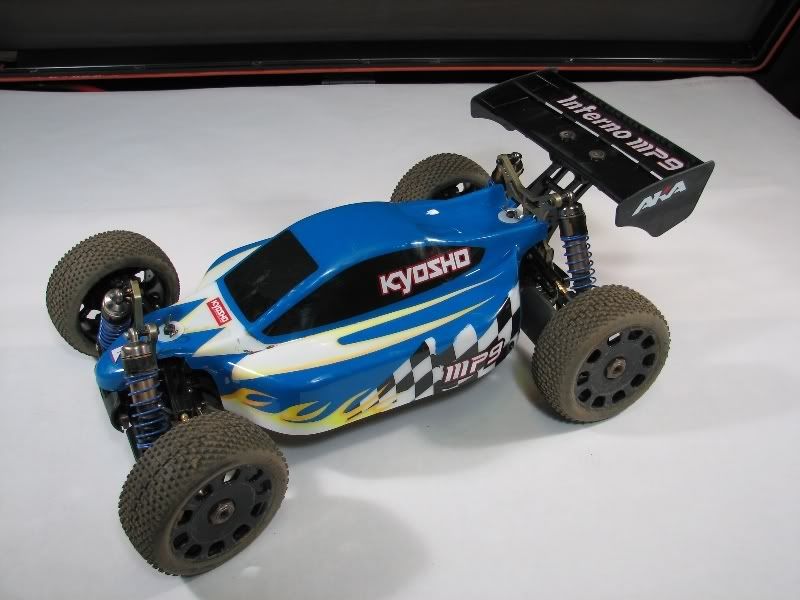
I have always had a love for Kyosho and was itching to get my hands on an MP9. With a bunch and I mean bunch of overtime I scraped together the money or my MP9 yeah it’s a little pricey but worth every penny. There are a lot of things I liked better about the MP9 and will point out a few. The fit and finish of the kit is exceptional!! Even comes with AKA rubber. I set up both cars with a saddle bag battery setup the D8 has angled side rails that made it really tight and imposable to get the body to fit right. The MP9 allowed me to fit a battery holder I made out of some 1/16th aluminum angle. The black piece you see toward the front of the aluminum angle is a piece of Delrin. This is a critical part as the amount of g-force on the batteries to move forward when I center punch a berm is huge! I put three screws to keep this in place, two from the side and one from the bottom. The aluminum angle is only held down with a 1/16th inch thick high performance acrylic foam 2 sided tape. I left a 5/8” inch gap toward the middle of the angle in order to allow a Velcro strap fitted underneath the aluminum angle. Another great thing is the Kyosho MP9 body fits over the battery installation with about 1/8” clearance unlike the D8 which could have used about another 3/8 of an inch. The MP9 body fits so well it was like it was made to be converted!! This great fit also allowed for a perfect fit along the bottom edge making a nice seal to keep out the dirt. I still put a �” strip of Velcro loop stuck to the bottom edge as an added seal between the body and side rails and to help keep the body from getting buggered up. I designed the motor mount similarly for both cars except I added a fastener toward the front of the mount that really locks it in place. The rear motor clamp is spring loaded to allow for thermal expansion of the motor in both direction diameter and length. I like having the switch readily available without pealing the body up that is the reason it is mounted at the rear. I switch it on-off with the body on and still keep it protected form those little 10th scale buggy wheels


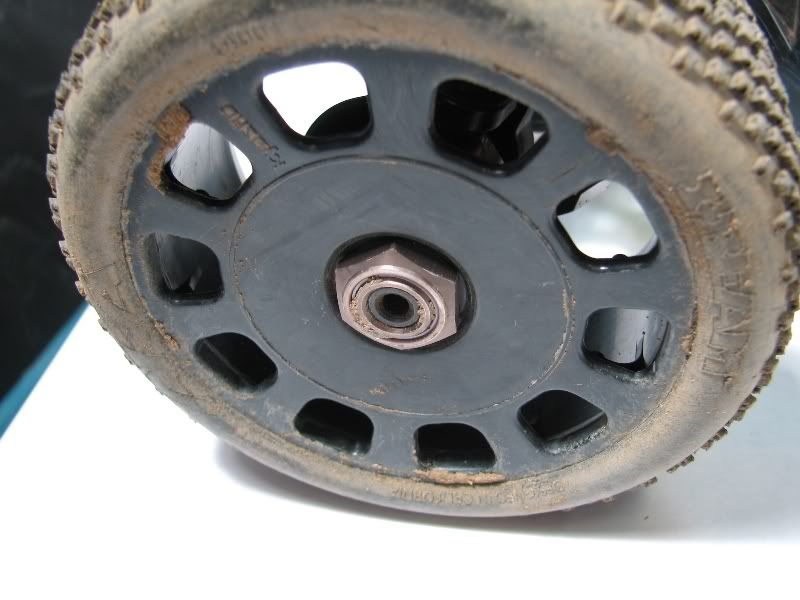
I like a lot of the small details nylock wheel nuts
Spring loaded rear motor support
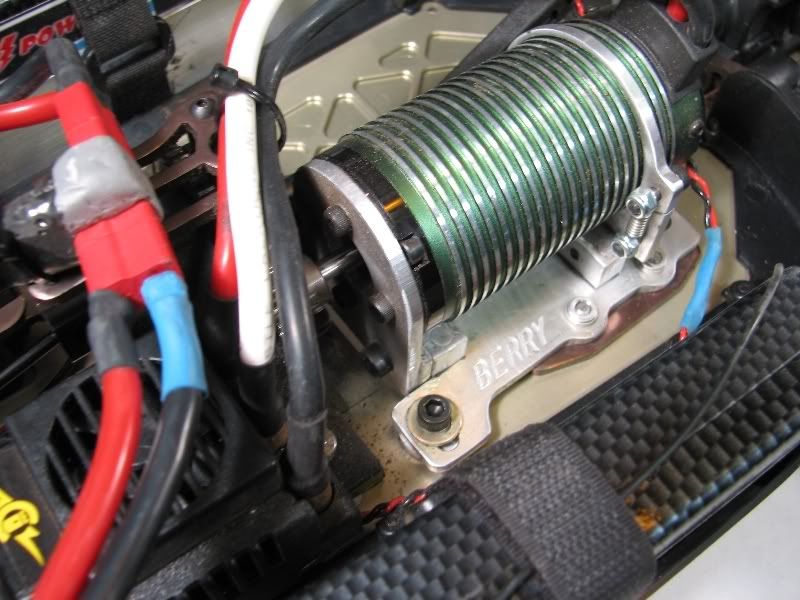
Notice the front fastener added to the mount
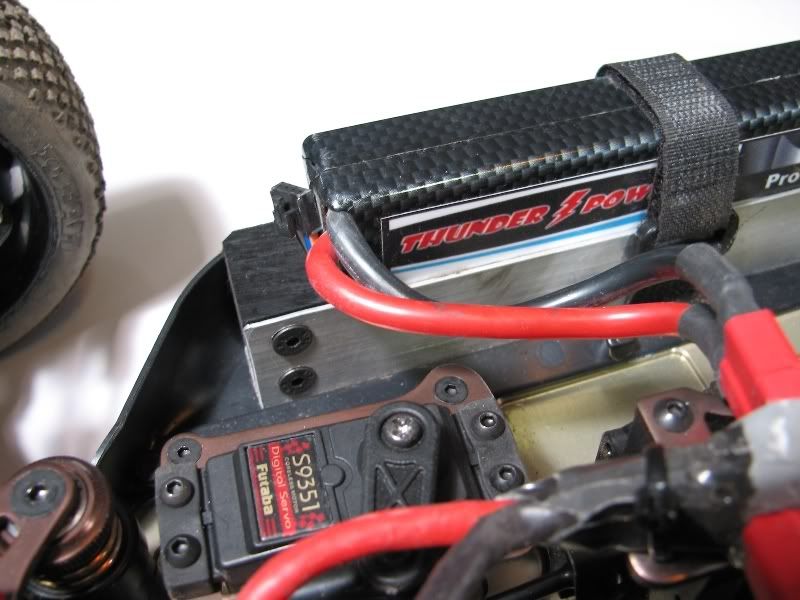
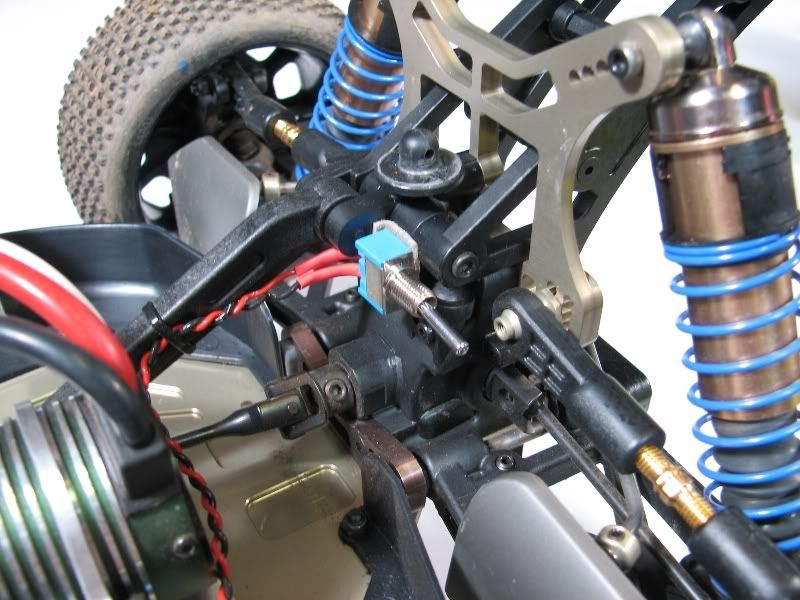
This is 10ga wire for both speed controller and batteries! Soldered Deans together and insulated with putty epoxy
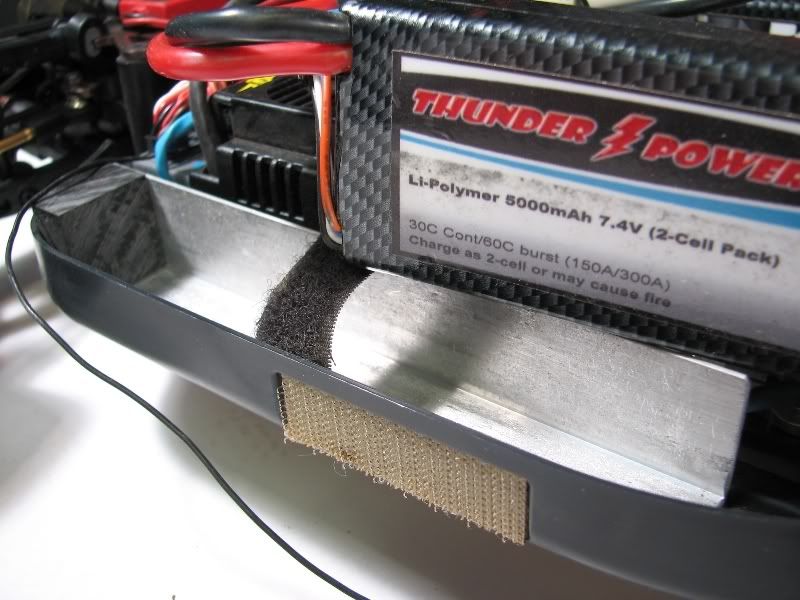
Here is a pic of the angle and strap.
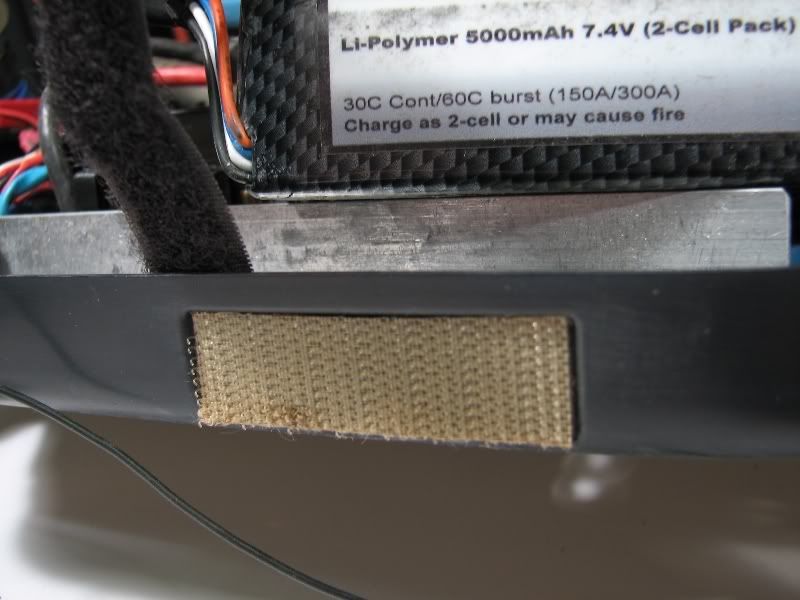
Recess for Velcro so body sits tight.
All electronics are mounted on an easy to remove mount (3 screws)
Another nice little detail mud guards even in the rim.
Did I say I love the car!!
Well I have had a lot of people ask me to post my experiences playing with the Hot Bodies D8 and Kyosho MP9 so here you go! I started with the D8 and I have to say the D8 is an unbelievable car for the money!! Drives good and remarkably strong! Believe me I tested it to extremes!! I built the D8 with a Castle Creations Mamba Monster 2200kv brushless. This motor is an animal for sure! I have a lot of time on the motor and it has preformed awesome right out of the box. I am not easy on it I run with three sets of 5000ma battery packs and run for 20 minutes each time I go out only letting it cool 20-30 minutes before going back out. Coming off the track the motor is only warm temping out at about 125f- 130f the speed controller is fantastic by design, holding up great to some major pounding.
I have always had a love for Kyosho and was itching to get my hands on an MP9. With a bunch and I mean bunch of overtime I scraped together the money or my MP9 yeah it’s a little pricey but worth every penny. There are a lot of things I liked better about the MP9 and will point out a few. The fit and finish of the kit is exceptional!! Even comes with AKA rubber. I set up both cars with a saddle bag battery setup the D8 has angled side rails that made it really tight and imposable to get the body to fit right. The MP9 allowed me to fit a battery holder I made out of some 1/16th aluminum angle. The black piece you see toward the front of the aluminum angle is a piece of Delrin. This is a critical part as the amount of g-force on the batteries to move forward when I center punch a berm is huge! I put three screws to keep this in place, two from the side and one from the bottom. The aluminum angle is only held down with a 1/16th inch thick high performance acrylic foam 2 sided tape. I left a 5/8” inch gap toward the middle of the angle in order to allow a Velcro strap fitted underneath the aluminum angle. Another great thing is the Kyosho MP9 body fits over the battery installation with about 1/8” clearance unlike the D8 which could have used about another 3/8 of an inch. The MP9 body fits so well it was like it was made to be converted!! This great fit also allowed for a perfect fit along the bottom edge making a nice seal to keep out the dirt. I still put a �” strip of Velcro loop stuck to the bottom edge as an added seal between the body and side rails and to help keep the body from getting buggered up. I designed the motor mount similarly for both cars except I added a fastener toward the front of the mount that really locks it in place. The rear motor clamp is spring loaded to allow for thermal expansion of the motor in both direction diameter and length. I like having the switch readily available without pealing the body up that is the reason it is mounted at the rear. I switch it on-off with the body on and still keep it protected form those little 10th scale buggy wheels
I like a lot of the small details nylock wheel nuts
Spring loaded rear motor support
Notice the front fastener added to the mount
This is 10ga wire for both speed controller and batteries! Soldered Deans together and insulated with putty epoxy
Here is a pic of the angle and strap.
Recess for Velcro so body sits tight.
All electronics are mounted on an easy to remove mount (3 screws)
Another nice little detail mud guards even in the rim.
Did I say I love the car!!
Last edited by Kyoshodriver; 01-29-2009 at 12:02 AM. Reason: better wording
 01-29-2009, 04:52 AM
#2
Looks nice. 
Where did you get that motor mount?
Where did you get that motor mount?
01-29-2009, 05:32 AM
#3
Tech Regular
Clearly home made stuff,
Nice and interesting saddle pack configuration, that allow to keep room annd the Monster max in low profile, just be carefull to not be hit by a car on the side
Nice and interesting saddle pack configuration, that allow to keep room annd the Monster max in low profile, just be carefull to not be hit by a car on the side
01-29-2009, 07:49 AM
#4
Tech Rookie
Thread Starter
Thanks Guys, I built the motor mount out of some .1" 2024T3 aircraft aluminum. Probably overkill I think it would work just fine with 6061T6. Using the four stock mounting screws + 1 located toward the front. By the way I like using Loctite 609 on the pinion/shaft. To remove it I hit it with a mini torch while using the spur gear to rotate it and slide it off with a pair of needle nose pliers not having to remove the motor.

 01-29-2009, 01:00 PM
#6
Tech Rookie
Thanxs for the pics. Now I want an MP9 too.... Let me know where I can get the motor mount.
01-29-2009, 08:54 PM
#10
Tech Rookie
Thread Starter
One other major difference is the setup options about three times that of the other cars.
01-29-2009, 10:35 PM
#11
so how much did it cost minus electrics?
where can i get that motor mount, and is thier a better way to put the batteries in , like flat or on one side?
is thier another way to put the motor in to change the weight distribution?
anything along those lines. im curious cause thats the car i want to build.
where can i get that motor mount, and is thier a better way to put the batteries in , like flat or on one side?
is thier another way to put the motor in to change the weight distribution?
anything along those lines. im curious cause thats the car i want to build.
01-30-2009, 10:04 PM
#12
Tech Rookie
Thread Starter
so how much did it cost minus electrics?
where can i get that motor mount, and is thier a better way to put the batteries in , like flat or on one side?
is thier another way to put the motor in to change the weight distribution?
anything along those lines. im curious cause thats the car i want to build.
where can i get that motor mount, and is thier a better way to put the batteries in , like flat or on one side?
is thier another way to put the motor in to change the weight distribution?
anything along those lines. im curious cause thats the car i want to build.
You could probably build everything for $50 bucks and never leave your home of coarse half of the $50 would be shipping. Buying the 1/2" thick 1"x1" plastic from a place like US Plastic http://www.usplastic.com/catalog/pro...duct%5Fid=4226 and the aluminum angle at a place like Metals Depot http://www.metalsdepot.com/Cart3/viewCart1.phtml?LimAcc=$LimAcc&aident The motor mount sheet and rod aluminum at a place like Online Metals http://www.onlinemetals.com/merchant...=76&top_cat=60 and 3/8�x3/8� square rod http://www.onlinemetals.com/merchant...999&top_cat=60 a great source for fasteners http://www.microfasteners.com/catalog/index.cfm If anyone would like a cad drawing of the motor mount peaces I could put one together. Happy building!!
02-05-2009, 12:15 PM
#13
Kyoshodriver, great job but your battery setup is way too far out. Were there any issues mounting the body (because of battery height) or did it work out fine?
-key
-key
02-19-2009, 09:25 PM
#14
Tech Rookie
Thread Starter
Body fits great no binding! With a little room to spare!
Currently Active Users Viewing This Thread: 1 (0 members and 1 guests)
