Go Back  R/C Tech Forums > General Forums > Electric Off-Road
Tekno RC EB410 Thread >

Tekno RC EB410 Thread

Community
Wiki Posts
Search
Like Tree2421Likes

Tekno RC EB410 Thread

    Hide Wikipost
Old 05-13-2019, 06:33 AM   -   Wikipost
R/C Tech ForumsThread Wiki: Tekno RC EB410 Thread
Please read: This is a community-maintained wiki post containing the most important information from this thread. You may edit the Wiki once you have been a member for 90 days and have made 90 posts.
 
Last edit by: tobamiester
Welcome to the EB410 Wiki page.

Basic Stats/Features:
  • Shaft drive (tapered AL for light weight and straightness)
  • Gear differentials (all 3)
  • Low Angle CVAs (with captured pins so no ejecting them!)
  • Durable stub axles with 12mm hexes and optional offset adjustments
  • Reverse bellcrank steering system
  • Quick access bulkheads (for easy diff maintenance and tuning)
  • Spllt center diff holder (for easy diff maintenance and tuning)
  • 8th scale style motor mount (for easy mesh adjustment)
  • 13mm big bore shocks
  • 3.5mm shock shafts
  • Droop screws

Videos
Servo Horns
Tekno included a plastic servo horn but also offers an aluminum one. This is highly recommended. Here's a list of servo horns that have been found to work:
Gearing:
Works out of the box for mod or 13.5.
  • Preference for Associated factory team pinions
  • Start mod gearing around 21t pinion
  • Start 13.5 gearing around 29t pinion with the stock spur (81tooth). If using a Tekin Spec R 13.5, start with a 24t pinion for medium sized indoor tracks.
  • Internal Gear Ratio: 2.5:1
  • For comparison:
  • B64 is 2.47:1
  • 22-4 is 2.4:1
  • YZ4 is 2.6:1

Wheels
  • B6/22/rb6 wheels direct fit
  • 22-4/XB4 front wheels direct fit
  • B64 front wheels will fit, but you need the +1 hexes (can use #TKR1654X, which is a +1mm hex)
  • 22 2wd front wheels will also fit, possibly a good option for carpet.

Setup Sheets and other documentation
Setup sheets for all Tekno RC vehicles can be found here. Please be sure to try our recommended setup. It works very well on most tracks.
Piston Drills:
Some of our setups recommend using pistons that are enlarged. For instance 4x1.9 or 3x2.0. To drill the pistons we recommend the following:
Aftermarket Upgrades:
Warranty Policy:
Tekno RC is the only company in the industry that will give 50% off of parts if returned to them using the General Warranty return policy found on their website. The parts can be lightly used or completely abused, as long as the part is still being produced it's covered!


Build Tips:
  • When fastening the steering posts with a 5.5mm socket wrench, you can back space the socket with some nuts to help drive the post into the bulk head

  • Place an alcohol swab over metal threads and drive screws through the swab to clean both sides of threads before applying thread lock

  • Use a metallic marker to indicate what fluids you have filled in your diffs for easy identification

  • Apply thin layer of grease on crown gears to help hold gaskets in place for easy hole alignment

  • Bags F and H have 2 different size set screws, be sure to use the smaller 3x3mm screws for the hexes or you may run into problems installing wheels over the hex if you use the longer 3x4mm screws
  • To make is easier to slip the o-rings on the shock cap bleeder screws, apply a drop of shock oil and slip them over a 1.5mm hex bit, then line up the bit with the screw and transfer the o-ring over using fingernails or needle nose pliers
  • pinch+rotate shock caps in 17mm hex wrench to improve roundness
    More shock build tips here
  • Use a 3.05mm drill bit or 3.05mm Kyosho arm reamer, 1/8" drill bits are not recommended because they are 3.17mm in diameter and tend to introduce too much slop, the pins are roughly 2.97mm in diameter
  • Replace the stock 3x14mm screws (TKR1405) with 3x20mm screws (TKR1409) in step H-10 in the manual in order to increase durability to the bulkhead.

  • When installing the front and rear differentials into the bulkheads be careful when tightening the 3x8mm screws of the cover that holds the diff in place. Bottom out the screws first (use a hand driver and make it hand tight) then check the diff to make sure it rotates smooth. If it binds up, start by backing out each screw 1/8-1/4 of a turn until the both front and rear diffs move freely. The plastic threads will keep the screws in place so don't worry if you think the screws are not secure.
  • When installing the steering hub kingpins (TKR6596), drive each one in hand tight only. Then check the movement of the steering hub. If it binds up, back out the kingpin screws by 1/8-1/4 of a turn until it moves freely. Then install the set screws (TKR1601) to hold it in place. Only drive the set screw in until you make contact with the kingpin. Do not force it.
  • If using the low profile servo mount, be sure to use smaller OD (outter diameter) washers to avoid rubbing on the center drive shaft. Protek ball stud washers are a good example of the acceptable diameter. You can chose to not run washers though it is recommended to use them as it makes for a more secure mount.

  • Ball Cup Alternative from AE: ASC91453. These are used as a harder composite option if you are not happy with the softer stock plastics. Note that these are approximately 2-3mm shorter and require compensation when building your kit to the manual specs to achieve proper camber/toe settings


  • Wheel Nut Alternative: Yokomo 4mm Thin Aluminum Serrated Flanged Nut

    https://www.amainhobbies.com/yokomo-...-n4flt/p541494


  • Moving Rear Shocks to the Front of the A-arm

    This is the break down of what's required by one of the Eb410 FB users.

    Joey A.

    So since there has been some people wondering about running the shocks in the front of the arm I though I would try explaining everything that I did to get them to work and why. My goal was to run as much stock stuff as possible with the least amount of modifications.

    -Arms- need to be flipped and 1mm shaved off the back (spacing the arm farther back) running it this way the car is still a mm shorter then stock but more material could be removed for more adjustability but I have found no need to make the car longer.

    -Inner ball stud- there are 2 ways of mounting, the first can be used with the stock plastic tower. All you need to do is use a 10mm ball stud instead of the lower shock mount screw and a little clearance from the shock tower and diff case. Using this method will work but the ball stud is moved lower and farther in then the stock locations which requires different pivot locations to try and correct roll centers. The other way (preferred) using the option carbon tower drill a hole higher and farther out if done properly you will be able to get the ball stud location in the correct hight(0mm) and between the two stock locations.

    -Shocks- only 2 changes from stock you will need to space the top shock mount 2mm out. You will also need to run around 1.5-2mm less droop depending on your setup.

    -Sway bar- this is the hardest part of the swap. This can be done a million ways I chose to print a mount in the stock ball stud location which allowed me to use the stock swaybars and arm mounting position. You can also bend your own bar and use the stock mounts on the back. You will have to drill your arms on the other side and closer to the pivot for this to work (remember you will need a thinner bar the closer you mount the lower pickup on the arm to get the same feeling as stock).

    -Other- you will need to remove the drop screws on the rear arm. Depending on rear rims,hubs,ballcups and setup you might need to clearance the outer ball cup so it doesn’t rub on the wheel.

    -Why- the benefits of running the shocks in the front are the ability to run a softer rear shock package without giving up corner speed and pack. The car will land without chassis slapping or packing out as easy allowing you to drive the car harder and it corners flatter and rotates faster without losing rear grip.

    Sorry for the shity grammar,
    TJR

    Sway bar mount for forward mounted shocks: https://www.ebay.com/itm/Tekno-EB410...4AAOSwYNxahFkq

Print Wikipost

Thread Tools
 
Search this Thread
 
Old 10-22-2018, 08:20 AM
  #4726  
Tech Adept
iTrader: (8)
 
Join Date: Jun 2018
Location: Maryland
Posts: 162
Trader Rating: 8 (100%+)
Default

Thanks to all for the replies regarding the shock spacers. The newest kits still do not include the new spacers (TKR6708) which were released over the summer, correct?
Bruce_R is offline  
Old 10-22-2018, 08:28 AM
  #4727  
Tech Champion
iTrader: (33)
 
Join Date: Mar 2011
Location: Austin,TX
Posts: 6,194
Trader Rating: 33 (97%+)
Default

I still see the old cartridge (TKR6707) listed under the "Standard Parts" section for the EB410:
https://www.teknorc.com/shop/tkr6707...in-4pcs-eb410/

The upgraded TKR6708 did come as a standard part in my ET410 kit, there seem to be many updates that were put in the ET410 that may not have yet been put into the EB410. Since we can't update the Wiki on this page anymore, hopefully someone will update the OP with current information on what upgrades are included with the ET410 spec/compatible parts.
Bruce_R likes this.
billdelong is offline  
Old 10-22-2018, 08:33 AM
  #4728  
Tech Elite
iTrader: (380)
 
Join Date: Aug 2001
Location: NW Indiana
Posts: 4,165
Trader Rating: 380 (99%+)
Default

I bought my kit 2 weeks ago from Tower and it did not come with the new spacers.
Bruce_R likes this.
jonski is offline  
Old 10-22-2018, 09:54 AM
  #4729  
Tech Adept
iTrader: (8)
 
Join Date: Jun 2018
Location: Maryland
Posts: 162
Trader Rating: 8 (100%+)
Default

Originally Posted by jonski
Can anyone give me the servo horn dimension from the centercof the servo shaft to the center of the ballstud? I don't have my EB410 yet, so I can't measure it. Want to see if any of my horns will be close enough. Thanks
Did anyone have an answer to this? I'm in the same boat. I didn't see a reply or see the info anywhere else in the thread.
Bruce_R is offline  
Old 10-22-2018, 09:58 AM
  #4730  
Tech Elite
iTrader: (380)
 
Join Date: Aug 2001
Location: NW Indiana
Posts: 4,165
Trader Rating: 380 (99%+)
Default

Not sure if anyone gave me an answer or not, but I did read on here that the Ruddog servo horns worked. I ended up ordering the one I needed. It is a 20mm center of ball stud to center of servo post.
jonski is offline  
Old 10-22-2018, 09:59 AM
  #4731  
Tech Elite
iTrader: (39)
 
EbbTide's Avatar
 
Join Date: Nov 2012
Location: Bay Area, Ca
Posts: 4,264
Trader Rating: 39 (100%+)
Default

Originally Posted by Bruce_R
Did anyone have an answer to this? I'm in the same boat. I didn't see a reply or see the info anywhere else in the thread.
I'm not sure how to explain it better than the manual will show it. There is a section towards the end of the build manual that shows how to install a low profile servo and which way the steering link and servo horn should be placed.

EDIT: this was for MaxxingOut
Maxxingout likes this.
EbbTide is offline  
Old 10-22-2018, 10:56 AM
  #4732  
Tech Champion
iTrader: (33)
 
Join Date: Mar 2011
Location: Austin,TX
Posts: 6,194
Trader Rating: 33 (97%+)
Default

I'm running a generic Racer's Edge servo horn that looks like this, I want to say that the holes are 20mm OC, but I will double check when I get home tonight:


In my ET410, I'm running a ProTek horn which is the same size and compatible too, almost certain it's this horn:
https://www.amainhobbies.com/protek-...819-bk/p292307

Last edited by billdelong; 10-22-2018 at 11:14 AM.
billdelong is offline  
Old 10-22-2018, 11:27 AM
  #4733  
Tech Adept
iTrader: (8)
 
Join Date: Jun 2018
Location: Maryland
Posts: 162
Trader Rating: 8 (100%+)
Default

I have one of these: https://nitrohobbies.com/ya-0516bk

It has a 20mm hole. I will compare it to the stock plastic horn when I get my kit and report back.

Ebbtide, I was planning to use a standard servo because that's what I already own. It appears you can use either. If the group here feels that the low profile one provides a distinct advantage over standard on this chassis, perhaps I will consider buying a low-profile one, but I am trying to keep costs down.
Bruce_R is offline  
Old 10-22-2018, 11:28 AM
  #4734  
Tech Elite
iTrader: (39)
 
EbbTide's Avatar
 
Join Date: Nov 2012
Location: Bay Area, Ca
Posts: 4,264
Trader Rating: 39 (100%+)
Default

Originally Posted by Bruce_R
I have one of these: https://nitrohobbies.com/ya-0516bk

It has a 20mm hole. I will compare it to the stock plastic horn when I get my kit and report back.

Ebbtide, I was planning to use a standard servo because that's what I already own. It appears you can use either. If the group here feels that the low profile one provides a distinct advantage over standard on this chassis, perhaps I will consider buying a low-profile one, but I am trying to keep costs down.
Standard or low profile is just fine either way you go. I accidentally replied to your comment instead of Maxxingout
EbbTide is offline  
Old 10-22-2018, 11:41 AM
  #4735  
Tech Champion
iTrader: (33)
 
Join Date: Mar 2011
Location: Austin,TX
Posts: 6,194
Trader Rating: 33 (97%+)
Default

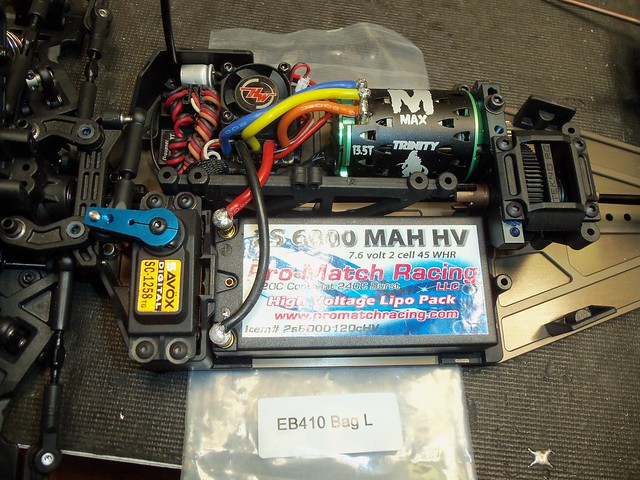
I'm happy with the standard servo, took about a year in my EB410 before the gears stripped on my Savox 1258 with racing on turf.

The current 13.5T National Champ is running a low profile servo, you can see his setup posted here:
https://blog.teknorc.com/2018/07/19/...0-stock-build/
billdelong is offline  
Old 10-22-2018, 12:38 PM
  #4736  
Tech Adept
iTrader: (8)
 
Join Date: Jun 2018
Location: Maryland
Posts: 162
Trader Rating: 8 (100%+)
Default

I had no idea what you meant that this was "for MaxxingOut" I thought that was some new RC buzzword I was not familiar with.
Bruce_R is offline  
Old 10-22-2018, 03:25 PM
  #4737  
Tech Champion
iTrader: (33)
 
Join Date: Mar 2011
Location: Austin,TX
Posts: 6,194
Trader Rating: 33 (97%+)
Default

Originally Posted by billdelong
I'm running a generic Racer's Edge servo horn that looks like this, I want to say that the holes are 20mm OC, but I will double check when I get home tonight:


In my ET410, I'm running a ProTek horn which is the same size and compatible too, almost certain it's this horn:
https://www.amainhobbies.com/protek-...819-bk/p292307

I just confirmed the RacersEdge horn is 19mm OC and the ProTek horn that I linked is the same one I am running in my ET410 where that horn is 20mm OC.

I would not recommend going with a horn that is any longer than 20mm OC because you will risk binding the horn with the ackermann bar.
Bruce_R likes this.
billdelong is offline  
Old 10-22-2018, 07:27 PM
  #4738  
Tech Adept
 
Join Date: Sep 2012
Location: Mill Creek, WA
Posts: 111
Default

Originally Posted by Bruce_R
Somewhat related to OSherman's question --

I am thinking of switching from Associated b64d to an eb410. I googled a few "must-have upgrades Tekno eb410" and saw a few threads and a few YouTube videos. The MIP shock cartridge spacer set was highly recommended on basically all of these, but then I found that they are discontinued on the MIP website, and not in stock many (maybe any) suppliers.

I then found the TKR6708 product, which appears to be similar. I searched this thread and only found a few people comment on the MIP product, and only 1 post regarding the new Tekno equivalent. So is everyone using either the MIP or the new Tekno replacement in the shocks, or just smashing the 2 X-rings directly together and bleeding shocks more frequently than pretty much all other models on the market?
I am using the mip spacers. The tekno ones will also work. Without them the shocks pull in more air and therefore require more bleading. I personally like the spacers but they are not 100% needed.
crash n go is offline  
Old 10-22-2018, 07:35 PM
  #4739  
Tech Adept
 
Join Date: Sep 2012
Location: Mill Creek, WA
Posts: 111
Default

Originally Posted by HOTROD716
I have been running this chassis for 2 months now and it has been a pleasure. Still working on a couple of setups for my driving style.

My issue: I keep losing left front wheel nuts more often than I care for. Once in a while right side ones. I am using TLR front rims and I have tried a couple of different brands of nuts. Any one experience this? I’m not opposed to replacing the output shafts on the front. Just not sure which direction to go.
I have also had this happen to me. You either need to find a wheel nut with more aggressive serrations or use thread lock.
crash n go is offline  
Old 10-22-2018, 07:53 PM
  #4740  
Tech Adept
iTrader: (8)
 
Join Date: Jun 2018
Location: Maryland
Posts: 162
Trader Rating: 8 (100%+)
Default

Originally Posted by crash n go
I have also had this happen to me. You either need to find a wheel nut with more aggressive serrations or use thread lock.
Are the nuts that the tekno come with both serrated AND have a nylon insert like the AE wheel nuts? I have never lost a nut on my B64D, but it has both features.
Bruce_R is offline  


Contact Us - Archive - Advertising - Cookie Policy - Privacy Statement - Terms of Service -

Copyright © 2024 MH Sub I, LLC dba Internet Brands. All rights reserved. Use of this site indicates your consent to the Terms of Use.