


 1131Likes
Tamiya TT02 Thread

 01-14-2021, 03:44 PM - Wikipost
|
|||
|
|||
 07-13-2017, 12:47 PM
#1456
I run on Grey Carpet.
Ride height 5
Droop - 1,5 over ride height in front and 2,5 in rear
Camber - 1,5ş all around
Front toe - 1,0ş toe out
Dampers TRF419 big bores
Shocks Muchmore 400 wt
Springs Muchmore X springs Red front (firm) Pink rear (medium) - I also tested the old HPI Pink in front and silver in rear.. was about the same.
Diff - Front epoxied / locked, Rear 10k (using my diff mod in this post
Motor fantom FR-1 21.5
ESC HW Just Stock
Gearing 78/51
Tyres USGT Spec
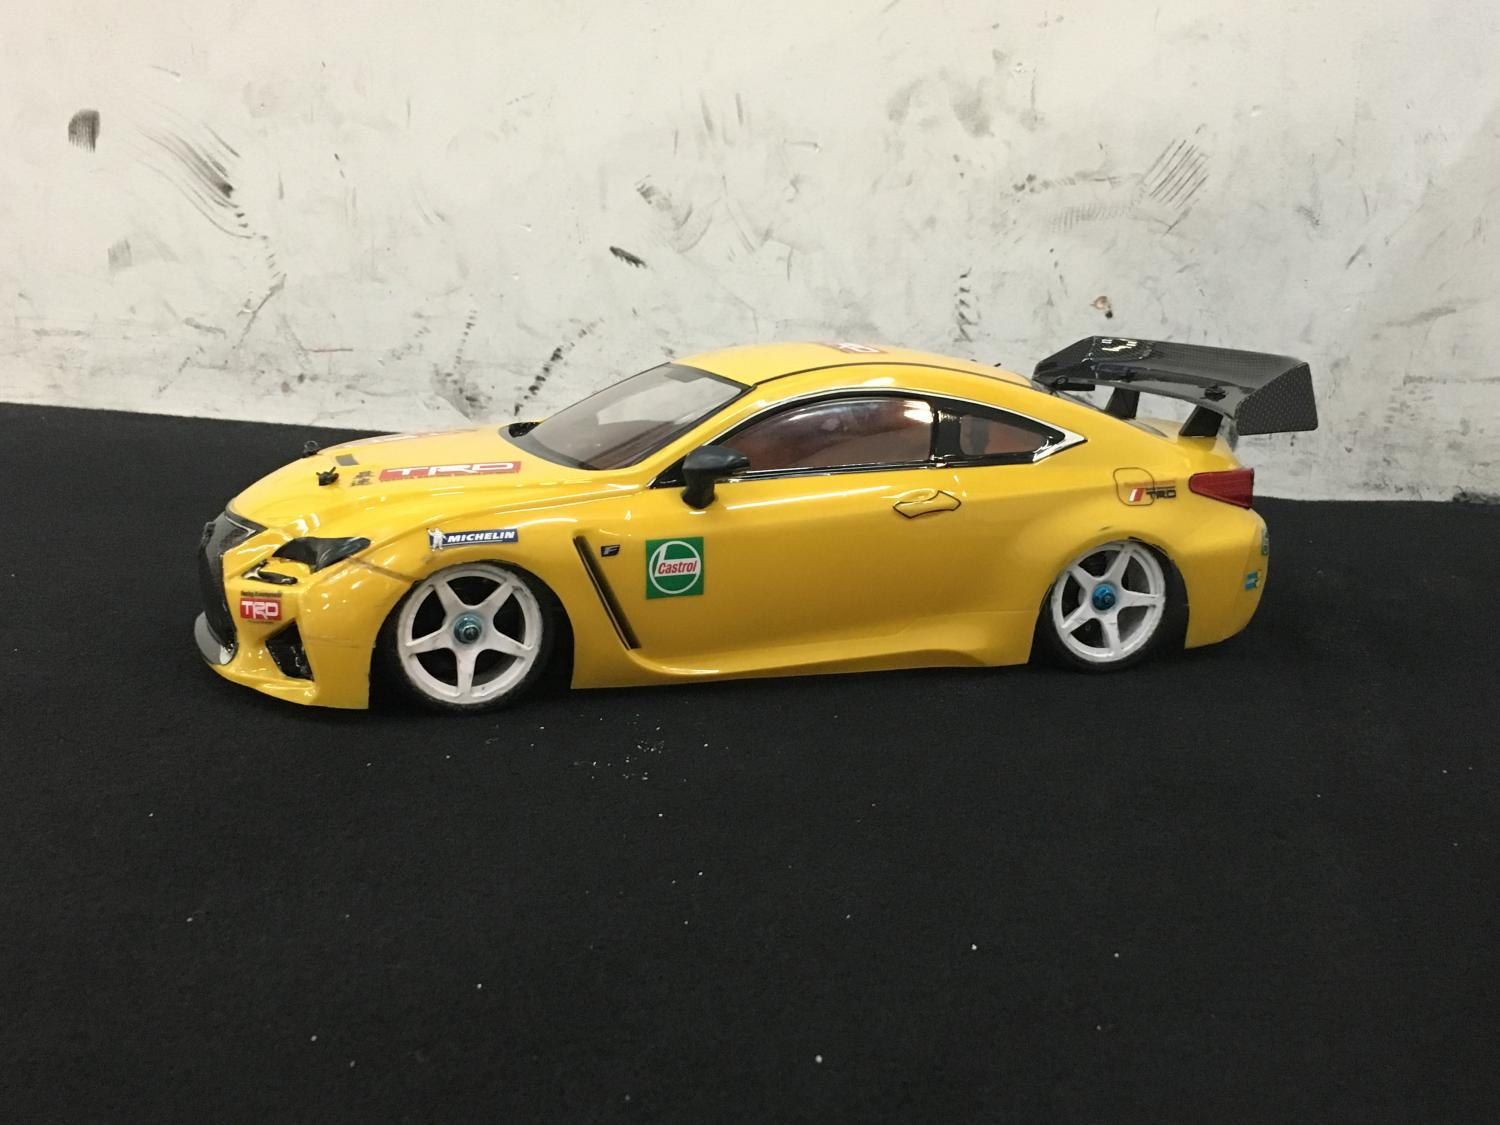
Body: Killerbody Lexus RC F
Ride height 5
Droop - 1,5 over ride height in front and 2,5 in rear
Camber - 1,5ş all around
Front toe - 1,0ş toe out
Dampers TRF419 big bores
Shocks Muchmore 400 wt
Springs Muchmore X springs Red front (firm) Pink rear (medium) - I also tested the old HPI Pink in front and silver in rear.. was about the same.
Diff - Front epoxied / locked, Rear 10k (using my diff mod in this post
Motor fantom FR-1 21.5
ESC HW Just Stock
Gearing 78/51
Tyres USGT Spec
Body: Killerbody Lexus RC F
 07-13-2017, 01:03 PM
#1457

 .. I'll see if I can load them from my phone.
 For gearing.. I'm using the Yeah racing motor mount.. and had to trim the gear cover to fit the spur gear.
Other upgrades - steering arms / bridge and the prop shaft... used all Tamiya parts for those. I also had spare DCJ for front and CVD for rear.. so I run those.
07-13-2017, 01:15 PM
#1458
My RC F.. you mean what's left of it , after battle scars .. I'll see if I can load them from my phone.
For gearing.. I'm using the Yeah racing motor mount.. and had to trim the gear cover to fit the spur gear.
Other upgrades - steering arms / bridge and the prop shaft... used all Tamiya parts for those. I also had spare DCJ for front and CVD for rear.. so I run those.
.. I'll see if I can load them from my phone. For gearing.. I'm using the Yeah racing motor mount.. and had to trim the gear cover to fit the spur gear.
Other upgrades - steering arms / bridge and the prop shaft... used all Tamiya parts for those. I also had spare DCJ for front and CVD for rear.. so I run those.
Also what parts do I need to mount the spur with? Thanks!
07-13-2017, 01:20 PM
#1459


DCJ are the double cardan axle joint. Similar to CVD but have two joints.. they're good for steering.
For spur gear mount, i forgot to list it as it came with the car.. it's this one 54500
https://www.tqrcracing.com/shop/prod....asp?p_id=7379
Last edited by Raman; 07-13-2017 at 07:29 PM.
07-14-2017, 12:21 PM
#1460
Two night is a row of thunder showers and not getting to run the car.....I have the jones bad....
With that the better half had a meeting last night so after putting the wee man to bed I played with the TT02. I converted it back to the RSR and put the staggered wheels with the Gravity USGT tires back on it. I also received the Maclan fan I had ordered and installed that. I will be interested to see how hot the motor gets with the 4.33:1 gearing and the fan.....I wonder if I will be able to go a bit steeper with the gearing with the fan. The last combination I have yields a FDR of 3.92:1, that might be pushing it a bit.
Cheers,
Jim
07-15-2017, 06:59 AM
#1461
It's been a while since I cut out a new body. I always used body scissors and kinda hacked it up. On this, I decided to check the YouTube out for tips and it seemed like the scoring method works best. So I grabbed a utility blade/box cutter and went to town...
Getting the hang of it

This is definitely the cleaner method to cutting bodies and getting clean lines and cuts.
All cut out.


The body lines and detail are great! Man this is a good looking body. And to top it off, I hadn't looked at the decal sheet. O my! These are great!

Again, for $100 these Tamiya kits can't be beat.
Getting the hang of it
This is definitely the cleaner method to cutting bodies and getting clean lines and cuts.
All cut out.
The body lines and detail are great! Man this is a good looking body. And to top it off, I hadn't looked at the decal sheet. O my! These are great!
Again, for $100 these Tamiya kits can't be beat.
07-15-2017, 09:32 AM
#1462
Back when I was building a lot of bodies I always used lexan scissors, they usually came out OK but when I cut out the Porsche body I used the scoring meathod.....way faster and cleaned. I have now done two bodies by scoring them and I think it is the only way to go now.
Tamiya still has the best bodies I have experienced, they just look good.
Cheers,
Jim
Tamiya still has the best bodies I have experienced, they just look good.
Cheers,
Jim
07-16-2017, 01:08 AM
#1463
Tech Adept
Always good to see more people with TT02 
I am using Hi-Torque Servo Saver (51000) that come with the steering upgrade set...the kit saver is pretty lame, you can just throw it away like my friend.
If you treasure your servo and would like to race then get a better one, otherwise you can still use the kit one for fun.
I am using Hi-Torque Servo Saver (51000) that come with the steering upgrade set...the kit saver is pretty lame, you can just throw it away like my friend.
If you treasure your servo and would like to race then get a better one, otherwise you can still use the kit one for fun.
07-16-2017, 06:39 PM
#1464
I finally had a chance to run the car with the 4.33:1 FDR. After 12 minutes I am at 155*. I think that is as steep as I can go this time of the year.
Cheers,
Jim
Cheers,
Jim
07-17-2017, 06:07 AM
#1465
Did you check temps on the ESC and lipo?
07-17-2017, 06:18 AM
#1466
07-17-2017, 07:18 AM
#1467
When I tore my chassis, I believe that the "soft" chassis would have been just fine in the end.
I can confirm the shipping times as well.
 07-18-2017, 12:00 AM
#1468
Tech Initiate
The Xray Super Stiff V2 servo saver is quality. Far better than the Tamiya 51000. Previously I'd put 51000s on all my cars as the only reference point I had was the kit savers which are variable to say the least. However I found after a few runs - probably an hour or so - they still developed some inconsistencies around the straight ahead position and the steering wouldn't quite centre which irritates the hellout of me. With the Xray my car has now got over 20 hours on it and it's still as good as day one.
Last week when I broke my front knuckle, I replaced the front upper arm at the same time with YR one so that I can adjust the camber. Their original turnbuckle is really soft...it bends after a light impact

I now replaced it with Ti one, looks much better but will see...
07-18-2017, 12:13 AM
#1469
Tech Apprentice
Would a 26t pinion fit with a stock 70t spur? 25t to 26t is an increase in diameter of 0.8mm so the pinion-spur distance is 0.4mm closer with the 26t. In my experience tamiya motor mounts provide a relatively loose mesh, certainly looser than I would set on my BD7.
I'm entering a stock spec class where only the pinion can be changed.
I'm entering a stock spec class where only the pinion can be changed.
07-18-2017, 07:19 AM
#1470
Finally got the wing, headlight and taillight buckets cut out. The wing must be thicker lexan because it was much harder to score, but I got it. My awesome wife was in town yesterday and stopped at the LHS for some paint. I let her pick out the main color but said it needed to be my sons favorite color, so fluorescent green it is. I should be ready to paint this afternoon after giving the lexan a quick bath.

