


 6Likes
Lightweight motor ducting and fan
 09-06-2019, 09:14 PM
#1
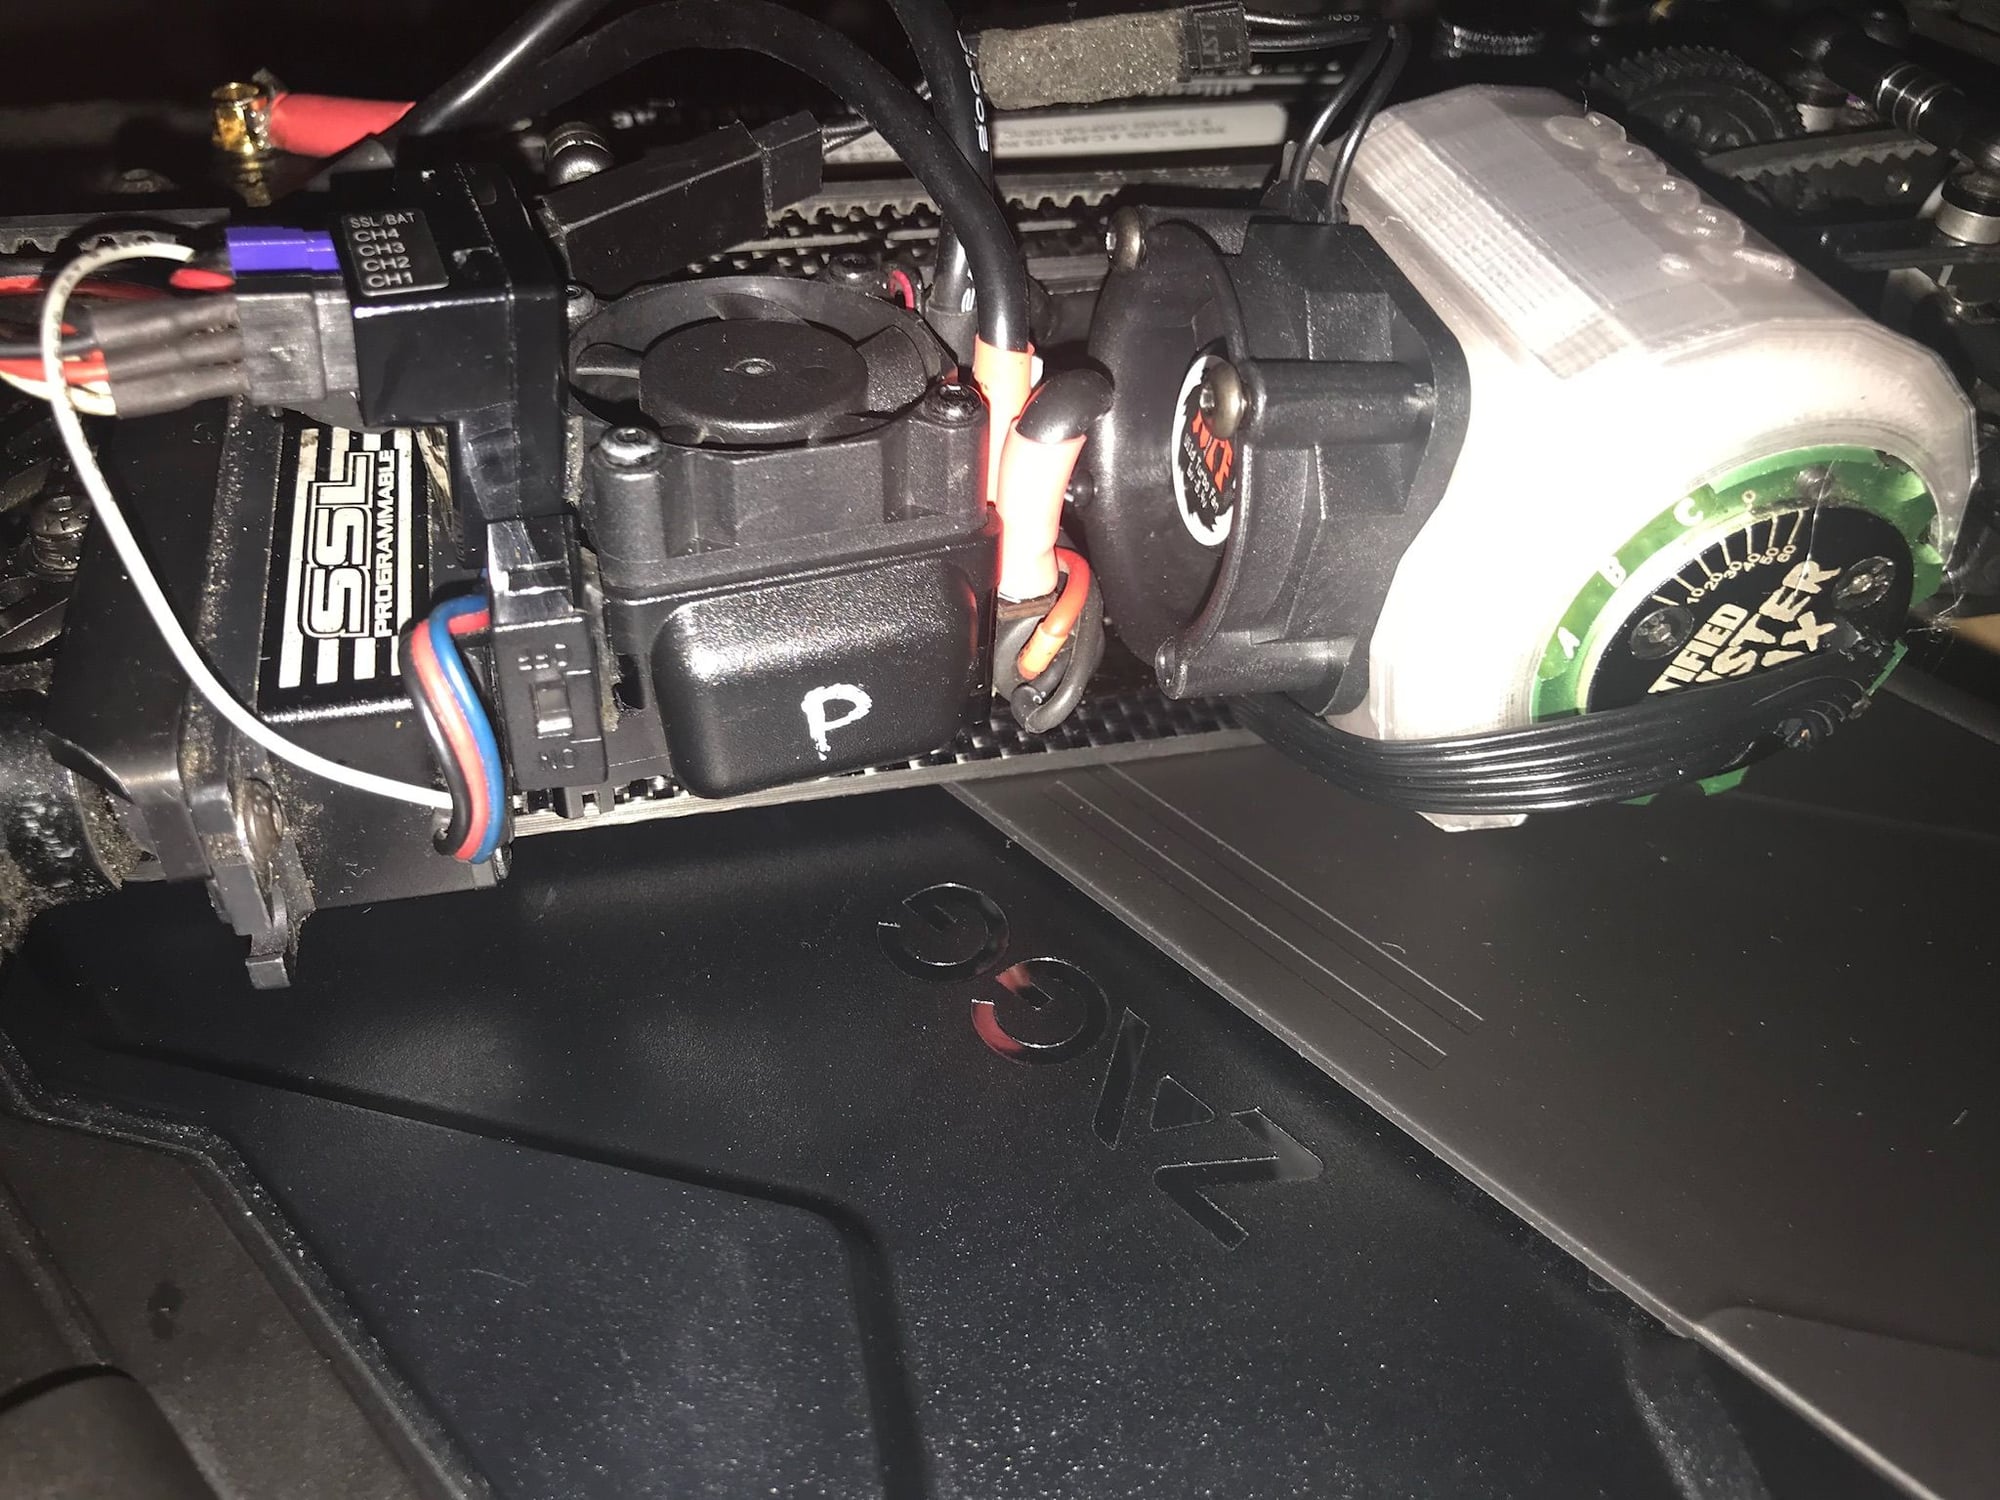
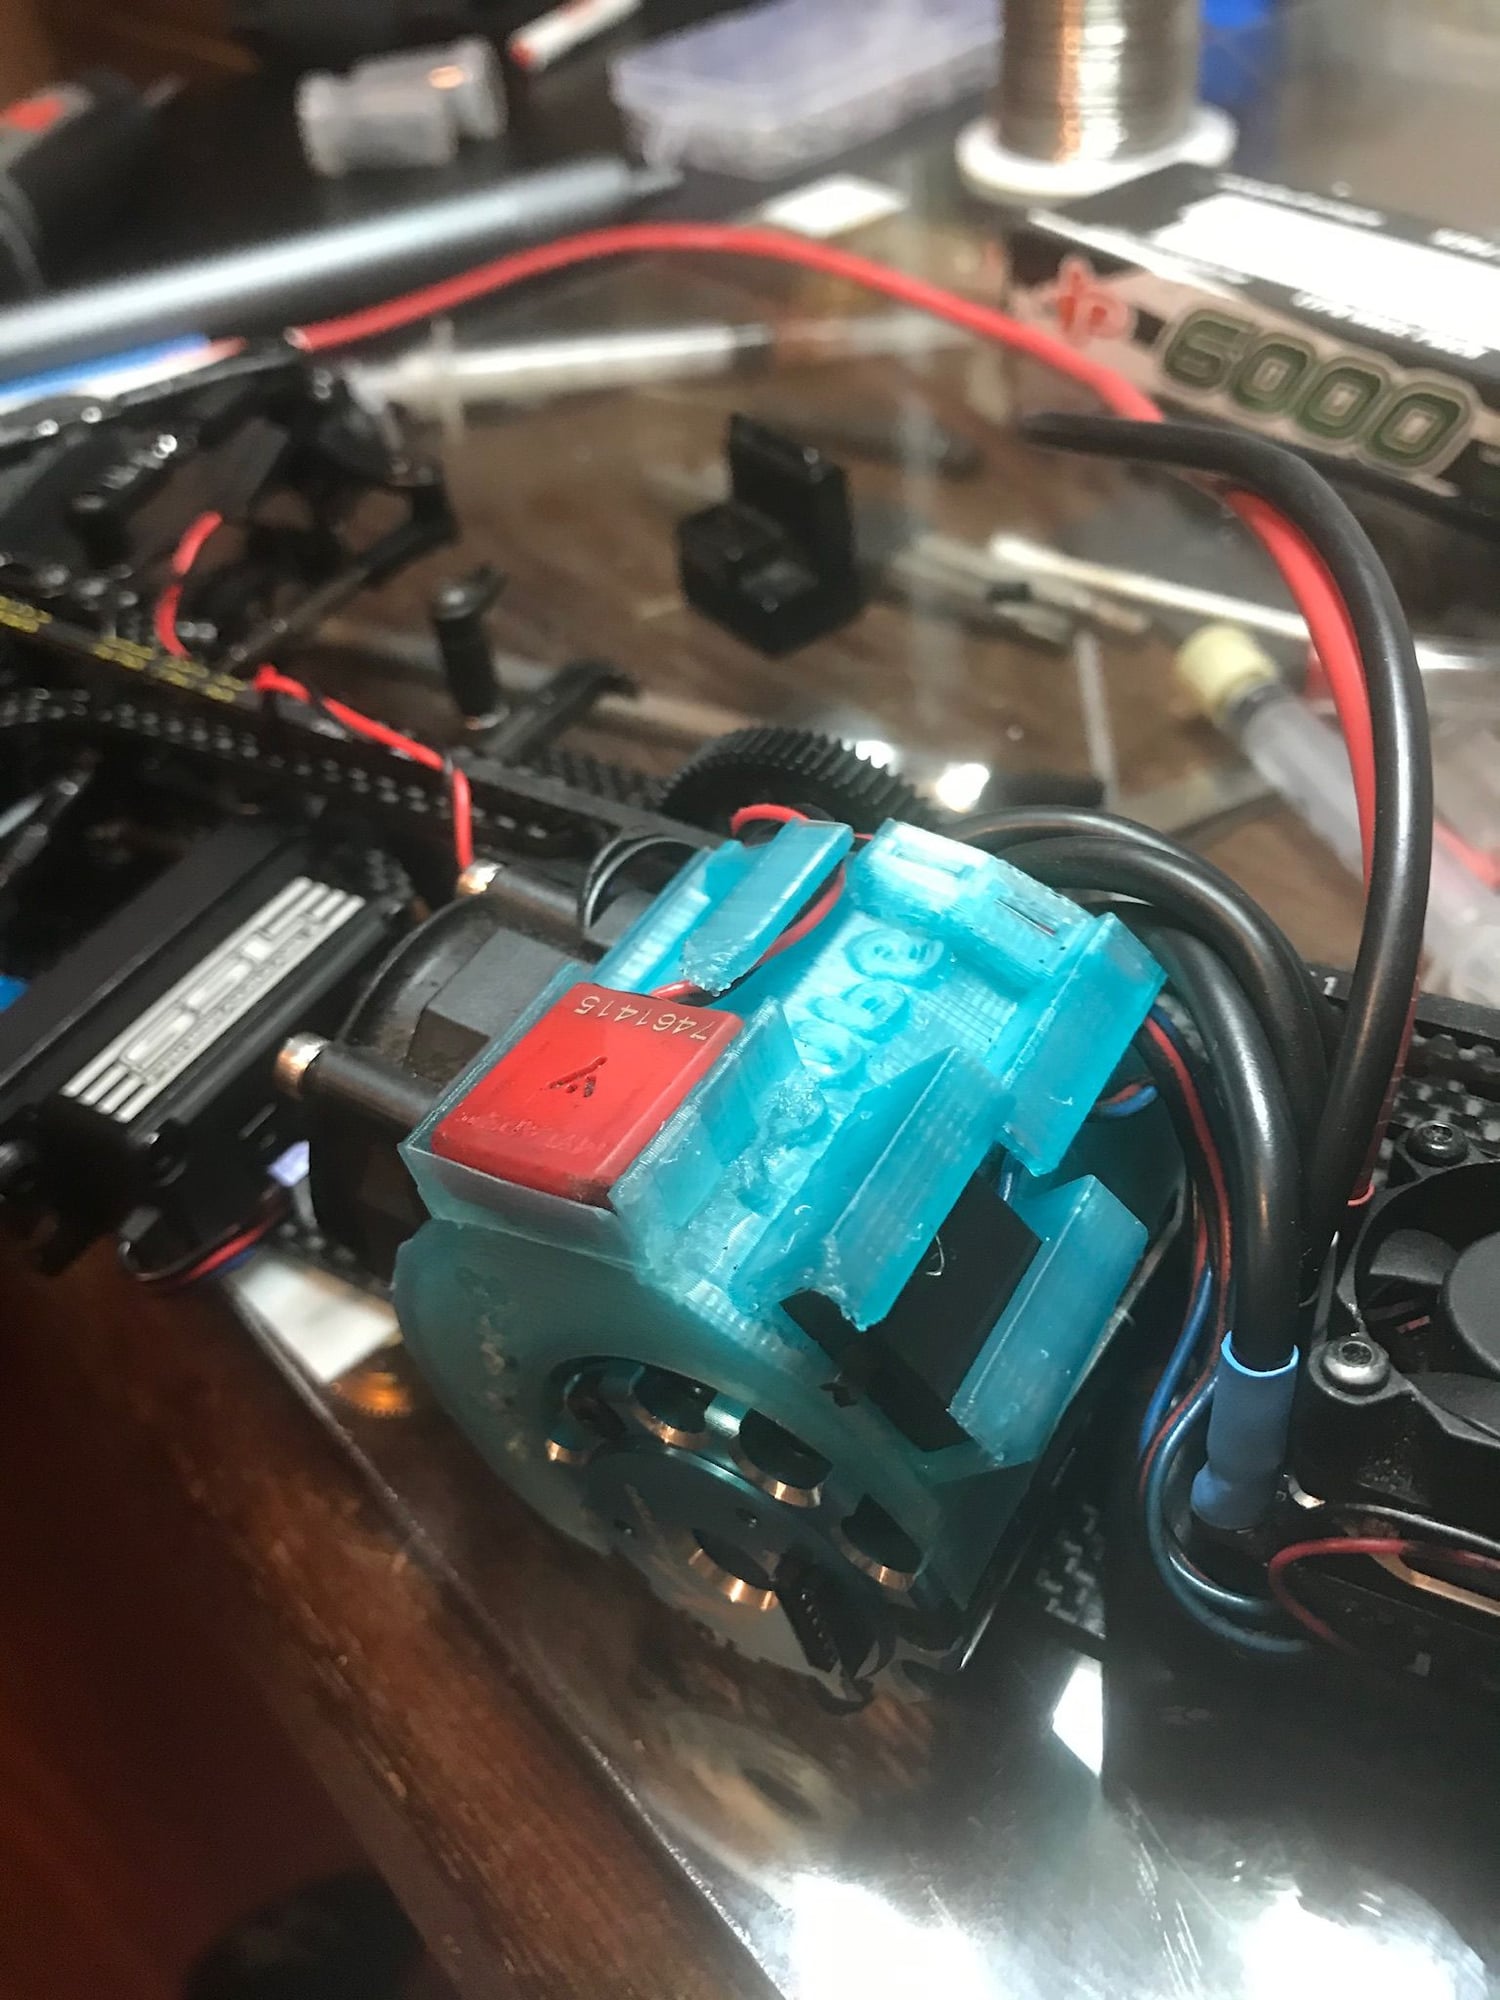
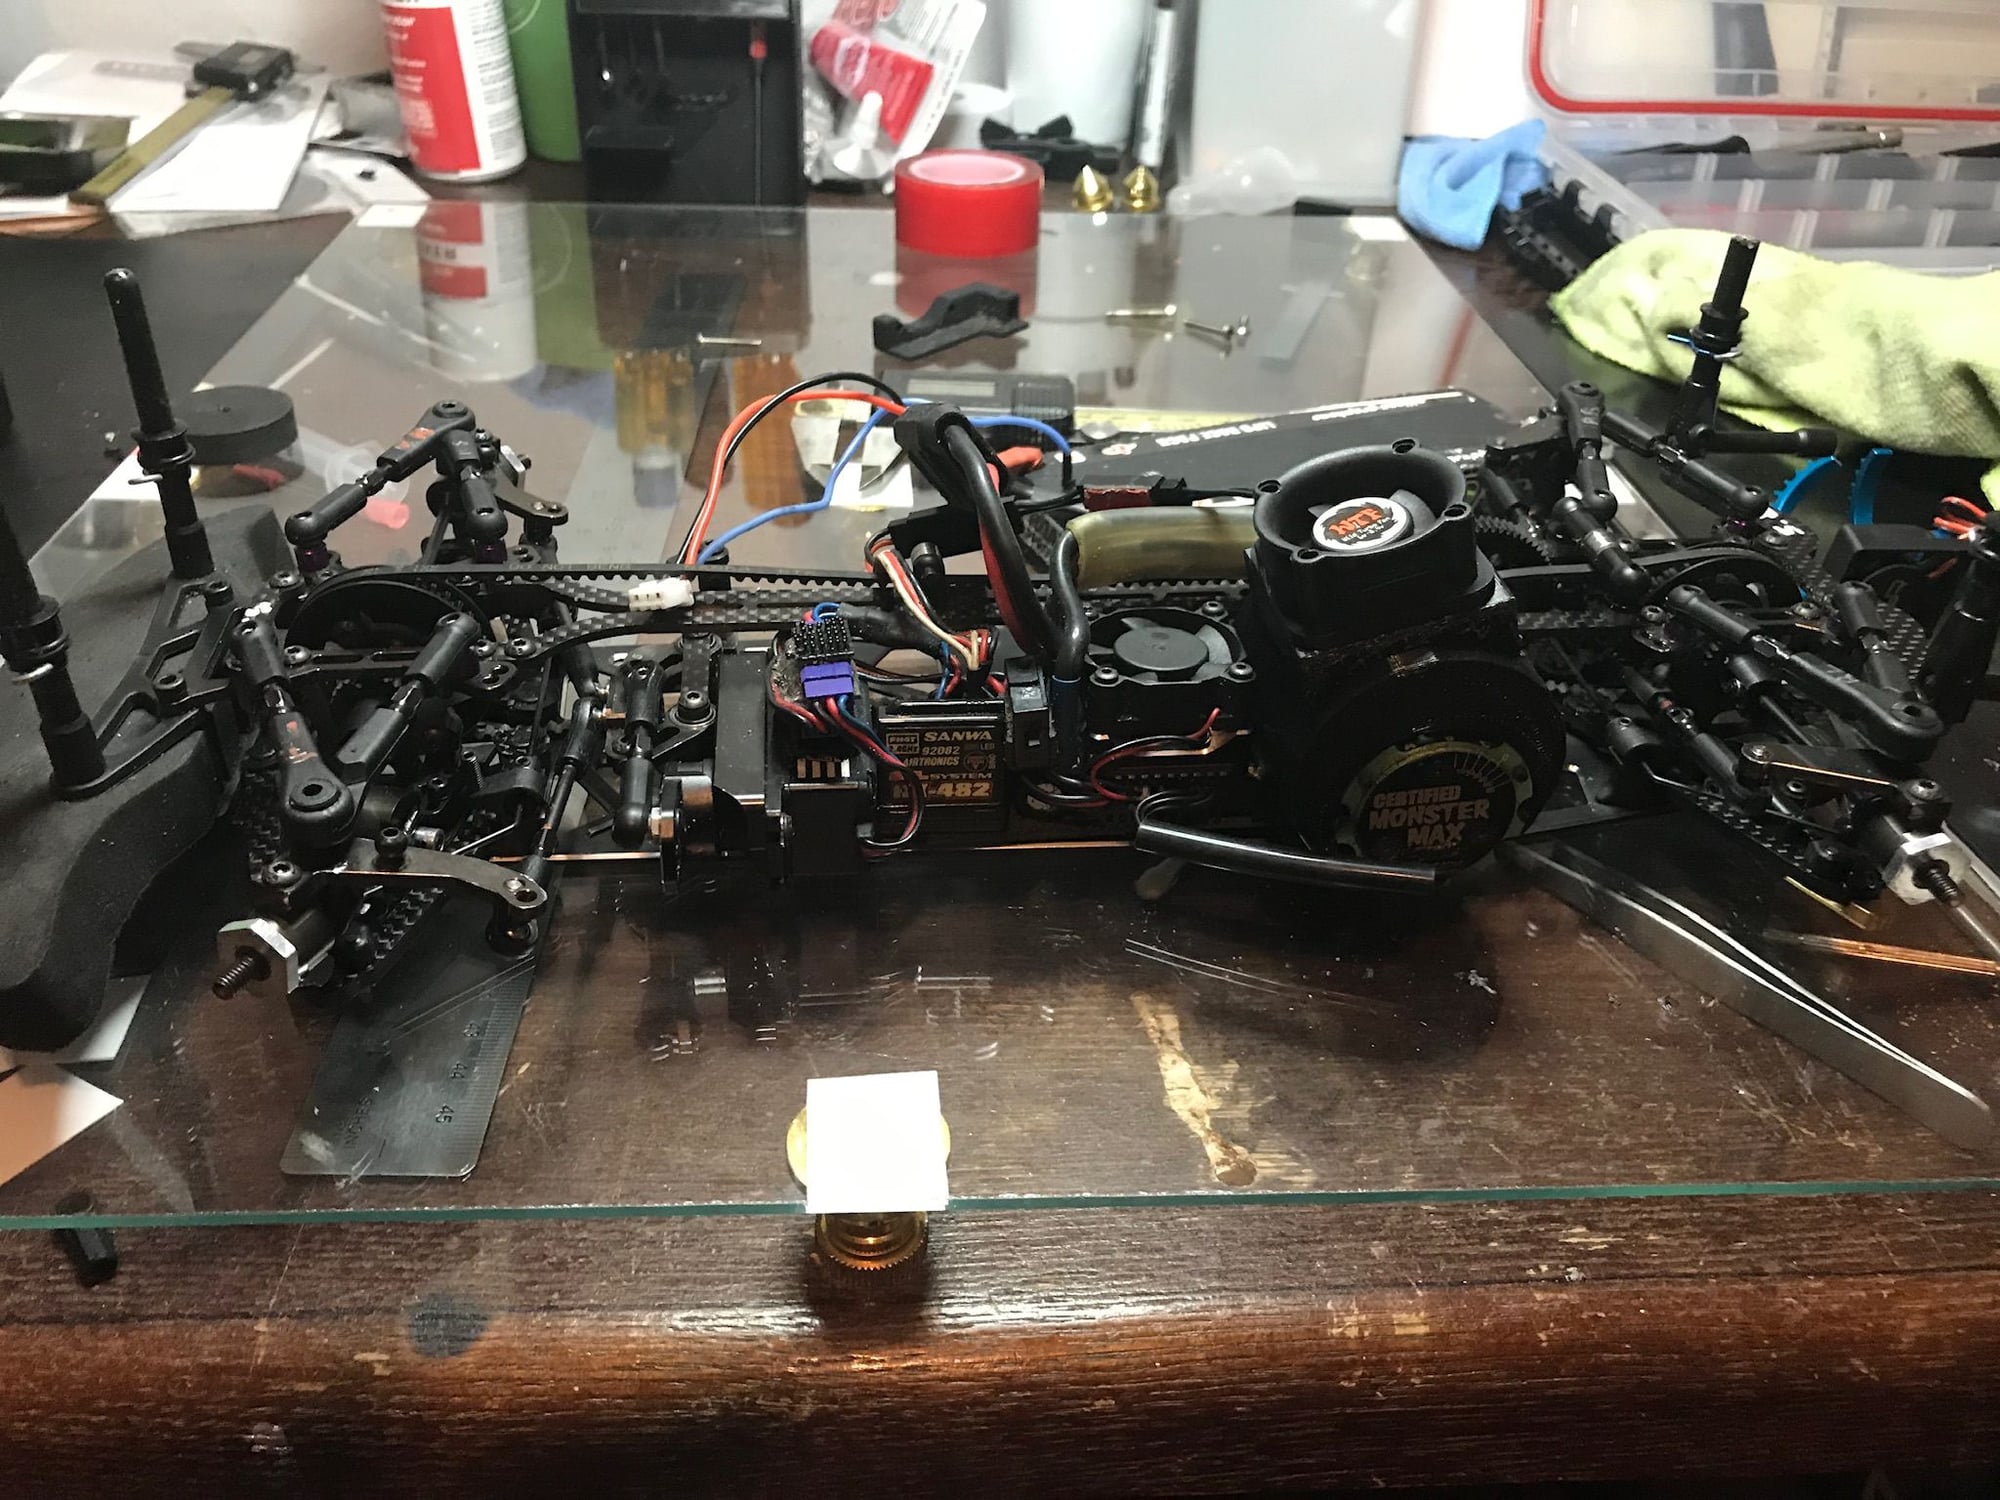 It looks big but its very light and hollow. It takes air moving towards the rear and forces it through the motor. Fans have a limited pressure they can work with so depending on the ventilation through the motor there is a vent to relieve pressure to keep the fan at optimal pressure. Significant air moves diagonally from the top front of the motor to the rear back of the motor. Hot air exits the chassis from underneath and the passenger side of the motor to keep the rotor bearing temperatures down.
 09-08-2019, 09:35 AM
#2
Better pictures with an easier color to see.
 10-10-2019, 08:30 PM
#5
I run this shroud all the time now. I run 5 minute races and pull the car off at 153. Same everything without the shroud was 168.Yea, Thermistors are in the motor instead of measuring from the outside so my temps are very accurate.. This is a winner and has probably 10 races in.
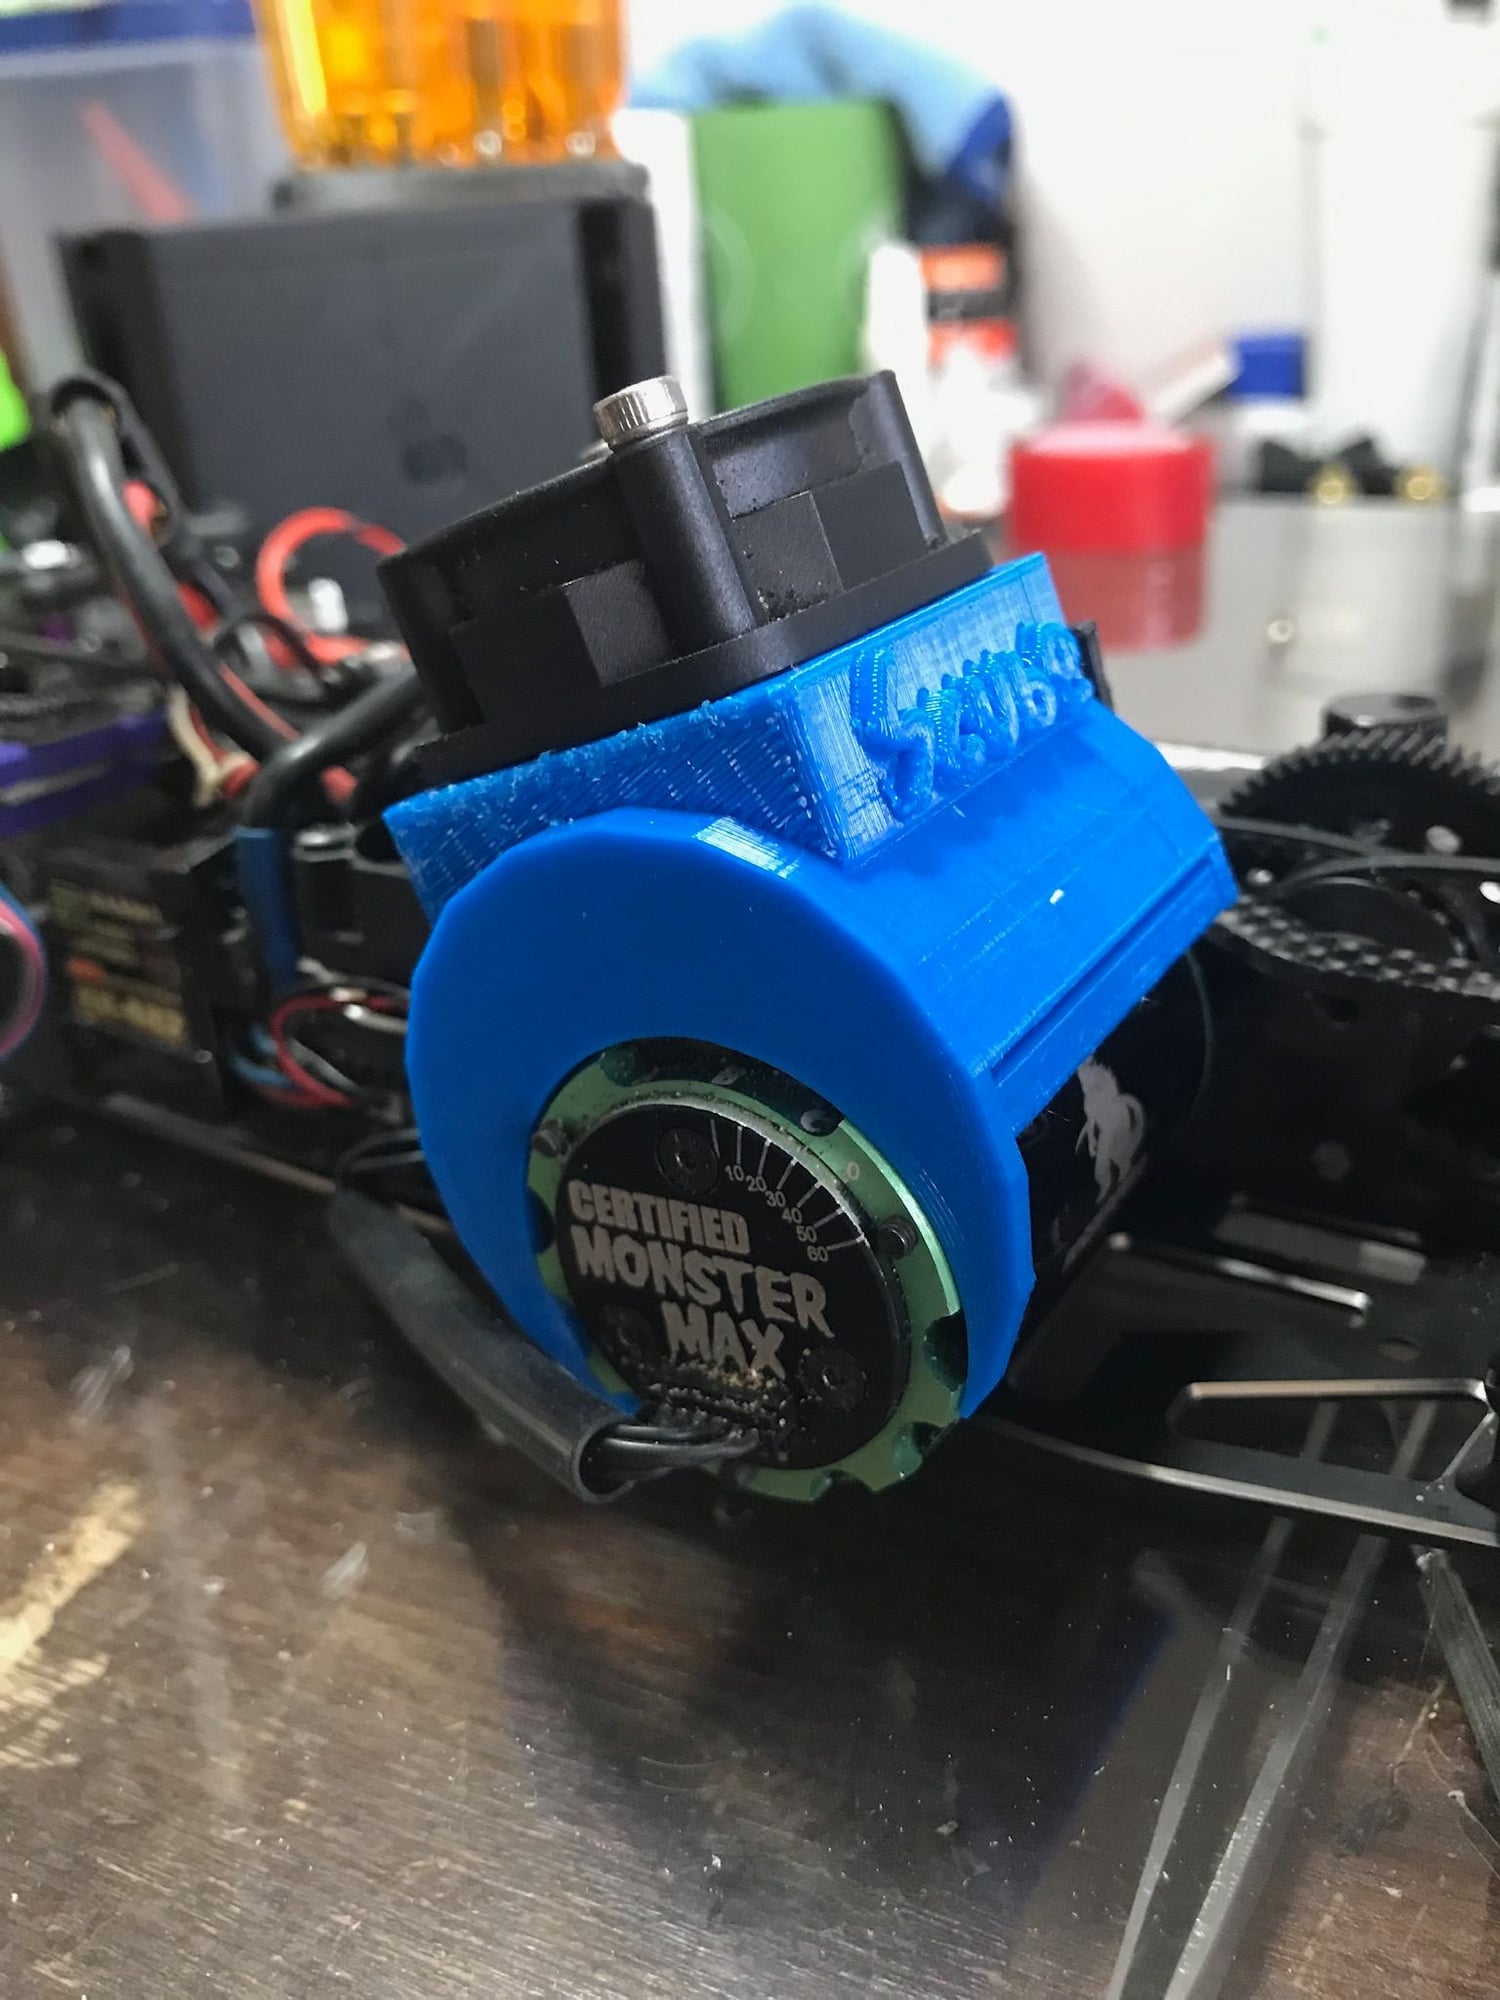
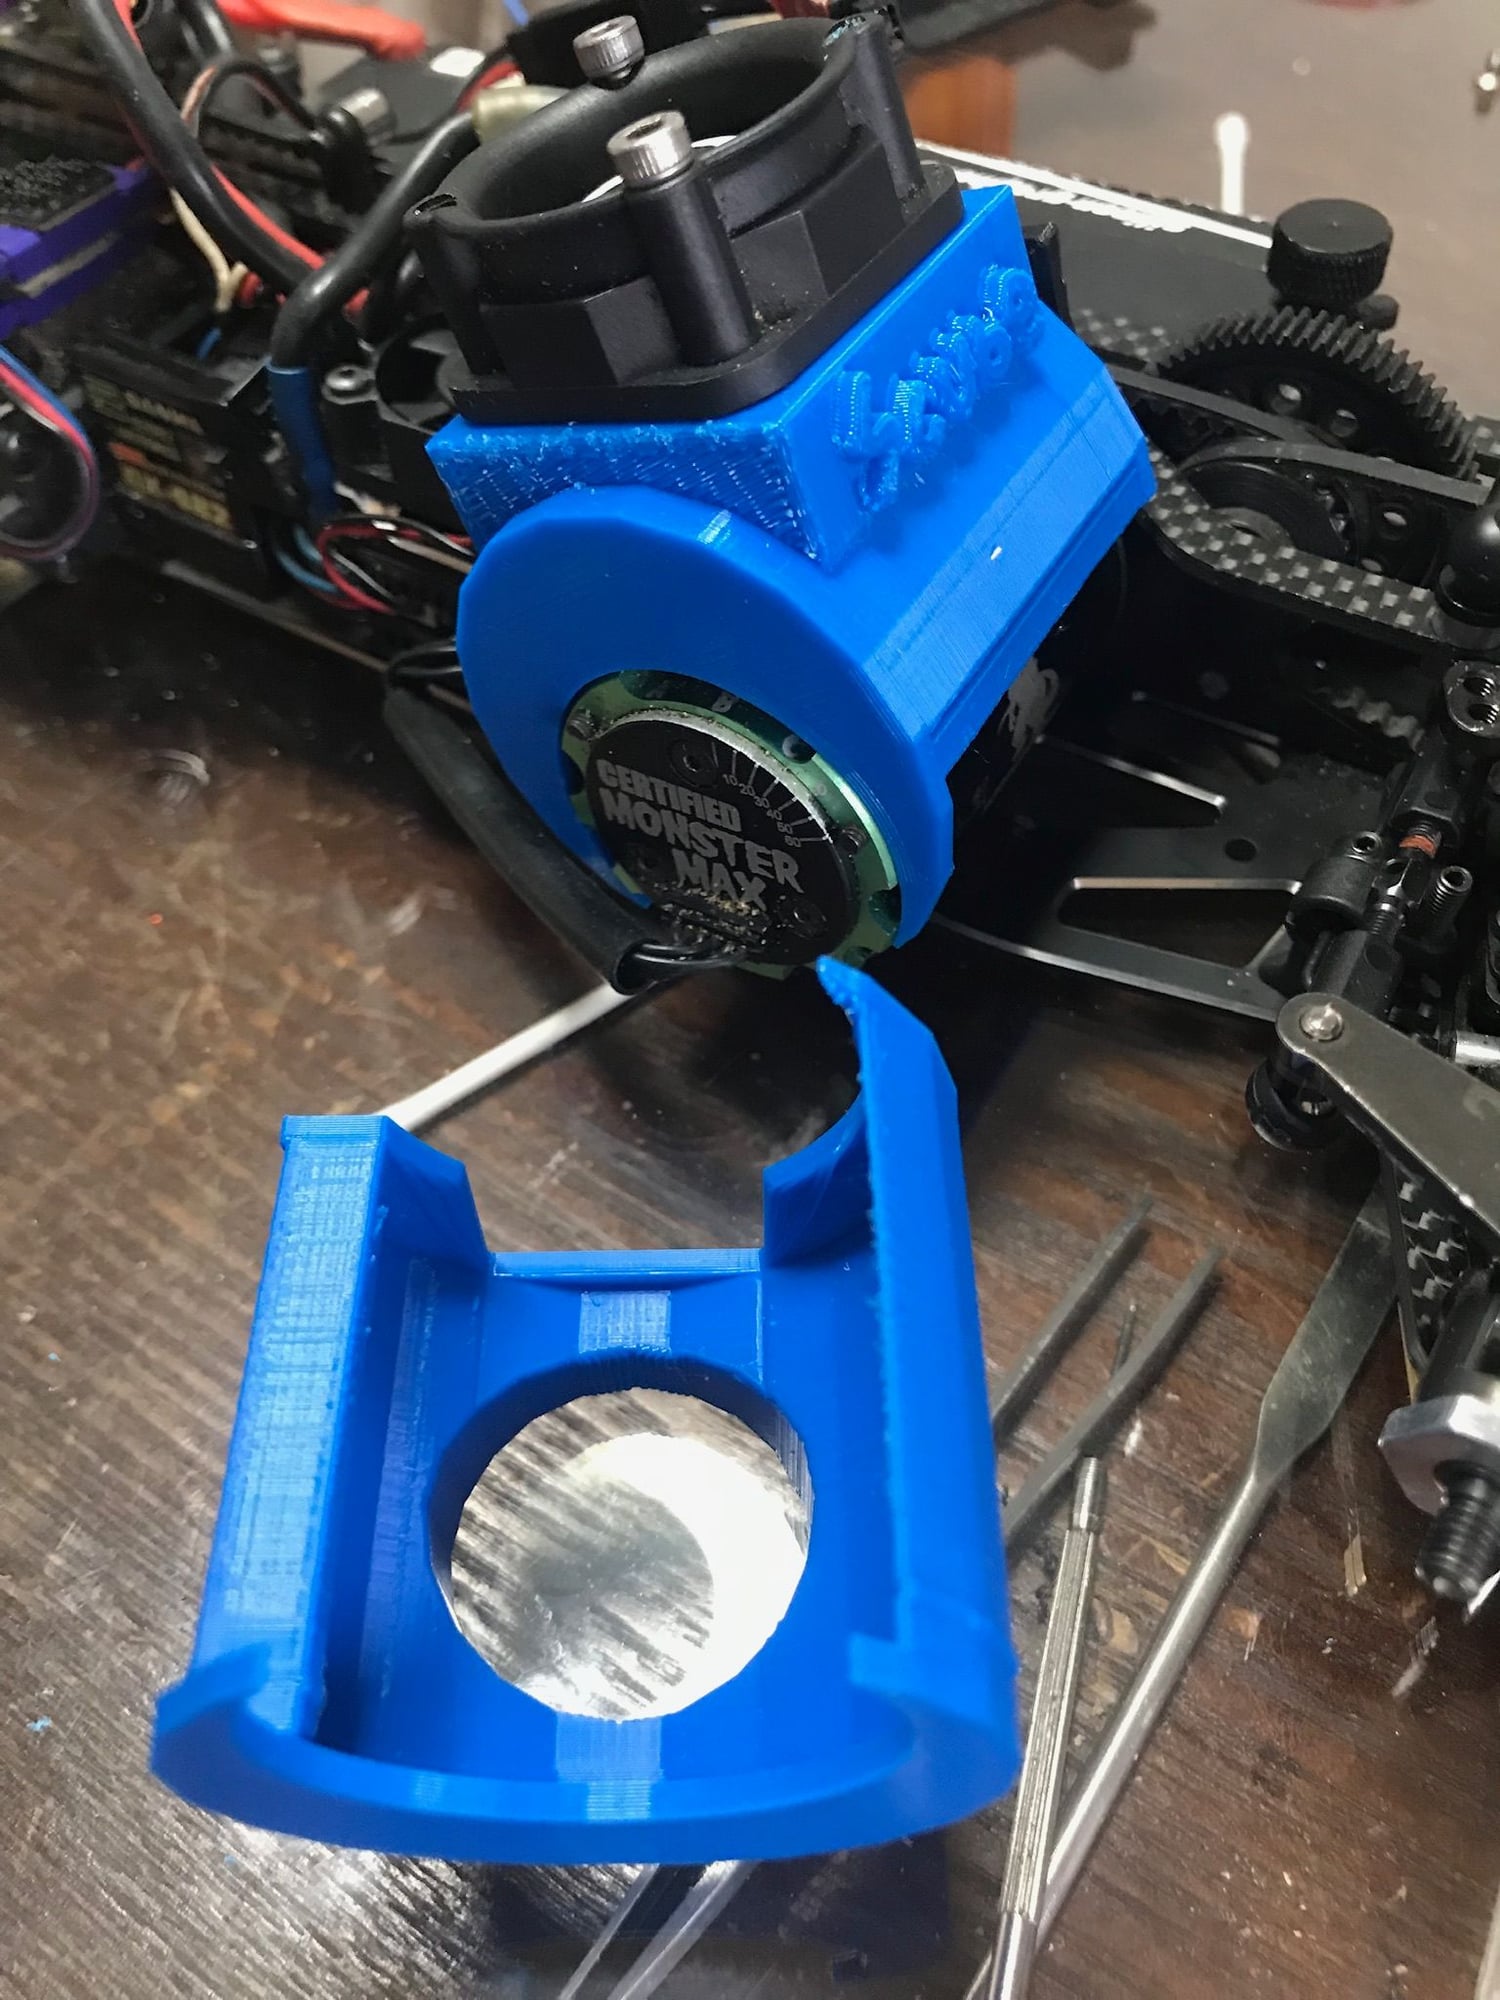
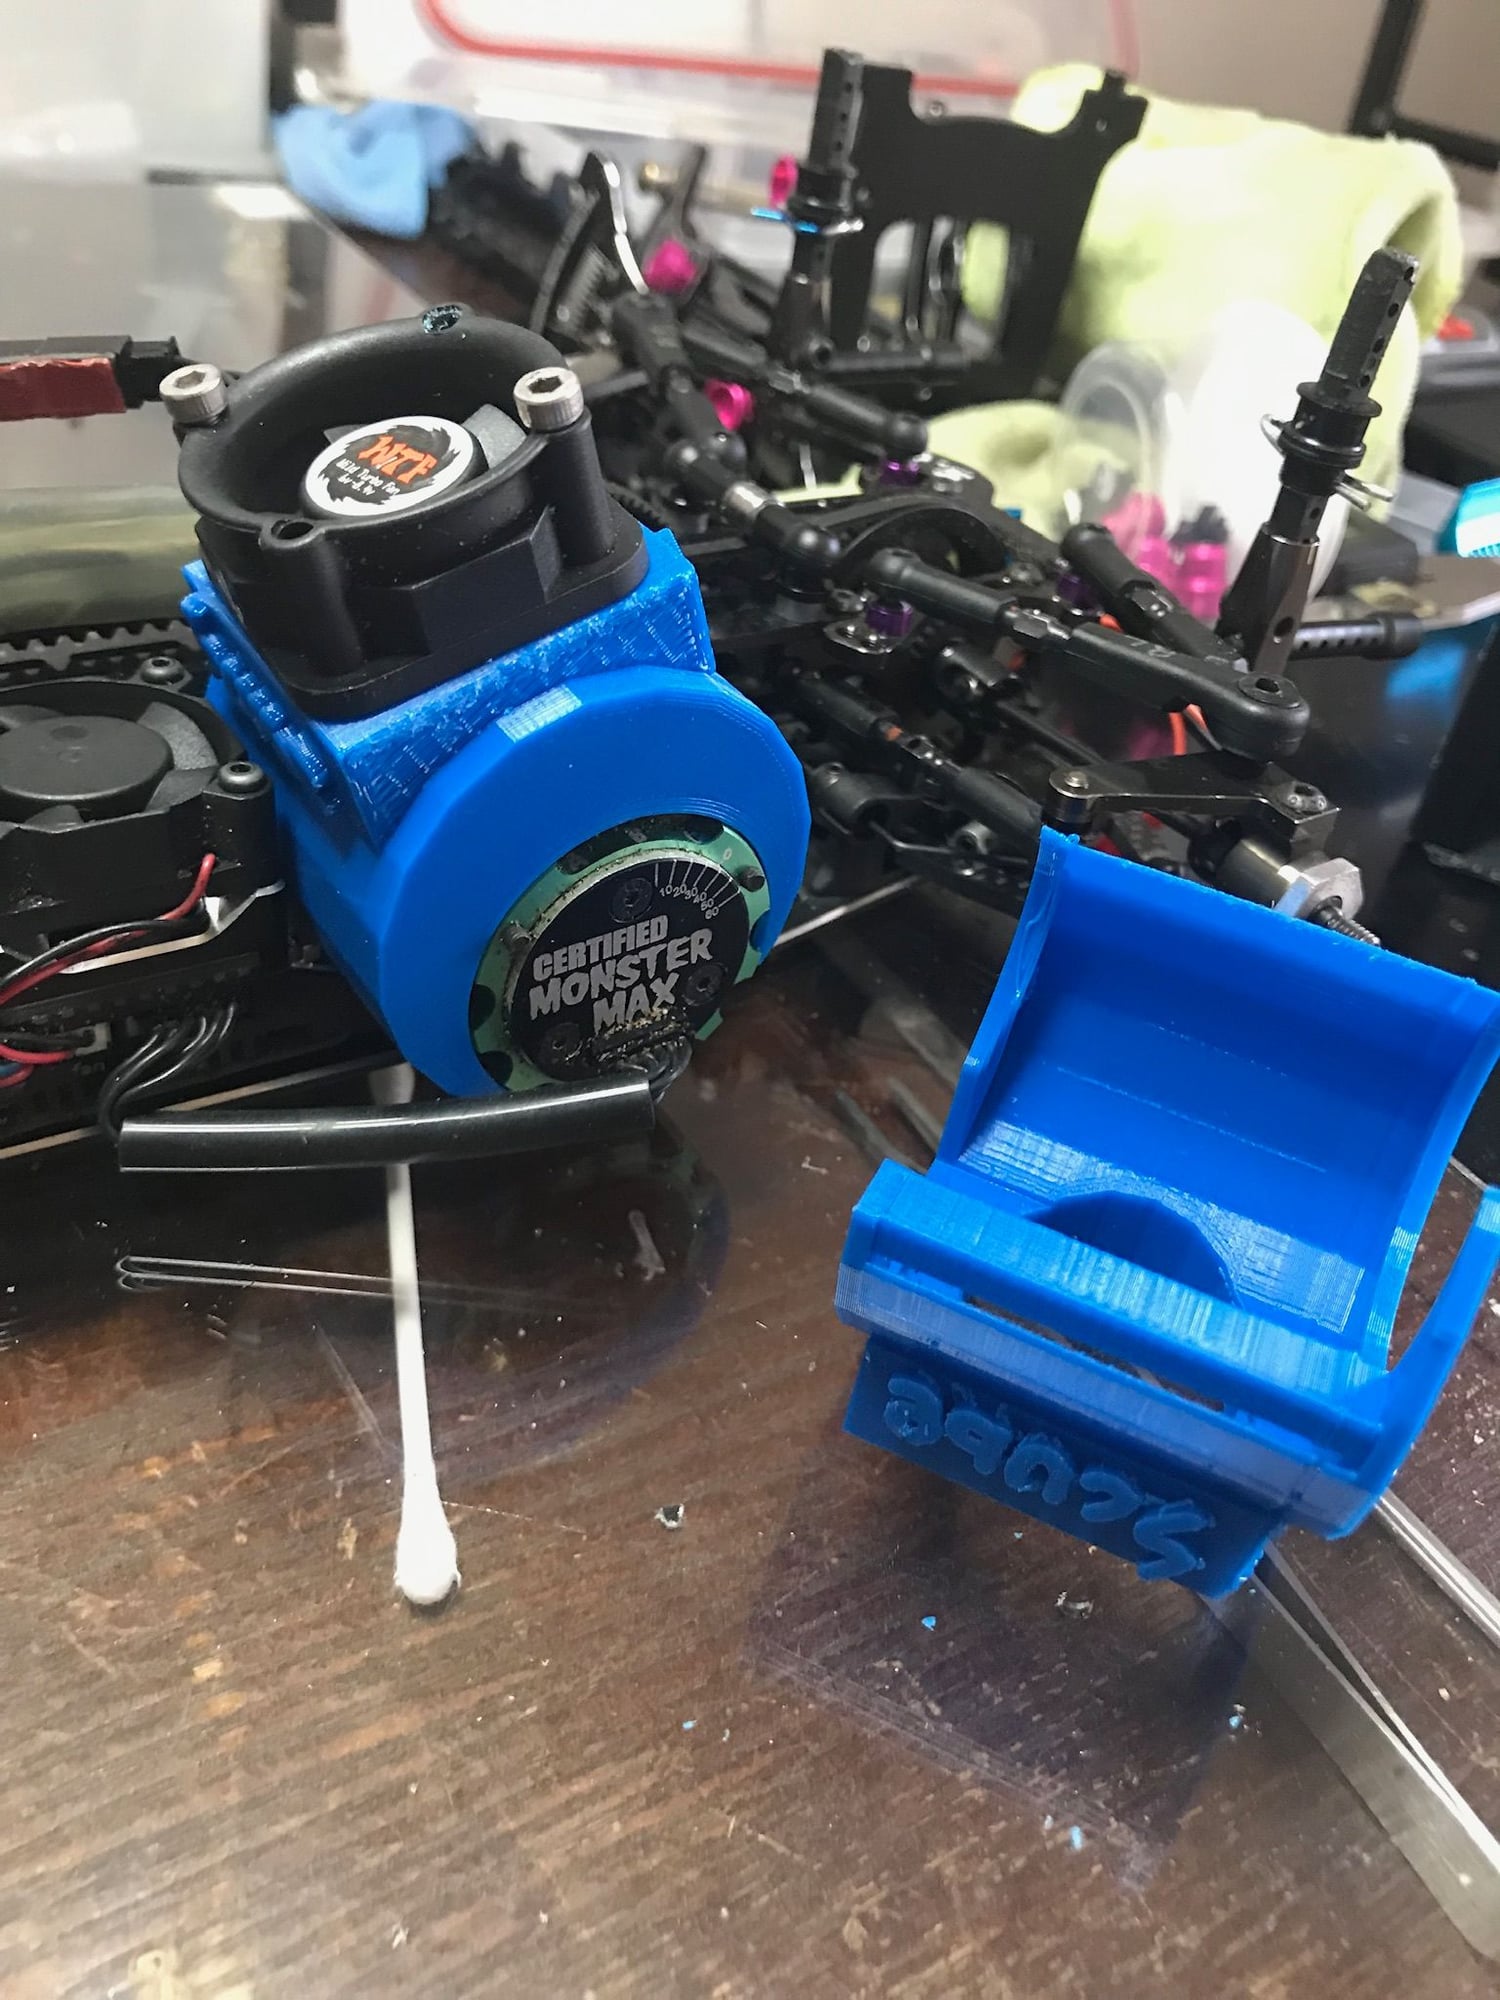
This is an adaption of the air cooling systems you find on servo motors. Its a hybrid Axial/Radial fan to stay within rules and still use pressure through the motor. The trick is to get the air moving through the motor and out the bottom and front and still circulate air around the outside of the can. These fans are sensitive to pressure so if there is too much pressure you get very little flow. You adjust pressure and flow by using the wide slit in the front of the fanshroud. The slit allows you to adjust the pressure by ear to keep the flow high (if the motor screams you blocked too much of the slit). Depending on the amount of holes in the can and front of the motor and flow obstructions through the motor the slit is used to tune the flow. For example once you assemble it block off the slit and fan speed will skyrocket. This is too much pressure and the fan cavitates. Block half of the slit and the rpms remain constant. This means you are under the pressure limit of the fan and will have max flow and pressure. This is the best fan setup ive used. The front flange of the motor and bulkheads conduct heat very quickly because they are metal. There is so much air flowing through the motor the bulkheads are staying much cooler which means more acceleration and prolonged bearing life.
a tricky part of the design is the OD interference with the top plate and sealing the wires that run through the shroud. If i were to guess i would say this is the area that has to change for different chassis but maybe not if the top deck heights are about the same center distance from the rotor.
it has come off in 1 of 10 crashes but a piece of tape solved that. I�ll eventually get a crash clamp designed in but its not really necessary.. At some point i will also run a duct from the pressure zone on the windshield to the inlet of the fan to see if clean air helps.
this is also done in pla which is temperature sensitive. There has been 0 problems with deformation.
Im not sure if it will fit anything but an awesomatix with a trinity monster but my son would probably ebay these if someone was interested. Adding timing is possible if you believe in that but I dont need nor can I use more motor. In fact I should probably take more heat out of the motor. Im not getting beat in the straights with my 21.5.
all of my motors are stock class and the shroud fits. including the new fixed timing usgt.
Last edited by Bry195; 10-13-2019 at 08:18 PM.
10-24-2019, 08:47 PM
#6
Its looks like this duct fits 36mm cans without an issue. I havent had interference with any top decks on about 5 cars like the 419, express, tc7. It rotates around the can. I ended the duct on the backside in a way that you have probably 10 degrees of rotation to clear the top deck.
01-01-2020, 07:32 PM
#8
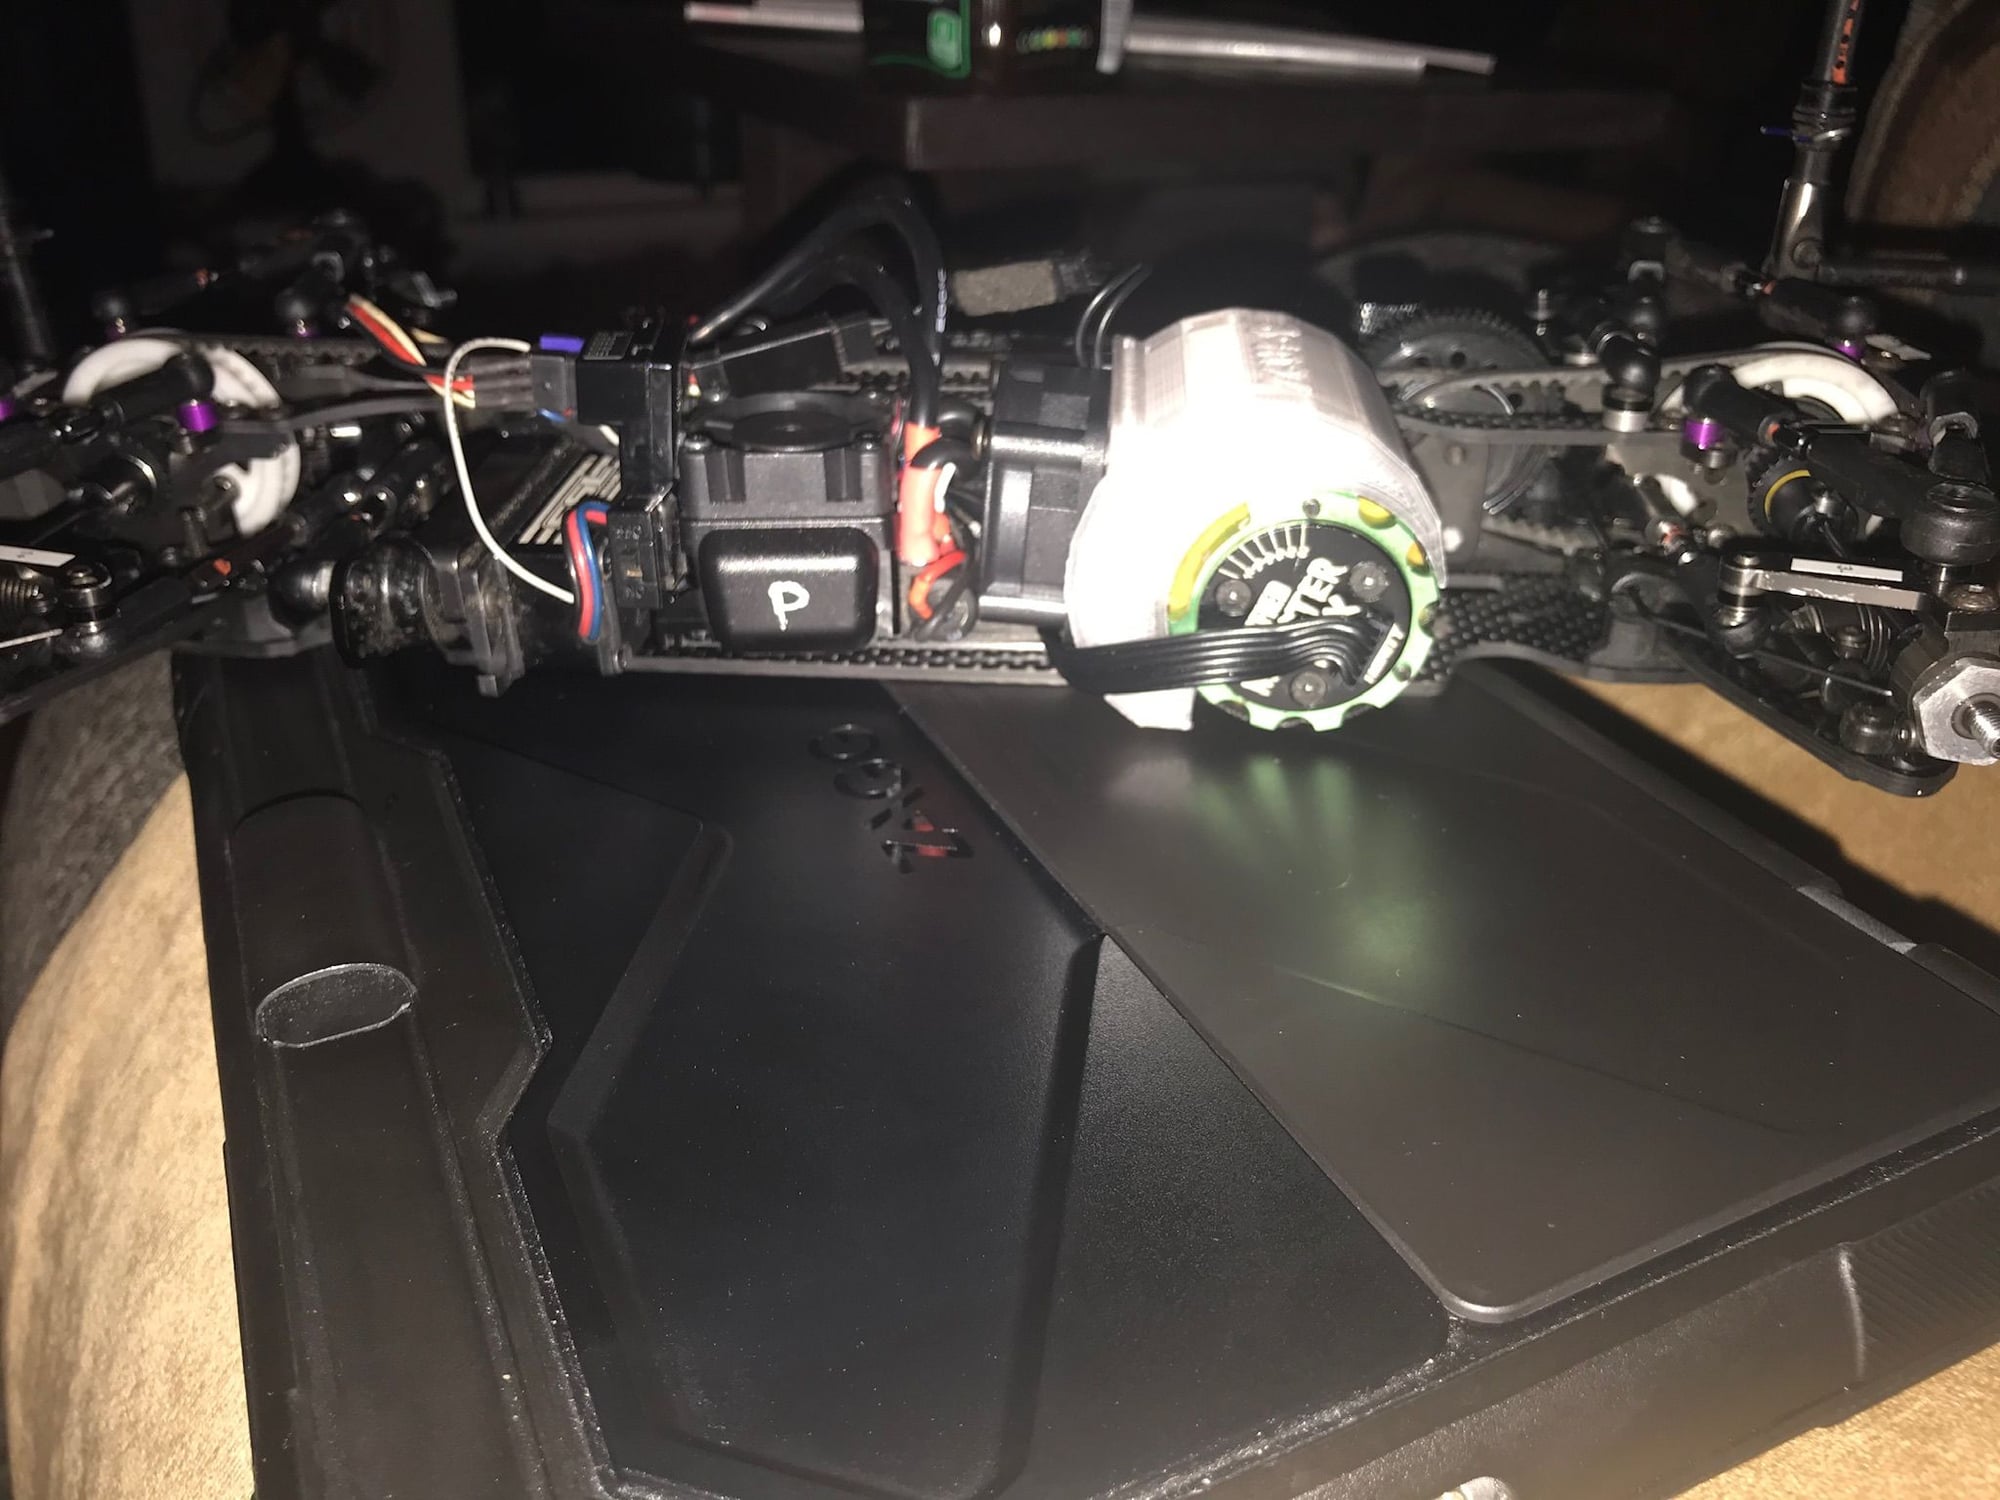
I put the carbon fiber chassis on this one so it gave me a chance to rebalance the car and create a new duct (shroud). I like this one allot. Its out of the way.
to be clear this is a rear motor setup for a forward facing fan.
Last edited by Bry195; 02-05-2020 at 08:15 PM.
01-02-2020, 09:27 AM
#9
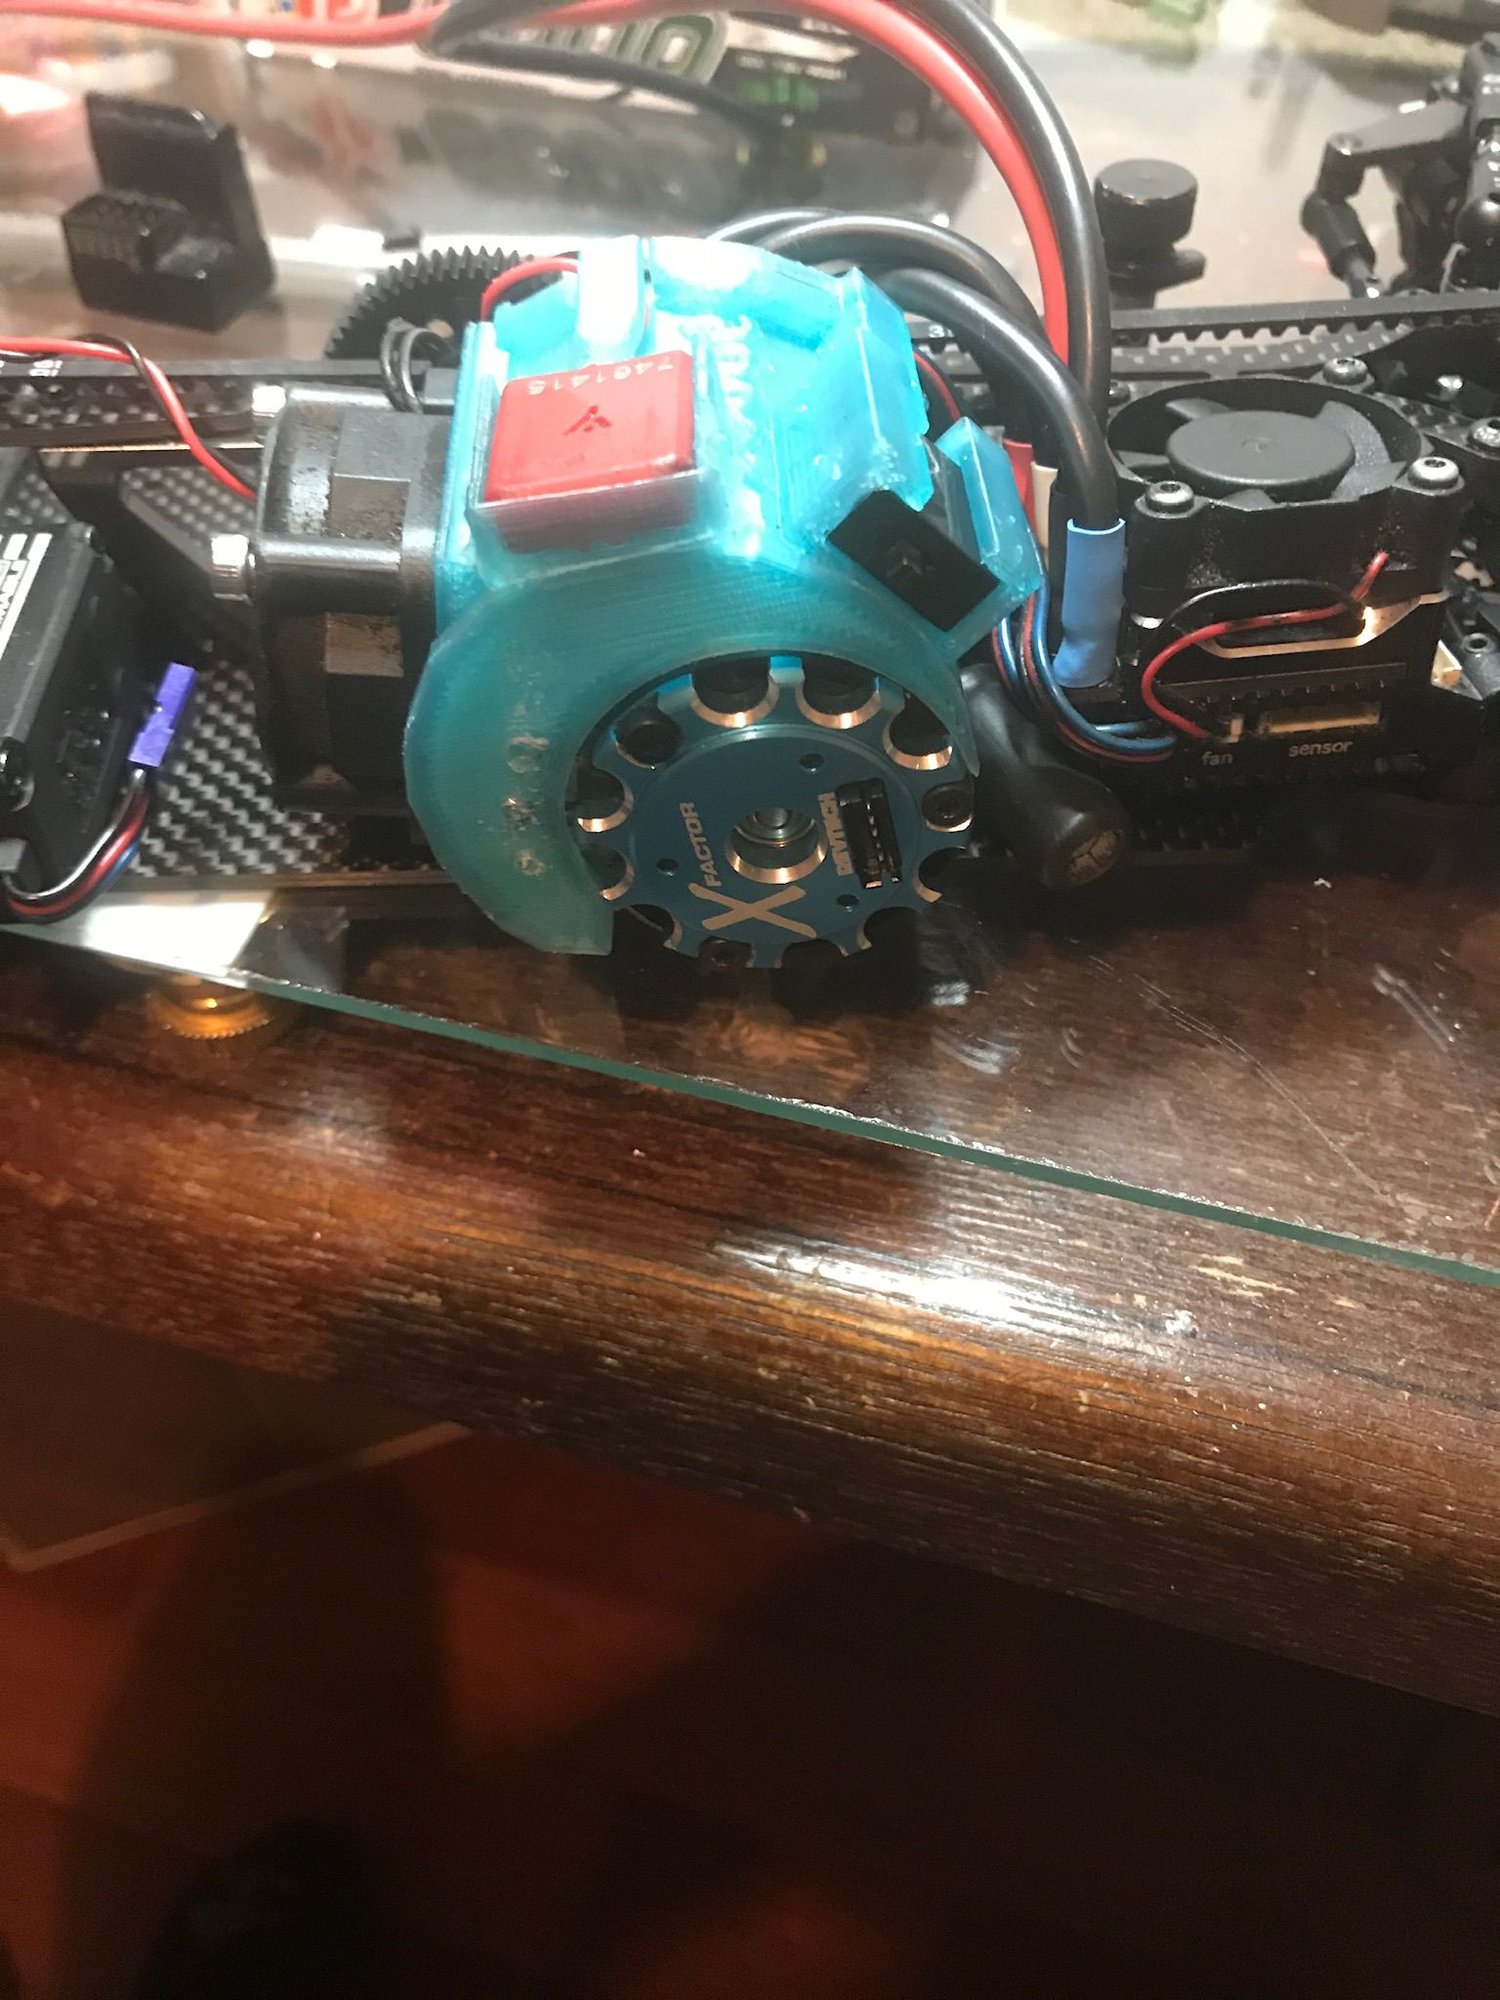
Nice design and print. Is that clear PLA? Was considering something like this for my buggy as well as keeping dirt/screws out of the can since the new Trinity XFactor stator/rotor is very exposed. If I get anything done on this I will post my results (might PM you for a file as well!)
FYI I just made a fan shroud in PLA for my discharge bank and the PLA does just start to stick to the heatsink surface but that is running at over 230F+ degrees! Agree in your application PLA should be more then fine.
FYI I just made a fan shroud in PLA for my discharge bank and the PLA does just start to stick to the heatsink surface but that is running at over 230F+ degrees! Agree in your application PLA should be more then fine.
01-02-2020, 07:03 PM
#10
Nice design and print. Is that clear PLA? Was considering something like this for my buggy as well as keeping dirt/screws out of the can since the new Trinity XFactor stator/rotor is very exposed. If I get anything done on this I will post my results (might PM you for a file as well!)
FYI I just made a fan shroud in PLA for my discharge bank and the PLA does just start to stick to the heatsink surface but that is running at over 230F+ degrees! Agree in your application PLA should be more then fine.
FYI I just made a fan shroud in PLA for my discharge bank and the PLA does just start to stick to the heatsink surface but that is running at over 230F+ degrees! Agree in your application PLA should be more then fine.
Yea its PLA. Wasn�t it you that did clear PLA that inspired me? I dont know what would happen to the PLA if the fan stopped but ive been itching for a new motor anyways. This one is 3 years old and I cant kill it. I really like this one. Its easier to mount and covers more of the surface area. I dont think Ill be able to add a duct on the front of that fan for fresh air in but maybe.
02-05-2020, 08:18 PM
#11
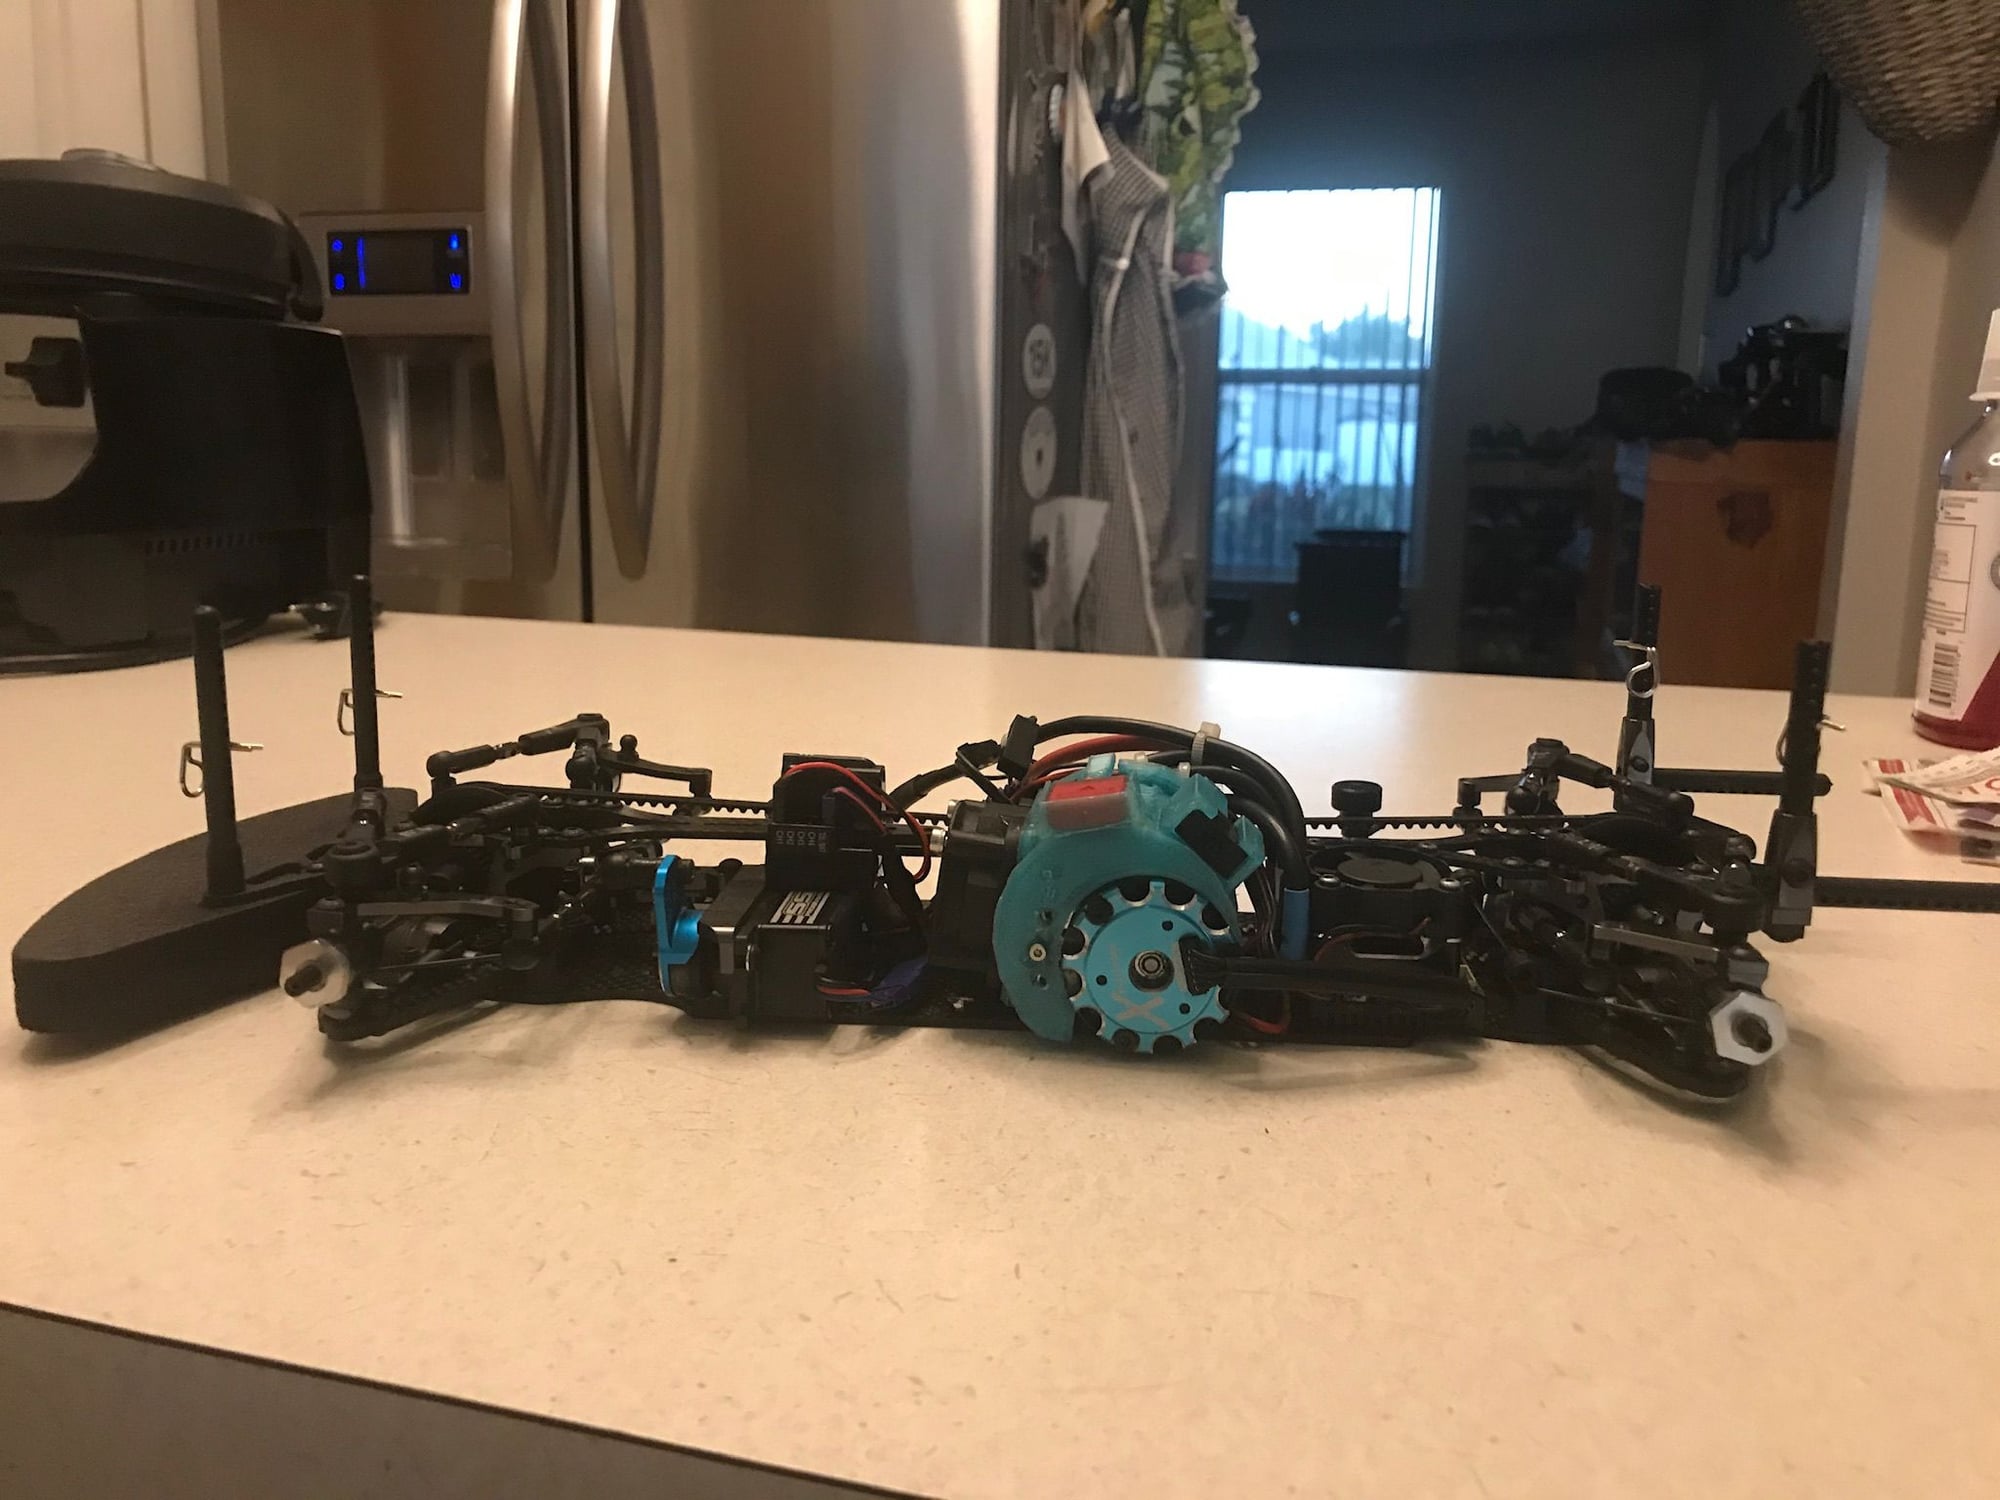
This is a mid-motor amx-mmx. Forward facing shroud. Transponder and cable management.
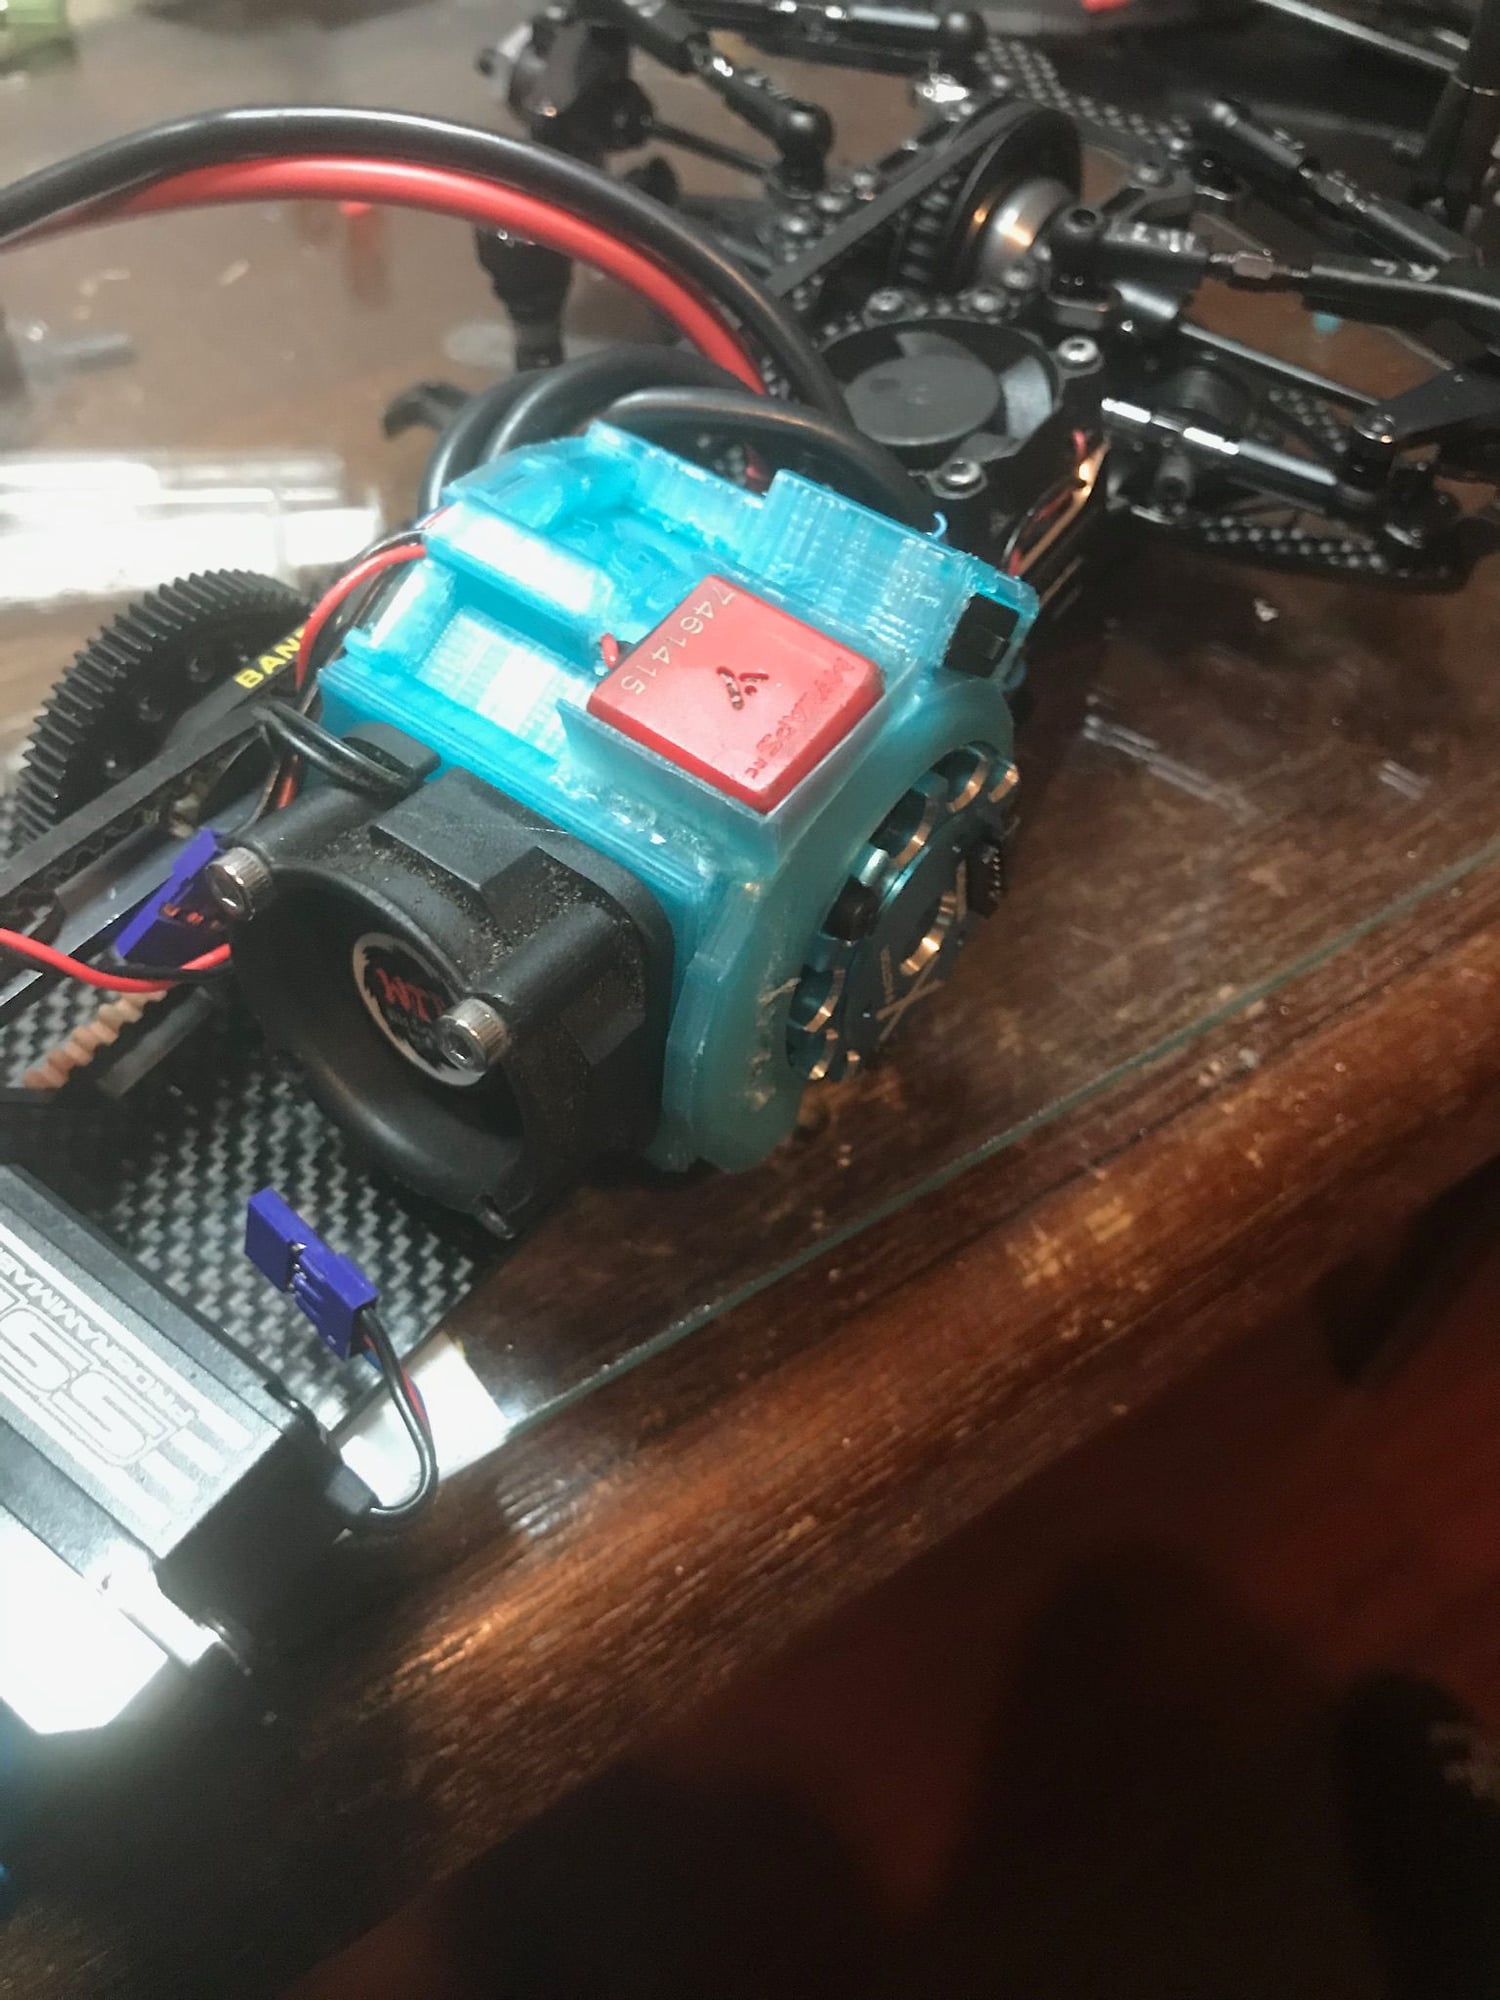
Still not done wiring.
On off switch for the esc.
02-06-2020, 04:33 PM
#12
Your fan ducting system is starting to look like Batman's utility belt. You can mount some extra body pins and maybe a travel size 2mm allen wrench next!!!! All kidding aside I like it!
If you get into a nose to nose race you cant just win by the nose with the transponder that far back (not that you see finishes that close very often if at all).
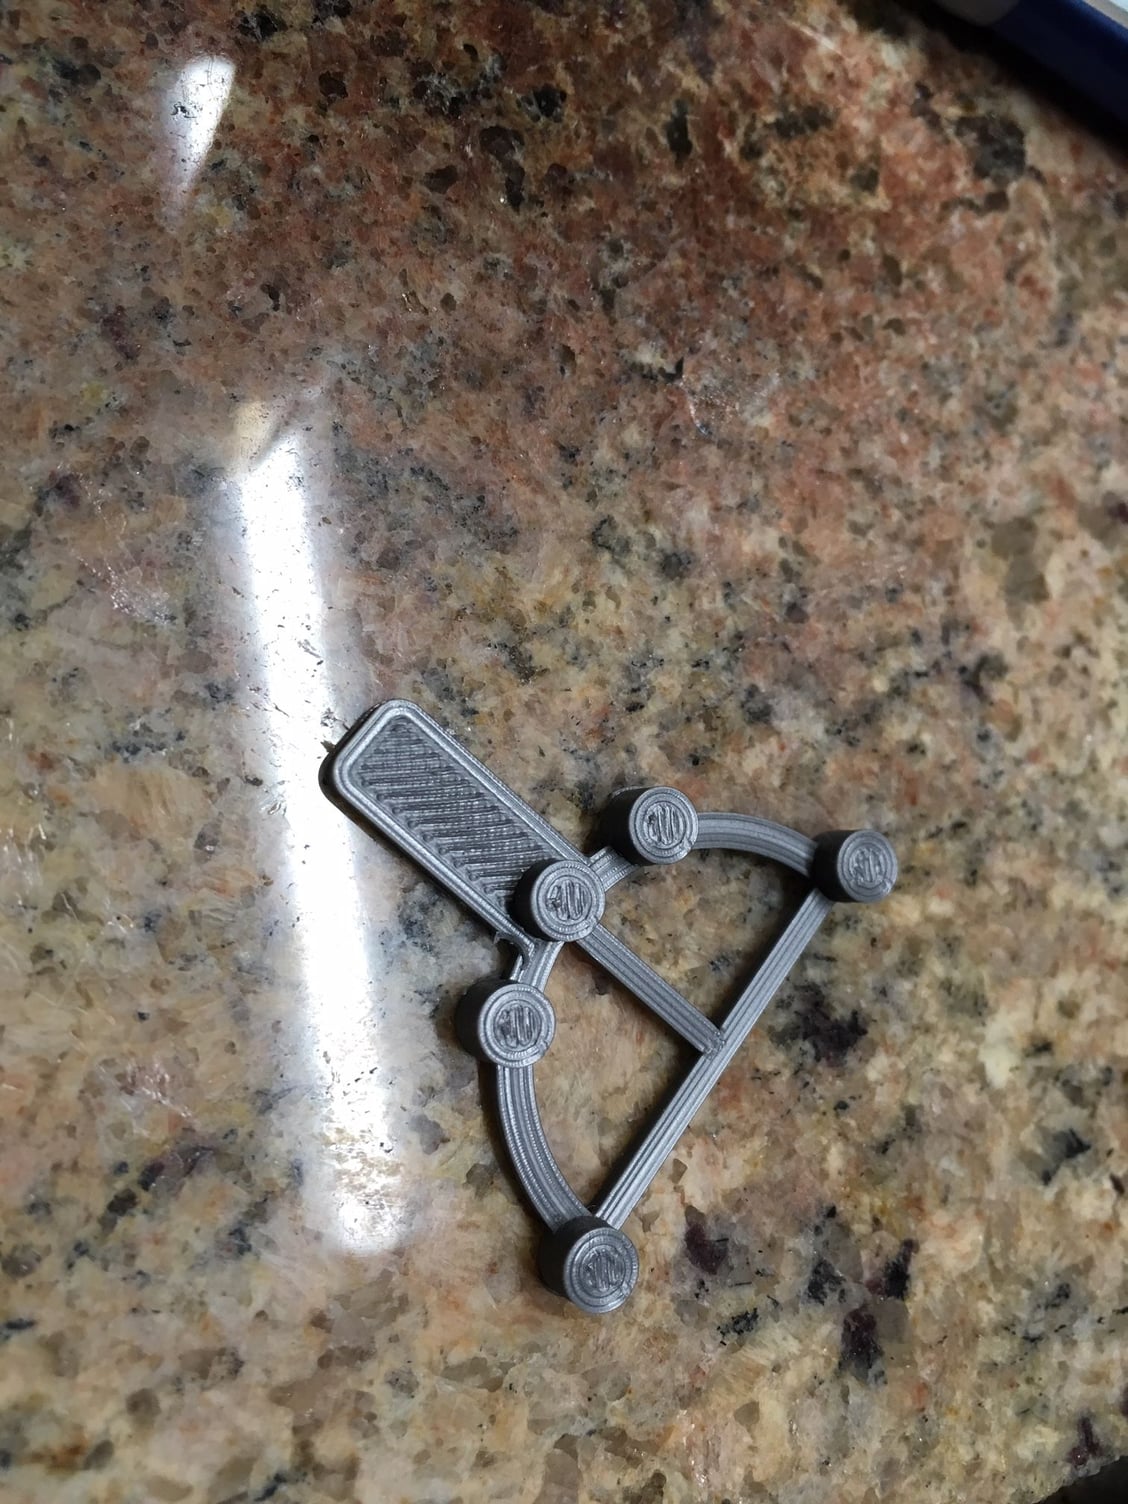
You need a timing adjustment tool for your motor?I will post this one to thingiverse (look under sacmiata). You can mount it to your fan duct. Thanks again for sending me your model as well. Still need to trim it for buggy use.
If you get into a nose to nose race you cant just win by the nose with the transponder that far back (not that you see finishes that close very often if at all).
You need a timing adjustment tool for your motor?I will post this one to thingiverse (look under sacmiata). You can mount it to your fan duct. Thanks again for sending me your model as well. Still need to trim it for buggy use.
02-06-2020, 08:15 PM
#13
Your fan ducting system is starting to look like Batman's utility belt. You can mount some extra body pins and maybe a travel size 2mm allen wrench next!!!! All kidding aside I like it!
If you get into a nose to nose race you cant just win by the nose with the transponder that far back (not that you see finishes that close very often if at all).
You need a timing adjustment tool for your motor?I will post this one to thingiverse (look under sacmiata). You can mount it to your fan duct. Thanks again for sending me your model as well. Still need to trim it for buggy use.
i saw your wrench and I though its payback time. And then i forgot to hit you up. So 10 minutes ago I corrected something on the bat fan and whipped a wrench out. But Im thinking this time im going to fan cool the wrench. Kidding. I know you would have hooked me up. I meant to take a look at the one Marcos was showing off but just forgot about it when I saw him last.
im going to drag that transponder about a second behind me until the last lap and im going to batarang that transponder about a second in front of me. LOL
Last edited by Bry195; 02-07-2020 at 08:50 PM.
02-09-2020, 09:39 AM
#14
LOL the bat fan. I dont see it any other way now. Im trying to get rid of the wires but i may put the bat symbol on it now.
i saw your wrench and I though its payback time. And then i forgot to hit you up. So 10 minutes ago I corrected something on the bat fan and whipped a wrench out. But Im thinking this time im going to fan cool the wrench. Kidding. I know you would have hooked me up. I meant to take a look at the one Marcos was showing off but just forgot about it when I saw him last.
im going to drag that transponder about a second behind me until the last lap and im going to batarang that transponder about a second in front of me. LOL
02-09-2020, 08:18 PM
#15
I cleaned it up a little for you Marcos. Still not as clean as your chassis but it will have to do.