


Build - TURNIGY 2WD 1/10 SCT
 05-31-2013, 10:06 AM
#1
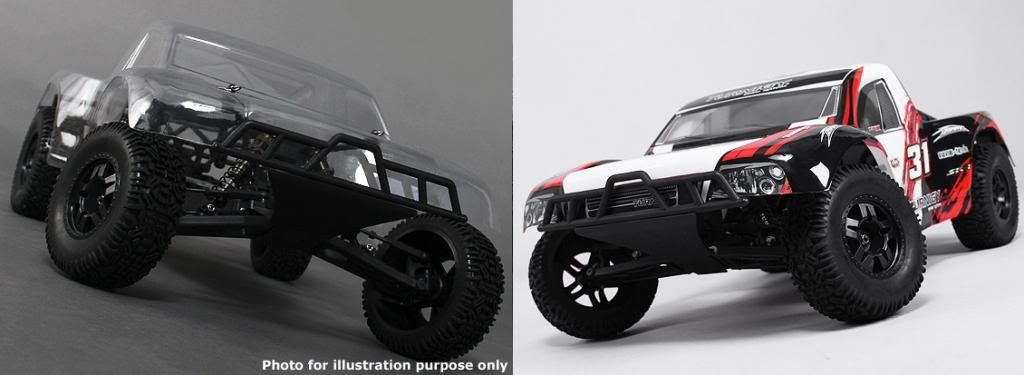
Turnigy SCT 2WD 1/10 Brushless Short Course Truck (KIT)
Turnigy SCT 2WD 1/10 Brushless Short Course Truck (ARR)
The Story - I needed a 1/10 2WD OffRoader and I want it cheap but great. Days of research later, I made payment for this SCT Kit! Couldn't be happier! It is a truck similar to the Kyosho Ultima SC and everyone is having fun with it!
Ofcourse, like many Copied kits they are bound to have some sort of a defect compared to their original. My research shows the common problems being the durability of certain plastic components and the shell. None the least, for the price I paid for, no biggie!
Essential spares and hopups:
Friction Plate Set (10pcs/bag) - A2030, A2031 and A2033
Spur Gear 82T - A2030 and A2031
Upgrade Rear susp Arm - A2030, A2031 and A2033
Upgrade Front susp Arm - A2030, A2031 and A2033
Titanium Color Aluminum Wheel Adaptors with Lock Screws - 5mm (12mm Hex)
You know what's amazing? The shipping. I've selected only regular air mail and it zoomed to my door step way faster than any EMS shipment! It was Customs Checked too!
Date Location Delivery Status
25-May-2013 Air Mail Centre (Counter Section) Hong Kong
25-May-2013 Hong Kong Item posted and is being processed.
27-May-2013 Hong Kong Processed for departure.
27-May-2013 Hong Kong The item left Hong Kong for its destination.
29-May-2013 Singapore Arrived and is being processed.
29-May-2013 Singapore Delivered.
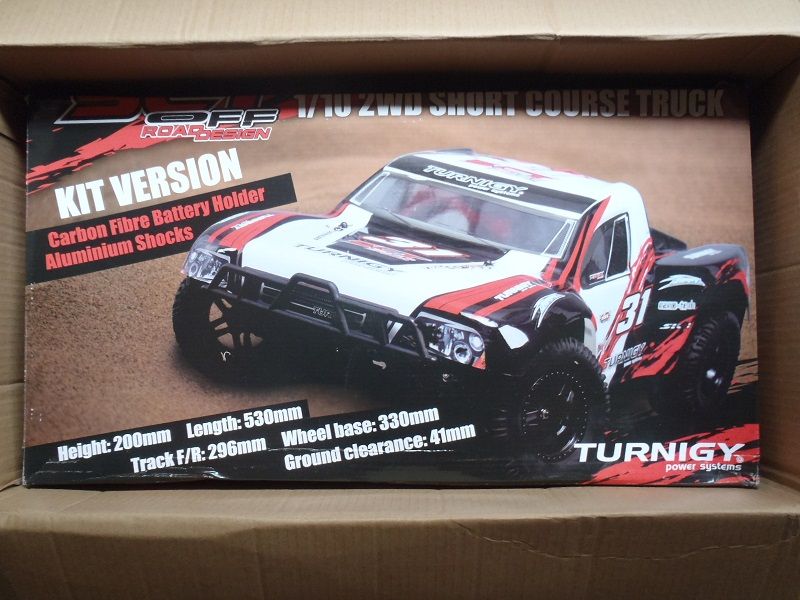
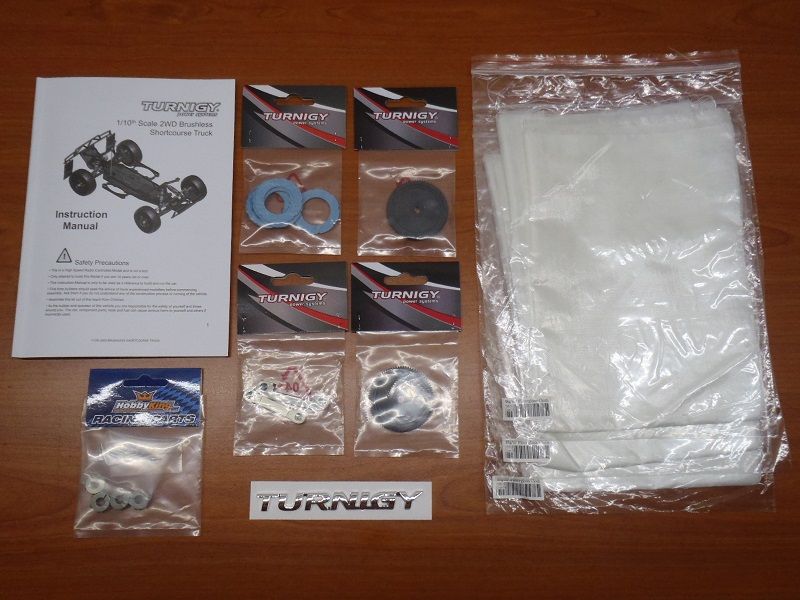
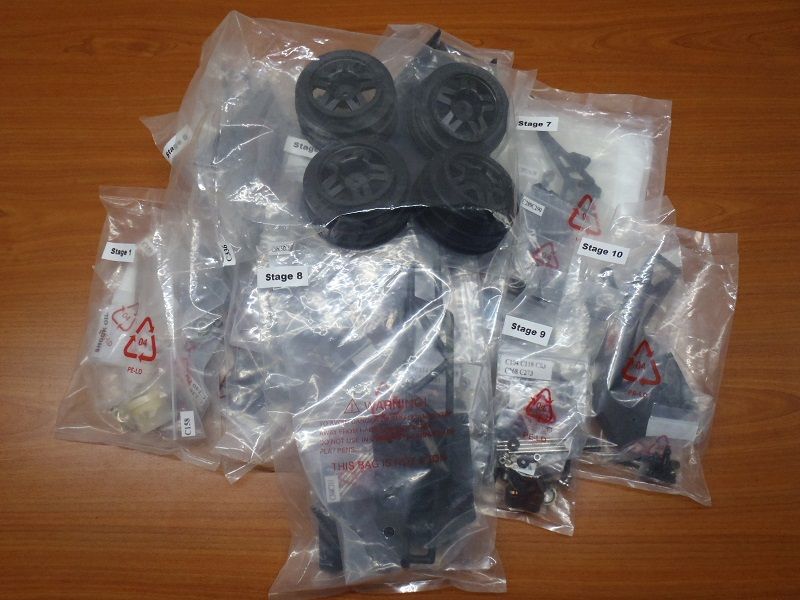
The adventure begins with the arrival!
1. Box of Happy
 05-31-2013, 11:35 AM
#2
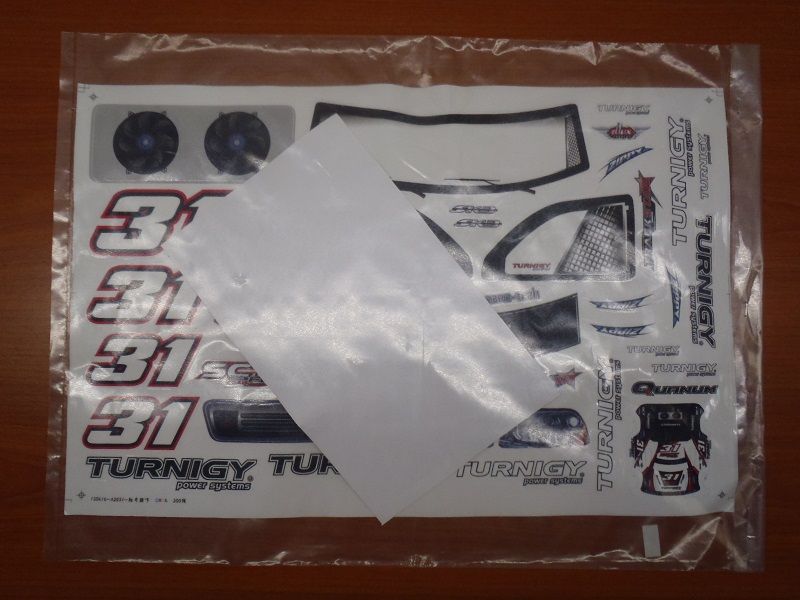
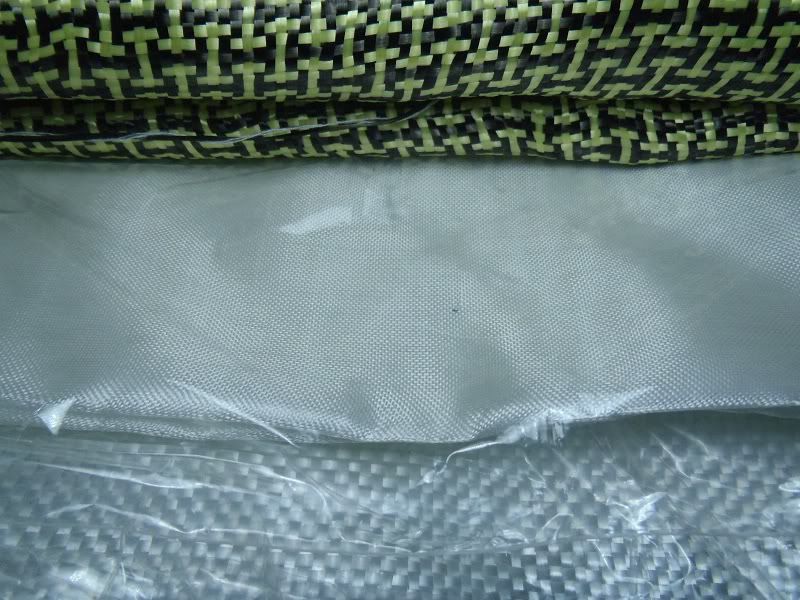
Is this the one that many pple said very light and fast ? And very fast shipping , if only all items came from them at that speed . Is that a packet of fibreglass cloth ? What is it used for ?
05-31-2013, 04:12 PM
#3
Yes I guess so and yea that's glass fabric. I intend to reinforce parts with it if required.
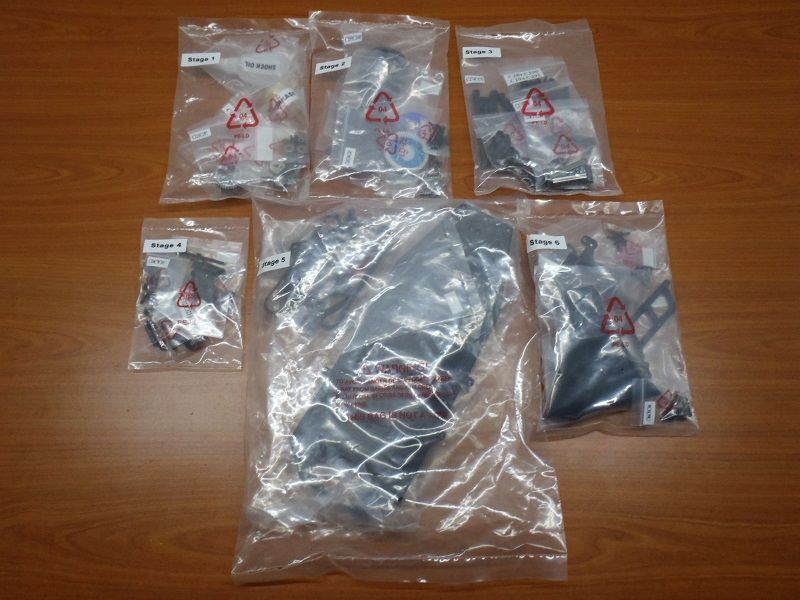
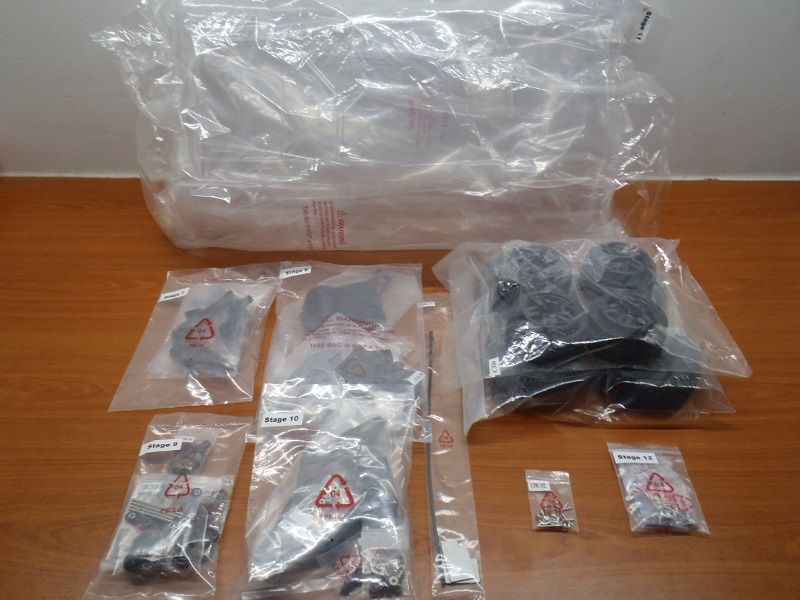
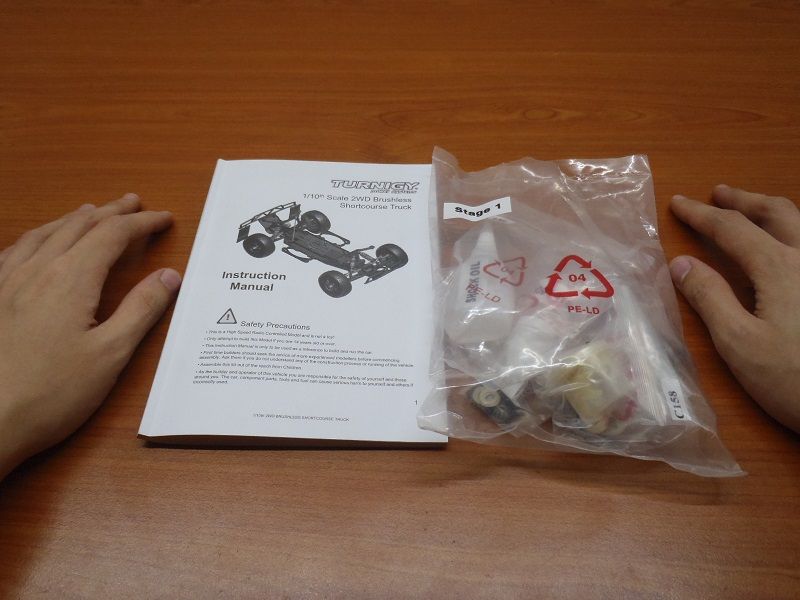
2. Pre-Assmebly
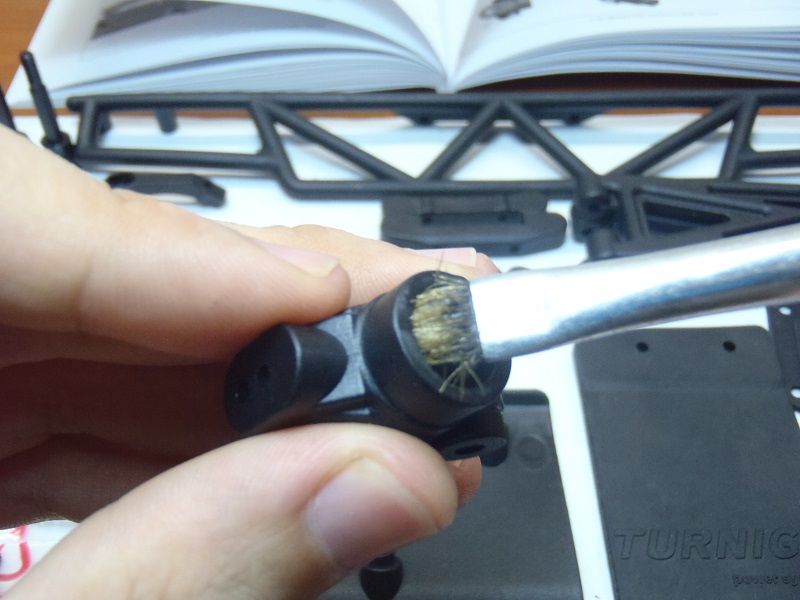
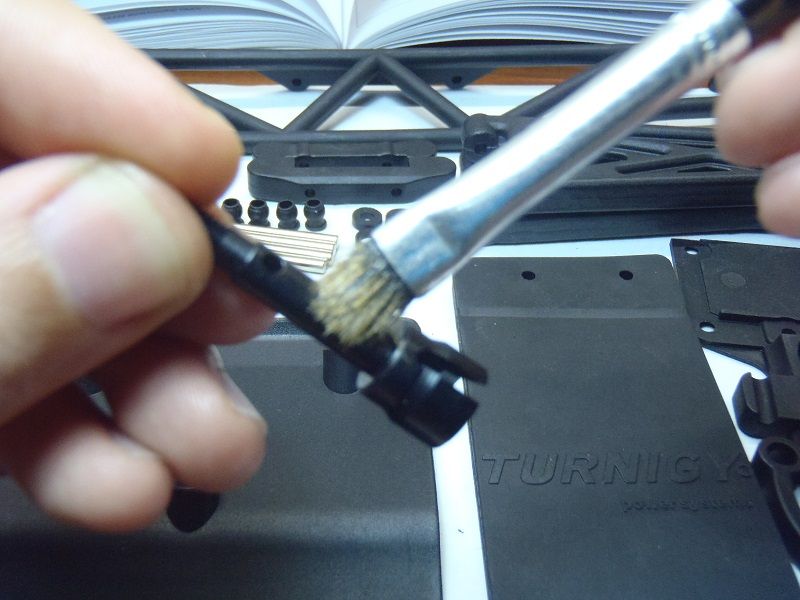
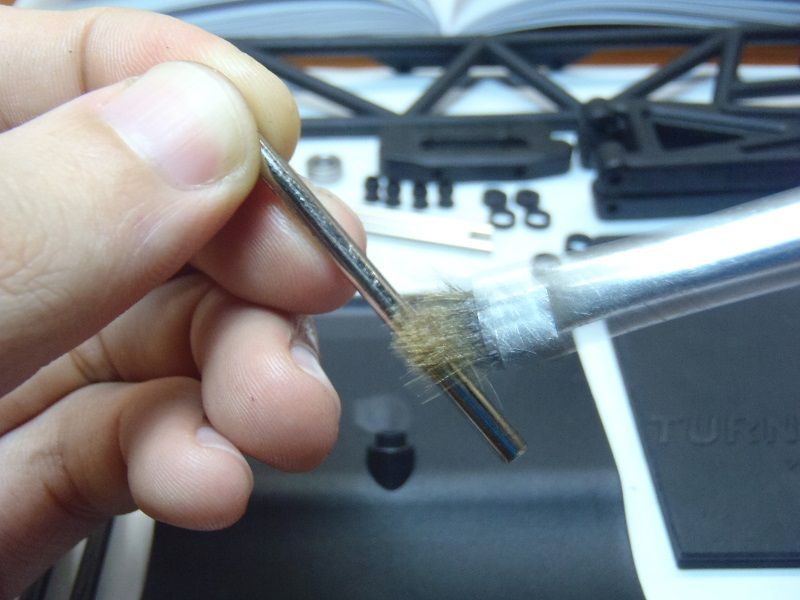
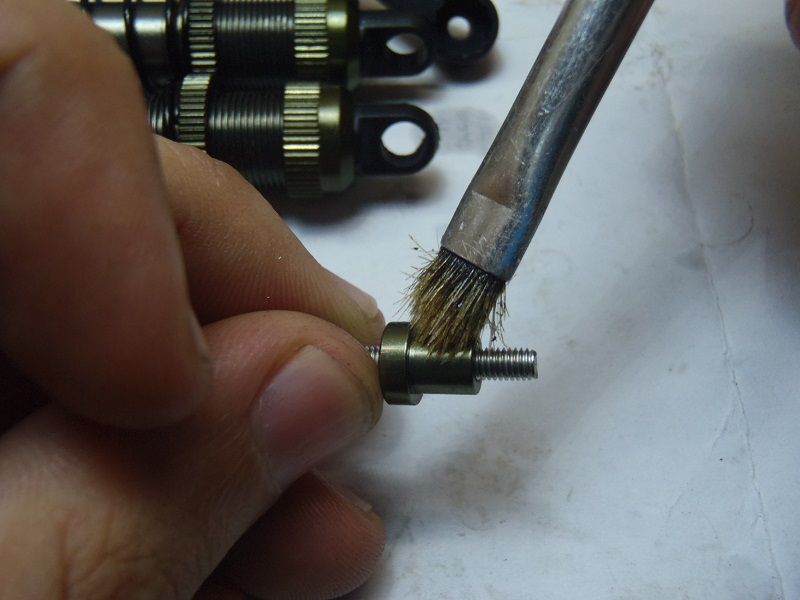
It is my personal habit to further finish and properly prepare the parts for assembly for the sake of good fitting and problem-free for the rest of their lives. Also, going through each and every part this way allows me to better understand the material's strength and weaknesses, such knowledge will come in handy.
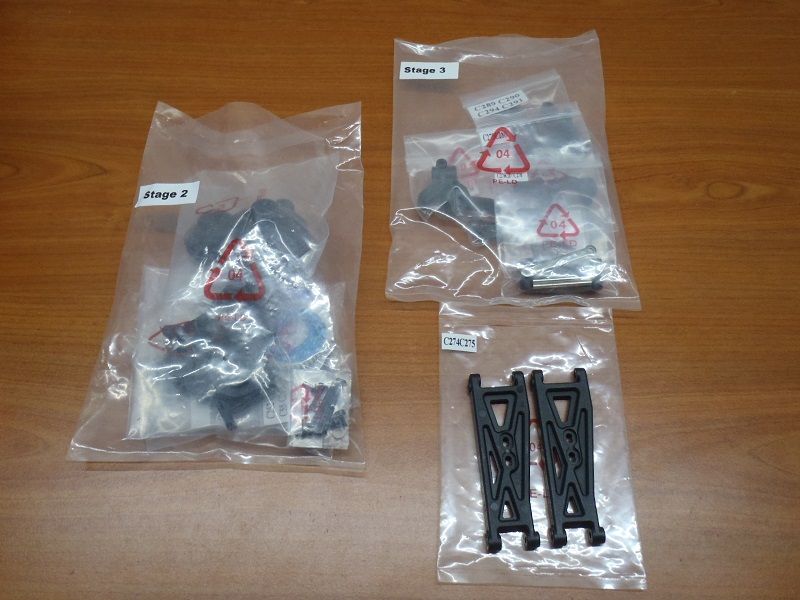
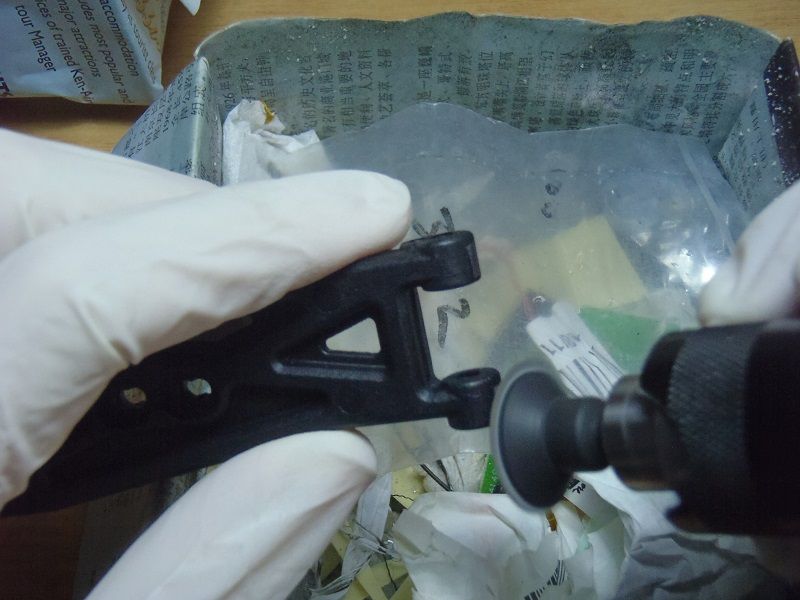
Most importantly, rough up the rims for better glue adhesion. A little trick I use - Rotary Wire brush. Manual Sandpaper would work too but it will need more efforts.
Many dusty hours later, it's all finally ready for assembly! However I need some sleep now, bye!
2. Pre-Assmebly
It is my personal habit to further finish and properly prepare the parts for assembly for the sake of good fitting and problem-free for the rest of their lives. Also, going through each and every part this way allows me to better understand the material's strength and weaknesses, such knowledge will come in handy.
Most importantly, rough up the rims for better glue adhesion. A little trick I use - Rotary Wire brush. Manual Sandpaper would work too but it will need more efforts.
Many dusty hours later, it's all finally ready for assembly! However I need some sleep now, bye!
06-01-2013, 07:27 AM
#4
Big thumbs up for your very nicely detailed documentation of your build.
06-01-2013, 12:27 PM
#5
Thank you!
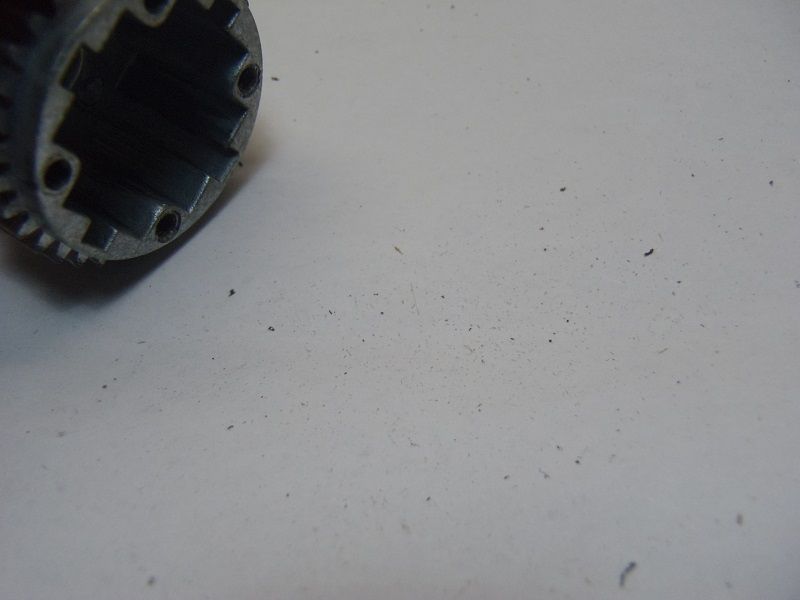
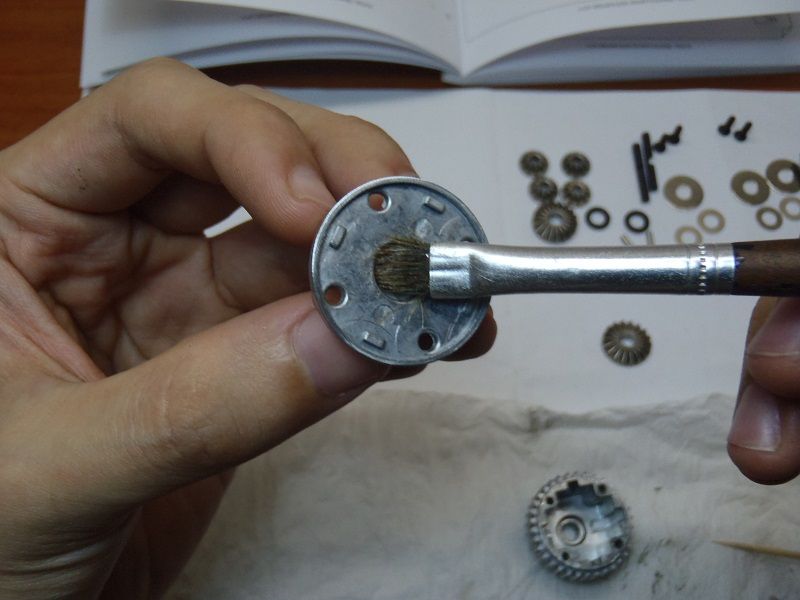
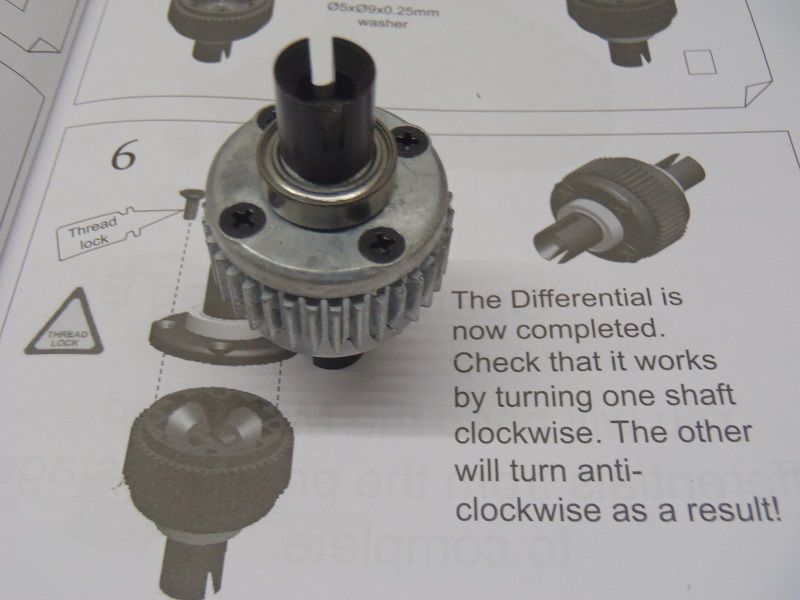
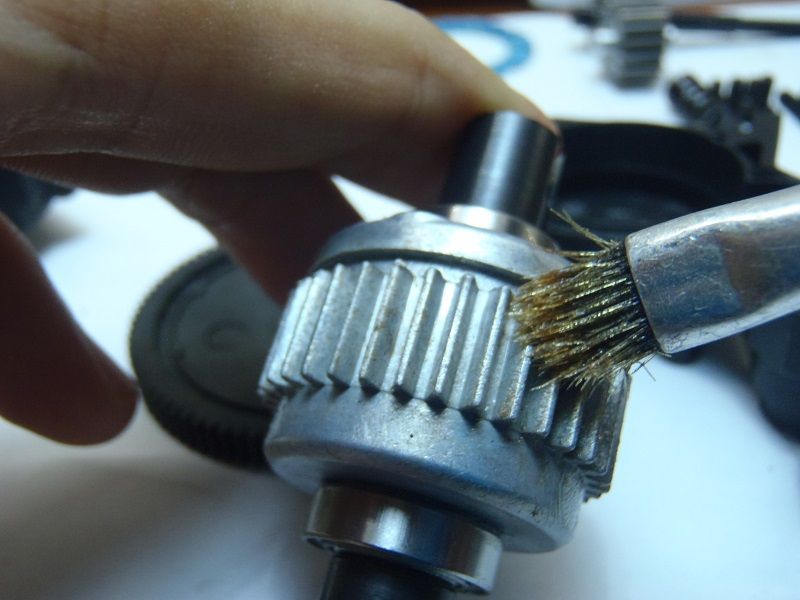
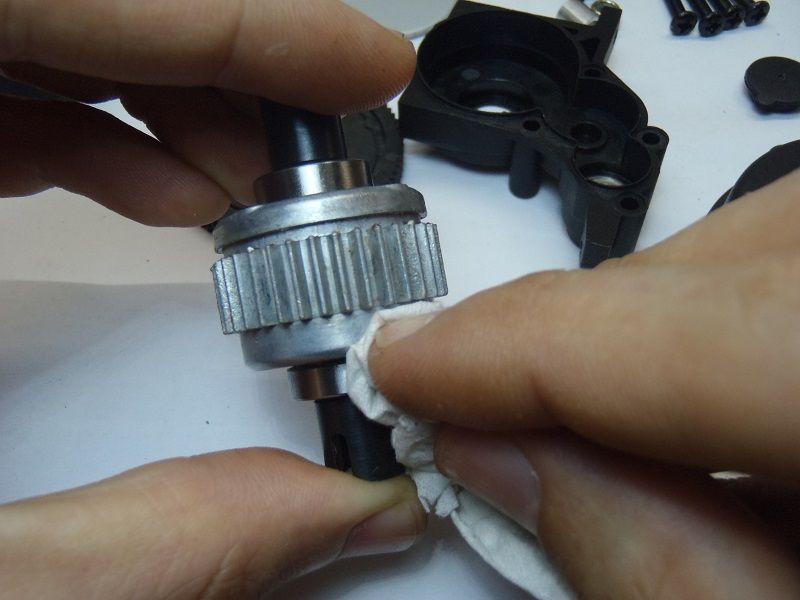
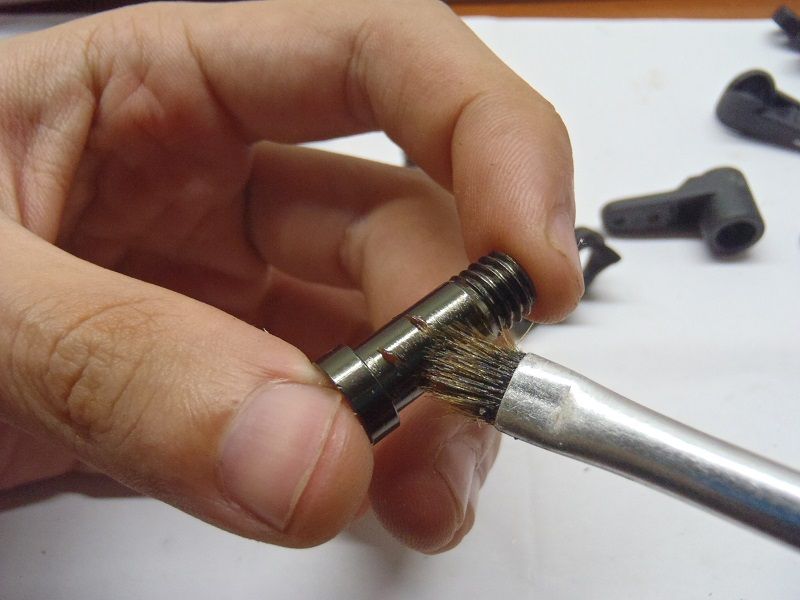
3. Stage 1 - Differential
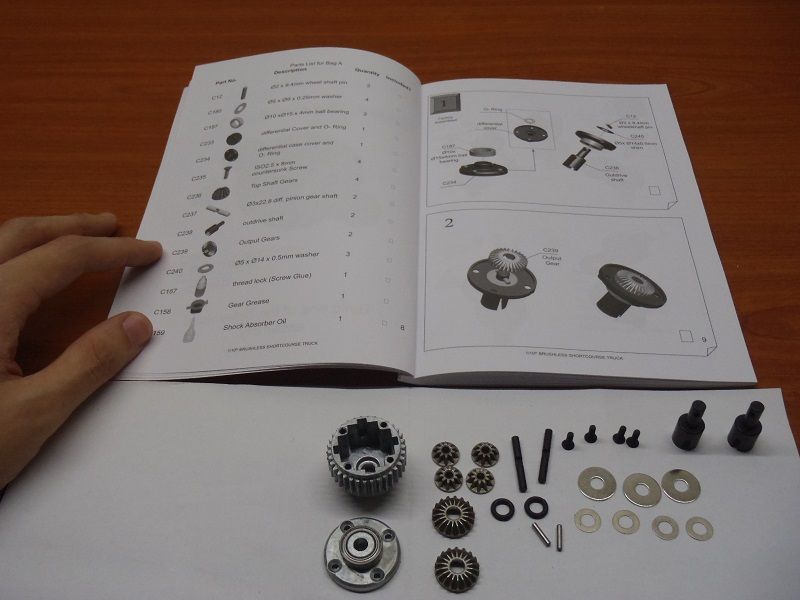
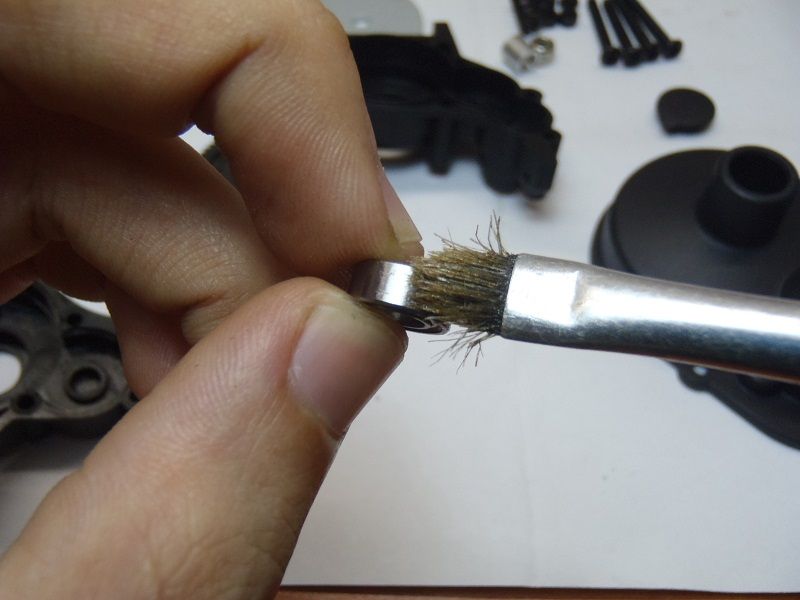
There are metal shavings all over the inside of the diff case! Brush them, turn over and tap out the particles. Repeat until completely clean.
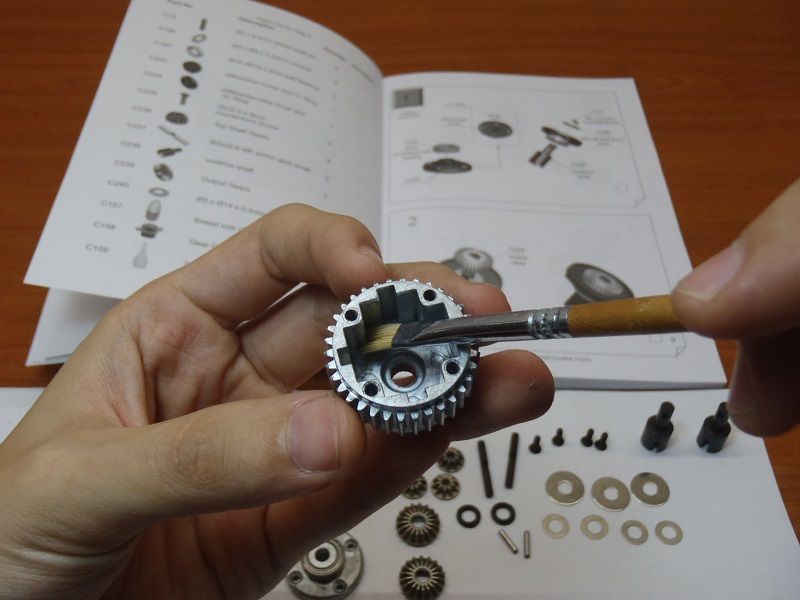
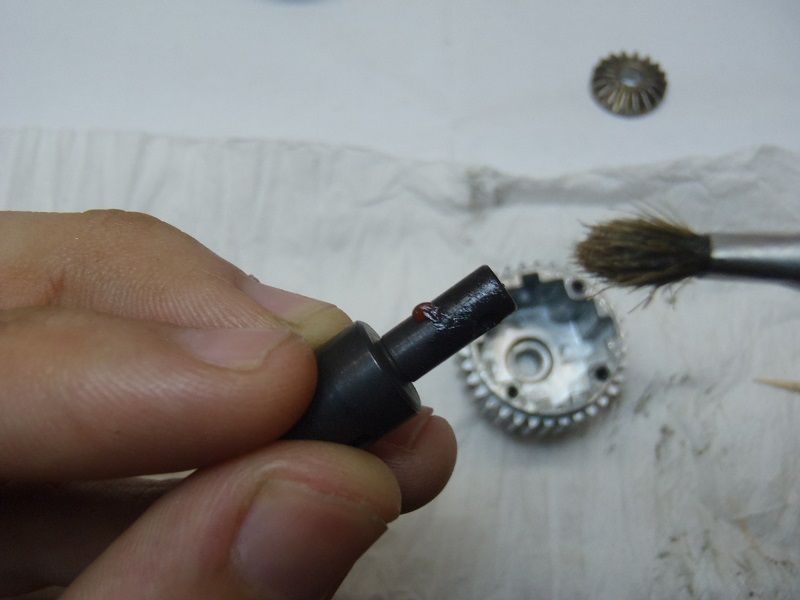
Before installing the O-Ring, I brush down a light coat of grease at where the O-ring will be seated. This helps in keeping the O-Ring "moisturized", provides better sealing and allows the ring to slip under heavy stress.
Grease up everything that is either mechincally contacted Metal-to-Metal, Plastic-to Metal or Plastic-to-Plastic. Exceptions would be the Differential's bevel gears as diff oil will be used. Remember to apply grease to any other things through out the rest of the build, it is absolutely essential for every advantages imaginable. Do note that there are grease out there which weakens or dissolve materials such as Rubber and plastic. Avoid those and use appropriate grease. Most regular R/C grease works fine, Ive yet to come across one that does actual harm.
Greasing these washers which seats between the Bevel gear and O-Ring will provide the ultimate sealing of an oiled diff.
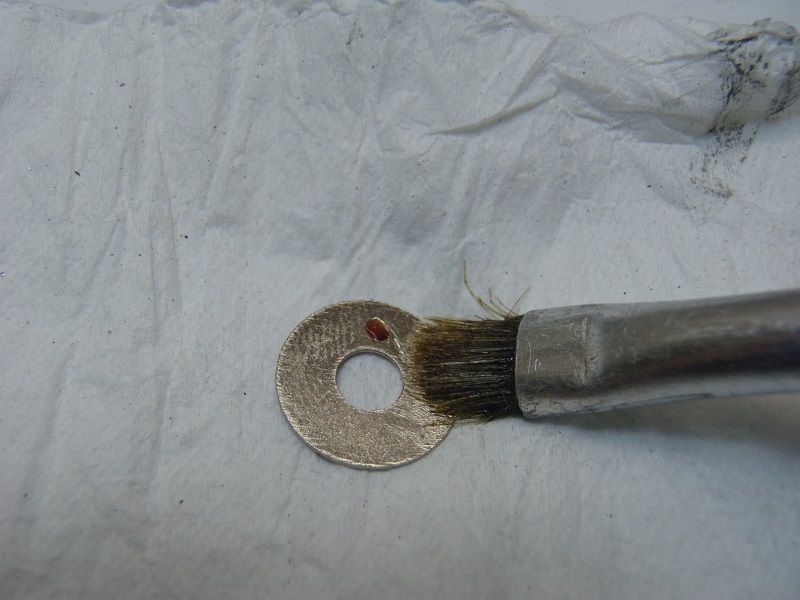
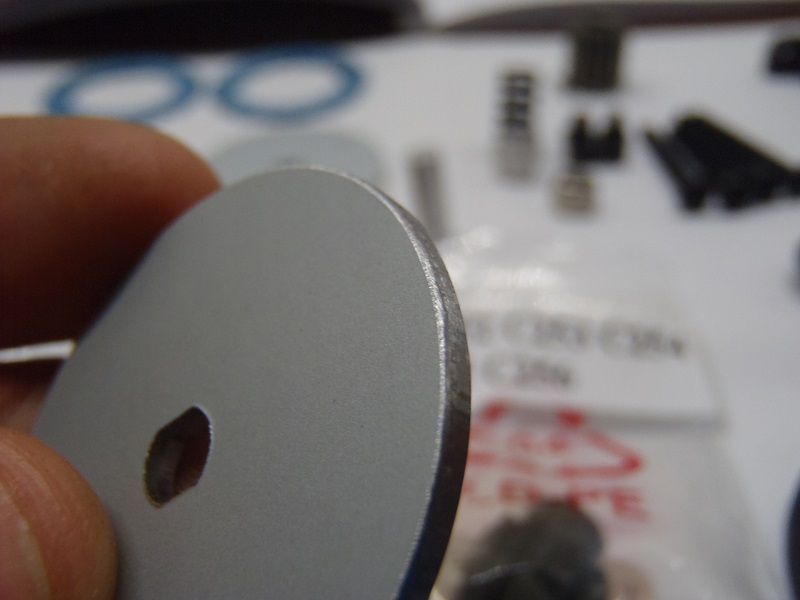
Awkward moment when HobbyKing provides incorrect washer size. Not a big deal anyway, it is still a suitable size. This is just meant for protecting the diff case from being rubbed by the bevel gears during operation.
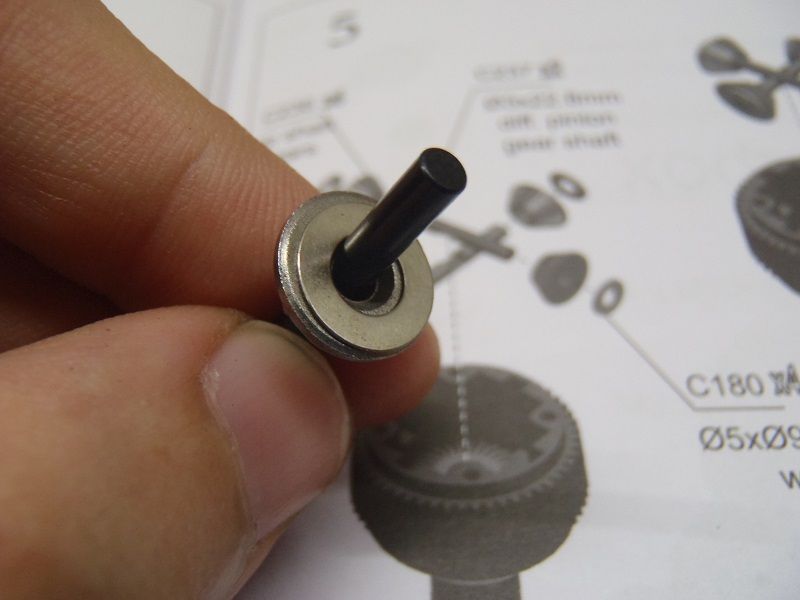
The diff case does not come with a gasket, so make one! This diff was clearly designed for diff oil to be filled with the whole deal of having O-Ring and large washers. Perhaps mine was missing the gasket. No matter, I'll make my own gasket with some PVC plumbing's sealant. It works.

The commonly recommended oil type for 1/10 2WD SCT is 5000cst(Low traction, loose dirt), 7000cst(Medium Traction, Clay) and 10000cst(High traction, Carpet or moist clay). Ive picked 7000cst as I believe it is suited for Segar's tracks. I'll post an update in the future if any changes are made.
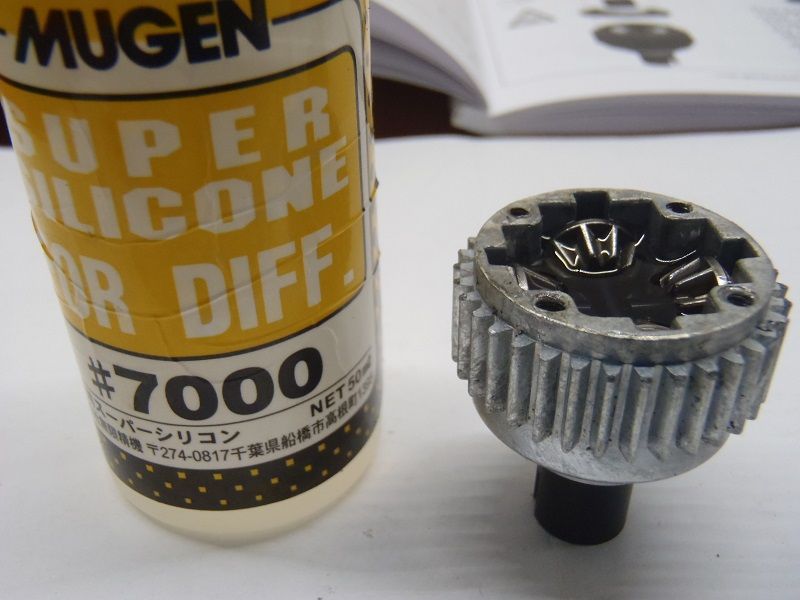
The final step - A little run-in to check for oil leakage and anomalies. None for mine!
Done!
3. Stage 1 - Differential
There are metal shavings all over the inside of the diff case! Brush them, turn over and tap out the particles. Repeat until completely clean.
Before installing the O-Ring, I brush down a light coat of grease at where the O-ring will be seated. This helps in keeping the O-Ring "moisturized", provides better sealing and allows the ring to slip under heavy stress.
Grease up everything that is either mechincally contacted Metal-to-Metal, Plastic-to Metal or Plastic-to-Plastic. Exceptions would be the Differential's bevel gears as diff oil will be used. Remember to apply grease to any other things through out the rest of the build, it is absolutely essential for every advantages imaginable. Do note that there are grease out there which weakens or dissolve materials such as Rubber and plastic. Avoid those and use appropriate grease. Most regular R/C grease works fine, Ive yet to come across one that does actual harm.
Greasing these washers which seats between the Bevel gear and O-Ring will provide the ultimate sealing of an oiled diff.
Awkward moment when HobbyKing provides incorrect washer size. Not a big deal anyway, it is still a suitable size. This is just meant for protecting the diff case from being rubbed by the bevel gears during operation.
The diff case does not come with a gasket, so make one! This diff was clearly designed for diff oil to be filled with the whole deal of having O-Ring and large washers. Perhaps mine was missing the gasket. No matter, I'll make my own gasket with some PVC plumbing's sealant. It works.
The commonly recommended oil type for 1/10 2WD SCT is 5000cst(Low traction, loose dirt), 7000cst(Medium Traction, Clay) and 10000cst(High traction, Carpet or moist clay). Ive picked 7000cst as I believe it is suited for Segar's tracks. I'll post an update in the future if any changes are made.
The final step - A little run-in to check for oil leakage and anomalies. None for mine!
Done!
06-01-2013, 12:58 PM
#6
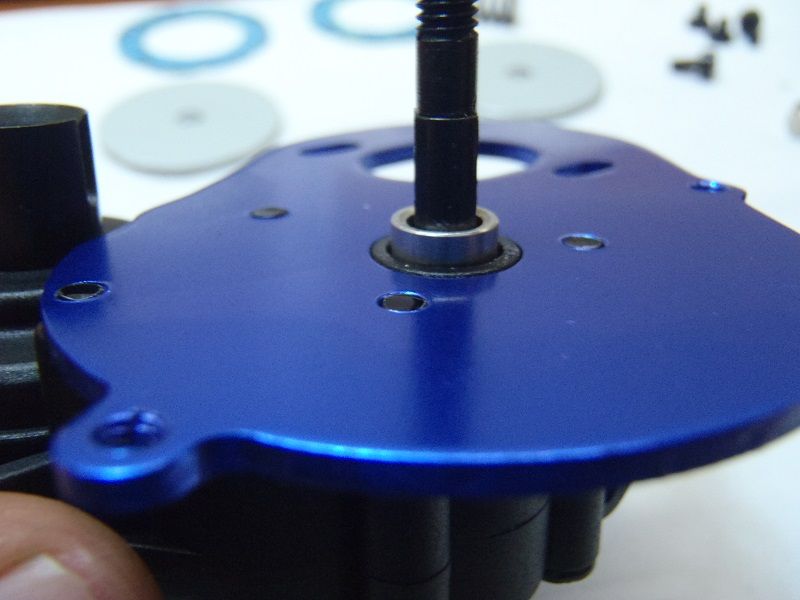
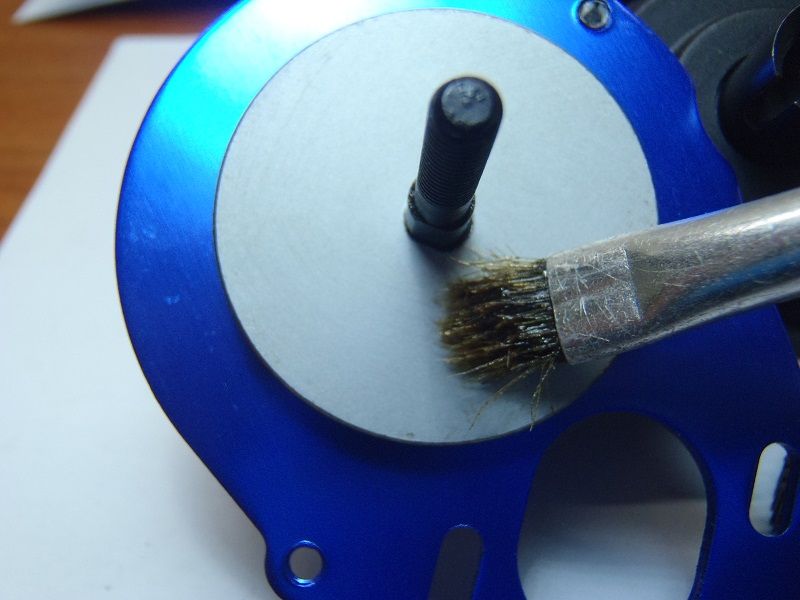
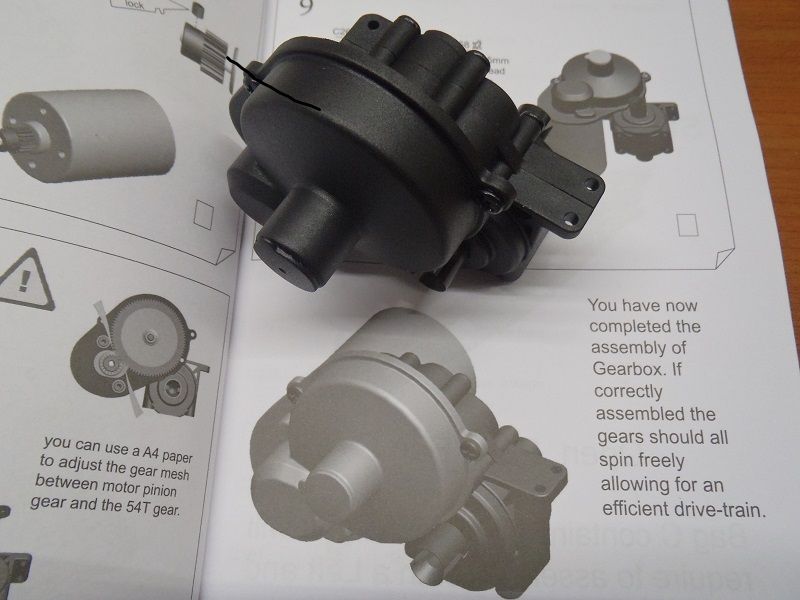
4. Stage 2 - Gear Box

First thing that Ive noticed, these Slipper discs' edges are sharp! Ive already went ahead and smoothen them. They would actually chew away a little of your Slipper pad if it was remained sharp. Not a real problem but it is a very simple task to it smoothen out. I rather have it done right now than to wait for something bad to happen.
Yep, every contacts should be greased. It helps in tolerance, ease of installation(and disassembly in the future) and the grease I use protect metal parts from rust.

Apply a long bead of grease around the gears and spread it out by brush. Do Not squish a lump of grease in there, it is a common mistake made by many. Ask yourself, when the centifugal forces swing the lumps apart and mess up the gear box, what's left on the gears? Only a thin coat of grease is left on the teeth, right? A thin layer of grease is all it takes to properly lubricate the transmission.
For the sake of cleanliness, wipe out the areas that might had gotten grease but dosen't need to be greased. A clean gear box is a happy one.
Clamping shut the diff case as you torque the motor plate down, becareful, it may seem like it can continue further but it is the correct tightness with all screws flushed to the motor plate. Remember to thread lock!
A personal habit, I apply an extremely thin layer of grease to the slipper's discs and pad as this nicely seals microscopic gap between them, keeping it clean and prevents the pad from drying out. It also significantly improve longevity of the slipper clutch. Do note that clutching problems will happen if applied too thick or if you use high-pressure grease which is not suitable for this(e.g. PTFE Telfon, Molybdenum).
Done!
First thing that Ive noticed, these Slipper discs' edges are sharp! Ive already went ahead and smoothen them. They would actually chew away a little of your Slipper pad if it was remained sharp. Not a real problem but it is a very simple task to it smoothen out. I rather have it done right now than to wait for something bad to happen.
Yep, every contacts should be greased. It helps in tolerance, ease of installation(and disassembly in the future) and the grease I use protect metal parts from rust.
Apply a long bead of grease around the gears and spread it out by brush. Do Not squish a lump of grease in there, it is a common mistake made by many. Ask yourself, when the centifugal forces swing the lumps apart and mess up the gear box, what's left on the gears? Only a thin coat of grease is left on the teeth, right? A thin layer of grease is all it takes to properly lubricate the transmission.
For the sake of cleanliness, wipe out the areas that might had gotten grease but dosen't need to be greased. A clean gear box is a happy one.
Clamping shut the diff case as you torque the motor plate down, becareful, it may seem like it can continue further but it is the correct tightness with all screws flushed to the motor plate. Remember to thread lock!
A personal habit, I apply an extremely thin layer of grease to the slipper's discs and pad as this nicely seals microscopic gap between them, keeping it clean and prevents the pad from drying out. It also significantly improve longevity of the slipper clutch. Do note that clutching problems will happen if applied too thick or if you use high-pressure grease which is not suitable for this(e.g. PTFE Telfon, Molybdenum).
Done!
06-01-2013, 01:12 PM
#7
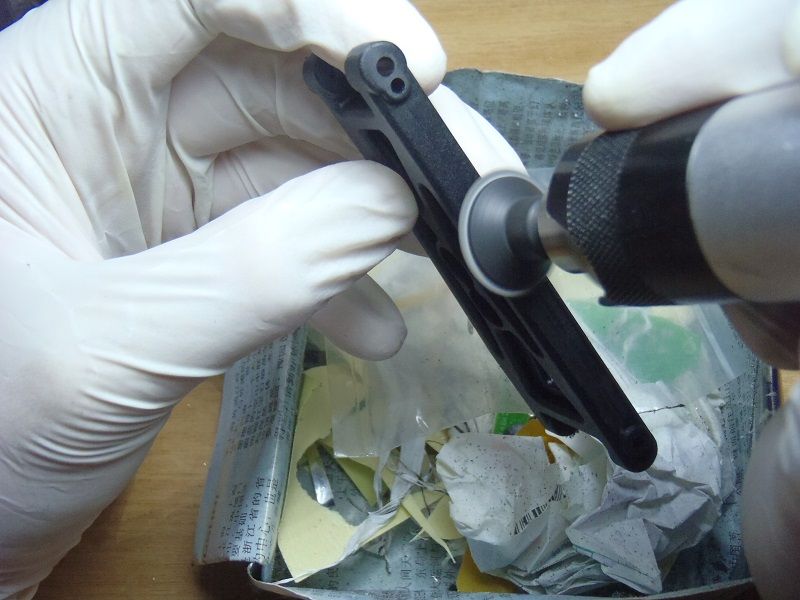
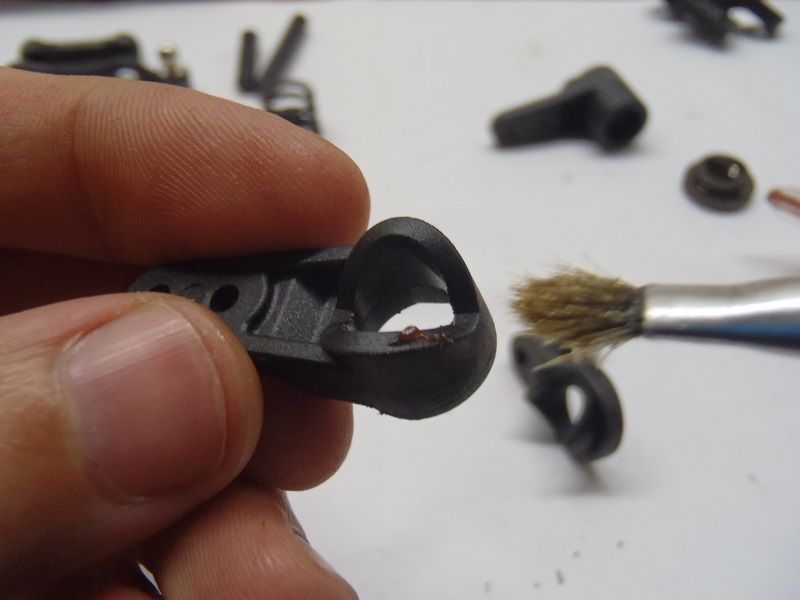
Stage 3 - Front Wishbones
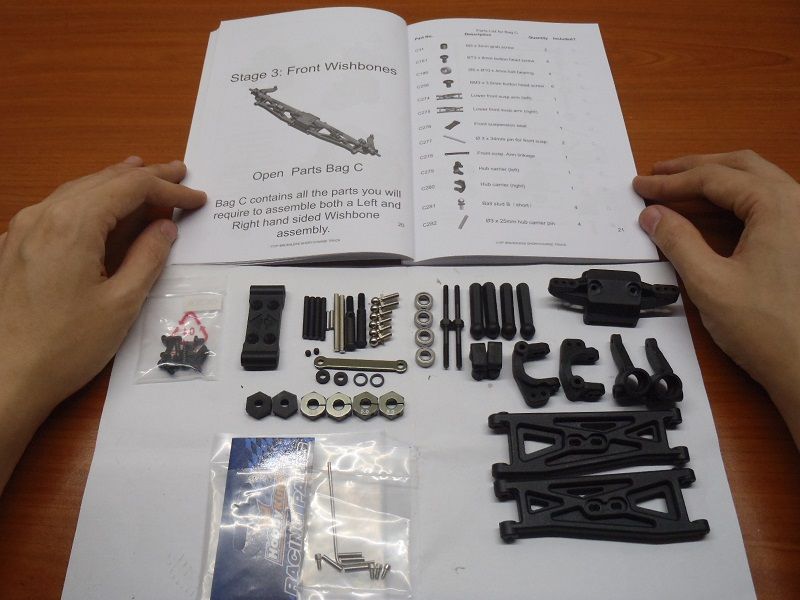
There is an official metal hopup part for the wheel hex nut but I got these 5mm clamp-style ones as it is cheaper and seats snag to the drive shaft. The original part have a total thickness of 5mm despite it looking a little shorter by itself.
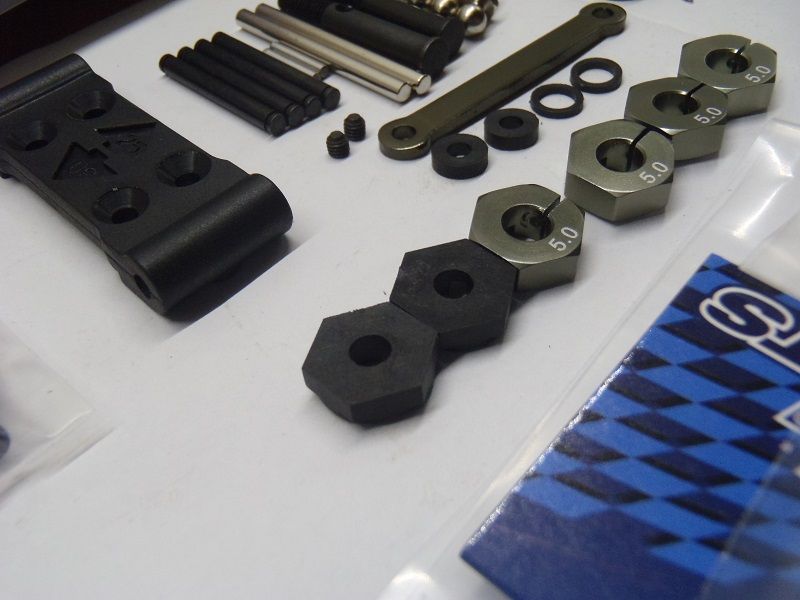
I used a vice to clamp down the nut for it to have a really snag fit. It will not clamp properly without doing this, if you were to use the screws to torque down the nut, you will risk stripping the threads.
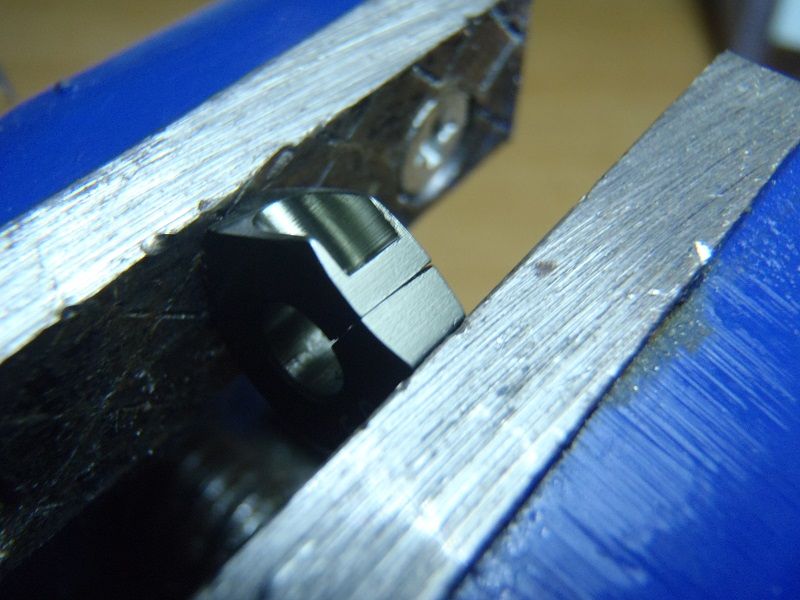
If the nut is too tight during installation, simply run a M4 nut down the drive shaft and wrench it till it pushes the Hex Nut in place.
This is known to snap, there is an alloy hopup for it but it wasn't in stock when I made my purchase for this truck. I'll save some money and improvise, I will reinforce it with gass fabric.
Sort-of Done!
There is an official metal hopup part for the wheel hex nut but I got these 5mm clamp-style ones as it is cheaper and seats snag to the drive shaft. The original part have a total thickness of 5mm despite it looking a little shorter by itself.
I used a vice to clamp down the nut for it to have a really snag fit. It will not clamp properly without doing this, if you were to use the screws to torque down the nut, you will risk stripping the threads.
If the nut is too tight during installation, simply run a M4 nut down the drive shaft and wrench it till it pushes the Hex Nut in place.
This is known to snap, there is an alloy hopup for it but it wasn't in stock when I made my purchase for this truck. I'll save some money and improvise, I will reinforce it with gass fabric.
Sort-of Done!
06-01-2013, 01:28 PM
#8
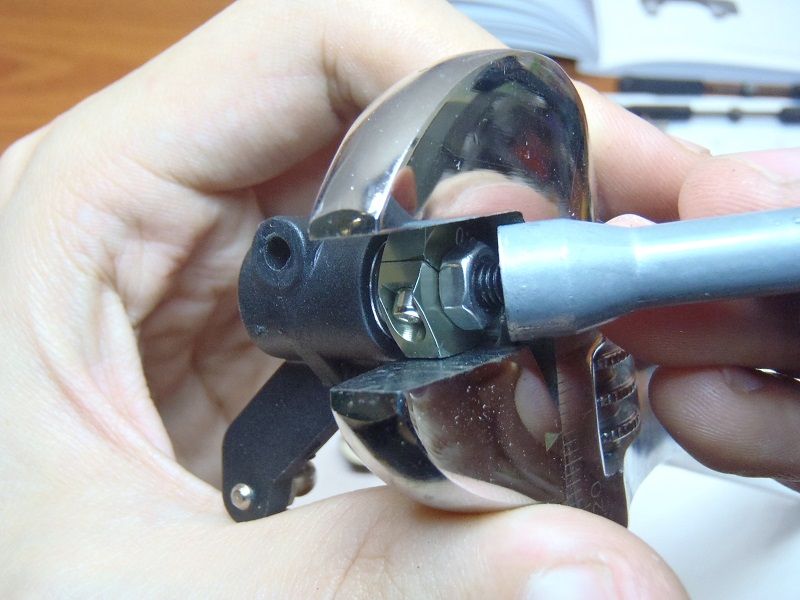
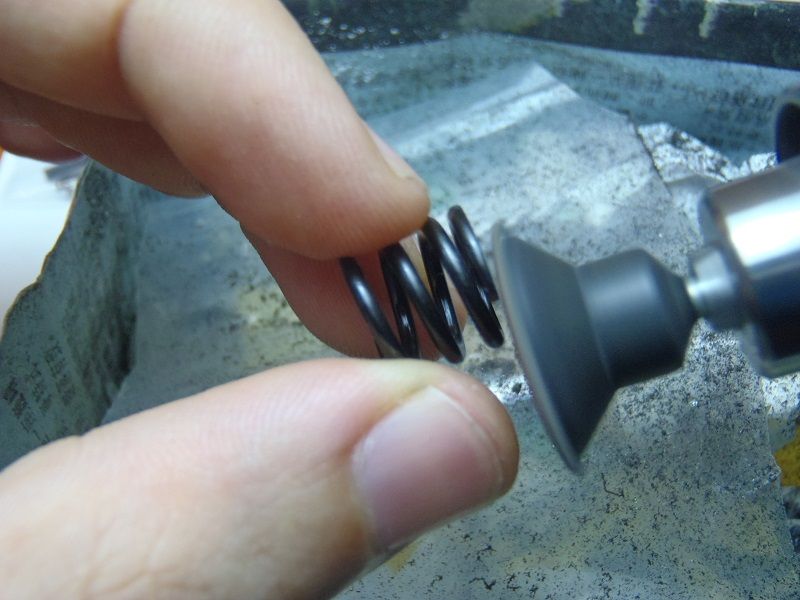
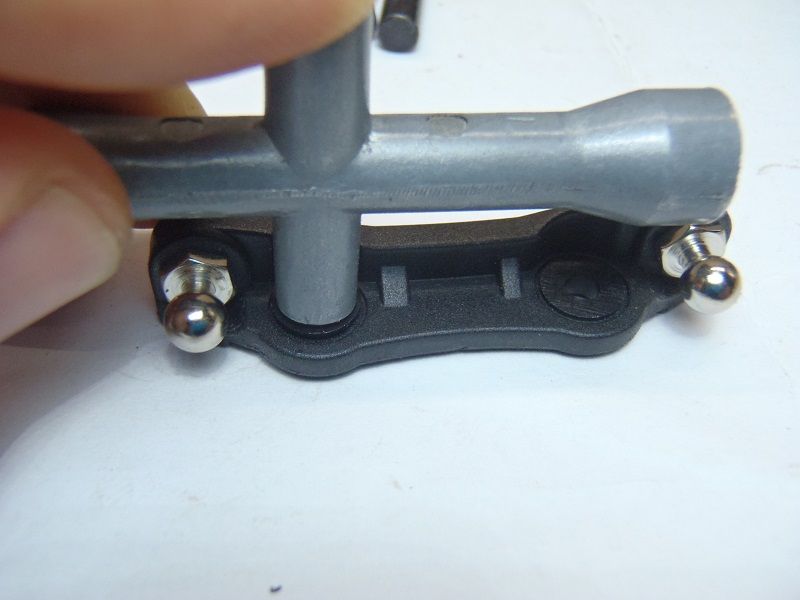
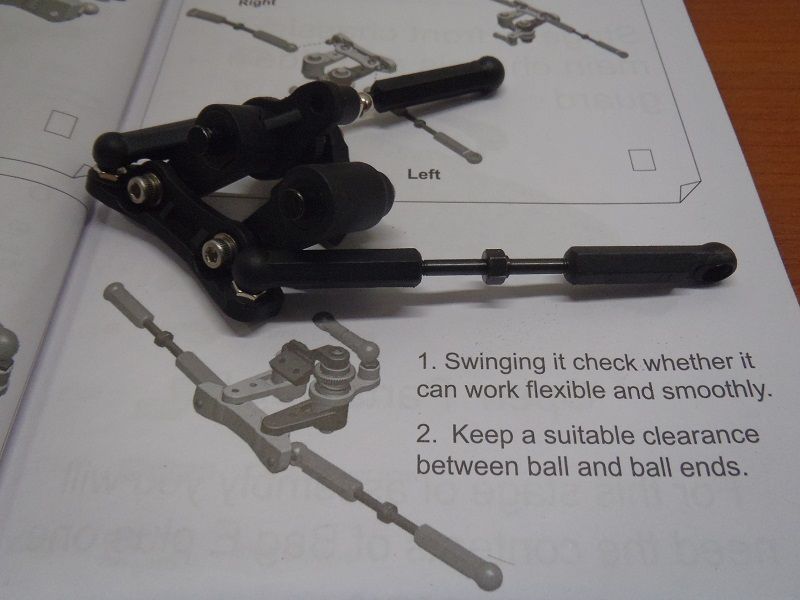
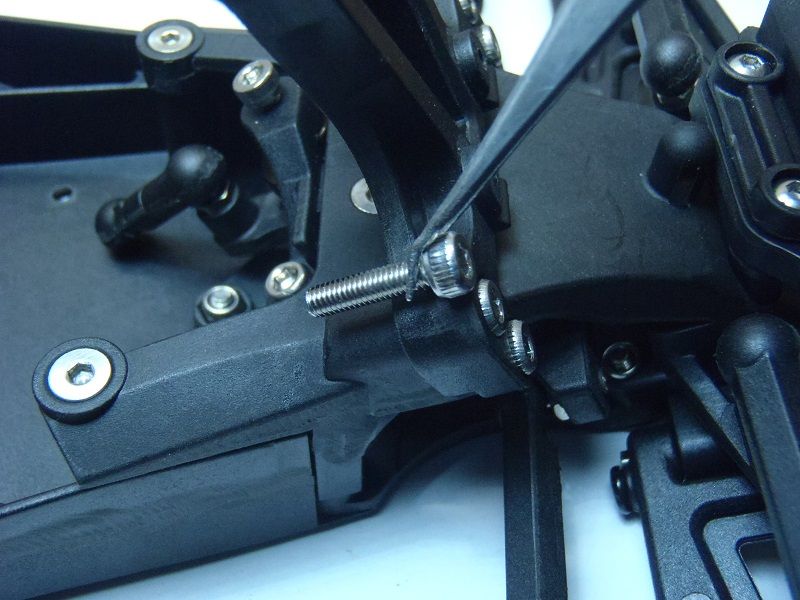
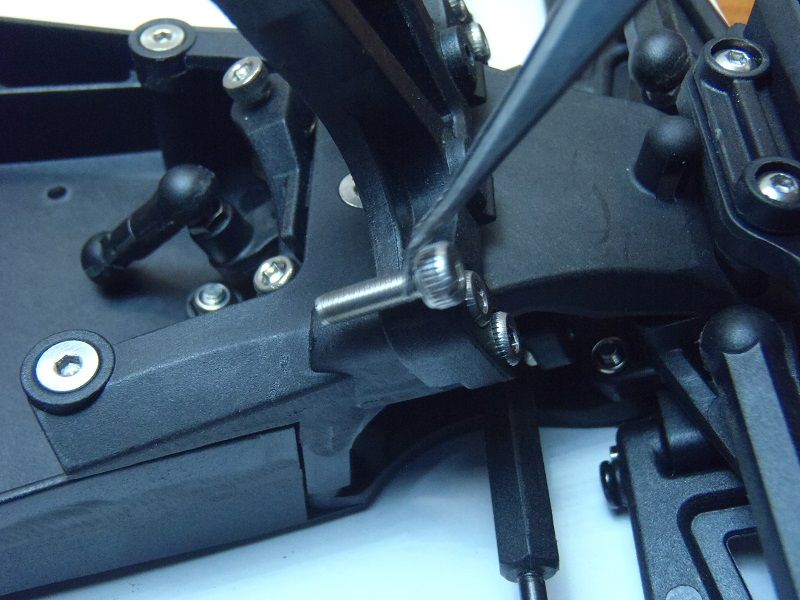
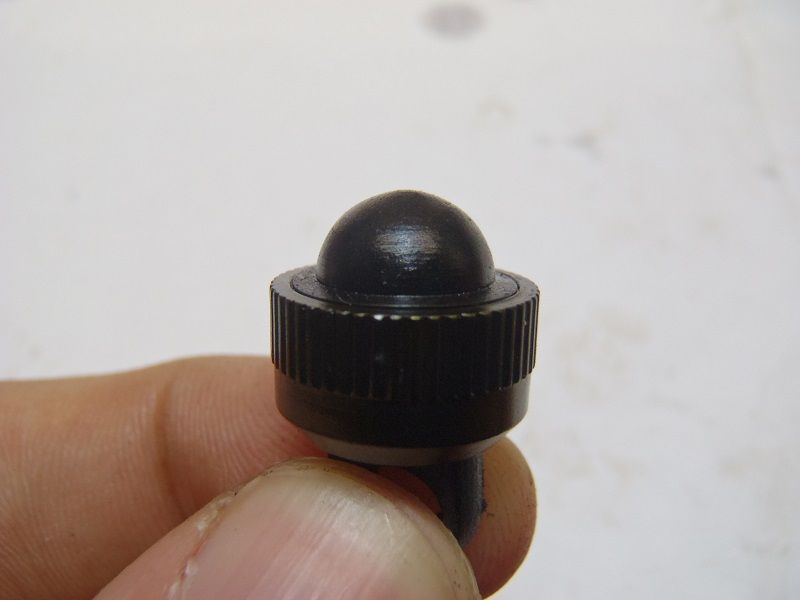
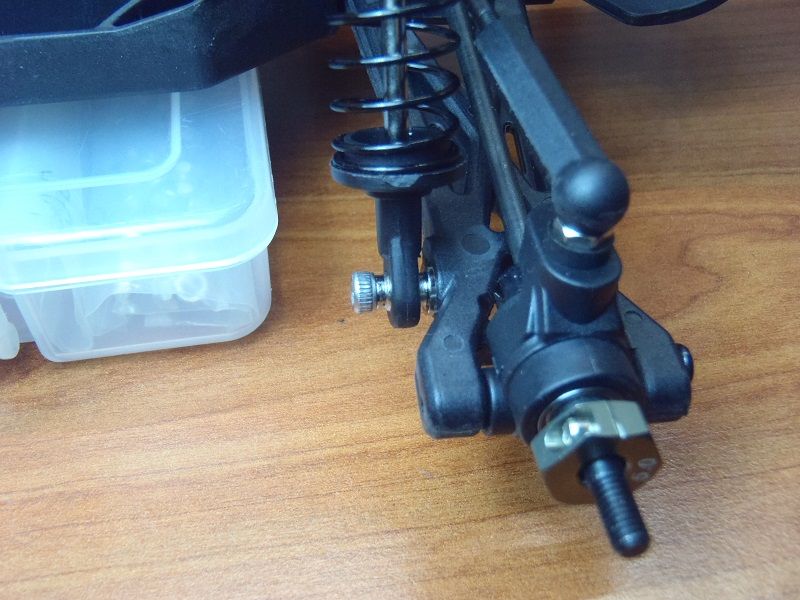
Stage 4 - Steering Mechanism
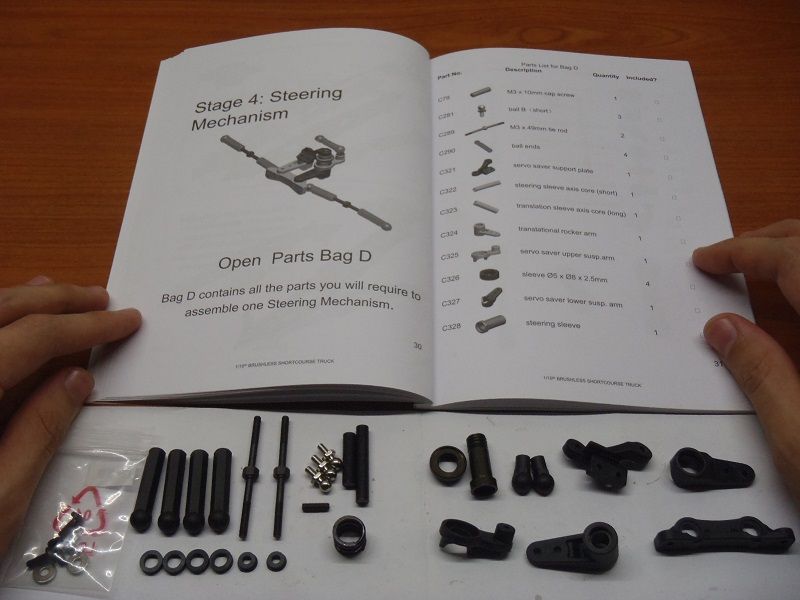
The usual, grease it up!
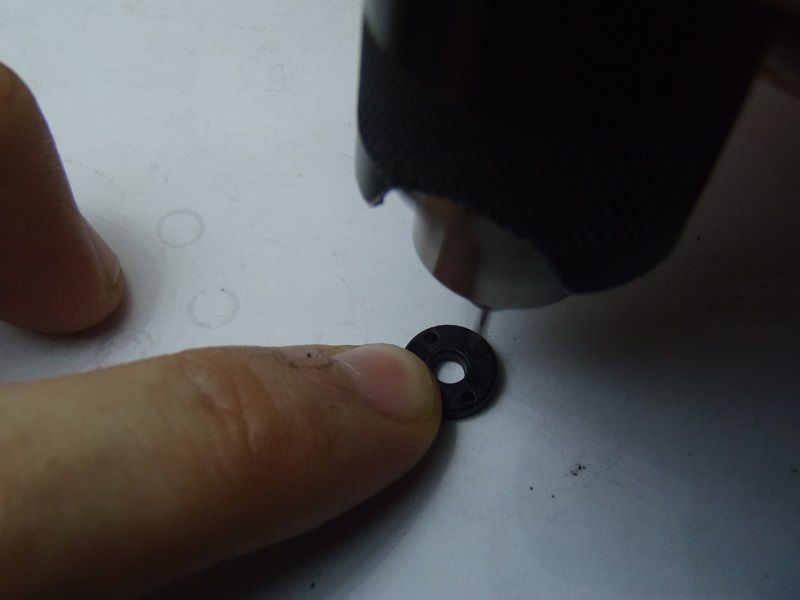
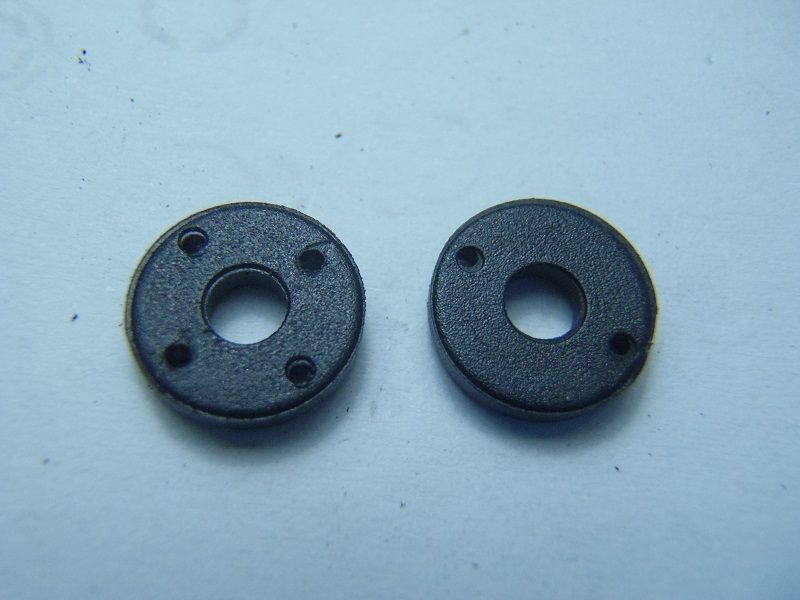
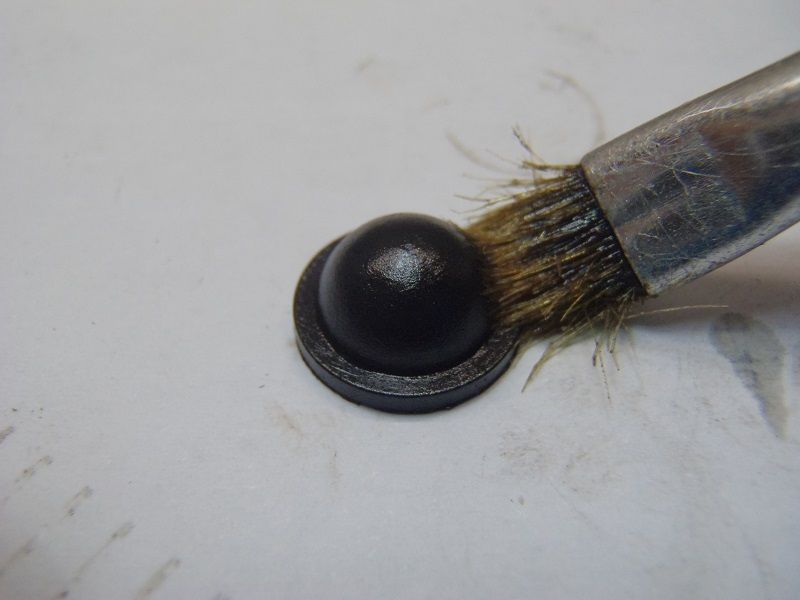
A very common problem for many other kits out there. Servo saver's springs that would will rub and grind as you tighten it down. Scratching and damaging other components. Simply grind it smooth and down with a slope.

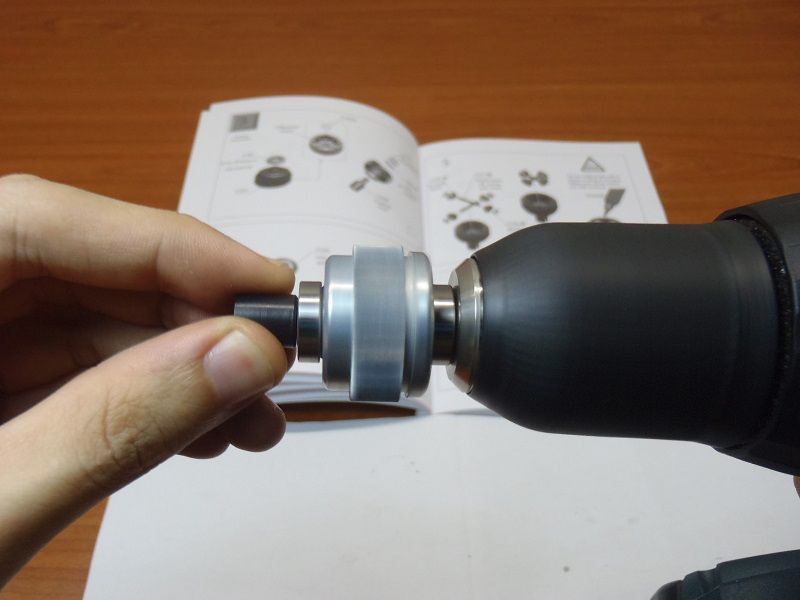
A nice trick, install this particular 'ball-bearing subsitute' with a mini T-wrench. Squeezes down nicely!
Manual shows a washer being used, I decided to use two instead. Since there was no ball bearings included(Argh! WHY!), using two washers will really help with consistant tolerance and improve part's longevity.
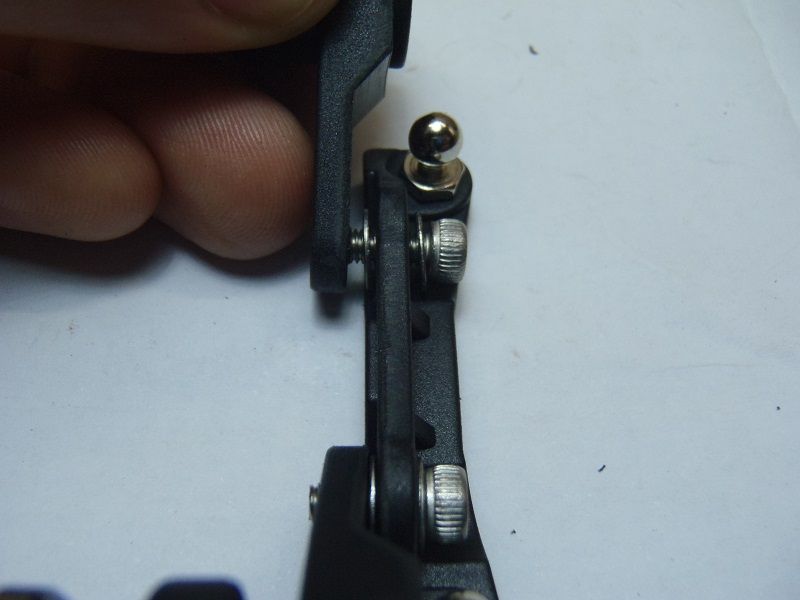
Yep, the balls are no exception for grease!
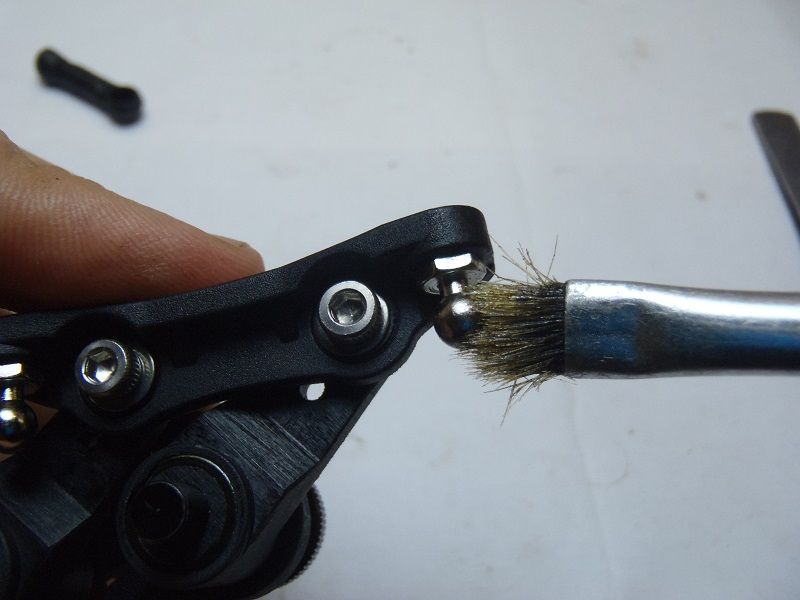
Done!
The usual, grease it up!
A very common problem for many other kits out there. Servo saver's springs that would will rub and grind as you tighten it down. Scratching and damaging other components. Simply grind it smooth and down with a slope.
A nice trick, install this particular 'ball-bearing subsitute' with a mini T-wrench. Squeezes down nicely!
Manual shows a washer being used, I decided to use two instead. Since there was no ball bearings included(Argh! WHY!), using two washers will really help with consistant tolerance and improve part's longevity.
Yep, the balls are no exception for grease!
Done!
06-01-2013, 01:34 PM
#9
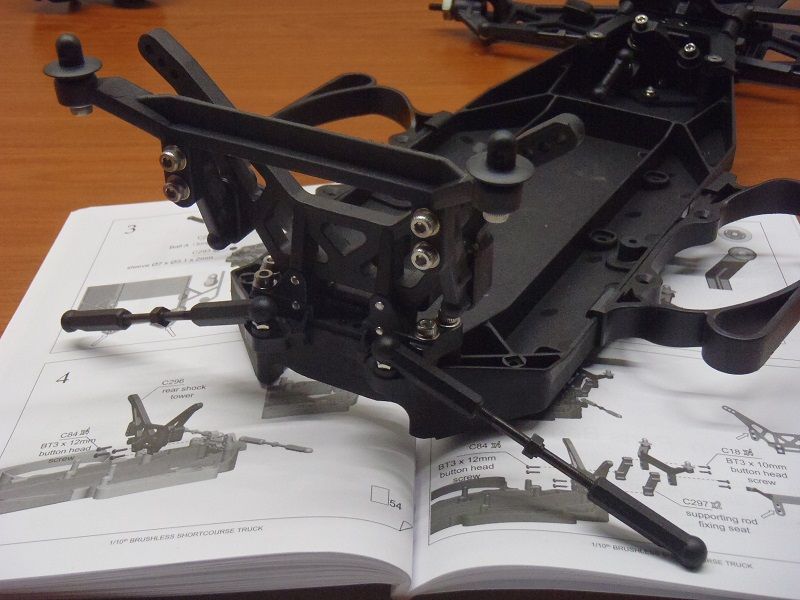
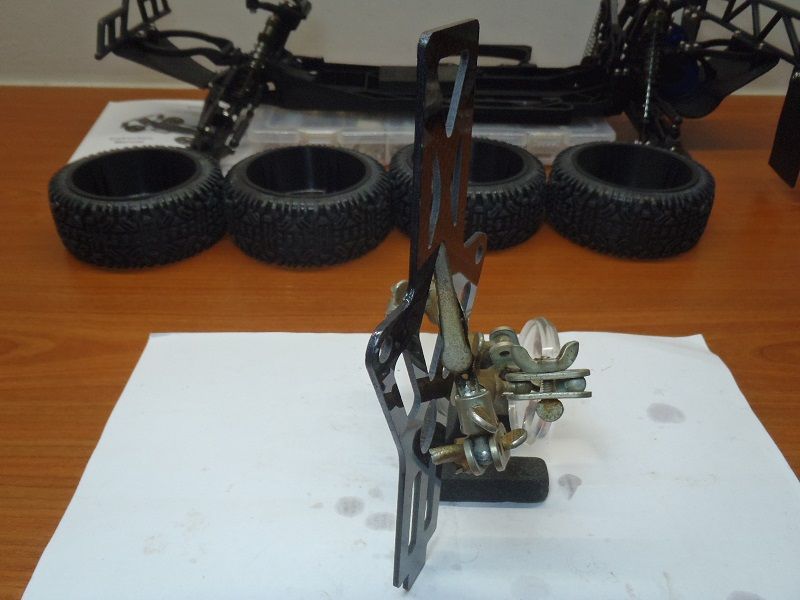
Stage 5 - Front Chassis, Main chassis and Side-Guard
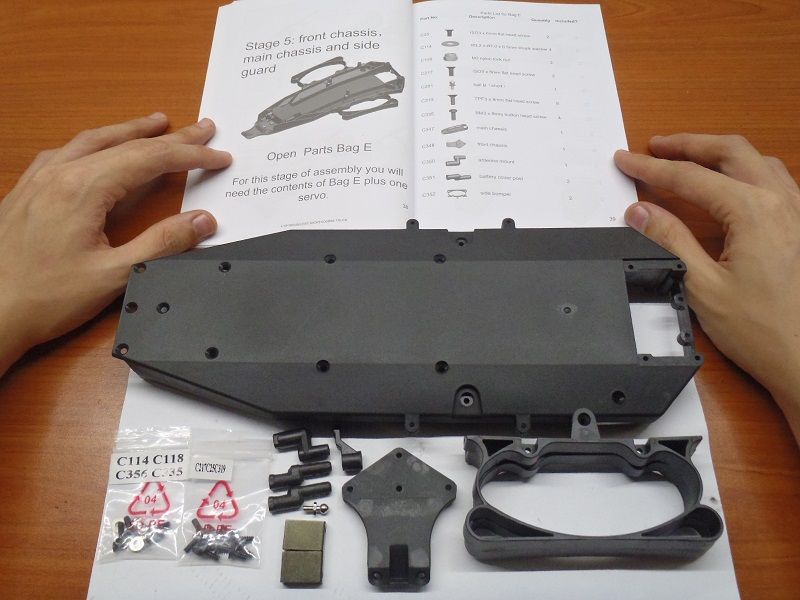
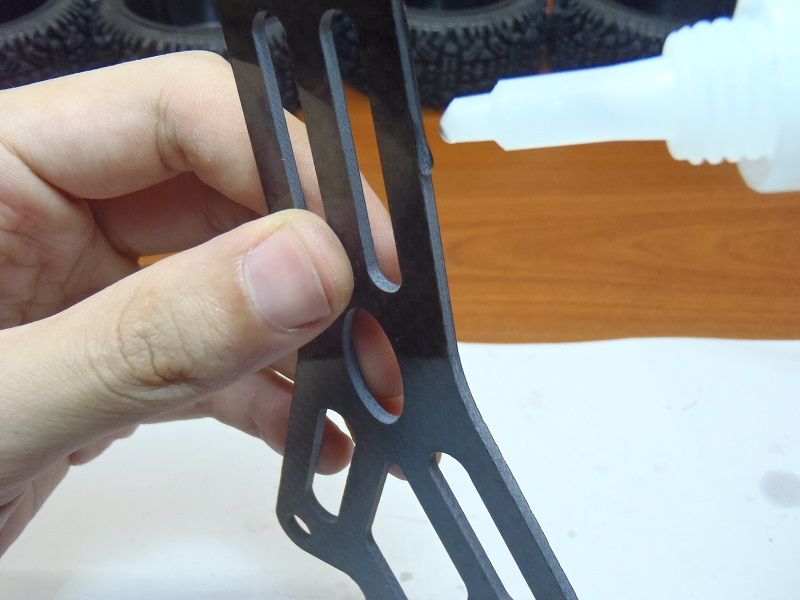
Ok yea, I'll stop here. It's getting really late and I planned on reinforcing these. Question is - with what?
Carbon, Kevlar and Glass. Quite a decision here, I'll have to think it through. Now, I have to sleep. Bye!
Ok yea, I'll stop here. It's getting really late and I planned on reinforcing these. Question is - with what?
Carbon, Kevlar and Glass. Quite a decision here, I'll have to think it through. Now, I have to sleep. Bye!
06-02-2013, 04:15 PM
#10
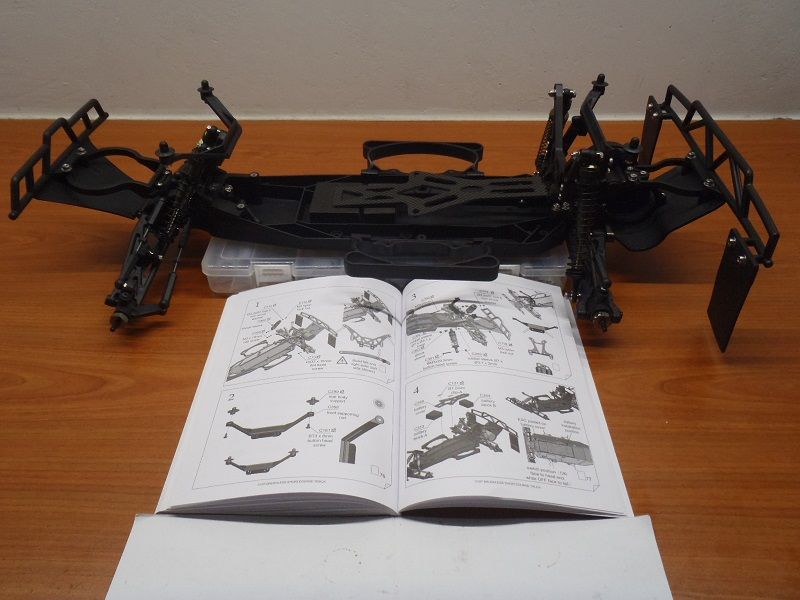
Ive decided to build the entire SCT as-is to check for clearance and weak points. After which then I will decide for reinforcements.
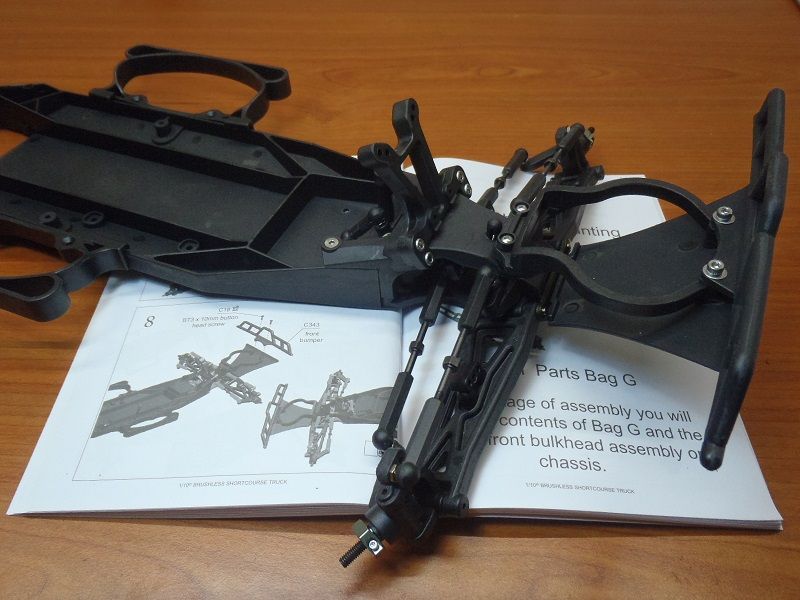
Stage 6 - Front Bulkhead, servo saver and chassis assembly
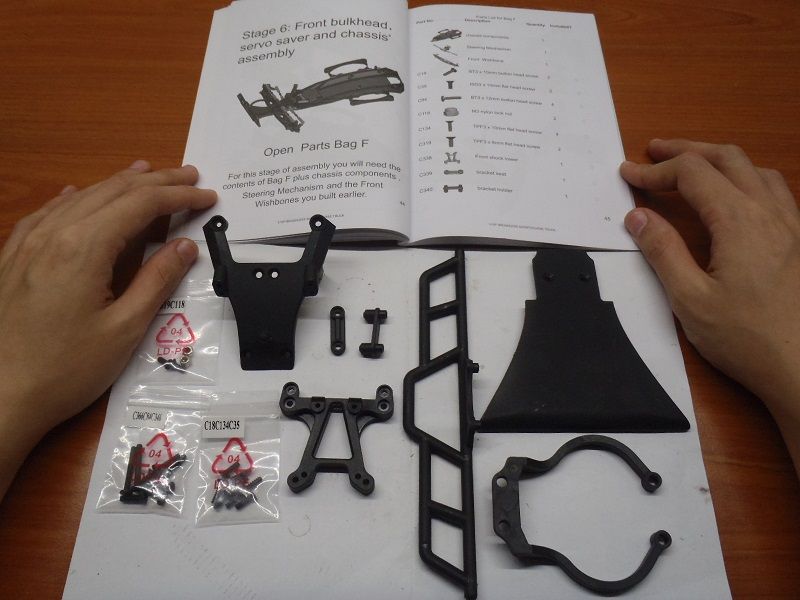
The manual says 12mm self-tapping screw here, however it is it is rather long and unnecessary for a M3 version.
10mm works fine!
And this was instructed to use 10mm but I'll go for 12mm instead! This seem to be an area that will get lots of beating and I think 10mm screws would be ripped off the skid if things get crazy.
Done!
Stage 6 - Front Bulkhead, servo saver and chassis assembly
The manual says 12mm self-tapping screw here, however it is it is rather long and unnecessary for a M3 version.
10mm works fine!
And this was instructed to use 10mm but I'll go for 12mm instead! This seem to be an area that will get lots of beating and I think 10mm screws would be ripped off the skid if things get crazy.
Done!
Last edited by FT; 06-03-2013 at 02:41 AM.
06-02-2013, 04:18 PM
#11
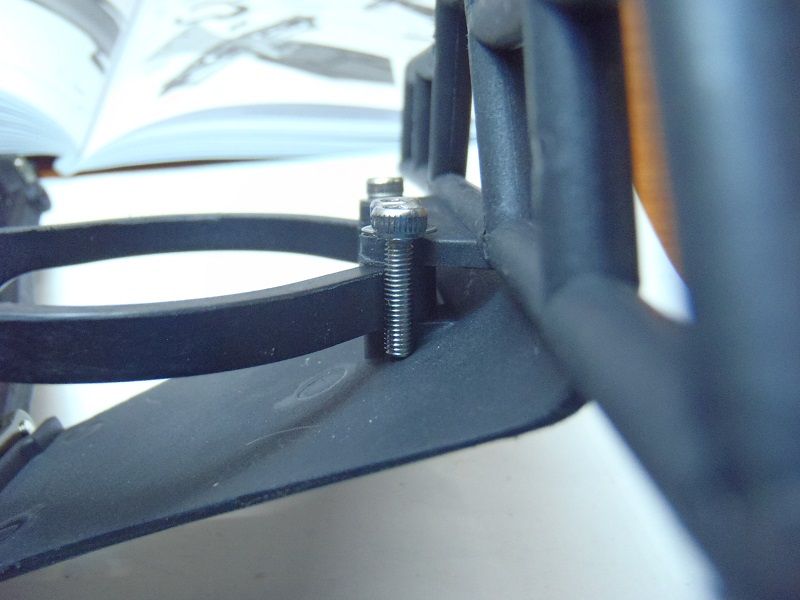
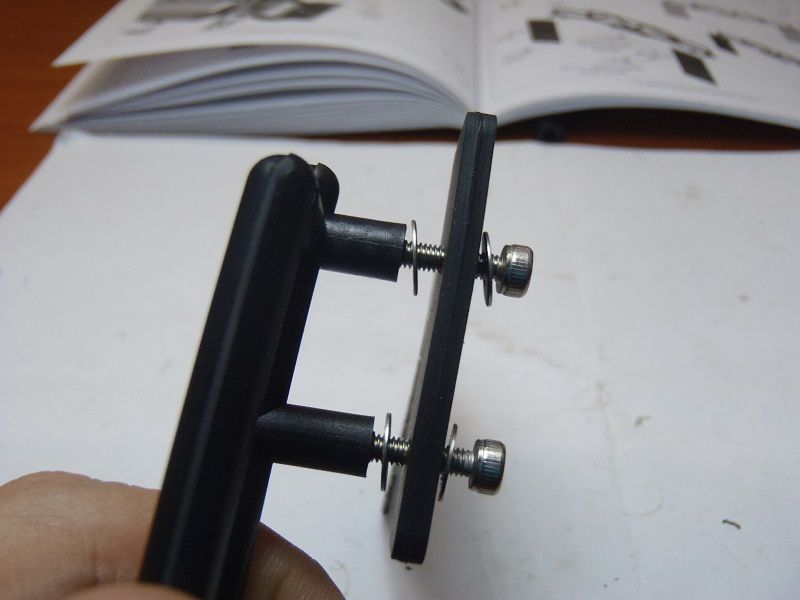
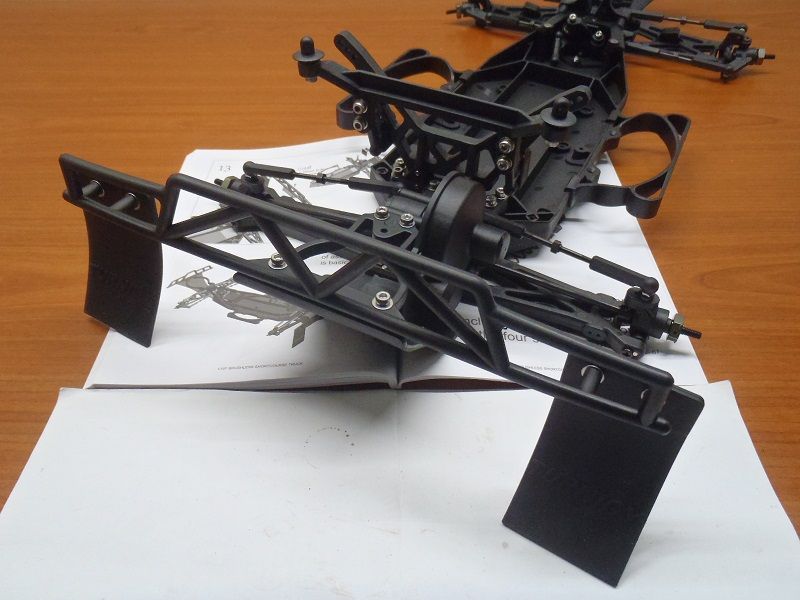
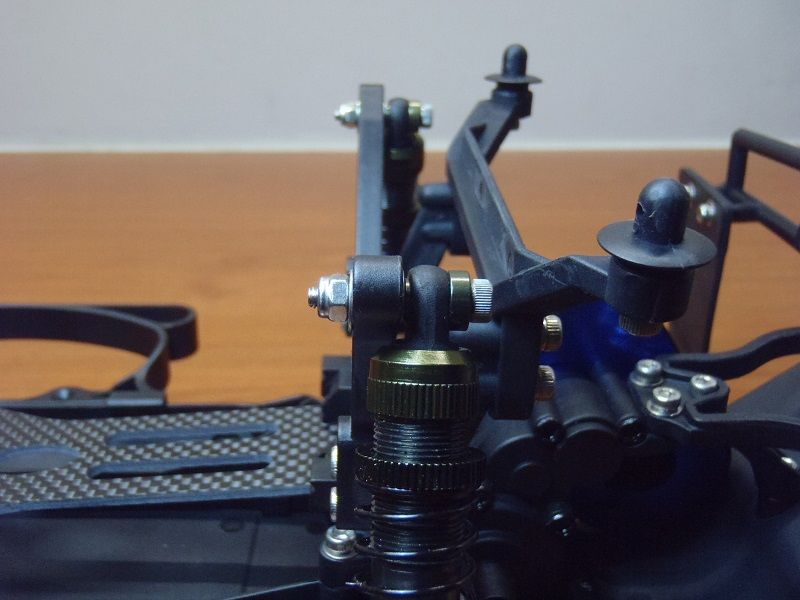
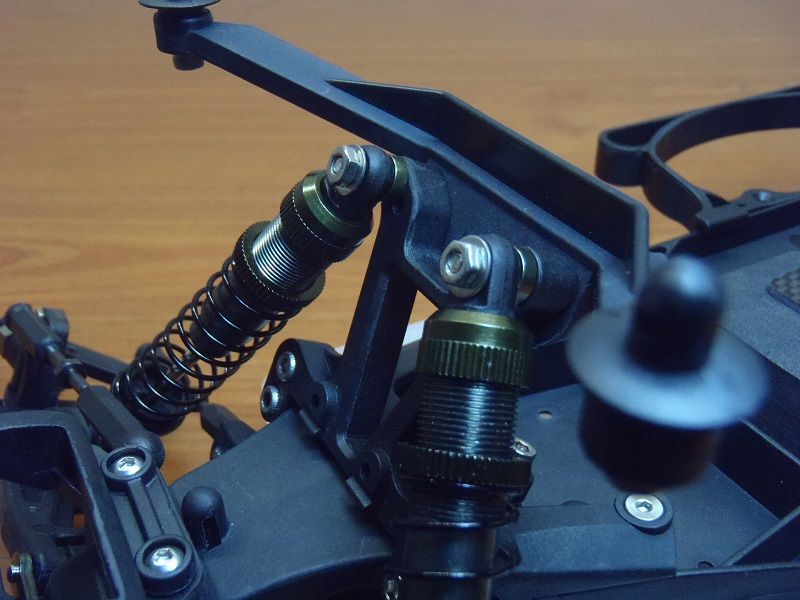
Stage 7 - Shock Mounting and Front bumper
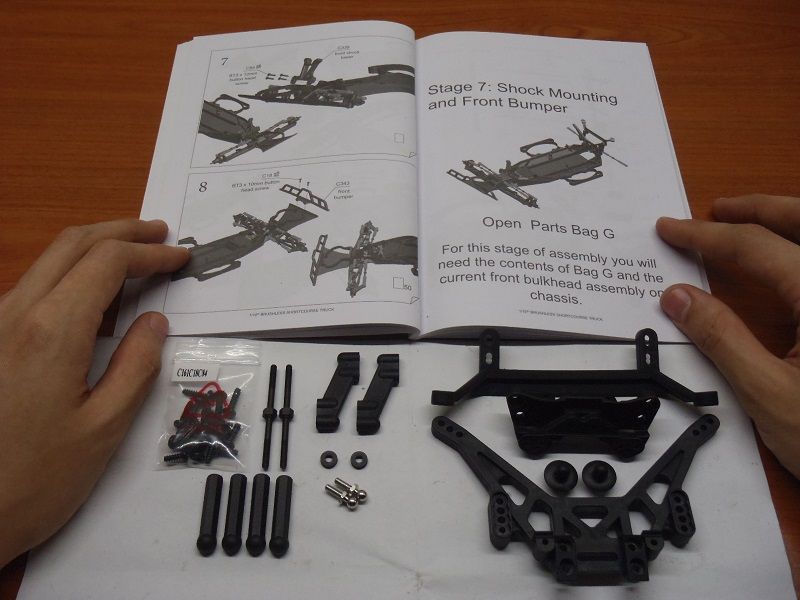
Done! Yea, that was very straight forward.
Done! Yea, that was very straight forward.
06-02-2013, 04:51 PM
#12
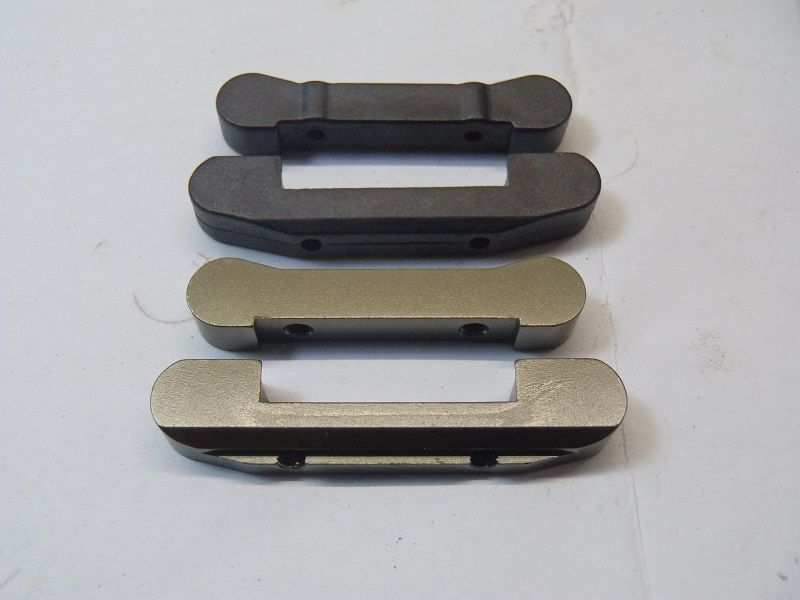
Stage 8 - Rear bulkhead assembly and Gearbox
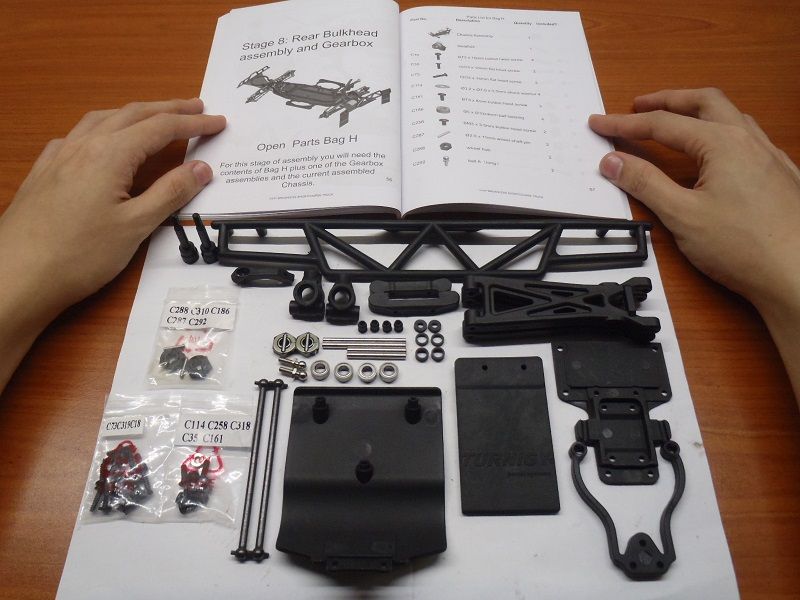
Grease it up, grease it up!
This is the weakest link known to every other Turnigy 2WD SCT owners out there. The alloy hopup is compulsory!
Sandwich the mudflaps with washers, it provides a secure grip to the flaps and prevents tearing. Make sure that the sharp-edge-side is not facing the flaps or it would slice and tear the flaps during bad crashes.
Done!
06-02-2013, 05:16 PM
#13
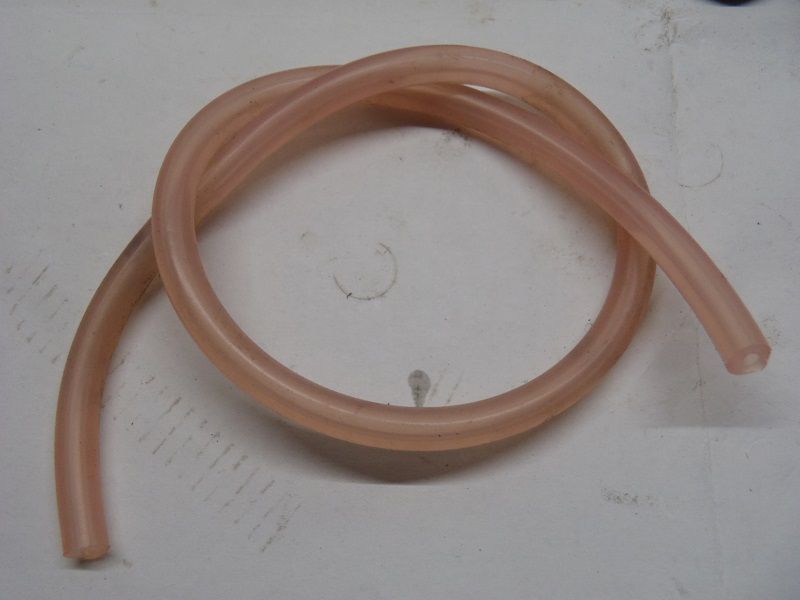
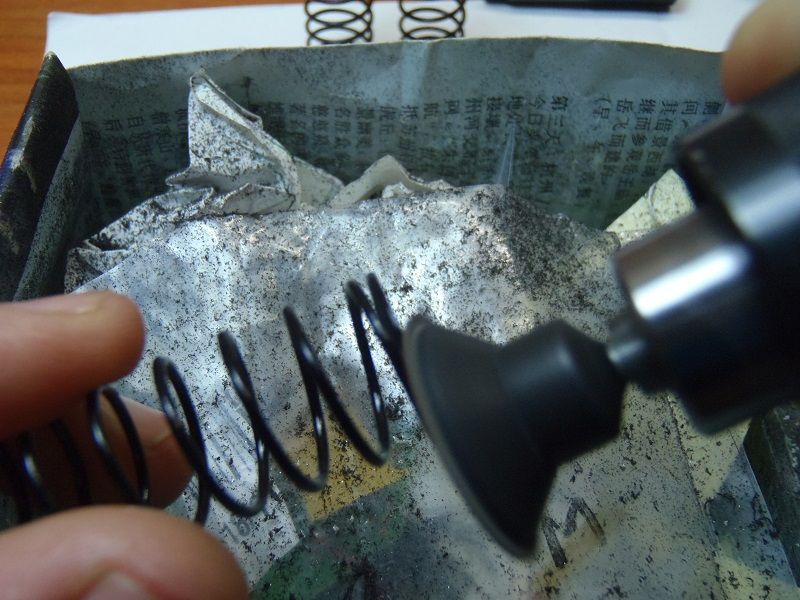
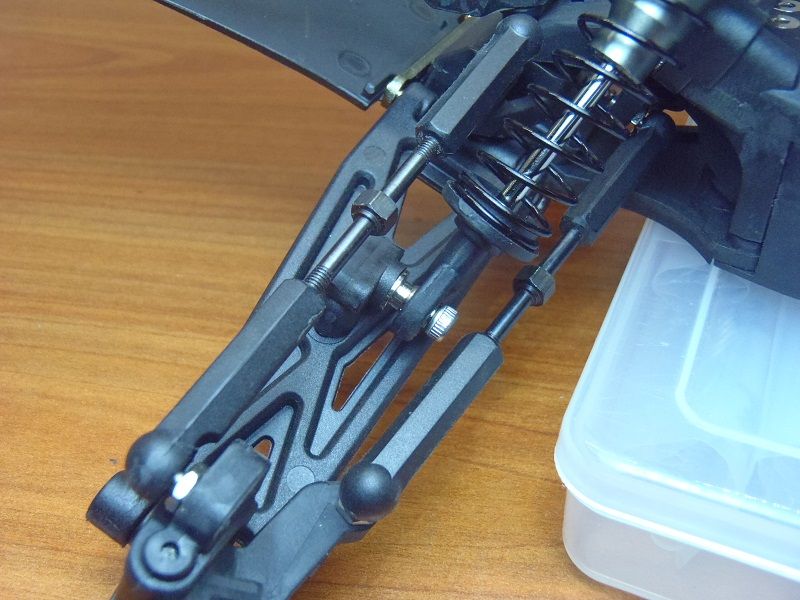
Stage 9 - Shock Absorbers
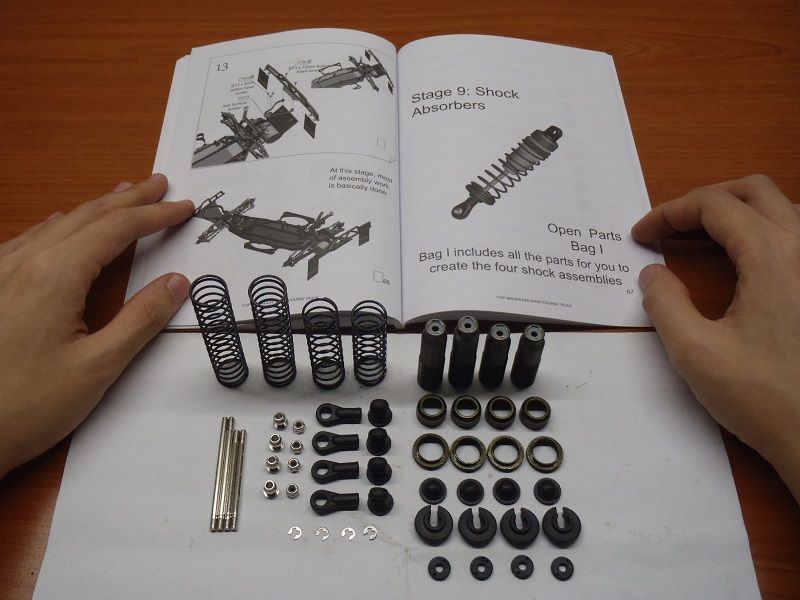
Argh! The dreadful G-clip. Interesting that the O-Rings are already pre-installed from factory.

Looks ok. Nothing wrong here, but I have a habit to modify shocks with a little trick that was taught to me some time ago, O-Ring alternative - Silicon Fuel Tube! Known to work better than O-rings because it have more surface area and better contact patch gripping onto the shock's shaft. However, such "grip" barely affect the smoothness of the shocks because once the silicon oil touches it, it becomes sliky smooth! Over time, these will out-last O-rings and continues to provide leak-free smooth shock action because it wipes away foreign particles far better. I replace just one O-ring for each shock, it is pretty much a hybrid with a regular O-rings and an improvised O-ring. The silicon O-ring should be placed just before the white washer so that dirt gets wiped away before reaching the the black O-ring inside.


Made two more holes for the shock piston as it is necessary for my setup.
Quick tip - wrench down the piston shaft slowly and this will "thread" and slide the shaft through the gaskets without risking any damages to them.

Greasing this helps in better sealing and extends it's life.
Attach the bladder gasket this way as it will help ease the assembly process.
Carefully put the "gasket-in-cap" on top of the filled shocks, do it slowly and start from the side-down so air could escape as you install and cap it down. Before capping all the way down, add a very small amount of thread lock for the cap to stay secured, just a little stain of it would do.

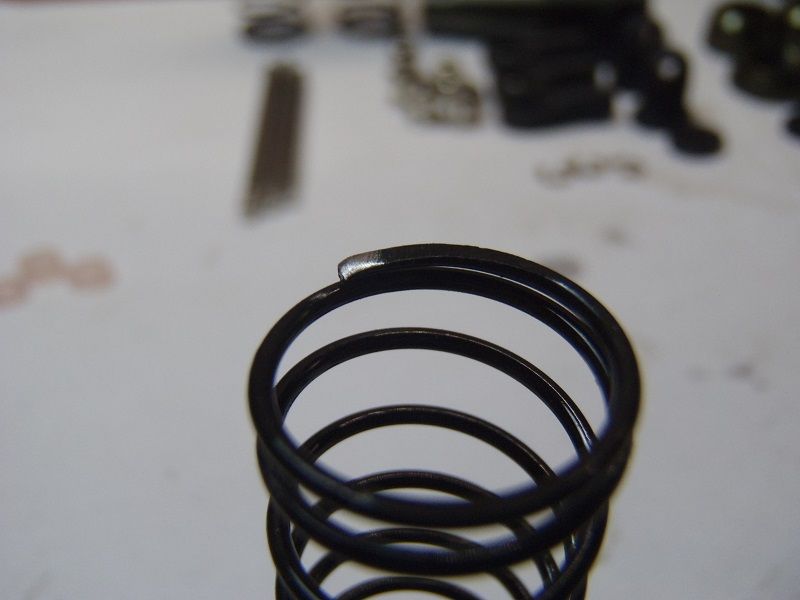
Just like the servo saver's springs, these shocks' springs also need to have smoother ends.
Done! Ive used 500cst front and 400cst rear. Seem to be over-dumpened. I'll figure this out next time.

Argh! The dreadful G-clip. Interesting that the O-Rings are already pre-installed from factory.
Looks ok. Nothing wrong here, but I have a habit to modify shocks with a little trick that was taught to me some time ago, O-Ring alternative - Silicon Fuel Tube! Known to work better than O-rings because it have more surface area and better contact patch gripping onto the shock's shaft. However, such "grip" barely affect the smoothness of the shocks because once the silicon oil touches it, it becomes sliky smooth! Over time, these will out-last O-rings and continues to provide leak-free smooth shock action because it wipes away foreign particles far better. I replace just one O-ring for each shock, it is pretty much a hybrid with a regular O-rings and an improvised O-ring. The silicon O-ring should be placed just before the white washer so that dirt gets wiped away before reaching the the black O-ring inside.
Made two more holes for the shock piston as it is necessary for my setup.
Quick tip - wrench down the piston shaft slowly and this will "thread" and slide the shaft through the gaskets without risking any damages to them.
Greasing this helps in better sealing and extends it's life.
Attach the bladder gasket this way as it will help ease the assembly process.
Carefully put the "gasket-in-cap" on top of the filled shocks, do it slowly and start from the side-down so air could escape as you install and cap it down. Before capping all the way down, add a very small amount of thread lock for the cap to stay secured, just a little stain of it would do.
Just like the servo saver's springs, these shocks' springs also need to have smoother ends.
Done! Ive used 500cst front and 400cst rear. Seem to be over-dumpened. I'll figure this out next time.
Last edited by FT; 06-03-2013 at 02:51 AM.
06-02-2013, 05:24 PM
#14
Stage 10 - Shocks absorbers and Battery Cover
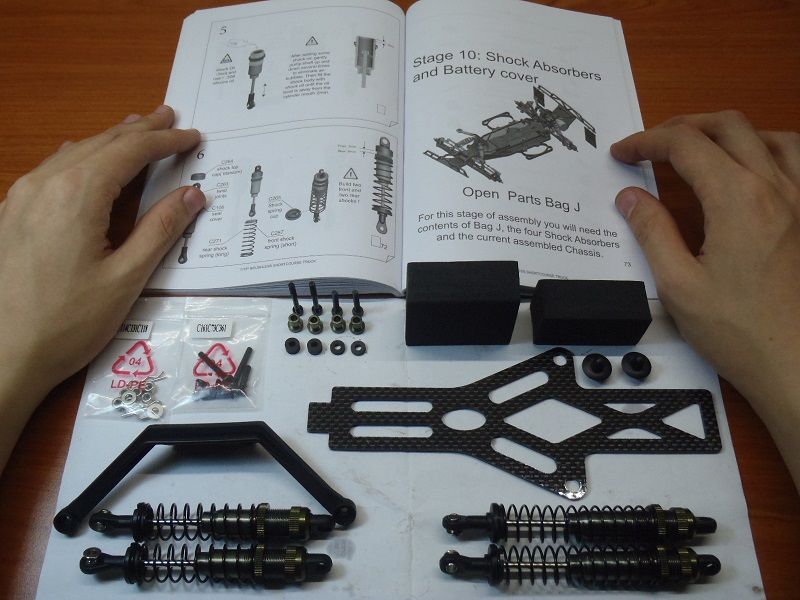
Yes, grease.
Ive installed it a little differently.
Done!
Yes, grease.
Ive installed it a little differently.
Done!
06-02-2013, 05:37 PM
#15
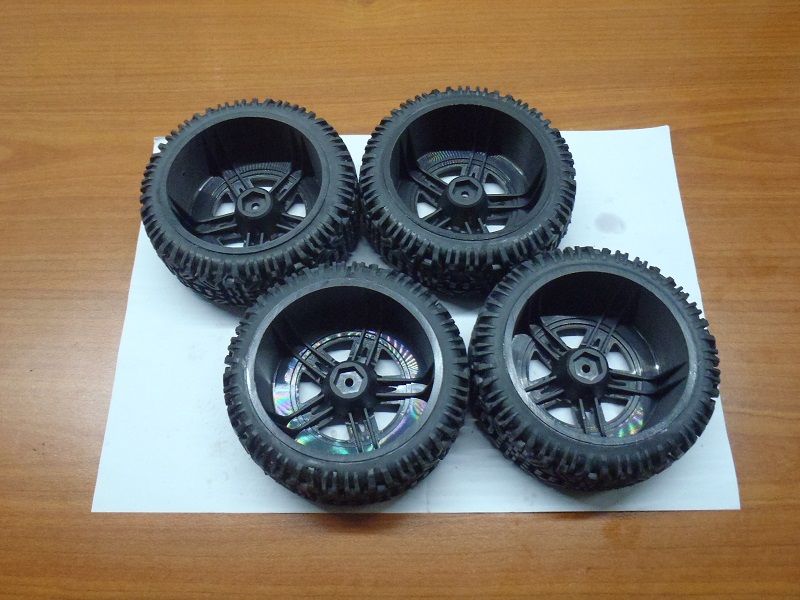
Stage 11 - Body Shell, Wheels and Tires
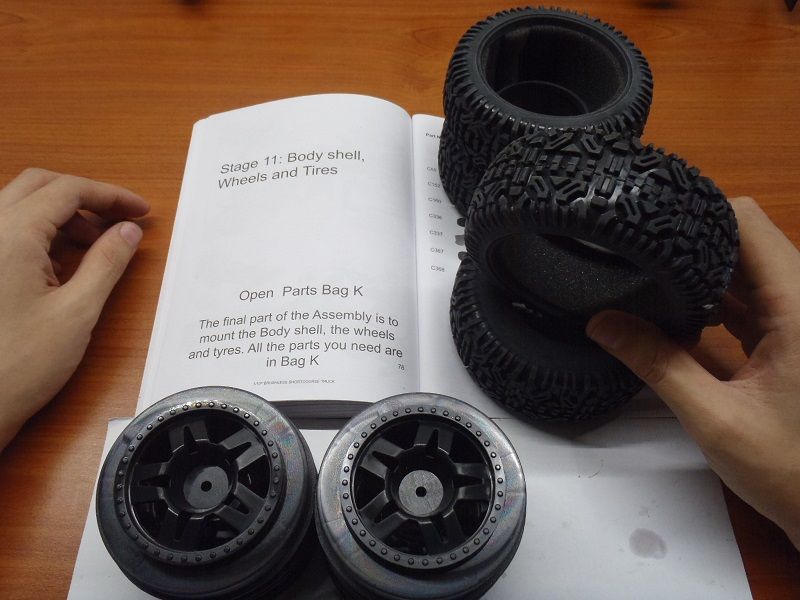
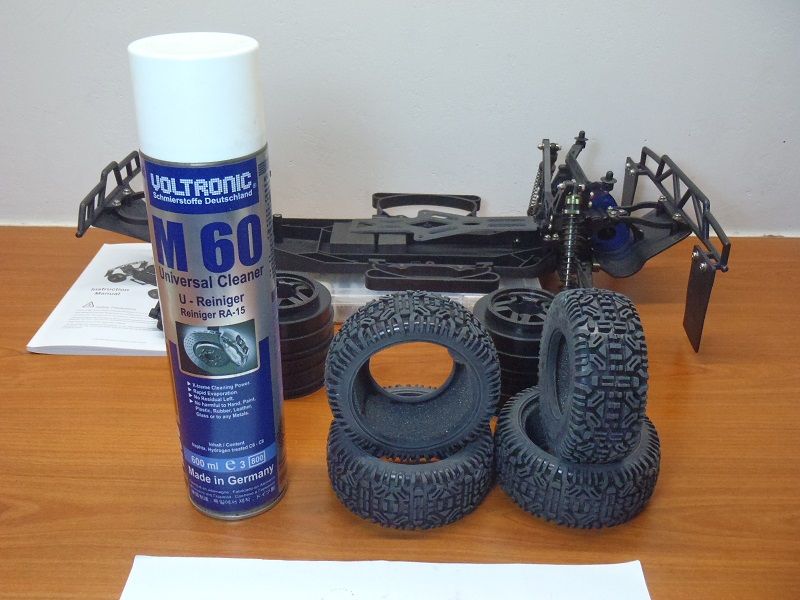
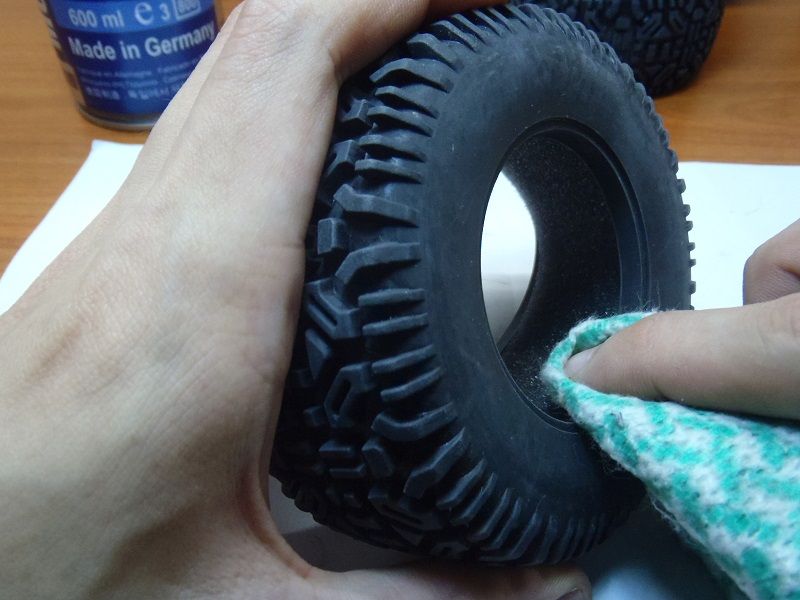
The tires came slightly powdery with release agent. Glue will not adhere to it prpoperly if you did not clean it down. Use contact cleaner with a rag and give the beads a good rub down. Alternatively, you can wash it with abit of dishwashing saop, rinse and let it dry completely before gluing.
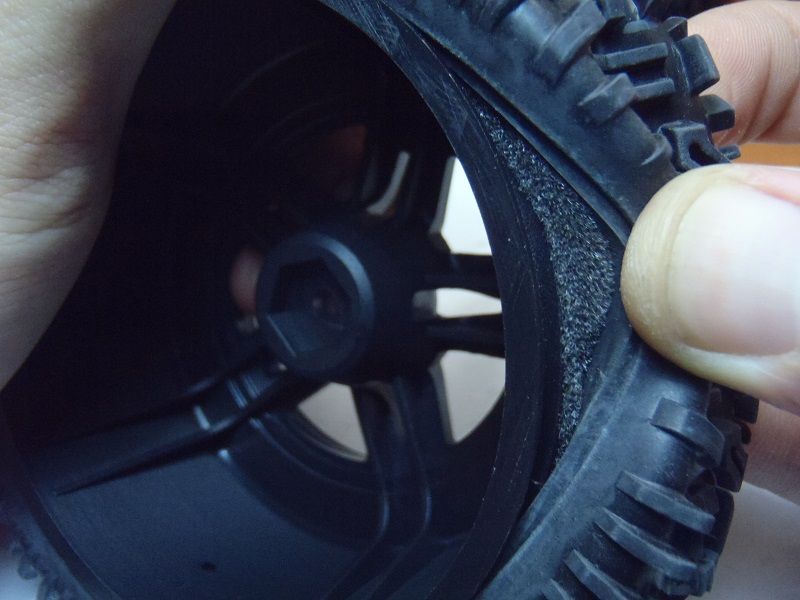
Before gluing, inspect through the grooves, making sure that the sponge inserts seated nicely away from it. It shouldn't look like this.
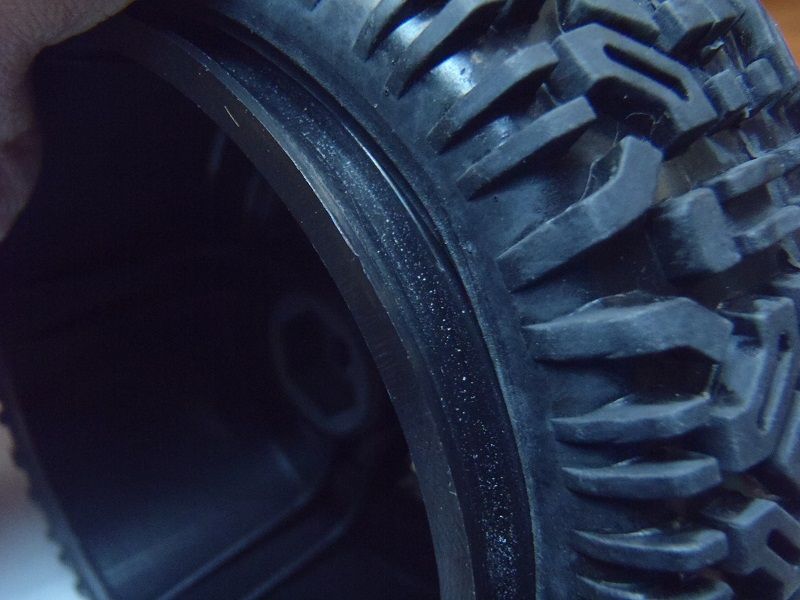
It should look like this.
Gluing tires is a skill that requires some trial and error, do it steadily and slowly. The key is to let gravity and liquid-tension do the job. Pull, drip, release, next segment, pull, drip, release, next segment.
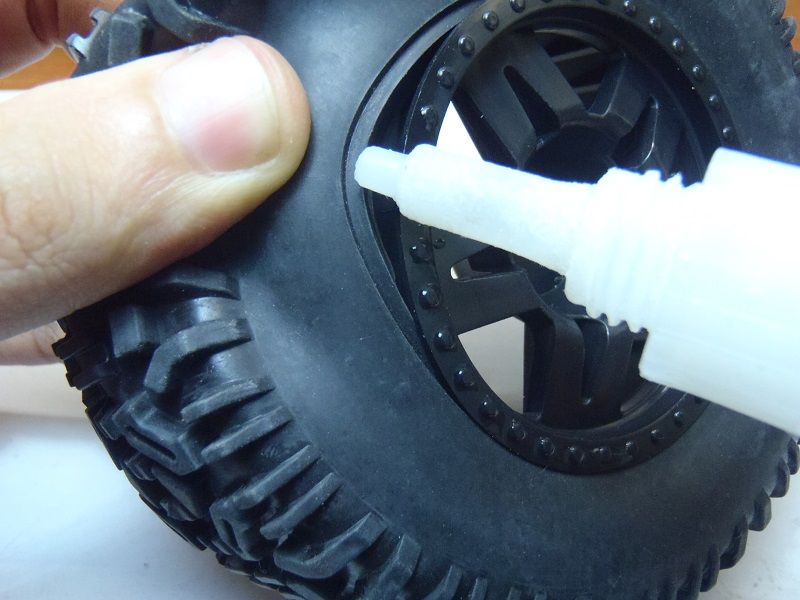
Glue up only one side at a time and let it rest for about 10mins to cure.
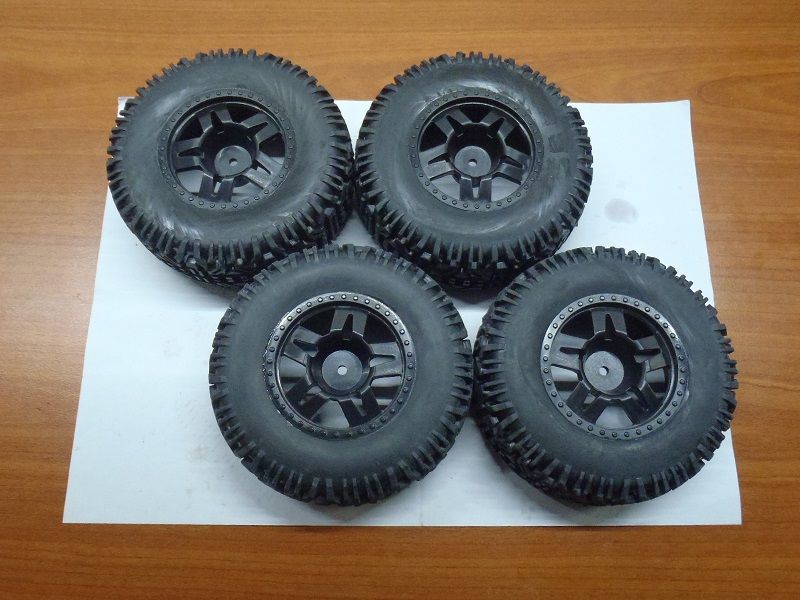
after 10mins, proceed with the other side.
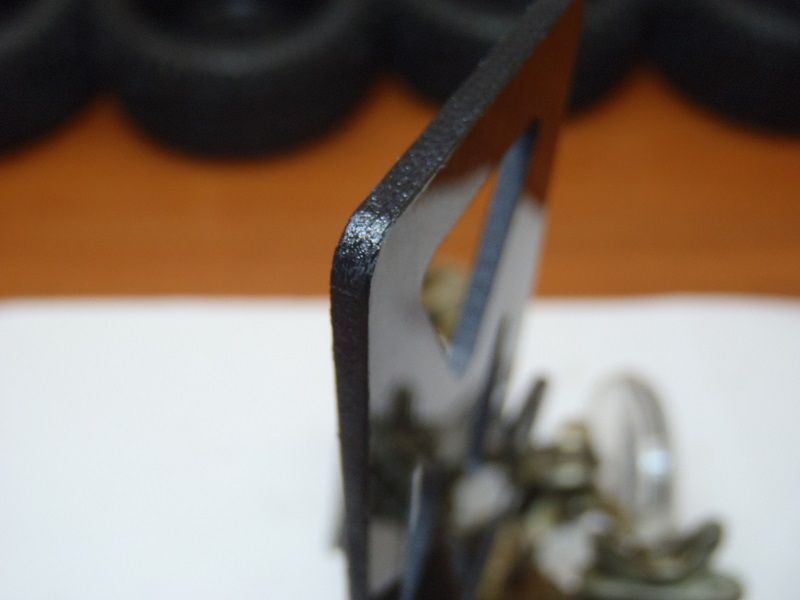
The carbonfiber battery cover could use a little gluing too - Sealing the edges. Exposed edges risk structural damages and can become frayed. Use CA to seal it. Drip a drop and "guide" it with the tip of the glue bottle, it will spread much faster without causing a big mess.
This is what it looks like when the CA had cured and sealed the Carbonfiber.
Ok, that's it for now! I'm literally dosing off. I'll continue with more posts when I wake. Bye!
The tires came slightly powdery with release agent. Glue will not adhere to it prpoperly if you did not clean it down. Use contact cleaner with a rag and give the beads a good rub down. Alternatively, you can wash it with abit of dishwashing saop, rinse and let it dry completely before gluing.
Before gluing, inspect through the grooves, making sure that the sponge inserts seated nicely away from it. It shouldn't look like this.
It should look like this.
Gluing tires is a skill that requires some trial and error, do it steadily and slowly. The key is to let gravity and liquid-tension do the job. Pull, drip, release, next segment, pull, drip, release, next segment.
Glue up only one side at a time and let it rest for about 10mins to cure.
after 10mins, proceed with the other side.
The carbonfiber battery cover could use a little gluing too - Sealing the edges. Exposed edges risk structural damages and can become frayed. Use CA to seal it. Drip a drop and "guide" it with the tip of the glue bottle, it will spread much faster without causing a big mess.
This is what it looks like when the CA had cured and sealed the Carbonfiber.
Ok, that's it for now! I'm literally dosing off. I'll continue with more posts when I wake. Bye!
Last edited by FT; 06-03-2013 at 02:00 AM.