


 2421Likes
Tekno RC EB410 Thread

 05-13-2019, 06:33 AM - Wikipost
|
|||
|
|||


 10-24-2018, 06:00 AM
#4756

It's been a long time since I've ran 2.4" (aka 60mm) wheels, is anyone still making tires this size? Yes, the TLR22-3.0 wheels worked fine for me, however the depth of the hexes are kind of shallow, I would not use these wheels in mod or will risk stripping the hexes. For 13.5T racing on clay, I usually got about 2 race days... some folks were reporting issues with the sidewalls of 2.4" tires tearing, but I never had that problem with only 2 race days in the stock class.
 10-24-2018, 06:19 AM
#4757
Thanks Bill. I know Jconcepts and Sweep Racing make the 2.4 inch tires. I suspect more.
So is the offset different between the TLR 22 3.0 and 4.0 wheels? I thought I saw 22 4.0 is right for the Tekno.
So is the offset different between the TLR 22 3.0 and 4.0 wheels? I thought I saw 22 4.0 is right for the Tekno.
10-24-2018, 06:40 AM
#4758
I am not sure if they changed the offset between TLR22-3.0 and TLR22-4.0 front wheels (pretty sure it's the same offset, but I could be wrong), I have ran TLR22-3.0 wheels on my EB410 without any issue... the club in my area switched to turf just before the EB410 was first introduced so I never had the chance to run the 2.4" wheels on my EB410 because I don't know of any 2.4" turf tires that are made, but I did run TLR22-3.0 wheels on my Schumacher CAT K2 (both 2.2" and 2.4") which shares the same track width as the EB410 which was really nice to switch cars. That said, I know that the TLR22-3.0 wheels in 2.4" will work on the EB410 perfectly fine.
10-24-2018, 11:43 AM
#4759
I am not sure if they changed the offset between TLR22-3.0 and TLR22-4.0 front wheels (pretty sure it's the same offset, but I could be wrong), I have ran TLR22-3.0 wheels on my EB410 without any issue... the club in my area switched to turf just before the EB410 was first introduced so I never had the chance to run the 2.4" wheels on my EB410 because I don't know of any 2.4" turf tires that are made, but I did run TLR22-3.0 wheels on my Schumacher CAT K2 (both 2.2" and 2.4") which shares the same track width as the EB410 which was really nice to switch cars. That said, I know that the TLR22-3.0 wheels in 2.4" will work on the EB410 perfectly fine.
 10-24-2018, 12:47 PM
#4760
TLR223.0 is kind of hard to understand, no rhyme or reason to say that it's a 2WD car though I can sort of see that the TLR22-44.0 is a 4WD car but really hard to see what version the car is without any delimiters between. At least with TEKNO, they call it a EB410.1, no mistake there, but then Associated calls their buggy an RC10B64D (seriously???)... at least XRay goes by year XB4'2019 but what happens if you do 2 releases in 1 year??? What happens if you pull a Microsoft and skip a version?
10-24-2018, 06:02 PM
#4761
Tech Rookie
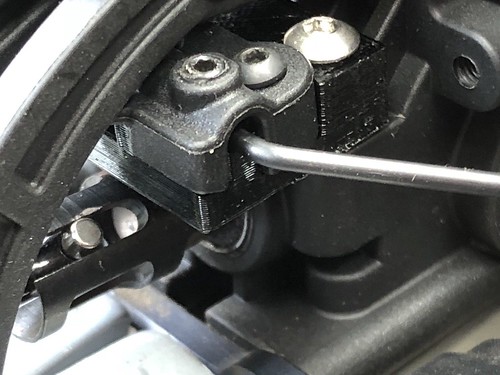
Thanks for the picture, it helps. But what are the Turn buckle screwing into in the center? That plastic plate looks like its only fastened by the two screws. Is this what every ones set up looks like?
10-24-2018, 06:08 PM
#4762
https://www.ebay.com/itm/Tekno-EB410...hFkq:rk:1:pf:0
 10-24-2018, 09:38 PM
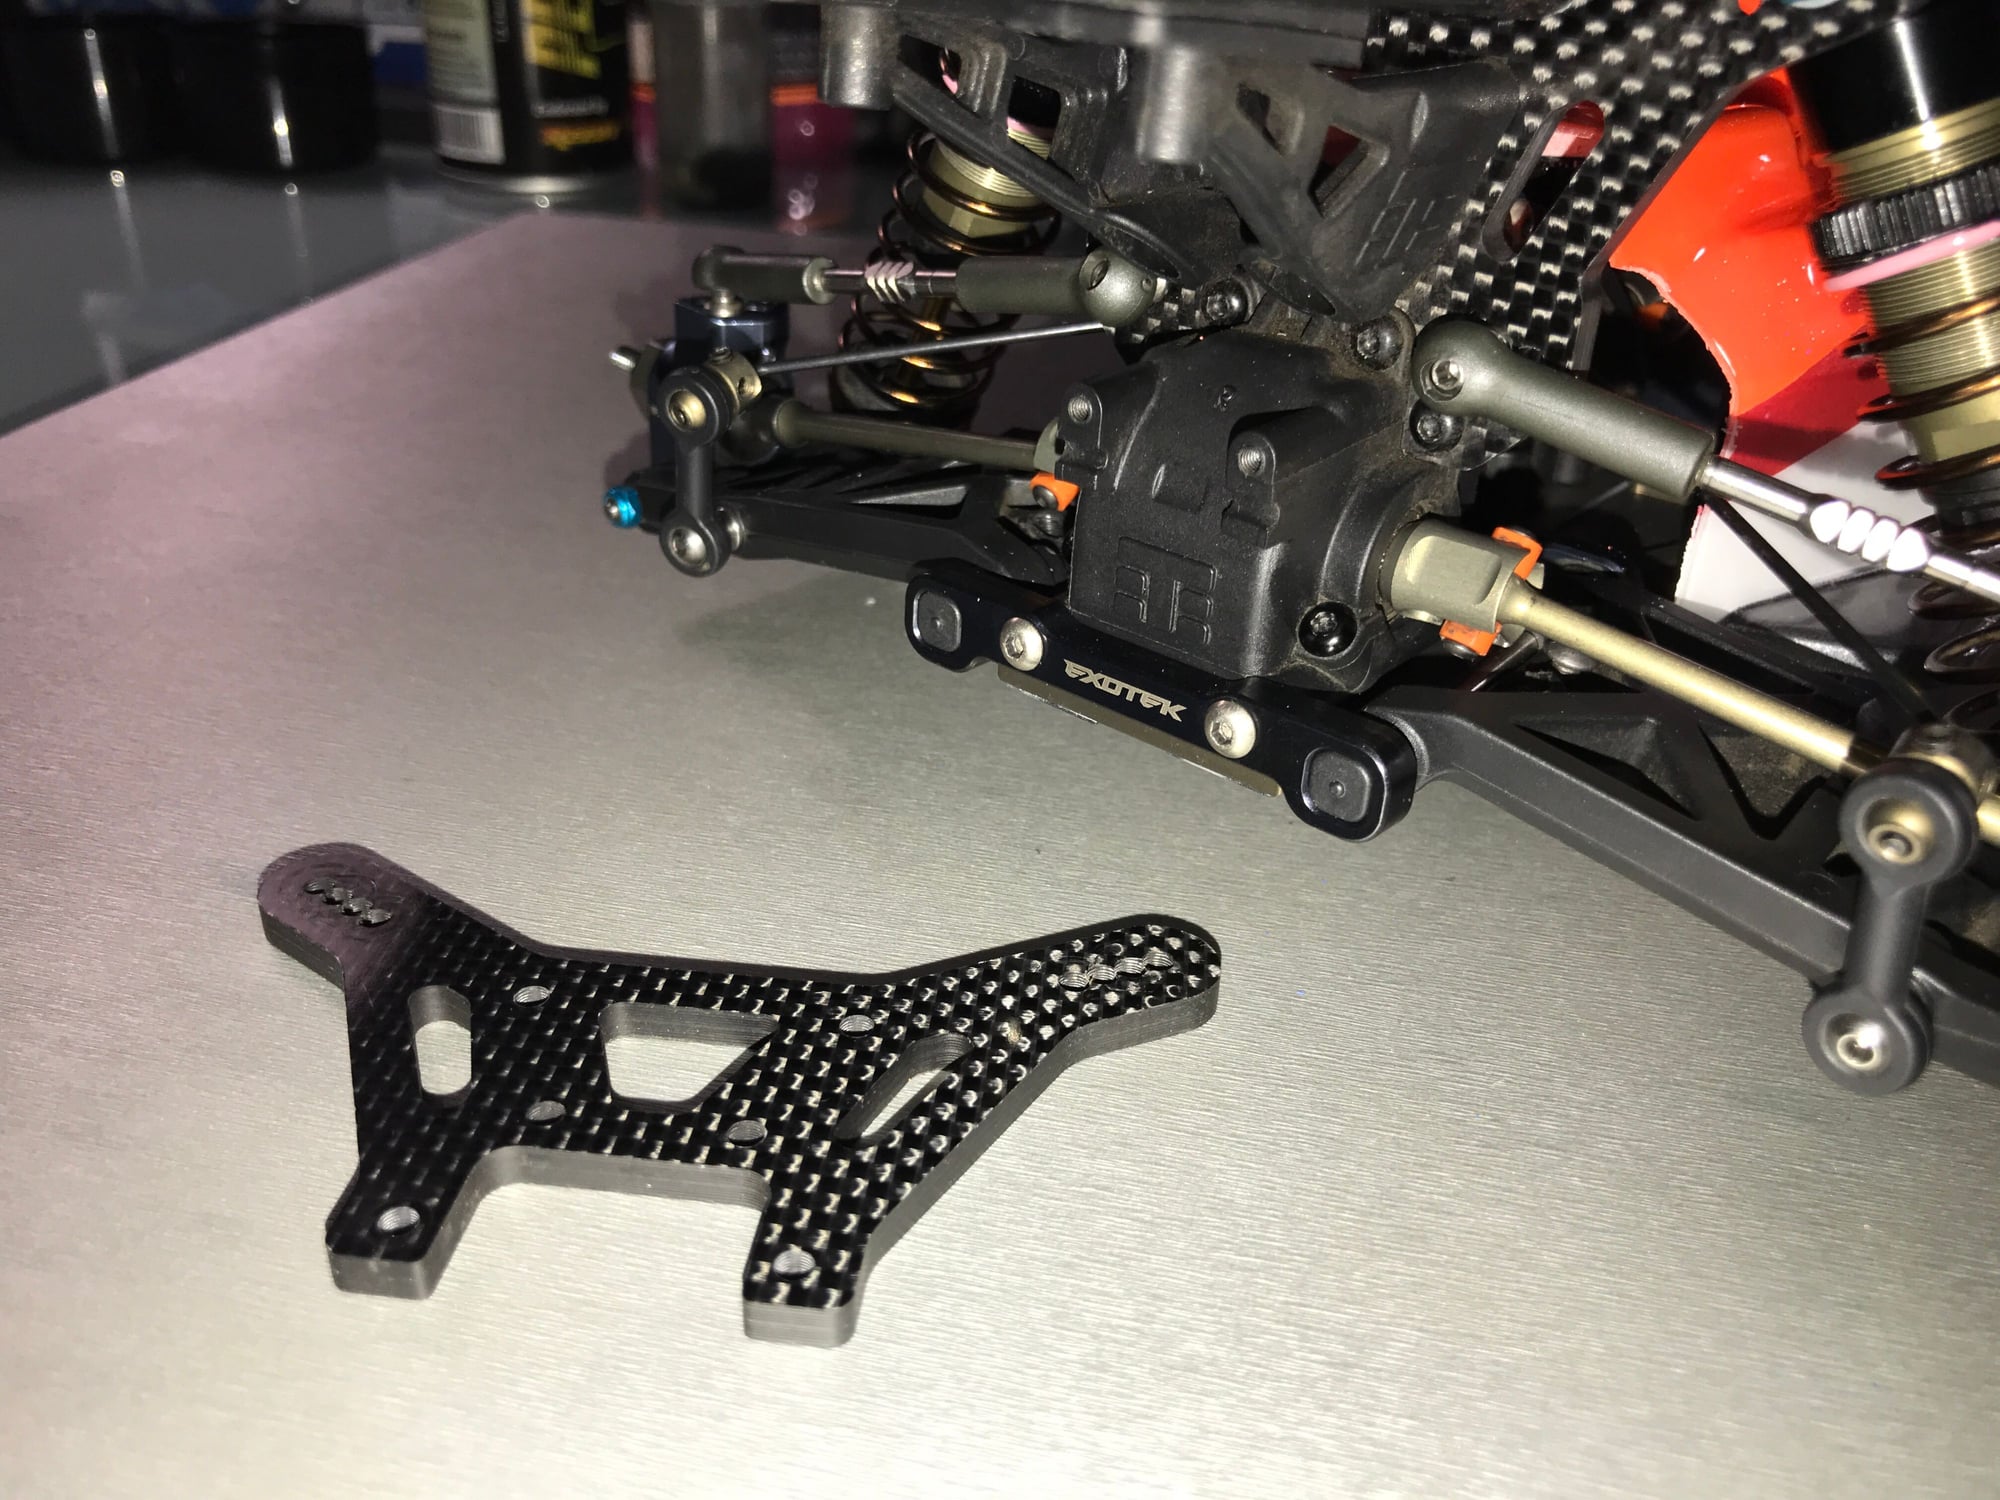
#4765
For racing on turf, I would recommend the VRP +3mm rear tower to get the rear ride height as low as 14mm:
https://www.visionracingproducts.com...10-VRP1526.htm
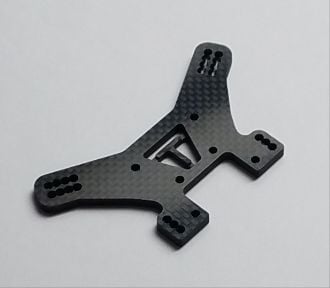
Note that it offers a roll center position that is lower than the stock bar that is removed when flipping the arms, this allows a higher roller center which is ideal for high traction conditions
https://www.visionracingproducts.com...10-VRP1526.htm
Note that it offers a roll center position that is lower than the stock bar that is removed when flipping the arms, this allows a higher roller center which is ideal for high traction conditions
10-25-2018, 09:01 AM
#4766
I recently picked up this buggy (used, but new to me,) and am very surprised as to how good it is. I have always had xrays (xb4 13, 14, 15, then updates to the 15 to make it similar to the 16 and 17.) The eb410 is simply easier to drive fast. It doesn't feel on edge, lands much better than the xray, and parts are much cheaper.
I moved the rear shocks forward, and given how many racers have done this, I would suggest that tekno offer optional arms for the shock forward position to correct the wheelbase and allow for the droop screws. They could also mold the sway bar mount and offer a kit for the conversion including the rear carbon tower ($35 or so.)
Great job tekno!!
10-25-2018, 09:11 AM
#4767
Indoor clay medium grip track...guys that have done the rear shocks forward, do you feel it was worth it. I am currently running mine on the rear (stock location) and the thing feels great. I know on my TLR 22 4.0 I currently run the shocks in the forward position. I hate dremeling my cars, using parts from different cars, etc. If Tekno did release an actual are for it, I would run it in a heart beat.
10-25-2018, 09:59 AM
#4768
Tech Rookie
How is everyone including the chassis brace body mount? #TRK6538 = The small plastic piece that has the nub for the body and the lower ring to mount the chassis braces. It does not fit when using the eBay MOD part. Is this not used when doing the MOD? Are you trimming it back? Please let me know
10-25-2018, 10:01 AM
#4769
Tech Addict
iTrader: (16)
You don't need to dremel anything, and it is not all that difficult. Get the carbon shock tower, ebay part, flip the arms and done. You can swap between the shocks forward or behind really easy without any mods. I like shocks forward but you may or may not.
10-25-2018, 10:04 AM
#4770
Tech Addict
iTrader: (16)
How is everyone including the chassis brace body mount? #TRK6538 = The small plastic piece that has the nub for the body and the lower ring to mount the chassis braces. It does not fit when using the eBay MOD part. Is this not used when doing the MOD? Are you trimming it back? Please let me know