


Help a noobie install his Speed Controller
 06-11-2006, 06:19 PM
#1
Tech Apprentice
Thread Starter
Hey,
So I got a MR4TC-SD last night and i need to install the speed controller. All help is apreciated and i've got some pics to show you where I am at right now...
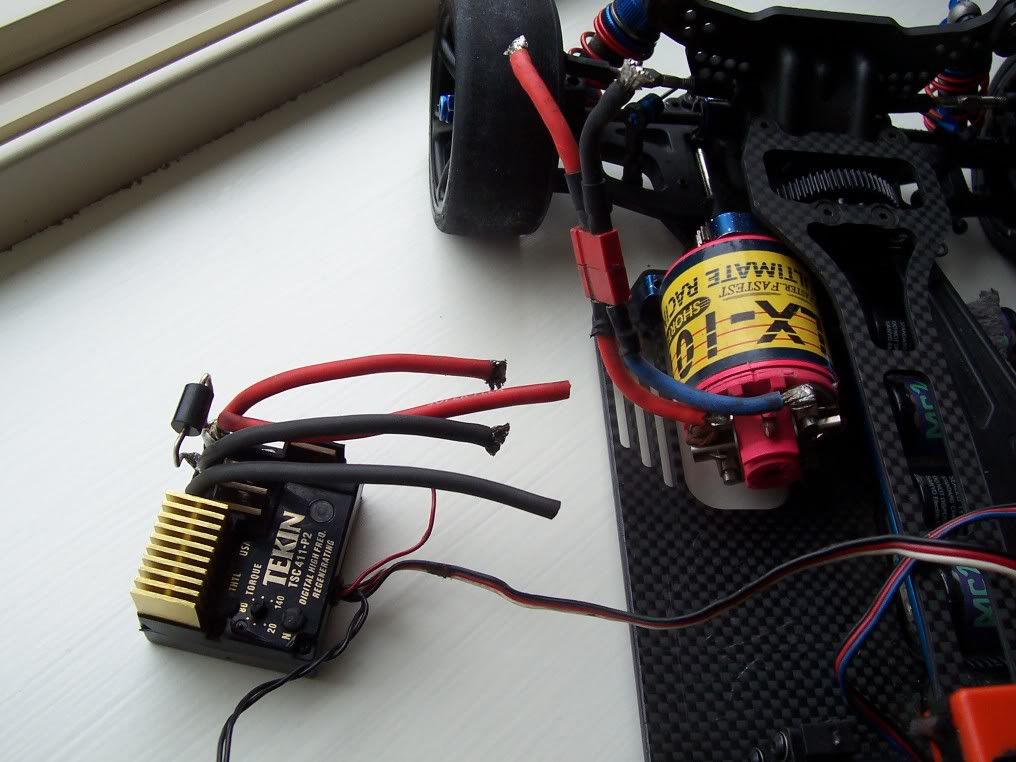
Cables to the motor.
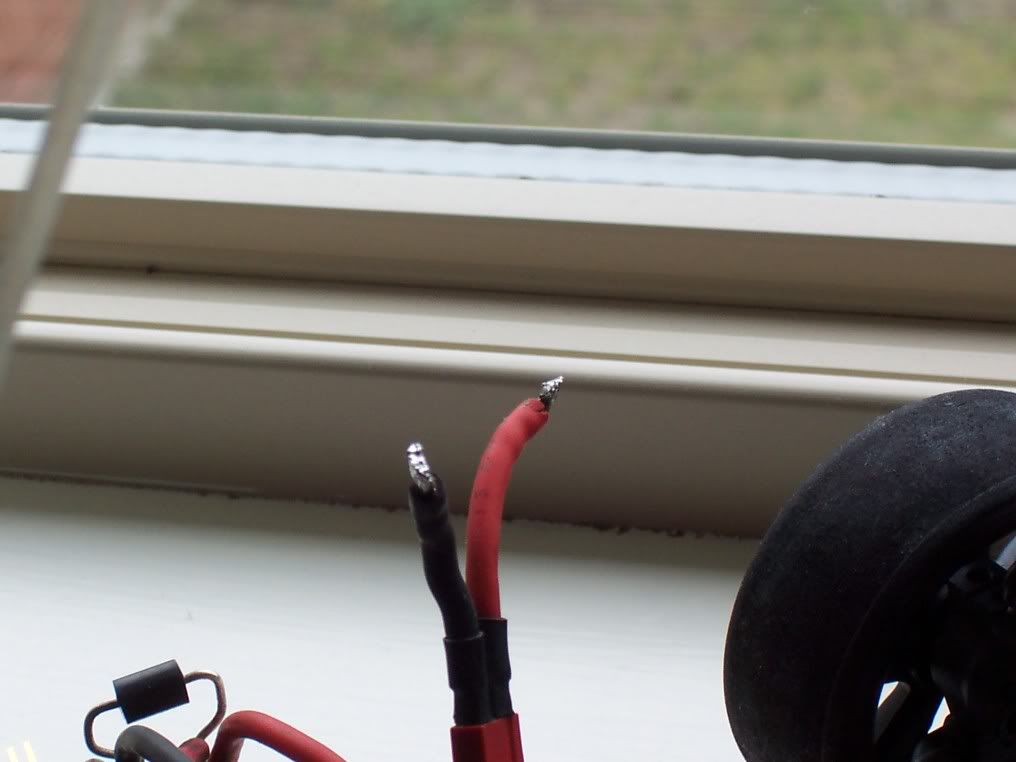
Cables to the battery.
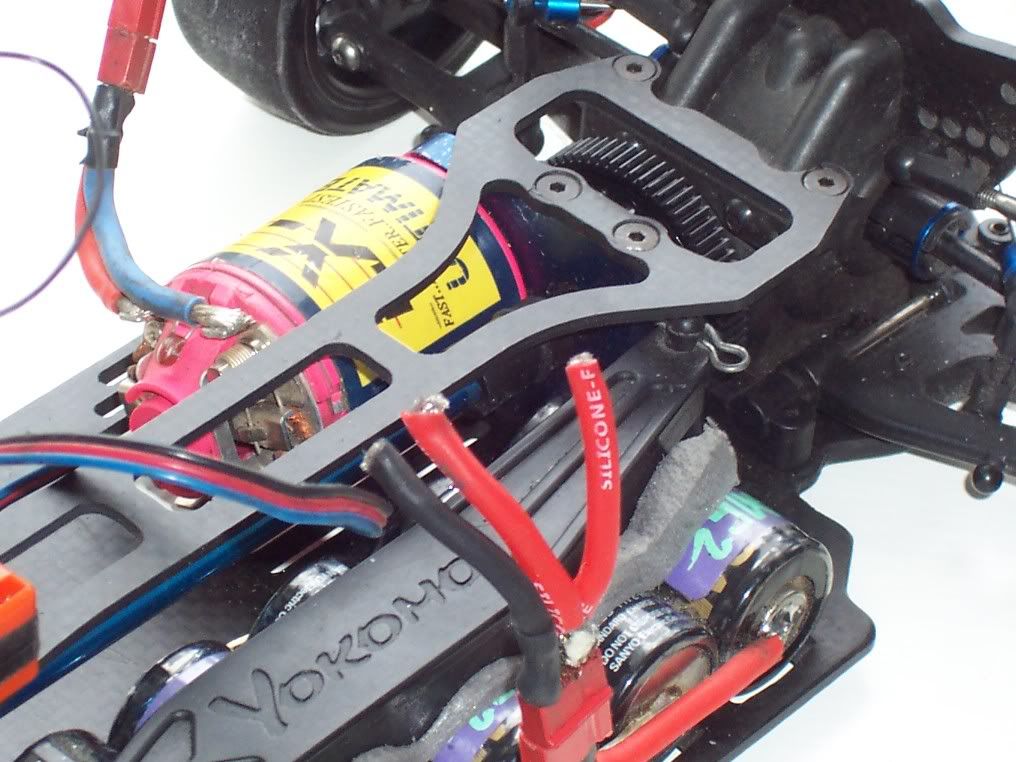
Don't forget I'm just a beginner and does not know much about R/C
So I got a MR4TC-SD last night and i need to install the speed controller. All help is apreciated and i've got some pics to show you where I am at right now...
Cables to the motor.
Cables to the battery.
Don't forget I'm just a beginner and does not know much about R/C
 06-11-2006, 08:22 PM
#3

Man looks like an ebay purchase? (1700mah battery is a dead give-away) 
For the ESC(speed control) I have the sameone in my hands:
-From your picture the first black wire an the left= to the battery packs negative terminal(black wire on the packs connector
-Second black wire(middle wire) goes to your negative terminal on the motor the black wire that changes to blue after its connector
-The finally 2 wires are red and go to one single terminal on the esc. From there one goes to positive/red on the motor and positive/red on the battery pack.
For the most part i would eliminate the deans connector going to the motor, you dont have alot of space on that side so solder your negative and positive wires directly to the motor. IF your able to get new wire run one single long red wire from the ESC to the motor and then onto the battery pack stripping off insulation at the point where the wire crosses over the motors positive terminal.
Here it dont get much better then this:
ps i loved my SSG
06-11-2006, 10:58 PM
#4
Tech Apprentice
Thread Starter
Thanks to both of you for the awesome info!
No it's not an eBay purchase, it was a local purchase and he just threw the battery pack into the deal haha .
.
Probably a very stupid question, but when I get my hands on a soldering iron, will I need to melt some solder onto where i want to join the wires? Or can I just melt them together without solder?
Thanks again.
No it's not an eBay purchase, it was a local purchase and he just threw the battery pack into the deal haha
.Probably a very stupid question, but when I get my hands on a soldering iron, will I need to melt some solder onto where i want to join the wires? Or can I just melt them together without solder?
Thanks again.
06-12-2006, 05:03 AM
#5
Originally Posted by Revox
Thanks to both of you for the awesome info!
No it's not an eBay purchase, it was a local purchase and he just threw the battery pack into the deal haha .
Probably a very stupid question, but when I get my hands on a soldering iron, will I need to melt some solder onto where i want to join the wires? Or can I just melt them together without solder?
Thanks again.
No it's not an eBay purchase, it was a local purchase and he just threw the battery pack into the deal haha
.Probably a very stupid question, but when I get my hands on a soldering iron, will I need to melt some solder onto where i want to join the wires? Or can I just melt them together without solder?
Thanks again.
 06-12-2006, 05:01 PM
#6
u definately need a soldering iron... ive had mine since i was 5 and ive gone through like 3 i think...i went through em because wen i was moving houses wich was twice i knda like lost em lol
06-12-2006, 05:27 PM
#7
Tech Apprentice
Thread Starter
Ok thanks, gonna go buy a soldering iron this week...In the mean time a guy from the local track was generous enough to help me install my ESC sometime  .
.
.
06-12-2006, 07:55 PM
#9
Tech Apprentice
Thread Starter
I was thinking of getting one 40 watt and one 80 watt.
How much do the adjustable temperature ones cost?
How much do the adjustable temperature ones cost?
06-13-2006, 06:17 AM
#10
Once you have soldered the wires make sure they are covered well with heatshrink tubing,or at the very least a good electrical tape.
Would hate to see anything short curcuit

Would hate to see anything short curcuit
06-13-2006, 07:34 PM
#11
Tech Apprentice
Thread Starter
Nevermind on the temperature adjustable soldering iron...I just got a 35W today..
I covered my soldering places in electrical tape. Looks kinda bulgy .
.
I covered my soldering places in electrical tape. Looks kinda bulgy
.
06-13-2006, 09:09 PM
#12
Tech Master
iTrader: (6)
35w, that is small. did you tin all of your wires first? Really helps, and tin your connections as well. I would get an 80w if I were you, or adjustable like was said earlier, and keep the 35 for whne you have a lot of time to get your stuff soldered
06-13-2006, 09:27 PM
#13
Tech Apprentice
Thread Starter
I dont think I tined my wires...I don't know what that is .
Hm, the people at the local track said I should just for a smaller W for wires and 80W would be too much for wires.
. Hm, the people at the local track said I should just for a smaller W for wires and 80W would be too much for wires.
06-14-2006, 04:22 AM
#14
Originally Posted by Revox
I dont think I tined my wires...I don't know what that is .
Hm, the people at the local track said I should just for a smaller W for wires and 80W would be too much for wires.
. Hm, the people at the local track said I should just for a smaller W for wires and 80W would be too much for wires.
As for iron wattage.. I'm with the others in the 80w camp. You can solder very small wires with a high heat iron if you know what you're doing and get some practice at it.
06-14-2006, 08:02 AM
#15
Tech Apprentice
Thread Starter
Oh thats what tining is  . I accidentally tined my wires .
Thank you guys for all your great help.
. I accidentally tined my wires .Thank you guys for all your great help.
Currently Active Users Viewing This Thread: 1 (0 members and 1 guests)
