


 14Likes
Serpent 977 Viper

 05-03-2014, 10:08 AM
#542

 05-03-2014, 10:26 AM
#543
Can you confirm whether using the Novarossi cone will work with the serpent flywheel? My kit didn't have the cone. Just wondering whether I need to place an order.
Regards,
05-03-2014, 10:29 AM
#544
If not, was is your preferred method?
Thanks again!
05-04-2014, 12:00 PM
#547
Everything installed quite nice, however I wouldn't mind knowing what everyone's is using for shimming for the clutch gap and for end play. I am striving for 0.5 to 0.6mm clutch gap and approx 0.05 to 0.1mm end play, but depending on the methods that I use for measuring, I get different results, thus I have added 0.5mm in front of the thrust bearing to set proper clutch gap and 0.3mm behind the large bearing to set end play.
Does this sound about right for the vir-tus?
Appreciate!!
05-04-2014, 12:00 PM
#548
05-04-2014, 01:54 PM
#549
Perfect Thanks again Paulie!
Everything installed quite nice, however I wouldn't mind knowing what everyone's is using for shimming for the clutch gap and for end play. I am striving for 0.5 to 0.6mm clutch gap and approx 0.05 to 0.1mm end play, but depending on the methods that I use for measuring, I get different results, thus I have added 0.5mm in front of the thrust bearing to set proper clutch gap and 0.3mm behind the large bearing to set end play.
Does this sound about right for the vir-tus?
Appreciate!!
05-04-2014, 06:01 PM
#550
Appreciate!!
05-05-2014, 07:18 PM
#551
The holes in the aluminum part of the shock cap are there to allow the shock oil to bleed out as you screw it together. You want to drill a small hole in the plastic part of the shock cap only.
Get your hands on one of these. It makes life much easier.
Mugen Clutch Spacing Thickness Gauge
Perfect Thanks again Paulie!
Everything installed quite nice, however I wouldn't mind knowing what everyone's is using for shimming for the clutch gap and for end play. I am striving for 0.5 to 0.6mm clutch gap and approx 0.05 to 0.1mm end play, but depending on the methods that I use for measuring, I get different results, thus I have added 0.5mm in front of the thrust bearing to set proper clutch gap and 0.3mm behind the large bearing to set end play.
Does this sound about right for the vir-tus?
Appreciate!!
Everything installed quite nice, however I wouldn't mind knowing what everyone's is using for shimming for the clutch gap and for end play. I am striving for 0.5 to 0.6mm clutch gap and approx 0.05 to 0.1mm end play, but depending on the methods that I use for measuring, I get different results, thus I have added 0.5mm in front of the thrust bearing to set proper clutch gap and 0.3mm behind the large bearing to set end play.
Does this sound about right for the vir-tus?
Appreciate!!
Mugen Clutch Spacing Thickness Gauge
05-05-2014, 10:01 PM
#552
977WC!!
about halfway done
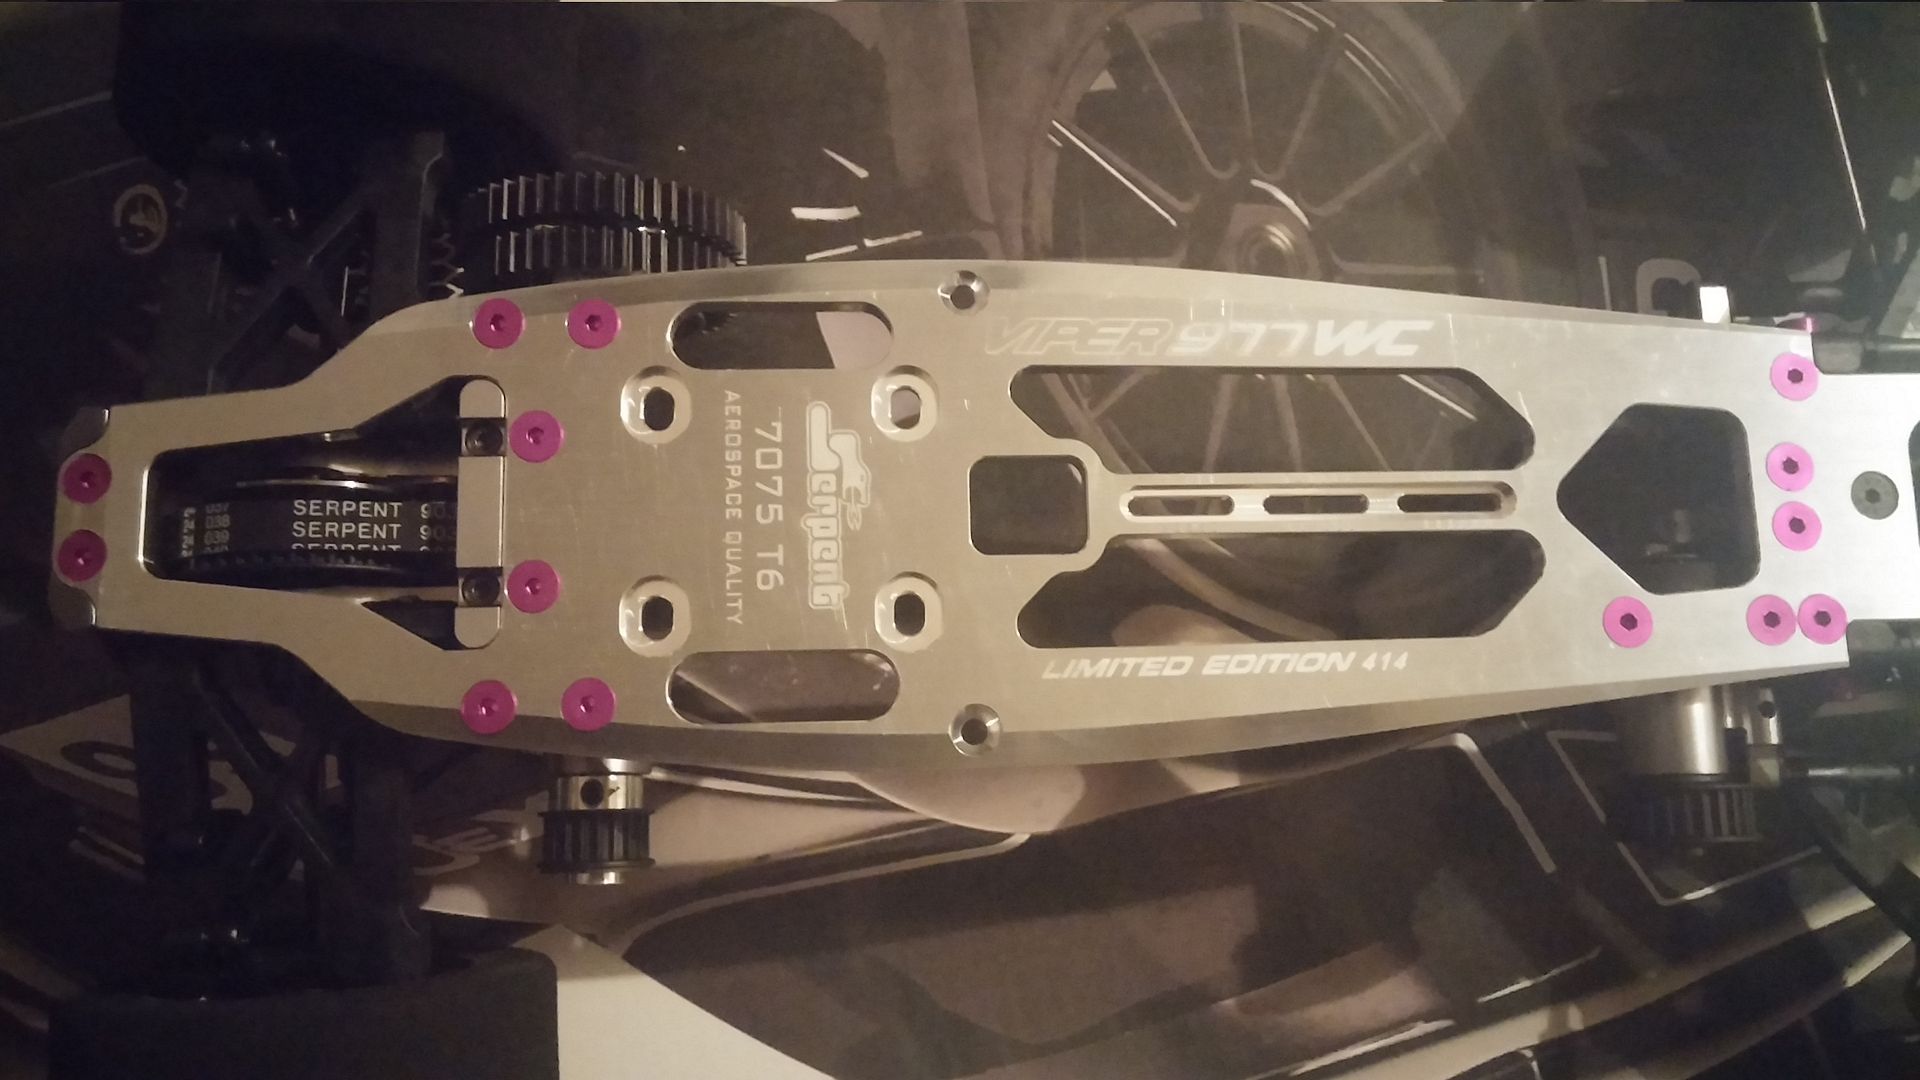
There seems to be quite a few differences between this kit and the normal version. I had some issues with the servo saver assembly, no matter what you do it would bind up with the provided hat spacer and you cannot tighten the 4mm flathead with any tension or it binds. the steering post is really short and barely goes into the upper bearing so when you put the provided spacer in it squeezes the bearings together.
The instructions say to use 4 shims behind the front hubs and 1 in front but when you do this the wheels will not lock in to place so I am going to have to play with the shims. Very nice kit assembly is good as is the quality of parts. My only gripe is the damn snap rings, going to have to go buy some snap ring pliers tomorrow!Shakedown run on wednseday.
about halfway done


There seems to be quite a few differences between this kit and the normal version. I had some issues with the servo saver assembly, no matter what you do it would bind up with the provided hat spacer and you cannot tighten the 4mm flathead with any tension or it binds. the steering post is really short and barely goes into the upper bearing so when you put the provided spacer in it squeezes the bearings together.
The instructions say to use 4 shims behind the front hubs and 1 in front but when you do this the wheels will not lock in to place so I am going to have to play with the shims. Very nice kit assembly is good as is the quality of parts. My only gripe is the damn snap rings, going to have to go buy some snap ring pliers tomorrow!Shakedown run on wednseday.
05-06-2014, 04:40 AM
#553
You'll love the car. It's awesome!
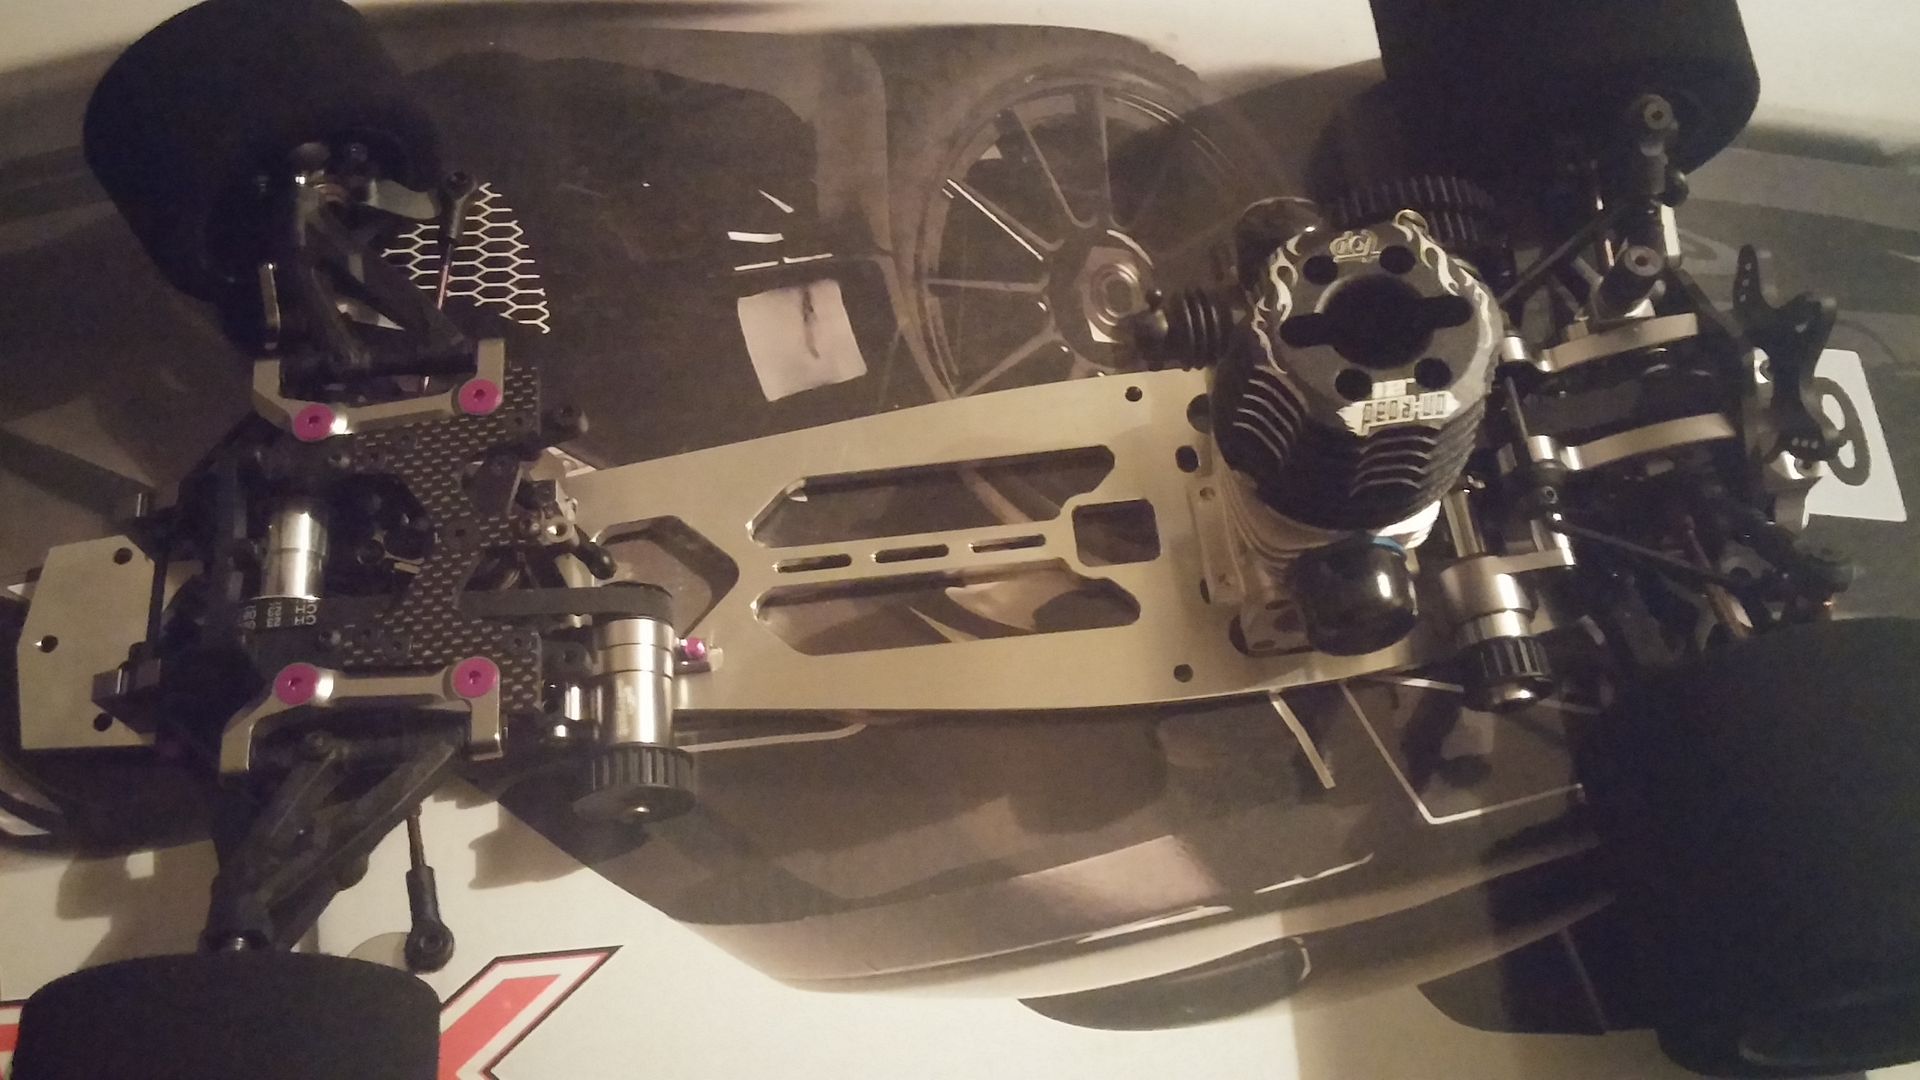
The heads look a little big on those chassis 4mm screws as the are sitting proud. Those screws should carry on down below the surface of the chassis and into a counterbore as per the stock steel screws. It'll be an issue trying to set up the car without the chassis bottom being totally flat.
The heads look a little big on those chassis 4mm screws as the are sitting proud. Those screws should carry on down below the surface of the chassis and into a counterbore as per the stock steel screws. It'll be an issue trying to set up the car without the chassis bottom being totally flat.
05-06-2014, 05:12 AM
#554
You'll love the car. It's awesome!
The heads look a little big on those chassis 4mm screws as the are sitting proud. Those screws should carry on down below the surface of the chassis and into a counterbore as per the stock steel screws. It'll be an issue trying to set up the car without the chassis bottom being totally flat.
The heads look a little big on those chassis 4mm screws as the are sitting proud. Those screws should carry on down below the surface of the chassis and into a counterbore as per the stock steel screws. It'll be an issue trying to set up the car without the chassis bottom being totally flat.
I noticed that too which is why i switched to the aluminum screws thinking that maybe the kit screws were not to spec but its the same. When rebuild time comes up I will countersink them deeper on my mill. Its only the ones towards the rear of the chassis, front ones are fine???
Last edited by MantisWorx; 05-06-2014 at 05:56 AM.
05-08-2014, 08:23 PM
#555
Just weighed my machine.
Ready to race, without body stiffeners and normal weight wheels and body and srg servos, weighing in at 2620g, yikes, heavy!
I an running all alu pulleys. I've seen others on this thread weighing in at approx 2460g. Can light weight wheels and body account for this large difference in weight?
Thanks!