Go Back  R/C Tech Forums > General Forums > Nitro Off-Road
HB Racing D819 Nitro Buggy >

HB Racing D819 Nitro Buggy

Community
Wiki Posts
Search
Like Tree120Likes

HB Racing D819 Nitro Buggy

Thread Tools
 
Search this Thread
 
Old 05-20-2019, 09:42 AM
  #151  
Tech Addict
iTrader: (5)
 
Big Will's Avatar
 
Join Date: May 2009
Location: San Antonio
Posts: 740
Trader Rating: 5 (100%+)
Default

How do we run emulsion on this car? Is there an o-ring? Or are we to cut the bladder?
Big Will is offline  
Old 05-20-2019, 06:53 PM
  #152  
Tech Addict
iTrader: (53)
 
Join Date: May 2010
Posts: 579
Trader Rating: 53 (100%+)
Default

Originally Posted by Big Will
How do we run emulsion on this car? Is there an o-ring? Or are we to cut the bladder?
Yes, just cut off the billow part and good to go.
GettinLapped is offline  
Old 06-07-2019, 02:20 AM
  #153  
Tech Apprentice
iTrader: (1)
 
Join Date: Sep 2004
Posts: 81
Trader Rating: 1 (100%+)
Default

Anybody running OS B2103 type R with the stock mount? Cracked my crankcase with the new mount.. Didnt have any problem using my b2102 and motor was fine mounted on diff buggy... just curious..
luihed is offline  
Old 06-07-2019, 06:59 AM
  #154  
Tech Master
iTrader: (22)
 
samuelsonmark71's Avatar
 
Join Date: Aug 2010
Posts: 1,476
Trader Rating: 22 (100%+)
Default

I prefer to just run the old mount
samuelsonmark71 is offline  
Old 06-07-2019, 10:34 PM
  #155  
Tech Apprentice
iTrader: (1)
 
Join Date: Sep 2004
Posts: 81
Trader Rating: 1 (100%+)
Default

Yes, using the old mount now..
Buggy is awesome, jumps way way better than my tki4 and best of all I can finish a 45min main...
luihed is offline  
Old 06-08-2019, 11:38 AM
  #156  
Tech Apprentice
 
Join Date: Jul 2012
Location: Belgrade
Posts: 76
Default

Have anyone tried MIP Bypass1 piston?
artur72 is offline  
Old 07-12-2019, 05:00 PM
  #157  
Tech Fanatic
iTrader: (2)
 
Join Date: Apr 2006
Location: Melb, AU
Posts: 934
Trader Rating: 2 (100%+)
Lightbulb

HB204565 D819 Arm Mount C (Wide)


HB204562 D819 Servo Saver Tube


D819 Editable Blank Setup Sheet

TRiN is offline  
Old 08-11-2019, 11:51 AM
  #158  
Tech Adept
iTrader: (2)
 
Join Date: Jun 2006
Posts: 209
Trader Rating: 2 (100%+)
Default

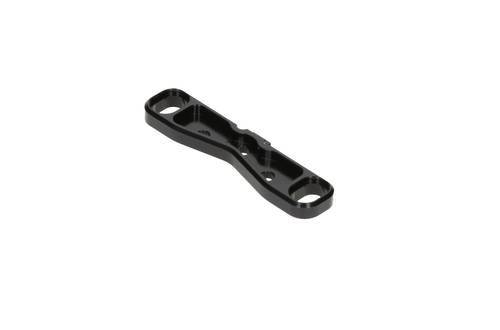
I'm switching over to the new Engine Mount and the Engine Mount Cams. I run the Mod 0.8 Gears. What Cams do I need to use with this setup to get the proper gear mesh?. I guess there are three types, so just trying to figure out which one works. Also, what's the proper orientation of the notch in the Cam as far as facing inward or outward on the chassis in order to accomplish the gear mesh?. Thanks in advance.
kaneye2 is offline  
Old 08-12-2019, 03:27 PM
  #159  
Tech Apprentice
 
TruggyStyle's Avatar
 
Join Date: Jun 2015
Location: Germany
Posts: 55
Default

I think there is no general Cam set for the same gearing every time. It depends on your Motor and the Crankshaft height.
Normally one position on the Cams is for new gears and the other one for broken in gears. In my case with a OS 21B AD it didn’t work. With stock 13/48 gearing I need the no.2 cams and not the no.1 of the kit. I bought all of them to get the best gearmash with every Engine and gearing.
TruggyStyle is offline  
Old 08-12-2019, 08:35 PM
  #160  
Tech Adept
iTrader: (2)
 
Join Date: Jun 2006
Posts: 209
Trader Rating: 2 (100%+)
Default

Originally Posted by TruggyStyle
I think there is no general Cam set for the same gearing every time. It depends on your Motor and the Crankshaft height.
Normally one position on the Cams is for new gears and the other one for broken in gears. In my case with a OS 21B AD it didn’t work. With stock 13/48 gearing I need the no.2 cams and not the no.1 of the kit. I bought all of them to get the best gearmash with every Engine and gearing.
Thank you for your input. I've tried all three Cam sets, and it feels as if the #3 Cam set is the one that works for me. The gear mesh feels a little tight and notchy, but I was told that if I run it this way for about two tanks it will eventually free up.

kaneye2 is offline  
Old 08-24-2019, 02:49 AM
  #161  
Tech Regular
iTrader: (1)
 
Join Date: Jun 2012
Posts: 287
Trader Rating: 1 (100%+)
Default

So -2mm chassis? Isn't that an 815 chassis?
brokenmoto is offline  
Old 08-26-2019, 12:26 PM
  #162  
Tech Initiate
 
Join Date: May 2015
Posts: 33
Default

Originally Posted by brokenmoto
So -2mm chassis? Isn't that an 815 chassis?
The current chassis is 4mm longer than the original 815 chassis so it will be 2mm longer.
brokenmoto likes this.
Dave.C is offline  
Old 08-28-2019, 04:24 PM
  #163  
Tech Addict
iTrader: (3)
 
Join Date: Sep 2013
Posts: 692
Trader Rating: 3 (100%+)
Default

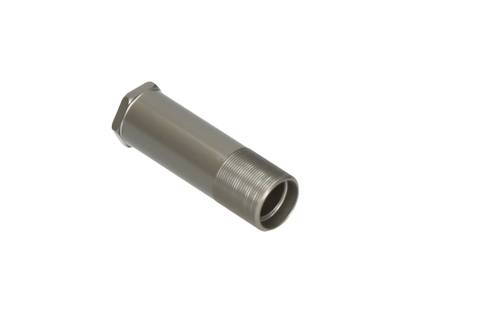
What is different about the 819 servo saver tube?
fbrk8r is offline  
Old 09-03-2019, 08:29 AM
  #164  
Tech Master
iTrader: (2)
 
omarwashington's Avatar
 
Join Date: Aug 2008
Location: Kenmore, WA
Posts: 1,102
Trader Rating: 2 (100%+)
Default

About those rear hub inserts manual says to have arrows pointing away from each other but I've seen other people's car have the arrows pointing The same directions. Kinda confused but ive built my rear hub inserts per manual.
omarwashington is offline  
Old 09-03-2019, 09:06 AM
  #165  
Tech Fanatic
iTrader: (16)
 
Join Date: Oct 2015
Location: Indiana
Posts: 790
Trader Rating: 16 (100%+)
Default

Originally Posted by omarwashington
About those rear hub inserts manual says to have arrows pointing away from each other but I've seen other people's car have the arrows pointing The same directions. Kinda confused but ive built my rear hub inserts per manual.

both pointing out equals no toe and wide wheel base
both point in equals no toe and narrow wheel base.

Front one pointing in and back one pointing out equals more toe in.

Front one pointing out and back one pointing in equals less toe in.
Flipnsticks is offline  


Contact Us - Archive - Advertising - Cookie Policy - Privacy Statement - Terms of Service -

Copyright © 2024 MH Sub I, LLC dba Internet Brands. All rights reserved. Use of this site indicates your consent to the Terms of Use.