


 3Likes
TRF101

 08-09-2013, 08:15 AM
#602
Tech Master
iTrader: (39)
The TRF101 is a great looking car. There is one thing that has bothered me since the inception of the v2.
Tamiya, if you are listening........Please provide an option part to center mount the center shock. It is disturbing to me that the car under shock compression is providing more load to the left side of the car than the right.
A simple carbon brace with a countersunk hole and shims would be easy enough to to.
08-09-2013, 09:28 AM
#603

The TRF101 is a great looking car. There is one thing that has bothered me since the inception of the v2.
Tamiya, if you are listening........Please provide an option part to center mount the center shock. It is disturbing to me that the car under shock compression is providing more load to the left side of the car than the right.
A simple carbon brace with a countersunk hole and shims would be easy enough to to.
Tamiya, if you are listening........Please provide an option part to center mount the center shock. It is disturbing to me that the car under shock compression is providing more load to the left side of the car than the right.
A simple carbon brace with a countersunk hole and shims would be easy enough to to.
08-13-2013, 01:37 PM
#605
Suspended
The TRF kit landed on my doorstep today 
Started the build - Only on step 13 so far, but its a nice build!
Im having lots of problems with trying to get the adjusters onto the turnbuckle shafts though
Started the build - Only on step 13 so far, but its a nice build!
Im having lots of problems with trying to get the adjusters onto the turnbuckle shafts though
08-13-2013, 03:42 PM
#606
Suspended
In fact, the hard time has turned into a nightmare. I can only get one of the grey adjusters onto each of the anodized turnbuckle shafts.
Anyone got any suggestions?
Anyone got any suggestions?
08-13-2013, 03:59 PM
#607
Perhaps you're attempting to thread all ball ends on by twisting every end clockwise. Being a turnbuckle, one ball end will thread onto the turnbuckle clockwise, the other anti-clockwise. I presume you know this but is the first thing that comes to mind, given you've got one end of each sorted.
08-13-2013, 04:00 PM
#608
08-14-2013, 03:02 AM
#609
Suspended
lol - I didnt know this. How daft do I feel??!
Will go back to it, See how it works now
Cheers guys!
Will go back to it, See how it works now
Cheers guys!
08-14-2013, 11:11 AM
#611
Suspended
Cheers!
Well, I'm all done and built. Still got a while to wait till I can actually drive it.
Just waiting on the funds to buy my Motor, Battery, Tyres and a body shell - Oh and a reciever. Time for me to start learning how to solder, So I can replace the SP Reventons motor and battery wire to better quality Black Wire.
Well, I'm all done and built. Still got a while to wait till I can actually drive it.
Just waiting on the funds to buy my Motor, Battery, Tyres and a body shell - Oh and a reciever
. Time for me to start learning how to solder, So I can replace the SP Reventons motor and battery wire to better quality Black Wire.
08-14-2013, 11:31 AM
#612
Suspended
Quick question for you guys. Im having some problems with these screws:
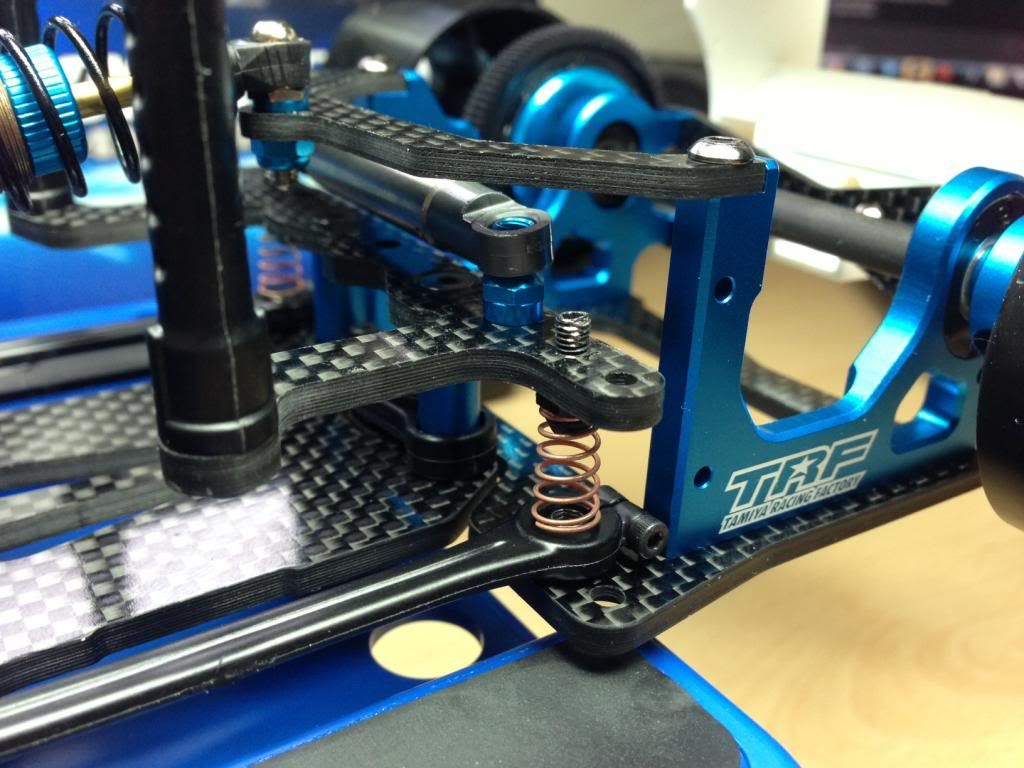
I cannot get them any lower. I have tried everything. I think I might have even rounded one of them off, Which is a real bummer. They were a real pain in the ass to get through the carbon. (Im talking about the grub screw attached to the spring)
Anybody got any advice?

I cannot get them any lower. I have tried everything. I think I might have even rounded one of them off, Which is a real bummer. They were a real pain in the ass to get through the carbon. (Im talking about the grub screw attached to the spring)
Anybody got any advice?
08-14-2013, 12:59 PM
#615
Suspended
@LloydLoar - Thanks - I will sort that out!