


 158Likes
Xpress Execute XM1S, Sport 4WD M-Chassis
 03-19-2019, 06:46 PM
#316
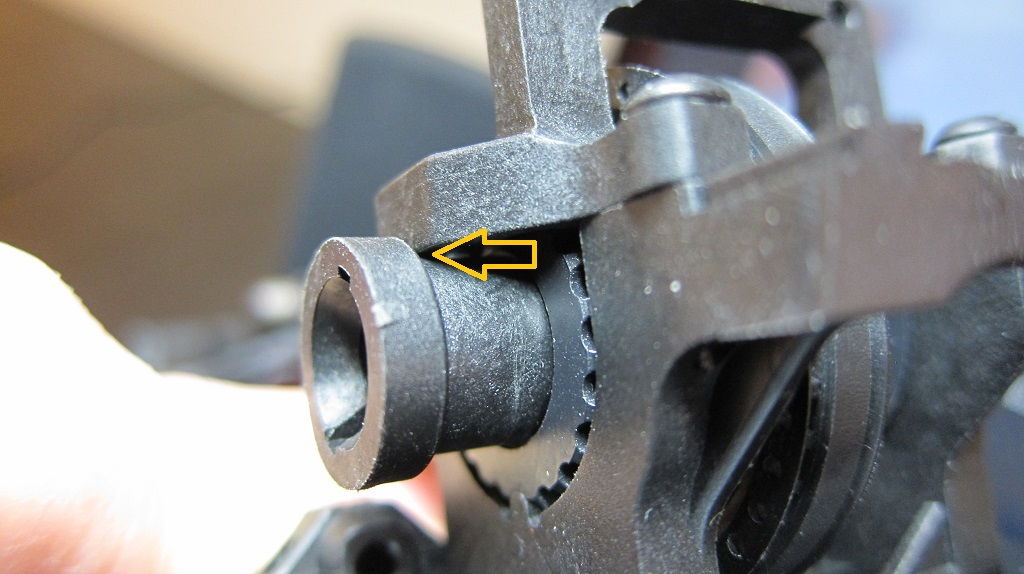
On the front, with the diff high, the outdrives hit the outside edge of the upper clamp. Just barely though. So, by chamfering the edge of the upper clamp slightly, you can run the diff high without any clearance issues. If the kit came with steel outdrives, which would be about the same size as the rears, there wouldn't be an issue at all.
Perhaps Bertolo can check with Xpress to see if this was meant to be an option on the diffs or if it's a minor design issue we run into with the plastic outdrives.
 03-19-2019, 06:56 PM
#317
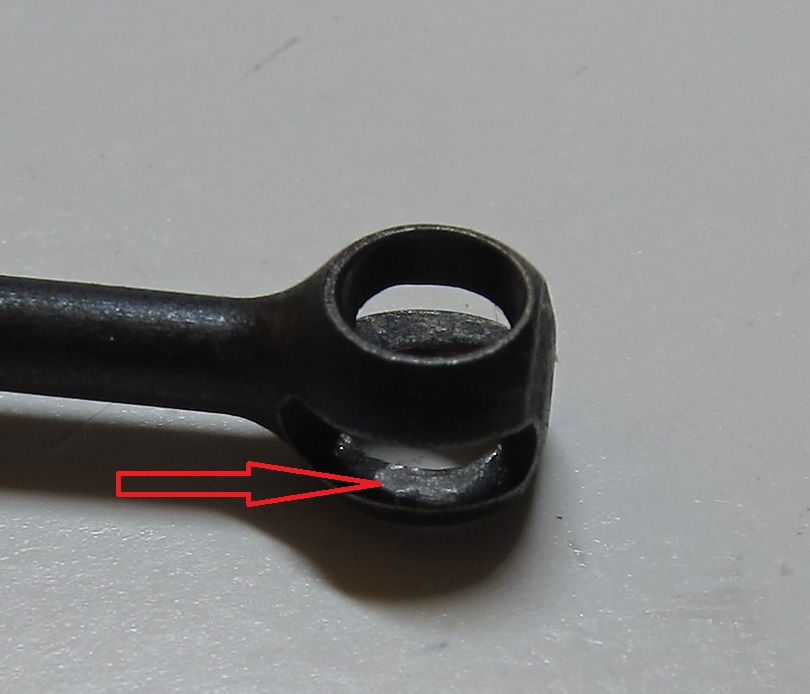
I ran into another small issue tonight as well. One universal shaft was badly bound up. Couldn't figure it out at first. Kept at it and discovered that there were several burrs on the inside of the dogbone. When the pin was moving across the slot, the assembly locked up. I filed down the burrs and all's well now. In the picture below, you can see the shiny burrs from my first few passes of the file. There were burrs on both sides of the dogbone.
Last edited by JC3; 03-19-2019 at 07:21 PM.
03-20-2019, 08:08 PM
#318
I ran into a small problem during my build. If you've already built your kit, you may want to check for this.
The front upper clamp, when tightened down, is rubbing on the driveshaft adapters (aka, the outdrives.) It caused quite a bit of binding in the drivetrain. To remedy the problem, I simply chamfered the outer edge of the upper clamp, just above the driveshaft adapters. This completely eliminated the problem and had no other negative effects on how the upper clamp fits.


The front upper clamp, when tightened down, is rubbing on the driveshaft adapters (aka, the outdrives.) It caused quite a bit of binding in the drivetrain. To remedy the problem, I simply chamfered the outer edge of the upper clamp, just above the driveshaft adapters. This completely eliminated the problem and had no other negative effects on how the upper clamp fits.
03-21-2019, 07:19 PM
#320
Update: It appears that I was wrong about the front swaybar. It will fit just fine with some minor adjustments. Please disregard my comments below and my photos as well. Regarding the front swaybar, I agree with what gigaplex recommends as a fix. That is, that lengthening the links and perhaps trimming the ballcups should work just fine.
------------------------
The XM1 front swaybar doesn't fit well with the composite outdrives. I think it's more honest to say that it simply does not fit the XM1S. I see that some of you have made it work by lengthening your links and/or trimming them. As far as I can tell, that would put the swaybar at a rather unusual angle from horizontal. While that certainly will work, I'm looking for alternatives.
To get the kit front swaybar to fit properly, you need the smaller steel front outdrives. As far as I can see, you'd have to buy an entire new front spool from the XM1 in order to use them. Bummer. Instead of that, I experimented with the swaybar from another car to see if I could get it to fit. As you can see below, I was able to bend it up and it fits pretty well. It keeps the links centered between the outdrives and c-hubs and keeps the swaybar at it's preferred horizontal position too. I'm kind of torn as to what to do. I'll see how much the XM1 spool is and if it's too pricey, I might just bend up another swaybar from scratch for an even better fit around the chunky composite outdrives.
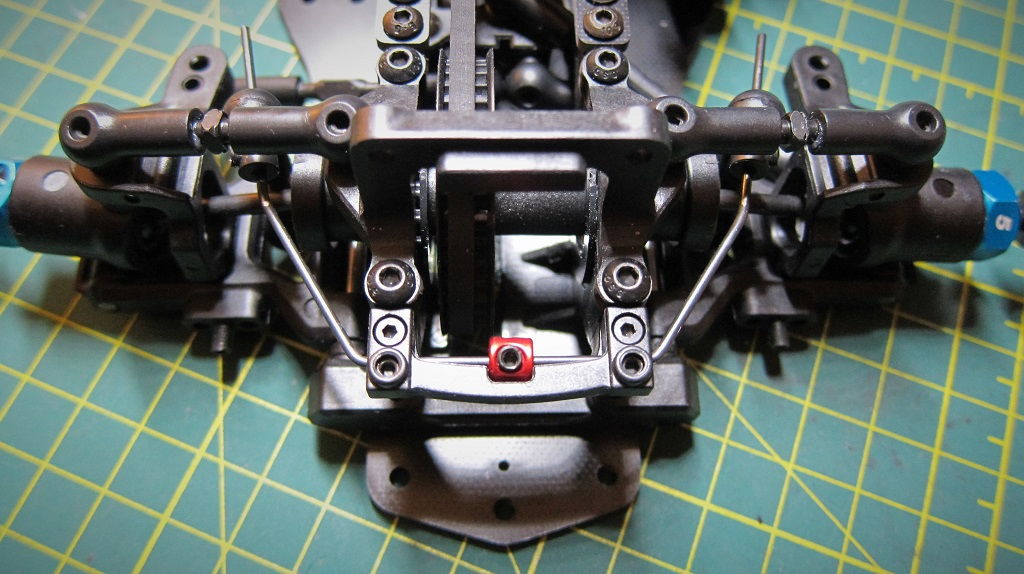
A bit long, but fits okay.
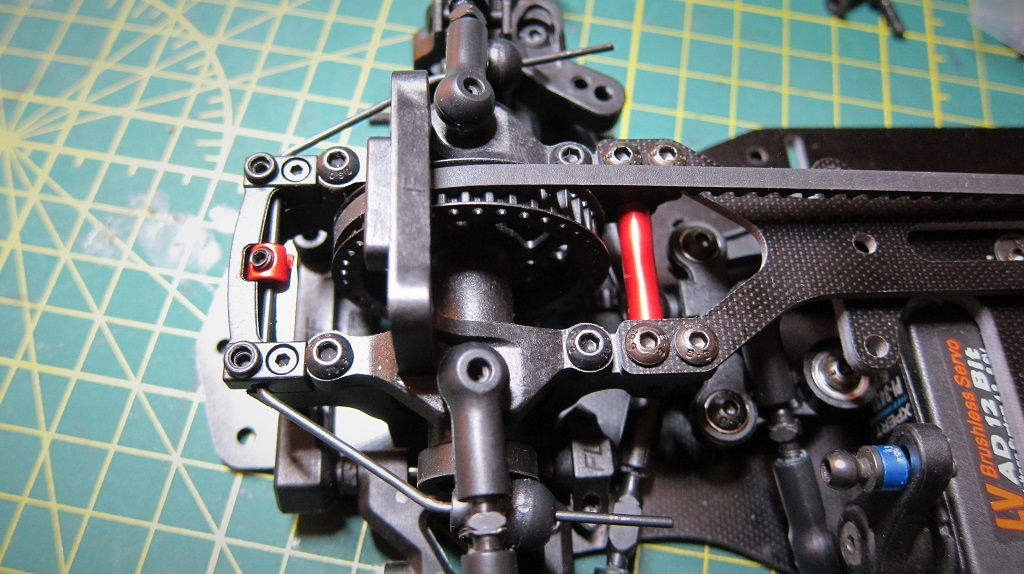
Experimenting with the bar ends on in reverse. Seems to work well, and keeps the links straight up and down.
------------------------
The XM1 front swaybar doesn't fit well with the composite outdrives. I think it's more honest to say that it simply does not fit the XM1S. I see that some of you have made it work by lengthening your links and/or trimming them. As far as I can tell, that would put the swaybar at a rather unusual angle from horizontal. While that certainly will work, I'm looking for alternatives.
To get the kit front swaybar to fit properly, you need the smaller steel front outdrives. As far as I can see, you'd have to buy an entire new front spool from the XM1 in order to use them. Bummer. Instead of that, I experimented with the swaybar from another car to see if I could get it to fit. As you can see below, I was able to bend it up and it fits pretty well. It keeps the links centered between the outdrives and c-hubs and keeps the swaybar at it's preferred horizontal position too. I'm kind of torn as to what to do. I'll see how much the XM1 spool is and if it's too pricey, I might just bend up another swaybar from scratch for an even better fit around the chunky composite outdrives.
A bit long, but fits okay.
Experimenting with the bar ends on in reverse. Seems to work well, and keeps the links straight up and down.
Last edited by JC3; 03-22-2019 at 03:36 PM. Reason: I was wrong!
03-24-2019, 04:56 AM
#321
Tech Initiate
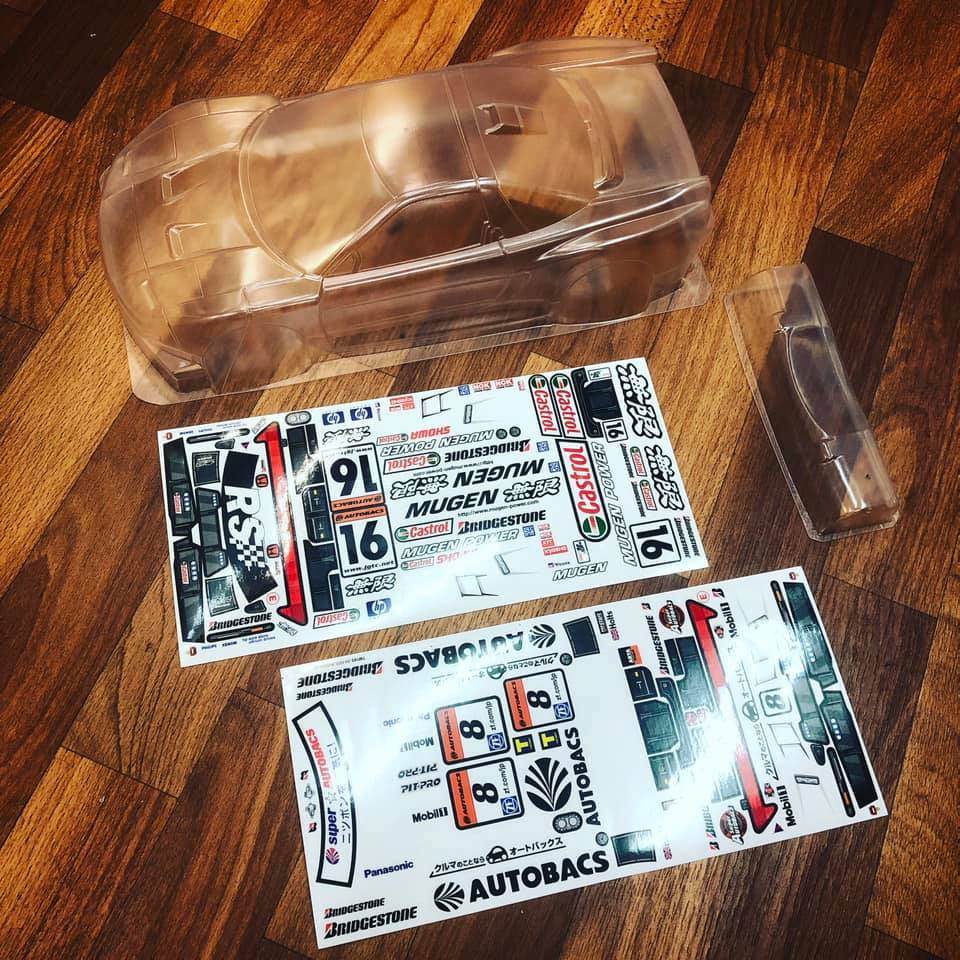
to those Honda fans here, this is for you. Team C 210mm body there aren't much info from their website. Best to contact Terry from RCTECHK on FB. they do ship worldwide.
03-30-2019, 10:23 AM
#322
Initial outing for the XM1S on carpet last night. The car is amazing and so much fun to drive and to play around with.
I'm running a 17.5 but it was simply too much power, even on our largish track. The 36R tires provided outstanding grip but it felt like too much. The car responded well to small adjustments. Still too much front grip.
Running 0 camber up front and 1 rear. 1 degree front toe out. 3.5 to 4 droop f/r. Ride height around 5. Kit diff oil.
Next thing to try will be a 25.5 motor, the 30X tires, and stiffer front springs.
03-31-2019, 12:07 AM
#323
Looks good! I haven't driven mines yet but got a 25.5 in mines. Might just be the right power for a tight indoor carpet track. I have an old set of Team powers 36R mini tires. I'll be gluing the front sidewalls. Even on asphalt, the tires had a bit too much front grip (only sauced rears.)
03-31-2019, 03:50 PM
#324
Great outing today for the XM1S.
I put the 25.5 in and while it is certainly more driveable than the 17.5, I think a 21.5 would be perfect. I'll try one soon. On black carpet, the Xpress 30X tires were far superior to the 36R's. The grip level was just right and I only had minor traction roll problems when I left the tire sauce on for too long.
I put softer springs in the rear and even moved the shocks all the way down on top. This really helped and as of now I intend to keep it this way. I did experiment with additional suspension settings but I think that the original settings from my previous post were just right. There is still a bit of push under power which I have to work on.
This is an impressive little kit.
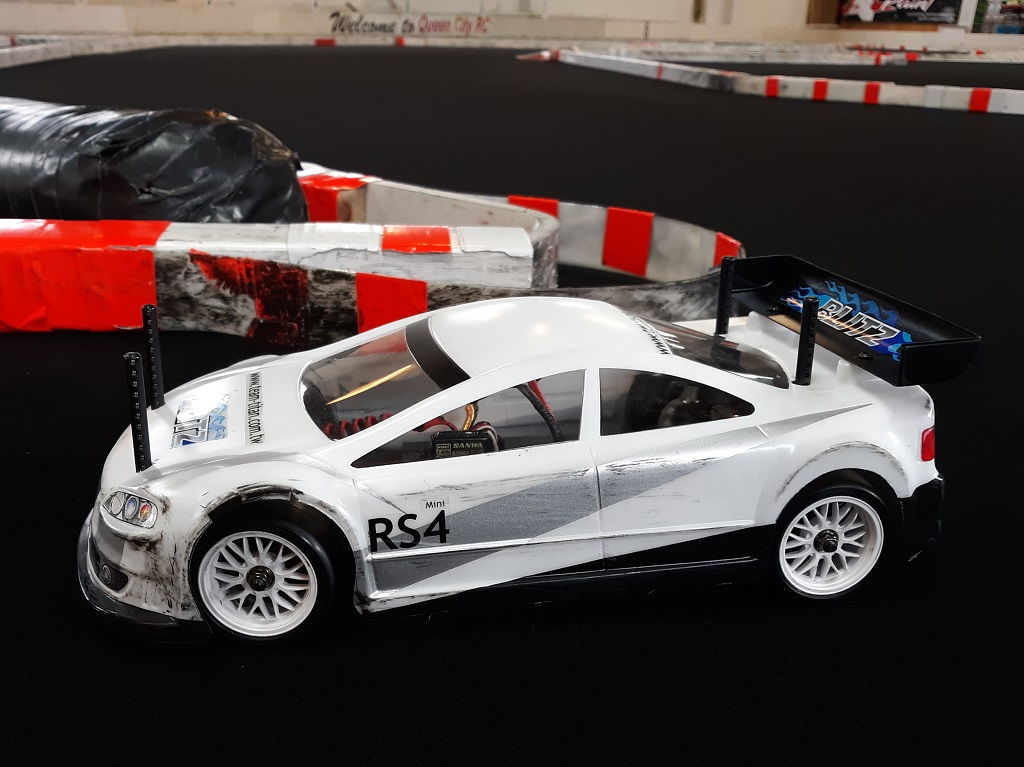
Getting beat up from practice laps.
I put the 25.5 in and while it is certainly more driveable than the 17.5, I think a 21.5 would be perfect. I'll try one soon. On black carpet, the Xpress 30X tires were far superior to the 36R's. The grip level was just right and I only had minor traction roll problems when I left the tire sauce on for too long.
I put softer springs in the rear and even moved the shocks all the way down on top. This really helped and as of now I intend to keep it this way. I did experiment with additional suspension settings but I think that the original settings from my previous post were just right. There is still a bit of push under power which I have to work on.
This is an impressive little kit.
Getting beat up from practice laps.
Last edited by JC3; 03-31-2019 at 07:45 PM. Reason: Put in a smaller photo.
03-31-2019, 07:13 PM
#325
Tech Master
I�ll bet those Mr. Clean magic eraser sponges will make that body look like new.
03-31-2019, 07:41 PM
#326
I need to work on getting that body to sit right. It's as far down as it will go in the rear and is resting on the shock tower. The front just doesn't want to go any lower either. Once I figure out which body works best, I can finally trim those mounts down.
04-01-2019, 01:48 AM
#328
Tech Elite

iTrader: (7)
Join Date: Jun 2002
Location: Melbourne, Australia. Home of rc-mini.net
Posts: 3,549
Trader Rating: 7 (100%+)
Hmm, that's an interesting idea. Might have to give that a try. I have the exterior sprayed with the Tamiya flat, so I wonder how that will affect use of the eraser. Thanks for the tip.
I need to work on getting that body to sit right. It's as far down as it will go in the rear and is resting on the shock tower. The front just doesn't want to go any lower either. Once I figure out which body works best, I can finally trim those mounts down.
I need to work on getting that body to sit right. It's as far down as it will go in the rear and is resting on the shock tower. The front just doesn't want to go any lower either. Once I figure out which body works best, I can finally trim those mounts down.
04-01-2019, 04:35 AM
#329
04-02-2019, 08:00 PM
#330
Tech Master
Hmm, that's an interesting idea. Might have to give that a try. I have the exterior sprayed with the Tamiya flat, so I wonder how that will affect use of the eraser. Thanks for the tip.
I need to work on getting that body to sit right. It's as far down as it will go in the rear and is resting on the shock tower. The front just doesn't want to go any lower either. Once I figure out which body works best, I can finally trim those mounts down.
I need to work on getting that body to sit right. It's as far down as it will go in the rear and is resting on the shock tower. The front just doesn't want to go any lower either. Once I figure out which body works best, I can finally trim those mounts down.