


 2421Likes
Tekno RC EB410 Thread

 05-13-2019, 06:33 AM - Wikipost
|
|||
|
|||


 10-27-2018, 12:53 PM
#4801

 you just have to be okay with spending the money initially.
 10-27-2018, 09:32 PM
#4802
So I am up to the rear shocks on my new build of my first eb410. As mentioned before, I had a ball stud with defective threads. Now I found another issue with my kit. The spur gear has teeth that are not fully formed in certain areas around the circumference. 85% of the teeth look fine, but about every 20 teeth or so there are a few which are about half the normal height. It looks similar to a flat spot created by a pinion that spun on it, but the teeth are not flattened, they are just shorter than the rest. I haven't even finished building the car yet, and it looks like I will be making a second run to my local hobby shop for parts to replace the new/defective ones in my kit. Has anybody else received Spur Gears/Center diff covers which were defective? I will post a couple pictures tomorrow. This is frustrating. And yes, this is a brand new kit bought from it legitimate dealer, Factory sealed.
10-28-2018, 07:45 AM
#4803
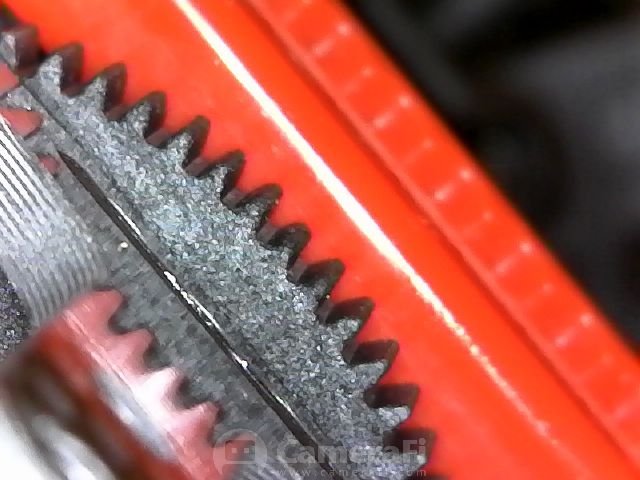
You can see well-formed teeth to the right, short ones front and center.
10-28-2018, 07:47 AM
#4804
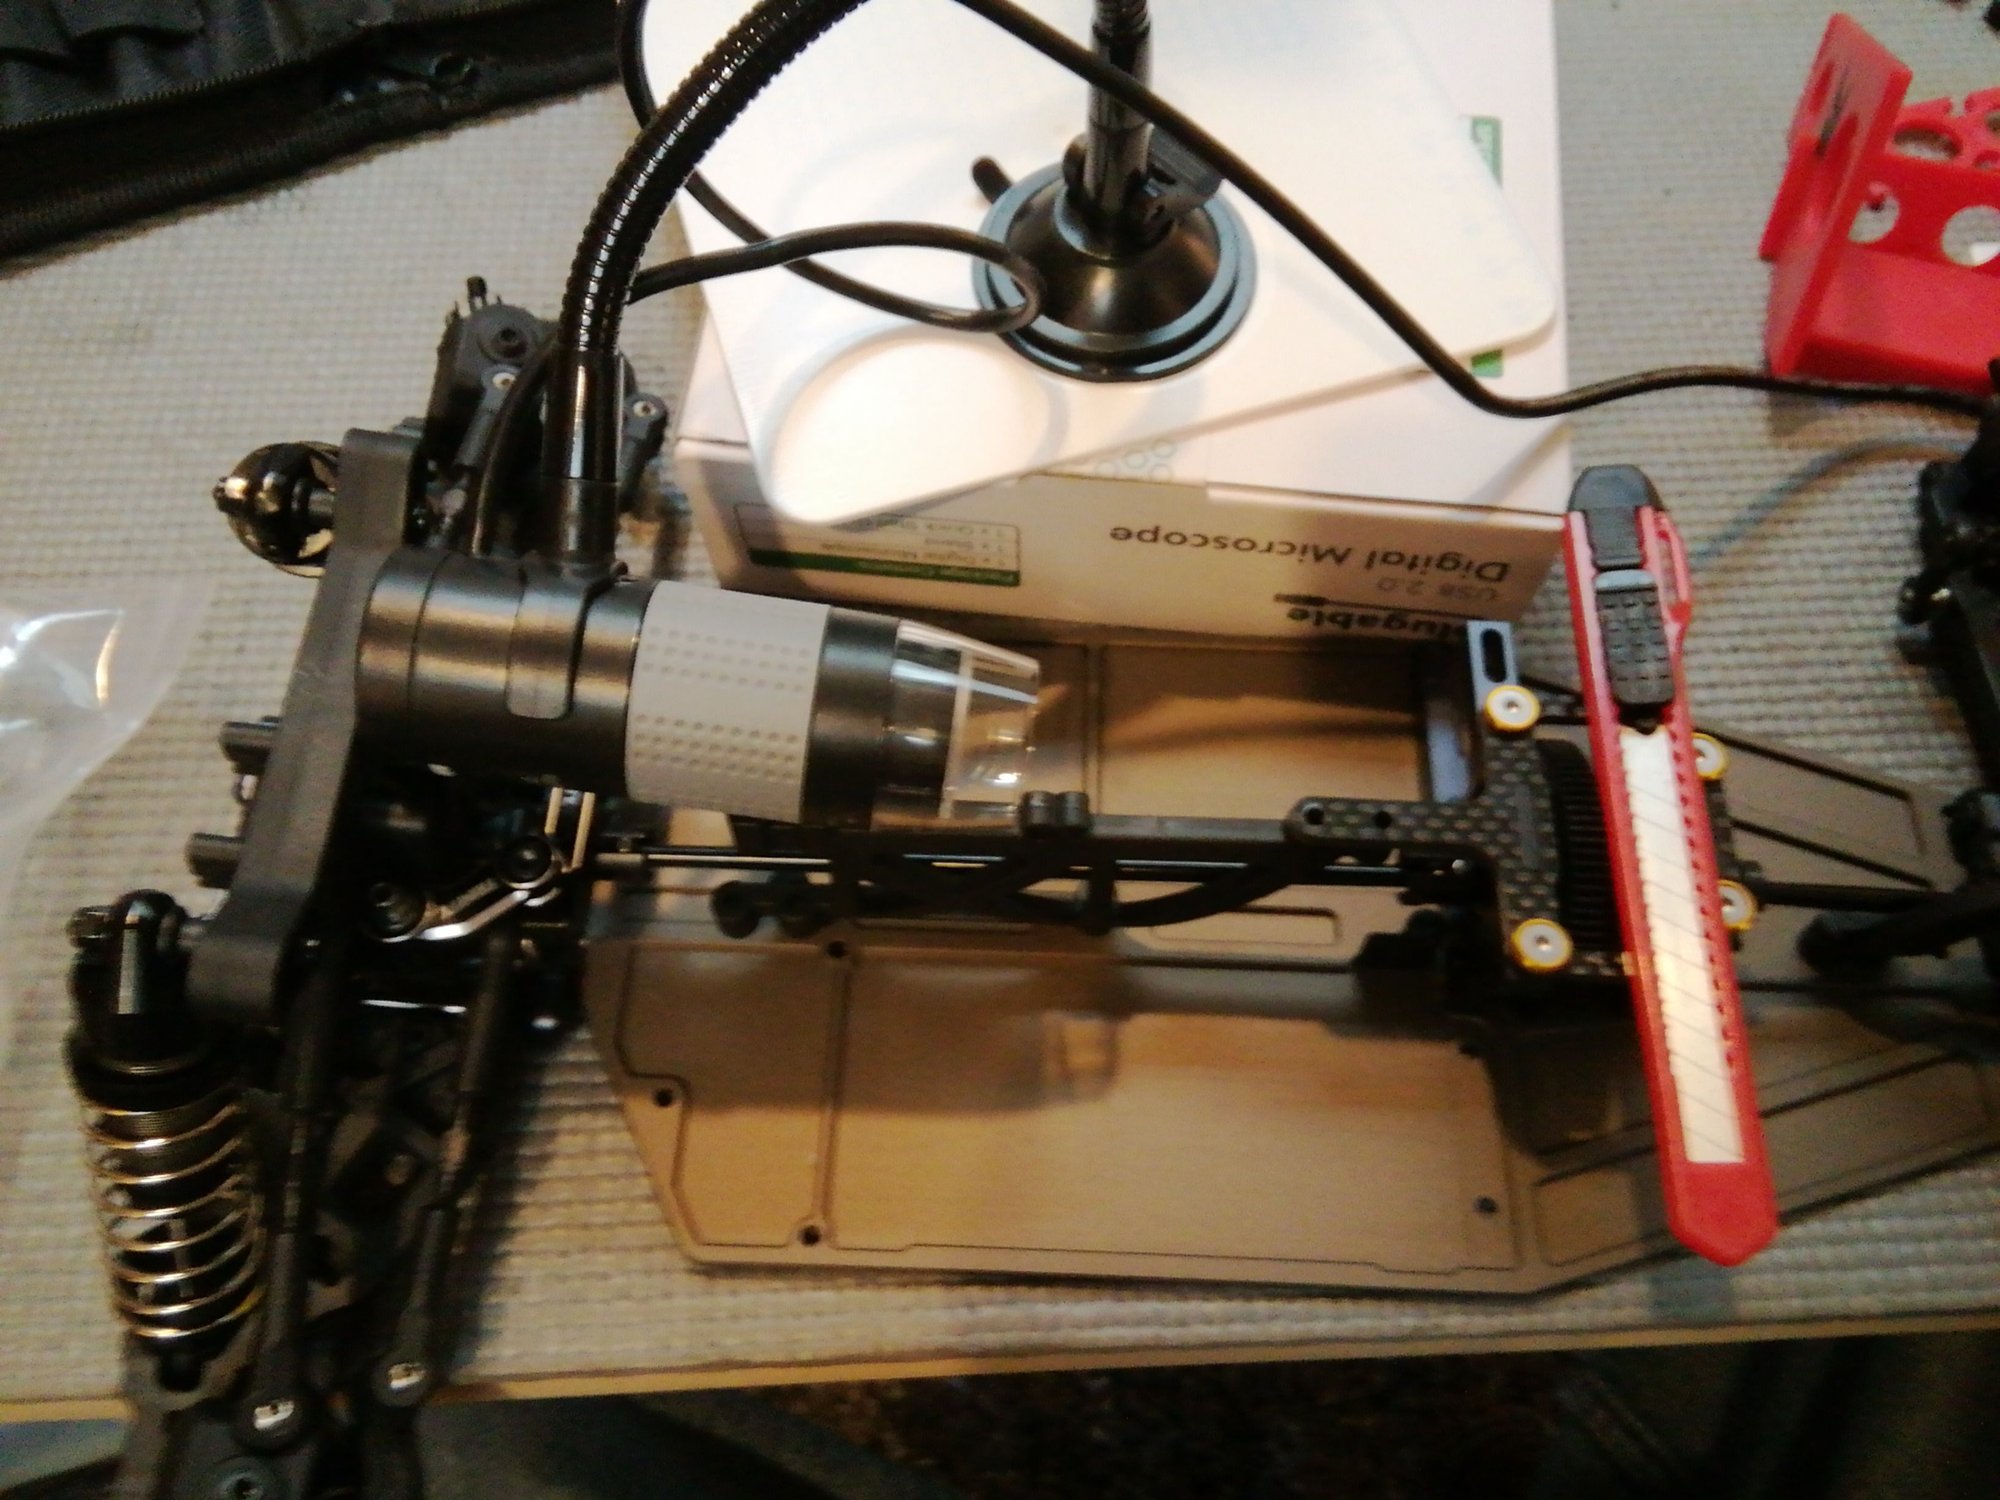
How I took the photo, FYI.
10-28-2018, 09:41 AM
#4805
Tbh yours is the first I've seen that defective. I have several spare spurs some NIP some used and all of them look good. It is normal for there to be high spots but yours is clearly a little more than just a high spot. I'm sure tekno will help you out especially now that you documented it with images.
10-29-2018, 04:37 AM
#4806
I had a issue with a new part on my tekno. I went to there website and contacted them with a description and pictures of the item plus my invoice. In about 3 days I had my new item at my door, great customer service.
10-29-2018, 04:23 PM
#4808
10-30-2018, 12:33 PM
#4812
https://arndtcraft.com/collections/k...n-shroud-mount
Arndtcraft's mount is one of the best out there, if not the best, and is designed to clear the JConcepts body as well.
Arndtcraft's mount is one of the best out there, if not the best, and is designed to clear the JConcepts body as well.
11-04-2018, 07:12 PM
#4814
Tried composite diff gears for the last few weeks...
The rear diff let go yesterday (stripped the <sun gear?> on one side).... Had a heads up from a couple of fellow racers that they had problems with theirs and had gone back to metal gears... did I listen??
Needless to say I removed the composites in all 3 diffs and put the steel gears back in....

The rear diff let go yesterday (stripped the <sun gear?> on one side).... Had a heads up from a couple of fellow racers that they had problems with theirs and had gone back to metal gears... did I listen??
Needless to say I removed the composites in all 3 diffs and put the steel gears back in....
11-04-2018, 09:48 PM
#4815
Tried composite diff gears for the last few weeks...
The rear diff let go yesterday (stripped the <sun gear?> on one side).... Had a heads up from a couple of fellow racers that they had problems with theirs and had gone back to metal gears... did I listen??
Needless to say I removed the composites in all 3 diffs and put the steel gears back in....
The rear diff let go yesterday (stripped the <sun gear?> on one side).... Had a heads up from a couple of fellow racers that they had problems with theirs and had gone back to metal gears... did I listen??
Needless to say I removed the composites in all 3 diffs and put the steel gears back in....
