


 2421Likes
Tekno RC EB410 Thread

 05-13-2019, 06:33 AM - Wikipost
|
|||
|
|||


 02-09-2018, 01:08 PM
#3631
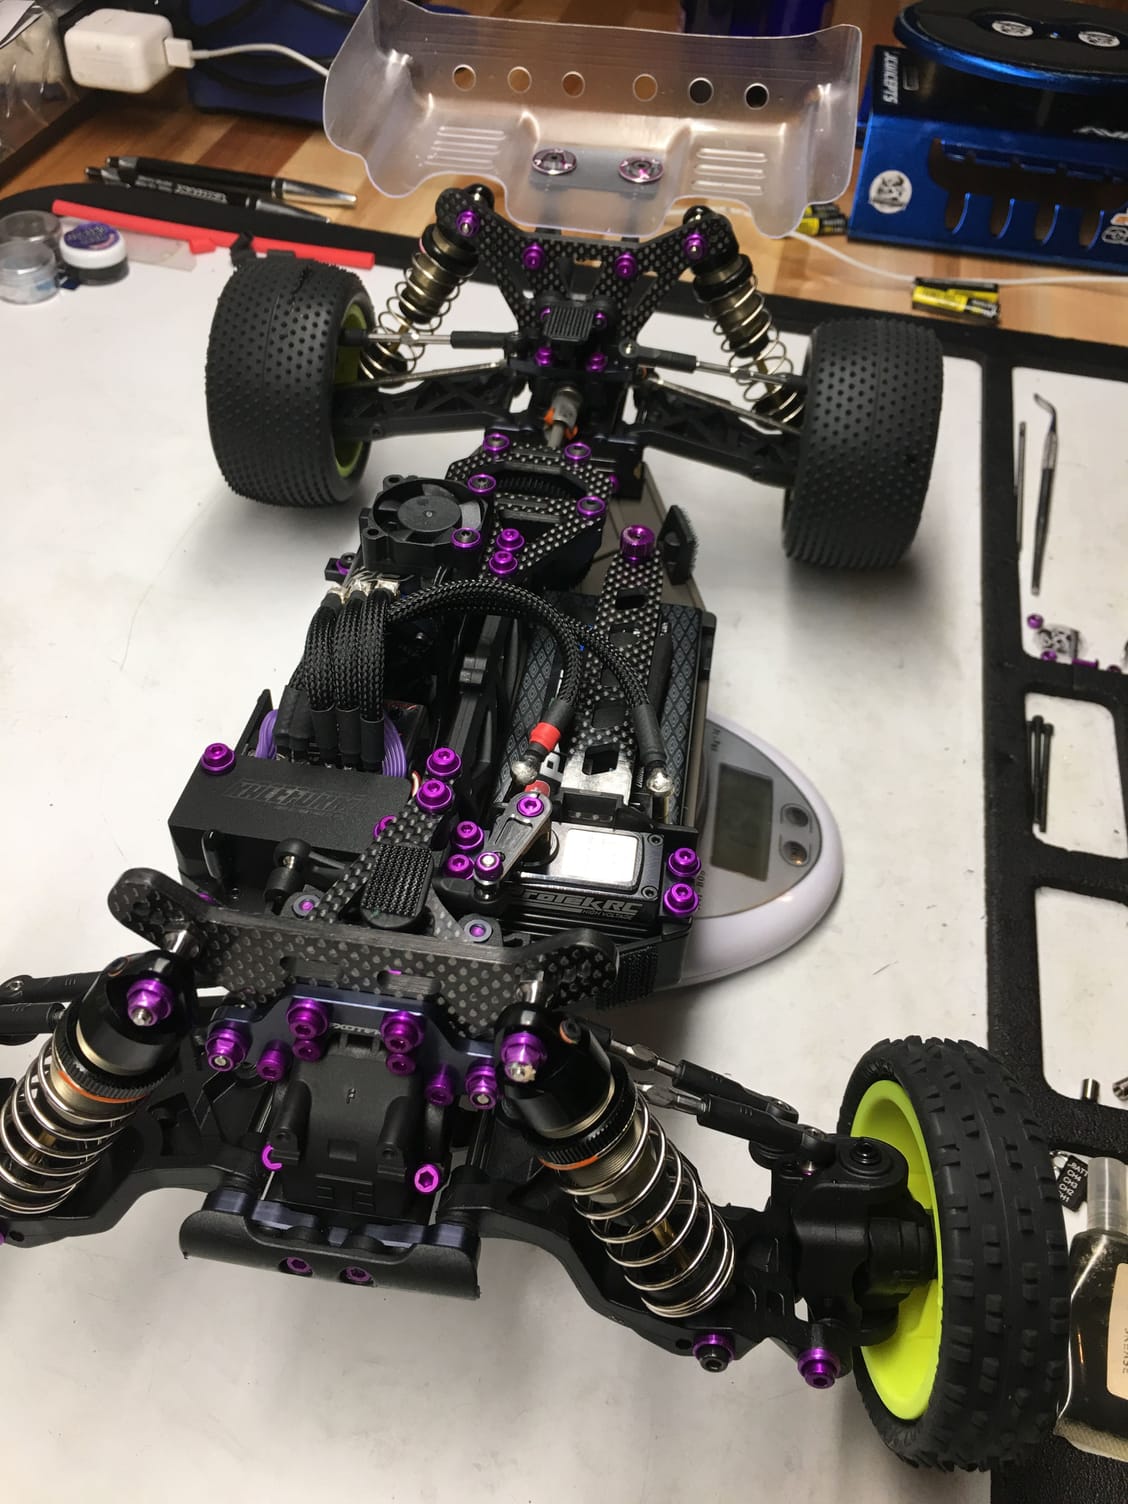
Here's one with a custom swaybar on back and the shocks up front.
https://www.facebook.com/CJ4RC/photo...&theater&ifg=1
https://www.facebook.com/CJ4RC/photo...&theater&ifg=1
 02-09-2018, 01:28 PM
#3632
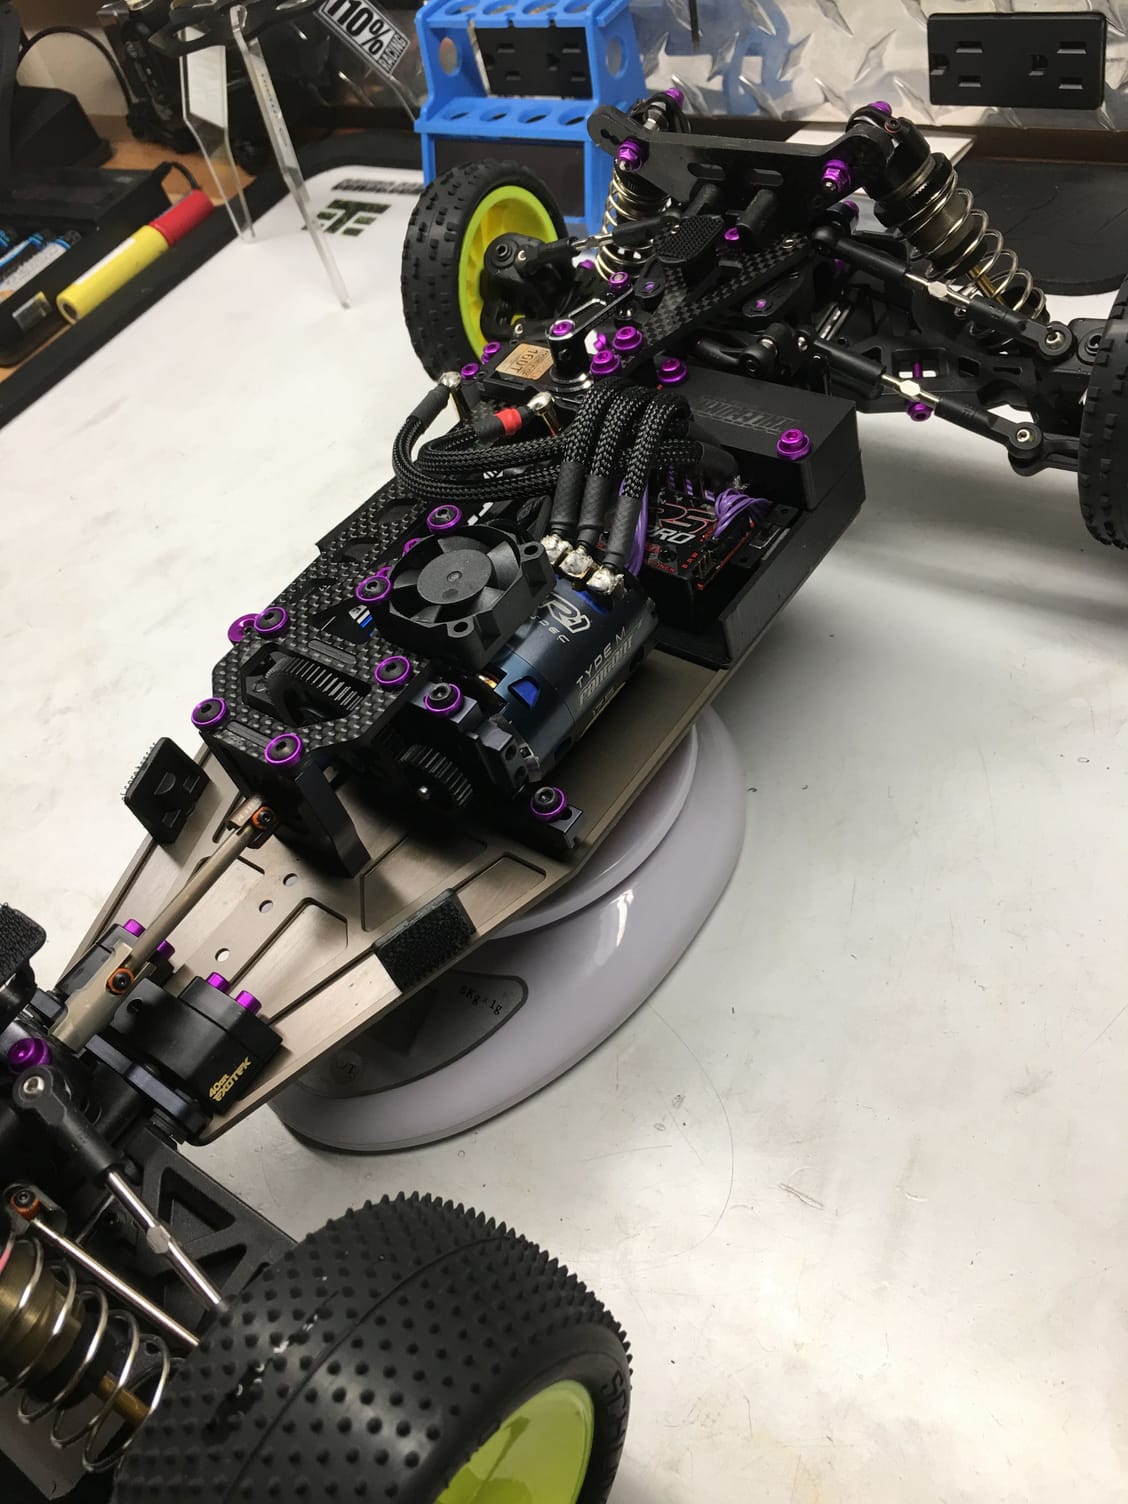
I know not actually a Tekno but our B64 conversion car mimic's the EB and we have guys running rear shocks both ways. On my own car I run them on the rear side for carpet. According to Xray its a tuning thing - forward for high bite, rearward for low bite. I also put the weight out back thinking it will help the pitch of the car when air born, makes it jump more like a 2wd.
Guys running them in front like a stock B64 seem to over rotate for my liking, it gives them a slight stall when exiting corners. They tend to run more rear toe then me to counter it. I took my rear toe out to 2* with rearward shocks and seems to bite and drive off the corners much better. Actually rotates much smoother then theirs I think.
Maybe changeable arms from Tekno could be a good tuning option but maybe these guys are feeling too much traction on high bite tracks with the stock setup? Rearward is adding rear traction but they may need to loosen it up since the track has bite? Just thinking out loud.
02-09-2018, 01:46 PM
#3633
Tech Master
iTrader: (35)
I know not actually a Tekno but our B64 conversion car mimic's the EB and we have guys running rear shocks both ways. On my own car I run them on the rear side for carpet. According to Xray its a tuning thing - forward for high bite, rearward for low bite. I also put the weight out back thinking it will help the pitch of the car when air born, makes it jump more like a 2wd.
Guys running them in front like a stock B64 seem to over rotate for my liking, it gives them a slight stall when exiting corners. They tend to run more rear toe then me to counter it. I took my rear toe out to 2* with rearward shocks and seems to bite and drive off the corners much better. Actually rotates much smoother then theirs I think.
Maybe changeable arms from Tekno could be a good tuning option but maybe these guys are feeling too much traction on high bite tracks with the stock setup? Rearward is adding rear traction but they may need to loosen it up since the track has bite? Just thinking out loud.
Guys running them in front like a stock B64 seem to over rotate for my liking, it gives them a slight stall when exiting corners. They tend to run more rear toe then me to counter it. I took my rear toe out to 2* with rearward shocks and seems to bite and drive off the corners much better. Actually rotates much smoother then theirs I think.
Maybe changeable arms from Tekno could be a good tuning option but maybe these guys are feeling too much traction on high bite tracks with the stock setup? Rearward is adding rear traction but they may need to loosen it up since the track has bite? Just thinking out loud.
Back to the subject at hand. Thanks for the out-loud thinking by the way I was curious as what the benefits were for moving the shocks forward.
02-09-2018, 07:28 PM
#3634
Tech Initiate
EbbTide, that’s awesome about your carrier bag man. Looking forward to when they are back in stock
02-09-2018, 08:28 PM
#3635
Tech Regular
iTrader: (6)
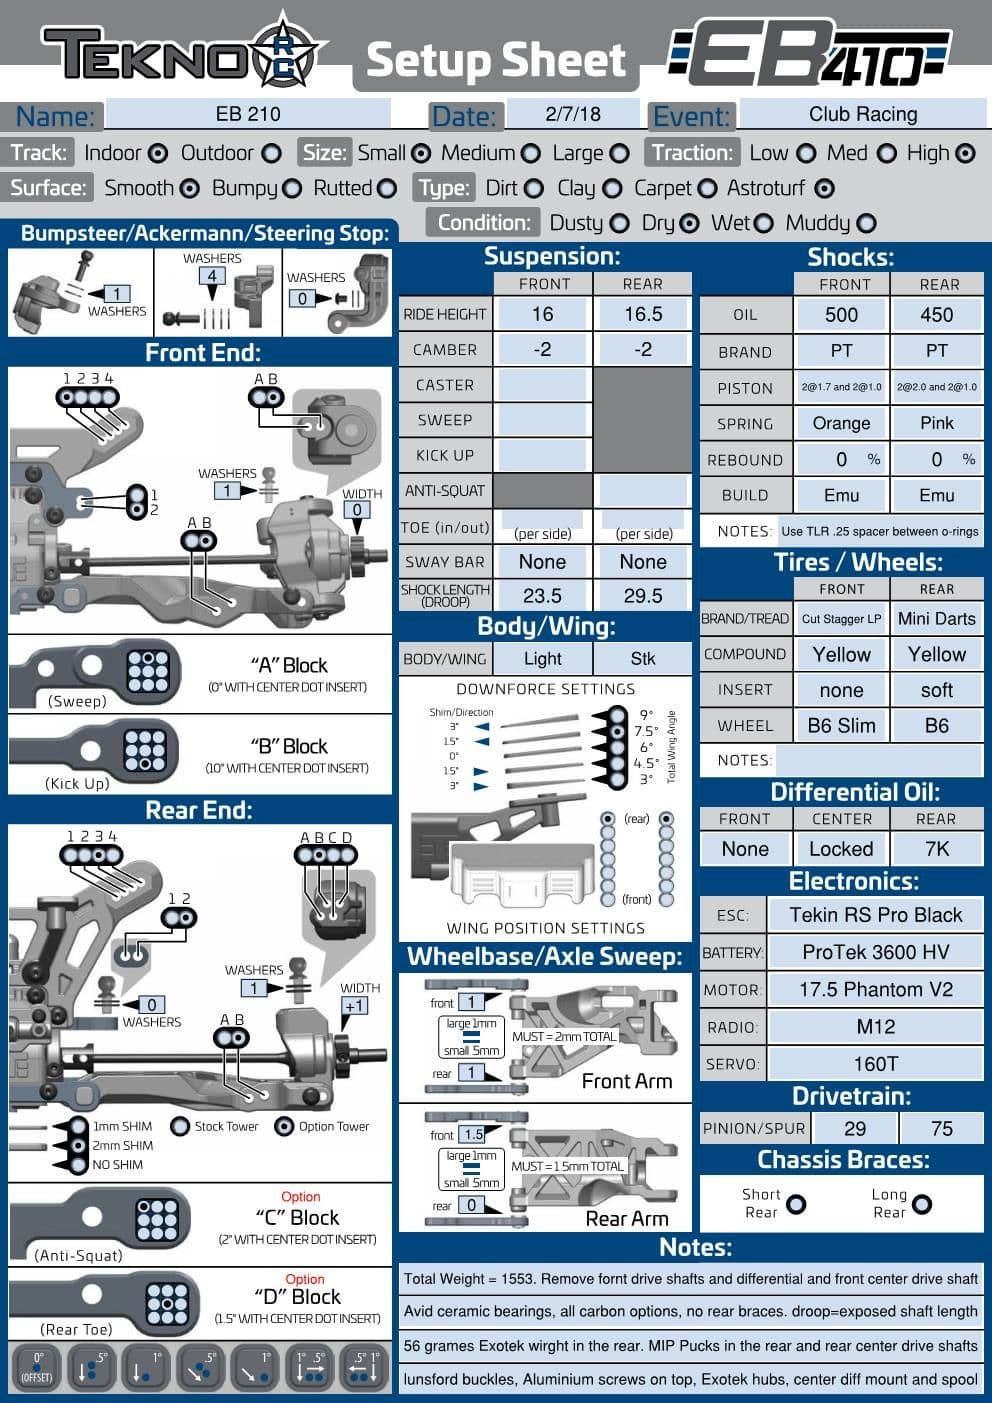
This setup should do well on tight tracks. It rotates very predictably on power. Did you do everything? Washers on the arms, long front link, etc? You should be able to turn up the dual rate as well. Check your EPAs, something doesn’t sound right.
02-09-2018, 10:19 PM
#3636
I like to reference peoples setups, but rarely take them precisely.
Im also a madden junkie and watch people play the slider game, but always, their suggestion almost always sucks for how i like to do it.
02-10-2018, 12:25 AM
#3637
has anyone ran this car outdoors on medium bite dusty tracks? Is there any good starting set ups for this?
Also what gearing are people running with a 5.5t?
Also what gearing are people running with a 5.5t?
02-10-2018, 06:41 AM
#3638
Tech Adept

 02-10-2018, 02:28 PM
#3641
Tech Initiate
Snap, what did you hit?
 02-11-2018, 12:32 AM
#3644
Tech Adept
02-11-2018, 02:36 AM
#3645
Tech Initiate
What is the benefit of this spool? I was just checking them.