


My new Xray XT8 "brushless"
 02-18-2016, 12:53 PM
#1
Tech Elite

Thread Starter
Blah blah blah...
Got this second hand for cheap (100€).
-She's almost like new. No signs of wear on the central CVD pin's...
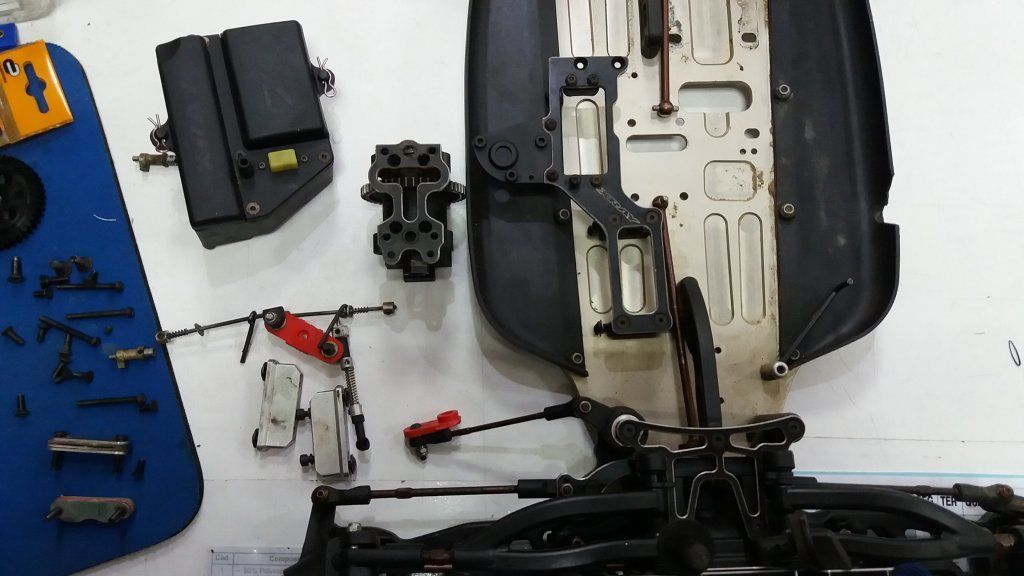
-First thing was removing the nitro stuff.
I am going to try to cheap it as cheap as possible, beside the eletrics.
I have some motor mounts from other rc's, some receivers boxs, from this to, and batery trays from laptops transformers. No money will be involved until eletrics come in!
Can it be done?
Got this second hand for cheap (100€).
-She's almost like new. No signs of wear on the central CVD pin's...
-First thing was removing the nitro stuff.
I am going to try to cheap it as cheap as possible, beside the eletrics.
I have some motor mounts from other rc's, some receivers boxs, from this to, and batery trays from laptops transformers. No money will be involved until eletrics come in!
Can it be done?
 02-18-2016, 01:51 PM
#2
you are not alone my friend !
I did the exact same move as you
yours will probably look better, but I have so much fun on 6s with this thing made from aluminium plates from the hardware store !
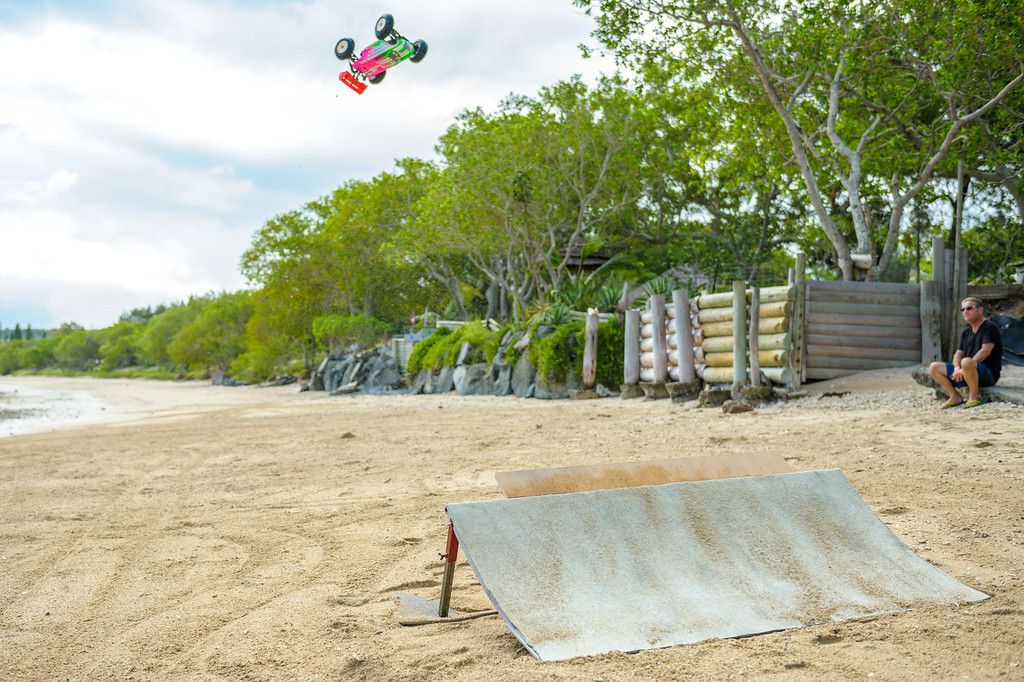
my xt8 landed double backflips and frontflips and holds a very good thank to metallic plates to help the front arms.
I did the exact same move as you
yours will probably look better, but I have so much fun on 6s with this thing made from aluminium plates from the hardware store !
my xt8 landed double backflips and frontflips and holds a very good thank to metallic plates to help the front arms.

 02-18-2016, 02:16 PM
#4
 02-19-2016, 01:35 AM
#5
Tech Elite
Thread Starter
I prefer women. But thanks for the tip.And for a decade i have only interest in one women, my wife! 
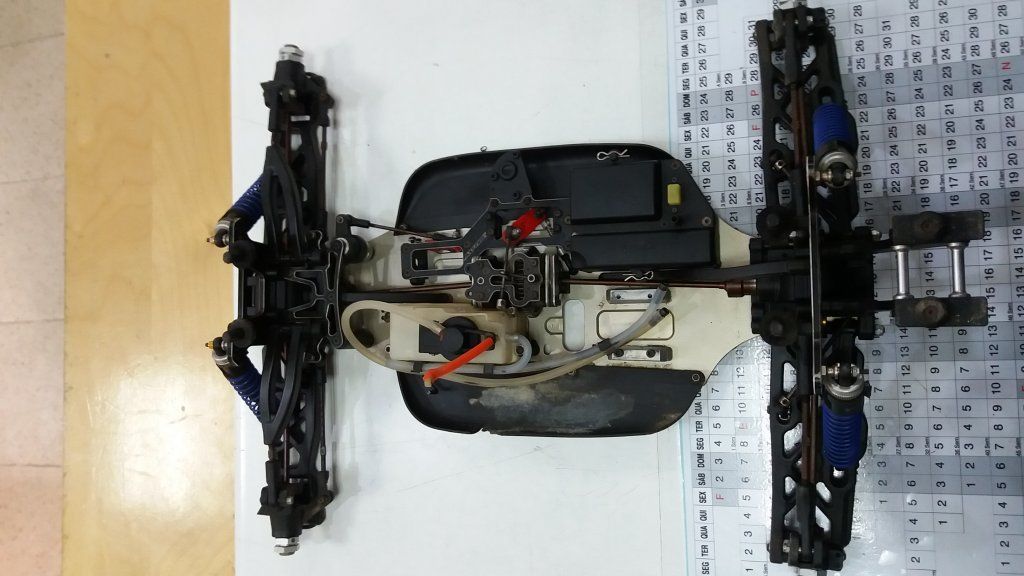
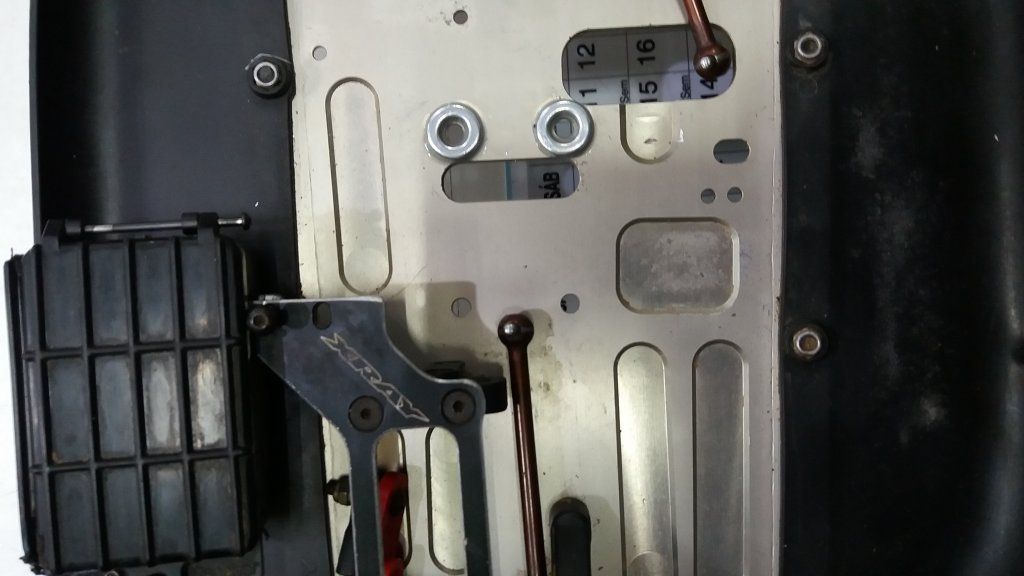
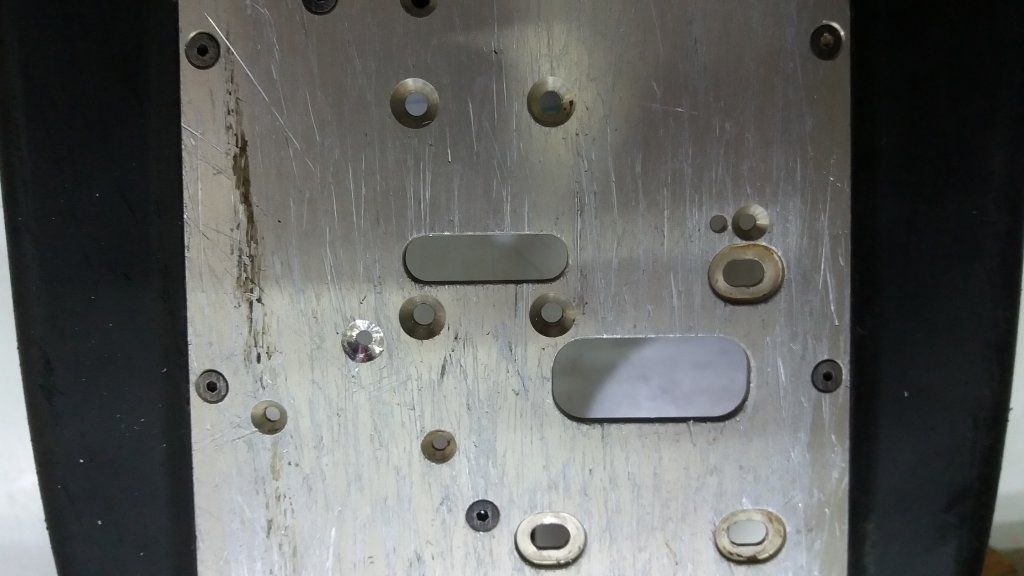
-Been looking at my spare motor mounts...and i think the MP9e motor mounts fits... :P
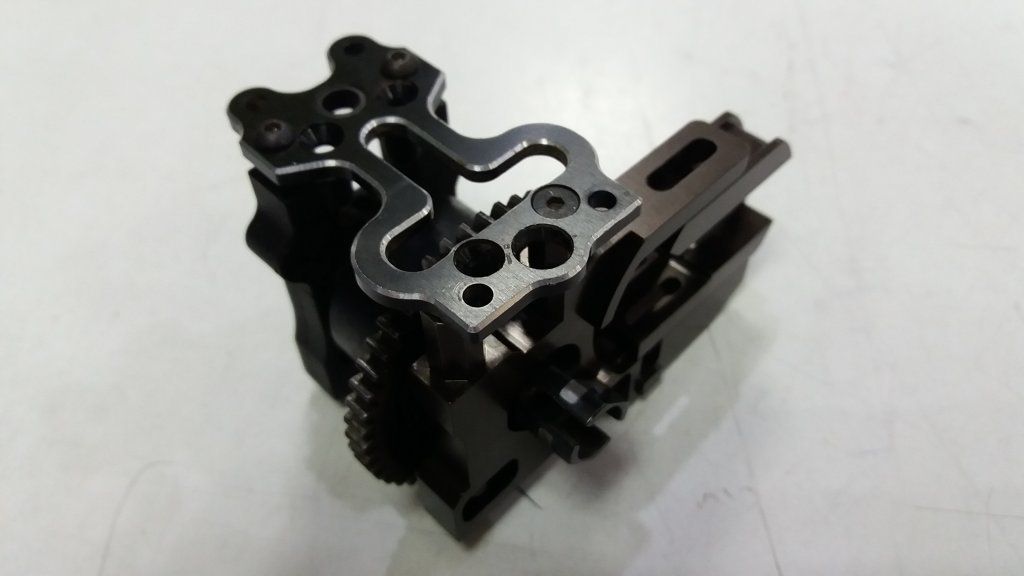
-You know what? It fits... with some little spacers and washers!
-Pic shows that... :P
Also need to find now space for the receiver box:
-Cut the dam servos holder...

-And now i might think a receiver box from the MP9 nitro stuff, will work with some mods...
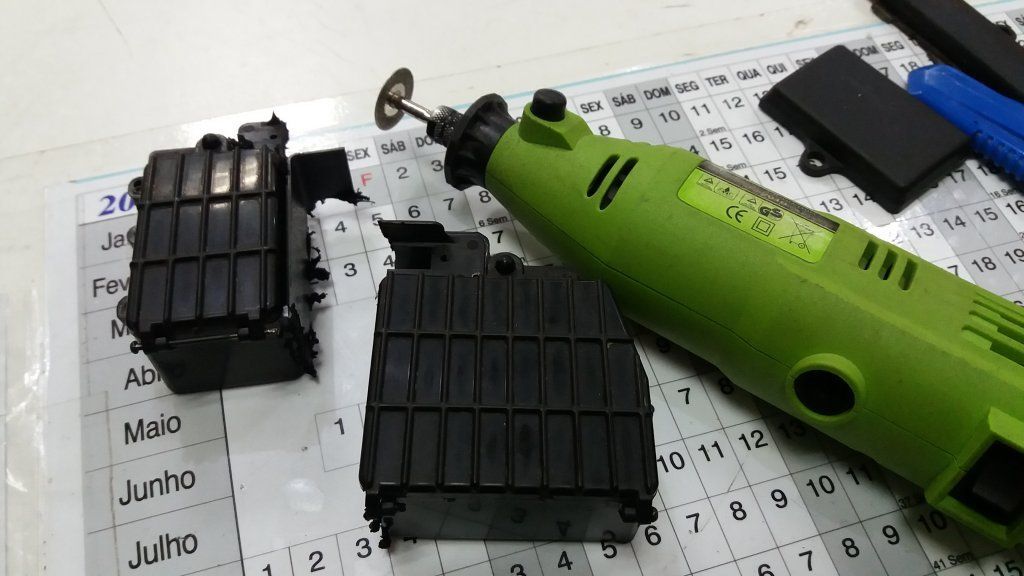
-First cut it to fit... No need for the receiver batery box!
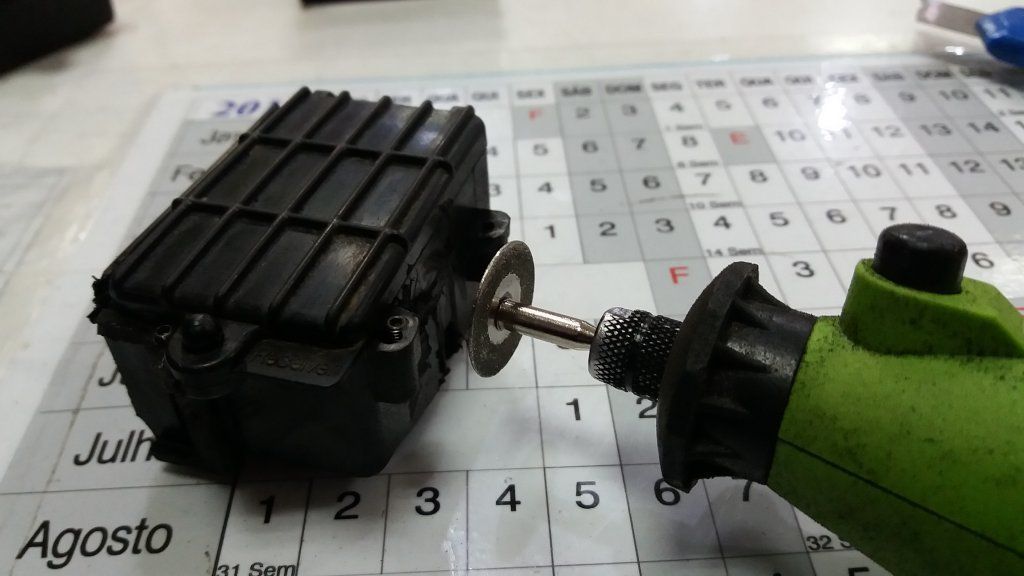
-Dremel the dam thing till it fits...
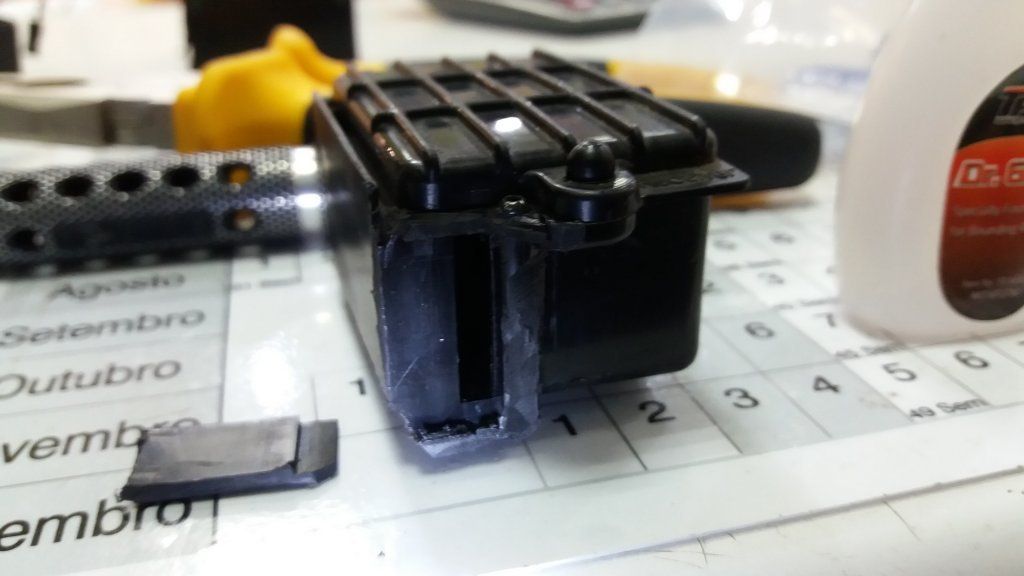
-Some hole...need to be taped!
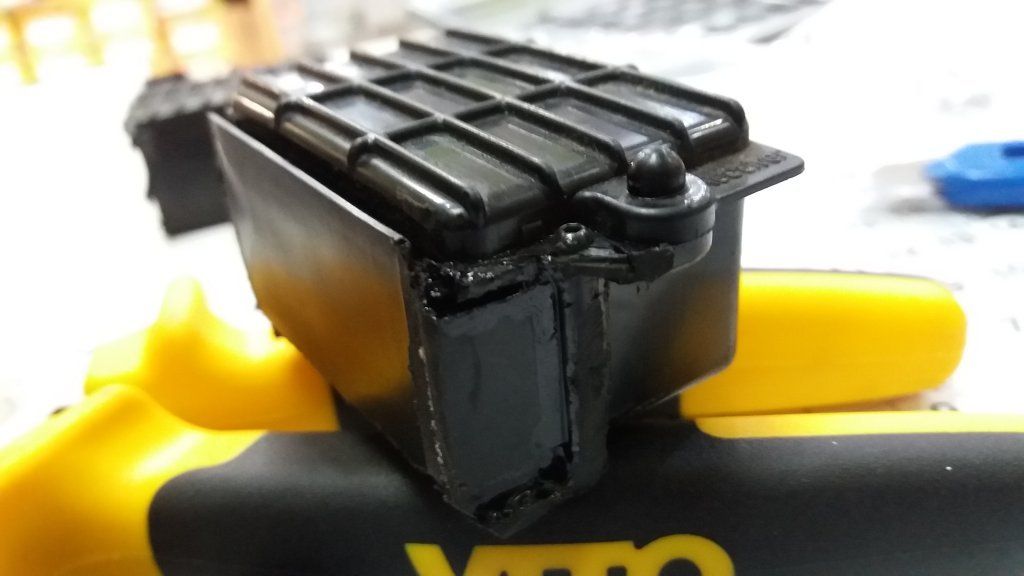
-Done. Let's see if when got the servo if got any space to move...
It's a working process... :P
-Been looking at my spare motor mounts...and i think the MP9e motor mounts fits... :P

-You know what? It fits... with some little spacers and washers!
-Pic shows that... :P
Also need to find now space for the receiver box:
-Cut the dam servos holder...
-And now i might think a receiver box from the MP9 nitro stuff, will work with some mods...
-First cut it to fit... No need for the receiver batery box!
-Dremel the dam thing till it fits...
-Some hole...need to be taped!
-Done. Let's see if when got the servo if got any space to move...
It's a working process... :P
02-20-2016, 03:58 AM
#6
Tech Elite
Thread Starter
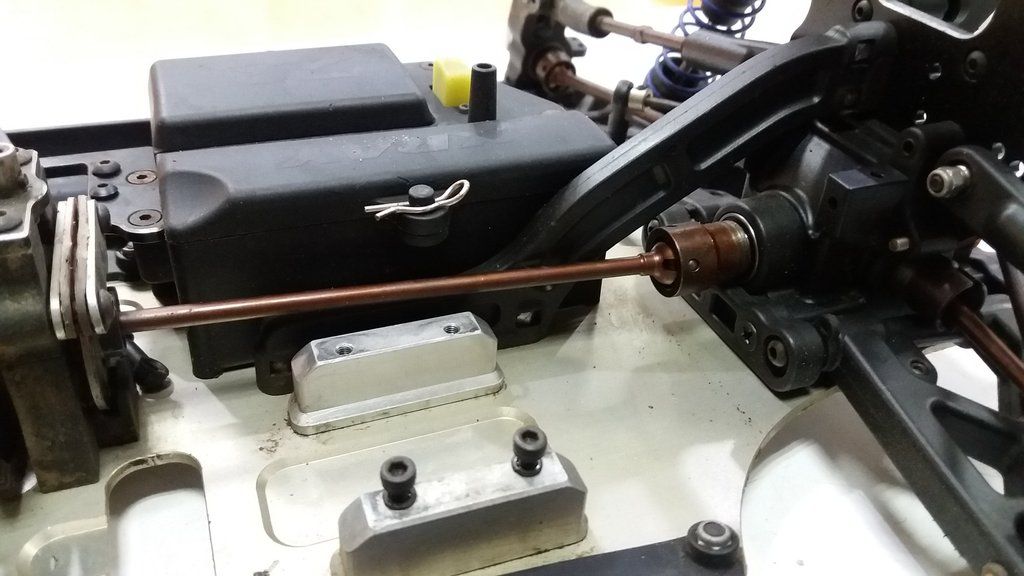
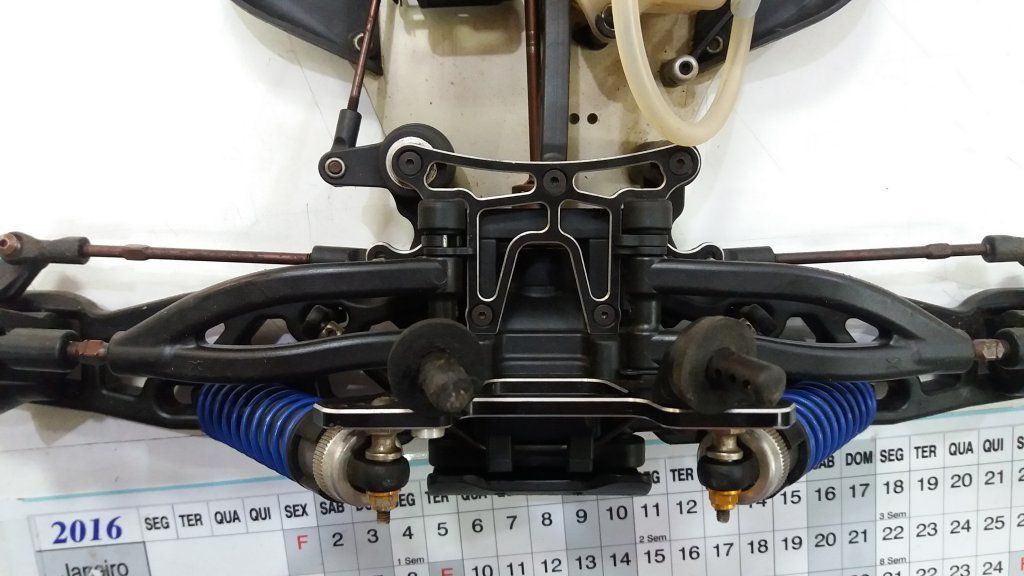
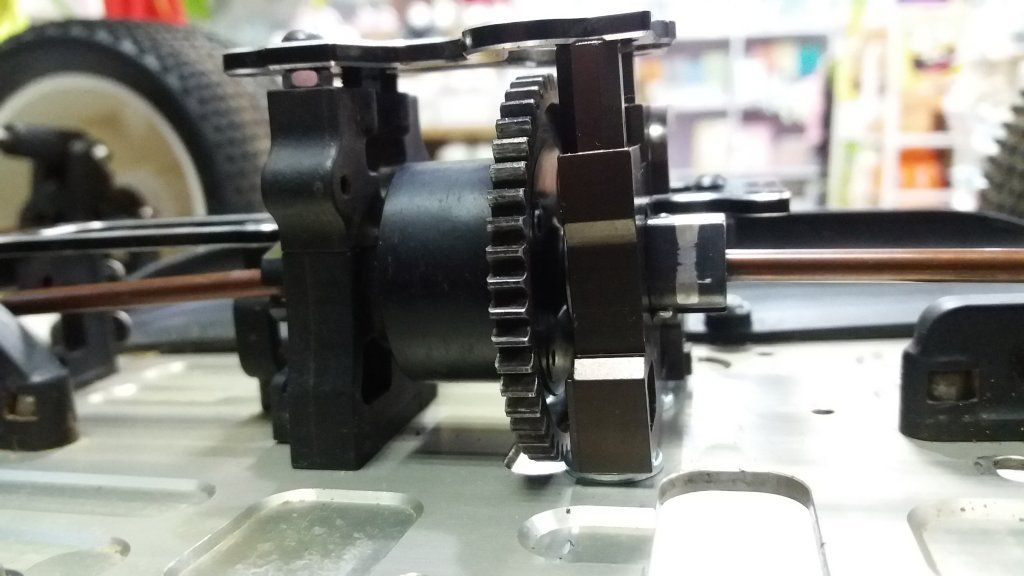
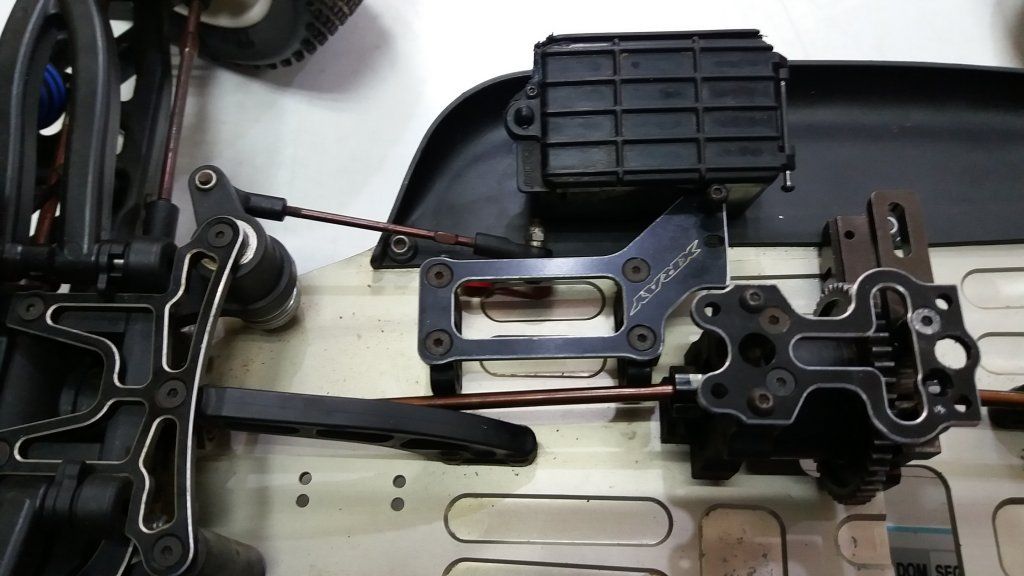
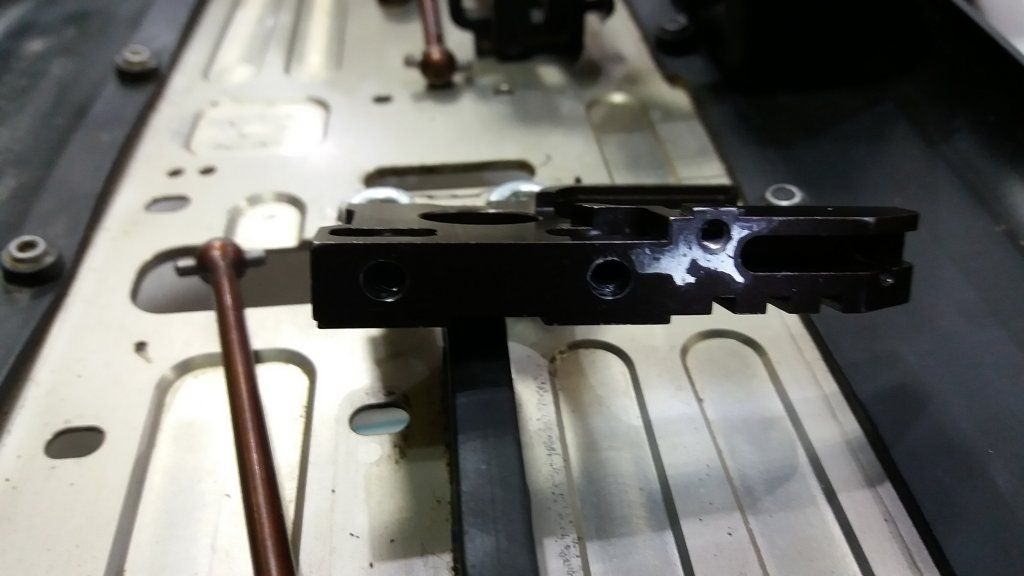
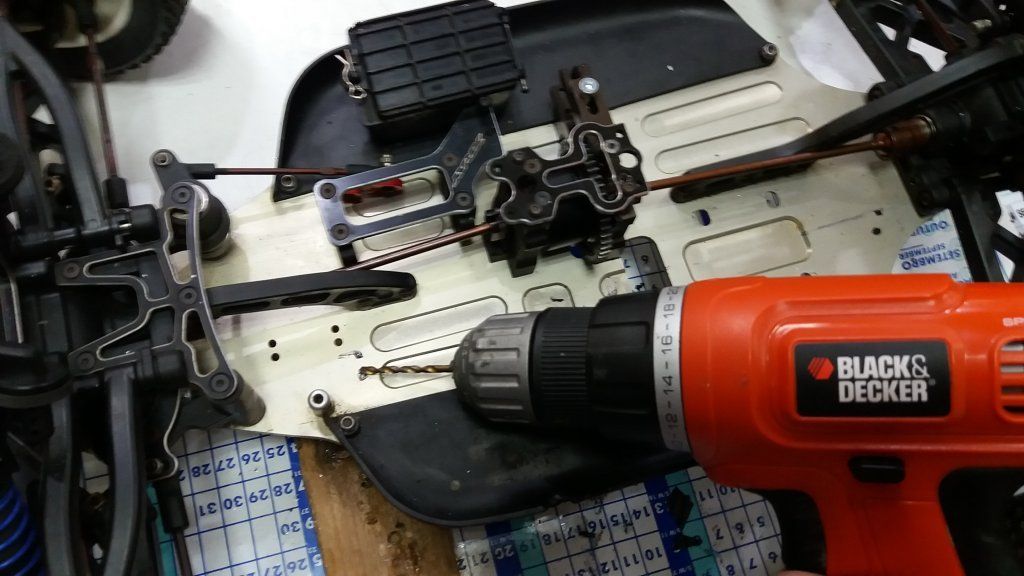
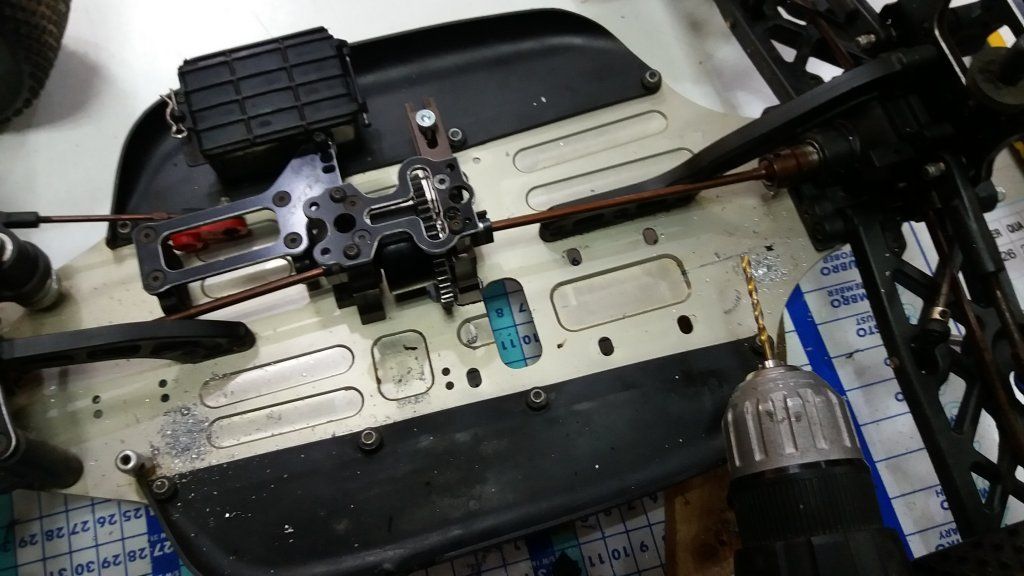
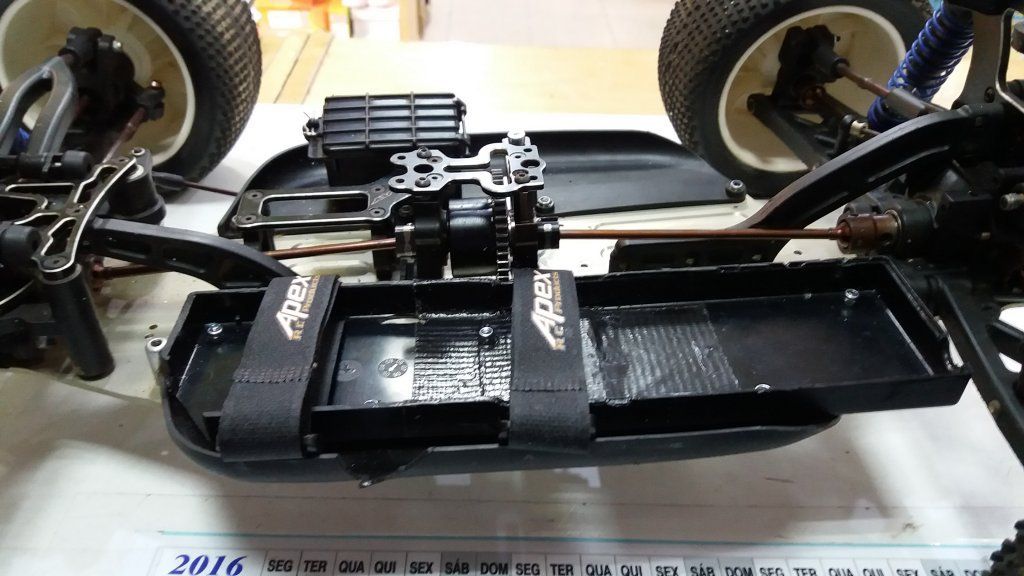
-I glued the spacer's with CA tire glue. Much better then not glued. They stay! I could cut the center diff tower but i prefer to keep stock to re-use later in the long run on whatever...
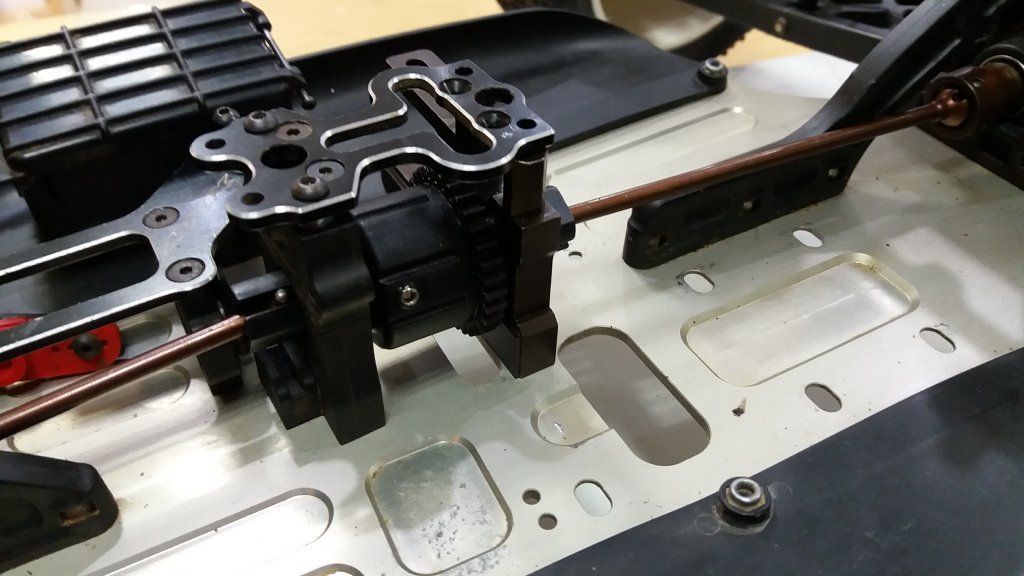
-That tower need an hole on the right side...
-Drilled one extra hole on the tower, cause on one side it only matches one hole. That way i kept all screws, like stock!
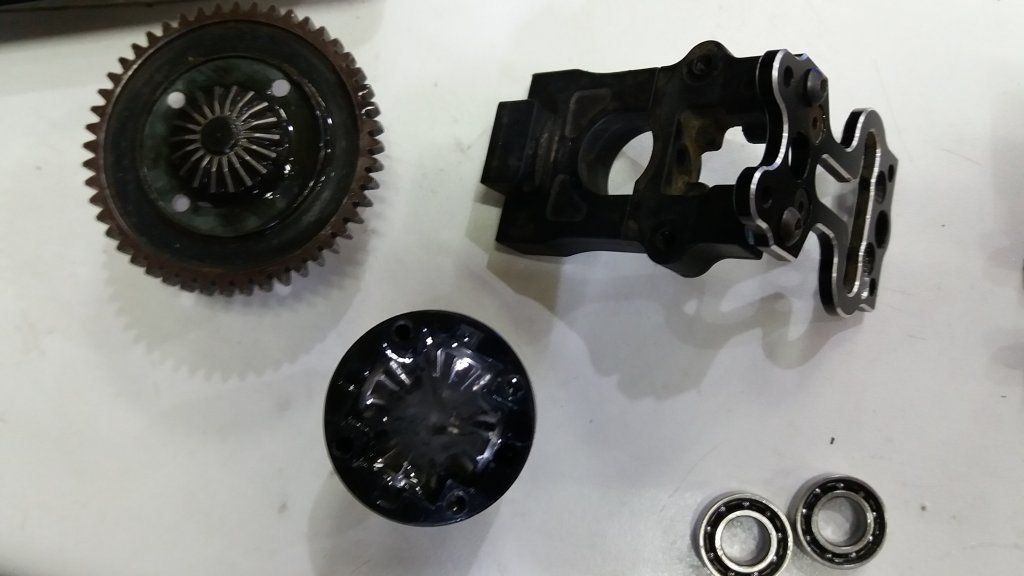
-Open the center diff, put 500k silicone oil...The last one was black!

-The outdrivers are 6mm...for anyone with interest, and for me for future reference!
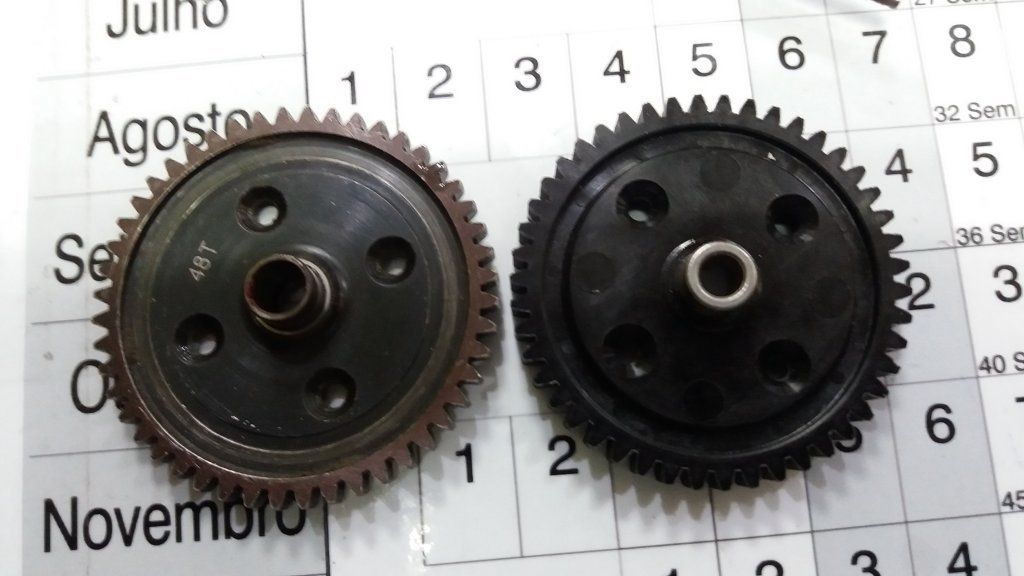
-Just like for these. The plastic spur is a Mugen that fits fine on the Xray diff cup but the outdrives is for 5mm ..."bummer".
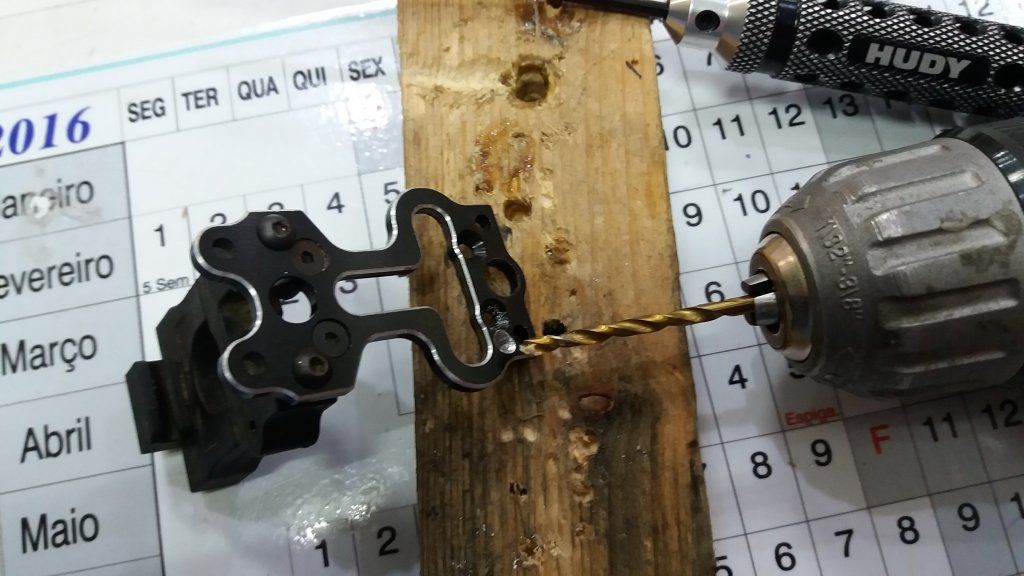
-The Mp9e motor mount had an extra third hole...
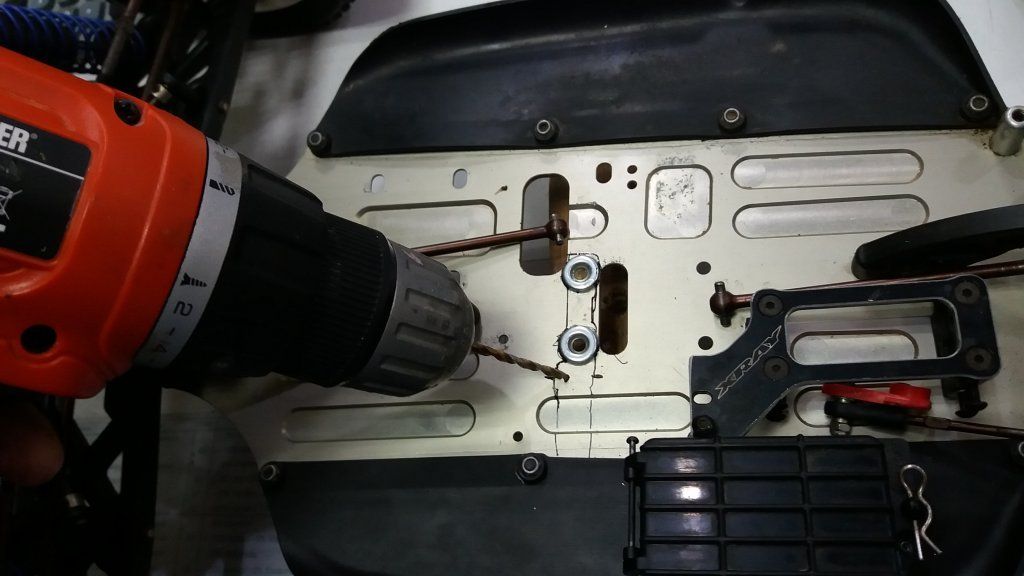
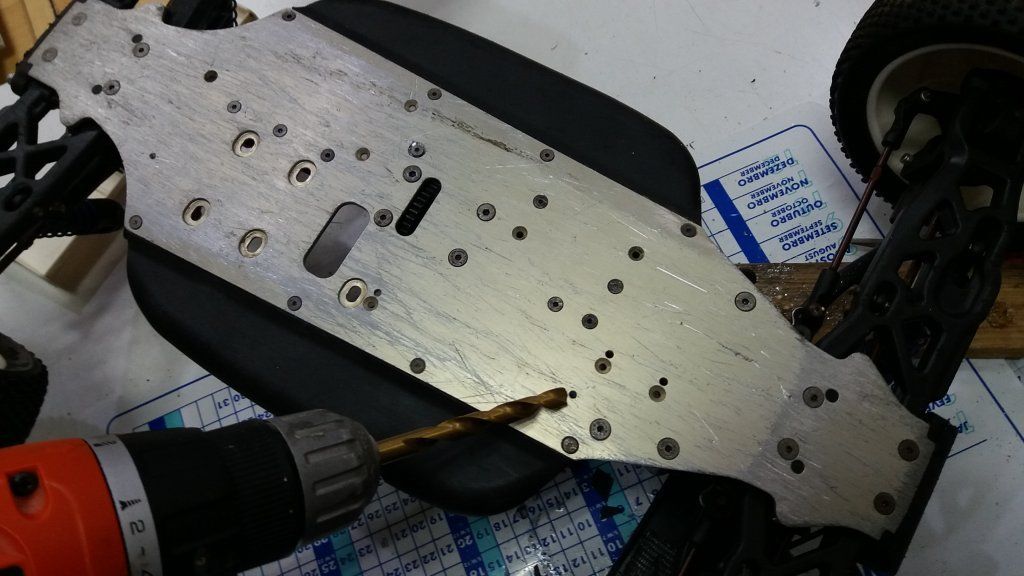
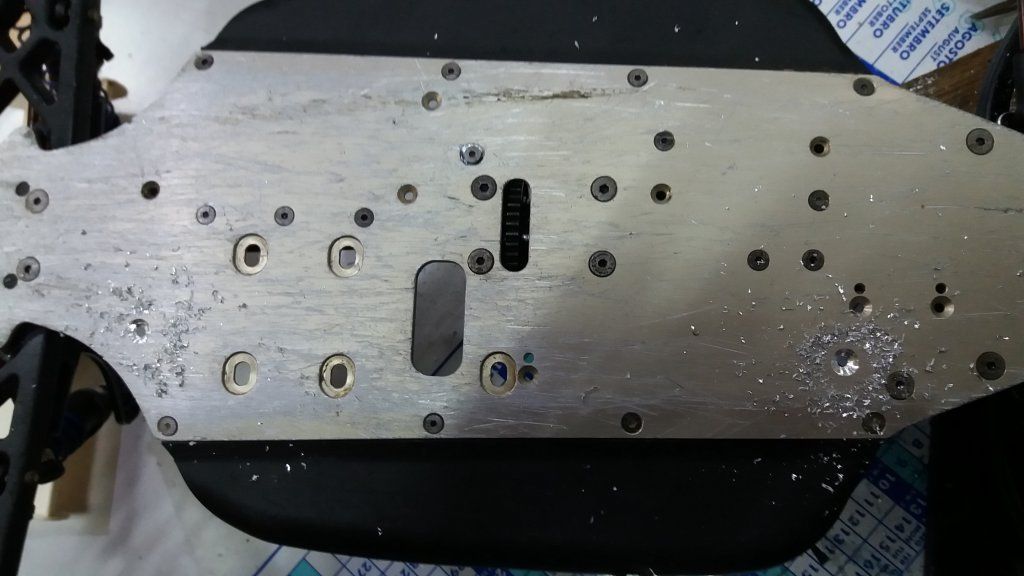
-Drilling the chassis for that 3th hole....
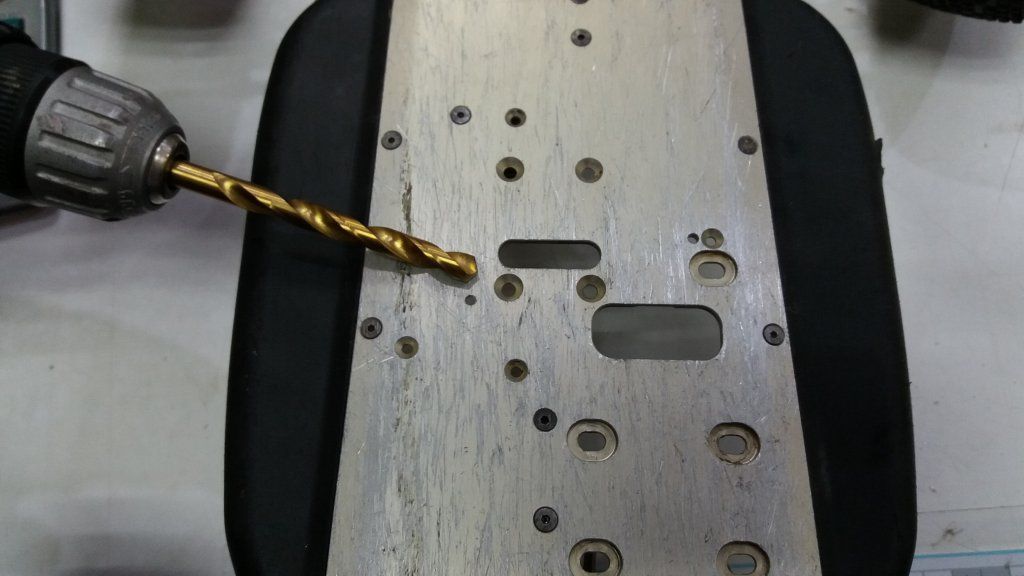
-Need to make it flat head?
-Flat head, done!
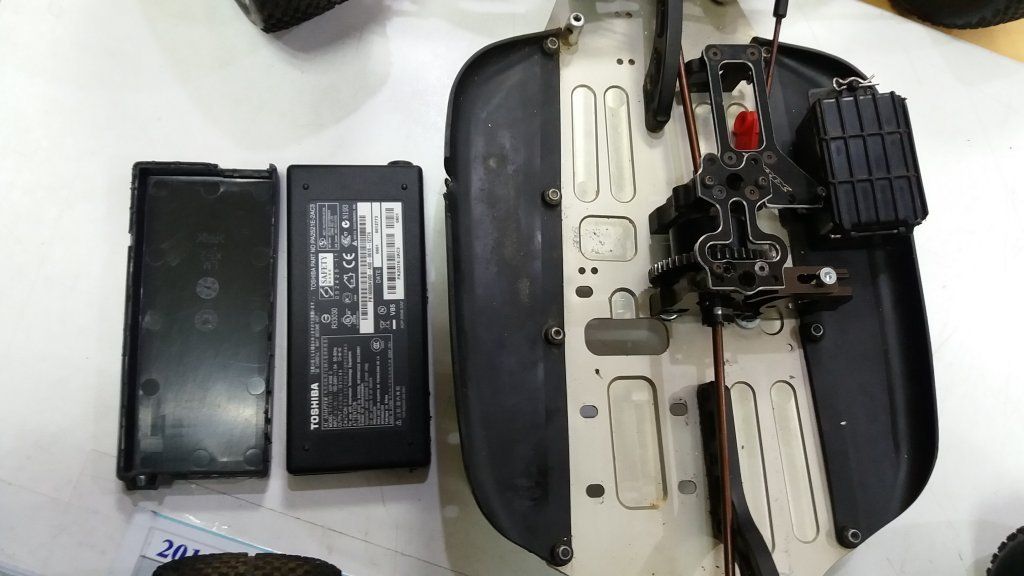
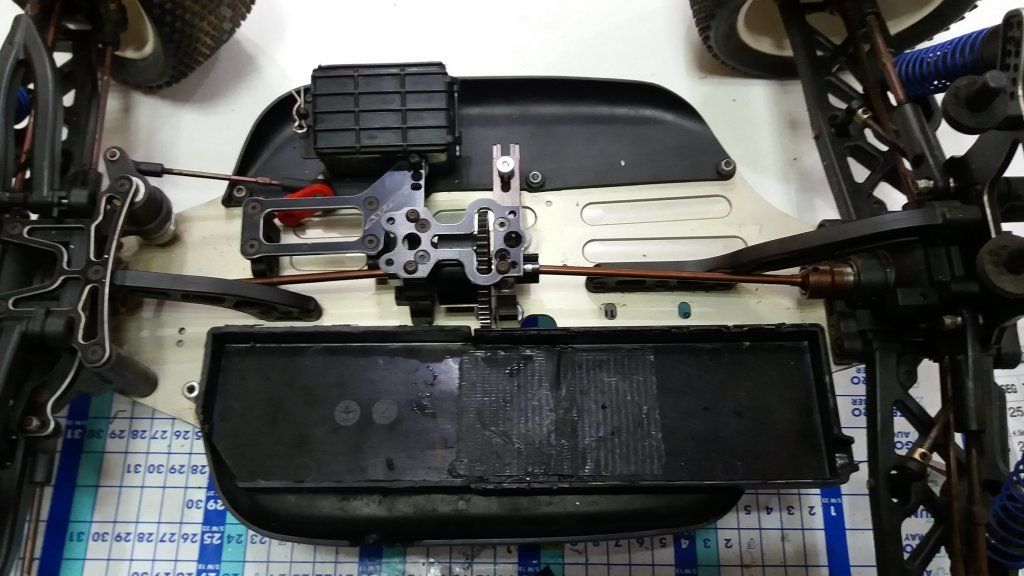
-Now for the batery tray... i just used some laptop dead transformer box..wil do!!
02-21-2016, 02:00 PM
#7
Tech Elite
Thread Starter
"Hands" on job...
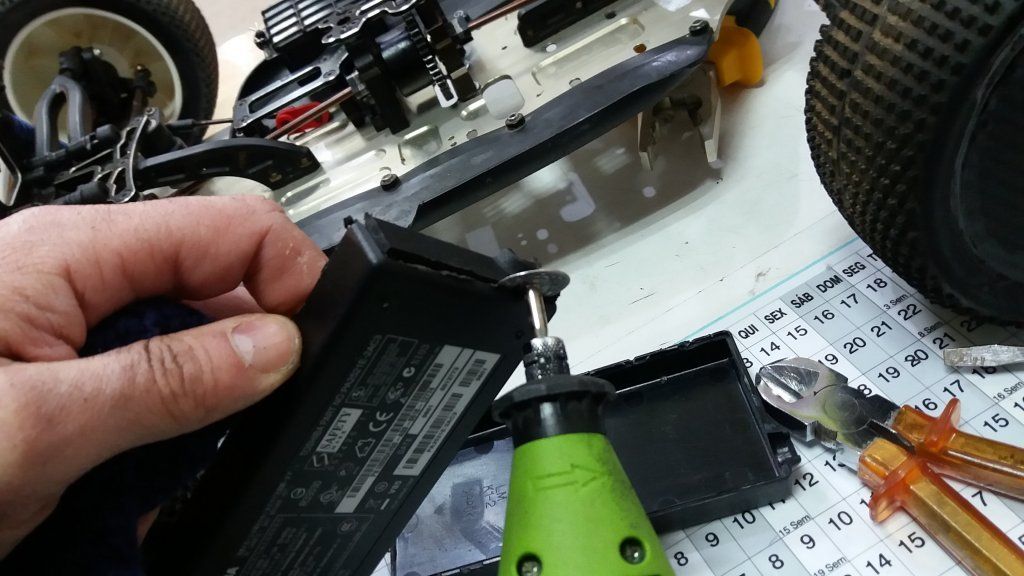
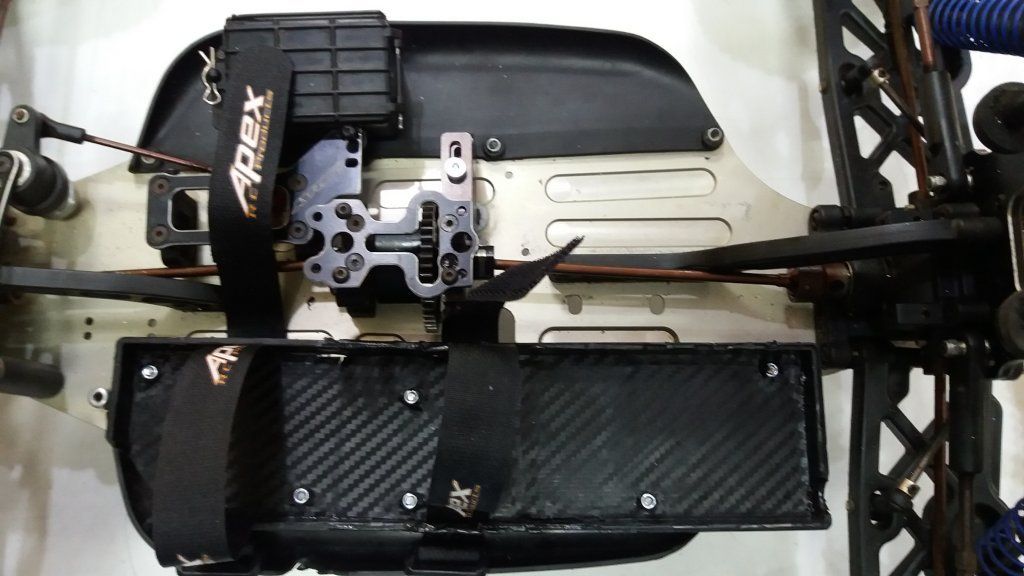
-Dremel the "batery" box to fit...
-Cut and glue the 2 pieces together with CA and put some fat tape around the uninon...Got space for the ESC to!! :P
-Making the holes to secure the batery tray!
-Flat head on the botton to match the screws...
-I only had long screws...so... make them shorter! :P
-DONE, brushless conversion for free....still on the 100€ for this one.

-I hate this body... need to do something...
-Dremel the "batery" box to fit...
-Cut and glue the 2 pieces together with CA and put some fat tape around the uninon...Got space for the ESC to!! :P
-Making the holes to secure the batery tray!
-Flat head on the botton to match the screws...
-I only had long screws...so... make them shorter! :P
-DONE, brushless conversion for free....still on the 100€ for this one.
-I hate this body... need to do something...
02-23-2016, 01:57 PM
#8
Tech Elite
Thread Starter
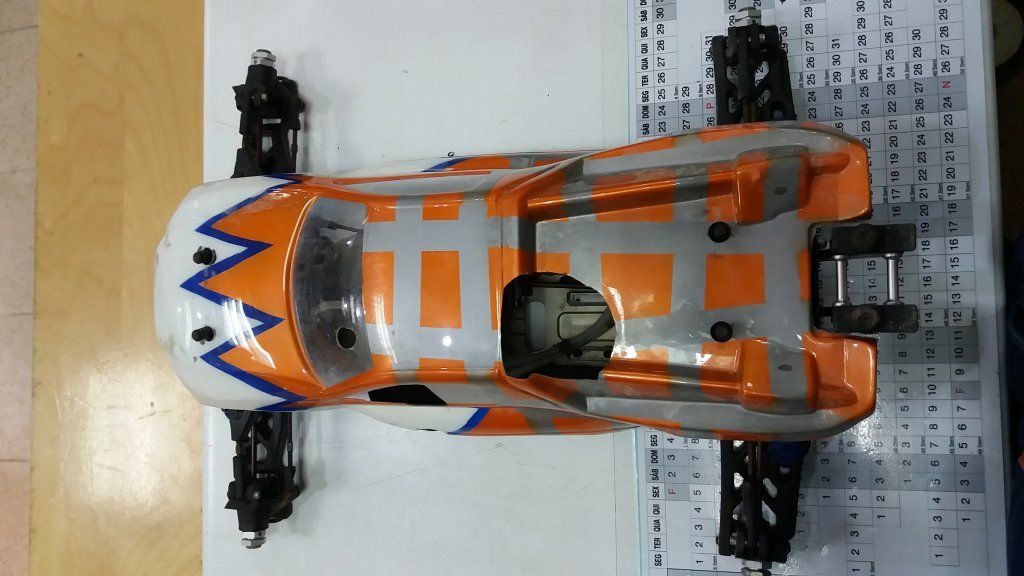
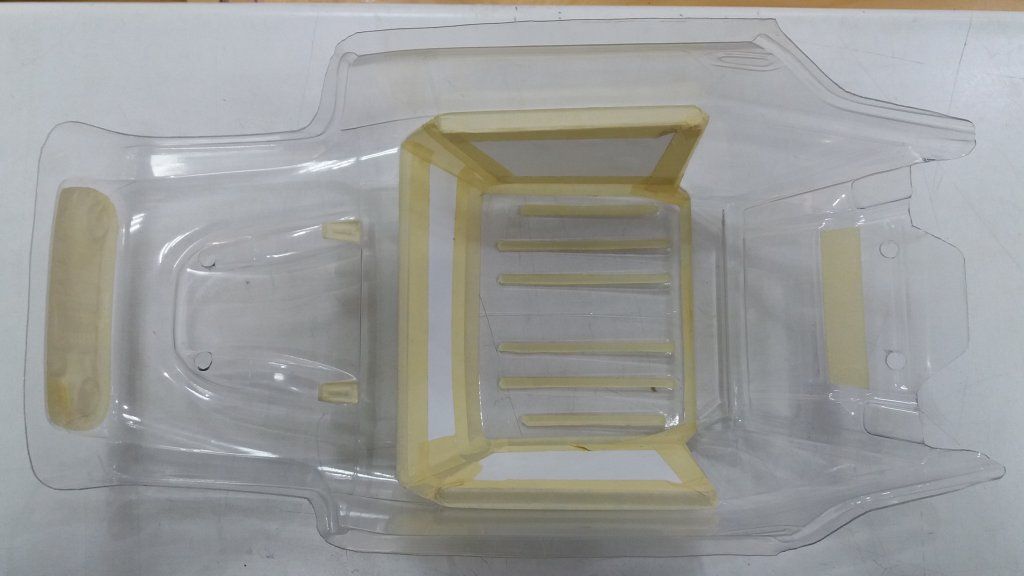
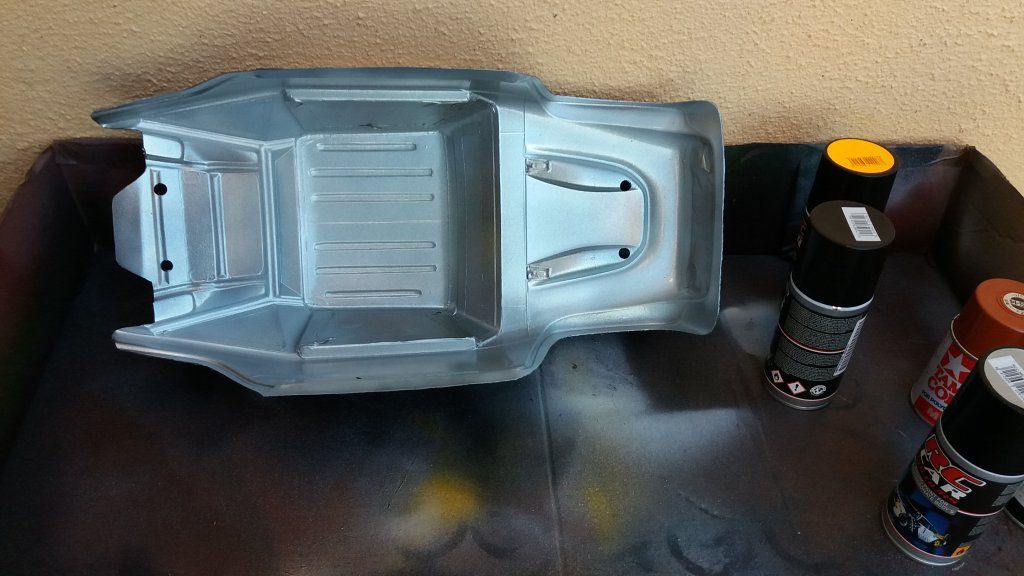
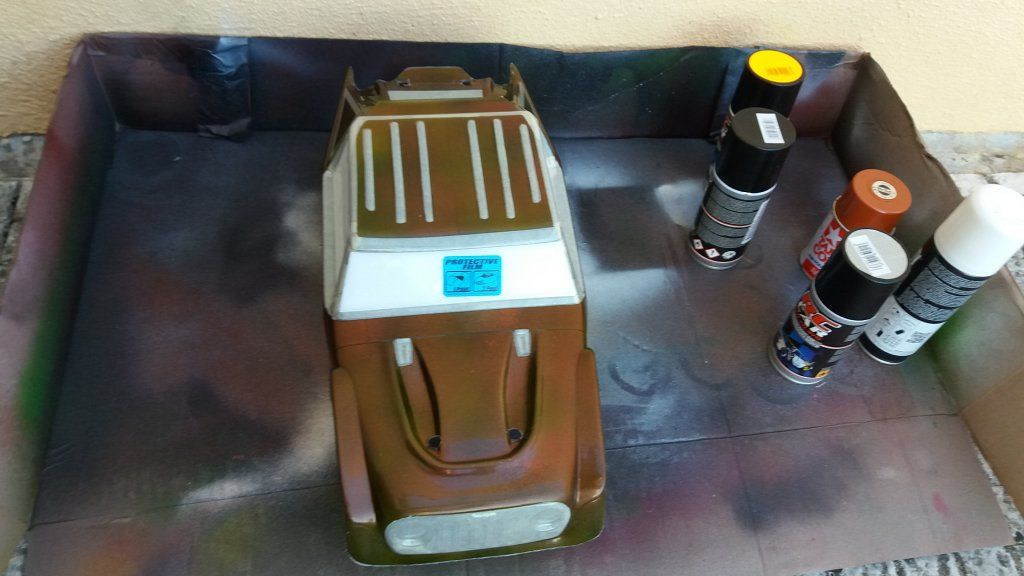
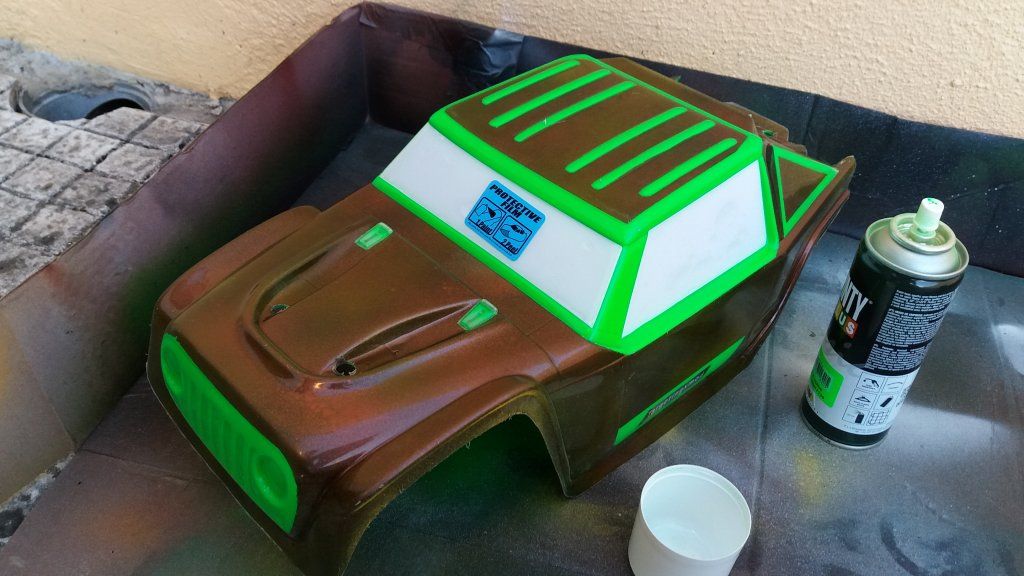
-So after this complete, i take care of the body...
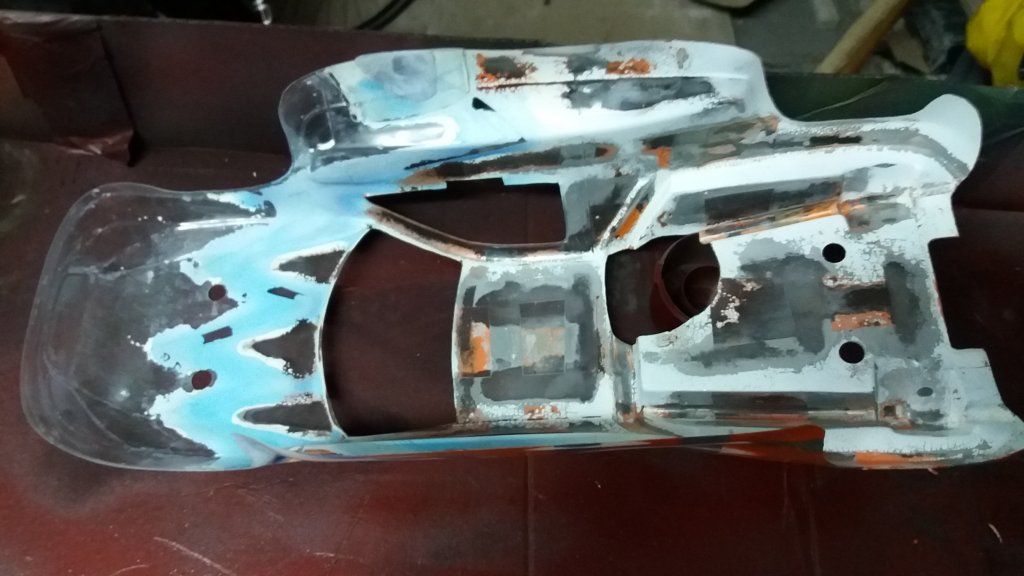
-Some acetone to remove some paint!
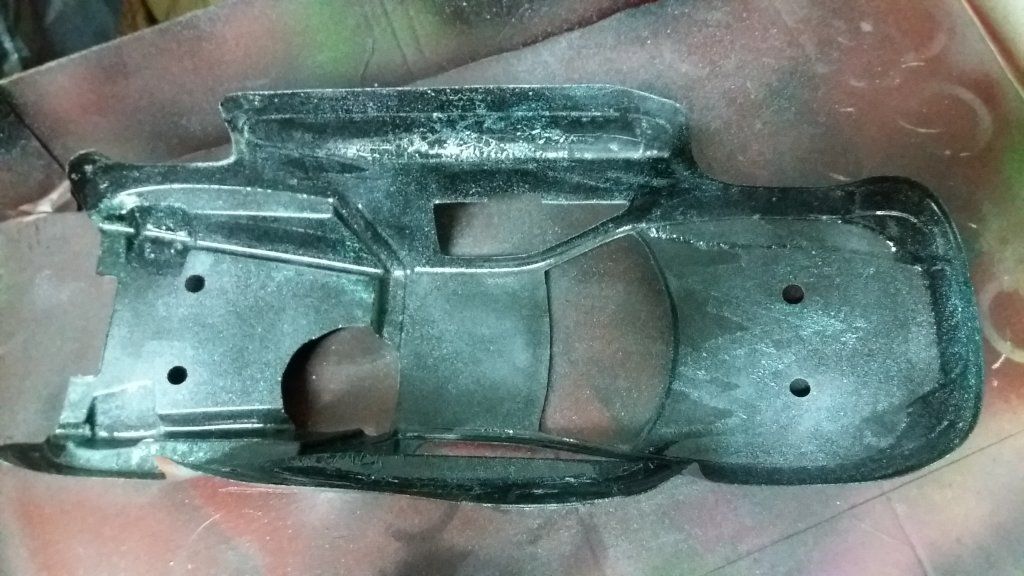
-Did my spray thing...
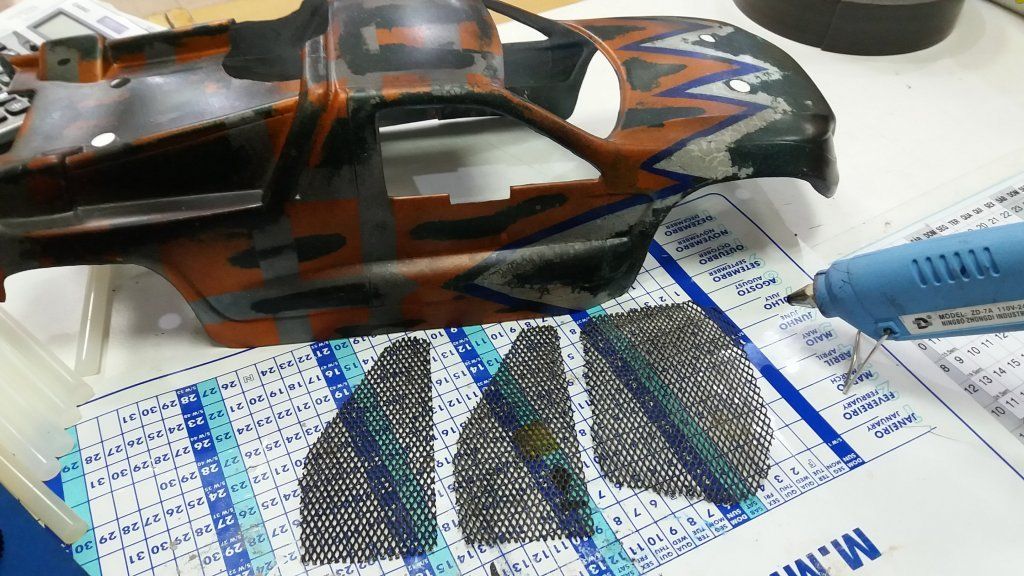
-Also cute the windows, and want to put some iron black mesh!
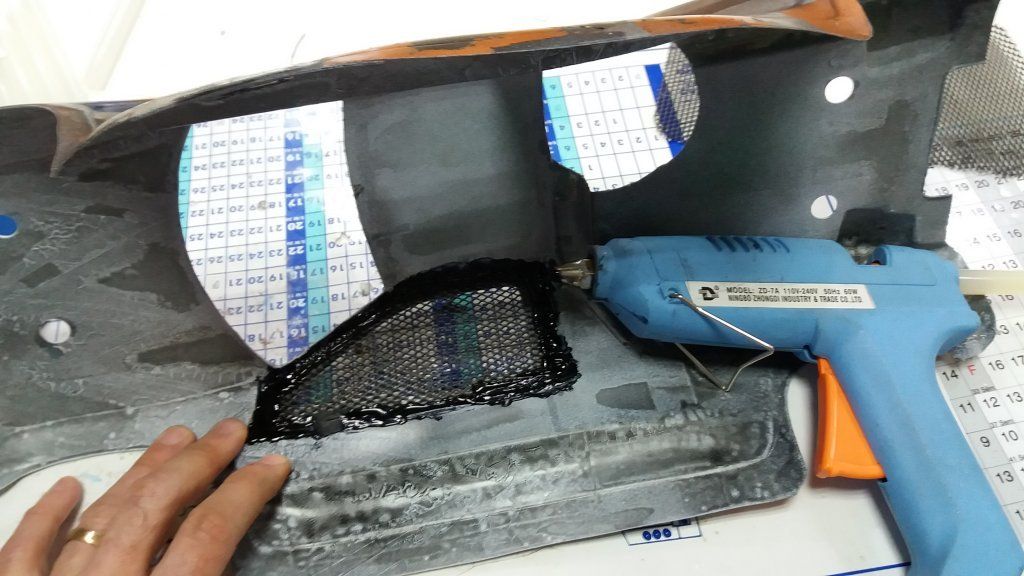
-Cover the engine hole on the body...

-That it for now...
Still on the 100€ tag for this...using what i have avaiable around the house!
Last edited by targetingxmod; 02-25-2016 at 01:14 AM.
03-01-2016, 09:04 AM
#9
Tech Elite
Thread Starter
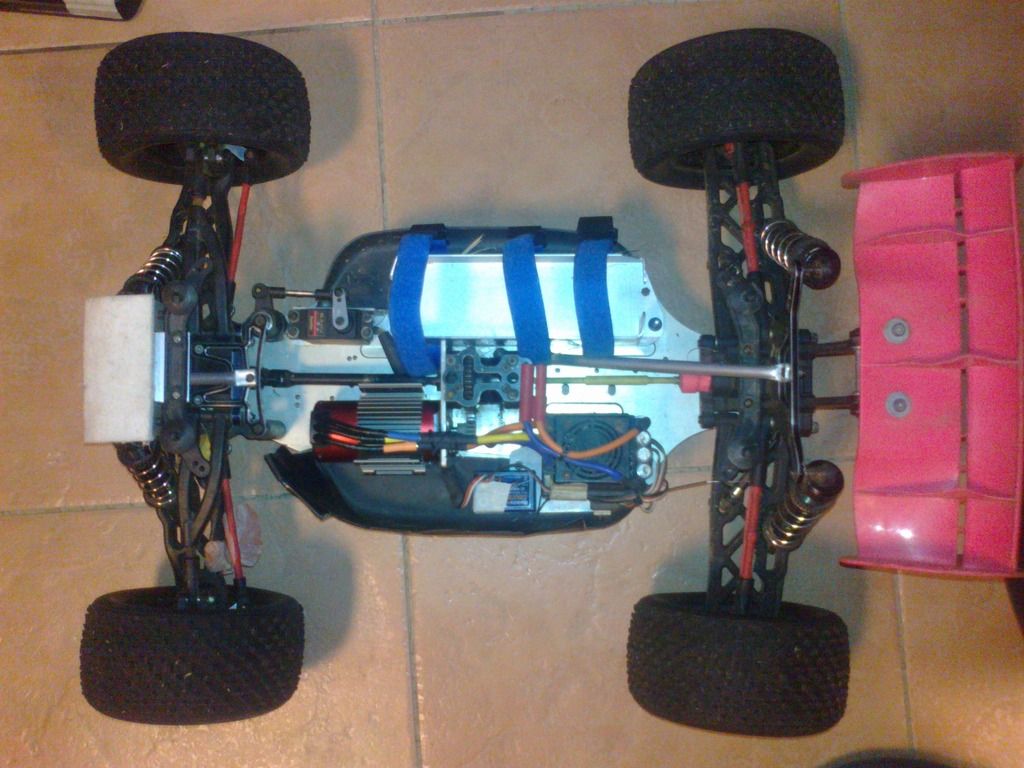
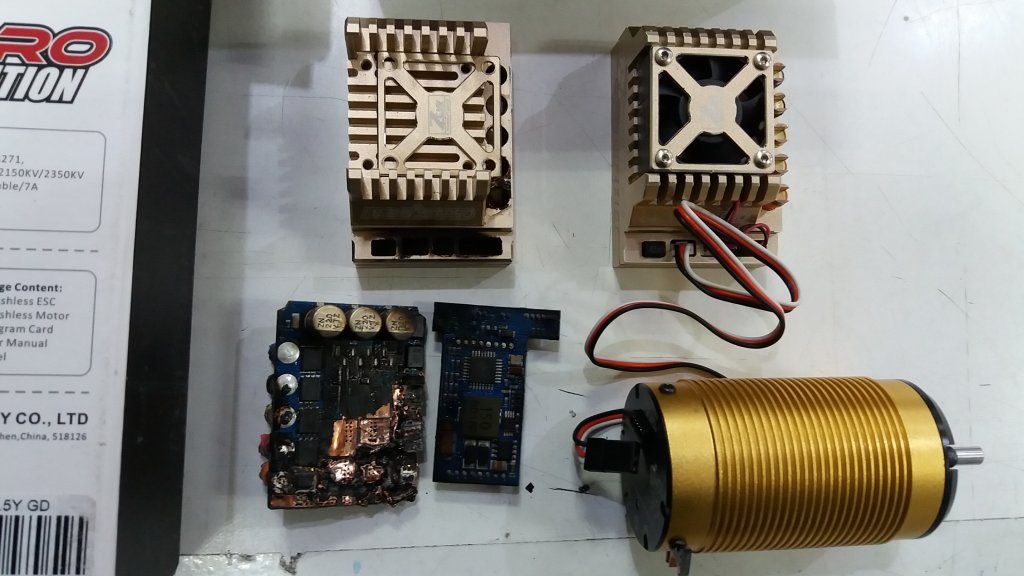
Ok, first euros spent on this:
30bucks...
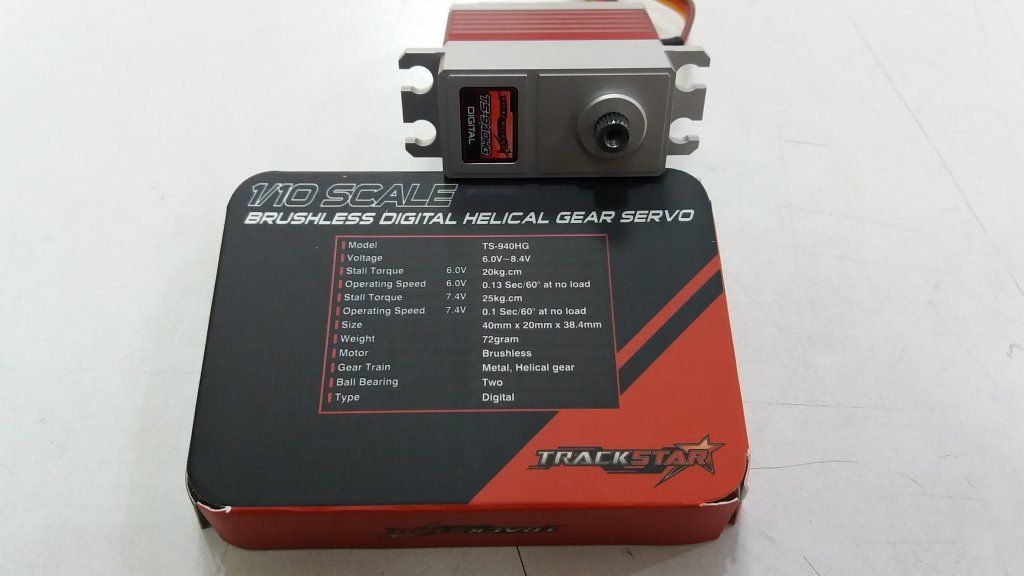
-Brushless, Digital, Metal Helical Gears, Dual Ball Bearing, and 20kg of torque on 6v... :P
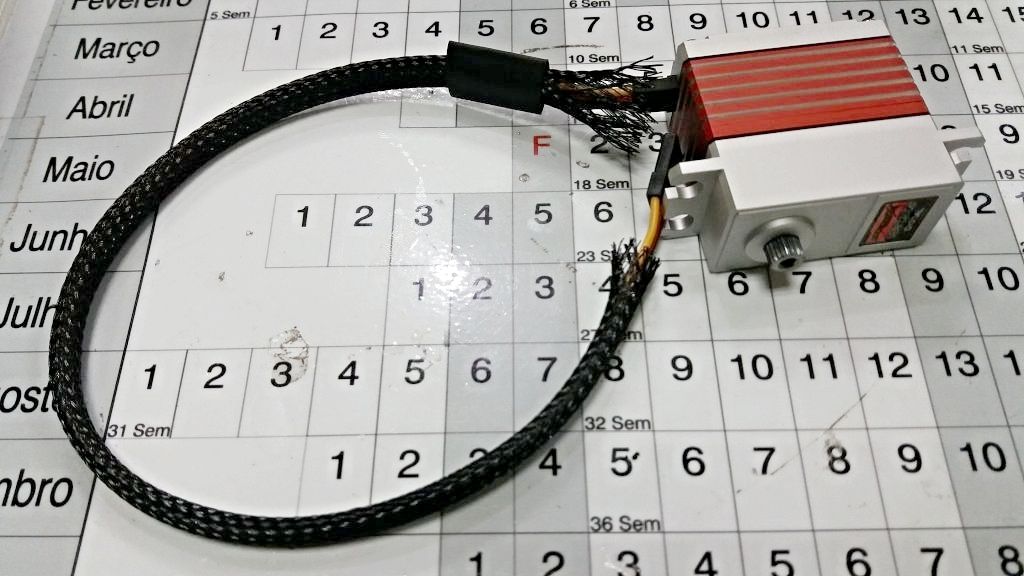
Going to use the snake skin on this RC all over it. Much better looking then just "solo naked cables"
Need to find a place for the receiver box. I know i havent' space when the servo go in...and i don't! Not a problem....just another place in the Truggy!
30bucks...

-Brushless, Digital, Metal Helical Gears, Dual Ball Bearing, and 20kg of torque on 6v... :P


Going to use the snake skin on this RC all over it. Much better looking then just "solo naked cables"
Need to find a place for the receiver box. I know i havent' space when the servo go in...and i don't! Not a problem....just another place in the Truggy!
03-05-2016, 01:08 AM
#10
Tech Elite
Thread Starter


-Getting the tyres i have ready for 6s sessions!
 03-17-2016, 03:52 AM
#11
Tech Elite
Thread Starter
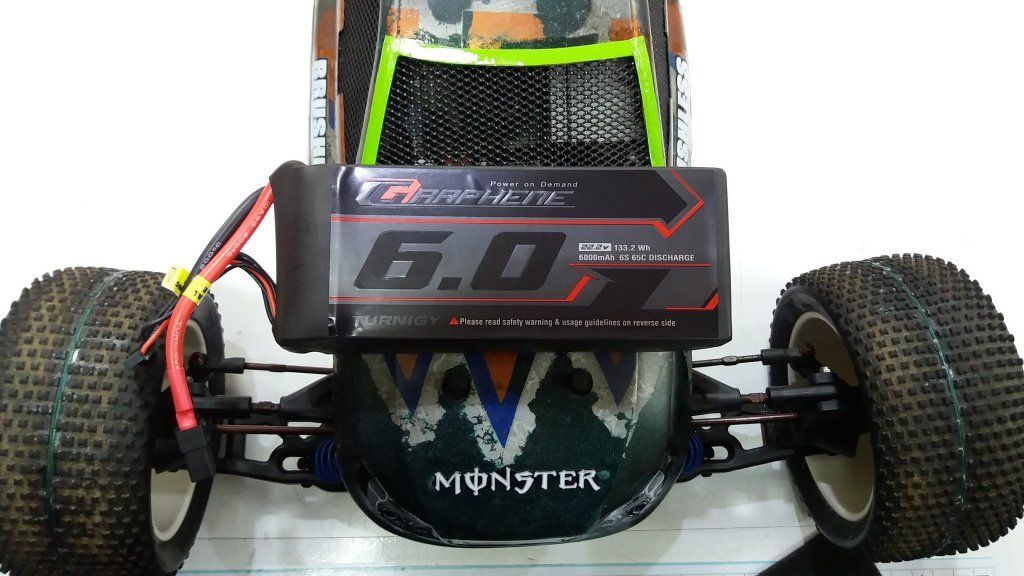
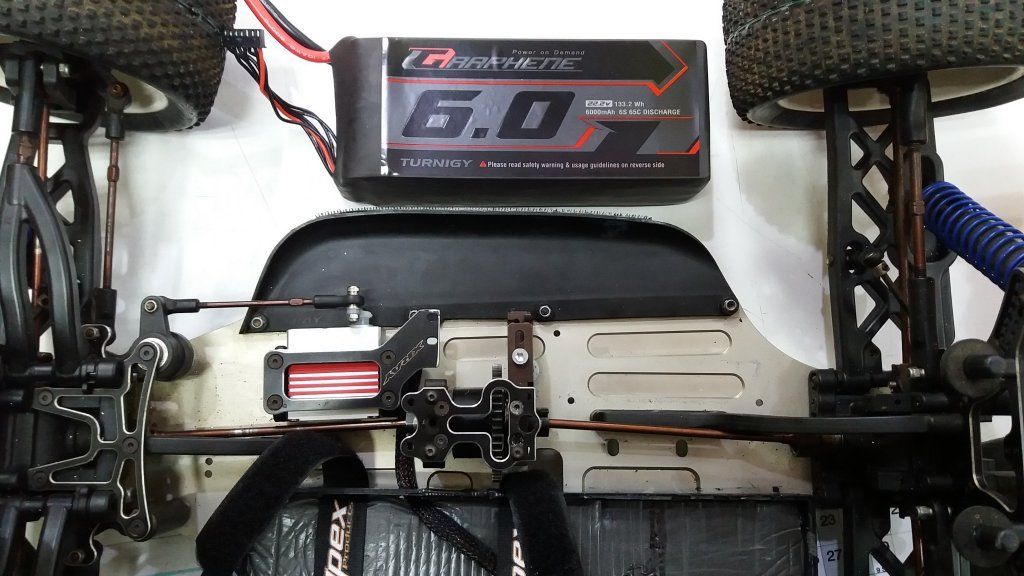
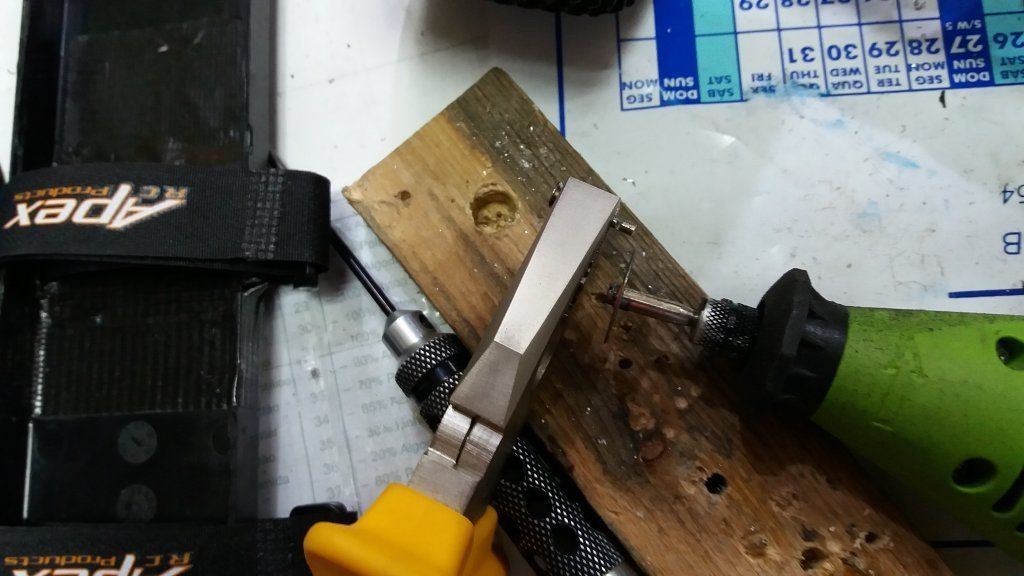
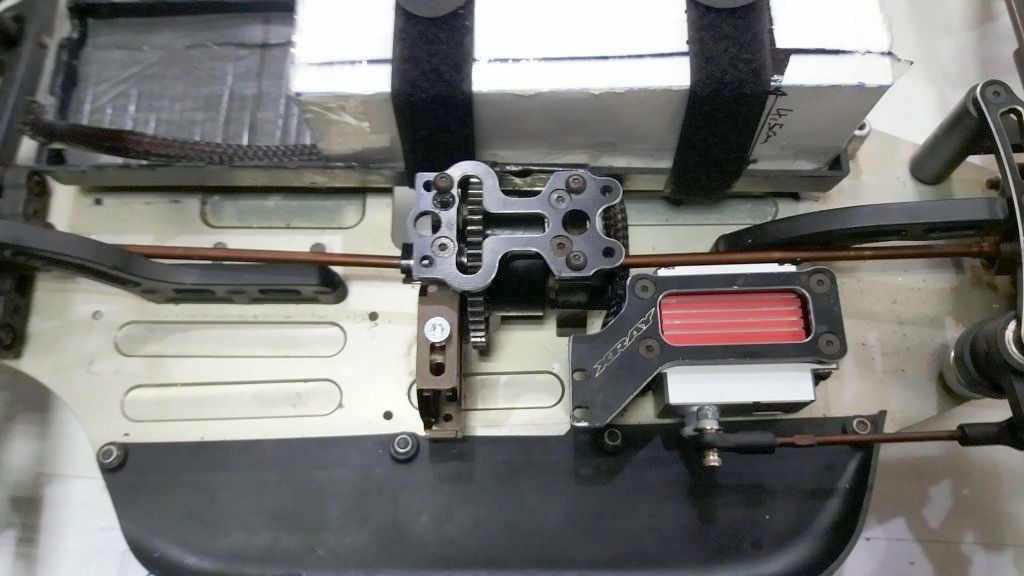
-Need to reconfigure the batery tray....nothing major :P

-Done!
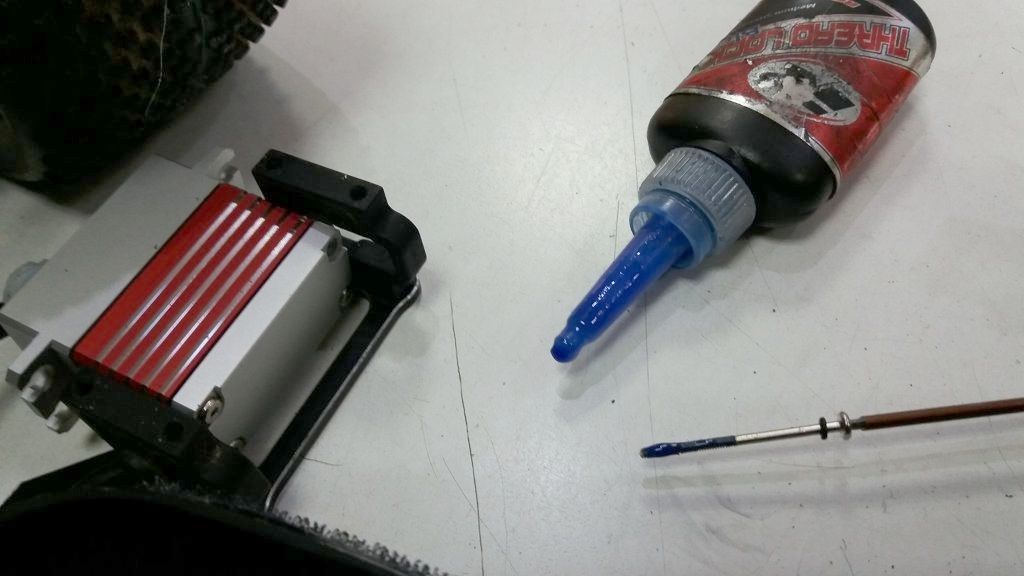
-Also glued the servo screws, cause it's alloy on alloy! :P
Last edited by targetingxmod; 03-17-2016 at 04:50 AM.
03-18-2016, 11:01 AM
#12
Tech Elite
Thread Starter

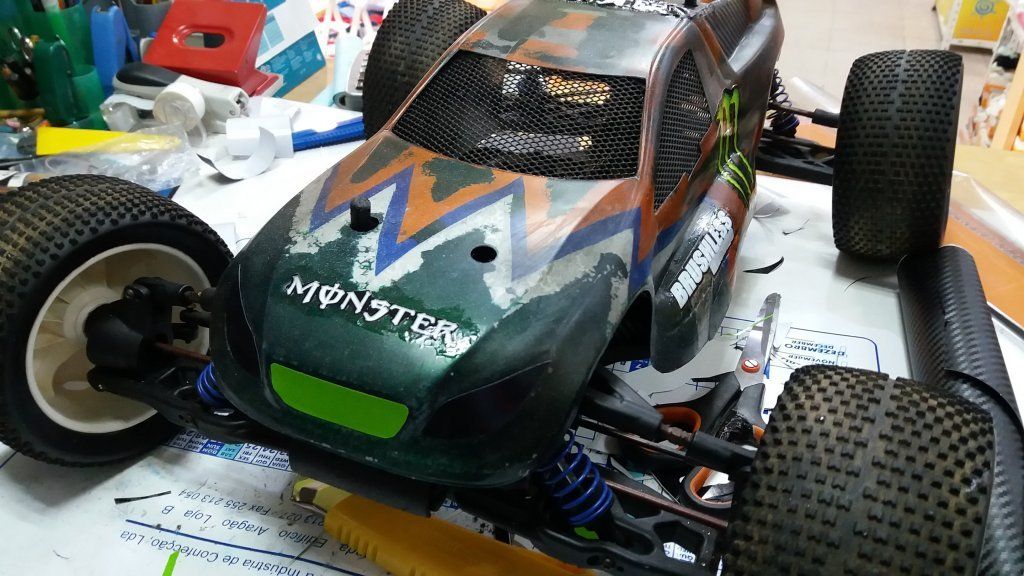
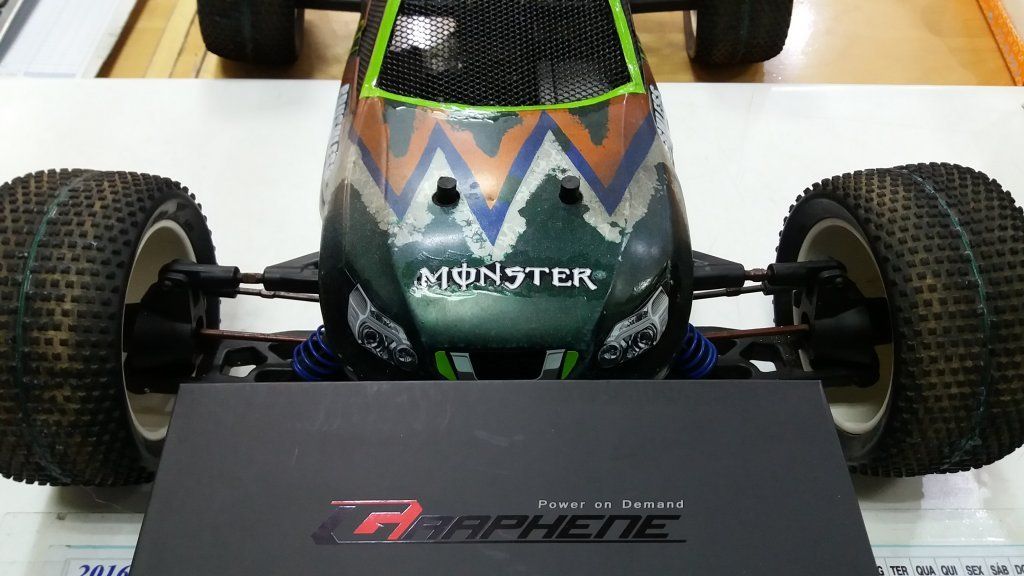
-This is how i close the "nitro" hole of the body...

-And some windows "pimp" :P
07-09-2016, 01:03 PM
#13
Tech Elite
Thread Starter
Got my esc/motor...
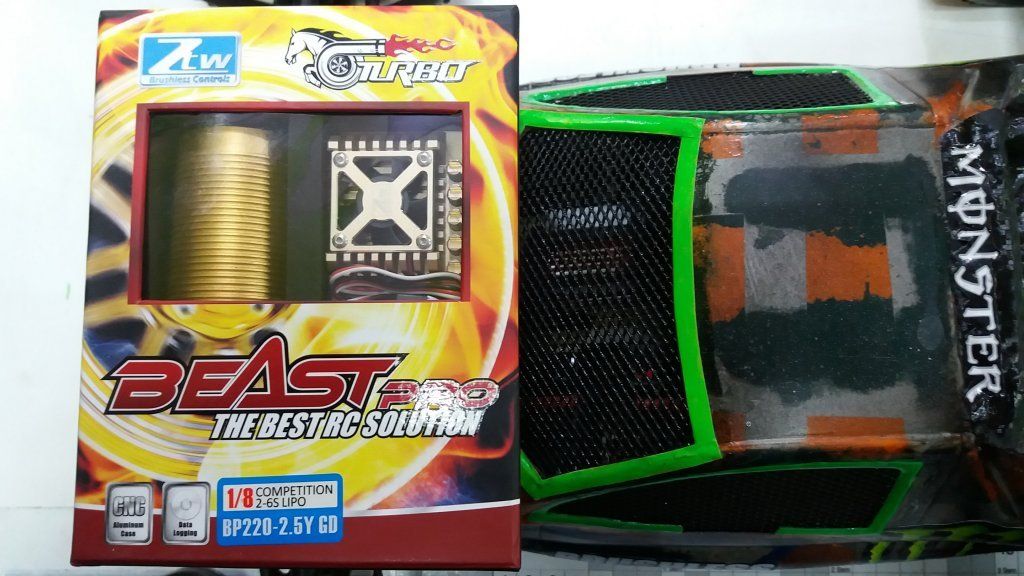
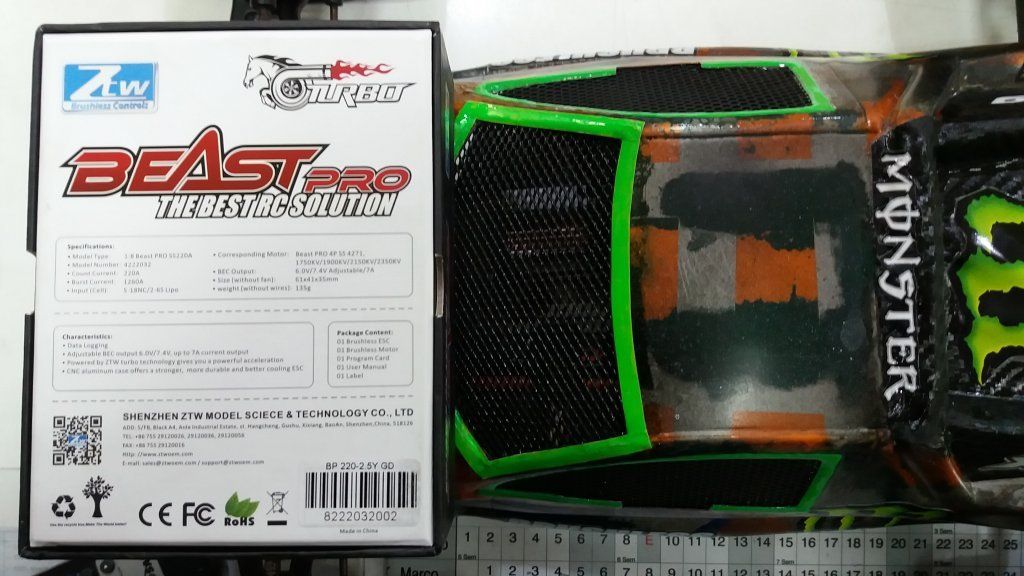
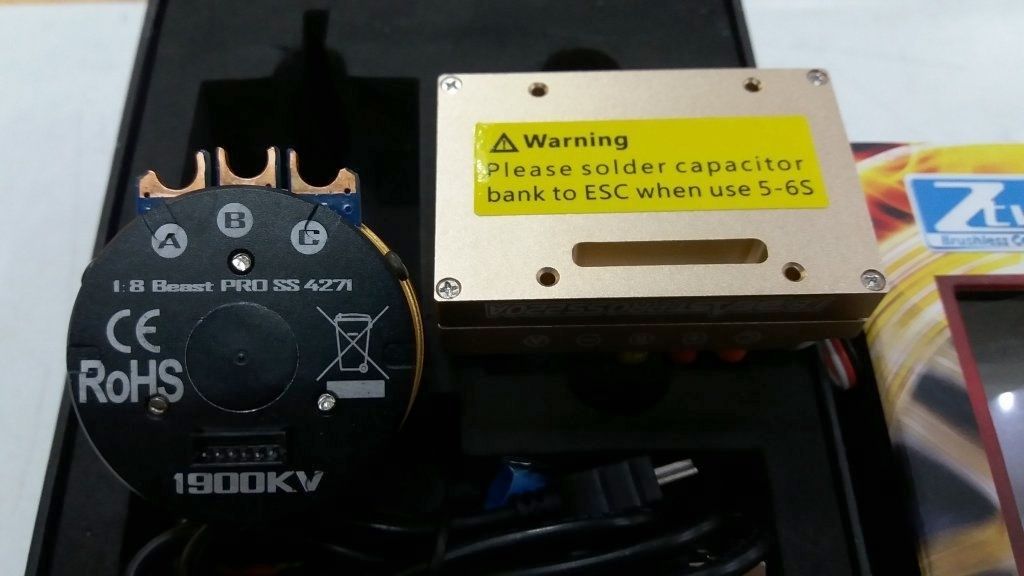
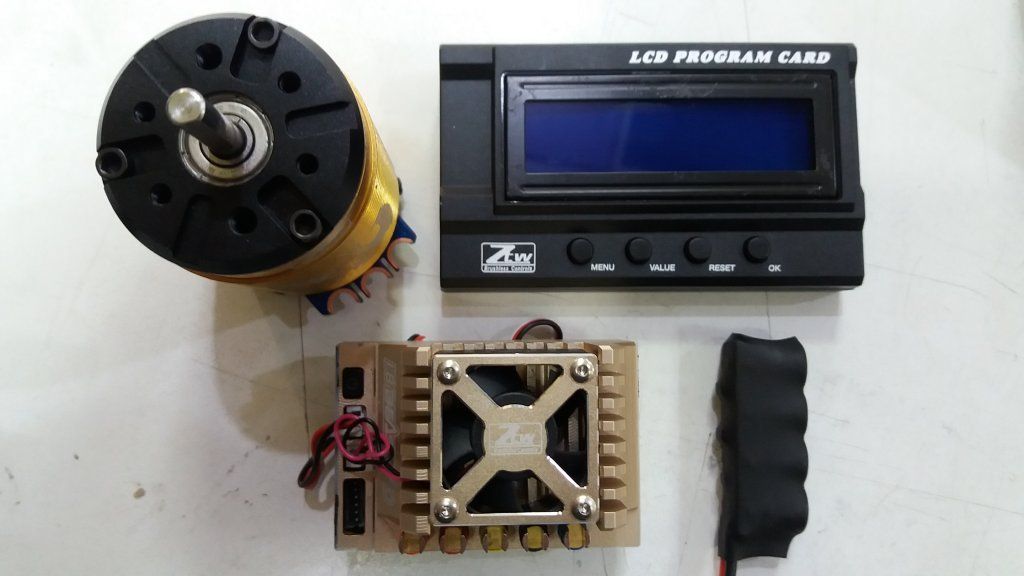
Was all happy wiring it...and all...and then...
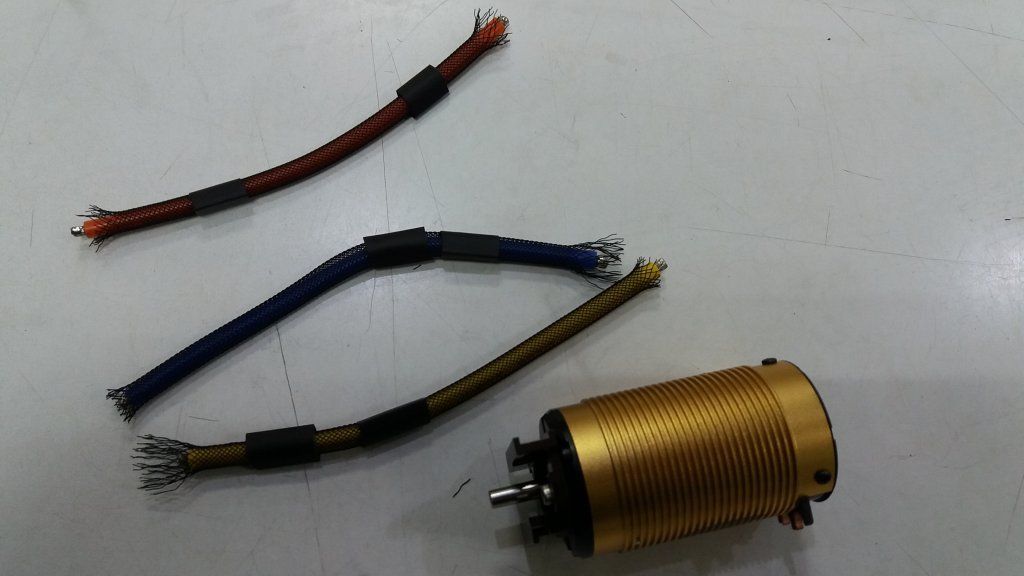
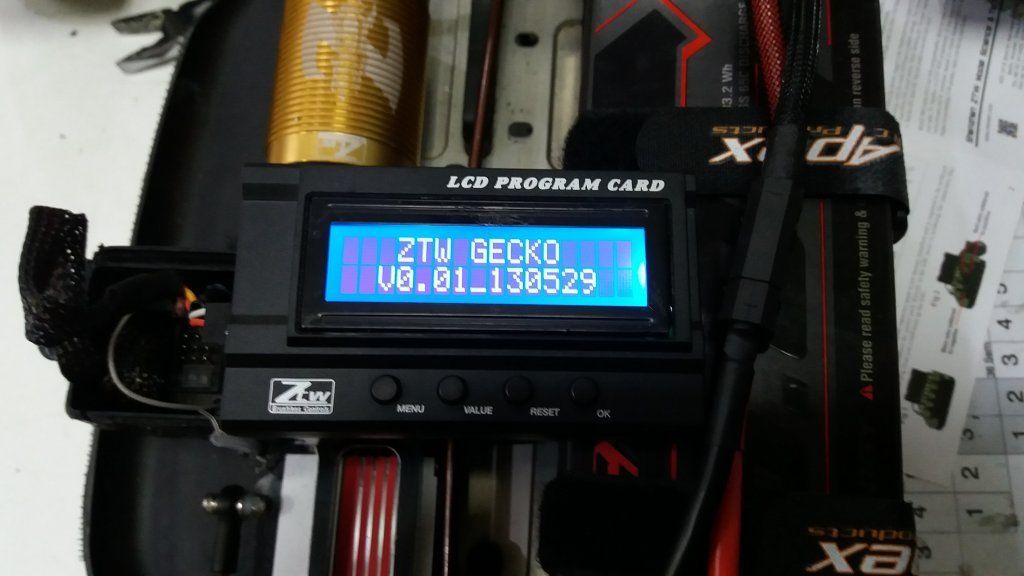
-Tuning it... and so...
-And bang.... surprise.
Then after a few weeks i got a new one from warranty from the the shop owner...and the second made the same thing basically. ZTW did not warranty their produts...so i will never EVER buy from them again anywhere!
.....
Meanwhile i have now time for a new body
Was all happy wiring it...and all...and then...
-Tuning it... and so...
Then after a few weeks i got a new one from warranty from the the shop owner...and the second made the same thing basically. ZTW did not warranty their produts...so i will never EVER buy from them again anywhere!
.....
Meanwhile i have now time for a new body


Last edited by targetingxmod; 05-12-2018 at 04:29 AM.
Currently Active Users Viewing This Thread: 1 (0 members and 1 guests)
